
Search results for "Electrical professionals" in Home Design Ideas
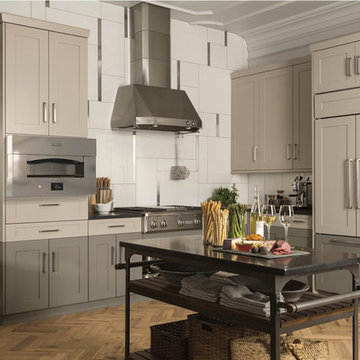
 Custom Distributors
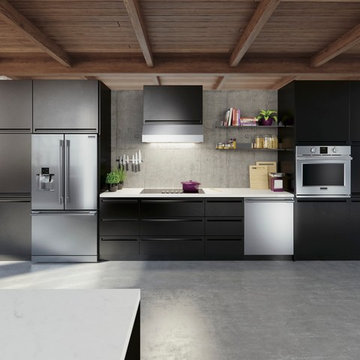
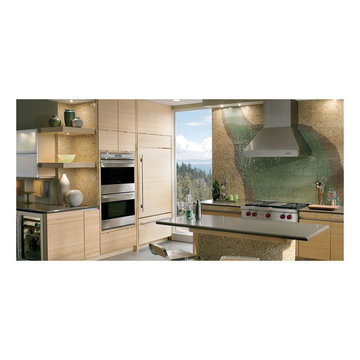
This Kitchen Features:
- Monogram 30" Pizza Oven
- Monogram 36" Professional Hood
- Monogram 36" Professional Gas Rangetop
- Monogram 36" Built-In French-Door Refrigerator

 DeVance Electronic Lifestyle
Photos by Suad Bejtovic
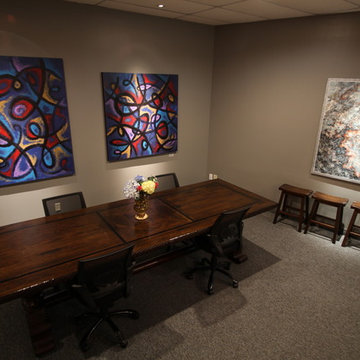
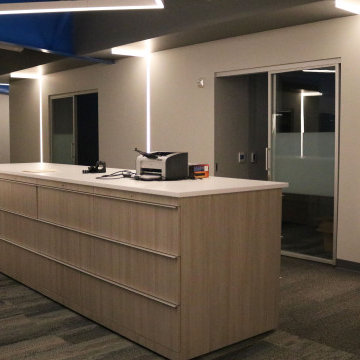
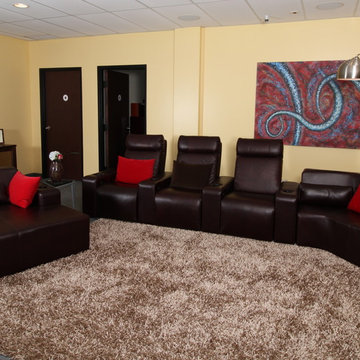
The DeVance Team has collaborated with various synergistic partners in order to create a one-of-a-kind ‘Experience Center’ in the North Dallas corridor. This Electronic Lifestyle facility has quickly become a savvy social and entertaining environment; set up to demonstrate just a few things one can do in their home or office to enhance their quality of life through the use of technology. Guests are dazzled by a plethora of custom electronic selections, incorporated into the latest technology in a cozy, yet high-end residential-style environment. The entire space is home to dozens of custom paintings by local artists and master-crafted wood works and built in cabinetry. The reception area is complimented with a 55” custom designed Art Screen TV with retractable art that rolls up into a motorized casing to reveal a 4K TV screen. The additional spaces show beautifully, with a modern family room, a sophisticated entertainment lounge, and fully functional, stocked wet bar. An acoustically treated 2-Channel listening room houses the finest in McIntosh audio equipment complete with a turntable. This room was designed for vinyl record or streaming music for ‘audiophile enthusiasts.’ The DeVance 18 seat movie theater boasts a state-of-the-art perforated ten foot screen, JBL Synthesis 7.1 surround sound system and crystal clear Runco projection system. Guests enjoy luxurious motorized leather theater seating complete with warm throws and leather ottomans for comfortable movie viewing. The DeVance restrooms continue the Electronic Lifestyle theme on a more personal level, as they are equipped with the top of the line sensor faucets and sinks by TOTO USA, Electric Mirror TVs and the ‘cleaner and greener’ electronic TOTO USA Washlets!
The ultimate vision for the DeVance Experience was to create an environment unlike any retail storefront or big box shop, where a unique and exciting experience awaits existing and prospective clients, guests, trade partners and business associates. Collaborating partners are encouraged to utilize the space as a mini-custom showroom of their own; accessing a relaxing environment to lay out clients’ space plans and select samples for custom countertops, specialized cabinet designs, fabrics, paint, carpets, etc. Essentially, The DeVance Experience Center is the hottest design/build/electronic lifestyle showroom around, lending a whole new meaning to “industry partnerships!” Based on current knowledge, there is no other showroom that is comparable.
The layout of the new Experience Center was designed specifically for event marketing. To name a few, continuing education classes and training seminars for builders, remodelers, architects, and interior designers, professional meet up groups and local business functions. Private client tours, relationship appreciation functions, sports and movie watching parties are just a smattering of the promotional campaign lineup. The center provides a professional, yet relaxing and entertaining venue for professional industry trade gatherings and events.
The Experience Center offers a showcase for user-friendly automation and control and variety of electronic lifestyle systems throughout the space via the use of an iPhone, iPad or smart tablet. With ease and elegance, guests may choose to control the lighting, shades and draperies, thermostats, whole house music, multiple televisions and video displays (many of which are concealed behind beautifully framed artwork). Mimicking many of the latest possibilities for the high-end homeowner, all of this in a comfortable and luxurious environment that makes them feel right at home!
Showroom Exchange Partners include woodworking cabinetry Concepts Realized by Walt Ring, custom artwork by Mark Whitmarsh, Ric Falster, Dawn Cleaves, and Jenny Williamson. Theater millwork interiors by Mancave DFW, custom theater seating, leather furnishings, and wood tables by Touch of France, Silestone surfaces by Cosentino USA, stone fabrication services by A-A Marble also contributing exotic granite vanity tops, faucets, sinks and toilets by TOTO USA, and Kane theater carpeting by Natural Selections.
Find the right local pro for your project


 DeVance Electronic Lifestyle
Suad Bejtovic
The DeVance Team has collaborated with various synergistic partners in order to create a one-of-a-kind ‘Experience Center’ in the North Dallas corridor. This Electronic Lifestyle facility has quickly become a savvy social and entertaining environment; set up to demonstrate just a few things one can do in their home or office to enhance their quality of life through the use of technology. Guests are dazzled by a plethora of custom electronic selections, incorporated into the latest technology in a cozy, yet high-end residential-style environment. The entire space is home to dozens of custom paintings by local artists and master-crafted wood works and built in cabinetry. The reception area is complimented with a 55” custom designed Art Screen TV with retractable art that rolls up into a motorized casing to reveal a 4K TV screen. The additional spaces show beautifully, with a modern family room, a sophisticated entertainment lounge, and fully functional, stocked wet bar. An acoustically treated 2-Channel listening room houses the finest in McIntosh audio equipment complete with a turntable. This room was designed for vinyl record or streaming music for ‘audiophile enthusiasts.’ The DeVance 18 seat movie theater boasts a state-of-the-art perforated ten foot screen, JBL Synthesis 7.1 surround sound system and crystal clear Runco projection system. Guests enjoy luxurious motorized leather theater seating complete with warm throws and leather ottomans for comfortable movie viewing. The DeVance restrooms continue the Electronic Lifestyle theme on a more personal level, as they are equipped with the top of the line sensor faucets and sinks by TOTO USA, Electric Mirror TVs and the ‘cleaner and greener’ electronic TOTO USA Washlets!
The ultimate vision for the DeVance Experience was to create an environment unlike any retail storefront or big box shop, where a unique and exciting experience awaits existing and prospective clients, guests, trade partners and business associates. Collaborating partners are encouraged to utilize the space as a mini-custom showroom of their own; accessing a relaxing environment to lay out clients’ space plans and select samples for custom countertops, specialized cabinet designs, fabrics, paint, carpets, etc. Essentially, The DeVance Experience Center is the hottest design/build/electronic lifestyle showroom around, lending a whole new meaning to “industry partnerships!” Based on current knowledge, there is no other showroom that is comparable.
The layout of the new Experience Center was designed specifically for event marketing. To name a few, continuing education classes and training seminars for builders, remodelers, architects, and interior designers, professional meet up groups and local business functions. Private client tours, relationship appreciation functions, sports and movie watching parties are just a smattering of the promotional campaign lineup. The center provides a professional, yet relaxing and entertaining venue for professional industry trade gatherings and events.
The Experience Center offers a showcase for user-friendly automation and control and variety of electronic lifestyle systems throughout the space via the use of an iPhone, iPad or smart tablet. With ease and elegance, guests may choose to control the lighting, shades and draperies, thermostats, whole house music, multiple televisions and video displays (many of which are concealed behind beautifully framed artwork). Mimicking many of the latest possibilities for the high-end homeowner, all of this in a comfortable and luxurious environment that makes them feel right at home!
Showroom Exchange Partners include woodworking cabinetry Concepts Realized by Walt Ring, custom artwork by Mark Whitmarsh, Ric Falster, Dawn Cleaves, and Jenny Williamson. Theater millwork interiors by Mancave DFW, custom theater seating, leather furnishings, and wood tables by Touch of France, Silestone surfaces by Cosentino USA, stone fabrication services by A-A Marble also contributing exotic granite vanity tops, faucets, sinks and toilets by TOTO USA, and Kane theater carpeting by Natural Selections.

 Talon Construction Inc.
Designing and building a kitchen addition is a complex process that involves multiple steps and considerations. Here is a general outline to help you get started on your kitchen addition project:
Define Your Goals and Budget:
• Determine the purpose of the kitchen addition. Is it for more cooking space, a dining area, or a combination of both?
• Establish a realistic budget for your project. Consider all costs, including construction, permits, materials, and furnishings.
Hire a Design Professional:
• Seek the services of a design build company who specializes in kitchen additions.
• Discuss your vision, needs, and budget with the design professional to create a design concept.
Site Evaluation:
• Assess the existing space and structural condition of your home to ensure it can support the addition.
• Consider factors like zoning regulations, setbacks, and building codes.
Design Development:
• Collaborate with your design professional to refine the concept, including the layout, size, and architectural style.
• Choose materials, finishes, and fixtures that fit your design and budget.
Obtain Permits:
• Consult with your local design build contractor to determine the necessary permits and approvals.
• Prepare and submit all required documents, including architectural drawings and engineering plans.
Create Construction Documents:
• Work with your design build professional to develop detailed construction drawings and specifications.
• These documents will serve as a guide for contractors during construction.
Hire a design build contractor:
• Check references, credentials, and licenses before selecting a contractor.
• Sign a detailed contract that outlines the scope of work, timeline, and payment schedule.
Construction Phase:
• Demolition: If needed, remove any existing structures or walls.
• Foundation: Construct the foundation for the addition.
• Framing: Build the structural framework of the addition.
• Plumbing, Electrical, and HVAC: Install or update utilities as required.
• Insulation: Ensure proper insulation for energy efficiency.
• Drywall and Finish Work: Complete the walls and ceilings.
• Flooring and Cabinetry: Install flooring and kitchen cabinets.
• Appliances and Fixtures: Add appliances, plumbing fixtures, and lighting.
• Paint and Finish: Apply paint and finishes to achieve the desired look.
• Final Inspection: Schedule inspections to ensure compliance with building codes.
Final Inspections and Approvals:
• Arrange for final inspections to ensure the addition meets all safety and code requirements.
• Obtain any necessary certificates of occupancy or compliance.
Move In and Enjoy:
• Once all inspections and approvals are received, you can move into your new kitchen addition and start enjoying it.
Remember that every kitchen addition project is unique, so adapt this outline to your specific needs and circumstances. Consulting with professionals and obtaining the required permits and inspections is crucial to a successful and safe project.

 Talon Construction Inc.
Designing and building a kitchen addition is a complex process that involves multiple steps and considerations. Here is a general outline to help you get started on your kitchen addition project:
Define Your Goals and Budget:
• Determine the purpose of the kitchen addition. Is it for more cooking space, a dining area, or a combination of both?
• Establish a realistic budget for your project. Consider all costs, including construction, permits, materials, and furnishings.
Hire a Design Professional:
• Seek the services of a design build company who specializes in kitchen additions.
• Discuss your vision, needs, and budget with the design professional to create a design concept.
Site Evaluation:
• Assess the existing space and structural condition of your home to ensure it can support the addition.
• Consider factors like zoning regulations, setbacks, and building codes.
Design Development:
• Collaborate with your design professional to refine the concept, including the layout, size, and architectural style.
• Choose materials, finishes, and fixtures that fit your design and budget.
Obtain Permits:
• Consult with your local design build contractor to determine the necessary permits and approvals.
• Prepare and submit all required documents, including architectural drawings and engineering plans.
Create Construction Documents:
• Work with your design build professional to develop detailed construction drawings and specifications.
• These documents will serve as a guide for contractors during construction.
Hire a design build contractor:
• Check references, credentials, and licenses before selecting a contractor.
• Sign a detailed contract that outlines the scope of work, timeline, and payment schedule.
Construction Phase:
• Demolition: If needed, remove any existing structures or walls.
• Foundation: Construct the foundation for the addition.
• Framing: Build the structural framework of the addition.
• Plumbing, Electrical, and HVAC: Install or update utilities as required.
• Insulation: Ensure proper insulation for energy efficiency.
• Drywall and Finish Work: Complete the walls and ceilings.
• Flooring and Cabinetry: Install flooring and kitchen cabinets.
• Appliances and Fixtures: Add appliances, plumbing fixtures, and lighting.
• Paint and Finish: Apply paint and finishes to achieve the desired look.
• Final Inspection: Schedule inspections to ensure compliance with building codes.
Final Inspections and Approvals:
• Arrange for final inspections to ensure the addition meets all safety and code requirements.
• Obtain any necessary certificates of occupancy or compliance.
Move In and Enjoy:
• Once all inspections and approvals are received, you can move into your new kitchen addition and start enjoying it.
Remember that every kitchen addition project is unique, so adapt this outline to your specific needs and circumstances. Consulting with professionals and obtaining the required permits and inspections is crucial to a successful and safe project.
 Universal Appliance and Kitchen Center
Available at Universal Appliance and Kitchen Center | uakc.com
The E series made Wolf precision performance accessible for more cooks. Now three distinct new styles make the E series ideal for more kitchen designs than ever. The new 30" E series professional double oven features an all-stainless touch control panel, pro-style capped handles and stainless-framed doors - a design meant to coordinate beautifully with similarly-styled Wolf microwaves and warming drawers. Inside the upper oven, dual convection fans and ten cooking modes control heat and airflow more precisely than less sophisticated single-convection systems. Uniform heat throughout the oven and the efficiency of circulating air around the food produce faster, more consistent and more predictably delicious results for your baking, roasting and broiling. The lower oven is a standard, non-convection oven offering four modes (bake, broil, roast and proof). The E series oven controls are a favorite of Wolf chefs for their intuitive usability whether setting the temperature, mode or timer. Meanwhile, dual interior halogen lights and a large viewing window help you keep tabs on cooking progress without having to disturb your dish by opening the door. Other standard convenience features include self-clean and timed cook settings, along with one full-extension, easy-glide rack and one full-extension, door-glide rack that put even the largest, heaviest dishes safely within reach.
Appearance:
Cobalt Blue Porcelain Oven Interior (Each Oven)
Large Viewing Double-Pane Window (Each Oven)
Pro Handle
Stainless Steel Professional Design
Capacity:
4.5 Cu Ft Oven Capacity (Each Oven)
Dimensions:
50 3/8" H x 23 3/4" D x 29 7/8" W
Manufacturers Warranty:
2 Year Parts & Labor
5 Year Parts-Electric Elements, Electronic Control
Controls:
Touch Control Panel w/ LCD Display
Oven Features:
10 Cooking Modes (Upper Oven)
3 Oven Racks w/ 6 Level Guide (Each Oven)
Convection Bake, Roast, Broil
Conventional Bake, Roast, Broil
Dehydrate & Proof Modes
Dual Convection System with Two Fans - Upper Oven
Full Extension Bottom Rack
Hidden Bake Element
Recessed Broil Element
Self Clean Porcelain Oven (Each Oven)
Temperature Probe (Each Oven)
Convenience Features:
Delay Start Option (Each Oven)
Dual Interior Halogen Lighting (Each Oven)
Sabbath Mode (Each Oven)
Additional Features:
Balanced Door Hinge
Standard or Flush Inset Application Installation

 Talon Construction Inc.
Designing and building a kitchen addition is a complex process that involves multiple steps and considerations. Here is a general outline to help you get started on your kitchen addition project:
Define Your Goals and Budget:
• Determine the purpose of the kitchen addition. Is it for more cooking space, a dining area, or a combination of both?
• Establish a realistic budget for your project. Consider all costs, including construction, permits, materials, and furnishings.
Hire a Design Professional:
• Seek the services of a design build company who specializes in kitchen additions.
• Discuss your vision, needs, and budget with the design professional to create a design concept.
Site Evaluation:
• Assess the existing space and structural condition of your home to ensure it can support the addition.
• Consider factors like zoning regulations, setbacks, and building codes.
Design Development:
• Collaborate with your design professional to refine the concept, including the layout, size, and architectural style.
• Choose materials, finishes, and fixtures that fit your design and budget.
Obtain Permits:
• Consult with your local design build contractor to determine the necessary permits and approvals.
• Prepare and submit all required documents, including architectural drawings and engineering plans.
Create Construction Documents:
• Work with your design build professional to develop detailed construction drawings and specifications.
• These documents will serve as a guide for contractors during construction.
Hire a design build contractor:
• Check references, credentials, and licenses before selecting a contractor.
• Sign a detailed contract that outlines the scope of work, timeline, and payment schedule.
Construction Phase:
• Demolition: If needed, remove any existing structures or walls.
• Foundation: Construct the foundation for the addition.
• Framing: Build the structural framework of the addition.
• Plumbing, Electrical, and HVAC: Install or update utilities as required.
• Insulation: Ensure proper insulation for energy efficiency.
• Drywall and Finish Work: Complete the walls and ceilings.
• Flooring and Cabinetry: Install flooring and kitchen cabinets.
• Appliances and Fixtures: Add appliances, plumbing fixtures, and lighting.
• Paint and Finish: Apply paint and finishes to achieve the desired look.
• Final Inspection: Schedule inspections to ensure compliance with building codes.
Final Inspections and Approvals:
• Arrange for final inspections to ensure the addition meets all safety and code requirements.
• Obtain any necessary certificates of occupancy or compliance.
Move In and Enjoy:
• Once all inspections and approvals are received, you can move into your new kitchen addition and start enjoying it.
Remember that every kitchen addition project is unique, so adapt this outline to your specific needs and circumstances. Consulting with professionals and obtaining the required permits and inspections is crucial to a successful and safe project.
 Talon Construction Inc.
Designing and building a kitchen addition is a complex process that involves multiple steps and considerations. Here is a general outline to help you get started on your kitchen addition project:
Define Your Goals and Budget:
• Determine the purpose of the kitchen addition. Is it for more cooking space, a dining area, or a combination of both?
• Establish a realistic budget for your project. Consider all costs, including construction, permits, materials, and furnishings.
Hire a Design Professional:
• Seek the services of a design build company who specializes in kitchen additions.
• Discuss your vision, needs, and budget with the design professional to create a design concept.
Site Evaluation:
• Assess the existing space and structural condition of your home to ensure it can support the addition.
• Consider factors like zoning regulations, setbacks, and building codes.
Design Development:
• Collaborate with your design professional to refine the concept, including the layout, size, and architectural style.
• Choose materials, finishes, and fixtures that fit your design and budget.
Obtain Permits:
• Consult with your local design build contractor to determine the necessary permits and approvals.
• Prepare and submit all required documents, including architectural drawings and engineering plans.
Create Construction Documents:
• Work with your design build professional to develop detailed construction drawings and specifications.
• These documents will serve as a guide for contractors during construction.
Hire a design build contractor:
• Check references, credentials, and licenses before selecting a contractor.
• Sign a detailed contract that outlines the scope of work, timeline, and payment schedule.
Construction Phase:
• Demolition: If needed, remove any existing structures or walls.
• Foundation: Construct the foundation for the addition.
• Framing: Build the structural framework of the addition.
• Plumbing, Electrical, and HVAC: Install or update utilities as required.
• Insulation: Ensure proper insulation for energy efficiency.
• Drywall and Finish Work: Complete the walls and ceilings.
• Flooring and Cabinetry: Install flooring and kitchen cabinets.
• Appliances and Fixtures: Add appliances, plumbing fixtures, and lighting.
• Paint and Finish: Apply paint and finishes to achieve the desired look.
• Final Inspection: Schedule inspections to ensure compliance with building codes.
Final Inspections and Approvals:
• Arrange for final inspections to ensure the addition meets all safety and code requirements.
• Obtain any necessary certificates of occupancy or compliance.
Move In and Enjoy:
• Once all inspections and approvals are received, you can move into your new kitchen addition and start enjoying it.
Remember that every kitchen addition project is unique, so adapt this outline to your specific needs and circumstances. Consulting with professionals and obtaining the required permits and inspections is crucial to a successful and safe project.
 Talon Construction Inc.
Designing and building a kitchen addition is a complex process that involves multiple steps and considerations. Here is a general outline to help you get started on your kitchen addition project:
Define Your Goals and Budget:
• Determine the purpose of the kitchen addition. Is it for more cooking space, a dining area, or a combination of both?
• Establish a realistic budget for your project. Consider all costs, including construction, permits, materials, and furnishings.
Hire a Design Professional:
• Seek the services of a design build company who specializes in kitchen additions.
• Discuss your vision, needs, and budget with the design professional to create a design concept.
Site Evaluation:
• Assess the existing space and structural condition of your home to ensure it can support the addition.
• Consider factors like zoning regulations, setbacks, and building codes.
Design Development:
• Collaborate with your design professional to refine the concept, including the layout, size, and architectural style.
• Choose materials, finishes, and fixtures that fit your design and budget.
Obtain Permits:
• Consult with your local design build contractor to determine the necessary permits and approvals.
• Prepare and submit all required documents, including architectural drawings and engineering plans.
Create Construction Documents:
• Work with your design build professional to develop detailed construction drawings and specifications.
• These documents will serve as a guide for contractors during construction.
Hire a design build contractor:
• Check references, credentials, and licenses before selecting a contractor.
• Sign a detailed contract that outlines the scope of work, timeline, and payment schedule.
Construction Phase:
• Demolition: If needed, remove any existing structures or walls.
• Foundation: Construct the foundation for the addition.
• Framing: Build the structural framework of the addition.
• Plumbing, Electrical, and HVAC: Install or update utilities as required.
• Insulation: Ensure proper insulation for energy efficiency.
• Drywall and Finish Work: Complete the walls and ceilings.
• Flooring and Cabinetry: Install flooring and kitchen cabinets.
• Appliances and Fixtures: Add appliances, plumbing fixtures, and lighting.
• Paint and Finish: Apply paint and finishes to achieve the desired look.
• Final Inspection: Schedule inspections to ensure compliance with building codes.
Final Inspections and Approvals:
• Arrange for final inspections to ensure the addition meets all safety and code requirements.
• Obtain any necessary certificates of occupancy or compliance.
Move In and Enjoy:
• Once all inspections and approvals are received, you can move into your new kitchen addition and start enjoying it.
Remember that every kitchen addition project is unique, so adapt this outline to your specific needs and circumstances. Consulting with professionals and obtaining the required permits and inspections is crucial to a successful and safe project.
 Santos Kitchens Dubai
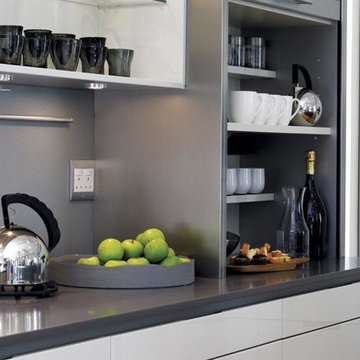
This kitchen's best features are its layout, that makes work easier, and the latest electrical appliances. This project is characterised by an intelligent choice of modules which permit six electrical appliances to be integrated in the tall unit area. An auxiliary working and storage area has been installed In front of the island. The highlights are the roller shutter unit and the wall unit with a folding door system.
 Universal Appliance and Kitchen Center
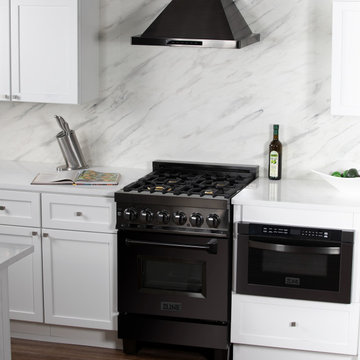
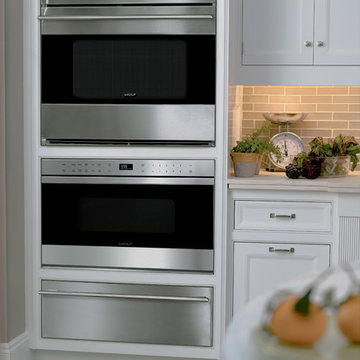
As true cooking instruments, Wolf drawer microwaves include many features that make fast meals better meals. Drawer microwaves can be installed undercounter, in a corner or in a wall of cabinetry which provides easy access to food from any angle. They are designed to match the trim style of Wolf E series ovens and can be installed in a standard or flush inset application.
Design and Performance Features:
Classic stainless steel Designed to match Wolf E series ovens.
Design flexibility Can be installed in a standard or flush inset (accessory required) application.
Increased capacity 20% larger interior capacity accommodates 9" x 13" pans and cups up to 7" in height.
Easy to operate 10 power levels and sensor cooking make cooking easy.
Keep warm setting Allows food to be kept warm for up to 99 minutes.
Kitchen timer Can be set for up to 99 minutes and 99 seconds.
Control panel lock Can be locked for child safety or to prevent unwanted use.
Technical Features:
Interior capacity - 1.2 cu. ft.
Power - 950 watts
23