
Search results for "Extract" in Home Design Ideas

 Stephanie Barnes-Castro
Stephanie Barnes-Castro is a full service architectural firm specializing in sustainable design serving Santa Cruz County. Her goal is to design a home to seamlessly tie into the natural environment and be aesthetically pleasing and energy efficient.
 HotShotPros.com Photography
HotShotPros.com
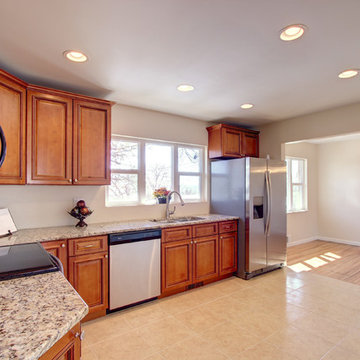
Mid-sized trendy l-shaped porcelain tile eat-in kitchen photo in Denver with raised-panel cabinets, granite countertops, white backsplash, stainless steel appliances, white walls and no island
Mid-sized trendy l-shaped porcelain tile eat-in kitchen photo in Denver with raised-panel cabinets, granite countertops, white backsplash, stainless steel appliances, white walls and no island
 ttschoonover
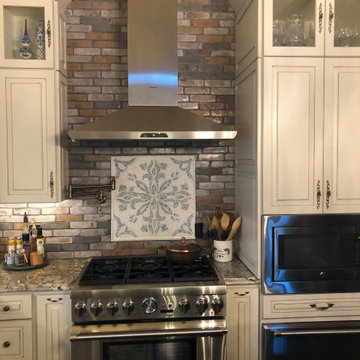
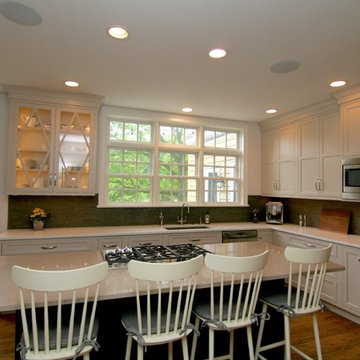
Inspiration for a mid-sized french country l-shaped dark wood floor and brown floor kitchen remodel with granite countertops, multicolored backsplash, brick backsplash, stainless steel appliances, an island and multicolored countertops
Find the right local pro for your project
 Studio Zung
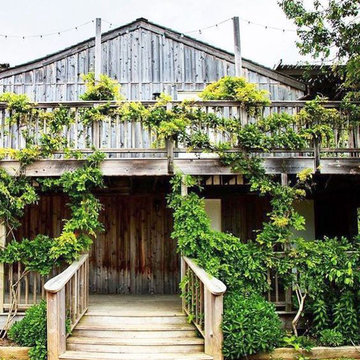
The concept and design of the hotel and restaurant was done in collaboration with Sean MacPherson to transform the aging but extraordinary property into an authentic surf shack. The architectural goal was to create simplicity out of natural materials while allowing the physical expansiveness of the location to shine through. This involved extracting the design down to the wood structure, framing, and elements. Locally sourced cedar lines the rooms, absorbing the summer and early fall quality of light, allowing the inside and outside to blue and age together in natural harmony. The perfection of the space embodied in the imperfections.

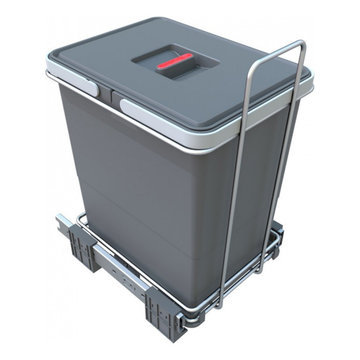
 Elletipi Inc.
Practical and functional system ELLETIPI for waste separation, provided with metal sliders for total extraction. The buckets are installed in a basket made of chrome plated steel wire and all its components are 100% recyclable. The durability and simplicity of this product are its strong points. All containers are equipped with a lid. It is easy to identify and label the type of waste that goes into each bin, using the multicolor resin stickers that were supplied with the lids. You can install these bins in kitchen bases, specifically under the sink. Its installation on the bottom of the kitchen base, using the supplied 5 self-tapping screws, is easy and practical.
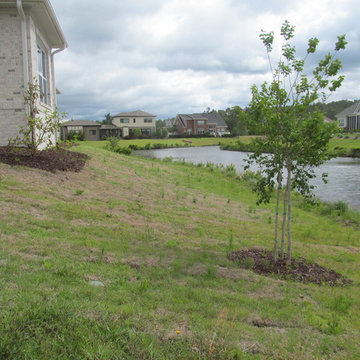
 Outdoor Creations Landscape & Design Inc.
Initial consult: Dormant New Sod that was installed by the builder in 2016/Dead and damaged. Extremely overloaded with late cool season weeds and transitional warm season weed growth.
Extracted soil for soil testing to determine what we'd be working with structure wise and best management practices going forward for the client.
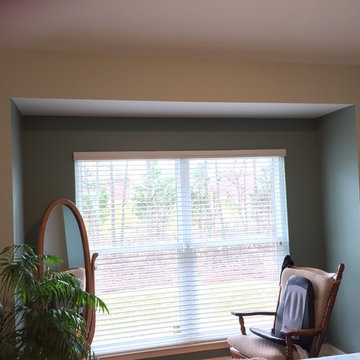
 Jill J. Wallace, Color Redesign
To create a feeling of warmth and coziness a picture (not shown) that inspires the homeowners was used to extract subtle colors that could transform the master bedroom.
Photos by Color ReDesign
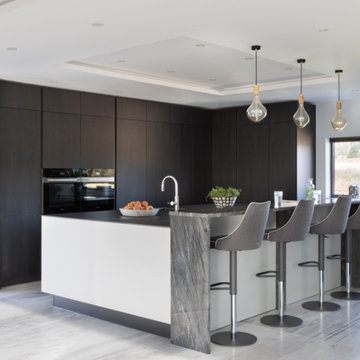
 The Myers Touch
The layout follows a wide L shape with a central island which is wide enough to house both the hob and the sink. The Miele induction hob includes an integrated extraction which allows the client a seamless view across the island and out to their wonderful farmland vista. A Neolith Bromo worktop provides both beauty and durability, making use and cleaning of this kitchen a dream. Hidden within a bank of tall cabinetry lies a large walk-in larder space, perfect for storage of everyday items, or for keeping pre-made party food a secret! The dark SieMatic cabinets in Onyx oak laminate create drama and visual strength in this large open-plan space, whilst a soft sterling grey finish was chosen for the island and console cabinets to bring warmth and light into the central area.
Inspiration for a contemporary home design remodel in Hampshire
 Williamsons Kitchens
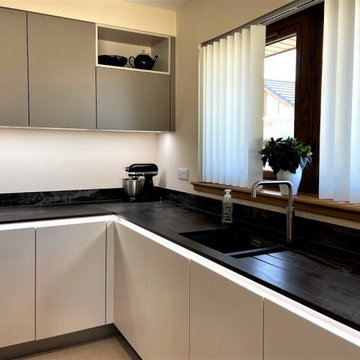
Our client was in the process of building a new house to their specification in Fraserburgh. The centrepiece? A contemporary, open-plan kitchen that not only serves as a functional space but also as an inviting hub for family gatherings.
Opting for the Nolte SoftLack range, we integrated the Silver MatrixArt handleless trims, complemented by elegant integrated lighting. The main furniture showcases a soothing Sahara hue, contrasted smartly by the Lava accent.
The 20mm Dekton Trilium worktop exudes sophistication, while the 40mm Nolte Platinum Bough Oak table adds a touch of warmth. We included a full suite of NEFF appliances: a single oven, combination microwave, induction hob, ceiling extraction, and a full-height fridge and freezer, meeting every culinary need.
Special requests are what make a design truly personal. We incorporated a Blanco Subline undermounted sink in Alumetallic, a state-of-the-art Quooker Fusion Square Stainless Steel instant boiling water tap, and durable Pergo flooring. Notably, the elevated dishwasher was positioned conveniently beside the sink, based on the client's preference. The tall units were seamlessly integrated into the ceiling, complemented by an artful goal-post niche. Furthermore, the extractor finds its home within a stylish ceiling drop box, highlighted by a subtly lit stepped ledge.
Dreaming of your own bespoke kitchen? Let us transform your vision into reality.
 Williamsons Kitchens
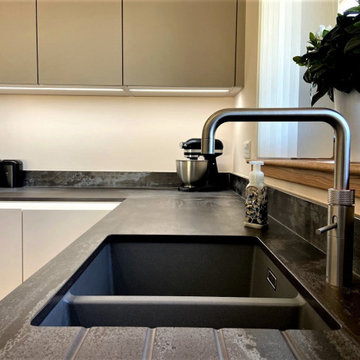
Our client was in the process of building a new house to their specification in Fraserburgh. The centrepiece? A contemporary, open-plan kitchen that not only serves as a functional space but also as an inviting hub for family gatherings.
Opting for the Nolte SoftLack range, we integrated the Silver MatrixArt handleless trims, complemented by elegant integrated lighting. The main furniture showcases a soothing Sahara hue, contrasted smartly by the Lava accent.
The 20mm Dekton Trilium worktop exudes sophistication, while the 40mm Nolte Platinum Bough Oak table adds a touch of warmth. We included a full suite of NEFF appliances: a single oven, combination microwave, induction hob, ceiling extraction, and a full-height fridge and freezer, meeting every culinary need.
Special requests are what make a design truly personal. We incorporated a Blanco Subline undermounted sink in Alumetallic, a state-of-the-art Quooker Fusion Square Stainless Steel instant boiling water tap, and durable Pergo flooring. Notably, the elevated dishwasher was positioned conveniently beside the sink, based on the client's preference. The tall units were seamlessly integrated into the ceiling, complemented by an artful goal-post niche. Furthermore, the extractor finds its home within a stylish ceiling drop box, highlighted by a subtly lit stepped ledge.
Dreaming of your own bespoke kitchen? Let us transform your vision into reality.
 Patience Designs Studio Ltd
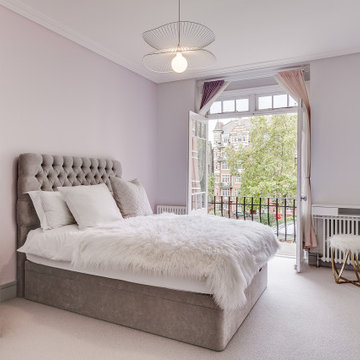
This St Johns Wood mansion block flat was one of our recent projects with a luxurious property developer in the area. We opened up spaces between the hallway, living area and kitchen to create a much more open feel throughout. A bespoke bench wrapped around the living space providing extra seating as well as storage whilst, keeping as much of the floor space free. Hidden cabling, Samsung Frame TV and biofires helped to add the luxuries without drawing away from the tranquillity.
Another view of the St Johns Wood mansion block flat, the modern kitchen layout with it's central island and induction hob and ceiling mounted extraction pendant above. The brushed bronze finish on the island's facade contrasts with the sleek minimal gloss white cabinetry for the rest of the kitchen.
 George Robinson Kitchens
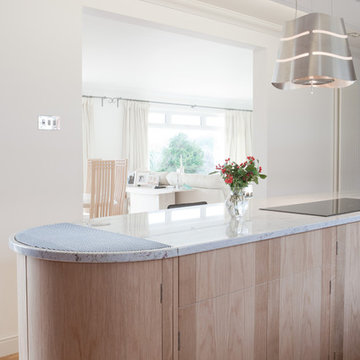
Light and airy kitchen with curved oak island and inbuilt hob. Pop up power sockets are neatly concealed in the island. Above the hob is a wave extraction unit, a red plinth ties the look together with the gloss red features elsewhere in the space.
 Neale Smith Photography
Neale Smith
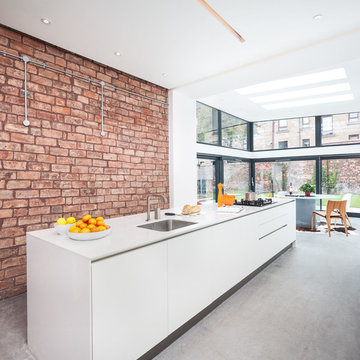
Eat-in kitchen - large modern galley concrete floor eat-in kitchen idea in Glasgow with a single-bowl sink, flat-panel cabinets, white cabinets, orange backsplash, stainless steel appliances and an island
Eat-in kitchen - large modern galley concrete floor eat-in kitchen idea in Glasgow with a single-bowl sink, flat-panel cabinets, white cabinets, orange backsplash, stainless steel appliances and an island
 Arani Construction
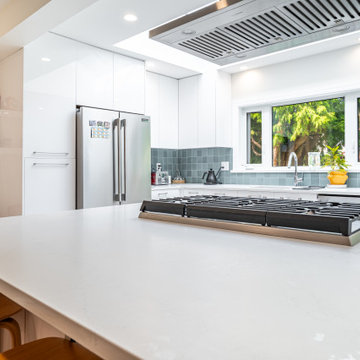
This photo highlights the large quartz kitchen island created during a full house renovation in the Kerrisdale neighbourhood of Vancouver by Arani Construction Inc. The island was designed as the central workspace of the kitchen, providing generous surface area for food preparation, cooking, and gathering.
A gas cooktop was integrated directly into the quartz countertop, allowing the island to function as the main cooking zone while maintaining open interaction with the surrounding living and dining areas. Above the cooktop, a ceiling-mounted stainless steel ventilation hood provides effective air extraction while preserving the clean architectural lines of the space.
The renovation also introduced high-gloss white cabinetry, built-in appliances, and a modern tile backsplash along the perimeter walls. Positioned beneath a large window and skylight, the kitchen benefits from abundant natural light while maintaining clear sightlines through the open concept layout created during the structural renovation.
 Tile Doctor Ltd
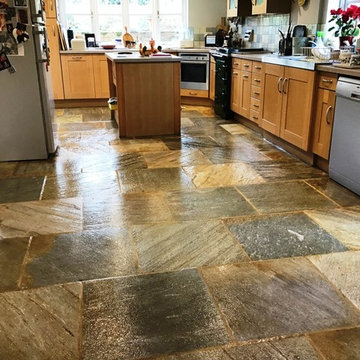
I recently visited a customer living in the village of Ravensthorpe, just outside Northampton to rejuvenate a 15-year-old multi coloured Chinese riven slate floor that needed a deep professional clean. Slate is a hard-wearing tile used for flooring high traffic areas but does need sealing to bring out its best features. In this case the sealer had long since worn off and dirt had become ingrained in the stone making it difficult to clean effectively.
We discussed the client’s requirements and the cleaning process I planned to follow to rejuvenate the floor. I had to check on availability, so I e-mailed over a quote and some dates later that day. They were happy with my proposal and agreed for the work to be done whilst the customers were on holiday.
My first task was to test a small area to determine which products would give the best results. In this case, I decided to start with a strong dilution of Tile Doctor Remove and Go which is a strong alkaline cleaner/coatings remover that’s safe to use on Tile and Stone. I spread this solution across a section of the floor and left it to seep into the pores of the stone and lift out the ingrained dirt.
After allowing the solution adequate time to dwell, I scrubbed the slate with a carbon brush fitted to a rotary machine to gradually reveal the fantastic natural colours of the Slate hidden beneath the dirt. Happy with my choice of cleaning product I repeated this process in sections until it had been carried out throughout the entire area. Following this, I rinsed the entire floor several times with clean water, before soaking up the resulting soiled residue with a wet vacuum.
The next part of the cleaning process entailed paying attention to the grout lines which were scrubbed using Tile Doctor Grout Clean-Up. The resulting residue was promptly extracted with the wet vacuum and I finished by giving the whole floor a rinse with Tile Doctor pH Neutral Tile Cleaner. This is a day to day tile cleaning product which is recommended for stone floors, many supermarket tile cleaning products are only suitable for ceramic tiles due to their acidic formula and can damage a floor over years of use so you should always read the label. However, I always leave my clients with a complimentary bottle of a suitable Tile Doctor product to maintain their floors.
The floor was left to dry off overnight and I returned on the second day to seal the floor. Before starting I checked the floor was dry using a damp meter which confirmed the Slate was dry and ready to seal. The floor must be completely dry before sealing as any excess moisture has the potential to the damage the performance of the sealer. Since my client had specifically requested a silk finish, I opted to use Tile Doctor Seal and Go which dries to leave a lovely subtle sheen that really enhances the look of the stone. Five coats were applied to ensure a good hard-wearing protection.
My client was very pleased with the results, particularly as they hadn’t realised how much colour it had lost over the years and left the following feedback on our website.
”I despaired of having a clean-looking floor again. Phil Vissian assured me that intensive deep cleaning and resealing could restore our fifteen year old, subtly coloured, Chinese riven slate kitchen floor. He has done a fantastic job. Looks like new, and I shall book Phil for an annual professional clean, so that it never gets as bad again.” Sally M, Northampton
Phil Vissian
Northamptonshire Tile Doctor
 Rebecca Randall Colour and Design
Our clients sought to transform a functional but uninspired ensuite into a high-end, spa-like retreat. The original room occupied a converted garage space, which presented a unique architectural hurdle: an excessively high ceiling that made the room feel cold and cavernous rather than intimate. The goal was to balance this industrial heritage with the "pampered relaxation" of a luxury hotel.
To achieve a cohesive, tranquil atmosphere, we focused on tactile materials and atmospheric volume:
Spatial Proportions: We lowered the ceiling to a more intimate height, which not only improved the acoustics but also allowed for the installation of integrated, soft-glow lighting and high-performance extraction.
Climate Control: To ensure comfort throughout the year, we installed a high-efficiency underfloor heating (UFH) system. This was essential to mitigate the thermal mass of the large-format porcelain tiles, ensuring the floor remains warm to the touch.
Dual-Purpose Luxury: The layout was meticulously planned to accommodate both a deep soaking bath and a spacious walk-in shower, providing the couple with versatile options for both quick refreshment and long, indulgent soaks.
 Tile Doctor Ltd
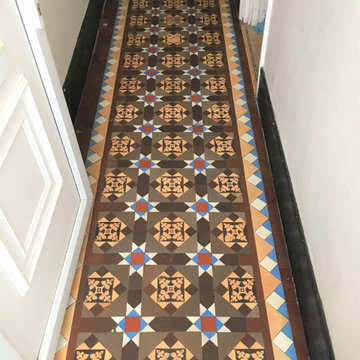
This client owned a property in Haringey, North London, which had a classic Victorian tiled floor laid in the hallway. Unfortunately, the floor was in a bad state, the tiles were dull and dirty and there was a missing section by the bottom of the stairs that had been back filled with cement. Fortunately for him however his neighbour decided to remove their front path which was made with matching tiles and so he was able acquire replacements from him. He then contacted us to see if we could use those tiles to fill in the missing ones and revive the whole floor with a clean and seal at the same time.
Before quoting for the restoration work, I paid a visit to the property to survey the floor. I can give quotes from photographs, but much prefer to visit and conduct a test clean, and in this case, I was able to check the spare tiles he had acquired. From that I emailed a quote which the client was happy with, so we arranged a date to return and do the work.
This was a large job, so I teamed up with Jackson Davis the Central London Tile Doctor and whilst Jackson started on cleaning the floor, I took the reclaimed tiles outside and carefully grinded off the excess cement and adhesive from them and cleaned them by hand. We managed to do this by about 3pm. Jackson and I work on a lot of jobs together so it made sense to work as a bubble from the beginning of Covid so we could continue to work together, with two of us on the job it also means we can get the job done quicker.
Cleaning the floor involved applying a 200-grit diamond burnishing pad to the tile lubricated with a strong dilution of Tile Doctor Remove and Go, the slurry was then rinsed off the floor with more water and then extracted with an industrial vacuum. The process was repeated on stubborn areas until we were satisfied the tiles were really clean.
We then moved onto carefully removing the cement from the floor at the bottom of the stairs and cleaning up the base. Once done the newly renovated replacement tiles were laid in place using a rapid setting adhesive which meant they could be grouted later that day before heading home. The floor was then left overnight to dry off.
We then returned the following day and took some moisture readings with the damp meter. The readings were within the expected range, so we were good to go ahead and apply the sealer. If the floor is not dry the seal will not cure properly, and this can lead to a patchy finish.
Three coats of Tile Doctor Colour Grow were applied to seal the tiles. This is a colour intensifying impregnating sealer that works from with and will gives the Victorian tiles durable protection, ideal for a high traffic area such as the hallway. In addition, Colour Grow is a fully breathable sealer so it will allow for moisture to rise through the tile and evaporate, this is critical for floors of this age that will not have the benefit of a damp proof membrane installed under the floor.
The hallway is now looking transformed by the work we did, we certainly thought so, but more importantly our client was very happy with the result and now has the floor he hoped for.
Andrew Newstead
North London Tile Doctor
 Tile Doctor Ltd
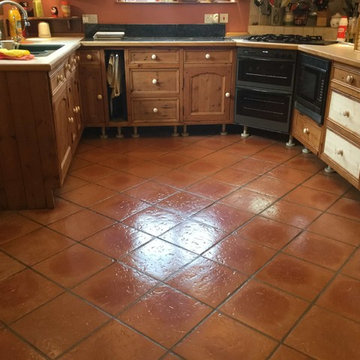
This Terracotta tiled floor was installed in the kitchen of a cottage in the small village of Maidford near Towcester. The tiles were not looking their best and the owner of the property realised it was time to do something about it and contacted Tile Doctor to have the floor stripped and resealed. Stripping and Sealing tile and stone floors is our bread and butter so I was more than happy to pop round and survey the floor which was approximately 9m2.
The grout had darkened with dirt and the previous tile sealer was failing so dirt was now getting ingrained in the Terracotta making it difficult to clean in places and leading to a patchy appearance. We discussed the work involved, my quote was accepted, and a date agreed for me to return and complete the work which would take two days, one to clean and one to seal.
After tidying up the Kitchen and removing the kickboards from underneath the kitchen units I set about working on cleaning and stripping the Terracotta floor of old sealers. To start I tested a small area with a strong dilution of Tile Doctor Wax Away. Wax was quite often used on Terracotta so I figured this product would be a good place to start. My suspicions were proved correct, and I found this to be the best product for removing the many layers of sealant on the floor. Wax Away is a new alkaline product by Tile Doctor and ideal for cleaning clay-based tiles such as Terracotta.
With my sights set on the rest of the floor Wax Away was scrubbed into the tile using a 17” rotary floor scrubbing machine and a black scrubbing pad running on a slow speed which helps to reduce splashing. This activity soon brought the dirt off the floor and the soiled cleaning solution was removed using a wet vacuum and the floor was rinsed down with clean water. The cleaning process was repeated a couple of times until I was happy with the floor, a stiff hand brush was then used along the grout lines with a dilution of Tile Doctor Pro-Clean to clean up the grout.
After rinsing and extracting the floor again the floor was inspected, and I noticed there were a few stubborn paint splashes on the tiles. I managed to remove these and these by spot treating the affected area with Tile Doctor Remove and Go and a steamer to lift the stain out of the clay tile. Once happy the floor was clean it was given a thorough rinse to neutralise it and remove any trace of cleaning products and then left it to dry.
I allowed the floor to dry for several days before returning to seal the Terracotta using numerous coats of Tile Doctor Seal and Go which is an ideal sealer for Terracotta and provides durable stain protection together with a low sheen finish. Terracotta is by its nature very porous and so it’s not unknown for it to take up to nine coats of sealer, which can take some time to apply as like paint you have to wait until it’s dry before it will take the next coat.
The customer was so impressed by the results I achieved in their kitchen they decided to go ahead and book me in to carry out this process throughout the whole of the ground floor which included lounge, study and hallway.
Phil Vissian
Northamptonshire Tile Doctor
 Tile Doctor Ltd
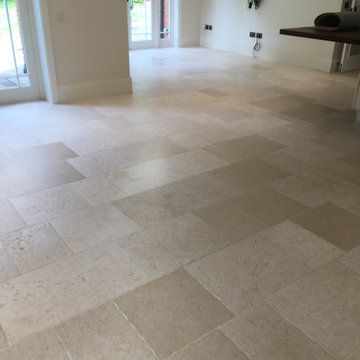
Our client had inherited this Travertine floor when purchasing in a lovely street in Walton-On-Thames, close by was the River Thames which runs all the way into London. The new owners were unhappy with the floor in that it did not look very clean, and they were keen to get this rectified. I arranged a site visit to survey the floor and see what could be done to restore its appearance.
The floor itself was in good physical condition, however, it was apparent from the level of dirt ingrained in the stone that it had not been maintained very well by the previous owner. I carried out a small test clean which came out well and they could see straight away what the floor should look really like! They were happy with my renovation quote and we agreed a mutually convenient time where I could work in relation to the COVID guidelines.
The Travertine floor was scrubbed using a mixture of Tile Doctor Pro Clean and Remove and Go. These are heavy duty cleaning products designed for use on tile and stone can be combined to form a powerful cleaning/stripping solution which is left to dwell on the floor surface. After a short while the solution was worked into the stone using a rotary machine fitted with a black scrubbing pad.
This cleaning recipe works extremely well breaking down dirt, stains, and grease in the stone. Following a machine scrub and a more manual hand scrub of the grout lines, we then pressure rinsed the soil away and then it was extracted using an industrial wet vacuum. In a couple of areas, it was necessary to repeat the process to ensure it was completely clean. Once we were satisfied that the stone was fresh and clean, the floor was left to dry off overnight, so it would be ready for sealing the following day.
After drying overnight, the floor was checked with a damp meter to make sure it was dry. Once reassured I started with the application of the fresh sealer to the floor using Tile Doctor Colour Grow Sealer which is a colour enhancing sealer that works from within by soaking into the pores of the stone. Several coats were applied allowing each one to dry before applying the next. This sealer does not provide a glossy finish, just a nice natural sheen. This brought back the contrast and natural colours in the stone, whilst adding protection to stone for many years to come.
The client was very happy with the work we carried out, the floor had come up much better than they had expected, and it really made a difference to the lovely kitchen space. The floor looked like new. I recommended the regular use of Tile Doctor Stone Soap for future cleaning which will keep the floor in great condition and ensure the longevity of the newly applied sealant.
Jonathan Oldham
South Middlesex Tile Doctor
30