
Search results for "Factor crucial" in Home Design Ideas
 Gallery KBNY
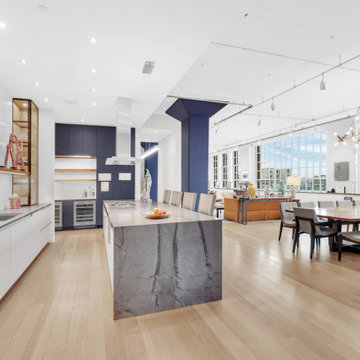
Located in the Sky Lofts building in Tribeca (once home to the most expensive apartment sale in NYC), our clients were ready to renovate and modernize their centerpiece kitchen. Due to the unique nature of loft renovations (high ceilings, columns, creative and skillful lighting applications, among other factors), Gallery’s expertise in loft spaces was vital to our clients. In addition to the loft particularities, it’s important in a kitchen of this size to ensure that all the elements have been laid out with purpose from a functional perspective and a design perspective.
CENTERPIECE KITCHEN
Color was an important design element in this kitchen. This is evident in the striking blues and grays of the marble countertops and backsplash, as well as the dark navy hue of the built-in cabinets. White lower cabinets create two-tone contrast, while glass cabinets and a long wood open shelf make the most of the available height.
The built-in cabinets also include built-in appliances: an espresso maker, coffee machine, two side-by-side wine fridges, and even an integrated refrigerator paneled to match the cabinetry for an essentially seamless look. The cabinets are all push-to-open, eliminating knobs to complete the overall sleek, contemporary style.
The marble backsplash is also book-matched, meaning the slabs of stone have been cut and polished to match each other, creating a mirroring effect that further contributes to the cohesive, contemporary aesthetic of this apartment.
BUILDING CONSIDERATIONS
Functional factors are another vital component to New York City apartment building renovations. In this particular project, we had to consider how to get large slabs of stone into the loft without having to cut them up. When working with slabs, and especially when the design is as sleek and contemporary as this one, it’s vital to eliminate seams as much as possible. Elevators and stairs are often not large enough to handle large slabs of stone, which means there are only two other options: cutting the stone and putting it back together on site (but this will create a seam, so it’s not always an option) or using a crane to bring it in through a window.
Higher-end buildings tend to have more restrictions and management companies with stricter renovation guidelines – with good reason. A good relationship with the super and staff of the building is absolutely essential; effective communication with everyone involved will result in an ideal outcome for all parties.
ARTFUL LOGISTICS
Seemingly minor elements such as apartment protections are also just as crucial. While every renovation will require protections in hallways, common spaces, zip walls, and perhaps the floors, those protections are doubled when renovating in an apartment that’s currently occupied. In the case of this particular client, who owned a great deal of valuable artwork in addition to their furniture and other belongings, Gallery exacted their own form of art when putting the protections in place and maneuvering around them with skill.
SOME HIGHLIGHTS
- Unique marble slabs (Azul Macauba quartzite and Calacatta Diamond quartzite) for the countertops and backsplash
- Book-matched backsplash
- Gaggenau appliances
- Glass cabinets with built-in lighting
- Custom millwork for the cabinets
 Gallery KBNY
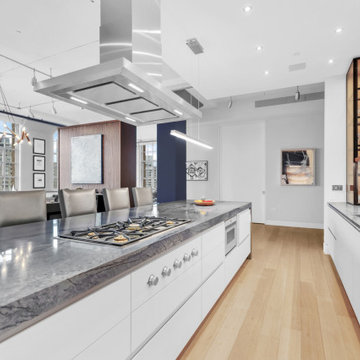
Located in the Sky Lofts building in Tribeca (once home to the most expensive apartment sale in NYC), our clients were ready to renovate and modernize their centerpiece kitchen. Due to the unique nature of loft renovations (high ceilings, columns, creative and skillful lighting applications, among other factors), Gallery’s expertise in loft spaces was vital to our clients. In addition to the loft particularities, it’s important in a kitchen of this size to ensure that all the elements have been laid out with purpose from a functional perspective and a design perspective.
CENTERPIECE KITCHEN
Color was an important design element in this kitchen. This is evident in the striking blues and grays of the marble countertops and backsplash, as well as the dark navy hue of the built-in cabinets. White lower cabinets create two-tone contrast, while glass cabinets and a long wood open shelf make the most of the available height.
The built-in cabinets also include built-in appliances: an espresso maker, coffee machine, two side-by-side wine fridges, and even an integrated refrigerator paneled to match the cabinetry for an essentially seamless look. The cabinets are all push-to-open, eliminating knobs to complete the overall sleek, contemporary style.
The marble backsplash is also book-matched, meaning the slabs of stone have been cut and polished to match each other, creating a mirroring effect that further contributes to the cohesive, contemporary aesthetic of this apartment.
BUILDING CONSIDERATIONS
Functional factors are another vital component to New York City apartment building renovations. In this particular project, we had to consider how to get large slabs of stone into the loft without having to cut them up. When working with slabs, and especially when the design is as sleek and contemporary as this one, it’s vital to eliminate seams as much as possible. Elevators and stairs are often not large enough to handle large slabs of stone, which means there are only two other options: cutting the stone and putting it back together on site (but this will create a seam, so it’s not always an option) or using a crane to bring it in through a window.
Higher-end buildings tend to have more restrictions and management companies with stricter renovation guidelines – with good reason. A good relationship with the super and staff of the building is absolutely essential; effective communication with everyone involved will result in an ideal outcome for all parties.
ARTFUL LOGISTICS
Seemingly minor elements such as apartment protections are also just as crucial. While every renovation will require protections in hallways, common spaces, zip walls, and perhaps the floors, those protections are doubled when renovating in an apartment that’s currently occupied. In the case of this particular client, who owned a great deal of valuable artwork in addition to their furniture and other belongings, Gallery exacted their own form of art when putting the protections in place and maneuvering around them with skill.
SOME HIGHLIGHTS
- Unique marble slabs (Azul Macauba quartzite and Calacatta Diamond quartzite) for the countertops and backsplash
- Book-matched backsplash
- Gaggenau appliances
- Glass cabinets with built-in lighting
- Custom millwork for the cabinets
 Gallery KBNY
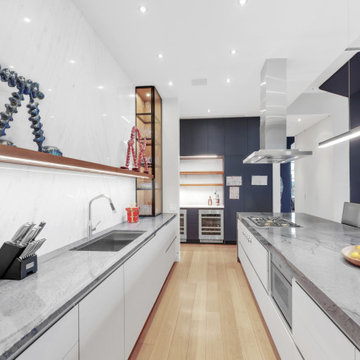
Located in the Sky Lofts building in Tribeca (once home to the most expensive apartment sale in NYC), our clients were ready to renovate and modernize their centerpiece kitchen. Due to the unique nature of loft renovations (high ceilings, columns, creative and skillful lighting applications, among other factors), Gallery’s expertise in loft spaces was vital to our clients. In addition to the loft particularities, it’s important in a kitchen of this size to ensure that all the elements have been laid out with purpose from a functional perspective and a design perspective.
CENTERPIECE KITCHEN
Color was an important design element in this kitchen. This is evident in the striking blues and grays of the marble countertops and backsplash, as well as the dark navy hue of the built-in cabinets. White lower cabinets create two-tone contrast, while glass cabinets and a long wood open shelf make the most of the available height.
The built-in cabinets also include built-in appliances: an espresso maker, coffee machine, two side-by-side wine fridges, and even an integrated refrigerator paneled to match the cabinetry for an essentially seamless look. The cabinets are all push-to-open, eliminating knobs to complete the overall sleek, contemporary style.
The marble backsplash is also book-matched, meaning the slabs of stone have been cut and polished to match each other, creating a mirroring effect that further contributes to the cohesive, contemporary aesthetic of this apartment.
BUILDING CONSIDERATIONS
Functional factors are another vital component to New York City apartment building renovations. In this particular project, we had to consider how to get large slabs of stone into the loft without having to cut them up. When working with slabs, and especially when the design is as sleek and contemporary as this one, it’s vital to eliminate seams as much as possible. Elevators and stairs are often not large enough to handle large slabs of stone, which means there are only two other options: cutting the stone and putting it back together on site (but this will create a seam, so it’s not always an option) or using a crane to bring it in through a window.
Higher-end buildings tend to have more restrictions and management companies with stricter renovation guidelines – with good reason. A good relationship with the super and staff of the building is absolutely essential; effective communication with everyone involved will result in an ideal outcome for all parties.
ARTFUL LOGISTICS
Seemingly minor elements such as apartment protections are also just as crucial. While every renovation will require protections in hallways, common spaces, zip walls, and perhaps the floors, those protections are doubled when renovating in an apartment that’s currently occupied. In the case of this particular client, who owned a great deal of valuable artwork in addition to their furniture and other belongings, Gallery exacted their own form of art when putting the protections in place and maneuvering around them with skill.
SOME HIGHLIGHTS
- Unique marble slabs (Azul Macauba quartzite and Calacatta Diamond quartzite) for the countertops and backsplash
- Book-matched backsplash
- Gaggenau appliances
- Glass cabinets with built-in lighting
- Custom millwork for the cabinets
Find the right local pro for your project

 Trilogy Construction Company
Great glass scallop tile detail. This tile is bordered by slabs of white marble.
Bathroom - modern bathroom idea in Miami
Bathroom - modern bathroom idea in Miami
 Gallery KBNY
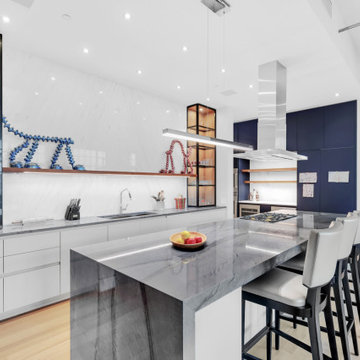
Located in the Sky Lofts building in Tribeca (once home to the most expensive apartment sale in NYC), our clients were ready to renovate and modernize their centerpiece kitchen. Due to the unique nature of loft renovations (high ceilings, columns, creative and skillful lighting applications, among other factors), Gallery’s expertise in loft spaces was vital to our clients. In addition to the loft particularities, it’s important in a kitchen of this size to ensure that all the elements have been laid out with purpose from a functional perspective and a design perspective.
CENTERPIECE KITCHEN
Color was an important design element in this kitchen. This is evident in the striking blues and grays of the marble countertops and backsplash, as well as the dark navy hue of the built-in cabinets. White lower cabinets create two-tone contrast, while glass cabinets and a long wood open shelf make the most of the available height.
The built-in cabinets also include built-in appliances: an espresso maker, coffee machine, two side-by-side wine fridges, and even an integrated refrigerator paneled to match the cabinetry for an essentially seamless look. The cabinets are all push-to-open, eliminating knobs to complete the overall sleek, contemporary style.
The marble backsplash is also book-matched, meaning the slabs of stone have been cut and polished to match each other, creating a mirroring effect that further contributes to the cohesive, contemporary aesthetic of this apartment.
BUILDING CONSIDERATIONS
Functional factors are another vital component to New York City apartment building renovations. In this particular project, we had to consider how to get large slabs of stone into the loft without having to cut them up. When working with slabs, and especially when the design is as sleek and contemporary as this one, it’s vital to eliminate seams as much as possible. Elevators and stairs are often not large enough to handle large slabs of stone, which means there are only two other options: cutting the stone and putting it back together on site (but this will create a seam, so it’s not always an option) or using a crane to bring it in through a window.
Higher-end buildings tend to have more restrictions and management companies with stricter renovation guidelines – with good reason. A good relationship with the super and staff of the building is absolutely essential; effective communication with everyone involved will result in an ideal outcome for all parties.
ARTFUL LOGISTICS
Seemingly minor elements such as apartment protections are also just as crucial. While every renovation will require protections in hallways, common spaces, zip walls, and perhaps the floors, those protections are doubled when renovating in an apartment that’s currently occupied. In the case of this particular client, who owned a great deal of valuable artwork in addition to their furniture and other belongings, Gallery exacted their own form of art when putting the protections in place and maneuvering around them with skill.
SOME HIGHLIGHTS
- Unique marble slabs (Azul Macauba quartzite and Calacatta Diamond quartzite) for the countertops and backsplash
- Book-matched backsplash
- Gaggenau appliances
- Glass cabinets with built-in lighting
- Custom millwork for the cabinets

 User
Wool Patterned Field Carpet with Linen Wide Binding & Chrome Upholstery Nails
Mid-sized transitional carpeted u-shaped staircase photo in Chicago with carpeted risers
Mid-sized transitional carpeted u-shaped staircase photo in Chicago with carpeted risers

 Village Home Stores
Full-overlay Rustic Beech cabinets in the "Charleston" door style and "Briarwood" finish.
Village Home Stores
Example of a large mountain style kitchen design in Chicago
Example of a large mountain style kitchen design in Chicago
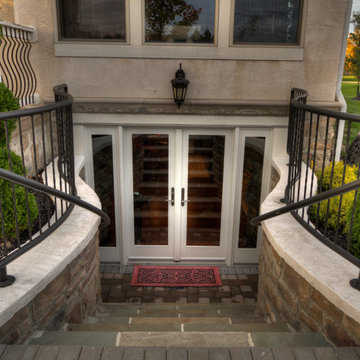
Sponsored
Delaware, OH

Buckeye Basements, Inc.
Central Ohio's Basement Finishing ExpertsBest Of Houzz '13-'21
 Publisher
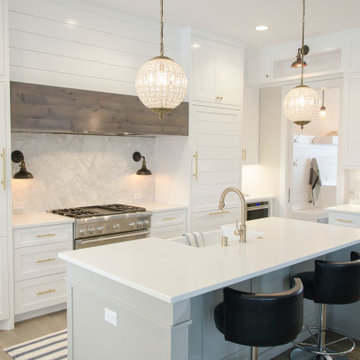
The kitchen, often considered the heart of the home, is a space where functionality and aesthetics coalesce. Among the myriad choices homeowners face when designing or renovating their kitchens, selecting a suitable kitchen splashback is crucial. In recent years, glass splashbacks have emerged as a versatile and universally appealing option. This article delves into the reasons why a glass kitchen splashback is suitable for everyone, blending seamlessly with diverse preferences, lifestyles, and design aesthetics.
Versatility in Design
One of the key factors that make glass kitchen splashbacks universally suitable is their versatility in design. Glass offers a neutral and timeless aesthetic, effortlessly complementing various interior styles, from modern and minimalist to classic and eclectic. Whether your kitchen embodies a sleek, contemporary vibe or a rustic, traditional charm, a glass splashback seamlessly integrates into the design landscape.
Furthermore, the transparency of glass allows it to adapt to any colour scheme or pattern in the surrounding space. Whether you prefer bold and vibrant hues or a more subdued palette, a glass splashback can be customised to match your preferences, making it an ideal choice for homeowners seeking design flexibility.
Enhanced Perception of Space
Glass has a unique ability to create an illusion of space and openness in a room. This quality is particularly beneficial for smaller kitchens or those with limited natural light. A glass kitchen splashback reflects sunlight, making the space brighter and more expansive. By enhancing the perception of the room, glass splashbacks contribute to an overall sense of airiness and openness, creating an inviting atmosphere that suits various home sizes and layouts.
Easy Maintenance and Hygiene
Practicality is a paramount consideration in kitchen design, and glass splashbacks excel in ease of maintenance and hygiene. Unlike porous materials such as tiles or grout, glass provides a smooth, non-absorbent surface that is easy to clean and maintain. Spills and splatters can be effortlessly wiped away with a damp cloth, ensuring a hygienic and sanitary kitchen environment.
The non-porous nature of glass also prevents mould and bacteria growth, making it a suitable choice for families with young children or individuals with allergies. The low-maintenance aspect of glass makes it a universally appealing option for those who value a clean and sanitary kitchen without the hassle of extensive upkeep.
Durability and Longevity
Glass kitchen splashbacks are known for their durability and longevity. The tempered glass commonly used in splashbacks is heat-resistant, ensuring it can withstand the rigours of a busy kitchen without compromising its integrity. This durability makes glass splashbacks suitable for households with avid home cooks who frequently use high-temperature cooking techniques.
Moreover, the longevity of glass ensures that it remains a sustainable and cost-effective choice over the long term. Unlike some materials that may wear out or become dated, a well-maintained glass splashback retains its aesthetic appeal and functionality for years, making it an investment that stands the test of time.
Customisation Options
Personalisation is a crucial aspect of home design, and glass kitchen splashbacks offer various customisation options. From selecting the colour and pattern to incorporating personalised designs or digitally printed images, homeowners can tailor their glass splashbacks to reflect their style and preferences.
The ability to customise glass splashbacks makes them suitable for everyone, allowing individuals to express their creativity and personality in the heart of their homes. Whether you opt for a bold, statement-making design or a subtle, elegant finish, the customisation options inherent in glass splashbacks ensure a perfect fit for diverse tastes.
Conclusion
In conclusion, the universality of glass kitchen splashbacks lies in their ability to seamlessly integrate into various design styles, enhance the perception of space, offer easy maintenance and hygiene, exhibit durability, and provide many customisation options. As a versatile and timeless choice, glass splashbacks cater to homeowners' preferences and practical needs across different demographics.
Whether you reside in a compact urban apartment or a spacious suburban home, whether your aesthetic leans towards modern minimalism or classic elegance, a glass kitchen splashback is a fitting and universal solution. Its adaptability to different lifestyles and design preferences positions it as a versatile and enduring element in the ever-evolving kitchen design landscape.

 Sidetex Company
Shake Siding Close Up A Cape Cod style house with Alside Pelican Bay cedar shake siding, Color: Cape Cod Gray. Installed by Sidetex in North Haven CT 06473

 Stonebridge Mosaics
A beautiful design of Thassos and Mother of Pearl in a very unique shade of blue!
Minimalist bathroom photo in New York
Minimalist bathroom photo in New York


 The Workroom
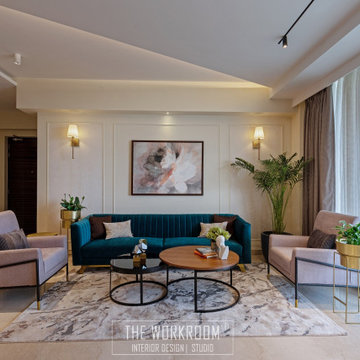
The interiors of this high end luxury apartment spanning over 3500sqft in M3M GolfEstate, one of the most sought after societies in G-town, is an exquisite blend of classic and contemporary aesthetics dominated by abundant natural light & fresh breeze swooshing through. This 5 bedroom home belonging to a family of 2 and a shih tzu, had an advantage of 10 feet high ceilings, which contributed immensely to the grandeur of the space.
Formal area-
On entering the apartment, the visitor will be blown by the resplendence of the formal area. The use of different textures along with muted tones with a subtle pop of teal and tall palms, the luster of exotic backlit marble, and a very unconventional ceiling design helped conjure the chic and welcoming vibe.
For the dining area, we let the gift of natural light play a major role in making the otherwise narrow space look more airy and bright by not only using lighter hues of beige and ivory, but also by adding just a single layer of sheer curtain.
We decided to steer away from the typical ‘chairs and console’ look for the 10 feet wide and 20 feet long passage leading to the bedrooms, and went with an offbeat conception of a crystal chandelier hovering over a state of the art horn and bone round table, that captivates anyone and everyone.
The smart play of wooden reapers on the ceiling, under lit onyx for the front counter, and a dramatic black & white marble on the backsplash make for the perfect ‘fun evening with friends’ corner as it exudes the right amount of warmth with brown tones, and an oomph factor with the rich looking onyx.
Master bedroom-
The client's vision of having a cool toned yet welcoming bedroom was achieved by using grey and brown hues. The flooring, which sets the main color scheme of any space, was swapped with glossy grey tiles from the warm beige Diana, to maximize the illusion of a bigger space. We took the liberty of accentuating the room with a faux archway of wooden louvered panels, which not only complement the rustic yet clean TV unit and wall color, but also take care of the cozy and relaxing vibe. To add some bling and that luxury quotient to the space, we chose a good quality vegan leather for the bed with some brushed gold metal strips on the headboard. In the form of color, some pink accents were used on armchairs, rugs and artworks, which was a crucial vastu rectification to make up for the nitty gritties.
Home office-
The one good that came with the pandemic was the need for most clients to have a home office, which for us designers meant that we can bring to life our very own rendition of the oh-so-aesthetic pinterest-y den / office concepts we come across. For this space, we kept the design minimal, clean and timeless with a classic tan chesterfield, an exposed white brick wall, a dark ceiling with customized sputnik inspired color changing lights, and a massive workstation doubling as a gaming altar for the end user. The client’s only wish was to have an office that was fit to entertain his friends post work hours.
 Talon Construction Inc.
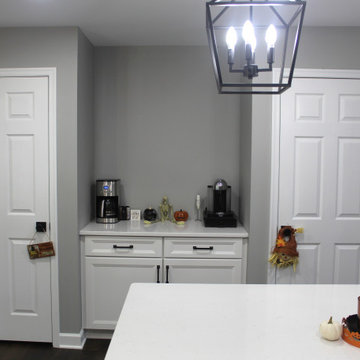
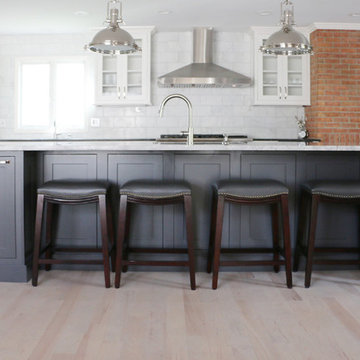
Designing and building a kitchen addition is a complex process that involves multiple steps and considerations. Here is a general outline to help you get started on your kitchen addition project:
Define Your Goals and Budget:
• Determine the purpose of the kitchen addition. Is it for more cooking space, a dining area, or a combination of both?
• Establish a realistic budget for your project. Consider all costs, including construction, permits, materials, and furnishings.
Hire a Design Professional:
• Seek the services of a design build company who specializes in kitchen additions.
• Discuss your vision, needs, and budget with the design professional to create a design concept.
Site Evaluation:
• Assess the existing space and structural condition of your home to ensure it can support the addition.
• Consider factors like zoning regulations, setbacks, and building codes.
Design Development:
• Collaborate with your design professional to refine the concept, including the layout, size, and architectural style.
• Choose materials, finishes, and fixtures that fit your design and budget.
Obtain Permits:
• Consult with your local design build contractor to determine the necessary permits and approvals.
• Prepare and submit all required documents, including architectural drawings and engineering plans.
Create Construction Documents:
• Work with your design build professional to develop detailed construction drawings and specifications.
• These documents will serve as a guide for contractors during construction.
Hire a design build contractor:
• Check references, credentials, and licenses before selecting a contractor.
• Sign a detailed contract that outlines the scope of work, timeline, and payment schedule.
Construction Phase:
• Demolition: If needed, remove any existing structures or walls.
• Foundation: Construct the foundation for the addition.
• Framing: Build the structural framework of the addition.
• Plumbing, Electrical, and HVAC: Install or update utilities as required.
• Insulation: Ensure proper insulation for energy efficiency.
• Drywall and Finish Work: Complete the walls and ceilings.
• Flooring and Cabinetry: Install flooring and kitchen cabinets.
• Appliances and Fixtures: Add appliances, plumbing fixtures, and lighting.
• Paint and Finish: Apply paint and finishes to achieve the desired look.
• Final Inspection: Schedule inspections to ensure compliance with building codes.
Final Inspections and Approvals:
• Arrange for final inspections to ensure the addition meets all safety and code requirements.
• Obtain any necessary certificates of occupancy or compliance.
Move In and Enjoy:
• Once all inspections and approvals are received, you can move into your new kitchen addition and start enjoying it.
Remember that every kitchen addition project is unique, so adapt this outline to your specific needs and circumstances. Consulting with professionals and obtaining the required permits and inspections is crucial to a successful and safe project.
Sponsored
Plain City, OH

The Creative Kitchen Company
Columbus Area Kitchen Remodeling and Refacing Professional
 Talon Construction Inc.
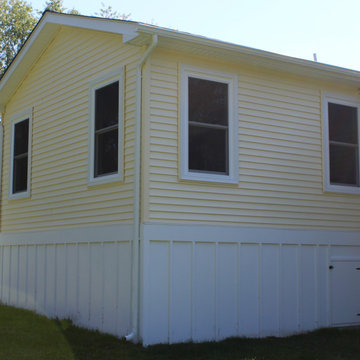
Designing and building a kitchen addition is a complex process that involves multiple steps and considerations. Here is a general outline to help you get started on your kitchen addition project:
Define Your Goals and Budget:
• Determine the purpose of the kitchen addition. Is it for more cooking space, a dining area, or a combination of both?
• Establish a realistic budget for your project. Consider all costs, including construction, permits, materials, and furnishings.
Hire a Design Professional:
• Seek the services of a design build company who specializes in kitchen additions.
• Discuss your vision, needs, and budget with the design professional to create a design concept.
Site Evaluation:
• Assess the existing space and structural condition of your home to ensure it can support the addition.
• Consider factors like zoning regulations, setbacks, and building codes.
Design Development:
• Collaborate with your design professional to refine the concept, including the layout, size, and architectural style.
• Choose materials, finishes, and fixtures that fit your design and budget.
Obtain Permits:
• Consult with your local design build contractor to determine the necessary permits and approvals.
• Prepare and submit all required documents, including architectural drawings and engineering plans.
Create Construction Documents:
• Work with your design build professional to develop detailed construction drawings and specifications.
• These documents will serve as a guide for contractors during construction.
Hire a design build contractor:
• Check references, credentials, and licenses before selecting a contractor.
• Sign a detailed contract that outlines the scope of work, timeline, and payment schedule.
Construction Phase:
• Demolition: If needed, remove any existing structures or walls.
• Foundation: Construct the foundation for the addition.
• Framing: Build the structural framework of the addition.
• Plumbing, Electrical, and HVAC: Install or update utilities as required.
• Insulation: Ensure proper insulation for energy efficiency.
• Drywall and Finish Work: Complete the walls and ceilings.
• Flooring and Cabinetry: Install flooring and kitchen cabinets.
• Appliances and Fixtures: Add appliances, plumbing fixtures, and lighting.
• Paint and Finish: Apply paint and finishes to achieve the desired look.
• Final Inspection: Schedule inspections to ensure compliance with building codes.
Final Inspections and Approvals:
• Arrange for final inspections to ensure the addition meets all safety and code requirements.
• Obtain any necessary certificates of occupancy or compliance.
Move In and Enjoy:
• Once all inspections and approvals are received, you can move into your new kitchen addition and start enjoying it.
Remember that every kitchen addition project is unique, so adapt this outline to your specific needs and circumstances. Consulting with professionals and obtaining the required permits and inspections is crucial to a successful and safe project.
 Talon Construction Inc.
Designing and building a kitchen addition is a complex process that involves multiple steps and considerations. Here is a general outline to help you get started on your kitchen addition project:
Define Your Goals and Budget:
• Determine the purpose of the kitchen addition. Is it for more cooking space, a dining area, or a combination of both?
• Establish a realistic budget for your project. Consider all costs, including construction, permits, materials, and furnishings.
Hire a Design Professional:
• Seek the services of a design build company who specializes in kitchen additions.
• Discuss your vision, needs, and budget with the design professional to create a design concept.
Site Evaluation:
• Assess the existing space and structural condition of your home to ensure it can support the addition.
• Consider factors like zoning regulations, setbacks, and building codes.
Design Development:
• Collaborate with your design professional to refine the concept, including the layout, size, and architectural style.
• Choose materials, finishes, and fixtures that fit your design and budget.
Obtain Permits:
• Consult with your local design build contractor to determine the necessary permits and approvals.
• Prepare and submit all required documents, including architectural drawings and engineering plans.
Create Construction Documents:
• Work with your design build professional to develop detailed construction drawings and specifications.
• These documents will serve as a guide for contractors during construction.
Hire a design build contractor:
• Check references, credentials, and licenses before selecting a contractor.
• Sign a detailed contract that outlines the scope of work, timeline, and payment schedule.
Construction Phase:
• Demolition: If needed, remove any existing structures or walls.
• Foundation: Construct the foundation for the addition.
• Framing: Build the structural framework of the addition.
• Plumbing, Electrical, and HVAC: Install or update utilities as required.
• Insulation: Ensure proper insulation for energy efficiency.
• Drywall and Finish Work: Complete the walls and ceilings.
• Flooring and Cabinetry: Install flooring and kitchen cabinets.
• Appliances and Fixtures: Add appliances, plumbing fixtures, and lighting.
• Paint and Finish: Apply paint and finishes to achieve the desired look.
• Final Inspection: Schedule inspections to ensure compliance with building codes.
Final Inspections and Approvals:
• Arrange for final inspections to ensure the addition meets all safety and code requirements.
• Obtain any necessary certificates of occupancy or compliance.
Move In and Enjoy:
• Once all inspections and approvals are received, you can move into your new kitchen addition and start enjoying it.
Remember that every kitchen addition project is unique, so adapt this outline to your specific needs and circumstances. Consulting with professionals and obtaining the required permits and inspections is crucial to a successful and safe project.
 Talon Construction Inc.
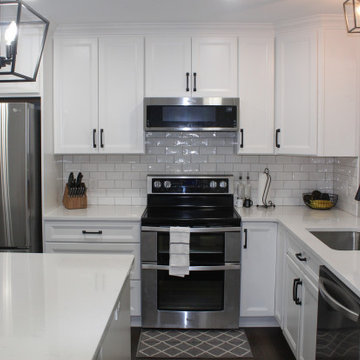
Designing and building a kitchen addition is a complex process that involves multiple steps and considerations. Here is a general outline to help you get started on your kitchen addition project:
Define Your Goals and Budget:
• Determine the purpose of the kitchen addition. Is it for more cooking space, a dining area, or a combination of both?
• Establish a realistic budget for your project. Consider all costs, including construction, permits, materials, and furnishings.
Hire a Design Professional:
• Seek the services of a design build company who specializes in kitchen additions.
• Discuss your vision, needs, and budget with the design professional to create a design concept.
Site Evaluation:
• Assess the existing space and structural condition of your home to ensure it can support the addition.
• Consider factors like zoning regulations, setbacks, and building codes.
Design Development:
• Collaborate with your design professional to refine the concept, including the layout, size, and architectural style.
• Choose materials, finishes, and fixtures that fit your design and budget.
Obtain Permits:
• Consult with your local design build contractor to determine the necessary permits and approvals.
• Prepare and submit all required documents, including architectural drawings and engineering plans.
Create Construction Documents:
• Work with your design build professional to develop detailed construction drawings and specifications.
• These documents will serve as a guide for contractors during construction.
Hire a design build contractor:
• Check references, credentials, and licenses before selecting a contractor.
• Sign a detailed contract that outlines the scope of work, timeline, and payment schedule.
Construction Phase:
• Demolition: If needed, remove any existing structures or walls.
• Foundation: Construct the foundation for the addition.
• Framing: Build the structural framework of the addition.
• Plumbing, Electrical, and HVAC: Install or update utilities as required.
• Insulation: Ensure proper insulation for energy efficiency.
• Drywall and Finish Work: Complete the walls and ceilings.
• Flooring and Cabinetry: Install flooring and kitchen cabinets.
• Appliances and Fixtures: Add appliances, plumbing fixtures, and lighting.
• Paint and Finish: Apply paint and finishes to achieve the desired look.
• Final Inspection: Schedule inspections to ensure compliance with building codes.
Final Inspections and Approvals:
• Arrange for final inspections to ensure the addition meets all safety and code requirements.
• Obtain any necessary certificates of occupancy or compliance.
Move In and Enjoy:
• Once all inspections and approvals are received, you can move into your new kitchen addition and start enjoying it.
Remember that every kitchen addition project is unique, so adapt this outline to your specific needs and circumstances. Consulting with professionals and obtaining the required permits and inspections is crucial to a successful and safe project.
 Talon Construction Inc.
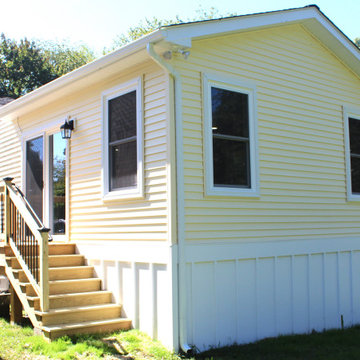
Designing and building a kitchen addition is a complex process that involves multiple steps and considerations. Here is a general outline to help you get started on your kitchen addition project:
Define Your Goals and Budget:
• Determine the purpose of the kitchen addition. Is it for more cooking space, a dining area, or a combination of both?
• Establish a realistic budget for your project. Consider all costs, including construction, permits, materials, and furnishings.
Hire a Design Professional:
• Seek the services of a design build company who specializes in kitchen additions.
• Discuss your vision, needs, and budget with the design professional to create a design concept.
Site Evaluation:
• Assess the existing space and structural condition of your home to ensure it can support the addition.
• Consider factors like zoning regulations, setbacks, and building codes.
Design Development:
• Collaborate with your design professional to refine the concept, including the layout, size, and architectural style.
• Choose materials, finishes, and fixtures that fit your design and budget.
Obtain Permits:
• Consult with your local design build contractor to determine the necessary permits and approvals.
• Prepare and submit all required documents, including architectural drawings and engineering plans.
Create Construction Documents:
• Work with your design build professional to develop detailed construction drawings and specifications.
• These documents will serve as a guide for contractors during construction.
Hire a design build contractor:
• Check references, credentials, and licenses before selecting a contractor.
• Sign a detailed contract that outlines the scope of work, timeline, and payment schedule.
Construction Phase:
• Demolition: If needed, remove any existing structures or walls.
• Foundation: Construct the foundation for the addition.
• Framing: Build the structural framework of the addition.
• Plumbing, Electrical, and HVAC: Install or update utilities as required.
• Insulation: Ensure proper insulation for energy efficiency.
• Drywall and Finish Work: Complete the walls and ceilings.
• Flooring and Cabinetry: Install flooring and kitchen cabinets.
• Appliances and Fixtures: Add appliances, plumbing fixtures, and lighting.
• Paint and Finish: Apply paint and finishes to achieve the desired look.
• Final Inspection: Schedule inspections to ensure compliance with building codes.
Final Inspections and Approvals:
• Arrange for final inspections to ensure the addition meets all safety and code requirements.
• Obtain any necessary certificates of occupancy or compliance.
Move In and Enjoy:
• Once all inspections and approvals are received, you can move into your new kitchen addition and start enjoying it.
Remember that every kitchen addition project is unique, so adapt this outline to your specific needs and circumstances. Consulting with professionals and obtaining the required permits and inspections is crucial to a successful and safe project.
 Talon Construction Inc.
Designing and building a kitchen addition is a complex process that involves multiple steps and considerations. Here is a general outline to help you get started on your kitchen addition project:
Define Your Goals and Budget:
• Determine the purpose of the kitchen addition. Is it for more cooking space, a dining area, or a combination of both?
• Establish a realistic budget for your project. Consider all costs, including construction, permits, materials, and furnishings.
Hire a Design Professional:
• Seek the services of a design build company who specializes in kitchen additions.
• Discuss your vision, needs, and budget with the design professional to create a design concept.
Site Evaluation:
• Assess the existing space and structural condition of your home to ensure it can support the addition.
• Consider factors like zoning regulations, setbacks, and building codes.
Design Development:
• Collaborate with your design professional to refine the concept, including the layout, size, and architectural style.
• Choose materials, finishes, and fixtures that fit your design and budget.
Obtain Permits:
• Consult with your local design build contractor to determine the necessary permits and approvals.
• Prepare and submit all required documents, including architectural drawings and engineering plans.
Create Construction Documents:
• Work with your design build professional to develop detailed construction drawings and specifications.
• These documents will serve as a guide for contractors during construction.
Hire a design build contractor:
• Check references, credentials, and licenses before selecting a contractor.
• Sign a detailed contract that outlines the scope of work, timeline, and payment schedule.
Construction Phase:
• Demolition: If needed, remove any existing structures or walls.
• Foundation: Construct the foundation for the addition.
• Framing: Build the structural framework of the addition.
• Plumbing, Electrical, and HVAC: Install or update utilities as required.
• Insulation: Ensure proper insulation for energy efficiency.
• Drywall and Finish Work: Complete the walls and ceilings.
• Flooring and Cabinetry: Install flooring and kitchen cabinets.
• Appliances and Fixtures: Add appliances, plumbing fixtures, and lighting.
• Paint and Finish: Apply paint and finishes to achieve the desired look.
• Final Inspection: Schedule inspections to ensure compliance with building codes.
Final Inspections and Approvals:
• Arrange for final inspections to ensure the addition meets all safety and code requirements.
• Obtain any necessary certificates of occupancy or compliance.
Move In and Enjoy:
• Once all inspections and approvals are received, you can move into your new kitchen addition and start enjoying it.
Remember that every kitchen addition project is unique, so adapt this outline to your specific needs and circumstances. Consulting with professionals and obtaining the required permits and inspections is crucial to a successful and safe project.
 Talon Construction Inc.
Designing and building a kitchen addition is a complex process that involves multiple steps and considerations. Here is a general outline to help you get started on your kitchen addition project:
Define Your Goals and Budget:
• Determine the purpose of the kitchen addition. Is it for more cooking space, a dining area, or a combination of both?
• Establish a realistic budget for your project. Consider all costs, including construction, permits, materials, and furnishings.
Hire a Design Professional:
• Seek the services of a design build company who specializes in kitchen additions.
• Discuss your vision, needs, and budget with the design professional to create a design concept.
Site Evaluation:
• Assess the existing space and structural condition of your home to ensure it can support the addition.
• Consider factors like zoning regulations, setbacks, and building codes.
Design Development:
• Collaborate with your design professional to refine the concept, including the layout, size, and architectural style.
• Choose materials, finishes, and fixtures that fit your design and budget.
Obtain Permits:
• Consult with your local design build contractor to determine the necessary permits and approvals.
• Prepare and submit all required documents, including architectural drawings and engineering plans.
Create Construction Documents:
• Work with your design build professional to develop detailed construction drawings and specifications.
• These documents will serve as a guide for contractors during construction.
Hire a design build contractor:
• Check references, credentials, and licenses before selecting a contractor.
• Sign a detailed contract that outlines the scope of work, timeline, and payment schedule.
Construction Phase:
• Demolition: If needed, remove any existing structures or walls.
• Foundation: Construct the foundation for the addition.
• Framing: Build the structural framework of the addition.
• Plumbing, Electrical, and HVAC: Install or update utilities as required.
• Insulation: Ensure proper insulation for energy efficiency.
• Drywall and Finish Work: Complete the walls and ceilings.
• Flooring and Cabinetry: Install flooring and kitchen cabinets.
• Appliances and Fixtures: Add appliances, plumbing fixtures, and lighting.
• Paint and Finish: Apply paint and finishes to achieve the desired look.
• Final Inspection: Schedule inspections to ensure compliance with building codes.
Final Inspections and Approvals:
• Arrange for final inspections to ensure the addition meets all safety and code requirements.
• Obtain any necessary certificates of occupancy or compliance.
Move In and Enjoy:
• Once all inspections and approvals are received, you can move into your new kitchen addition and start enjoying it.
Remember that every kitchen addition project is unique, so adapt this outline to your specific needs and circumstances. Consulting with professionals and obtaining the required permits and inspections is crucial to a successful and safe project.
 RMW Team
Designing a Health-Focused Home Living Space
Designing a health-focused home living space is more than just arranging furniture and choosing colors; it's about creating an environment that promotes physical well-being, mental clarity, and overall wellness. As we spend more time at home, especially in the wake of recent global shifts towards remote work and lifestyle changes, the importance of our living spaces in supporting our health has never been greater. Here are some key considerations when designing a health-oriented home.
Natural Light and Air Quality
Natural light plays a crucial role in our health, affecting everything from our sleep patterns to our mood. When designing your home, prioritize spaces that allow for ample sunlight. Large windows, skylights, and strategically placed mirrors can help maximize natural light. In rooms where natural light is limited, consider using full-spectrum lighting that mimics daylight to support your circadian rhythms.
Air quality is another critical factor in a health-focused home. Indoor air can be more polluted than outdoor air due to various factors like off-gassing from furniture, household cleaners, and poor ventilation. Incorporating plants that are known to purify air, such as spider plants, snake plants, and peace lilies, can help improve indoor air quality. Additionally, ensure your home is well-ventilated by using exhaust fans in kitchens and bathrooms, and consider investing in air purifiers, especially if you live in an area with high pollution levels.
Ergonomic Furniture and Movement Spaces
The furniture you choose and how you arrange it can significantly impact your physical health. Ergonomic furniture, especially in workspaces, can help prevent strain and injury. Adjustable desks, supportive chairs, and monitor stands can contribute to better posture and reduced risk of musculoskeletal issues.
Incorporating spaces that encourage movement is also important. For example, a small home gym or a yoga corner can serve as a dedicated area for physical activity. Even in smaller spaces, you can create movement opportunities by ensuring there’s enough room to stretch or do simple exercises. Open floor plans or multipurpose spaces that can be easily reconfigured for different activities can help integrate movement into daily life.
Mindful and Minimalist Design
A clutter-free environment is conducive to mental clarity and relaxation. Mindful and minimalist design principles focus on creating spaces that are both functional and aesthetically pleasing without being overwhelming. Start by decluttering and organizing your belongings, keeping only what you need and what brings you joy.
Choose furniture and decor that are simple, natural, and calming. Materials like wood, stone, and natural fibers not only add a touch of nature to your home but also tend to have fewer chemicals than synthetic materials. Neutral color palettes with accents of soothing colors like blues and greens can help create a tranquil atmosphere.
Sleep and Restful Areas
A significant part of health-focused design is creating spaces that promote restful sleep. Your bedroom should be a sanctuary that encourages relaxation. Invest in a good-quality mattress and pillows that support your body. Blackout curtains, soundproofing, and maintaining a cool room temperature can also contribute to better sleep quality.
In addition to the bedroom, consider creating other restful areas in your home where you can unwind, meditate, or practice mindfulness. A cozy reading nook, a meditation space, or even a comfortable chair by a window can serve as your personal retreat.
Incorporating Nature and Green Spaces
Finally, integrating elements of nature into your living space can have a profound impact on your health. Biophilic design, which connects indoor environments with nature, has been shown to reduce stress and increase feelings of well-being. This can be as simple as adding more houseplants, incorporating natural materials, or even installing a small indoor water feature.
If you have outdoor space, create a garden or a patio where you can relax and enjoy fresh air. Even a small balcony can be transformed into a green oasis with the right plants and seating.
By thoughtfully designing your living space with health in mind, you create an environment that not only looks beautiful but also supports your physical and mental well-being.
3