
Search results for "Felt pad tools" in Home Design Ideas



 over,under
Bob O'Connor
Nursery - contemporary gender-neutral white floor nursery idea in Boston with multicolored walls
Nursery - contemporary gender-neutral white floor nursery idea in Boston with multicolored walls
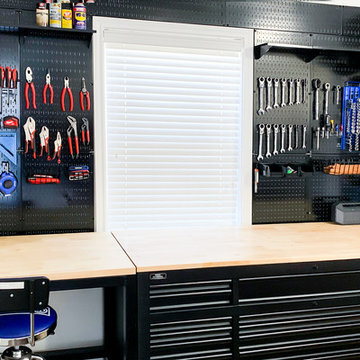
 Wall Control
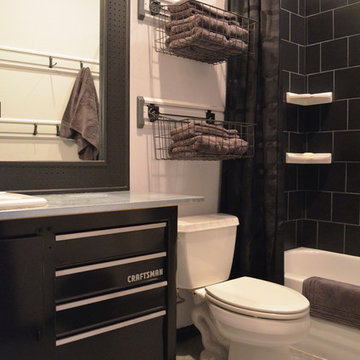
Wall Control Pegboard will look great above your workbench, in your garage, or shed. Wherever you work this steel pegboard will store and organize your tools while making them easy to get to. It is the ultimate storage solution! Thanks for the photo Larry!
Find the right local pro for your project



 Maureen Stevens Design
Bold colors and geometric patterns is what it's all about in this space as the client wanted a boutique hotel vibe with all the frills . A condo unit at the Seaholm towers in Austin is transformed from a plain modern-industrial aesthetic to a daring navy and magenta pad.

 Robin Davis Interiors
Mid-sized trendy formal and open concept carpeted living room photo in Portland Maine with gray walls, no fireplace and no tv
 Wall Control
Here is a Wall Control Master Workbench Kit with red pegboard, white accessories, and blue bins being put to good use over a workbench. Another great customer submission, thanks Ken!

Sponsored
Delaware, OH

Buckeye Basements, Inc.
Central Ohio's Basement Finishing ExpertsBest Of Houzz '13-'21


 Wall Control
Another great customer submission showcasing Wall Control's Screw Driver Holders and Slotted Tool Holders as well as some other tool organizers being hung from the panels with Wall Control's Standard and Medium Length Hooks. Thanks again Ken for another helpful pic!


 Cando Construction
shelterlab87
Small minimalist l-shaped light wood floor eat-in kitchen photo in Orange County with an undermount sink, flat-panel cabinets, dark wood cabinets, quartz countertops, metallic backsplash, glass tile backsplash, paneled appliances and an island
Small minimalist l-shaped light wood floor eat-in kitchen photo in Orange County with an undermount sink, flat-panel cabinets, dark wood cabinets, quartz countertops, metallic backsplash, glass tile backsplash, paneled appliances and an island

 Neat Method San Diego
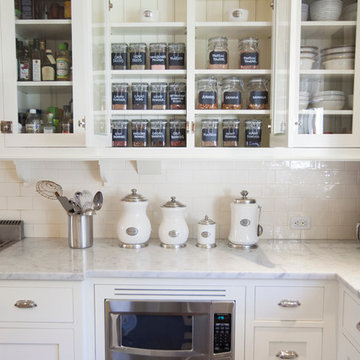
Inspiration for a timeless kitchen remodel in San Diego with white cabinets, white backsplash, subway tile backsplash and shaker cabinets

Sponsored
Delaware, OH
Buckeye Basements, Inc.
Central Ohio's Basement Finishing ExpertsBest Of Houzz '13-'21

 Lux Pad Interiors
Example of a mid-sized trendy open concept light wood floor and gray floor living room design in New York with gray walls, no fireplace and a wall-mounted tv
 Inglenook Energy Center
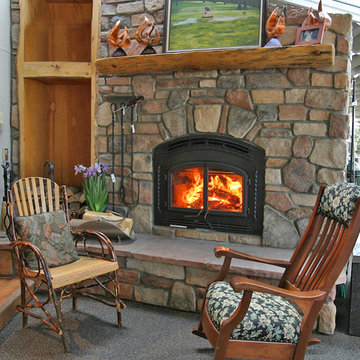
The Denver area’s best fireplace store is just a short drive from downtown Denver, right in the heart of Conifer CO. We have over 40 burning displays spread throughout our expansive 3,000 sq ft showroom area. Spanning 5 full rooms, our Denver area hearth store showcases some of the best brands in the industry including a wide selection of fireplaces, fireplace inserts, wood stoves, gas stoves, pellet stoves, gas fireplaces, gas log sets, electric fireplaces, fire pits, outdoor fireplaces and more!
Beyond just fireplaces & heating stoves, we also stock a great supply of hearth accessories, including hearth pads, tool sets, fireplace doors, grates, screens, wood holders, ash buckets, and much more. Homeowners & Contractors alike turn to us for all of their hearth and heating needs, including chimney venting pipe, like Class A Chimney, Direct Vents, Pellet Vents, and other chimney systems.
At Inglenook Energy Center, you can count on full service customer care from the moment you walk in the door. Our trained & knowledgeable experts can help you select the perfect fireplace, stove, or insert for your needs then set up installation with our trusted group of licensed independent sub-contractors. We also have a fireplace & stove parts department that can help with all of your fireplace & stove repairs and maintenance needs, too.
We only carry & offer quality products from top name brands & manufacturers so our customers will get the most out of their new heating unit. Stop by our showroom and store today to view your favorite models side by side and get inspired to design & build a beautiful new hearth area, whether that is indoors or outdoors.
 Sarah Greenman
Photo: Sarah Greenman © 2013 Houzz
Alcove bathtub - contemporary alcove bathtub idea in Dallas
Alcove bathtub - contemporary alcove bathtub idea in Dallas

 Tile Doctor Ltd
This job was for a repeat client in Toft near Cambridge who had aa stunning large hallway that was tiled in beautiful pale Limestone. My client had asked me back to work on the floor having previously completed the deep clean and seal of a Terracotta floor previously.
The Limestone tiling in the entrance hall had years of some type of topical sealer applied to it. This caused the stone to look slightly discoloured and from certain lights showed up hundreds of scratches and smudges embedded in the seal. I’ve tried to capture this problem in the photographs on this page, but it was very difficult.
A topical sealer sits on the surface of the tile where it is vulnerable to scratching, hallways are generally high traffic areas and so more likely to see this sort of problem. Ideally an impregnating sealer should have been applied, impregnators work by occupying the pores in the stone thus preventing soiling from becoming ingrained in the stone.
Before starting we protected the woodwork against splashing with blue film, I don’t usually make a great deal of mess, but you can never be too careful when working in someone’s property especially one as beautiful as this.
To strip off the old sealer I began by applying a strong dilution of Tile Doctor Remove and Go to the Limestone tiles. I split the floor into sections and used a 400-grit diamond burnishing pad to work the Tile Doctor Remove and Go into the tiles. The floor was then rinsed off using our high-pressure cleaning system that applies pressurised hot water to the floor whilst simultaneously extracting the soil with its built-in vacuum. The system is quite heavy, so it is built into my van, and I run a large flexible hose to a spinner tool that does the cleaning. It is an expensive tool, but it saves a lot of time and leaves the floor fairly dry afterwards.
The 400-grit pad had released a lot of the sealer but there were quite a few layers to get through, so I changed the burnishing pad to a coarse 200-grit pad and repeated the process. After another rinse and extract I would see it had the desired effect and I was able to carry on building up the finish on the Limestone by apply the 400-grit followed by the 800, 1500 grit pads. It was a large floor and so this took up much of the day so once complete I left for the day so it could dry off overnight.
The next day I finished the polishing process with the application of a 3000-grit burnishing pad which is applied with a little water sprayed onto the tile and really brings up the polish on the stone. This process has the added advantage of leaving the floor dry so not long afterwards I was able to move on to sealing.
For this floor two coats of Tile Doctor Ultra-Seal were applied, it is an impregnating sealer that won’t alter the colour of the tiles leaving a natural look.
My client was much happier with the new finish and has asked for another quotation on some more Terracotta flooring that needs attention. For aftercare I recommend using Tile Doctor stone soap, it’s a special formula that builds on the patina which will help maintain the polished appearance of the Limestone.
Tom Conlon
Cambridge Tile Doctor

Sponsored
Columbus, OH

Snider & Metcalf Interior Design, LTD
Leading Interior Designers in Columbus, Ohio & Ponte Vedra, Florida
 TOC design & construction inc.
Designed by : TOC design – Tania Scardellato
Construction by: TOC design & construction inc.
Photographer: Guillaume Gorini - Studio Point de Vue
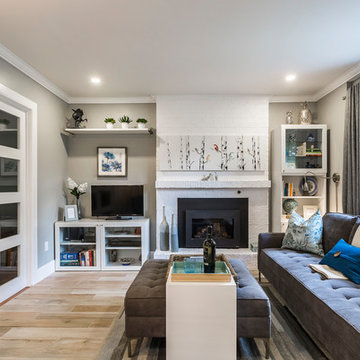
An inexpensive way to add character is to paint that dated brick you may have at your fireplace, we did just that, with 2 coats of a Zinner primer and high quality semi gloss white paint, the once dated fireplace got a makeover and blends perfectly in the space.
 Tile Doctor Ltd
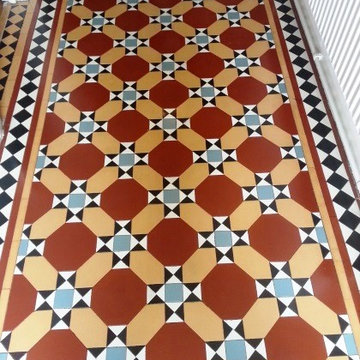
We were asked to restore a beautiful geometric Victorian tiled floor. The property had been used as a letting house and the floor had been used and abused for many years, just given an occasional mop over from time to time.
The new owners wanted to revive the colours and deal with the neglect. Step one was to put down the tile doctor pro clean alkaline cleaning solution and to let it dwell for a period of around twenty minutes.
We gave the solution plenty of dwell time before setting up our low speed rotary machine, underneath it we used a black pad to agitate and help loosen the ingrained dirt.
Once completed we set up our powerful rinsing tool which is attached to a machine fixed into our van, by doing this we do not need to dispose of any dirty water on your property but instead we take it away with us and dispose of it in the proper manner in an appropriate disposal point.
After rinsing the floor came up very well but we still felt it could be better, we used a steamer coupled with HBU Nanotech and a scraper to remove various deposits of paint and other sticky residue which had set over time.
After thoroughly rinsing the floor again we left the floor to dry for 4 days, Victorian tiles along with other earth based tiles are very absorbent and need to dry thoroughly and fully.
On our return we tested for damp ensuring the floor was dry enough to seal.
To seal the floor we used two coats of colour grow impregnating sealer, once the sealer had dried we then began sealing the floor using seal and go.
After applying several thin coats of seal and go, the floor reached the desired appearance.
A combination of Pro clean, hbu nanotech, colour grow and seal and go with a little bit of care from your local tile doctor restored this old uncared for floor back to the prime of its life.
 Tile Doctor Ltd
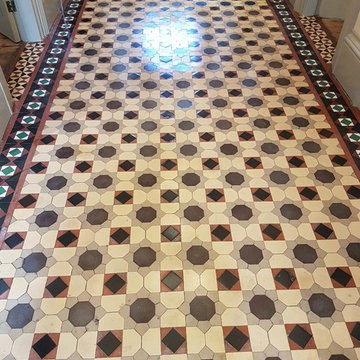
I recently re-visited a Victorian period property in the Leeds suburb of Headingley which had an unusually large tiled entrance hall which we believe to be as old as the property itself. I say re-visited as I actually gave this floor a deep clean and reseal around five years ago; it’s always nice to be asked to return to a job as it shows the customers was very happy with the work. However, with five years of wear and tear the sealer had worn down and the floor was now starting to trap dirt, also it had lost the attractive shine added by the sealer and the owner felt it was time to have it done again. Additionally, the owner had recently had the whole house decorated and wanted the floor to look its best and match the fresh appearance of the property.
Sealers do wear off with use and so it is inevitable that the tiles will need to be cleaned and sealed again with time. Given it hadn’t had a professional clean and seal for five years the floor wasn’t looking too bad as you can see from the picture, it was just a bit dull in the high traffic areas such as along the centre. I’ve certainly seen a lot worse.
Initially I wasn’t 100% sure on which cleaning method l was going to use on this floor. Originally l thought about using a coarse 200-grit burnishing pad to take off a couple of layers of sealer and then re-apply 2 more coats. However, the finish on the floor wasn’t even across the width of the hallway and l felt using that approach wouldn’t resolve that. Additionally, a lot of tiles were pitted and a burnishing pad would struggle to get into the holes. So instead I decided to completely strip the floor and re-seal it which would ensure a uniform finish across the floor.
I used a strong 50:50 dilution of Tile Doctor Pro-Clean on the tiles and scrubbed it in with a black floor pad which removed the old sealer and ingrained dirt. The large floor pads are not very effective in the corners and edges, so I used a 6-inch red buffing pad fitted to a hand buffer for those. The floor was rinsed with water and the soil extracted using a wet vacuum. After inspecting the floor some areas were retreated with a repeat of the same process.
After a final rinse and extraction of the soiled water the floor was left to dry overnight.
The next day after first checking the floor was dry with a damp meter it was sealed with four coats of Tile Doctor Seal and Go. This is a water based sealer that gives a lovely sheen and allows the colours to shine through as well as letting the floor breath, which is important in properties of this age that usually do not have a damp proof membrane.
I was very pleased with the finished result as the pictures show and glad that l had chosen to do a deep clean and not just apply more coats of sealer. The client was over the moon.
Nigel Stoker
North West Yorkshire Tile Doctor
3