
Search results for "Fertile" in Home Design Ideas

Find the right local pro for your project


 FormLA Landscaping
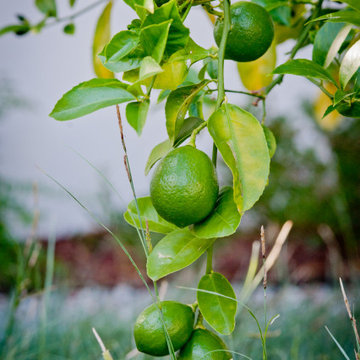
Citrus trees do well among the native grasses and foliage. Because the natives need no fertilizers or pesticides to thrive, fruit is also chemical free.


 The Master's Lawn Care, Inc.
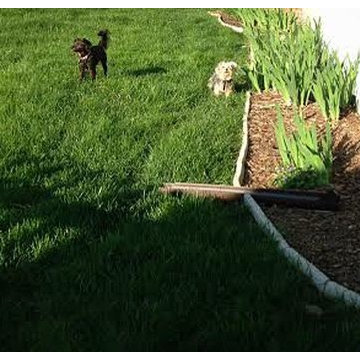
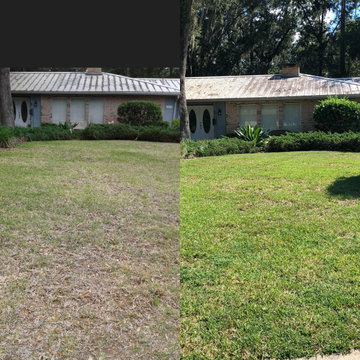
4 months on lawn fertilization program
This is an example of a mid-sized traditional landscaping in Jacksonville.
This is an example of a mid-sized traditional landscaping in Jacksonville.

 kmjee
kmjeePepper plants are a delightful addition to any garden, offering a vibrant burst of color and spice to your culinary creations. However, even experienced gardeners can encounter challenges when growing pepper plants. In this blog, we'll explore some common issues you might face and provide practical solutions to help your pepper plants thrive.
1. Slow or Stunted Growth
Issue: Slow or stunted growth in pepper plants can be discouraging, but there are specific steps you can take to address this issue effectively.
Solution:
a. Soil Health:
- Well-Draining Soil: Ensure your pepper plants are in well-draining soil to prevent waterlogged roots, which can inhibit growth.
- Organic Matter: Incorporate plenty of organic matter, such as compost or well-rotted manure, into the soil to improve its texture and nutrient content.
- pH Level: Test the soil pH and adjust it to the ideal range between 6.0 and 6.8 using lime or sulfur as needed.
b. Fertilization:
- Balanced Fertilizer: Use a balanced, slow-release fertilizer designed for vegetables to provide essential nutrients steadily throughout the growing season.
- Compost: Amend the soil with compost to enhance nutrient availability and soil structure. This can promote healthier growth.
c. Watering:
- Consistent Moisture: Maintain consistent soil moisture levels by watering your pepper plants regularly but avoid waterlogging. Aim for 1-2 inches of water per week, adjusting based on your local climate and weather conditions.
- Mulching: Apply mulch around the base of the plants to retain soil moisture and regulate temperature.
2. Yellowing Leaves
Issue: Yellowing leaves can be a sign of various underlying problems, but addressing them promptly can restore the vibrancy of your pepper plants.
Solution:
a. Nutrient Deficiencies:
- Balanced Fertilization: Use a well-balanced fertilizer that includes micronutrients to address nutrient deficiencies.
- Specific Nutrients: If you suspect a particular deficiency, such as magnesium, iron, or nitrogen, apply the appropriate nutrient supplement following package instructions.
b. Pest and Disease Control:
- Pest Inspection: Regularly inspect the leaves and stems for common pests like aphids and mites. Remove affected leaves and treat with organic pesticides if necessary.
- Disease Management: Look out for signs of diseases like bacterial leaf spot or fungal issues. Apply organic fungicides or bactericides as recommended.
3. Blossom Drop
Issue: When pepper plants drop their blossoms prematurely, it can hinder fruit development and lead to disappointment.
Solution:
a. Temperature Control:
- Stable Temperatures: Ensure your pepper plants are exposed to consistent temperatures between 70°F and 80°F (21°C to 27°C) during flowering. Avoid sudden temperature fluctuations by providing shelter or using row covers.
b. Pollination:
- Assist with Pollination: If growing peppers indoors or in a greenhouse, help with pollination by gently shaking the plants or using a small brush to transfer pollen between flowers. Outdoor pepper plants are usually pollinated by insects.
4. Wilting Plants
Issue: Wilting or drooping pepper plants can be a sign of various problems, but proper care can revive them.
Solution:
a. Watering:
- Consistent Moisture: Adjust your watering routine to keep the soil consistently moist but not waterlogged. Water early in the day to prevent fungal issues.
- Drainage: Ensure proper soil drainage by amending the soil or using raised beds to prevent waterlogged roots.
b. Pest Control:
- Pest Inspection: Examine the undersides of leaves for signs of pests like aphids, spider mites, or whiteflies. Treat infestations promptly with biological insecticides.
5. Curling Leaves
Issue: Curling or misshapen leaves indicate stress in pepper plants, which can be caused by various factors.
Solution:
a. Environmental Stress:
- Stable Conditions: Ensure your pepper plants are in an environment with stable humidity, temperature, and adequate air circulation. Avoid sudden changes in conditions.
- Proper Ventilation: Adequate air circulation can reduce humidity and prevent fungal issues.
b. Pest and Disease Management:
- Pest Inspection: Regularly inspect your plants for pests and diseases, addressing them promptly with organic remedies as needed.
6. Sunscald
Issue: Sunscald can lead to discolored, leathery patches on pepper fruits when exposed to intense sunlight.
Solution:
a. Shade Cloth:
- Sun Protection: Shield your pepper plants from harsh sunlight during the hottest part of the day using shade cloth or by planting them where they receive some filtered sunlight.
b. Pruning:
- Fruit Shading: Prune excess foliage to allow better fruit shading, reducing the risk of sunscald. Ensure that there's a balance between foliage and fruit.
7. Pepper Plant Pests and Diseases
Issue: Aphids, mites, whiteflies, and various diseases can affect pepper plants, but you can manage them effectively.
Solution:
a. Regular Inspection:
- Vigilant Monitoring: Regularly inspect your pepper plants for signs of pests or diseases, paying close attention to the undersides of leaves and stems.
b. Organic Remedies:
- Pest Control: Use organic remedies like neem oil, insecticidal soap, or diatomaceous earth for pest control.
- Disease Management: Apply organic fungicides or bactericides as recommended to manage diseases like powdery mildew or bacterial spot.
While growing pepper plants can present various challenges, these common issues are manageable with the right knowledge and care. Regular monitoring, proper soil preparation, and timely intervention can help you enjoy a bountiful harvest of vibrant, spicy peppers. Remember that gardening is a learning experience, and each challenge you face is an opportunity to improve your skills and enjoy the rewards of homegrown peppers in your favorite dishes.

 safe ZOnea
If you’re active on GardenWeb sharing plant photos, asking for advice, tracking seasonal progress you already understand how much detail goes into gardening. Soil pH, rainfall, emerging leaves, bloom counts, fertilizer schedules it adds up fast. But all that rich information often remains buried in posts, lists or memory. What if you could visualize that data and turn it into clear quick insights? That’s where a graph maker becomes a game-changer for your gardening workflow.
1. Why garden data belongs on a graph
On GardenWeb, you’ll find forums for everything from perennial care, vegetable gardening, patios, herbs, even cooking and craft projects. While plant lovers share observations and ask questions, many track progress manually in spreadsheets or memory. A graph maker flips that around:
Instead of a list of numbers (e.g., “Soil test: pH 6.4 in May, 6.1 in October”), you get a line graph showing the decline over time.
Instead of guessing which plant bloomed most, you see a bar chart comparing counts across plants.
Instead of manually calculating average rainfall effect, you plot scatter points of bloom count vs. rainfall.
By turning your data into visuals, you’re not just recording—you’re analysing, learning and improving. For GardenWeb users this means smarter decisions: Which fertilizer actually improves bloom count? Which shady spot recovers slower? A graph maker gives clarity.
2. What is a graph maker and how to use one
A graph maker is a web tool or software that lets you input raw data (numbers, dates, categories) and output visual charts like line graphs, bar charts, scatter plots, etc. It might allow you to import a spreadsheet, select chart type, customize colours, label axes, and export the image for your blog, forum post or personal log.
Here’s how you could apply it for gardening:
Log blooms per week for each rose plant.
Using the graph maker, choose line graph to track changes over weeks.
Label your y-axis “Number of Blooms”, x-axis “Week of Year”.
Add colour lines for each plant for easy comparison.
Export as PNG and embed it in a GardenWeb forum post: “See bloom trend for my ‘Peace’ vs ‘Knock Out’ roses”.
This isn’t just pretty-to-look-at: it makes the trend obvious, invites discussion (“Hey, your ‘Knock Out’ line dips after week 28—what changed?”) and helps you refine your routine.
3. Use these specific scenarios on GardenWeb
A. Soil pH and plant health tracking
After multiple tests you have pH values over time and bloom results. Upload both datasets into the graph maker, produce a dual-axis line graph: soil pH on one axis, bloom count on the other. Post your findings in the “Soil, Fertility & Nutrients” forum and get feedback.
B. Seasonal pest or disease appearance
Record number of aphids spotted each month and whether you used treatment. A bar chart via the graph maker can show pre- and post-treatment figures. Then ask the “Insect & Disease Control” forum for advice based on your visual data.
C. Yield comparison between varieties
You grow two zucchini varieties. You keep weekly yield in pounds. Use the graph maker for a side-by-side bar chart. Share in the “Vegetable Gardening” forum: “Which was better this year? See the chart”.
D. Rainfall vs growth rate
You log weekly rainfall and growth (in cm) of your tomato plants. Use scatter plot in graph maker. If a pattern emerges, you’re ready to post: “Is my growth plateau due to drought? Chart shows a clear correlation.”
4. Why this elevates your GardenWeb contributions
When you post with a chart made by a graph maker, you’re doing more than asking or showing off. You’re investigating. You’re analysing. You invite the community to give feedback on data, not just anecdotes. That elevates the discussion. Instead of “My plant died, any ideas?” you post “See this graph of pH drop and bloom count—what might be the limiting factor?” High-quality visuals raise your post’s value and garner more thoughtful responses.
Plus, your posts become useful references for others: someone else can say, “Cool graphic, can you share your data sheet?” You build credibility and help the forum become a learning hub—not just a Q&A board.
5. Tips for using a graph maker effectively in the GardenWeb context
Keep it simple: One chart, one insight. Don’t overcrowd.
Label clearly: Titles, axis labels, units (e.g., cm/week, mg/L, °F).
Use readable colours: Avoid faint tones that vanish on mobile.
Annotate when needed: Add notes like “Fertiliser switched week 12” or “Shade cloth added”.
Provide context in your post: Don’t leave the chart alone—write a few sentences explaining what it shows and what you’re seeking.
Embed carefully: Make sure your image displays properly in GardenWeb; check mobile view.
Share raw data: If possible link to your spreadsheet so others can replicate or comment.
Be open to feedback: The chart invites questions; embrace them.
6. Possible pitfalls and how to avoid them
Bad data = bad chart: If your measurements aren’t consistent, your graph will mislead. Use standardized data collection.
Too much complexity: Multi-axis charts, too many variables—confusing. Stick to one or two variables.
Overlooking mobile viewers: Many GardenWeb users browse via phones. Use large fonts and simple visuals.
Ignoring the narrative: Chart alone won’t answer. Explain what it means and what you need.
Outdated charts: If you update your data annually, keep your visuals current or label them clearly as “2024 data”.
7. Final thoughts
On GardenWeb you’ll find a vibrant community of gardeners, DIYers, cooks and design lovers.Using a graph maker for your posts and progress turns your experience from casual hobby-logging into smart data-driven gardening. You’ll not only learn more—your peers will learn more, too.
So next time you log your plant growth, record your yield, test your soil or track pests—don’t just note it. Plot it. Use a graph maker. Share it in the forum. Let your garden tell the story, and let the community help you write the next chapter.



 Studio Felix
Inspiration for a contemporary freestanding desk medium tone wood floor and brown floor home office remodel in Calgary with white walls



 Space Landscape Designs
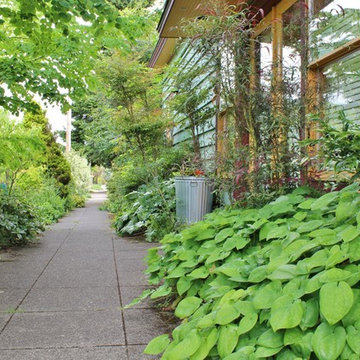
Formal entrance way and garden beds into the house.
Inspiration for a contemporary gray two-story glass exterior home remodel in Sydney with a shed roof
Inspiration for a contemporary gray two-story glass exterior home remodel in Sydney with a shed roof


 Five Star Tree Care
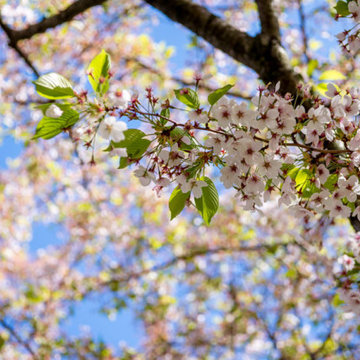
Once the endless winter has finally subsided, it is time to start thinking about your spring tree care! Once the last of the snow and ice has finally melted away, your trees and garden will be released once again. It is finally time to prepare for your spring tree care. If you want to maximize your tree’s new growth, you are going to want to follow Five Star Tree Services spring checklist! You can also start planning for new trees as well. We are going to give you all the information you need to know in order to properly take care of your trees this spring.
Inspect Your Trees
When all the ice and snow has left your trees, this is a good time to inspect for any damage done from the harsh winter. There aren’t any leaves that will get in your way, making it easier to see anything amiss, like damage or diseases. If you hire an arborist to do this initial spring inspection, you can guarantee that they will analyze every tree on your property very carefully to make sure they can provide you with the most accurate report. This report will make you aware of any and all tree problems on your property. The arborist will also go over all possible ways that you can fix these problems and explain them to you.
Preemptive Pruning
In order to properly prepare your trees for their spring growth, you will need to prune them. A trained arborist will be able to identify dead branches and cut them off. They will also deal with damaged branches, weak branches, and any unsafe branches and make sure they remove them before they become a problem or hazard. We recommend that you prune or hire an arborist to prune your trees in the early spring. If you wait and prune your trees after their spring growth, they are more likely to be attacked by pests and diseases. When done properly, your spring pruning is going to have a major positive impact on the overall health of your trees.
Cleanup the Gardens
Part of your spring cleaning is not limited to your home. You also need to clean your gardens too! This is an important part of your checklist routine. When all the snow and ice melt away and exposes your gardens and lawn once again, it is important to clean up your yard from any and all fallen leaves, branches, and anything else that isn’t supposed to be there. Once you do this, the sunlight will be able to get to the ground and will aid in penetrating and warming up the ground faster below the surface. Developing tree roots will have a positive effect from the sunlight. Which results in better tree growth in the spring.
Fertilization of Your Trees
After the winter has subsided, it usually takes most of the nutrients out of the soil. Which is why you should be taking advantage of fertilizing your trees in the spring. It is important to feed your trees in order to provide them with the adequate nutrients they need in order for them to be healthy and grow during the spring. When trees are properly fertilized, this helps them fight off diseases and pests.
Add Some Mulch
There are many marvelous benefits to mulching in the spring. This improves the soil quality that’s around your tree. It also helps to keep the soil fertilized and moist. Mulch is also a fantastic way to prohibit weeds from developing and growing in your gardens. This is very important for newly planted and young trees. We recommend that you add 2-4 inches of mulch around each tree in the early spring.
Plant Some New Trees!
There are many reasons why people plant trees. One major reason is to combat deforestation and provide more oxygen. If you are looking for other reasons to plant some trees, consider planting shade trees. These trees allow you to take shelter under them in the summer from the glaring sun. But did you know that they can also benefit you by maximizing your energy savings during the winter? Making it so that you can actually increase the overall value of your home when you plant new trees.
How Five Star Tree Services Can Help
When you are looking to add more magnificent trees to your yard, you need to make sure they are planted properly. One of the first important steps is to pick the right placement for your new tree. You also need to consider what trees are right for your property. Without any experience planting trees, we highly recommend that you contact your local Toronto Tree Planting Services for assistance! Our team is highly knowledgeable and will be able to help you with anything you require for your trees, both new and pre-existing. Make sure to contact Five Star Tree Service for all your tree needs. Contact us at (416) 990-3355 or go to our website to learn more!
 Fertility centre in chennai
Are you fighting with infertility Issue? Have you comprises fertility treatment suggested to you? Then you are at right place. Jayadeva Fertility Center and Women’s hospital one among the best Fertility centre in chennai to give right treatment with high success rate. Visit here https://tinyurl.com/mtu3cz5p
 gardenaar
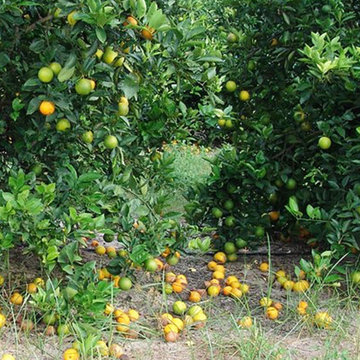
Does your orange tree drop its fruit before it reaches full size, or worse, does it drop flowers before the fruit starts to form?
Trees photosynthesize to produce carbohydrates like sugar which they store as a source of energy. They can maintain a limited amount, which is used to drive the growth of new leaves, branches, roots and stem. Fruitfulness requires the tree to divert its limited energy sources away from these vital functions to the production of flowers, blossoms and fruits.
Fruit development involves maturity followed by fertilization, growth, maturity and maturity. This process takes between 6-7 months in warmer climates, which requires a large number of tree energy sources as a result.
Trees are able to manage their resources, and will also divert them to emergencies ...
Fruit Drop and Crop Depression
In regions where oranges produce one crop per year, they go through a series of growth stages as follows:
Sprout formation and flower launching (mid-winter)
Flowers and fruit set (early spring)
Fruit growth - cell division (late spring to early summer)
Fruit growth - cell proliferation (mid-summer to early autumn)
Fruit ripening (autumn to late winter)
The difference is in the regions where most citrus crops are produced year-round. In these cases, the different stages of development will take place simultaneously.
The orange tree can handle its plant load well, and it will bear as much fruit as we can support. It is natural for all citrus trees to produce too little fruit and too little flowers in early spring to prevent overproduction. There is no need to worry too much about flowering, as an orange tree needs only 1% to 2% of flowers to produce a good crop, and sometimes even less than 1% is enough.
If a tree is depressed because it does not get enough water in hot, dry weather, and if it dies of nitrogen starvation because it is not given enough fertilizer, fruit set will be very difficult in the spring. There may also be a small number of fruit losses in the summer under stressful conditions.
Solution: Provide enough water, and water often in hot weather and strong winds. Orange feed with moderate fertilizer in early spring (September in Southern hemisphere, March in the Northern Hemisphere)
Fruit Drop and Lack of Potassium Nutrient
When orange trees are heavy, the decline in fruit can be exacerbated by low potassium levels.
Potassium, also known as potash (represented by the chemical mark K on fertilizer labels meaning N-P-K or nitrogen-phosphorus-potassium ratio) is a major macronutrient needed for flowering and fruit formation. Next to nitrogen, plants absorb more potassium than any other nutrient. Without potassium, the trees stop flowering and fruiting, which is what happens if they are not fed regularly.
Before any smug horticulturist declares to you that potassium has no direct effect on flowering and fruit set, let me say that as a horticulturist and biochemist, plant chemistry, like the chemistry of all living things is complex, but some input it is necessary to produce certain results. , and the references I have made to the end of this article support what I am saying!
Entering science, Potassium (K) is essential for water, nutrients and the movement of carbohydrates in plant tissues. It also activates enzymes that facilitate the synthesis of complex chemicals within the plant - such as starch, protein and adenosine triphosphate (ATP) production. The role of ATP is to transport the energy needed for all cellular metabolic activities to all living things, and in plants ATP production can regulate the level of photosynthesis.
Potassium also helps regulate the opening and closing of stomata, holes or cavities under which oxygen and carbon dioxide are exchanged with the atmosphere, and respiratory losses are controlled. It increases root growth which increases the absorption of nutrients and improves drought resistance, and increases resistance to frost, pests and diseases. High potassium levels produce similar maturity and fruit growth rate, as well as better nutritional quality, taste and range.
Agricultural extension agencies suggest that large amounts of potash are needed in many crops, and that potassium deficiency or macronutrient deficiency leads to reduced crop growth and reduced yields, and that potassium levels not only affect yield, but fruit size, juice. quality and shelf life.
Since potassium plays an important role in water regulation, deficiency can clearly increase the pressures associated with the declining fruit mentioned in the previous section.
Solution: Make sure that the orange trees are fertilized with the right fertilizer as previously discussed. Extra potassium can be brought in using seaweed extract (which is not a fertilizer but contains a good amount of potassium), wood ash (used in small quantities only as it is very alkaline), or potash sulphate (potassium sulphate) - all this is guaranteed. as acceptable in a natural garden.
Never use potassium chloride as it can be harmful to plants, it is a very inexpensive alternative to fertilizer manufacturers to save money!
Even if there are sufficient levels of potassium in the soil, it may not be accessible to plants, unless we make some improvements.
9