
Search results for "Fertilizing vegetation" in Home Design Ideas

 Dig Your Garden Landscape Design
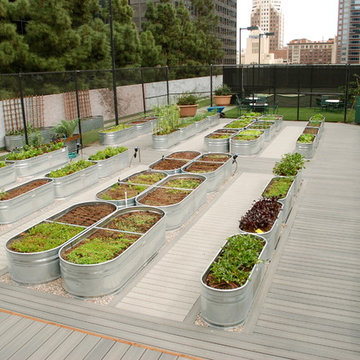
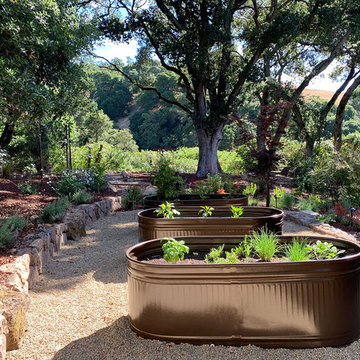
APLD 2021 Silver Award Winning Landscape Design. Galvanized troughs used for vegetables in the side yard. An expansive back yard landscape with several mature oak trees and a stunning Golden Locust tree has been transformed into a welcoming outdoor retreat. The renovations include a wraparound deck, an expansive travertine natural stone patio, stairways and pathways along with concrete retaining walls and column accents with dramatic planters. The pathways meander throughout the landscape... some with travertine stepping stones and gravel and those below the majestic oaks left natural with fallen leaves. Raised vegetable beds and fruit trees occupy some of the sunniest areas of the landscape. A variety of low-water and low-maintenance plants for both sunny and shady areas include several succulents, grasses, CA natives and other site-appropriate Mediterranean plants complimented by a variety of boulders. Dramatic white pots provide architectural accents, filled with succulents and citrus trees. Design, Photos, Drawings © Eileen Kelly, Dig Your Garden Landscape Design
 Steve Masley Consulting and Design
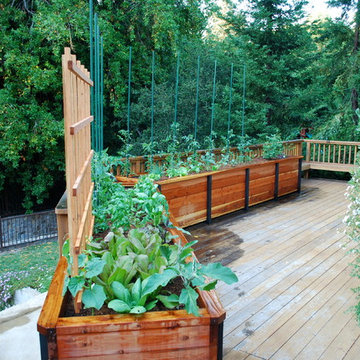
The garden 3 weeks after planting, on a foggy day.
Photo by Steve Masley
Inspiration for a timeless deck container garden remodel in San Francisco with decking
Inspiration for a timeless deck container garden remodel in San Francisco with decking
Find the right local pro for your project
 Homefront Farmers
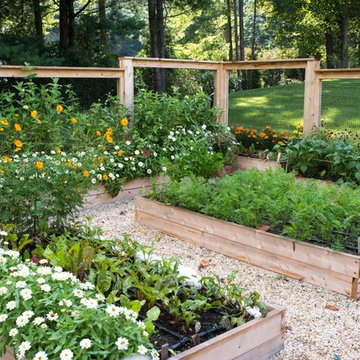
Nothing equals the transparency of having your fruits and vegetables grown in your own yard. While the term “organic” means many different things to many different growers, Homefront Farmers follows a model of practices that promote the health and ecological biodiversity of your garden. We never use chemical fertilizers, pesticides, fungicides, or other synthetic applications.
We think there’s comfort in knowing where and how your food is grown. Do you?
 Steve Masley Consulting and Design
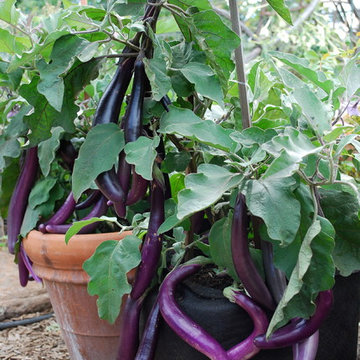
Teenage eggplants hanging out. Eggplants thrive in containers, whether they're terra-cotta pots, or fabric Smart Pots. Photo by Steve Masley
Photo of a traditional landscaping in San Francisco.
Photo of a traditional landscaping in San Francisco.
 The Gardener of Urban
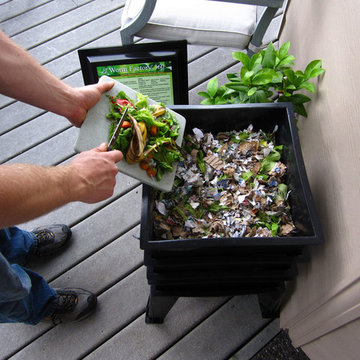
Your worm composter fits anywhere. No mess.
Mid-sized porch vegetable garden idea in DC Metro
Mid-sized porch vegetable garden idea in DC Metro
 Steve Masley Consulting and Design
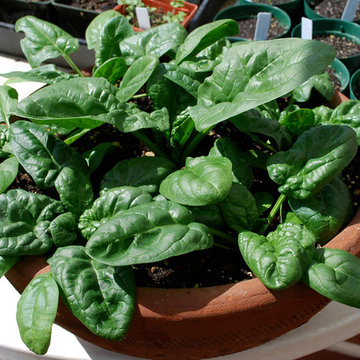
Spinach is easy to grow in shallow pots or window boxes, and you can harvest leaves as needed for sandwiches, salads, and soups. Photo by Steve Masley
 Steve Masley Consulting and Design
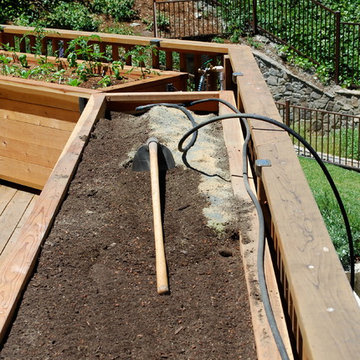
Organic soil amendments are cultivated into the soil. Since their nutrients are released by soil microbes, they need to be mixed into the soil so they're in contact with the soil food web. These organic fertilizers are built into the soil at the start of the season, and release over time--no need for additional fertilizers, it's like winding up a clock.
Photo by Steve Masley
 The Crafted Garden
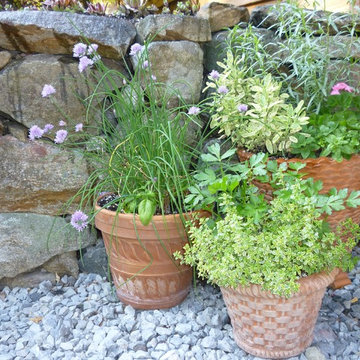
Trio of herb pots near kitchen door.
Inspiration for a large rustic drought-tolerant and full sun backyard stone landscaping in New York for summer.
Inspiration for a large rustic drought-tolerant and full sun backyard stone landscaping in New York for summer.
 Lore Patterson
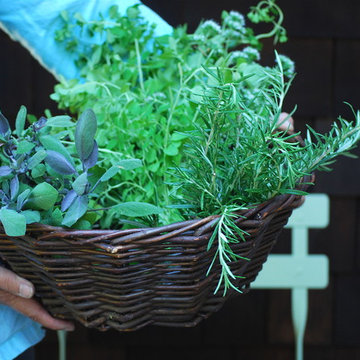
Basket of fresh cut herbs | Lore Patterson
Photo of a small rustic landscaping in Seattle.
Photo of a small rustic landscaping in Seattle.

 Mariani Landscape
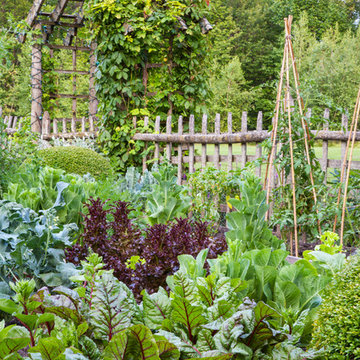
This project represents the evolution of a 10 acre space over more than three decades. It began with the pool and space around it. As the vegetable garden grew, the orchard was established and the display gardens blossomed. The prairie was restored and a kitchen was added to complete the space. Although, it continues to change with a pond next on the design plan. Photo credit: Linda Oyama Bryan
 Steve Masley Consulting and Design
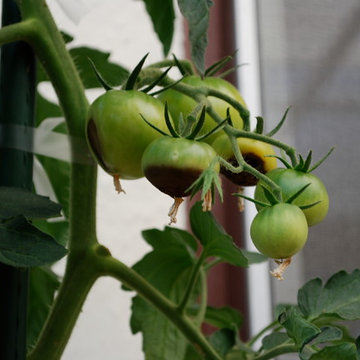
Blossom End Rot (BER) is not a disease, it's a physiological condition of tomatoes. It usually occurs after a heat wave early in the summer, and arises when the plant's growth outstrips its ability to deliver water all the way to the tip of the fruit. It usually only affects the tomato trusses that are growing rapidly at the time.
Irregular or inadequate water is the most common cause, and over-fertilization can contribute. Inadequate calcium was once thought to be the culprit, but only in rare cases is calcium deficiency the cause. BER is common in container-grown tomatoes.
Affected tomatoes are still edible, just cut off the bad part of the fruit. With adequate water, the problem usually self-corrects, but if you want to avoid it entirely, grow cherry tomatoes. Photo by Steve Masley
 The Garden Design Company
Lance Kelly
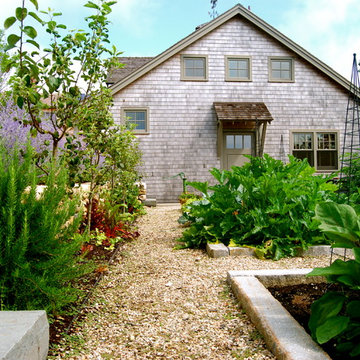
Inspiration for a mid-sized farmhouse full sun backyard gravel vegetable garden landscape in Boston for summer.
Inspiration for a mid-sized farmhouse full sun backyard gravel vegetable garden landscape in Boston for summer.
 The Ardent Gardener Landscape Design
The Ardent Gardener Landscape Design
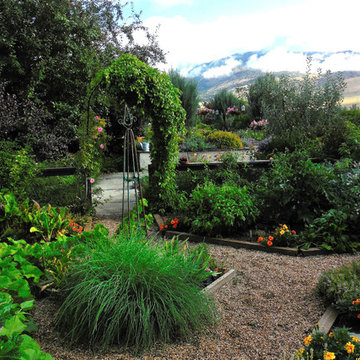
Photo of a large traditional full sun side yard gravel formal garden in Salt Lake City for summer.
Photo of a large traditional full sun side yard gravel formal garden in Salt Lake City for summer.

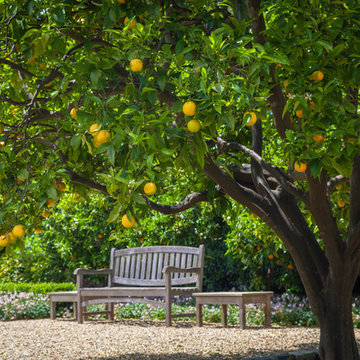
 TFLA | Terra Ferma Landscape Architecture
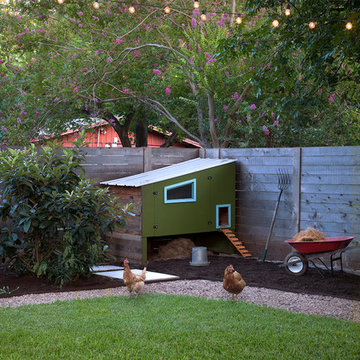
A perfect little seating area next to a heritage orange tree.
Design ideas for a large traditional full sun backyard gravel vegetable garden landscape in San Francisco for spring.
Design ideas for a large traditional full sun backyard gravel vegetable garden landscape in San Francisco for spring.
 Backyard Buildings
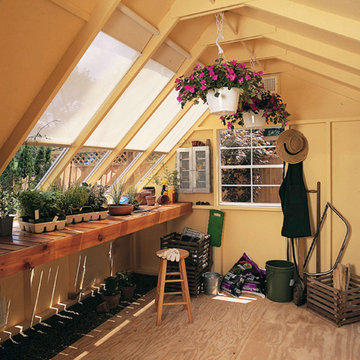
The Benefits of a Greenhouse Shed
By definition, a greenhouse shed (also called a glasshouse) is a building in which plants are grown. Thanks to the 8 ft. glass roof, the Aurora invites plenty of natural sunlight inside. In this type of environment, vegetables and other plants will thrive.
After adding the power ventilation system, you will have complete control of the amount of light, temperature, water, fertilizer and atmosphere inside.
The Ultimate “Green” Storage Solution
Today’s ecologically minded backyard gardeners are thinking about more than maintenance. More and more people are turning toward growing their own food all year round; using green technology and finding alternative ways to enjoy natural sunlight during the winter months. The Aurora is the perfect solution to grow fruit and vegetables right in your backyard all year long.Optional Accessories:
Solar shades: block 75% of sunlight and 50% of heat (Set of 4)
Power Ventilation Fan: Removes excess heat and brings in cool, fresh air
8 ft. Cedar Bench: Hand-crafted from select tight-knot cedar.
Large window with screen to let sunlight in and keep pesky insects out

 safe ZOnea
If you’re active on GardenWeb sharing plant photos, asking for advice, tracking seasonal progress you already understand how much detail goes into gardening. Soil pH, rainfall, emerging leaves, bloom counts, fertilizer schedules it adds up fast. But all that rich information often remains buried in posts, lists or memory. What if you could visualize that data and turn it into clear quick insights? That’s where a graph maker becomes a game-changer for your gardening workflow.
1. Why garden data belongs on a graph
On GardenWeb, you’ll find forums for everything from perennial care, vegetable gardening, patios, herbs, even cooking and craft projects. While plant lovers share observations and ask questions, many track progress manually in spreadsheets or memory. A graph maker flips that around:
Instead of a list of numbers (e.g., “Soil test: pH 6.4 in May, 6.1 in October”), you get a line graph showing the decline over time.
Instead of guessing which plant bloomed most, you see a bar chart comparing counts across plants.
Instead of manually calculating average rainfall effect, you plot scatter points of bloom count vs. rainfall.
By turning your data into visuals, you’re not just recording—you’re analysing, learning and improving. For GardenWeb users this means smarter decisions: Which fertilizer actually improves bloom count? Which shady spot recovers slower? A graph maker gives clarity.
2. What is a graph maker and how to use one
A graph maker is a web tool or software that lets you input raw data (numbers, dates, categories) and output visual charts like line graphs, bar charts, scatter plots, etc. It might allow you to import a spreadsheet, select chart type, customize colours, label axes, and export the image for your blog, forum post or personal log.
Here’s how you could apply it for gardening:
Log blooms per week for each rose plant.
Using the graph maker, choose line graph to track changes over weeks.
Label your y-axis “Number of Blooms”, x-axis “Week of Year”.
Add colour lines for each plant for easy comparison.
Export as PNG and embed it in a GardenWeb forum post: “See bloom trend for my ‘Peace’ vs ‘Knock Out’ roses”.
This isn’t just pretty-to-look-at: it makes the trend obvious, invites discussion (“Hey, your ‘Knock Out’ line dips after week 28—what changed?”) and helps you refine your routine.
3. Use these specific scenarios on GardenWeb
A. Soil pH and plant health tracking
After multiple tests you have pH values over time and bloom results. Upload both datasets into the graph maker, produce a dual-axis line graph: soil pH on one axis, bloom count on the other. Post your findings in the “Soil, Fertility & Nutrients” forum and get feedback.
B. Seasonal pest or disease appearance
Record number of aphids spotted each month and whether you used treatment. A bar chart via the graph maker can show pre- and post-treatment figures. Then ask the “Insect & Disease Control” forum for advice based on your visual data.
C. Yield comparison between varieties
You grow two zucchini varieties. You keep weekly yield in pounds. Use the graph maker for a side-by-side bar chart. Share in the “Vegetable Gardening” forum: “Which was better this year? See the chart”.
D. Rainfall vs growth rate
You log weekly rainfall and growth (in cm) of your tomato plants. Use scatter plot in graph maker. If a pattern emerges, you’re ready to post: “Is my growth plateau due to drought? Chart shows a clear correlation.”
4. Why this elevates your GardenWeb contributions
When you post with a chart made by a graph maker, you’re doing more than asking or showing off. You’re investigating. You’re analysing. You invite the community to give feedback on data, not just anecdotes. That elevates the discussion. Instead of “My plant died, any ideas?” you post “See this graph of pH drop and bloom count—what might be the limiting factor?” High-quality visuals raise your post’s value and garner more thoughtful responses.
Plus, your posts become useful references for others: someone else can say, “Cool graphic, can you share your data sheet?” You build credibility and help the forum become a learning hub—not just a Q&A board.
5. Tips for using a graph maker effectively in the GardenWeb context
Keep it simple: One chart, one insight. Don’t overcrowd.
Label clearly: Titles, axis labels, units (e.g., cm/week, mg/L, °F).
Use readable colours: Avoid faint tones that vanish on mobile.
Annotate when needed: Add notes like “Fertiliser switched week 12” or “Shade cloth added”.
Provide context in your post: Don’t leave the chart alone—write a few sentences explaining what it shows and what you’re seeking.
Embed carefully: Make sure your image displays properly in GardenWeb; check mobile view.
Share raw data: If possible link to your spreadsheet so others can replicate or comment.
Be open to feedback: The chart invites questions; embrace them.
6. Possible pitfalls and how to avoid them
Bad data = bad chart: If your measurements aren’t consistent, your graph will mislead. Use standardized data collection.
Too much complexity: Multi-axis charts, too many variables—confusing. Stick to one or two variables.
Overlooking mobile viewers: Many GardenWeb users browse via phones. Use large fonts and simple visuals.
Ignoring the narrative: Chart alone won’t answer. Explain what it means and what you need.
Outdated charts: If you update your data annually, keep your visuals current or label them clearly as “2024 data”.
7. Final thoughts
On GardenWeb you’ll find a vibrant community of gardeners, DIYers, cooks and design lovers.Using a graph maker for your posts and progress turns your experience from casual hobby-logging into smart data-driven gardening. You’ll not only learn more—your peers will learn more, too.
So next time you log your plant growth, record your yield, test your soil or track pests—don’t just note it. Plot it. Use a graph maker. Share it in the forum. Let your garden tell the story, and let the community help you write the next chapter.

 kmjee
kmjeePepper plants are a delightful addition to any garden, offering a vibrant burst of color and spice to your culinary creations. However, even experienced gardeners can encounter challenges when growing pepper plants. In this blog, we'll explore some common issues you might face and provide practical solutions to help your pepper plants thrive.
1. Slow or Stunted Growth
Issue: Slow or stunted growth in pepper plants can be discouraging, but there are specific steps you can take to address this issue effectively.
Solution:
a. Soil Health:
- Well-Draining Soil: Ensure your pepper plants are in well-draining soil to prevent waterlogged roots, which can inhibit growth.
- Organic Matter: Incorporate plenty of organic matter, such as compost or well-rotted manure, into the soil to improve its texture and nutrient content.
- pH Level: Test the soil pH and adjust it to the ideal range between 6.0 and 6.8 using lime or sulfur as needed.
b. Fertilization:
- Balanced Fertilizer: Use a balanced, slow-release fertilizer designed for vegetables to provide essential nutrients steadily throughout the growing season.
- Compost: Amend the soil with compost to enhance nutrient availability and soil structure. This can promote healthier growth.
c. Watering:
- Consistent Moisture: Maintain consistent soil moisture levels by watering your pepper plants regularly but avoid waterlogging. Aim for 1-2 inches of water per week, adjusting based on your local climate and weather conditions.
- Mulching: Apply mulch around the base of the plants to retain soil moisture and regulate temperature.
2. Yellowing Leaves
Issue: Yellowing leaves can be a sign of various underlying problems, but addressing them promptly can restore the vibrancy of your pepper plants.
Solution:
a. Nutrient Deficiencies:
- Balanced Fertilization: Use a well-balanced fertilizer that includes micronutrients to address nutrient deficiencies.
- Specific Nutrients: If you suspect a particular deficiency, such as magnesium, iron, or nitrogen, apply the appropriate nutrient supplement following package instructions.
b. Pest and Disease Control:
- Pest Inspection: Regularly inspect the leaves and stems for common pests like aphids and mites. Remove affected leaves and treat with organic pesticides if necessary.
- Disease Management: Look out for signs of diseases like bacterial leaf spot or fungal issues. Apply organic fungicides or bactericides as recommended.
3. Blossom Drop
Issue: When pepper plants drop their blossoms prematurely, it can hinder fruit development and lead to disappointment.
Solution:
a. Temperature Control:
- Stable Temperatures: Ensure your pepper plants are exposed to consistent temperatures between 70°F and 80°F (21°C to 27°C) during flowering. Avoid sudden temperature fluctuations by providing shelter or using row covers.
b. Pollination:
- Assist with Pollination: If growing peppers indoors or in a greenhouse, help with pollination by gently shaking the plants or using a small brush to transfer pollen between flowers. Outdoor pepper plants are usually pollinated by insects.
4. Wilting Plants
Issue: Wilting or drooping pepper plants can be a sign of various problems, but proper care can revive them.
Solution:
a. Watering:
- Consistent Moisture: Adjust your watering routine to keep the soil consistently moist but not waterlogged. Water early in the day to prevent fungal issues.
- Drainage: Ensure proper soil drainage by amending the soil or using raised beds to prevent waterlogged roots.
b. Pest Control:
- Pest Inspection: Examine the undersides of leaves for signs of pests like aphids, spider mites, or whiteflies. Treat infestations promptly with biological insecticides.
5. Curling Leaves
Issue: Curling or misshapen leaves indicate stress in pepper plants, which can be caused by various factors.
Solution:
a. Environmental Stress:
- Stable Conditions: Ensure your pepper plants are in an environment with stable humidity, temperature, and adequate air circulation. Avoid sudden changes in conditions.
- Proper Ventilation: Adequate air circulation can reduce humidity and prevent fungal issues.
b. Pest and Disease Management:
- Pest Inspection: Regularly inspect your plants for pests and diseases, addressing them promptly with organic remedies as needed.
6. Sunscald
Issue: Sunscald can lead to discolored, leathery patches on pepper fruits when exposed to intense sunlight.
Solution:
a. Shade Cloth:
- Sun Protection: Shield your pepper plants from harsh sunlight during the hottest part of the day using shade cloth or by planting them where they receive some filtered sunlight.
b. Pruning:
- Fruit Shading: Prune excess foliage to allow better fruit shading, reducing the risk of sunscald. Ensure that there's a balance between foliage and fruit.
7. Pepper Plant Pests and Diseases
Issue: Aphids, mites, whiteflies, and various diseases can affect pepper plants, but you can manage them effectively.
Solution:
a. Regular Inspection:
- Vigilant Monitoring: Regularly inspect your pepper plants for signs of pests or diseases, paying close attention to the undersides of leaves and stems.
b. Organic Remedies:
- Pest Control: Use organic remedies like neem oil, insecticidal soap, or diatomaceous earth for pest control.
- Disease Management: Apply organic fungicides or bactericides as recommended to manage diseases like powdery mildew or bacterial spot.
While growing pepper plants can present various challenges, these common issues are manageable with the right knowledge and care. Regular monitoring, proper soil preparation, and timely intervention can help you enjoy a bountiful harvest of vibrant, spicy peppers. Remember that gardening is a learning experience, and each challenge you face is an opportunity to improve your skills and enjoy the rewards of homegrown peppers in your favorite dishes.
1