
Search results for "Fixed matches" in Home Design Ideas
 Stairworks
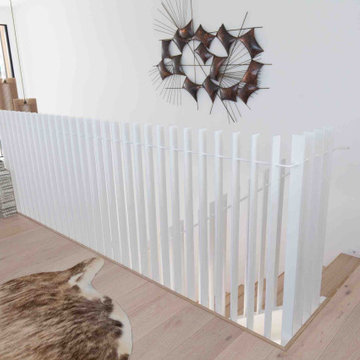
This project is a great example of how the addition of a well-designed and considered balustrade can vastly improve an existing staircase and landing, without the need to replace or damage any of the already in-situ finishes.
The clients already had a firm idea of the aesthetic they wanted and engaged us to come up with a method to achieve it without creating any disruption to an already finished and painted staircase.
After a detailed survey and studying the structural plans of the building, we were able to fully manufacture and powder-coat everything off-site, and simply bolt on to the existing staircase and landing structure in a single visit. This managed to leave no damage or disruption to the property, meaning no remedial work for our clients after we had finished.
The balustrade itself was manufactured from a mild steel flat bar and welded to a steel channel, which we bolted to the staircase, and a steel angle bracket, which we fixed to the landing. It was all tied together with a continuous thin round steel bar that was drilled through the top of each upright for rigidity, as well as a flat steel handrail to match the uprights. It was then powder-coated matte white to help it blend in with the walls and ceilings.
 Stable Works LLC
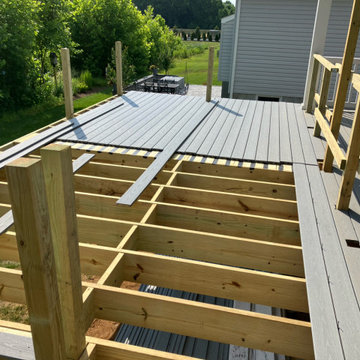
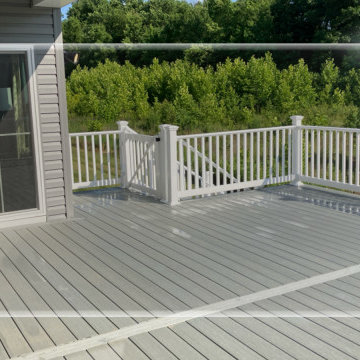
Stable Works will provide labor, material and equipment for the completion of the scope of work outlined below.
-Current (22'x8') New (22'x20' with 5'x'5 landing for stairs)
-Supply and install deck extension as pictured in rendering
- Remove current facia, soffet and header
- Temporarily support roof while work is being performed
- Move center support beam to against the house (Needed to carry the load of new LVL)
- Install new 5 1/2" x 11 7/8" x 22' LVL header
- Replace all facia and soffet
-All footings will use 4000psi concrete
-6"x6" pressure treated supports
-Decking will be Fiberon Good Life (Cottage) $2.49 per linear foot)
-Railing will be White vinyl "Safe-T-Rail"
-Gate at top of steps to be made same as railing.
-Fascia and risers will be PVC board to color match
-Fix all missing fasteners on current deck
-Relocate electrical under new stairs
-Add LED low voltage lighting to post caps and stair treads
-All trash and debris will be removed from site
-Deck area will be power washed after completion
 Stable Works LLC
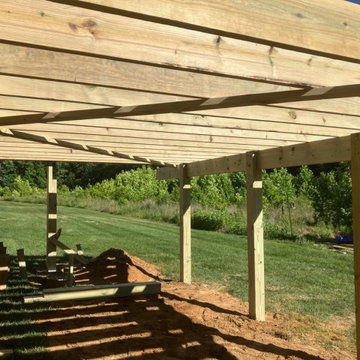
Stable Works will provide labor, material and equipment for the completion of the scope of work outlined below.
-Current (22'x8') New (22'x20' with 5'x'5 landing for stairs)
-Supply and install deck extension as pictured in rendering
- Remove current facia, soffet and header
- Temporarily support roof while work is being performed
- Move center support beam to against the house (Needed to carry the load of new LVL)
- Install new 5 1/2" x 11 7/8" x 22' LVL header
- Replace all facia and soffet
-All footings will use 4000psi concrete
-6"x6" pressure treated supports
-Decking will be Fiberon Good Life (Cottage) $2.49 per linear foot)
-Railing will be White vinyl "Safe-T-Rail"
-Gate at top of steps to be made same as railing.
-Fascia and risers will be PVC board to color match
-Fix all missing fasteners on current deck
-Relocate electrical under new stairs
-Add LED low voltage lighting to post caps and stair treads
-All trash and debris will be removed from site
-Deck area will be power washed after completion
Find the right local pro for your project
 MIREWORKS
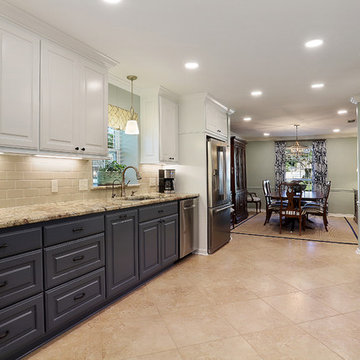
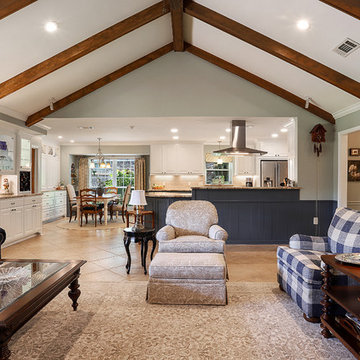
The homeowners invited us in to their home with hopes of updating it's aesthetics, fixing some functional nightmares, and creating an open but still intimate space for small gatherings. Our changes included; removing a large wet bar area, partially removing the wall between the living and kitchen, and opening the formal dining to the kitchen by removing a cased opening between the two rooms. By making these changes, along with many cabinet and appliance location adjustments, a cordially inviting space was achieved. Now the home matches the owner's charm and hospitable spirit.
 SUPERIOR CHIMNEY SERVICES CORPORATION
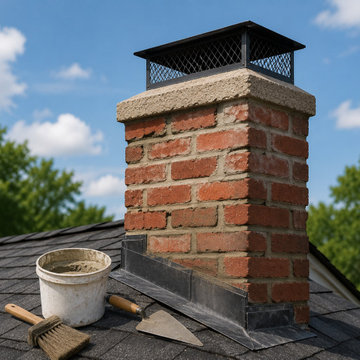
A friend noticed a damp, musty smell coming from her living room fireplace the week after a February thaw. When she called a masonry technician from Superior Chimney, to take a look, and found that water had been working its way behind the bricks for years. What started as a small crack now meant her chimney needed structural repairs before she could safely use it again.
Chimney repairs are any work done to restore the structural and weatherproof condition of a chimney. This can include mortar joint repair, brick replacement, crown repair, flue repair, and cap or flashing replacement. Most Chicagoland homeowners discover the need for chimney repairs often times after winter, when the freeze and thaw cycles have already done its damage. Uncovering the symptoms early is the best way to keep chimney repairs down. Let’s discuss how that can be done.
Why Chicagoland Weather Is Especially Hard on Chimneys
Chicagoland has some of the most polarized weather. One day it’s a blizzard and the next week hot, humid and 100 degrees. That swing in weather conditions and temperatures are the real reasons why chimney repairs are needed.
When moisture from humid and rainy days’ soak into brick and mortar and then freezes, it expands. As it begins to thaw, the materials contract. Repeat that cycle dozens of times in a single Illinois winter and even solid masonry in the chimney starts to crack, spall, and separate from the joints holding it together. This is called the freeze thaw cycle. We’ve talked about it many times over the years, and it continues to be the single biggest reason homes need chimney repairs more often than homes in milder climates.
The Chimney Safety Institute of America (CSIA), the leading nonprofit certifying body for chimney professionals in the United States, notes that water intrusion is one of the most damaging and most preventable problems. If the problem is left to mature, it affects more than the appearance. It compromises the structure itself.
What Do Chimney Repairs Involve?
Not every chimney problem requires the same fix. Chimney repairs generally fall into a few categories. Understanding the difference, helps homeowners have a more informed conversation with the expert technician.
Mortar joint repair or tuckpointing. This involves removing deteriorated mortar between bricks and replacing it with fresh mortar, matched to the original color and texture as closely as possible.
Brick replacement. When individual bricks have spalled, meaning the face has cracked or popped off from trapped moisture, those bricks are removed and replaced.
Crown and cap repair. The crown is the concrete slab at the very top of the chimney. Cracks both big and small let water directly into the chimney flue. Chimney crown repair is often one of the most urgent forms of chimney repairs.
Flashing repair. Flashing is the barrier where the chimney meets the roofline. Loose, damaged or poorly installed flashing is a common source for water leaks. The roof gets the blame as it is the largest piece that covers the house. However, it certainly can be the overlooked chimney.
Flue and liner repair. Cracked flue tiles or damaged liners affect how safely a chimney vents smoke and combustion gases.
When to Know a Chimney Needs Repair
Most chimney damage shows up as small, easy to dismiss way. Let’s take a look at the following list. Be sure to print this out and keep it handy so if/when something happens, you know what to look for.
• Water stains near the fireplace or on the ceiling
• A brownish stain on the wall around your fireplace, or a stain on the ceiling near an exterior chimney. This means water is getting in somewhere it should not.
• Crumbling or missing mortar
• If you can see gaps between bricks, or mortar that flakes off when you touch it
• A leaning or visibly shifting chimney
• A chimney that appears to pull away from the house, even slightly, could indicate a structural issue
• White staining on the brick (efflorescence)
• Chalky white residue left behind as water evaporates out of the masonry. It is a visible sign that moisture is moving through brick
• Rusted damper or firebox components
• Metal parts inside a fireplace that are rusting are a strong indicator that moisture is present
• Debris in the fireplace
• Small chunks of brick, mortar, or tile landing in the firebox
What are the Various Types of Chimney Repair?
This is a compiled list of chimney repairs so you can be aware of what to look for. If you have any questions, contact us directly at 877-244-6349.
Homeowners who schedule chimney repairs at the first sign of trouble typically spend far less than those who wait until water damage reaches the interior of the home. This is a great reason to contact Superior Chimney at 877-244-6349.
Why an Annual Inspection Matters More Than People Think
The CSIA and the National Fire Protection Association both recommend that chimneys, fireplaces, and vents be inspected at least once a year, whether or not the fireplace gets used. This recommendation exists because damage does not take a break just because a chimney sits without any use.
According to data stated by the CSIA, chimney related fires still contribute to tens of thousands of residential fires across the United States each year, and a large share of those incidents can be traced back to deferred maintenance. An annual chimney inspection is what catches the small mortar crack or the hairline crown crack before it turns into a repair bill.
Hiring the Right Company for Chimney Repairs
Not every company who offers chimney repair work has the certified training to diagnose a problem correctly. CSIA certification is the most widely recognized credential in the industry, and it requires technicians to study chimney physics, venting systems, and fire codes. After the studies, the new technician needs to pass an exam and agree to a professional code of ethics.
When you call, be sure to ask:
Are your technicians CSIA certified, and can I verify that certification?
Will you show me photos or video of the damage before starting work?
Does the estimate distinguish between cosmetic repair and structural repair?
At Superior Chimney, we welcome these and other of your questions.
How Chimney Repairs Affect Insurance and Resale
A chimney in poor condition can complicate a home sale or an insurance claim. Home inspectors routinely report on visible mortar loss, leaning chimneys, or missing chimney caps. Some insurers will request proof of repair before renewing a policy on an older home. Addressing chimney repairs proactively protects more than curb appeal. It protects the sale timeline and the claims history associated to the property.
Frequently Asked Questions
How often should a Chicago area chimney be inspected? At least once a year, per CSIA and NFPA guidance, regardless of how often the fireplace is used.
Can chimney repairs be done in winter? Some interior repairs can happen in cold weather, but most masonry repair requires temperatures consistently above freezing. Spring and fall are the most common repair times in the Chicago area.
Is tuckpointing the same thing as chimney repair? Tuckpointing is one type of chimney repair, focused on replacing deteriorated mortar joints.
Does homeowners insurance cover chimney repairs? It depends. Sudden damage from a storm may be covered, while gradual deterioration from lack of maintenance typically is not.
So Finally…
Taking care of your home includes a chimney. Just because you don’t see it every day, doesn’t mean things aren’t happening. Be sure to get a chimney inspection done once per year by a certified and credible company such as Superior Chimney to take care of the issues. Contact us today by calling 877-244-6349.
 Michael Nash Design, Build & Homes
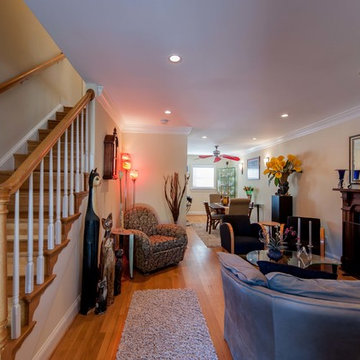
Built in the early 1950s, this small urban townhouse is located in North Old Town Alexandria in an area currently undergoing major redevelopment. The neighborhood is popular with, and affordable for, young people and families, and very convenient to Washington, DC.
In its heyday, the townhouse touted a stately brick exterior, plaster walls, tongue and groove wood flooring and beautiful wooden staircase. Sixty years later, however, the homeowners were faced with crumbling masonry, sagging floors, a double layer of wallpaper over the plaster walls, a crumbling staircase, a dysfunctional kitchen and small, dark second floor rooms. Additionally, the basement had a low ceiling, moldy and cinder block walls, no plumbing and a large boiler taking up most of the space.
The homeowners’ goal was to restore the exterior’s historic look while creating an interior up-to-date for the 21st Century. To turn their vision into reality, they turned to Michael Nash Design, Build & Homes.
Design Solutions
To maintain the townhome’s historic exterior, the Michael Nash team carefully removed, salvaged, restored and reused existing brick masonry. Matching fascia boards and windows were combined with existing windows to complete the exterior renovation.
All interior walls were gutted and reframed. New electrical work, new insulation and new drywall were installed. Much of the home’s original trim was salvaged and reused, as was a piece of art glass, all to keep a bit of the past in the renovation.
The sagging subfloors were fixed, new hard wood floors were installed and a new staircase and railing were designed in a style similar to the original.
The solid wall between the kitchen and the dining room was removed, plumbing was relocated for a new sink location and the kitchen got expanded with an island into the dining room. Closet and plumbing stacks were relocated to allow a new space for fridge. Stainless steel appliances, granite countertops and custom cabinetry highlight the new modern kitchen.
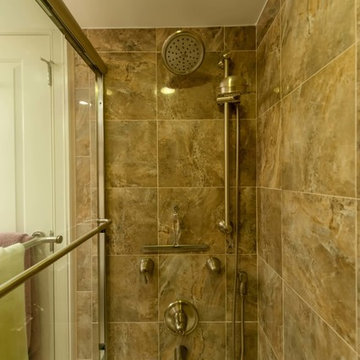
The plan called for redesigning the three bedrooms on the second floor to allow a larger bathroom, walk-in closet and wider hallways. In addition to new roofing, a large skylight was installed to allow natural light into the bathroom and the upper hallway.
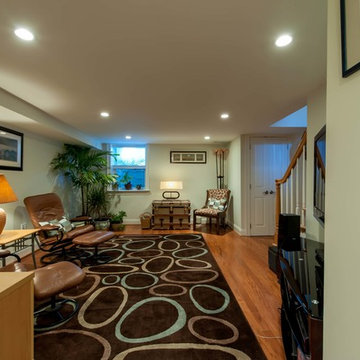
The basement was totally revamped. New plumbing was put in place for a full bathroom, laundry room and a den. New e-grass window was installed in the basement to bring this basement up to current building codes.
This homeowners love the neighborhood and now their home gives them the opportunity to stay in the same location.
 Michael Nash Design, Build & Homes
Built in the early 1950s, this small urban townhouse is located in North Old Town Alexandria in an area currently undergoing major redevelopment. The neighborhood is popular with, and affordable for, young people and families, and very convenient to Washington, DC.
In its heyday, the townhouse touted a stately brick exterior, plaster walls, tongue and groove wood flooring and beautiful wooden staircase. Sixty years later, however, the homeowners were faced with crumbling masonry, sagging floors, a double layer of wallpaper over the plaster walls, a crumbling staircase, a dysfunctional kitchen and small, dark second floor rooms. Additionally, the basement had a low ceiling, moldy and cinder block walls, no plumbing and a large boiler taking up most of the space.
The homeowners’ goal was to restore the exterior’s historic look while creating an interior up-to-date for the 21st Century. To turn their vision into reality, they turned to Michael Nash Design, Build & Homes.
Design Solutions
To maintain the townhome’s historic exterior, the Michael Nash team carefully removed, salvaged, restored and reused existing brick masonry. Matching fascia boards and windows were combined with existing windows to complete the exterior renovation.
All interior walls were gutted and reframed. New electrical work, new insulation and new drywall were installed. Much of the home’s original trim was salvaged and reused, as was a piece of art glass, all to keep a bit of the past in the renovation.
The sagging subfloors were fixed, new hard wood floors were installed and a new staircase and railing were designed in a style similar to the original.
The solid wall between the kitchen and the dining room was removed, plumbing was relocated for a new sink location and the kitchen got expanded with an island into the dining room. Closet and plumbing stacks were relocated to allow a new space for fridge. Stainless steel appliances, granite countertops and custom cabinetry highlight the new modern kitchen.
The plan called for redesigning the three bedrooms on the second floor to allow a larger bathroom, walk-in closet and wider hallways. In addition to new roofing, a large skylight was installed to allow natural light into the bathroom and the upper hallway.
The basement was totally revamped. New plumbing was put in place for a full bathroom, laundry room and a den. New e-grass window was installed in the basement to bring this basement up to current building codes.
This homeowners love the neighborhood and now their home gives them the opportunity to stay in the same location.
Sponsored
Columbus, OH
Free consultation for landscape design!

Peabody Landscape Group
Franklin County's Reliable Landscape Design & Contracting
 MIREWORKS
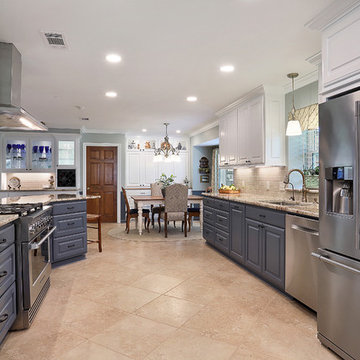
The homeowners invited us in to their home with hopes of updating it's aesthetics, fixing some functional nightmares, and creating an open but still intimate space for small gatherings. Our changes included; removing a large wet bar area, partially removing the wall between the living and kitchen, and opening the formal dining to the kitchen by removing a cased opening between the two rooms. By making these changes, along with many cabinet and appliance location adjustments, a cordially inviting space was achieved. Now the home matches the owner's charm and hospitable spirit.
 Stone Lion Properties
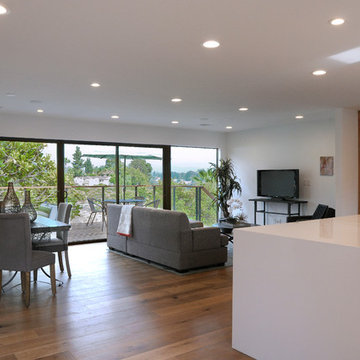
This space was originally closed off as a bedroom, bathroom, dining room, and kitchen. We gutted the space and opened it up by tucking a 22 ft long beam into the attic and opening up the rear of the house with a 21 ft wide glass wall. The canyon view deck with cable railing completes the picture.
 Drury Design
THE SETUP
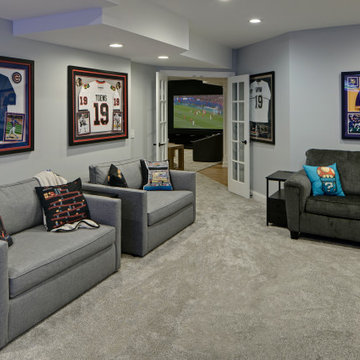
When we first encountered this basement for a family with three boys, we saw a space with untapped potential. Though previously remodeled, it lacked a cohesive design strategy. The expansive area housed various entertainment pieces (a shuffleboard table, air hockey, foosball, etc.) scattered haphazardly throughout the space.
While the basement included a workout room and a rudimentary kitchen area, it lacked a dedicated game room or proper bar. Excessive storage closets along the back wall consumed valuable real estate that could be repurposed for more engaging uses.
In essence, the basement was spacious but disjointed—functional for family use but falling short as an entertainment hub. It didn’t align with the sophistication of the rest of the home. Our clients envisioned a transformation: a fresh, organized space that would not only serve their family’s needs but also shine as an inviting arena for entertaining friends and hosting gatherings – especially sports-focused gatherings!
Design Objectives:
Reimagine the basement layout, creating distinct zones for varied activities.
Expand the workout area to accommodate new equipment, including a Smith machine.
Implement a multi-screen setup inspired by high-end sports bars, allowing guests to follow multiple games while socializing.
Enhance existing features while developing new areas:
Optimize a workout space for all equipment needs
Establish a dedicated children’s space with guest room capabilities
Create an integrated bar and entertainment area
Retain and incorporate the existing projector setup
Design Challenges:
Navigate layout constraints in the new workout room due to fixed utility areas.
Carve out a distinct space for kids within the open plan.
Revitalize an underutilized section of the basement.
Elevate the existing big screen area with purposeful design elements.
Develop a full-fledged bar area while maintaining kitchen functions applicable for hangout snacking.
Work around immovable structural elements (soffits, load-bearing support columns)
THE RENEWED SPACE
Design Solutions:
Install a stylish barn door for the utility area of the new workout space, improving aesthetics and accessibility.
Repurpose the former workout room into a dedicated game room for kids, utilizing couches with pull-out beds so the area can double as overflow guest accommodations.
Transform the unused area into a vibrant pub-style area for card and table games.
Enhance the big screen area with elegant wainscoting and ambient theatre-style lighting.
Design a multi-functional wet bar area featuring varied seating, prep areas, and a microwave.
Base the bar sink area width off the soffit above it.
In the big screen area, use the soffit to inform the width of a wainscoting section.
For the immovable support columns, dress one up to match the wainscoting of the nearby big screen wall. Hide the other one in a new wall.
Final Thoughts:
The reimagined basement has exceeded our clients’ expectations, evolving into the ultimate entertainment hub. With seven strategically placed screens, it’s perfect for gatherings focused on major sporting events and casual gatherings, as well. The space strikes a balance between adult sophistication and family-friendly functionality, featuring distinct zones for various activities.
The new design not only maximizes functionality for modern, multi-screen entertainment but also elevates the aesthetic appeal. It integrates flawlessly with the rest of the home’s transitional style while allowing each basement section to maintain its unique character. The result is a versatile space that caters to both intimate family time and large-scale entertaining.
 Michael Nash Design, Build & Homes
Built in the early 1950s, this small urban townhouse is located in North Old Town Alexandria in an area currently undergoing major redevelopment. The neighborhood is popular with, and affordable for, young people and families, and very convenient to Washington, DC.
In its heyday, the townhouse touted a stately brick exterior, plaster walls, tongue and groove wood flooring and beautiful wooden staircase. Sixty years later, however, the homeowners were faced with crumbling masonry, sagging floors, a double layer of wallpaper over the plaster walls, a crumbling staircase, a dysfunctional kitchen and small, dark second floor rooms. Additionally, the basement had a low ceiling, moldy and cinder block walls, no plumbing and a large boiler taking up most of the space.
The homeowners’ goal was to restore the exterior’s historic look while creating an interior up-to-date for the 21st Century. To turn their vision into reality, they turned to Michael Nash Design, Build & Homes.
Design Solutions
To maintain the townhome’s historic exterior, the Michael Nash team carefully removed, salvaged, restored and reused existing brick masonry. Matching fascia boards and windows were combined with existing windows to complete the exterior renovation.
All interior walls were gutted and reframed. New electrical work, new insulation and new drywall were installed. Much of the home’s original trim was salvaged and reused, as was a piece of art glass, all to keep a bit of the past in the renovation.
The sagging subfloors were fixed, new hard wood floors were installed and a new staircase and railing were designed in a style similar to the original.
The solid wall between the kitchen and the dining room was removed, plumbing was relocated for a new sink location and the kitchen got expanded with an island into the dining room. Closet and plumbing stacks were relocated to allow a new space for fridge. Stainless steel appliances, granite countertops and custom cabinetry highlight the new modern kitchen.
The plan called for redesigning the three bedrooms on the second floor to allow a larger bathroom, walk-in closet and wider hallways. In addition to new roofing, a large skylight was installed to allow natural light into the bathroom and the upper hallway.
The basement was totally revamped. New plumbing was put in place for a full bathroom, laundry room and a den. New e-grass window was installed in the basement to bring this basement up to current building codes.
This homeowners love the neighborhood and now their home gives them the opportunity to stay in the same location.
 MIREWORKS
The homeowners invited us in to their home with hopes of updating it's aesthetics, fixing some functional nightmares, and creating an open but still intimate space for small gatherings. Our changes included; removing a large wet bar area, partially removing the wall between the living and kitchen, and opening the formal dining to the kitchen by removing a cased opening between the two rooms. By making these changes, along with many cabinet and appliance location adjustments, a cordially inviting space was achieved. Now the home matches the owner's charm and hospitable spirit.
 Michael Nash Design, Build & Homes
Built in the early 1950s, this small urban townhouse is located in North Old Town Alexandria in an area currently undergoing major redevelopment. The neighborhood is popular with, and affordable for, young people and families, and very convenient to Washington, DC.
In its heyday, the townhouse touted a stately brick exterior, plaster walls, tongue and groove wood flooring and beautiful wooden staircase. Sixty years later, however, the homeowners were faced with crumbling masonry, sagging floors, a double layer of wallpaper over the plaster walls, a crumbling staircase, a dysfunctional kitchen and small, dark second floor rooms. Additionally, the basement had a low ceiling, moldy and cinder block walls, no plumbing and a large boiler taking up most of the space.
The homeowners’ goal was to restore the exterior’s historic look while creating an interior up-to-date for the 21st Century. To turn their vision into reality, they turned to Michael Nash Design, Build & Homes.
Design Solutions
To maintain the townhome’s historic exterior, the Michael Nash team carefully removed, salvaged, restored and reused existing brick masonry. Matching fascia boards and windows were combined with existing windows to complete the exterior renovation.
All interior walls were gutted and reframed. New electrical work, new insulation and new drywall were installed. Much of the home’s original trim was salvaged and reused, as was a piece of art glass, all to keep a bit of the past in the renovation.
The sagging subfloors were fixed, new hard wood floors were installed and a new staircase and railing were designed in a style similar to the original.
The solid wall between the kitchen and the dining room was removed, plumbing was relocated for a new sink location and the kitchen got expanded with an island into the dining room. Closet and plumbing stacks were relocated to allow a new space for fridge. Stainless steel appliances, granite countertops and custom cabinetry highlight the new modern kitchen.
The plan called for redesigning the three bedrooms on the second floor to allow a larger bathroom, walk-in closet and wider hallways. In addition to new roofing, a large skylight was installed to allow natural light into the bathroom and the upper hallway.
The basement was totally revamped. New plumbing was put in place for a full bathroom, laundry room and a den. New e-grass window was installed in the basement to bring this basement up to current building codes.
This homeowners love the neighborhood and now their home gives them the opportunity to stay in the same location.

 Stable Works LLC
Stable Works will provide labor, material and equipment for the completion of the scope of work outlined below.
-Current (22'x8') New (22'x20' with 5'x'5 landing for stairs)
-Supply and install deck extension as pictured in rendering
- Remove current facia, soffet and header
- Temporarily support roof while work is being performed
- Move center support beam to against the house (Needed to carry the load of new LVL)
- Install new 5 1/2" x 11 7/8" x 22' LVL header
- Replace all facia and soffet
-All footings will use 4000psi concrete
-6"x6" pressure treated supports
-Decking will be Fiberon Good Life (Cottage) $2.49 per linear foot)
-Railing will be White vinyl "Safe-T-Rail"
-Gate at top of steps to be made same as railing.
-Fascia and risers will be PVC board to color match
-Fix all missing fasteners on current deck
-Relocate electrical under new stairs
-Add LED low voltage lighting to post caps and stair treads
-All trash and debris will be removed from site
-Deck area will be power washed after completion
 Kaplan Thompson Architects
Context
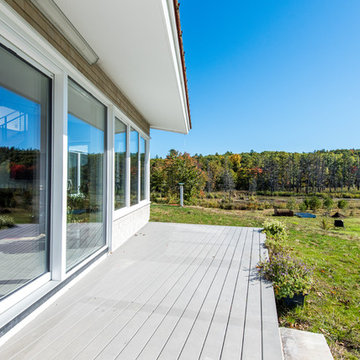
Norbert and Robin had dreamed of retiring in a Passive House-certified home overlooking the Lubberland Creek Preserve in Southeastern New Hampshire, and they’d done their homework. They were interested in using four integrated Zehnder America (www.zehnderamerica.com) technologies to make the 1,900 square foot home extremely energy efficient.
They didn’t miss any opportunity to innovate or raise the bar on sustainable design. Our goals were focused on guaranteeing their comfort in every season, saving them money on a fixed income, and reducing the home’s overall impact on the environment as much as possible.
Response
The home faces directly south and captures sunlight all winter under tall and vaulted ceilings and a continuous band of slim-lined, Italian triple-pane windows and doors that provide gorgeous views of the wild preserve. A second-story office nook and clerestory provide even deeper views, with a little more privacy.
Zehnder, which previously sold its innovative products only in Europe, took on the project as a test house. We designed around Zehnder’s vent-based systems, including a geothermal heat loop that heats and cools incoming air, a heat pump cooling system, electric towel-warmer radiators in the bathrooms, and a highly efficient energy recovery ventilator, which recycles heat and minimizes the need for air conditioning. The house effectively has no conventional heating system—and doesn’t need it. We also looked for efficiencies and smart solutions everywhere, from the lights to the windows to the insulation.
The kitchen exhaust hood eliminates, cleans, and recirculates cooking fumes in the home’s unique kitchen, custom-designed to match the ways Norbert likes to prepare meals. There are several countertop heights so they can prep and clean comfortably, and the eat-in kitchen also has two seating heights so people can sit and socialize while they’re working on dinner. An adjacent screened porch greets guests and opens to the view.
A roof-mounted solar system helps to ensure that the home generates more energy than it consumes—helped by features such as a heat pump water heater, superinsulation, LED lights and a polished concrete floor that helps regulate indoor temperatures.
Photo credit Chris Smith
 MH2G
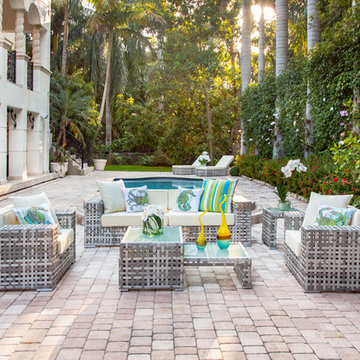
MH2GModern outdoor wide wicker Patio Three seater Sofa, armchair, tempered frosted glass top Side table and Nesting Coffee Tables. Sofa and Chair include water resistant fixed outdoor fabric cushions and pillows that come with standard removable and washable off white color. Available with Light-Grey base.
Mix and match to make the set of your choice. Each piece is sold separately.
Dimensions
Three seater sofa 90" x 36.25" x 24"
Single Arm Chair 44.5" x 36.25" x 24"
Coffee Table 51" x 27" x 12"
High Coffee Table 33.5" x 24" x 18.5"
Side Table 19.25" x 19.25"x 19.25"
 Lfd Home Furnishings
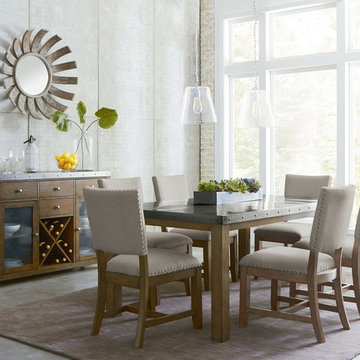
Riverton Dining has an upcycled industrial character with its dusty weathered wood finish and tarnished sheet metal tops with riveted edges.
CARE:
Surfaces clean easily with a soft cloth.
FEATURES:
Casual design elements include sturdy square legs, riveted metal tops, seeded glass doors, and linen-look seating with nailhead trim.
A 40"x 70" Dining Table has straight square wooden legs and a top wrapped in tarnished steel sheet metal with riveted edges.
Upholstered Side Chairs and a backless Bench have square legs with angled foot, H-shaped stretchers and off-white color linen-look 100% polyester fabric.
The Sideboard has seeded glass doors for a vintage touch, a removable X-wine rack, adjustable shelves and drawers for dining storage.
Drawers have stained interiors, bottom mounted Kenlin metal glide, and a fixed felt liner in the top drawer.
Cast metal knob hardware is finished to match the 1 mm thick stainless steel top color.
For an aged look, this group has a dusty weathered wood finish with lots of burnishing.
Riverton is constructed of poplar and Asian hardwood solid components with quality engineered wood products.
Industrial Styling
Straight square legs and framing
40"x70"rectangle leg table
Seeded glass doors on Sideboard
Adjustable shelves & removable X- wine rack
100% polyester neutral linen-look chair fabric
Aged nickel color nailhead trim on chairs
1mm stainless steel sheet metal wrapped tops
Decorative metal rivets on top edges
Cast metal knob hardware in aged steel color
Dusty weathered and burnished wood finish
Poplar and Asian hardwood solid, wood products

 MIREWORKS
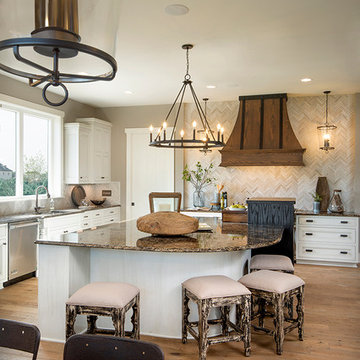
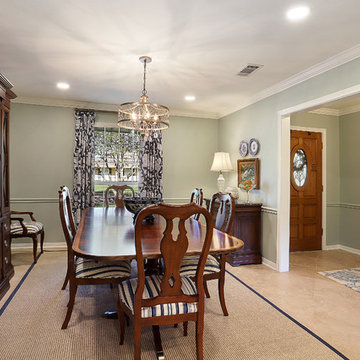
The homeowners invited us in to their home with hopes of updating it's aesthetics, fixing some functional nightmares, and creating an open but still intimate space for small gatherings. Our changes included; removing a large wet bar area, partially removing the wall between the living and kitchen, and opening the formal dining to the kitchen by removing a cased opening between the two rooms. By making these changes, along with many cabinet and appliance location adjustments, a cordially inviting space was achieved. Now the home matches the owner's charm and hospitable spirit.
 Sklar Studios
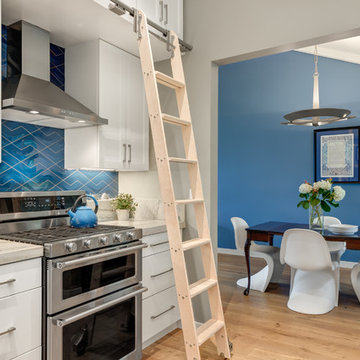
Kitchen Transformation: This family loves to cook & entertain! To tie the transformation into the rest of the home we raised the ceiling to match the adjacent dining & living room spaces, opened up the passageway to the dining room to connect it more to the kitchen, added new wood flooring throughout the main level of this split level home, repainted, and designed a completely new kitchen layout to take better advantage of their space. With a fix on the color blue...the clients loved the unique, 3-dimensional backsplash by Versatile Arc by BT Tile & Stone. The design configurations are endless!
Chris Haver Photography
 E_ Designs
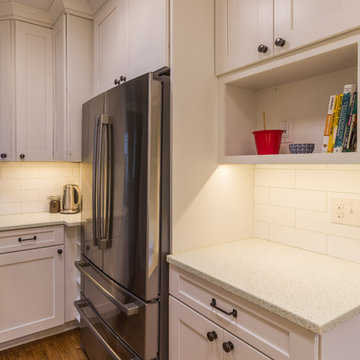
These environmentally conscious homeowners have always hoped for a light and bright kitchen. Having tried new paint and DIY fixes, they knew the next step was a full kitchen remodel. The new kitchen was designed to incorporate more storage, additional countertop space, and a focus on bringing light within the room. White cabinets, custom handmade recycled glass countertops by Dakota Surfaces, and white backsplash surround the room. Bringing in natural light, two additional windows were added with a view of the back yard and two new solatubes were installed for additional natural light. LED solatube light kits were included, LED undercabinet lighting and an LED entry light complete the light package. To tie in the existing home, the existing hardwoods were refinished and stained to match the front of the home along with new millwork and trim in coordinating styles. The whole space provides not only a functional space but a wonderful feeling of sunshine when you walk into the room.
31