
Search results for "Hour period" in Home Design Ideas
 Tile Doctor Ltd
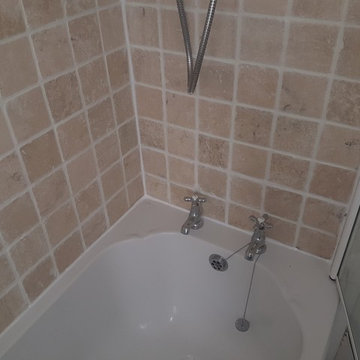
Here’s a quick example of an interesting tiled shower cubicle at a property in Edinburgh that was well overdue for a refresh, including deep cleaning and recolouring do the grout lines that had become stained and mouldy. This is a problem that the majority of property owners experience due to the simple fact that shower cubicles come into contact with damaging acid-based shampoos and soaps on a daily basis.
The short-term solution for this is to wash the shower cubicle down with water after each use, however busy people do not always remember to do so! The prognosis is bad discolouration, mould growth and staining if the problem if proper care isn’t taken. In this case, the problem had worsened to the point that the property owner decided to contact Tile a Doctor to provide a thorough refresh of the tiles.
Our process for refreshing shower cubicles in a similar state to this one is simple, but highly effective. I started by mixing a strong solution of our high alkaline cleaner, known as Tile Doctor Pro Clean (diluted to an appropriate level with water), before applying it directly to the tile and grout.
Next, I worked it in using specialised handheld grout brushes , with the alkaline in the Pro Clean neutralising the acidic staining and mould growth had leaving the area clean and fresh. Pro Clean is suitable for use on all kinds of natural stone, and on both verticals and horizontal surfaces. Once satisfied the grout had been cleaned to the best of my abilities, I quickly dried the entire area using a heat gun.
To restore the appearance of the installation back to it’s optimal appearance I chose to recolour the grout lines with our Light Grey grout colourant, which matched in very nicely. This is just one of ten different colours of grout colourant we offer. The colourant was left to dry for a short period before I cleaned off any excess. The final stage of the refresh involved stripping off the old discoloured silicone from around the bath and replacing it with fresh silicone.
The customer was very impressed by the speed and efficiency of the refresh. With the work completed to a high standard in just a few hours, she now has one less problem to worry about – and a very smart looking shower cubicle! Another satisfied customer.
Thomas Wilson
Edinburgh Tile Doctor
 Tile Doctor Ltd
Terracotta is an interesting type of stone manufactured using a variety of techniques dependant on the country of origin which leads to a number of differences such as Spanish Terracotta being less porous than its Mexican counterpart: the former is semi-hand made and finished in a factory kiln, while the latter is completely handmade. Spanish Terracotta is therefore a lot less than porous and ultimately, of a higher quality.
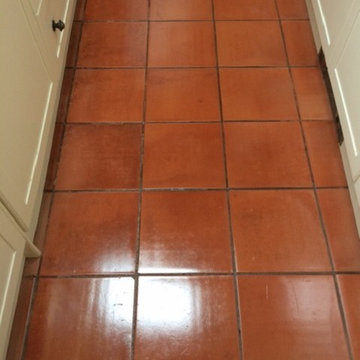
But despite the Spanish Terracotta being less porous, and therefore being less prone to ingrained dirt, it still, like any other stone, needs regular maintenance to keep it looking smart. In the tiling trade, we quite often refer to this as a good old fashioned ‘Clean and Seal’ and this is exactly what was requested by this property owner in Halifax, for their Spanish Terracotta tiled floors in the kitchen and adjacent hallway.
I cleaned both sets of Terracotta tiles using the same process, which involved the application of our reliable alkaline cleaner known as Tile a Doctor Pro Clean, diluted with five parts of warm water. Once the solution had been left to dwell for a short period, it was scrubbed into the tiles to remove all dust, dirt, and general muck. This created a slurry of cleaning residue, which I promptly soaked up using a wet vac. A wet vac machine is an essential tool when it comes to cleaning porous tiles since, unlike a traditional mop and bucket, it sucks the excess trapped dirt out of the clay and thus provides a superior clean.
Following this, I applied a small amount of our heavy duty remover, known as Tile Doctor Remove & Go, to deal with some of the more stubborn stains and paint splashes, before rinsing with clean water and wet vaxing in a similar fashion to before.
Once the clean had been completed I left the tiles to dry completely. This can take 12 to 24 hours depending on numerous factors including whether a Damp proof Membrane and underfloor heating has been installed which can really help reduce drying times. Letting the tiles dry completely before sealing is paramount as moisture can cloud the sealer and affect its performance.
Upon my return to the property I ran some quick damp tests, which revealed the tiles were ready to be sealed. I then applied several coats of Tile Doctor Seal and Go, our topical sealer which provides a satin finish and accentuates colour. A new coat of this product is recommended every six months on Terracotta to ensure the continuous protection of the tiles’ soft clay particles.
My customer was extremely pleased with her refreshed Terracotta tiles. It goes to show what a big difference a bit of regular maintenance can make. I advised the customer that an everyday cleaner called Tile Doctor pH Neutral cleaner can also be used regularly to keep the tiles looking great without damaging the sealer.
Nigel Stoker
North West Yorkshire Tile Doctor
 Tile Doctor Ltd
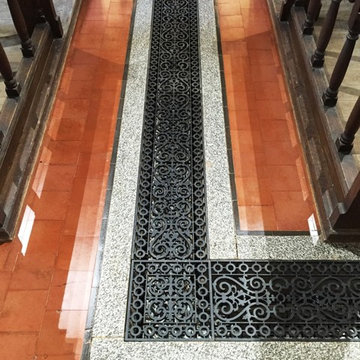
Did you know that Wantage, the town in Oxfordshire where I completed this job, is the birthplace of Alfred the Great? The town is certainly a historic area – in fact, I was contacted by the warden of a church dating back to the 12th century, who asked Tile Doctor Oxfordshire to help restore the building’s flooring, consisting of Quarry and Marble tiles.
This is an interesting mix of hard wearing and high end tiles, and while the floor was in
dire need of a deep clean, it could be restored back to looking fantastic once again.
The church has recently undergone a complete refurbishment with the help of a grant from lottery money. We were called after the builders had finished their work, to restore the floor to the finish required by the church warden.
His specification was to provide the Marble with a Matt finish and the Quarry tiles with a sheen finish. The floor was, at one point in its history, covered in carpet which had been taken up, no doubt exposing many years’ worth of muck.
My first task was to clean the floor with a diluted solution of Tile Doctor Pro-Clean, a high alkaline cleaner safe to use on tile and stone. This was left to dwell for a short period to seep into the tile, before being scrubbed in to remove the initial layers of muck. The resulting residue was promptly vacuumed away.
To tackle the tougher areas of soil buildup, I opted to use Tile Doctor Nanotech HBU which was spread over the floor and left to dwell for about 30 minutes. This product differs from most cleaners in that it uses nano-sized cleaning particles to deal with difficult to reach dirt ingrained in the stone. I then rinsed the area with water and vacuumed this up.
Due to the substantial size of the church floor I had to work in multiple sections, and so the cleaning process took three days to complete. After finishing, I left the church for a few days to allow the floor time to dry.
When I returned to the church I checked the floor with a damp meter and was satisfied that it was dry enough to seal.
First, I sealed the Marble tiles with Tile Doctor Colour Grow, which is a colour enhancing impregnating sealer suitable for use on high end stone such as Marble and Limestone. I applied two coats, leaving a few hours between coats; this brought the colour back without a high shine, as per the church warden’s request.
The next day I returned to seal the Quarry tiles, this time using Tile Doctor Seal & Go Extra which is a topical sealer specially formulated to lea e a nice sheen as requested. I applied several thin coats of the sealer to build up solid protection on the floor.
The warden was extremely pleased with the finished floor, leaving the following feedback:
“We found the Tile Doctor online and watched some of the very helpful slideshows on YouTube. The Victorian Quarry tiles in our 12th century church had been covered with carpet for many years and needed a thorough clean and polish at the end of our major restoration project. Barry was very quick to respond to our enquiry and over the course of a week he did a brilliant job on our tiles. We’re delighted with the results, just in time for our reopening service with our bishop and MP.”
Barry Woodward
Oxfordshire Tile Doctor
Find the right local pro for your project
 Tile Doctor Ltd
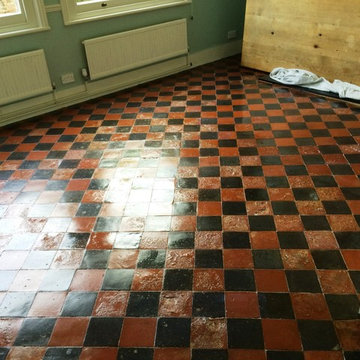
I was contacted recently by a client in East Grinstead, who asked me to restore a large area of damaged Quarry tiles in his house. East Grinstead actually dates back to the 14th century and is a town known for its many interesting houses and historic buildings. Hard-wearing Quarry tiles are most often used in high traffic areas, such as reception areas and hallways, although they are also commonly used for patio areas and porches. In these busy areas, the tiles can get dirty quickly, and this can lead to damage over time if they are not regularly tended to.
In this case, the damage to the tiles had actually been caused by regular flooding over a period of several years. The damage was so extreme that I advised my client that the only means of total restoration was re-tiling. However, my client informed me that the property was currently on the market for sale and this wasn’t an option. Instead, he settled on a deep clean and seal which, while not a complete restoration, would still significantly improve the condition of the tiled floor.
My first day of work was spent moving a significant amount of large furniture out of the room and into the garden. Once the area was completely clear, I was able to apply a layer of Tile Doctor Pro-Clean, using a stiff deck brush to really work it into the damaged stone. Pro-Clean helped to lift out a huge amount of the muck and ingrained dirt revealing, unfortunately, yet more damage beneath.
Once I had finished for the day, my client opened the windows to allow the warm sunshine to dry up any remaining moisture. This was important, as any excess moisture left on the floor may have affected the performance of the sealer when I returned to complete the sealing.
I allowed the floor a two-day drying period, during which time my client decided to colour some of the tiles with red doorstep paint. He counted up to two thousand tiles before giving up!
When I returned after 48 hours, I set about sealing the floor using Tile Doctor Seal & Go, which provided the eye-catching gloss finish and durable protection the client wanted whilst the house was still on the market. As it was another warm day, the homeowners went out cycling around the Ashdown forest, leaving me to complete the sealing carefully and without distraction.
When they returned a few hours later, they were amazed by the results! Although a complete re-tiling was not possible under the circumstances, both myself and my clients were extremely pleased with how great the Quarry tiles were now looking, especially after such significant water damage.

 Nick Smith www.nsphotography.co.uk
photographer Nick Smith
www.nsphotography.co.uk
designer : Fatima Fernandez
Example of a trendy study room design in London with white walls
Example of a trendy study room design in London with white walls




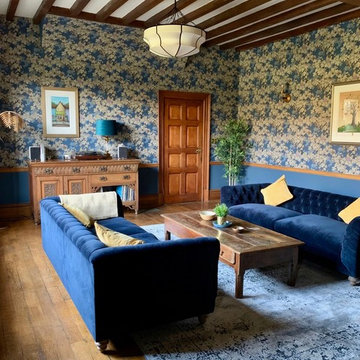
 Making Spaces
Before and After photos courtesy of my remote clients.
All details about this project can be found here:
https://blog.making-spaces.net/2019/04/01/vine-bleu-room-remote-design/
 The Throughstone Group
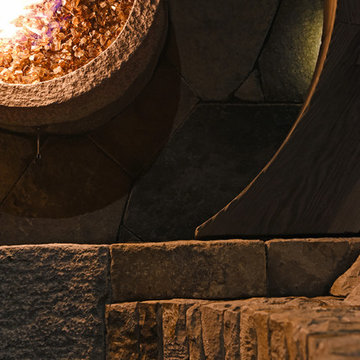
To-date this was the most complex dry stone project that the Heritage Earth & Stone team has designed and built. Jon designed it using what he describes as "circular" and "geometric" aspects. His intention was to build a stunning feature revolving around fire that connected everyone in one beautiful space close to the wild part of the property.
Seventeen people were involved in this collaboration including two other members of the Throughstone Group. Jay from Stellar Jay Designs built and installed several Doug Fir features including the benches, threshold and turned wooden tubes. Mary and Craig from Northwest Outdoor Lighting designed and installed a lighting system that created a magical nighttime setting.
The total man-hours exceeded 2,200 and approximately 1,200 stones were individually cut, shaped and tooled from raw rock. From the approximate 56 tons of raw rock about 30 tons were transformed into stone that was used for the feature. The project took place over a 5-1/2 month period and right through the middle of a Colorado winter.
6