
Search results for "Initially start" in Home Design Ideas
 Signature Kitchens Additions & Baths
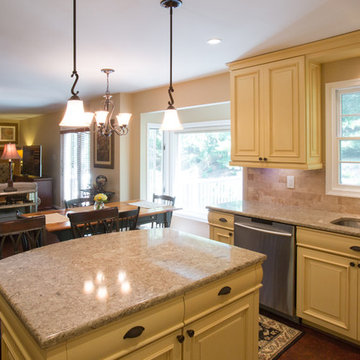
A retired couple considers Olney kitchen design & remodeling companies. Larry Wise the home owner had this to say about Signature Kitchens Additions & Baths, its kitchen designer, process, project coordinator & crew.
"After evaluating the highest rated companies for kitchen design & remodeling, we decided to go with Signature Kitchens, Additions and Baths. We went to their Rockville kitchen design showroom and spoke to one of their kitchen designers, who spent an hour or more reviewing some initial choices with us and discussing Signature kitchen design process. The kitchen designer then came to our home to take measurements & got into more detail on what we wanted. After visiting our home in Olney, she came up with a kitchen design we really liked. Our project included gutting our kitchen, tearing a half-wall out between the kitchen and family room and repairing a floor area in the family room. Our kitchen design included Medallion custom kitchen cabinets and quartz counter tops. Alyssa recommended cork flooring for both the kitchen and family room, since with no wall between them, the two spaces had become one large room."
Photography Jason Weil
 Timberline Patio Covers
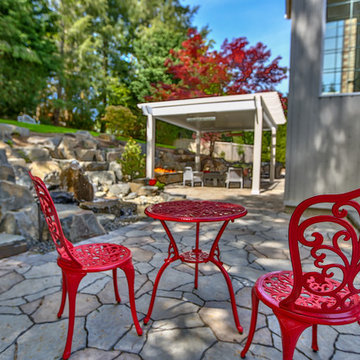
This project was a complete backyard renovation. It initially started with a full landscape and stone pavers throughout the backyard. Then we came in a built a beautiful waterproof pergola with outdoor gas fire pit and outdoor electric heaters and lighting

 Digital Home Technologies
Scott Fincher.
It started with a common complaint and in phases became a signature solution reflecting Digital Home Technologies motto: “We manage your most valuable asset – your free time.”
You know the feeling. You reach for your audio/video remote control and immediately experience button aggravation or, worse, malfunctioning. This is what frustrated a Northwest suburban homeowner and his family. The remote was their enemy. It had turned music or video fun into a struggle. The solution: Installation of ELAN g!, the innovative, award-winning multiroom audio/video and home control system. ELAN seamlessly combines music, TV and telephone-based features such as intercom and paging to create a new kind of whole-house entertainment and communications experience. The system and its simple interface allow people to move room-to-room, controlling and accessing centrally located audio and video equipment with ease.
And that is done with the touch of a finger on a smart phone, tablet or dedicated remote. No more hassle, but, wait, the story doesn’t end. The beauty of ELAN g! is that you can start with one solution and expand into others without draining your pocketbook.
So impressed was the homeowner that a week after the initial installation, which included a system adding Internet music streaming and iTunes organization, he inquired about some of the other features of ELAN like controlling lighting and interior climate. The family travels a lot, and he wanted to be able to adjust the house from anywhere in the world. Simple. Phase 2 done.
Phase 3: Because of the travelling, he had concerns about security of the home. Simple again – Digital Home added a camera and a digital recorder, ensuring peace of mind. What had started as a one-room remote turned this residence into a smart home over the course of two months.
ELAN g! and Digital Home Technologies, partners in making life easy.
Photography: Scott Fincher Photography
Audio Video Integrator: Digital Home Technologies
Find the right local pro for your project
 Timberline Patio Covers
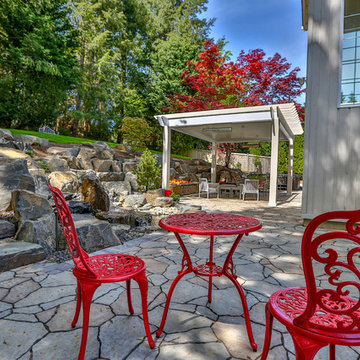
This project was a complete backyard renovation. It initially started with a full landscape and stone pavers throughout the backyard. Then we came in a built a beautiful waterproof pergola with outdoor gas fire pit and outdoor electric heaters and lighting

 Home service
Your kitchen is more than just a cooking space; it's the heart of your home—a place for family gatherings, shared meals, and unforgettable memories. If you're here, chances are you're dreaming of a kitchen upgrade that better serves your needs while enhancing its beauty and functionality. Whether you're aiming for a sleek modern design, a functional workspace, or a charming rustic vibe, finding the right kitchen remodel services is key to turning that dream into reality.
This guide will walk you through everything you need to know about choosing the best kitchen remodel near me. From understanding your specific needs to identifying reliable services, we've got you covered.
Understanding Your Unique Kitchen Remodeling Needs
Before hiring a kitchen remodel service, it’s essential to pinpoint why you're looking to remodel in the first place. Knowing your priorities will help you make informed decisions and ensure you choose a service that aligns with your vision.
1. Functionality Upgrades
Is your kitchen outdated or inefficient? Maybe you're dealing with limited countertop space or outdated appliances that make cooking a hassle. A remodel can help optimize the layout and incorporate modern solutions, such as smart appliances or ergonomic cabinets.
2. Aesthetic Enhancements
Perhaps you’re looking to give your kitchen a fresh, stylish look that reflects your personality. Whether it’s a chic industrial design or a cozy farmhouse style, professional remodelers can help bring your aesthetic dreams to life.
3. Improved Home Value
A beautifully renovated kitchen is one of the top features potential buyers look for. According to real estate experts, a well-designed kitchen remodel can deliver up to a 70%-80% return on investment.
4. Lifestyle Changes
Has your family grown? Do you cook at home more often now? Your kitchen should adapt to these shifts, accommodating more people or making meal prep seamless.
Clearly outlining your specific goals will make it easier to choose home remodeling contractor professionals who can meet (and exceed) your expectations.
Researching for the Best Kitchen Remodel Services Near Me
Once you’ve defined your needs, the next step is to start researching. But how do you pinpoint the best kitchen remodelers in your area? Here are actionable tips:
1. Read Reviews and Testimonials
Start by checking online reviews on platforms like Google, Yelp, and Houzz. Look for consistently positive feedback, with special attention paid to customer comments about quality, communication, and timelines.
2. Check Portfolios
A picture is worth a thousand words—and reading about a remodeling company’s success isn’t enough. Browse their portfolio to ensure the quality of their work aligns with what you’re envisioning.
3. Ask for Recommendations
Word of mouth is still one of the best ways to find trustworthy services. Ask friends, family, or coworkers if they’ve worked with a remodeling service they’d recommend.
4. Look for Professional Credentials
Make sure the companies you’re vetting hold all required licenses, certifications, and insurance. It’s a sign of their professionalism and ensures accountability.
5. Conduct Interviews
Consider meeting with a few top contenders. Ask about their experience, approach to projects similar to yours, and estimated costs. Don’t shy away from asking detailed questions—it’s important to feel confident in your choice.
By thoroughly researching, you'll narrow down your options and find a remodeler who matches your vision, budget, and style.
Key Factors to Consider Before Hiring
Deciding on the right kitchen remodel near me is about more than just skills. Here are some critical factors to weigh before signing any contracts.
1. Set a Clear Budget
It’s important to have a realistic budget in mind before you begin. A reliable remodeler will respect your financial boundaries and offer solutions that maximize your investment without overspending.
2. Outline Your Timeline
Discussing deadlines ensures the project starts and finishes on time. Make sure the remodeler can meet your schedule without compromising quality.
3. Communication is Key
Clear communication is essential. You want experts who listen carefully to your needs, explain their process, and keep you updated throughout the project.
4. Warranties and Guarantees
Always ask if the service provides warranties for craftsmanship and materials. It’s a sign they stand by the quality of their work.
Why RightWay Home Builders is the Solution to Your Kitchen Remodeling Needs
Looking for trusted experts who deliver stunning, functional kitchens? Meet RightWay Home Builders, a leading name in local remodeling services. Here's why they're a standout choice for your kitchen remodel project.
1. Proven Expertise: With over 10 years of experience in the industry, their portfolio boasts beautifully transformed kitchens that reflect each client’s unique style.
2. Customer-Centric Approach: RightWay prioritizes the client experience. From the initial consultation to the project's completion, their team ensures you’re heard every step of the way.
3. Comprehensive Services: From initial designs to installation, RightWay Home Builders handles every stage of remodeling with precision and care.
Their happy customers say it all. “RightWay took my outdated kitchen and turned it into something from a magazine. Their attention to detail was amazing, and they were a pleasure to work with!” - Sarah M.
Why Visit RightWayHomeBuilders.com?
Booking your dream remodel has never been simpler. RightWay’s website offers a streamlined process where you can request a consultation, view portfolios, and even access exclusive home remodeling tips. Don’t wait! Visit https://www.rightwayhomebuilders.com to kick-start your remodeling adventure.
FAQs About Kitchen Remodeling
1. How much does a kitchen remodel cost?
The cost depends on the size of your kitchen and the scope of the project, but the average remodel.
2. How long does the remodeling process take?
Most remodeling projects take 6 to 12 weeks, depending on the complexity.
3. Will a kitchen remodel increase my home’s value?
Absolutely! A well-done remodel can boost your home value significantly and make it more appealing to buyers.
4. Can I stay home during the remodel?
While it’s possible, the noise and dust might be inconvenient. Many clients prefer staying elsewhere temporarily.
Conclusion
Your dream kitchen is closer than you think. Whether you're upgrading for better functionality, fresh aesthetics, or added value, investing in the right kitchen remodel service will ensure your vision comes to life.
Explore your options, do your research, and don’t hesitate to reach out to trusted experts like RightWay Home Builders. Begin the first step today—schedule your consultation at RightWayHomeBuilders.com and take the leap toward the ultimate kitchen transformation.

 Copano Pools & Spas
The New Orleans is a beautiful medium sized pool with a round form. The New Orleans has a shallow depth, initially starting at 3'2", gradually descending to 4'10". These depths are perfect for relaxation!
The New Orleans is just a click away: www.copanopools.com
 KC Architects, Inc
Here is a professionally rewritten and beautifully formatted version of your text, optimized for the Houzz community. It transforms the rigid FAQ list into an engaging, scannable, and client-focused profile description or forum post.
Elegant Residential Design in Chicago | KC Architects
Looking to build your dream home, expand your space, or undertake a major renovation? KC Architects brings exceptional residential design expertise, seamless project management, and a unique international perspective to homeowners throughout the Chicagoland area.
Led by licensed architect Katarzyna Cimoch, our full-service firm bridges the gap between old-world artistry and modern living. As a prominent Polish architect in Chicago, Katarzyna beautifully combines European craftsmanship and timeless design excellence with contemporary American sensibilities.
Why Choose KC Architects?
Exclusive Residential Focus: We specialize only in residential architecture—from custom new construction to high-end renovations and seamless additions.
Dual-State Licensing: Principal architect Katarzyna Cimoch holds active architectural licenses in both Illinois and Florida.
Full-Service Execution: We don't just hand over drawings; we guide you through every step of the journey, ensuring your vision is built to perfection.
Frequently Asked Questions
What services do you provide?
We offer comprehensive, end-to-end architectural services. This includes initial custom design, navigating the municipal permitting and approval processes, and providing hands-on construction supervision throughout the build phase.
Do you handle additions and renovations?
Absolutely. Whether you want to build a custom estate from the ground up or design a beautiful home addition to accommodate a growing family, we tailor our designs to fit your lifestyle.
What areas do you serve?
We proudly serve the City of Chicago and its surrounding suburbs.
How do we get started, and how long does it take?
Every successful project begins with a comprehensive initial consultation to discuss your vision, budget, and scope. Timelines vary depending on the complexity of the design and local approval processes, which we will map out for you during our early planning phases.
Let’s Build Something Beautiful Together
We invite you to view our portfolio here on Houzz. Ready to discuss your project? Drop us a message or schedule your initial consultation today!
Contact KC Architects to bring European design excellence to your Chicago home.
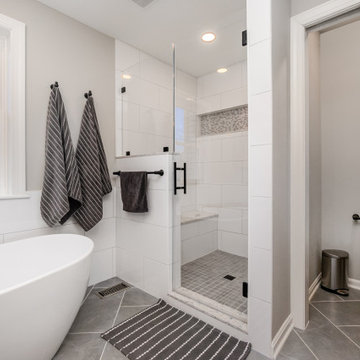
 Bel Air Construction
This project initially started as a discussion about remodeling the kitchen but morphed into a major renovation of the entire second floor including the addition of a new master suite and bath. This handsome new master bath has been created in a former small bedroom adjacent to the new master bedroom.
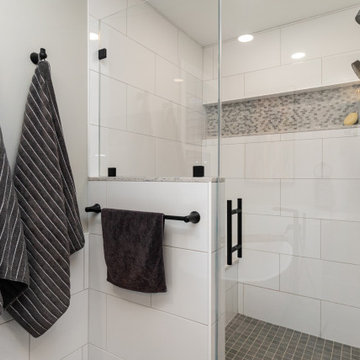 Bel Air Construction
This project initially started as a discussion about remodeling the kitchen but morphed into a major renovation of the entire second floor including the addition of a new master suite and bath. This handsome new master bath has been created in a former small bedroom adjacent to the new master bedroom.

 Simply Home Decorating
This beautiful North Vancouver home belongs to a nature-loving and health-conscious couple, Emma and Vince (names changed), their two young children, and their dog, Jasper. When they contacted us about renovating and furnishing their kitchen and family room, we walked in and saw a world of potential waiting to be uncovered.
Before: Larkhall Crescent Home:
Like many original North Vancouver homes, the interior was definitely dated. We encountered late ‘80s finishes in powder pink and teal green, old carpet, and a kitchen that wasn’t maximized to suit this family’s modern-day lifestyle. However, the size of the rooms offered us a ton of space with which to get creative.
Knowing our clients’ love of cooking, need for work spaces (Emma and Vince both work remotely), and growing family, we developed a design concept that would increase usable space, optimize storage, and create intimacy in this large area. As for the style, we were inspired by their European roots, inventing a new and modern take on “Belgian Farmhouse” style. Now, the home is truly one-of-a-kind.
After: Warm & Cozy Family Room:
Fresh, bright, and comfortable, this living area has been transformed! We started with the fireplace as a focal point, selecting aged brick tiles for added texture and a crisp wood mantle. The taupe-coloured sectional infuses the room with visual warmth and serves the added purpose of separating the family room from the kitchen.
Emma and Vince were also keen on using non-toxic materials in their home, and we were happy to oblige. To meet their needs, we sourced natural wood elements and sought out Canadian-made products - that adhere to high health standards - whenever possible.
Look closer at the elements of this space, and you will find this stunning, honeycomb-patterned rug in earthy gold, beige, and charcoal tones. It’s plush to the touch and full of visual texture that brings this room’s colour palette together. We sourced these two-tone chairs with caning, petrified wood side table, black sconces, and botanical prints in greyscale from local artist, Heather Johnston.
We topped off the space with this dark wood and rattan console that offers storage facing the kitchen and presents an opportunity to display cherished items. The result is a cozy lounging space brimming with comfort and functionality. It’s perfect for enjoying quality family time, or Emma can simply slide the coffee table away to make room for her morning yoga practice.
Now, let’s turn around and give some attention to the kitchen. Do you remember what the original kitchen looked like? If not, scroll back up, because the transformation is shocking…
Moody & Welcoming Kitchen for Healthy Living:
This kitchen looks very different from how it started, right? Though we didn’t touch any walls, the kitchen has almost doubled in usable space! We created a long, extended island with storage, an outlet for small appliances, and seating for comfortable prep, after-school snacking, or mingling among friends.
On the other side of the island, the family has even more storage and an integrated dishwasher within easy reach of the sink, perfect for quick clean-up. From this angle, you can also see the expansive custom Shaker cabinetry in white and the integrated double ovens. These facilitate their cooking experience and gave us the opportunity to add an additional surprise…
A coffee garage station and more hidden storage! Keeping these items located along the perimeter allows them to be accessed by the family or their guests without someone getting under the cook’s feet. These are the little details that make everyday life easier and more enjoyable.
Moving deeper into the kitchen, the seamless induction cooktop topped with a freestanding concealed hood fan commands attention in a soft yet prominent way. The natural wood accent mirrors the fireplace mantle, and the choice of off-black wood-grain cabinets not only continues our black-and-white colour palette but adds a sense of depth and contrast. The corner sink is located to the right and perfectly positioned with a view of their thriving backyard.
To invite more of this family’s character into the space, we mixed metals for interest — matte black, dark pewter, and warm brass — and created open shelves in white oak for their plants and decor. You can also glimpse the tumbled edge of the backsplash tile, which echoes the rustic brick of the fireplace. It adds that farmhouse charm while still feeling timeless and sophisticated.
Last but not least, we designed this dining banquette in the bay window (with integrated bench storage, of course), where the family can share a meal together, the kids can do homework, or Emma and Vince can work and enjoy a change of scenery from their offices. Like the other spaces in the home, it was designed to be beautiful, multi-functional, and long-lasting.
Praise from Our Clients:
It is clear that we love this home, but what did our clients have to say?
“Lori is a visionary and masters execution to the finest detail all at the same time. When she first met us to know more about who we are and how we live, she could right away envision how we could use the space in our kitchen and living room…The results exceeded our expectations.
Lori and her team were also a delight to work with — coordination with all the trades, fast problem-solving, regular updates, professional and friendly attitude of her entire team — made it the dream team. Thank you SHD for making our space so beautiful!”
In turn, we are so grateful for this family’s trust, their open communication, and for being wonderful people with whom to work. (So, thank you!)
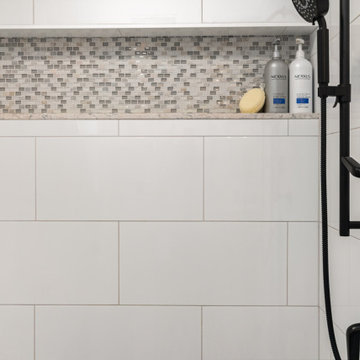 Bel Air Construction
This project initially started as a discussion about remodeling the kitchen but morphed into a major renovation of the entire second floor including the addition of a new master suite and bath. This handsome new master bath has been created in a former small bedroom adjacent to the new master bedroom.

 Muhammad zaid
Building a new home is a momentous occasion. For many, this is a once-in-a-lifetime opportunity to create the home of their dreams. However, selecting the perfect home design and floor plan can feel like a daunting task. After all, you want to ensure that your new home will meet your family's needs and desires for years. That's where trusted services come in. With the latest technology, you can design your entire home and even tour it in 3D. From building your 2D floor plan to furnishing it, you can watch as your dream home is brought to life. In this article, we will explore how you can beautifully decorate your home online.
Select the Main Theme
Embarking on a new home design project can be an exciting yet difficult task. One crucial step is to determine your style preference, as it will guide your decor choices throughout your home. Researching through various platforms and furniture websites can provide inspiration and help gauge pricing for your favorite pieces. One helpful strategy is to create a mood board where you gather your favorite interior design looks and examine any patterns that emerge.
By taking the time to establish your preferred style, you can create a cohesive and inviting atmosphere in your home that reflects your personal taste and style. If you want to create a design while traveling, you may need to use a USA VPN to access some online services with advanced home design tools. It will allow you to bypass geo-blocks.
Create a Layout
The global home design market reached $115 billion in 2022. When designing living spaces, several factors must be considered, including the arrangement of social and private areas and accommodating the changing needs of families over time. Parents with young children usually prefer bedrooms and bathrooms to be clustered together while families with teenagers often request more segregated spaces in two-story home designs.
Home design is an intricate art form that involves creating an interior space that is both visually appealing and functional. Whether you are starting afresh with a new home or looking to revamp an existing one, home design offers ample opportunities to unleash your creativity. It does not matter if you lack professional architecture expertise, as anyone can undertake the planning and execution of a home design project.
The initial steps involve analyzing your existing home layout and then conceptualizing your desired vision for the remodel. This is the cornerstone on which your entire project will be built, and it sets the tone for the aesthetic of your home's interior.
Utilize online home design software to generate realistic images of your new home and easily gather feedback from others. This allows you to make necessary adjustments to perfect your design. With the help of professional software, realizing your ideal home design is now made easy and achievable without requiring any specialized training or knowledge. You can access online tools using VeePN for a secure connection. Start by creating a blueprint of your floor plan.
Furnish Your Space
If you need to decorate house, selecting the right flooring and paint or wallpaper for the walls is key. Using online services, you can speed up this process. With intuitive tools such as dragging and dropping items, you can create a truly unique and personalized home design that is sure to impress.
When selecting a color scheme for your design, it is crucial to consider the benefits and drawbacks of using neutral tones versus incorporating a pop of color. While a neutral palette can simplify the design process and provide a timeless look, it may lack individuality or a focal point. Whereas, a splash of color can introduce a dynamic quality, offer intrigue, and contribute to an energetic ambiance. Additionally, combining a range of price points and textures can add dimension to your design. Consider juxtaposing high-end decor with refurbished furniture and incorporating cozy textures like plush rugs and fluffy cushions, to achieve both sophistication and comfort in your space.
Create a 3D Tour
Home design is a craft that involves creating an attractive home interior, irrespective of whether you're starting from scratch or remodeling an existing home. While anyone can undertake a home design project, you don't necessarily need to be a professional architect. The first step to kick-starting your project entails creating an outline of your abode's current status, and then proceeding to blueprint your preferred design. As you piece everything together, you'll be able to turn your creative vision into a tangible reality. The satisfaction derived from transforming your space into the home of your dreams is truly priceless.
As the market size of the interior design industry is projected to grow by over 4% in the next five years, it is clear that such services are in high demand. Home design involves creating an interior space that is both pleasing and functional. With the help of online tools, you can easily create realistic images of your dream home while gathering feedback from others to perfect your vision. As you piece everything together, be sure to consider neutral color palettes, mix price points, and textures, and add accent colors for depth and vibrancy. With a bit of planning and creativity, you can achieve your ideal design in no time!
 Tile Doctor Ltd
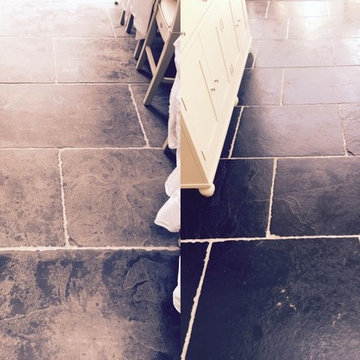
I was recently asked to this property in Wimbledon in to see if there was anything we could do to resolve the problem with a recently laid Black Limestone tiled floor. The builders that had laid the Limestone did not cover or clean the tiles prior to sealing with an impregnating seal thereby trapping in all the dirt from the building works. They then grouted the tiles but didn’t clean the grout off the surface before putting on another two coats of sealer all of which resulted in a very poor finish.
Naturally the customer was not happy so called them back to rectify the problem and so they came back and tried to strip the sealer off with cloths and a chemical stripper. Then without rinsing the stone to remove the chemicals they added another two coats of sealer; in desperation the lady gave up with them and called me in.
To resolve I tried all the sealant strippers available to me but couldn’t budge the mess effectively. The only other option available was to diamond grind the surface so I discussed this with the customer and she agreed to this and left me to carry on.
Initially I started with a coarse 400 grit diamond pad but even that wasn’t having much effect so in the end I had to cut back the surface using a 100 grit pad moving up to 200 grit, then 400 before finally stopping at 800. To lubricate the process you need to use a little water and then rinse away the resultant soil after each pad. If this was a polished stone surface I would have continued with finer and finer grits to restore the surface polish however these tiles were rough limestone and I needed to leave it as near to how it should be.
Once all the Limestone had been stripped back the stone turned an uninviting grey colour, so to bring it back to black I applied two coats of Tile Doctor Stone Oil which enhanced the colour.
I left the floor overnight to allow the Stone Oil to dry out and then returned to seal the Limestone using two coats of Tile Doctor Colour Grow which is an impregnating sealer that enhances the colour in the stone and will protect it from staining going forward.
When the customer saw the final result she was overwhelmed and said she felt like crying with relief, because the floor now looked how she had imagined it to be. It was a great feeling for me to know that I had solved the problems for her.
 Tile Doctor Ltd
This customer from the historic city of Cardiff was keen to see what Tile Doctor could do to put some life back into their treasured Limestone kitchen floor that was laid in 2008. My first observations were mainly centred on the horrific condition of the surface which although adequately sealed initially the floor had not received any subsequent maintenance and its condition had deteriorated over time. The light shining in from the patio doors highlighted all the imperfections in the floor caused by surface wear and tear commonly seen in high traffic areas such as a kitchen.
Upon closer inspection, there were further problems: the floor was stained and scuffed, and in most places the sealer had worn off completely allowing the dirt to become ingrained into the pores of the Limestone. Additionally the grout was recessed but was now flush with the tile surface due to dirt build-up. There were also areas contaminated with grease and kitchen cooking oil.
The Limestone floor tiles were 20mm thick French Limestone, and had been laid very well so there was no requirement to do any tile or grout repairs however to get this floor back to its original condition the surface would need to be reconditioned using the Tile Doctor four stage burnishing system.
I started by giving the floor a wash with a medium dilution of Tile Doctor Pro-Clean, focusing mainly on the grout lines in order to remove the muck that had built-up there. I used a special stiff grout brush for this activity; it’s quite narrow and ideal for grout scrubbing.
This worked well, but the significant build-up of dirt along some of the grout lines meant more work was required. I tackled this problem with a hand scraper assisted with steam. At the end of this process, the whole floor was then rinsed down with water to remove any soil and the resulting slurry was then extracted using a wet vacuum.
The next step was to start the burnishing process, which basically involves applying four diamond encrusted floor pads in sequence over the floor. Each pad is a different grade, starting with the most abrasive coarse pad and moving through to the finer grades using a little water to lubricate and rinsing away any slurry between each pad.
I eventually finished with the extra fine pad which builds up shine and lustre on the tile; it had taken two days to clean the grout and burnish the Limestone but the floor was much improved and so after a final rinse down I left the floor to dry off overnight with the aid of the underfloor heating.
During this time, I also addressed the stained Limestone in the area of the kitchen where the dustbin was situated. This had been a major upset for the customer and I’m happy to report I managed to deal with it. However, it was quite an involved process, so I’ll write about this in a separate post.
On the third day I came back to seal the floor, checking first that it had dried sufficiently with a damp meter. Fortunately, the underfloor heating had done a great job of drying the stone and I was able to seal the floor using three coats of Tile Doctor Colour Grow sealant. This sealant not only provides a durable seal but also penetrates deep into the pores of the stone protecting it from within and enhancing the natural colours of the Limestone in the process.
After the final layer of sealant, I worked over the floor again with the extra fine burnishing pad both to add shine again following sealing, and to ensure that no smear marks were visible as the lighting conditions were unforgiving and highlighted any imperfections.
The customer was delighted with the results: so much so, in fact, that they booked me in to restore their Victorian hallway floor as well but that’s a story for another time!
Julian Iancono
SE Wales Tile Doctor

 Diego Bringas
vi-deo! Person of Interest S.eason 5, E.pisode 12 F.ull O.nline. Here we go thhen for sure all the fans, this is the nice and wonderful time for all of us to start watch into the rest about Person of Interest season 5, episode 12 online. Entitled as .exe, here's such a wonderful over view to explore more, As Reese and Shaw race to catch up with Finch, he infiltrates a maximum-security government facility in a desperate mission which could mean the end for not only Samaritan, but for himself and The Machine as well.
"Synecdoche" reminder looks fantastic, When Reese, Shaw and Fusco travel to Washington, D.C. to protect their next number, The President of the United States, the Machine classifies this threat as extremely relevant - in terms of national security - but Shaw is worried about the implications behind Samaritan's neglecting to intervene. The threat is neutralized, but the inner-governmental privacy-activist group with a mole in the U.S.S.S. has turned the full force of the Secret Service on Reese and Shaw.
The Machine has secretly enlisted Logan Pierce, Joey Durban and Harper Rose to secure a clever exit strategy, with each of whom camouflaging into various resourceful associations; when Reese and Fusco are extracted, they band together with Logan, Joey and Harper to discuss their enlistment by the Machine, what has happened and what is to come.
Harold, meanwhile, is grieving over the loss of Root, and reaches a conclusion that brings him to a highly-secured government facility in San Antonio, Texas with a weaponized virus capable of destroying Samaritan. Harold has become ready to go to any lengths, and Reese and Shaw prepare for their final battle.
Series over view, They are helped by NYPD Detectives Lionel Fusco, a corrupt officer whom Reese coerces into helping them, and Joss Carter, who in early episodes investigates Reese for his vigilante activities.
Reese arranges for Fusco to spy on Carter by becoming her partner, but Carter eventually becomes Reese's ally and drops her investigation on him. Nevertheless, for the entirety of season one neither Fusco nor Carter is aware that the other is also working with Finch and Reese and both detectives are kept in the dark about the Machine. Periodically, the team enlists the aid of Zoe Morgan, a professional "fixer" who applies her skills to particularly difficult tasks.
The series features several subplots. One significant story arc involves "HR", an organization of corrupt NYPD officers who are initially in league with budding mob boss Carl Elias and later with the Russian mafia; in earlier parts of this arc, Fusco is forced to go undercover. Another important story line revolves around Root, a psychopathic hacker who is determined to gain access to The Machine.
During season two, another organization of powerful business figures, Decima Technologies, is revealed to be attempting to gain access to the Machine. Carter vows vengeance against HR after they have her boyfriend, Detective Cal Beecher, murdered. Reese and Finch encounter Sameen Shaw, an ISA assassin, on the run after being betrayed by her employers.
Shaw learns about The Machine in the season two finale and subsequently becomes a member of Reese and Finch's team. In Season three, Carter delves deeper into her investigation of HR, eventually uncovering its leader; but she is killed. In his grief, Reese briefly leaves the team. The team also battles Vigilance, a violent anti-government organization devoted to securing people's privacy.
100% working here:
http://tinyurl.com/zkfrsad
http://tinyurl.com/j6kjlsz
During the second half of season three, Decima Technologies starts to acquire hardware to bring to life a new artificial intelligence called Samaritan, using the codes from Harold's old college classmate, Arthur Claypool. In the season three finale, it is revealed that Vigilance was created by Decima to make them appear as domestic terrorists. This allowed Decima to obtain all the NSA feeds to make Samaritan operational. The Machine creates new identities for the Team so that they can fly beneath Samaritan's radar. Go for it finally fans, start watching for Person of Interest season 5, episode 12 : .exe online.
 Tile Doctor Ltd
My client had recently moved into a bungalow in Godalming where they inherited the Limestone tiled kitchen floor pictured below. The previous owner had not looked after the floor very well and by the time they moved in it was pretty filthy. Limestone is a natural but porous stone where, unless sealed, attracts dirt into its tiny holes and as you would expect Cream Limestone shows the dirt easily. The protective seal had long since worn off this floor and was now ingrained with dirt it was now looking permanently dirty.
Before quoting I conducted a small test clean to work out the best method to renovate the stone and this also gives the client a good idea of how the floor will look after its finished. They were delighted with the initial result and happy with my quote gave me the go ahead.
On arrival first I helped the customer remove his tables and chairs and I then set about tapping up the plinths in the kitchen and the skirtings to protect them from cleaning solutions and equipment. The cleaning equipment I have invested in works more efficiently in open spaces, so it’s worth spending time at the beginning preparing the area first.
Next, I used a deck brush to apply a mixture of water and Tile Doctor Pro-Clean to the dirtiest tiles. Tile Doctor Pro-Clean works well when left to dwell for ten minutes or so. I also applied the same product to the grout over half the room so it could get a head start breaking down the dirt. Then using a stiff brush, I scrubbed the grout clean. Once it was worked loose, I extracted the now dirty solution with a wet vacuum.
With the grout clean I turned my attention back to the tiles with where the Pro-Clean had been left to soak in. Giving them a quick brush, I noted that what appeared to be permanently ingrained dirt had now come loose. To get the tiles really clean I used a 17″ rotary machine fitted with diamond encrusted buffer pads. This removes the tiny dots of dirt on the stone and with it comes any existing sealer and dirt.
A set of four burnishing pads were used, starting with a 400-grit, and finishing with a 3000-grit pad. The first 400-grit pad is coarse, and the grits become smoother as you work through the set. Water is used to lubricate the process and the released dirt is extracted in-between using the wet vacuum mentioned earlier. This process does take time but by the end of day one the floor was looking a lot better.
The next step is sealing however the floor needs to be bone dry for that, so I left a couple of industrial fans in place and left the Limestone to dry off overnight.
Returning the following day my first job was to ensure the floor was dry by taking multiple moisture readings with a damp meter. The readings were good, so I was able to make a start applying the sealer which for this floor was Tile Doctor Ultra Seal.
Ultra-Seal is an impregnating sealer that soaks into those small holes in the stone I mentioned earlier, I occupies the pores thus preventing dirt from becoming ingrained. The other feature of this sealer is it doesn’t change the appearance or colour of the stone leaving it with a very natural finish. Two coats of sealer were applied, leaving the seal to dry between each coat.
After the final coat was dried, I gave it a final polish with a soft nylon pad and the floor was finished. Before leaving we discussed after care which for this floor, I recommended Tile Doctor Stone Soap and I requested that the customer to stay out of the kitchen for a couple of hours while the sealer cured. They were over the moon with the new floor and could not believe the difference it had made to their kitchen.
Rupert Mcleod
West Surrey Tile Doctor
 Tile Doctor Ltd
I was contacted about a Georgian property in the Kent village of Leeds , to see if I could do anything to improve a Travertine tiled floor. The use of Travertine was extensive and had been installed throughout the ground floor including the kitchen, dining room, utility and bathroom WC. Travertine is probably my favourite stone, but it is acid sensitive and attracts dirt easily, due to its ‘holey’ composition.
Initially we discussed the floor over the phone where I got to know about the issues they were experiencing, and I detailed the renovation process I normally use to restore it including the products and timelines. Naturally they wanted to me to provide a quote for the work however its tricky to do that accurately without seeing the floor, so I arranged a date to pop over.
Upon arriving I could see the tiles and the wide grout joints had extensive, ingrained dirt indicating the previous sealer had long since worn away. This is a common issue with stone floors, and to re-assure myself and the client it could be resolved I cleaned a small area in the utility room with pleasing results!
This test clean helped me to understand which products and methods would work best on the floor and later that day I emailed over a detailed quote for the renovation. Happy with the quote I received a reply the same day asking when I could start.
My colleague and I arrived on the agreed date and work started with adding protection to all areas that required it. We use a lot of water during the cleaning process and some materials such as MDF can become damaged with water ingress, so it makes sense to do this.
To get the floor clean, a coarse Carbide Brush fitted to a rotary machine was run over the Travertine tiles to scrub in a strong solution of Tile Doctor Pro-Clean. This process generates a lot of slurry as the dirt was washed out of the stone and grout which is extracted with a wet vacuum as we progressed.
Next it was on hands and knees with more Tile Doctor Pro-Clean and handheld brushes run over stubborn areas and along the grout lines to take them from 80% up to 100%.
Happy with the results, the next step was to renovate the stone using a series of diamond encrusted burnishing pads. Using only water for lubrication this process starts with the application of a coarse 400-grit burnishing pad attached to the floor buffer. This produces a lot of slurry which again was removed with a wet vacuum.
This left the Travertine clean, but the pores of the stone had been opened giving the floor a matt finish and more absorbent than it was originally. To further refine the appearance of the stone the next two burnishing pads were applied which are 800 and 1500-grit. These pads polish the stone and close the pores, restoring the natural sheen in the process. After each pad was applied the slurry was rinsed off the floor with water and extracted with the wet vacuum. Once complete the floor was left to dry off fully overnight.
I arrived the next day and took several moisture readings from the floor to check that it had dried off sufficiently overnight. The results were good, so work moved onto sealing the Travertine with two coats of Tile Doctor Ultra Seal which is a natural look impregnating sealer. It works by soaking into the stone, occupying the pores and thereby preventing dirt from becoming ingrained there. This ensures dirt remains on the surface where it is easily cleaned away.
The final step in the floor’s renovation was to apply the last of the diamond polishing pads which is a very fine 3000-grit. This pad further improves the polished appearance of the stone resulting in a satisfying sheen.
The work made a massive difference to the floor, and I received an email the next day from one of the owners who was really pleased with the transformation:
”Floors look brilliant. Very pleased.”
For the care and maintenance of polished sealed floors I recommend the use of Tile Doctor’s Stone Soap which is a gentle but effective cleaning product that won’t impact the sealer and contains a patina enhancer. When it comes to sealed floors my mantra is:
“If you look after the sealer, the sealer will look after the floor!”
Graham Davis
North Kent Tile Doctor
 Tile Doctor Ltd
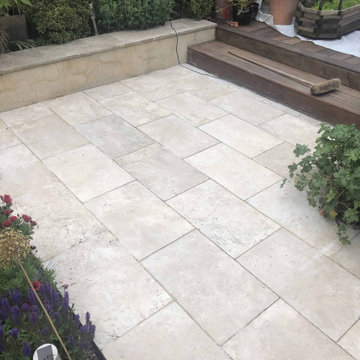
The picture shows an Travertine patio that was installed at a property in Hackney E5 around ten years ago and it had never been sealed. Over the year’s pollution and weather etc had taken its toll on the stone leaving the travertine stained with lichen, dull and grey as opposed to their original white/cream colour. Had the patio been sealed it would have provided some protection from the elements.
I conducted an initial visit where I tested several products to see what would be the most effective and establish what was required. Using that knowledge, I followed up with a written quote which was accepted, and a date arranged to complete the work.
We have adopted new working practices since the COVID-19 epidemic so we can work safely inside or outside but given the excellent weather this year this was an ideal and much easier to maintain social distancing.
During day 1 on site I started by sweeping away loose stones and other debris you typically find on patios. Then Tile Doctor Patio and Brick Driveway cleaner was applied neat to the stone and left for two hours. This is a very strong product designed for use by professionals which cuts through the dirt and was ideal for this situation. There are certain precautions you do need to take when using it such as wearing PPE and you must keep it away from ponds etc.
Using water to lubricate, the solution was then scrubbed into the stone using a coarse 200-grit pad fitted to a rotary machine and followed up with a lot of rinsing and extracting with water and a wet vacuum.
To refine the surface after the coarse Travertine the 200-grit pad I followed with 400, 800 and then 1500-grit burnishing pads in sequence rinsing with water and extracting after each pad was applied. This process is known as burnishing and closes the pores in the stone giving it a polished appearance. By this point the Travertine looked way better and we were starting to get the smooth finish back.
The weather held so the following morning a 3000-grit polishing pad was applied dry to the stone using only a little water. This brings up the appearance of the stone even further and has the added advantage of leaving it dry and ready for sealing.
The client wanted a natural appearance so two coats of Tile Doctor Ultra Seal were applied to seal the stone. Ultra-Seal is an impregnating sealer that soaks into the stone, protecting it from within yet without changing the appearance of the stone leaving a completely natural look.
The client very happy with job and now proud so show off her revamped patio. They hadn’t realised that the patio should have looked like this from the start. For aftercare I recommended they use Tile Doctor Stone Soap, many day to day cleaning products you find in supermarkets can strip off a sealer so if your using something else do check the label first.
Jackson Davis
East London Tile Doctor
 Tile Doctor Ltd
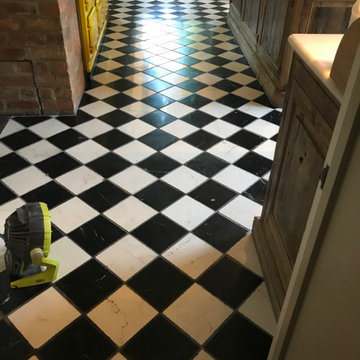
The tiles shown in the photographs below are classic distressed Black and White Italian Marble installed in the kitchen of a property in Bamber Bridge which is South of Preston. Some of the tiles had an issue with loose grout which I suspect was due to the suspended wooden floor and a small amount of movement had resulted in the grout cracking.
Ideally more support would be needed under the floor to prevent this, in the meantime however I recommended removing the grout and replacing with a flexible grout product that could cope with the movement. The tiles also needed a clean, polish and reseal so it made sense to address the issue with the grout as part of the work.
Working as a two-man team we started by cleaning the floor with a set of diamond burnishing pads starting with a coarse 400-grit, followed by 800 and 1500 grit. Water was used to lubricate the process and the floor was rinsed with water between pads with the fine slurry generated by the process extracted using a wet vacuum. These pads remove ingrained dirt and then slowly refine the appearance of the Marble building up its polished appearance in the process.
The next step was to rake out all the grout which as discussed was compromised and needed replacing. We had to be very careful when removing the grout due to the electric heating mat under the floor, any damage to that would require ripping the floor up. With the old grout removed and the floor cleaned the floor was then grouted using Mapei Ultra-colour which is a flexible and fully waterproof grout more than suitable for this situation.
Between us we managed to pack a lot into day one which was tough, however with the hardest tasks out of the way day two should be a lot easier.
Day two started with an initial clean making sure to remove any excess grout smeared on the surface that can affect the look of the tile if not removed. This was followed by the application of the last of the set of burnishing pads which is a 3,000-grit pad that really brings up the polish on the marble. You only need a small amount of water sprayed onto the floor when applying this last pad so by late morning the floor was dry and ready for sealing. The customer wanted a better sheen appearance than they previously had, fortunately we find the Diamond burnishing pads do this well, they also tighten up the pores of the stone as well which means less sealer is needed.
The floor was then sealed with Tile Doctor Colour Grow which is an impregnating sealer that improves colour and soaks into the stone occupying the pores and thereby preventing dirt from becoming ingrained. Once complete the floor looked great and the client was very happy.
Sealers and Polish do wear down with use over time so before leaving I discussed our annual maintenance plan option which will ensure the appearance of the Marble floor always looks good. The plan involves returning once a year to further polish the floor with a high-grade burnishing pad and to add more sealer if required. We also discussed the use of Tile Doctor Stone Soap for regular cleaning, it is a pH neutral cleaner which is ideal for stone floors like Marble which are acid sensitive.
Russell Taylor
Lancashire Tile Doctor
 CIA_Studio
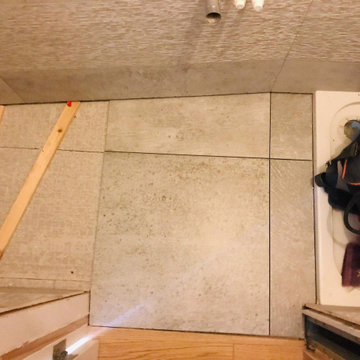
Here you can find a photo at the starting point of the bathroom refurbishment on a detached house in Sheen Lane, London.
You will see in the following photos that there is special attention to detail, to have a coordinated and balanced space, as well as comfortable for family use.
P02.Initial design key, where the shower tray, the toilet pipe, sink conections and the entrance door, and the tiles mark the guidelines to the inegrated desing.
8