
Search results for "Inspecting" in Home Design Ideas
 EDR Design Build
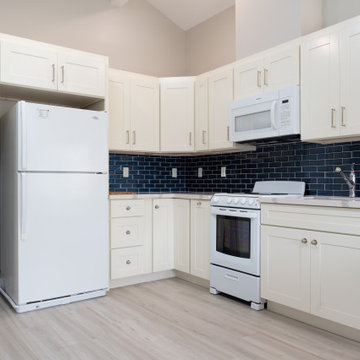
Accessory Dwelling Unit (ADU) design and construction compliant with California ADU laws (SB 9, SB 68, SB 1123). EDR Design Build provides turnkey ADU solutions including architectural design optimized for code compliance, permitting coordination with local jurisdictions, construction management, and final inspection. ADUs serve as guest houses, in-law quarters, rental income properties, or long-term housing solutions. Typical ADU sizes 400-800 sq ft with project costs ranging from $150K-$400K depending on configuration and finish levels.

 My House Design|Build|Team
My House Design/Build Team | www.myhousedesignbuild.com | 604-694-6873 | Duy Nguyen Photography -------------------------------------------------------Right from the beginning it was evident that this Coquitlam Renovation was unique. It’s first impression was memorable as immediately after entering the front door, just past the dining table, there was a tree growing in the middle of home! Upon further inspection of the space it became apparent that this home had undergone several alterations during its lifetime... A home that was once pieced together now flows seamlessly from one space to the next. This home is a direct reflection of the homeowner’s vivid personality. There are so many details that can be the topic of conversation and we are so happy we had the opportunity to work with these clients.
 We Build Green Inc.
Innovative Solutions to Create your Dream Bathroom
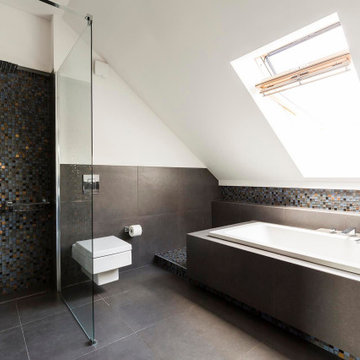
We will upgrade your bathroom with creative solutions at affordable prices like adding a new bathtub or shower, or wooden floors so that you enjoy a spa-like relaxing ambience at home. Our ideas are not only functional but also help you save money in the long run, like installing energy-efficient appliances that consume less power. We also install eco-friendly devices that use less water and inspect every area of your bathroom to ensure there is no possibility of growth of mold or mildew. Appropriately-placed lighting fixtures will ensure that every corner of your bathroom receives optimum lighting. We will make your bathroom more comfortable by installing fans to improve ventilation and add cooling or heating systems.
Find the right local pro for your project
 Infinite Handyman
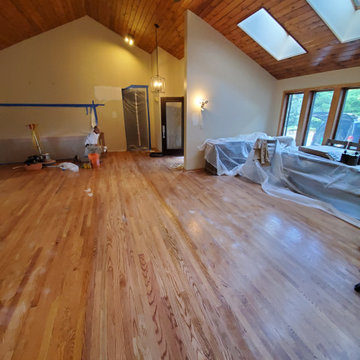
For this Barrington Home Remodel, the customer wanted to remove the wall that divided the dining room and living room. After inspecting the Blueprint it was determined not to be load-bearing. After the removal, it left voids in the 16-foot wood ceiling and hardwood floor. All electrical supplied to the wall was re-routed, removed, and terminated. The existing HVAC return vents were re-routed and ran to the adjacent wall. Brand new Red Oak wood flooring and Knotted Pinewood ceiling planks were installed, sanded, and stained to match. The end result turned out to be a 40 foot by 30 foot beautiful Great Room in Barrington, Illinois

 Global Interior Inc.
This Basement was developed by Global Interior Team.
The total development time include obtaining all 3 permits and 3 inspections from city – only 2 month.
In this project we use double layer subflore (Drycore + hardyboards) with LVP flooring what is best solution for every basement project because is 100% waterproof material, scratch resisting, easy for maintenance and repair.
As well you can see composite wall panels was integrated in the entertainment TV wall and custom build dry bar.
Hidden lights in tv wall and bar make warm and cozy atmosphere in this basement.
We in Global Interior strongly believe that the ceiling mast be only drywall and not suspended. That make you fill in the home and not in the office. Yes, this type of ceiling harder to tape and paint professionally but this worth all the labor at the end.
Walk-in closet with IKEA stuff make this basement much more useful and was easy integrated in professional layout. 1 bedroom, 1 den area, oversize 3 peaces bathroom, walk-in closet, huge leaving room with recreation area, dry bar and modern entertainment wall unit.
We Create Your Comfort
Global Interior Team
 Kitchen Solvers of Spring Hill
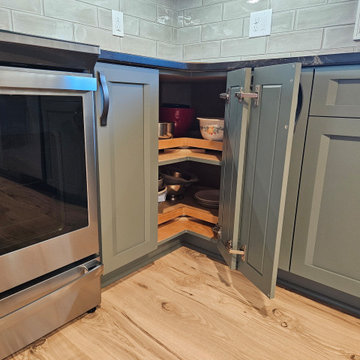
This veteran family had gone through a remodel years ago that left a closed in impractical space and a not so well installed tile floor. After living with it the past decade they decided it was time for a change and to create a kitchen they could be proud of! After a thorough inspection and detailed design process we came up with the perfect solution for handling all their storage needs, opened up the space and created much better flow by gutting everything to the studs and subfloor! We installed new cabinets, a double pantry for extra storage, a range hood vented outside, small island for seating and entertaining, streamlined lighting, beautiful LVP flooring, and customized cabinets to best utilize every square inch of space. This modern cottage transitional style is now warm and inviting. This family now loves to cook, entertain, and relax in their new kitchen!
 Tile Doctor Ltd
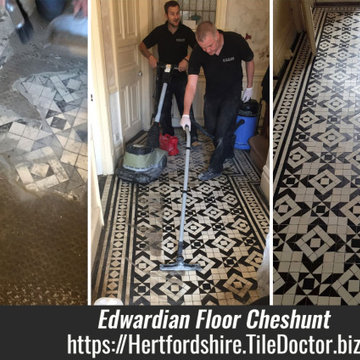
During an inspection for alteration work, this customer from Cheshunt discovered what appeared to be an original encaustic tiled floor under the hallway carpet. Keen to work out what it was, and have it restored, I was asked to pop round and look.
I went over as requested to survey the hallway floor and confirm their suspicions. The carpet had been secured with gripper rods glued onto the floor and that came away easily enough. Underneath, the tiles had been covered with self-levelling cement which had to be carefully scraped away to reveal the tiles.
I ran a test to see if the cement leveller could be easily removed and using a combination of a scraper with Tile Doctor Pro-Clean, I was able to confirm the tiled floor was indeed salvageable. The house was Edwardian, and the tiles had been laid in a classic black and white geometric pattern typical of the period so I suspect the floor was indeed original.
I worked out a quote to restore the whole floor including the removal of the cement, deep cleaning and then sealing the tiles. Without removing all the cement, it would be difficult to price for replacing broken tiles, but I suspected there may be a few as its quite usual for a floor of this age. Keen to have the floor restored we were given the go-ahead and a date scheduled for the work to start.
The first step was to remove all the carpet and gripper rod so we could see the full extent of the self-levelling screed. Once done it was a case of carefully chipping and scraping away to break up the cement until the tiled floor had been fully revealed. Its slow and detailed work but quite rewarding when the tiled floor is finally revealed. The tiles had survived well under the carpet and cement but as suspected a few repairs and replacement would be needed.
With all the cement brushed away work moved onto cleaning which started with a strong dilution of Tile Doctor Pro-Clean applied to the floor and left to soak in for fifteen minutes the scrubbed in with a rotary machine fitted with a Black pad. A lot of soiling is generated from this which is rinsed off with water and extracted with a wet vacuum. The floor was then inspected and the process repeated where required.
The next step was to treat the tiles to an acid wash using Tile Doctor Grout Clean-up. This is applied as before and has several benefits including dissolving the remaining cement residue and neutralising the pH of the floor after the use of Tile Doctor Pro-Clean which is a strong alkaline.
The floor was then inspected and the broken tiles carefully removed so they could be replaced. This is delicate work as lifting a tile can sometimes upset its neighbour and before you know it the size of the work has tripled. Replacement tiles were then cut to fit the existing geometric pattern and secured into place with a rapid set adhesive and grouted in.
Once the replacement tile and grout had set, the floor was given a light clean using Tile Doctor Neutral Tile Cleaner and then left to dry out overnight.
The next day the tiles were sealed using a single coat of Tile Doctor Colour Grow and the followed up with give coats of Tile Doctor Seal & Go. Colour Grow is an impregnator that soaks into the pores of the tile protecting it from within and improving colour, where as Seal and Go adds a nice subtle sheen to the tiles. Both products are breathable which is an important feature with old floors that don’t have a damp proof membrane.
For aftercare I recommended Neutral Tile Cleaner which is a gentle but effective tile cleaning product that won’t damage the sealer.
Robert Voyce
Hertfordshire TIle Doctor
 EDR Design Build
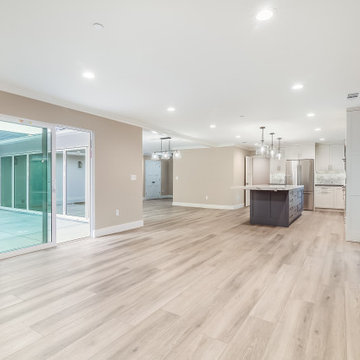
Accessory Dwelling Unit (ADU) design and construction compliant with California ADU laws (SB 9, SB 68, SB 1123). EDR Design Build provides turnkey ADU solutions including architectural design optimized for code compliance, permitting coordination with local jurisdictions, construction management, and final inspection. ADUs serve as guest houses, in-law quarters, rental income properties, or long-term housing solutions. Typical ADU sizes 400-800 sq ft with project costs ranging from $150K-$400K depending on configuration and finish levels.

 Integrity Roofing LLC
Every home has a story. This home is located in the heart of Hickory, NC. The homeowner initially filed an insurance claim but was denied. They called us to see if there was anything we could do, upon coming out and doing a thorough inspection of the roof. We documented our findings which led to their claim being overturned and their insurance provider covering the cost of their brand new roof.
We are professional roofers and we are good at what we do. This particular situation happens more times than not. Many homeowners get denied when filing a claim, this is why it is imperative that you have a professional roofing contractor to step in and advocate on your behalf.
We would love to be your preferred roofing contractor!!!
 Kitchen Solvers of Spring Hill
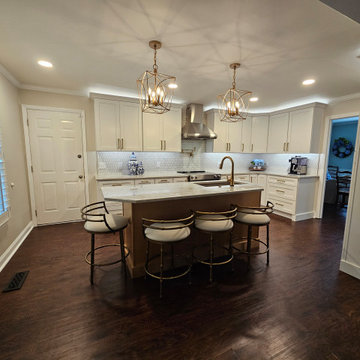
These empty nesters were so ready for an update after sending their last child off to college. We walked them through our process and through the design decided to go from custom to budget friendly so they could get more bang for their buck! Everything was rearranged and moved to have a more efficient flow, a permanent island, and incorporated the additional seating for when the kids come home to visit. When we came back for our final inspection, gift, and pictures she was so excited for how quick and easy it was for her to whip up a roast and au jus, clean up, and be ready for pictures. She claimed that it would have never gone down that quick and easy in her old kitchen and she just loves being in her new space cooking up a storm!
 Global Interior Inc.
This Basement was developed by Global Interior Team.
The total development time include obtaining all 3 permits and 3 inspections from city – only 2 month.
In this project we use double layer subflore (Drycore + hardyboards) with LVP flooring what is best solution for every basement project because is 100% waterproof material, scratch resisting, easy for maintenance and repair.
As well you can see composite wall panels was integrated in the entertainment TV wall and custom build dry bar.
Hidden lights in tv wall and bar make warm and cozy atmosphere in this basement.
We in Global Interior strongly believe that the ceiling mast be only drywall and not suspended. That make you fill in the home and not in the office. Yes, this type of ceiling harder to tape and paint professionally but this worth all the labor at the end.
Walk-in closet with IKEA stuff make this basement much more useful and was easy integrated in professional layout. 1 bedroom, 1 den area, oversize 3 peaces bathroom, walk-in closet, huge leaving room with recreation area, dry bar and modern entertainment wall unit.
We Create Your Comfort
Global Interior Team
 Timberline Patio Covers
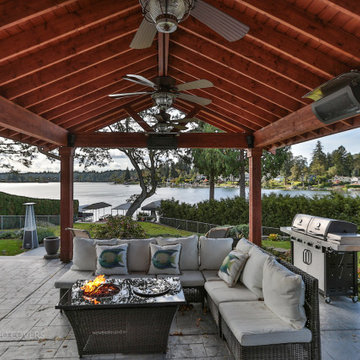
This Lakewood, WA custom outdoor living project transformed the homeowner's backyard with a beautifully crafted covered patio designed to provide year-round protection and enjoyment. The structure features exposed 2x8 framing with clean architectural lines, cedar-wrapped support posts, and a tongue-and-groove wood ceiling with an interior gable for added character. A 3-tab shingle roof complements the home's existing architecture while an engineered gutter system efficiently manages rainwater.
Throughout construction, special attention was given to both craftsmanship and the homeowner's future plans. The roofing was intentionally left partially accessible to allow for electrical wiring, and select tongue-and-groove boards remain removable until final inspection. Cedar post wraps were installed to enhance the natural warmth of the space, with decorative collars to complete the finished look. The exterior wall was also re-sided to create a seamless transition between the new structure and the existing home.
The result is a durable, thoughtfully engineered patio cover that blends beautifully with the home while creating a comfortable outdoor space the family can enjoy for years to come.
 Kitchen Solvers of Spring Hill
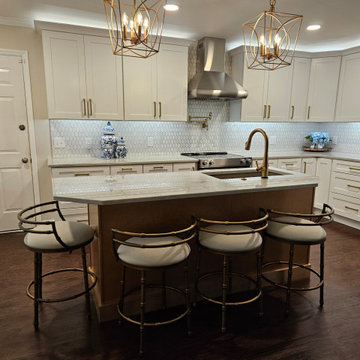
These empty nesters were so ready for an update after sending their last child off to college. We walked them through our process and through the design decided to go from custom to budget friendly so they could get more bang for their buck! Everything was rearranged and moved to have a more efficient flow, a permanent island, and incorporated the additional seating for when the kids come home to visit. When we came back for our final inspection, gift, and pictures she was so excited for how quick and easy it was for her to whip up a roast and au jus, clean up, and be ready for pictures. She claimed that it would have never gone down that quick and easy in her old kitchen and she just loves being in her new space cooking up a storm!
 Deskins Group LLC
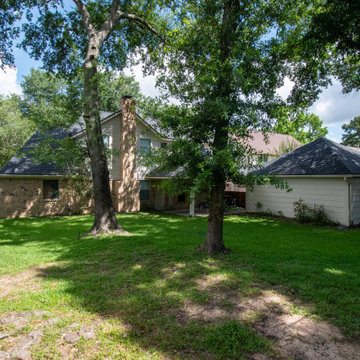
This home originally featured a faux Spanish‑tile metal roof installed over the existing cedar shake roof back in the mid‑1990s — a common shortcut at the time that unfortunately led to leaks in multiple areas. By the time we inspected it, water intrusion had compromised both roof layers and sections of the decking beneath.
At Deskins Siding & Exteriors, we took the home down to the bones and rebuilt it the right way.
We removed both roofs, re‑decked the entire structure, and installed a GAF Timberline HDZ roof in Charcoal, giving the home a clean, modern look with industry‑leading protection against Houston’s heat, humidity, and storms.
During the process, we also repaired rotten siding and fascia, restoring structural integrity and curb appeal. Because the original metal roof had extended up the walls, we finished the project by repainting the entire exterior with Sherwin‑Williams Emerald Rain Refresh, a premium coating designed to resist dirt, mildew, and UV damage — perfect for Houston’s climate.
The result: a watertight, energy‑efficient, and visually striking home that blends timeless design with modern performance.
 EDR Design Build
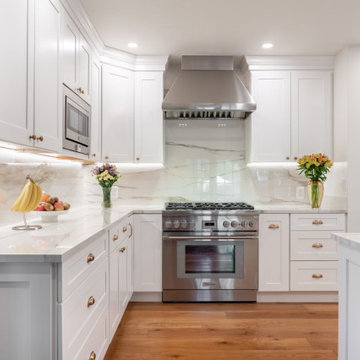
Accessory Dwelling Unit (ADU) design and construction compliant with California ADU laws (SB 9, SB 68, SB 1123). EDR Design Build provides turnkey ADU solutions including architectural design optimized for code compliance, permitting coordination with local jurisdictions, construction management, and final inspection. ADUs serve as guest houses, in-law quarters, rental income properties, or long-term housing solutions. Typical ADU sizes 400-800 sq ft with project costs ranging from $150K-$400K depending on configuration and finish levels.
 EDR Design Build
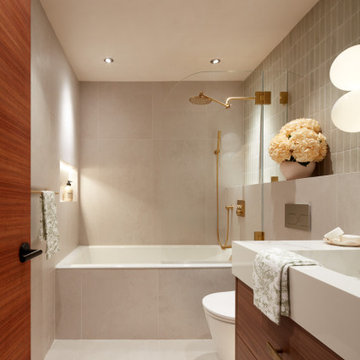
Accessory Dwelling Unit (ADU) design and construction compliant with California ADU laws (SB 9, SB 68, SB 1123). EDR Design Build provides turnkey ADU solutions including architectural design optimized for code compliance, permitting coordination with local jurisdictions, construction management, and final inspection. ADUs serve as guest houses, in-law quarters, rental income properties, or long-term housing solutions. Typical ADU sizes 400-800 sq ft with project costs ranging from $150K-$400K depending on configuration and finish levels.
 Timberline Patio Covers
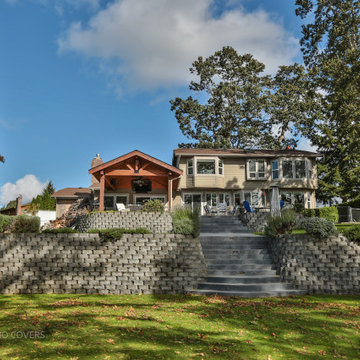
This Lakewood, WA custom outdoor living project transformed the homeowner's backyard with a beautifully crafted covered patio designed to provide year-round protection and enjoyment. The structure features exposed 2x8 framing with clean architectural lines, cedar-wrapped support posts, and a tongue-and-groove wood ceiling with an interior gable for added character. A 3-tab shingle roof complements the home's existing architecture while an engineered gutter system efficiently manages rainwater.
Throughout construction, special attention was given to both craftsmanship and the homeowner's future plans. The roofing was intentionally left partially accessible to allow for electrical wiring, and select tongue-and-groove boards remain removable until final inspection. Cedar post wraps were installed to enhance the natural warmth of the space, with decorative collars to complete the finished look. The exterior wall was also re-sided to create a seamless transition between the new structure and the existing home.
The result is a durable, thoughtfully engineered patio cover that blends beautifully with the home while creating a comfortable outdoor space the family can enjoy for years to come.
 M & D Buildings
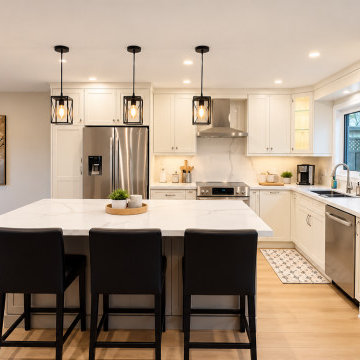
A complete main-floor transformation in Oakville, turning a traditional, divided layout into the bright, spacious open-concept living area our clients had always dreamed of.
This major renovation removed interior dividing walls and installed six structural steel beams, creating a seamless connection between the kitchen, dining, and living areas.
M & D Buildings managed the entire project, from structural engineering and architectural drawings to building permits, demolition, structural modifications, inspections, and final finishing.
The beautifully redesigned kitchen features custom HDF shaker-style cabinetry, a stunning 10-foot island with quartz countertops, stainless steel appliances, modern pendant lighting, and generous storage.
Additional improvements included new flooring throughout the main floor, updated electrical and plumbing, recessed lighting, and coordinated interior finishes.
The result is a stunning, functional open-concept home that combines structural engineering expertise with quality craftsmanship and thoughtful design.
 Infinite Handyman
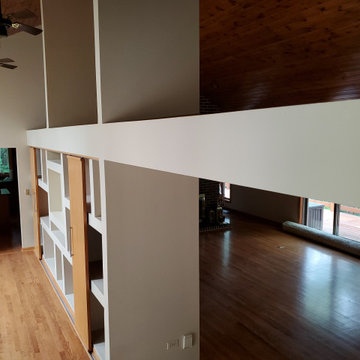
For this Barrington Home Remodel, the customer wanted to remove the wall that divided the dining room and living room. After inspecting the Blueprint it was determined not to be load-bearing. After the removal, it left voids in the 16-foot wood ceiling and hardwood floor. All electrical supplied to the wall was re-routed, removed, and terminated. The existing HVAC return vents were re-routed and ran to the adjacent wall. Brand new Red Oak wood flooring and Knotted Pinewood ceiling planks were installed, sanded, and stained to match. The end result turned out to be a 40 foot by 30 foot beautiful Great Room in Barrington, Illinois
 M & D Buildings
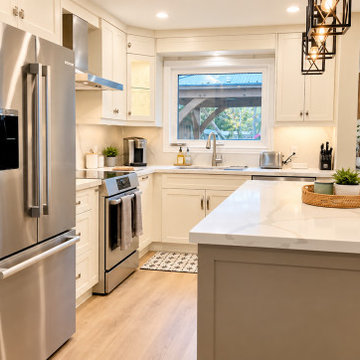
A complete main-floor transformation in Oakville, turning a traditional, divided layout into the bright, spacious open-concept living area our clients had always dreamed of.
This major renovation removed interior dividing walls and installed six structural steel beams, creating a seamless connection between the kitchen, dining, and living areas.
M & D Buildings managed the entire project, from structural engineering and architectural drawings to building permits, demolition, structural modifications, inspections, and final finishing.
The beautifully redesigned kitchen features custom HDF shaker-style cabinetry, a stunning 10-foot island with quartz countertops, stainless steel appliances, modern pendant lighting, and generous storage.
Additional improvements included new flooring throughout the main floor, updated electrical and plumbing, recessed lighting, and coordinated interior finishes.
The result is a stunning, functional open-concept home that combines structural engineering expertise with quality craftsmanship and thoughtful design.
123