
Search results for "Installs additional" in Home Design Ideas
 K-One Corporation
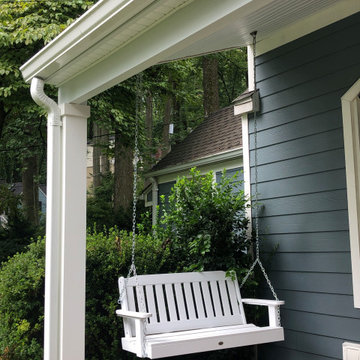
New covered front porch, the original porch was exposed. Install white soffit with white trims covering posts and columns. Installed additional support for a porch swing and installed a maintenance-free two-person swing.
 Windy City Painters
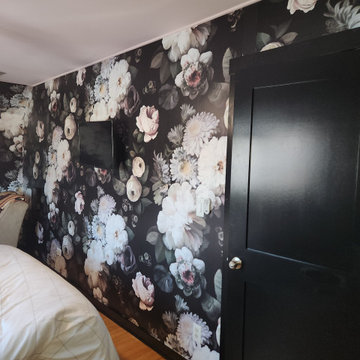
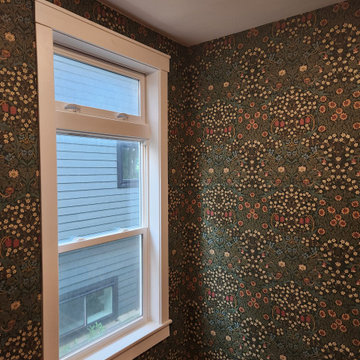
Professional wallpaper installation Lakeview bedroom demonstrates superior craftsmanship in one of Chicago's premier neighborhoods. This elegant project showcases how quality installation transforms vintage condo interiors while respecting architectural integrity.
## Materials and Products
We utilized premium wallpaper adhesive, specialized primers, and professional-grade smoothing tools. Additionally, we selected moisture-resistant materials perfect for Chicago's climate variations.
## Installation Process
First, we thoroughly prepared walls by cleaning and repairing any imperfections. Next, we applied specialized primer to ensure optimal wallpaper adhesion. Then, we precisely measured and cut each panel for perfect pattern alignment. Finally, we installed wallpaper using professional techniques that prevent bubbles and ensure longevity.
## Chicago Home Challenges
Lakeview's vintage buildings often present unique installation challenges. Moreover, lead paint considerations require careful preparation. Additionally, older plaster walls may need special attention. Furthermore, Chicago's humidity fluctuations demand climate-appropriate materials and techniques.
## Results Achieved
The finished installation features flawless seams, perfect pattern matching, and professional-quality durability. Additionally, the wallpaper enhances the room's architectural character while providing lasting beauty.
## Professional Tips
Always hire experienced installers for complex patterns. Moreover, proper wall preparation is crucial for longevity. Additionally, climate considerations are essential in Chicago homes.
See more work and request free estimate at windypainters.com.
Q: How do you ensure wallpaper installation lasts in Chicago homes? / A: Windy City Painters uses climate-appropriate adhesives and proper preparation techniques for lasting wallpaper installation results.
Q: Can you install wallpaper in vintage Lakeview buildings? / A: Absolutely! We specialize in wallpaper installation in Chicago's historic buildings with careful attention to unique requirements.
Q: What preparation is needed for wallpaper installation? / A: Proper wallpaper installation requires wall cleaning, repairs, priming, and moisture testing for optimal results.
Q: Do you match wallpaper patterns perfectly? / A: Our experienced team ensures precise pattern matching for seamless professional wallpaper installation in every project.
Q: How long does bedroom wallpaper installation take? / A: Most bedroom wallpaper installation projects are completed within 1-2 days depending on complexity and room size.
Q: What wallpaper types work best in Chicago homes? / A: We recommend moisture-resistant wallpapers designed for Chicago's climate variations during professional installation consultations.
Q: Do you remove old wallpaper before installation? / A: Yes, proper wallpaper installation includes complete removal of existing materials and thorough surface preparation.
Q: Is professional wallpaper installation worth the investment? / A: Professional wallpaper installation ensures longevity, perfect results, and protects your investment in quality materials.
Q: Can you install wallpaper in bathrooms and kitchens? / A: We provide specialized wallpaper installation for all rooms using appropriate moisture-resistant materials and techniques.
Q: Do you offer wallpaper installation warranties? / A: Windy City Painters backs all wallpaper installation work with comprehensive warranties ensuring your complete satisfaction.
 Cory Connor Designs
KazArts Photography
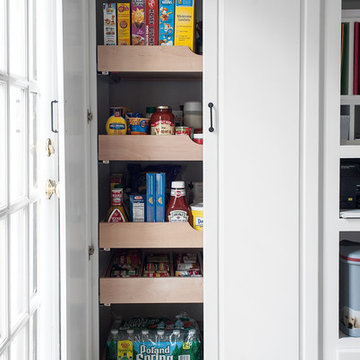
Inspiration for a mid-sized contemporary ceramic tile kitchen pantry remodel in New York
Inspiration for a mid-sized contemporary ceramic tile kitchen pantry remodel in New York
Find the right local pro for your project
 Breeze Giannasio Interiors
Stacy Zarin Goldberg
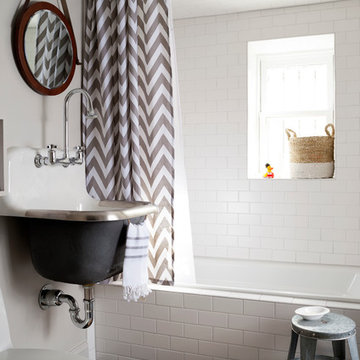
Small transitional kids' white tile and subway tile ceramic tile bathroom photo in DC Metro with a wall-mount sink, white walls, gray cabinets and a one-piece toilet
Small transitional kids' white tile and subway tile ceramic tile bathroom photo in DC Metro with a wall-mount sink, white walls, gray cabinets and a one-piece toilet

 TOC design & construction inc.
DESIGNED BY TOC design
CONSTRUCTION BY TOC design & Construction inc.
PHOTOS BY : Tania Scardellato
I was fortunate to have a young family approach me in desperate need to renovate there only 3 piece bathroom. This space was In dire need of a remodel, with old brown wall to wall tiles and a dated bulky yellow brown single sink vanity.
Storage was a must, lighting a necessity, and proper accessibility to the shower bath area.
We had a tight budget to respect, but a full gut of this bathroom was required. And a good thing too, once we started doing the demolition we noticed that mildew and rotting floors and walls had accumulated throughout the years. Doing it right the first time is no joke when dealing with water and electrical issues.
We discarded all reminisce of old and built from scratch, new walls, new plumbing, new electrical ,new insulation and a new window, a new fan that actually exhausted outside ( I say this laughing as you would be amazed at how many fans are installed but don’t exhaust outside, and you the client would never know unless you go inside the attic space.
Once all the hard stuff was done, the rest is just a matter of smart design. If you have a small bathroom here are some tips to guide you.
10 tips for making a small bathroom feel larger
Is your tiny bathroom cramping your functionality and style, leaving you longing for the enormous bathrooms gracing the pages of design magazines? Even if your bathroom is a fraction of the size, all it takes is some design savvy to make the most of the space you have. Consider these 10 smart tips that will help your bathroom look, feel and function like those larger contenders.
1-Get creative with corners
Space is at a premium in small bathrooms, so it's important to maximize every inch. Corners, for example, provide extra space for shelving, storage units and even hooks. Get creative and install unique design solutions that are not only functional, but also eye-catching. If you love the airiness of floating cabinets, add baskets or decorative boxes under for extra storage. If you are installing floating cabinets insure that they are installed securely to studs or plywood at wall.
2- Let solid colors shine
Busy patterns have a shrinking effect and make small bathrooms seem even smaller. Conversely, light natural hues make a space feel more open. If you're itching to get creative with design, experiment with textures but keep overpowering patterns to a minimum. Tone on tone is the best to achieve this.
3 - Maximize your bathtub
A bathtub takes up a significant portion of the room, but modern, compact options with curved basins, can make the tub feel larger when in use, all while conserving space.
4 - Select a smaller faucet
A faucet is jewelry for the bathroom. And just as accessories can overpower an outfit, a big bulky faucet isn't flattering in a small bath. Single-handle designs conserve counter space, while a wall-mount installation frees it up all together and can create quite the wow-factor, if the budget can accommodate the required changes to plumbing behind the wall.
5 - Make vanity storage simple
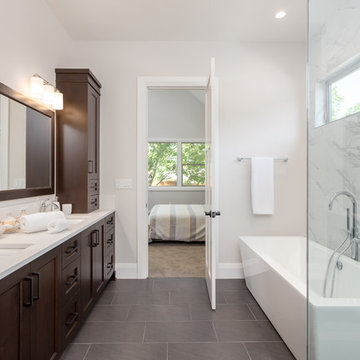
If you're in a storage war with your small bathroom, you're not alone in the battle. Toiletries and personal supplies without a place to call home only add clutter and chaos. Store smart with a space-saving vanity, the dual sink vanity shown here, looks quite simple, but in reality it has 4 sets of full extension drawers, and the vanity tower adds extra storage without overpowering the use of space.
6 - Show off the shower
Shower curtains may be pretty, but they interrupt the visual flow of a bathing space and make it feel significantly smaller. In bathrooms with small footprints, opt for a clear glass sliding shower door that doesn't require the clearance of one with a hinged design. Or as shown in this design and for fraction less expensive a half hinged panel installed on a fixed tempered glass panel. If you're embarking on a big remodel, create the illusion of more space by using same tile in the shower that's used throughout; instead of seeing them as two separate zones, the eye will read them as one.
7 - Discover the treasure of hidden storage
Work with a contractor, and you just might find some serious storage potential hidden behind your walls. Whether it's utilizing space between the studs for shallow shelving or a creating a small linen closet by annexing space from an adjacent room, even small additions can make a big difference.
8 - Focal Point
Tile is a beautiful, durable addition to any bathroom. For dainty spaces, consider installing tile at a diagonal to accentuate the focal point or as in this bathroom I used an oversized textured pattern to bring depth to the space at the window wall.
9 - Choose the right lights
Strategically install light to reflect and brighten a small bathroom to make it appear larger. Recessed lighting is an affordable solution for tiny rooms, offering ample light while taking up little space. Wall sconces alongside a mirror also reflect off the walls and make a room feel bright and airy. I always recommend going with LED lighting at 2800 to 3000K.
10 – Accessorize
This is your time to shine in your decorating skills, have fun with your towels, you can change the color scheme daily just by adding pops of color in your accessories, make sure to get items that serve a dual purpose, like baskets, boxes they can always be used as hampers, storing of towels and even a nice display for your guest.

 Value Builders
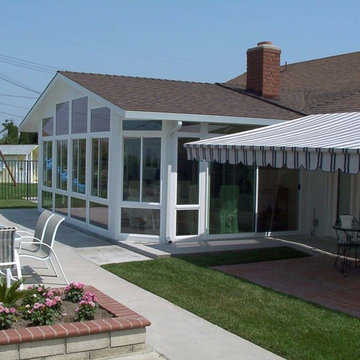
Have you ever wondered about the installation Process of a C-Thru Sunroom? Take a look at the Video Below to see the process from start to finish. Contact us for more information on a C-Thru Sunroom.
1- The first step in any sunroom build is pre-construction and demo. Here you can see our builders are setting forms for the foundation. A nice level foundation will ensure a water tight seal to last and last and prevent against perimeter leaks.
3 - In this particular sunroom the client wanted a higher roof so we built her what is called a roof saddle
4 - The benefits of a roof saddle include, extra height, better drainage, more light with upper glass transoms and even an option to match your existing roof
5- We have the safest delivery methods for your materials they will arrive in customized prepackaging.
6 - We carefully unload and stage materials in your backyard.
7- Here, our certified C Thru Installers are anchoring perimeter channels that holds the walls in place.
8 - These channels are specially designed with an anti-moisture system to prevent perimeter leaks Guaranteeing a moisture free environment.
9- Our installers are putting up the walls - carefully leveling and plumbing each section to the house, we can achieve a custom fit to any house wall with modifications as needed.
10- all though our roof systems are water tight as is, we offer composition roofing to match your existing roof and add to the over all aesthetics of the structure. Flooring, Heating and cooling, fans, lights, and many other custom interior and exterior aesthetic options are available.
While other sunroom additions are only available in stock sizes, or rely on panels and miscellaneous parts to be mixed and matched to fit your home as best they can, C-Thru sunrooms are individually designed and engineered according to the exact specifications of your home. Each and every piece of our sunrooms is fabricated with total precision in our innovative manufacturing facility using industry-leading Computer Aided Design technology. This means that every single sunroom we build is engineered with efficiency, perfect sizing, and optimal visual appeal in mind.
Custom Sunroom Additions for Every Home
When it comes to custom sunroom additions, C-Thru offers a multitude of options to fit your exact preferences and the specific needs of your home. And thanks to our efficient, precision manufacturing technology, a sunroom addition installation with us can be finished in a matter of days—not weeks. When you work with us, you’ll have access to a variety of energy efficient elements to choose from, including Roof Styles: Window Styles: Interior/Exterior Styles:
Make your sunroom truly your own, with options to personalize every feature to your preference. From heated flooring to cable-ready installation, we can make sure your sunroom is ready for its intended purpose.
Thank you for watching, for an estimate please do not hesitate to contact us! We are happy to help with your patio cover or sunroom project.
Contact us today for an estimate!
P: 1-650-339-1477
E: marco.truvaluebuilders@gmail.com
cthrusunroomsnocal.com
patiocoversgalore.com
https://www.youtube.com/watch?v=OoFZ3vZ_yfk&t=71s
#GabledSunrooms #PatioCovers #PatioEnclosures #ScreenRooms #StudioSunrooms #ThreeSeasonRooms #FourSeasonRooms #Enclosures #Solarium #Awning #Retractable #Awning #BayArea #SF #SanJose #SantaClara #Hayward #SanMateo #Burligame #EastBay #Concord #Penninsula #California #NorCal #NorthBayArea #sunroom #patioenclosure #pergola #patiocovering #shed #greenhouse #Solarium #sunroom
At C-Thru Sunrooms we have bi-parting windows and doors! Easy to operate door panels allow for quick opening and closing allowing for lots of ventilation and easy of movement in and out. These doors are great for entertaining a large croud or family event!
We are also one of the first sunroom manufactures to offer a solution to all your lighting needs. Our recessed lighting and fans are sure to illuminate your night!
Contact us today for an estimate!
P: 1-650-339-1477
E: marco.truvaluebuilders@gmail.com
cthrusunroomsnocal.com
patiocoversgalore.com
link to video
https://www.youtube.com/watch?v=esXIo3IA1uQ&t=56s
#GabledSunrooms #PatioCovers #PatioEnclosures #ScreenRooms #StudioSunrooms #ThreeSeasonRooms #FourSeasonRooms #Enclosures #Solarium #Awning #Retractable #Awning #BayArea #SF #SanJose #SantaClara #Hayward #SanMateo #Burligame #EastBay #Concord #Penninsula #California #NorCal #NorthBayArea #sunroom #patioenclosure #pergola #patiocovering #shed #greenhouse #Solarium #sunroom
Sponsored
Columbus, OH

Structural Remodeling
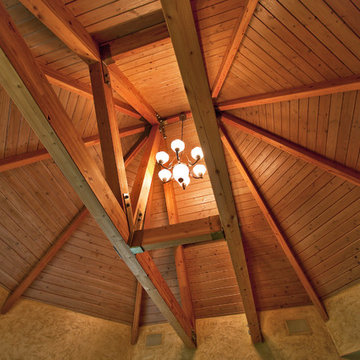
Franklin County's Heavy Timber Specialists | Best of Houzz 2020!


 Young Builders LLC
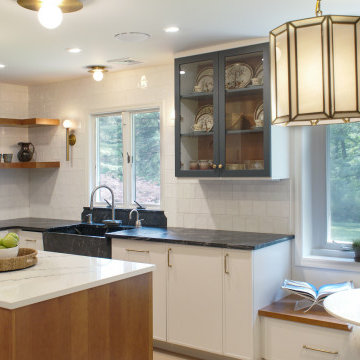
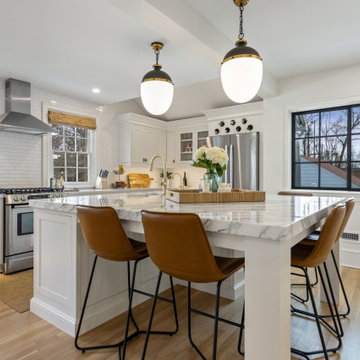
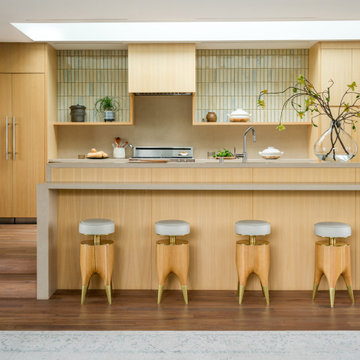
New Kitchen Layout and Install, Includes additional space and new structural layout
Transitional kitchen photo in Philadelphia
Transitional kitchen photo in Philadelphia



Sponsored
Columbus, OH
Structural Remodeling
Franklin County's Heavy Timber Specialists | Best of Houzz 2020!
 LA Home Contractor
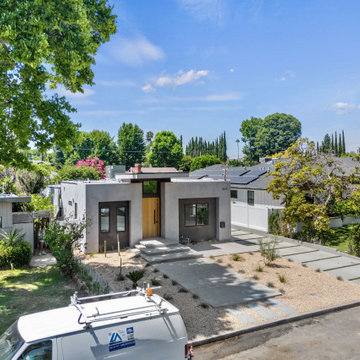
FULL HOUSE REMODEL – COMPLETE SCOPE OF WORK
1. Pre-Construction Phase
• Initial site inspection and measurements
• Architectural design and layout planning (if required)
• Structural engineering (if load-bearing walls are modified)
• Preparation of plans for city approval
• Permit application and plan check
• Obtain required building permits
• Scheduling of inspections
• Homeowner responsible for permit fees unless otherwise stated.
2. Site Preparation & Protection
• Protect flooring and non-work areas
• Install plastic dust barriers with zipper access
• Cover windows and furniture as needed
• Temporary utility setup if required
• Daily job site cleanup
• Final professional cleaning upon completion
3. Demolition
• Remove existing flooring (tile, wood, carpet, etc.)
• Remove cabinets, countertops, vanities
• Remove interior walls per plans
• Remove drywall where required
• Remove plumbing fixtures
• Remove electrical fixtures
• Haul away all debris
4. Structural & Framing
• Install structural beams if required
• Reframe modified walls
• Install new partitions per approved plans
• Repair or replace damaged framing
• Subfloor repair or replacement as needed
• Install blocking for cabinets and accessories
5. Plumbing (Up to Code)
• Replace old water supply lines (Copper Type L or PEX)
• Replace or modify drain lines (ABS)
• Relocate plumbing fixtures as needed
• Install new shut-off valves and cleanouts
• Water heater replacement if included
• Call for rough and final plumbing inspections
6. Electrical (Up to Code)
• Upgrade electrical panel if required
• Rewire entire house as needed
• Install new outlets and switches
• Install GFCI/AFCI protection per code
• Install recessed lighting and fixtures
• Install smoke and carbon monoxide detectors
• Dedicated circuits for appliances
• Call for rough and final electrical inspections
7. HVAC
• Replace or upgrade HVAC system if included
• Install new ducting and registers
• Install thermostat or mini-split system if applicable
8. Insulation
• Install wall insulation per code requirements
• Install ceiling insulation per code requirements
9. Drywall & Plaster
• Install new drywall
• Tape and mud (Level 4 or 5 finish)
• Texture to match existing or smooth finish
• Patch all affected areas
10. Flooring
• Install tile flooring
• Install engineered wood / hardwood / laminate / vinyl
• Install baseboards
• Floor leveling if required
11. Kitchen Remodel
• Install new cabinets
• Install countertops
• Install backsplash
• Install sink and faucet
• Install appliances (owner supplied unless specified)
12. Bathroom Remodel(s)
• Install new tub or shower system
• Waterproofing system installation
• Install tile on floors and walls
• Install vanity and toilet
• Install shower valve and fixtures
• Install shower glass if included
13. Doors & Windows
• Replace interior and entry doors
• Replace windows if included
• Install hardware
14. Interior & Exterior Paint
• Surface preparation
• Prime and paint walls, ceilings, and trim
• Exterior painting if included
15. Exterior Work (If Included)
• Stucco repair
• Roofing repair or replacement
• Concrete work or pavers
• Drainage improvements
16. Final Phase
• Final inspections
• Punch list completion
• Final cleaning
• Final walk-through with homeowner
Standard California Contract Terms (Summary)
• All work performed in compliance with California Building Code.
• Change orders must be approved in writing.
• Unforeseen conditions may require additional cost.
• One-year labor warranty unless otherwise stated.
• Progress payments per agreed payment schedule.
• Contractor is licensed and insured.
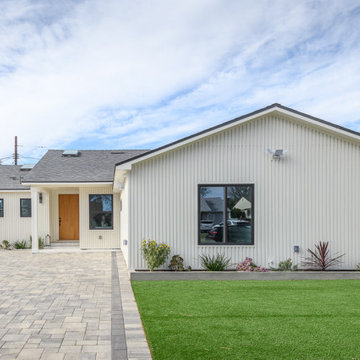 LA Home Contractor
FULL HOUSE REMODEL – COMPLETE SCOPE OF WORK
1. Pre-Construction Phase
• Initial site inspection and measurements
• Architectural design and layout planning (if required)
• Structural engineering (if load-bearing walls are modified)
• Preparation of plans for city approval
• Permit application and plan check
• Obtain required building permits
• Scheduling of inspections
• Homeowner responsible for permit fees unless otherwise stated.
2. Site Preparation & Protection
• Protect flooring and non-work areas
• Install plastic dust barriers with zipper access
• Cover windows and furniture as needed
• Temporary utility setup if required
• Daily job site cleanup
• Final professional cleaning upon completion
3. Demolition
• Remove existing flooring (tile, wood, carpet, etc.)
• Remove cabinets, countertops, vanities
• Remove interior walls per plans
• Remove drywall where required
• Remove plumbing fixtures
• Remove electrical fixtures
• Haul away all debris
4. Structural & Framing
• Install structural beams if required
• Reframe modified walls
• Install new partitions per approved plans
• Repair or replace damaged framing
• Subfloor repair or replacement as needed
• Install blocking for cabinets and accessories
5. Plumbing (Up to Code)
• Replace old water supply lines (Copper Type L or PEX)
• Replace or modify drain lines (ABS)
• Relocate plumbing fixtures as needed
• Install new shut-off valves and cleanouts
• Water heater replacement if included
• Call for rough and final plumbing inspections
6. Electrical (Up to Code)
• Upgrade electrical panel if required
• Rewire entire house as needed
• Install new outlets and switches
• Install GFCI/AFCI protection per code
• Install recessed lighting and fixtures
• Install smoke and carbon monoxide detectors
• Dedicated circuits for appliances
• Call for rough and final electrical inspections
7. HVAC
• Replace or upgrade HVAC system if included
• Install new ducting and registers
• Install thermostat or mini-split system if applicable
8. Insulation
• Install wall insulation per code requirements
• Install ceiling insulation per code requirements
9. Drywall & Plaster
• Install new drywall
• Tape and mud (Level 4 or 5 finish)
• Texture to match existing or smooth finish
• Patch all affected areas
10. Flooring
• Install tile flooring
• Install engineered wood / hardwood / laminate / vinyl
• Install baseboards
• Floor leveling if required
11. Kitchen Remodel
• Install new cabinets
• Install countertops
• Install backsplash
• Install sink and faucet
• Install appliances (owner supplied unless specified)
12. Bathroom Remodel(s)
• Install new tub or shower system
• Waterproofing system installation
• Install tile on floors and walls
• Install vanity and toilet
• Install shower valve and fixtures
• Install shower glass if included
13. Doors & Windows
• Replace interior and entry doors
• Replace windows if included
• Install hardware
14. Interior & Exterior Paint
• Surface preparation
• Prime and paint walls, ceilings, and trim
• Exterior painting if included
15. Exterior Work (If Included)
• Stucco repair
• Roofing repair or replacement
• Concrete work or pavers
• Drainage improvements
16. Final Phase
• Final inspections
• Punch list completion
• Final cleaning
• Final walk-through with homeowner
Standard California Contract Terms (Summary)
• All work performed in compliance with California Building Code.
• Change orders must be approved in writing.
• Unforeseen conditions may require additional cost.
• One-year labor warranty unless otherwise stated.
• Progress payments per agreed payment schedule.
• Contractor is licensed and insured.
 Windy City Painters
## Professional Wallpaper Installation Lincoln Park Project
Wallpaper installation Lincoln Park requires expert techniques for this stunning greystone renovation. Lincoln Park's architectural heritage includes beautiful greystones, vintage condos, and historic buildings that demand specialized installation approaches respecting original craftsmanship.
## Materials and Products Used
We utilized premium vinyl wallpaper with fabric backing for durability. Additionally, commercial-grade adhesives from Benjamin Moore ensure long-lasting application. Furthermore, we applied specialized primers designed for vintage plaster surfaces common in Lincoln Park homes.
## Four-Step Installation Process
First, complete removal of existing wallpaper and surface preparation. Second, repair any wall imperfections and apply appropriate primer. Third, precise measurement and cutting with careful pattern matching. Finally, professional installation with seamless application and detailed finishing.
## Chicago Home Challenges
Chicago's harsh winters create expansion and contraction issues requiring flexible adhesives. Moreover, older Lincoln Park buildings often have uneven plaster walls needing extensive preparation. Additionally, potential lead paint concerns in vintage homes require certified safe work practices.
## Results and Quality Standards
Perfect pattern alignment across all seams creates seamless appearance throughout the space. Furthermore, moisture-resistant materials ensure longevity against Chicago's humidity fluctuations. The finished installation enhances the home's architectural character while providing modern durability.
## Professional Tips
Always test adhesive compatibility on small areas first. Moreover, control room temperature and humidity during installation for optimal results. Additionally, choose wallpaper appropriate for Chicago's climate conditions.
See more work and request free estimate at windypainters.com.
## Frequently Asked Questions
Q: How long does wallpaper installation Lincoln Park typically take for one room?
A: Most single rooms completed within one to two days including preparation, removal, and professional wallpaper installation Lincoln Park application.
Q: What wallpaper types work best in Chicago's climate conditions?
A: Vinyl and fabric-backed wallpapers offer superior durability against humidity and temperature changes affecting wallpaper installation Lincoln Park projects.
Q: Can you install wallpaper over existing painted walls in older homes?
A: Yes, with proper surface preparation and primer application, wallpaper installation Lincoln Park works excellently over previously painted surfaces.
Q: Do you handle complete wallpaper removal before new installation?
A: Absolutely, comprehensive wallpaper removal and surface preparation included in all wallpaper installation Lincoln Park project estimates and services.
Q: What preparation is required for vintage Lincoln Park home wallpaper installation?
A: Surface cleaning, repairs, lead paint testing if applicable, and proper primer application essential for successful wallpaper installation Lincoln Park.
Q: How do you ensure perfect pattern matching across large walls?
A: Expert measuring, cutting, and installation techniques guarantee seamless pattern alignment throughout every wallpaper installation Lincoln Park project we complete.
Q: What warranty coverage do you provide for wallpaper installation work?
A: All wallpaper installation Lincoln Park projects include comprehensive warranty coverage protecting your investment and ensuring long-lasting beautiful results.
Q: Can wallpaper installation work in Lincoln Park condos and smaller spaces?
A: Yes, we specialize in all housing types including condos, requiring precise wallpaper installation Lincoln Park techniques for optimal results.
Q: How do Chicago weather conditions affect wallpaper installation timing and materials?
A: We schedule wallpaper installation Lincoln Park during optimal conditions and recommend climate-appropriate materials for Chicago's challenging weather patterns.
Q: What makes Windy City Painters different for wallpaper installation Lincoln Park projects?
A: Local Chicago expertise, understanding of neighborhood architecture, and proven wallpaper installation Lincoln Park experience delivering exceptional quality results.


15