
Search results for "Investments typically" in Home Design Ideas
 Lancko Group Inc.
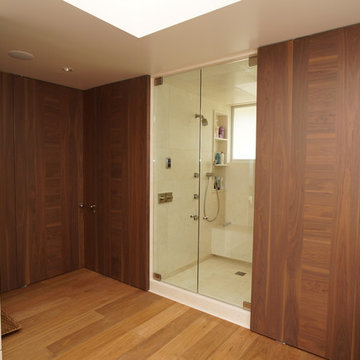
Wide Symmetrical Slats Frame a center ribbon of Encountered Grain. Available with Vertical Grain on the Edges and Horizontal in the Center or vice-versa with Horizontal Grain on Edges and Vertical Grain on the center.
No standard sizes of doors. Each door is produced to your exact specifications at our manufacturing facilities.
Industry accepted lead times; each manufacturing step is made with caution and care to insure a quality product that hopefully outlasts our generation.
It is good to be green; we use Formaldehyde Free products and low VOC Glues, Stains and Cores.
Our cores are FSC certified and we can get any material with FSC certifications.
We build our doors with engineered FSC certified laminated veneer lumber (LVL) cores. This material is none other than the best in the industry and provides superior strength and unmatched dimensional stability. It also has the best results in warping and twist tests. Our LVL core can hold screws with the same capacity as many wood species and is a MUCH better product than the cheap fiberboard core local carpenters typically use. Our cores can be machined the same as many solid wood species and they accept any hardware prep without affecting door integrity.
Stainless steel inserts, special wood elements or leather or cowhide inlays are a common landscape at Lancko. Please let us know what you are dreaming, most likely we can come up with a solution to achieve it.
About 80% of our doors are built with Hidden Hinges. Cool and exclusive and although they are a time consuming & difficult part to put together, we love it when our clients choose this available option. It is a luxury that will pay for itself, an investment into pure refinement and quality that greatly complements Lancko Doors and most definitively your project.
Capabilities. Can we do 20mins, 45 mins., 60 mins. and up to 3 Hour Fire Rated Doors, Bullet Proof Doors, Sound Proof Doors, Barn Doors, Huge Doors, Mini Doors, Hidden Doors, Louver Doors, Bi-pass Doors, Bi-fold doors, Pocket Doors, Dutch Doors, Rustic Doors, Stile and Rail Doors, Leather Doors, Cowhide Doors? Yes we can.. oh and dog doors too and of course we can do normal swing doors. What about gates? Yes. Modern Entry Doors? Yes. Garage doors? No, we need to draw the line somewhere.
Available as: Slabs only, slabs and jambs knocked down,Pre-hung units or Pre-hung & pre-finished units with hardware installed. You decide your level of door package. The best way to go to insure a top notch factory controlled quality product??... well that would be the Pre-Hung, Pre-Finished and Hardware installed product. It will cost you the same as doing it at the uncontrollable job site and the quality will be incomparable. Plus we use Conversion Varnish to finish our products. Who uses Conversion Varnish? High-End Kitchen Manufacturers and Lancko.
At Lancko, we can also manufacture Contemporary and Modern trim to complement your doors and integrate your design throughout your project.
 DKOR Interiors Inc.- Interior Designers Miami, FL
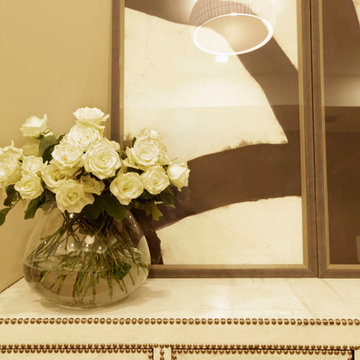
Miami Interior Designers - Residential Interior Design Project in Fort Lauderdale, FL. A classic Mediterranean home turns Contemporary by DKOR Interiors.
Photo: Alexia Fodere
Interior Design by Miami and Ft. Lauderdale Interior Designers, DKOR Interiors.
www.dkorinteriors.com


Find the right local pro for your project

 Windy City Painters
Iron Fence Painting Lincoln Park Chicago - Professional Metal Refinishing
Windy City Painters completed this comprehensive iron fence painting project for a beautiful Lincoln Park greystone property. Lincoln Park's historic architecture demands careful attention to detail, and furthermore, Chicago's harsh weather conditions require professional-grade materials and techniques for lasting protection.
We utilized premium Sherwin-Williams rust inhibiting primer and Benjamin Moore exterior metal paint for maximum durability. Additionally, our team employed specialized rust removal tools and surface preparation equipment to ensure optimal adhesion and longevity.
Our four-step process included complete rust removal and surface cleaning, minor repairs to damaged sections, premium primer application with proper curing time, and final topcoat application using spray and brush techniques for even coverage.
Chicago's unique challenges include extreme temperature fluctuations, salt exposure from winter treatments, and moisture from Lake Michigan. Moreover, older properties often have multiple paint layers requiring careful removal. Therefore, professional expertise ensures proper preparation and material selection.
The results exceeded client expectations with a smooth, durable finish that enhances the property's curb appeal. Subsequently, the fence now provides years of protection while complementing the neighborhood's architectural character perfectly.
Before starting similar projects, homeowners should understand that proper surface preparation accounts for 80% of project success. Additionally, weather conditions significantly impact application timing and results.
See more work and request free estimate at windypainters.com.
Frequently Asked Questions:
Q: How much does iron fence painting cost in Lincoln Park Chicago?
A: Iron fence painting costs vary based on fence size, existing condition, rust damage extent, and preparation requirements needed.
Q: What preparation is required for successful iron fence painting projects?
A: Iron fence painting requires thorough rust removal, surface cleaning, minor repairs, primer application, and proper weather conditions.
Q: How long does professional iron fence painting last in Chicago weather?
A: Professional iron fence painting typically lasts 8-12 years with quality materials, proper preparation, and regular maintenance.
Q: When is the best season for iron fence painting in Chicago?
A: Spring through early fall provides optimal conditions for iron fence painting with appropriate temperature and humidity levels.
Q: Can you match existing colors for iron fence painting restoration projects?
A: Yes, we provide custom color matching services for iron fence painting to complement existing architectural elements perfectly.
Q: Do you warranty iron fence painting work in Lincoln Park?
A: Windy City Painters provides comprehensive warranties on all iron fence painting projects ensuring quality and customer satisfaction.
Q: What makes professional iron fence painting worth the investment cost?
A: Professional iron fence painting ensures proper preparation, quality materials, expert application techniques, and significantly extended fence lifespan.
Q: How do you prevent rust from returning after iron fence painting?
A: Our iron fence painting process includes rust inhibiting primer, quality topcoats, and proper surface preparation for maximum protection.
Q: Can iron fence painting increase Lincoln Park property values significantly?
A: Professional iron fence painting enhances curb appeal, property aesthetics, and market value in desirable Lincoln Park neighborhood.
Q: What safety precautions are necessary during iron fence painting projects?
A: Iron fence painting requires proper ventilation, protective equipment, lead paint testing, and professional safety protocols throughout.
 Windy City Painters
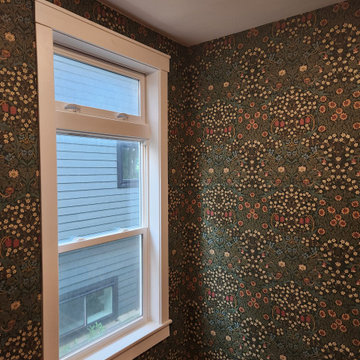
## Professional Wallpaper Installation Lincoln Park Project
Wallpaper installation Lincoln Park requires expert techniques for this stunning greystone renovation. Lincoln Park's architectural heritage includes beautiful greystones, vintage condos, and historic buildings that demand specialized installation approaches respecting original craftsmanship.
## Materials and Products Used
We utilized premium vinyl wallpaper with fabric backing for durability. Additionally, commercial-grade adhesives from Benjamin Moore ensure long-lasting application. Furthermore, we applied specialized primers designed for vintage plaster surfaces common in Lincoln Park homes.
## Four-Step Installation Process
First, complete removal of existing wallpaper and surface preparation. Second, repair any wall imperfections and apply appropriate primer. Third, precise measurement and cutting with careful pattern matching. Finally, professional installation with seamless application and detailed finishing.
## Chicago Home Challenges
Chicago's harsh winters create expansion and contraction issues requiring flexible adhesives. Moreover, older Lincoln Park buildings often have uneven plaster walls needing extensive preparation. Additionally, potential lead paint concerns in vintage homes require certified safe work practices.
## Results and Quality Standards
Perfect pattern alignment across all seams creates seamless appearance throughout the space. Furthermore, moisture-resistant materials ensure longevity against Chicago's humidity fluctuations. The finished installation enhances the home's architectural character while providing modern durability.
## Professional Tips
Always test adhesive compatibility on small areas first. Moreover, control room temperature and humidity during installation for optimal results. Additionally, choose wallpaper appropriate for Chicago's climate conditions.
See more work and request free estimate at windypainters.com.
## Frequently Asked Questions
Q: How long does wallpaper installation Lincoln Park typically take for one room?
A: Most single rooms completed within one to two days including preparation, removal, and professional wallpaper installation Lincoln Park application.
Q: What wallpaper types work best in Chicago's climate conditions?
A: Vinyl and fabric-backed wallpapers offer superior durability against humidity and temperature changes affecting wallpaper installation Lincoln Park projects.
Q: Can you install wallpaper over existing painted walls in older homes?
A: Yes, with proper surface preparation and primer application, wallpaper installation Lincoln Park works excellently over previously painted surfaces.
Q: Do you handle complete wallpaper removal before new installation?
A: Absolutely, comprehensive wallpaper removal and surface preparation included in all wallpaper installation Lincoln Park project estimates and services.
Q: What preparation is required for vintage Lincoln Park home wallpaper installation?
A: Surface cleaning, repairs, lead paint testing if applicable, and proper primer application essential for successful wallpaper installation Lincoln Park.
Q: How do you ensure perfect pattern matching across large walls?
A: Expert measuring, cutting, and installation techniques guarantee seamless pattern alignment throughout every wallpaper installation Lincoln Park project we complete.
Q: What warranty coverage do you provide for wallpaper installation work?
A: All wallpaper installation Lincoln Park projects include comprehensive warranty coverage protecting your investment and ensuring long-lasting beautiful results.
Q: Can wallpaper installation work in Lincoln Park condos and smaller spaces?
A: Yes, we specialize in all housing types including condos, requiring precise wallpaper installation Lincoln Park techniques for optimal results.
Q: How do Chicago weather conditions affect wallpaper installation timing and materials?
A: We schedule wallpaper installation Lincoln Park during optimal conditions and recommend climate-appropriate materials for Chicago's challenging weather patterns.
Q: What makes Windy City Painters different for wallpaper installation Lincoln Park projects?
A: Local Chicago expertise, understanding of neighborhood architecture, and proven wallpaper installation Lincoln Park experience delivering exceptional quality results.
 Architect
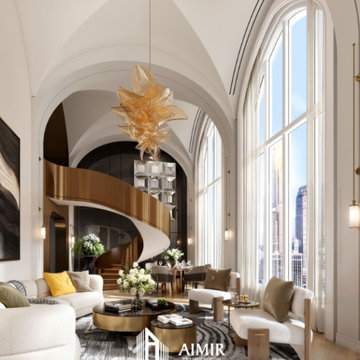
Not all architectural imagery is created equal. Some renderings look obviously computer-generated, with flat lighting and plastic-looking materials that fail to convince viewers. Others are so precise that they are indistinguishable from photographs. That second category, realistic architectural visualization rendering, has become the standard expectation for architects, developers, and marketers who need imagery capable of withstanding close scrutiny from investors, buyers, and planning authorities. As audiences grow more visually literate, the tolerance for obviously artificial, video-game-like imagery in professional presentations continues to shrink.
What Sets Realistic Visualization Apart
Realistic architectural visualization goes beyond simply modeling a building in three dimensions. It requires physically accurate lighting simulation, true-to-life material properties, and careful attention to the small imperfections that make real-world photography convincing, such as subtle reflections, ambient occlusion in corners, and natural depth of field. The goal is an image that a viewer would believe was captured by a camera on-site rather than generated by software. Achieving that level of believability typically means dozens of small adjustments layered on top of one another rather than any single dramatic setting.
Realistic Versus Stylized Rendering Approaches
Stylized or conceptual renderings still have their place, particularly in early design phases when a looser, more artistic representation helps convey mood without locking in every detail. But once a project moves toward marketing, investment, or permitting, stakeholders need to see exactly what they are getting. Realistic visualization removes ambiguity, showing true material colors, accurate proportions, and honest lighting conditions rather than idealized abstractions. Understanding which approach a project actually needs at each stage helps clients avoid paying for a level of polish that a given milestone does not yet require.
Why Realism Builds Client and Buyer Confidence
Buyers and investors are understandably skeptical of overly polished or unrealistic marketing images. When a rendering looks convincingly real, it builds trust rather than raising doubts about what the finished project will actually look like. This is especially important in real estate presales, where buyers are committing significant sums based largely on visual material rather than a finished physical space. A rendering that later turns out to have misrepresented the finished product can also create legal and reputational exposure for developers, making accuracy a genuine business risk rather than just an aesthetic preference.
The Technical Pillars Behind Every Realistic Scene
Achieving true realism depends on several technical disciplines working together: physically based rendering engines that simulate how light actually behaves, high-resolution texture libraries that replicate real materials like stone, wood, and glass, and careful camera work that mimics real photographic lenses and exposure. Post-production adds a final layer of color grading and atmospheric effects that ties everything together into a cohesive, believable image. Each of these pillars depends on the others; even flawless material work can be undermined by lighting that behaves in a physically implausible way.
Applications Across Residential, Commercial, and Institutional Projects
Realistic visualization serves a wide range of building types, from single-family homes and luxury condominiums to office towers, hotels, schools, and healthcare facilities. Each typology has its own material palette and lighting expectations, and an experienced studio adjusts its approach accordingly, whether that means warm, inviting tones for a residential lobby or crisp, professional lighting for a corporate headquarters. Institutional clients such as universities and hospitals often have additional requirements around accessibility signage and wayfinding, which need to be represented accurately alongside the architecture itself.
How AIMIR CG Delivers Photorealistic Accuracy
Our studio specializes in realistic architectural visualization rendering that holds up under close inspection. Every project moves through a disciplined pipeline of modeling, texturing, lighting, and post-production review, with artists cross-checking material references and lighting studies against real-world photography. This attention to detail is why clients consistently describe our end product as impressive and our process as easy to work with. A dedicated quality review stage before delivery catches inconsistencies that might otherwise slip through a faster, less structured pipeline.
Common Challenges in Achieving True Realism
Realistic rendering is technically demanding. Common obstacles include accurately simulating how light bounces between surfaces, matching material reflectivity to real product specifications, and avoiding the uncanny, slightly artificial look that comes from over-processed images. Overcoming these challenges requires experienced artists who understand both the science of light and the craft of photography, not just software proficiency. Rushed production schedules are often the real culprit behind unconvincing renderings, since realism typically requires several iterative passes rather than a single render.
What to Look for in a Realism-Focused Rendering Studio
When evaluating a rendering partner, review their portfolio critically. Do the images include convincing shadow detail and material variation, or do surfaces look uniformly smooth and artificial? Ask about their revision process and how closely they work with architects to source accurate material and lighting references, since realism is ultimately the product of disciplined collaboration, not a single software setting. It also helps to ask for examples of past projects in a similar building type, since a studio's strengths can vary across typologies.
Ready for Renderings That Look Real
If your project deserves imagery that can stand up to the scrutiny of investors, buyers, and planning boards, AIMIR CG is ready to help. Our team combines technical precision with artistic judgment to deliver visualization that looks and feels genuinely real. Contact us to discuss how photorealistic rendering can strengthen your next presentation or marketing campaign, and let us show you examples from projects similar to your own.
 Bloomington Carpet One
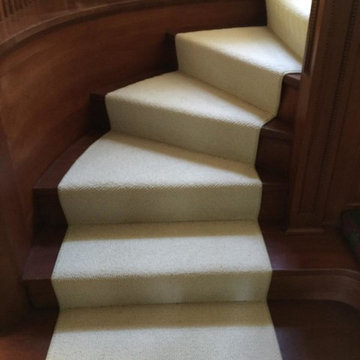
Beautiful custom runner to match the unique measurements of this staircase.
Small wooden curved staircase photo in Minneapolis with wooden risers
Small wooden curved staircase photo in Minneapolis with wooden risers


 highland
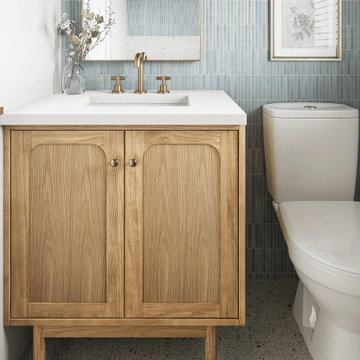
Renovating a bathroom is one of the most rewarding home improvement projects you can undertake. It adds immediate value to your property and elevates your daily routine. However, designing the perfect space requires balancing aesthetics with practical utility. At the heart of this balance is the vanity — it is the functional hub where you get ready each morning, a vital storage unit, and the visual centerpiece of the room.
To ensure you make the right investment, here is an in-depth look at choosing a bathroom vanity that blends style, longevity, and everyday functionality.
1. Assessing the Layout and Space Constraints
Before you fall in love with a specific design or finish, you must determine what your bathroom can physically handle. Scale is everything. A vanity that is too large disrupts traffic flow, while one that is too small gets lost visually and lacks adequate storage.
The next major step is determining the scale of your plumbing fixtures. Understanding how to choose a bathroom sink and vanity setup comes down to a simple choice: single or double sinks. Your choice will depend on who uses the bathroom and the overall footprint of the space.
Single Sink Vanities
Typically ranging from 20 to 48 inches (50–120 cm) in width, single vanities are the ideal choice for powder rooms, guest bathrooms, or small master suites. For very compact spaces, you can find narrower options starting around 16 inches (40 cm). The major advantage of a single-sink layout is that it provides more usable countertop space for cosmetics, toiletries, and decorative items. If you want to skip the guesswork and invest in a premium, beautifully handcrafted fixture, explore the luxury collections at Willow Bath and Vanity. From elegant single vanities to spacious double setups, their masterfully built furniture combines solid wood construction with elite styling to transform any bathroom into a spa-like retreat.
Double Sink Vanities
Usually starting at 48 inches (120 cm) and extending up to 72 inches (180 cm) or more, double vanities are a lifesaver for shared master bathrooms. They allow two people to get ready simultaneously without fighting for sink space. Keep in mind that a double vanity naturally reduces both cabinet storage space and countertop real estate since a second sink basin and plumbing lines take up substantial interior room.
Sink Types to Consider
The countertop is the workhorse of the bathroom. It regularly comes into contact with running water, toothpaste, soapy residue, and high-heat styling tools. Knowing how to choose a bathroom vanity top requires evaluating how much maintenance you are willing to perform against the look you want to achieve. Material Pros Cons Maintenance Level Quartz Highly durable, non-porous, stain and scratch-resistant. Offers the look of stone without the hassle. Premium pricing; can show seams on very large custom layouts. Low (No sealing required) Marble Timeless, elegant, and luxurious. Every slab features a completely unique veining pattern. Porous; prone to scratching, etching from acids, and water stains. Requires careful daily use. High (Requires regular sealing) Granite Naturally strong, heat-resistant, and chemically stable. Unique earthy patterns. Porous; can chip if subjected to heavy impacts. Medium (Requires occasional sealing) When coordinating your countertop, ensure it complements your bathroom’s floor tiles, shower surround, and plumbing hardware to maintain visual harmony.
4. Selecting the Core Vanity Style and Finish
Once the functional components are locked in, you can focus on the architectural style of the vanity base. The base dictates the design theme of the entire room.
Conclusion
Choosing the perfect vanity is a step-by-step process that combines precise measurements with your personal design taste. By taking careful measurements, choosing between a single- or double-sink setup, and picking a durable counter material like quartz or granite, you can transform your bathroom into a beautiful, organized retreat. Prioritize high-quality materials and smart craftsmanship, and your new vanity will look spectacular and serve your household reliably for years to come.
1. Assessing the Layout and Space Constraints
Before you fall in love with a specific design or finish, you must determine what your bathroom can physically handle. Scale is everything. A vanity that is too large disrupts traffic flow, while one that is too small gets lost visually and lacks adequate storage.
- Take Precise Measurements: measure the available width, depth, and height. Remember to account for surrounding fixtures.
- Check Clearance Zones: ensure there is enough clearance for the bathroom door to swing open, for shower glass doors to clear the vanity, and for drawers and cabinet doors to extend fully without hitting the toilet or walls.
-
Locate Existing Plumbing: moving pipes can significantly increase renovation costs. If you want a seamless installation, look for a vanity configuration that aligns easily with your current plumbing setup.
The next major step is determining the scale of your plumbing fixtures. Understanding how to choose a bathroom sink and vanity setup comes down to a simple choice: single or double sinks. Your choice will depend on who uses the bathroom and the overall footprint of the space.
Single Sink Vanities
Typically ranging from 20 to 48 inches (50–120 cm) in width, single vanities are the ideal choice for powder rooms, guest bathrooms, or small master suites. For very compact spaces, you can find narrower options starting around 16 inches (40 cm). The major advantage of a single-sink layout is that it provides more usable countertop space for cosmetics, toiletries, and decorative items. If you want to skip the guesswork and invest in a premium, beautifully handcrafted fixture, explore the luxury collections at Willow Bath and Vanity. From elegant single vanities to spacious double setups, their masterfully built furniture combines solid wood construction with elite styling to transform any bathroom into a spa-like retreat.
Double Sink Vanities
Usually starting at 48 inches (120 cm) and extending up to 72 inches (180 cm) or more, double vanities are a lifesaver for shared master bathrooms. They allow two people to get ready simultaneously without fighting for sink space. Keep in mind that a double vanity naturally reduces both cabinet storage space and countertop real estate since a second sink basin and plumbing lines take up substantial interior room.
Sink Types to Consider
- Undermount: installed beneath the counter for a smooth, seamless surface that is incredibly easy to wipe down.
- Vessel: sits atop the counter like a decorative bowl. It makes a bold style statement but raises the overall height of the counter surface.
- Drop-In: features a lip that rests on the counter cutout. It is easier to install, but its edges can catch dirt.
-
The countertop is the workhorse of the bathroom. It regularly comes into contact with running water, toothpaste, soapy residue, and high-heat styling tools. Knowing how to choose a bathroom vanity top requires evaluating how much maintenance you are willing to perform against the look you want to achieve. Material Pros Cons Maintenance Level Quartz Highly durable, non-porous, stain and scratch-resistant. Offers the look of stone without the hassle. Premium pricing; can show seams on very large custom layouts. Low (No sealing required) Marble Timeless, elegant, and luxurious. Every slab features a completely unique veining pattern. Porous; prone to scratching, etching from acids, and water stains. Requires careful daily use. High (Requires regular sealing) Granite Naturally strong, heat-resistant, and chemically stable. Unique earthy patterns. Porous; can chip if subjected to heavy impacts. Medium (Requires occasional sealing) When coordinating your countertop, ensure it complements your bathroom’s floor tiles, shower surround, and plumbing hardware to maintain visual harmony.
4. Selecting the Core Vanity Style and Finish
Once the functional components are locked in, you can focus on the architectural style of the vanity base. The base dictates the design theme of the entire room.
- Freestanding vanities: sit directly on the floor, supported by legs or a solid kickboard base. This is a traditional, stable configuration that offers the maximum hidden cabinet and drawer storage space.
- Wall-Mounted (Floating) vanities: anchored directly onto the wall studs, leaving the floor underneath completely clear. Floating vanities are staples of modern, minimalist design. They create an illusion of space, making small rooms look larger, and make cleaning the bathroom floor incredibly easy.
- Console vanities: feature an open shelving design supported by a metal or wood frame. It offers a light, airy look reminiscent of a boutique hotel, though it sacrifices hidden storage.
Conclusion
Choosing the perfect vanity is a step-by-step process that combines precise measurements with your personal design taste. By taking careful measurements, choosing between a single- or double-sink setup, and picking a durable counter material like quartz or granite, you can transform your bathroom into a beautiful, organized retreat. Prioritize high-quality materials and smart craftsmanship, and your new vanity will look spectacular and serve your household reliably for years to come.

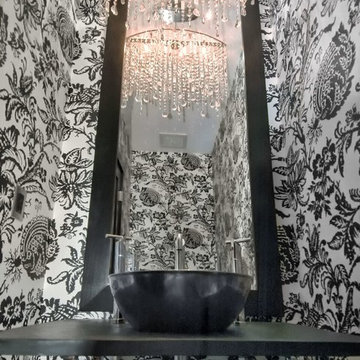
 In Your Space Interior Design
Designed By Runa Novak
In Your space Interior Design
Example of a small minimalist medium tone wood floor powder room design in Chicago with a wall-mount sink
Example of a small minimalist medium tone wood floor powder room design in Chicago with a wall-mount sink
 Save home
Choosing between American framed cabinets and European frameless renditions often boils down to personal preference.
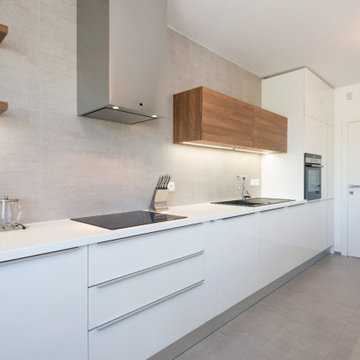
While the American framed counterpart emerges as an immensely popular choice, classic white European kitchen cabinets exhibit a timeless charm that one can't ignore.
It's pretty easy to distinguish a framed and a frameless cabinet as one pays close attention.
The American framed cabinets typically have wide gaps around the doors showing the face of the wood.
In comparison, the European frameless cabinets have much smaller gaps (less than a quarter-inch or more). Moreover, they also carry a matching edge band which is visible on the cabinet box, when its doors are left open.
Well, that's there with the basics and many more subtle differences that distinguish one kind from another.
In this post, we take a closer look at both frameless and framed cabinet styles, their merits and demerits, and help you make an informed decision to buy one.
The American Style Face Frames
As the name suggests, face frame cabinets dominate the structure of a cabinet and use comparatively thinner materials for the cabinet box.
One can find additional frame pieces (mullions) that rest right between the door and the face of the drawer.
One of the standout features of American framed cabinets is the doors that remain attached to the face frame and carry hinges concealed within. In such structures, the shelves are generally of half depth and can be hung side up or down according to one’s need.
Face frame cabinets are known to sport doors that are not classic or pure square in shape. Also, they use a trim mold for their finish which measures just about an inch, but wide enough to press on the wall contours. Thus, they are nailed right on the face of the cabinet as well as to the sides to even out the gaps following the installation.
In essence, this particular style of cabinetry is geared towards keeping things under budget and allows the makers to work persistently and create a specific line of products.
The European Frameless Style
Taking a different stance from American face frame cabinets, we have the European Frameless style that views the cabinet box as the main structure.
It goes to work with a thin edge connected to the cabinet box matching the exteriors. The material used for the cabinet box is also thicker and carries quite a bit of weight.
Also, instead of the face frame, the glides for the door and the drawers stay attached to the cabinet box itself. The white European kitchen cabinets also use concealed hinges, which is again chunkier compared to its American counterpart.
While such frameless cabinets can be easily ordered by referring to a catalog, most buyers opt for a custom made product.
Another glaring difference between the two cabinetry styles is how the European frameless renditions work with cabinet doors that are perfect squares, and all lines between the drawers and doors are straight, imparting consistency throughout.
Furthermore, the finishing detail instead of using trim molds are scribed and further cut to fit within the walls.
Delightful enough, one can have a European frameless cabinets customized to their liking, mood, and style. White European kitchen cabinets, unlike framed ones, can be made to look rustic, transitional, modern, or traditional, and could be even a blend of any two styles.
How Do You Know Which Is The Right Style For You?
As mentioned earlier, choosing a particular style of cabinetry is all dependent on your personal preference. However, there are a few merits and demerits to each style.
For instance, the white European kitchen cabinets are extremely high in demand and can offer a rich look and elegant feel to any space.
Even if you go for any other color other than the classic ones, it is the flexibility, the visually stunning appearance, and precise carpentry that goes in its favor.
Come-of-age cabinet makers have a wide range of white kitchen cabinets for sale to choose from. Cabinet DIY is one such professional and passionate cabinet maker that has helped many homeowners pick the right piece for their place. One can order from their website and get it shipped to their doorstep.
It's only evident why this carefully cut and sculpted cabinetry finds its place across leading home decor magazines and websites around the world.
The American face frame cabinets can seldom claim to match the elegance and timeless beauty of white European kitchen cabinets. Also, given the choice, European frameless cabinets have multiple doors and wide drawer banks offering adequate room for storage.
Most importantly, the hardware that goes into the making of a frameless cabinet has everything attached to the cabinet box which promises more longevity, compared to face frame renditions. While the former is more likely to stay the same over several years, the latter is prone to cracks appearing in places now and then, with slides and hinges fitted with screws.
Nevertheless, one of the standout reasons that might give American face frame cabinets an upper hand over European frameless cabinetry is budget.
American framed cabinets using much thinner finish material attributes to lower pricing. Also, given the fact that there isn't much room for exquisite designs, the budget is often an overpowering factor for many buyers.
Wrap up
For anyone who would like to order a cabinet that is aesthetically pleasing and promises endless customization and longevity will side with European frameless cabinets.
In doing so, it is quite probable that pricing won't be a hindrance as one wages the investment for the value the furniture adds to a living space. Something that American face framed cabinets can't seem to match up.
While the American framed counterpart emerges as an immensely popular choice, classic white European kitchen cabinets exhibit a timeless charm that one can't ignore.
It's pretty easy to distinguish a framed and a frameless cabinet as one pays close attention.
The American framed cabinets typically have wide gaps around the doors showing the face of the wood.
In comparison, the European frameless cabinets have much smaller gaps (less than a quarter-inch or more). Moreover, they also carry a matching edge band which is visible on the cabinet box, when its doors are left open.
Well, that's there with the basics and many more subtle differences that distinguish one kind from another.
In this post, we take a closer look at both frameless and framed cabinet styles, their merits and demerits, and help you make an informed decision to buy one.
The American Style Face Frames
As the name suggests, face frame cabinets dominate the structure of a cabinet and use comparatively thinner materials for the cabinet box.
One can find additional frame pieces (mullions) that rest right between the door and the face of the drawer.
One of the standout features of American framed cabinets is the doors that remain attached to the face frame and carry hinges concealed within. In such structures, the shelves are generally of half depth and can be hung side up or down according to one’s need.
Face frame cabinets are known to sport doors that are not classic or pure square in shape. Also, they use a trim mold for their finish which measures just about an inch, but wide enough to press on the wall contours. Thus, they are nailed right on the face of the cabinet as well as to the sides to even out the gaps following the installation.
In essence, this particular style of cabinetry is geared towards keeping things under budget and allows the makers to work persistently and create a specific line of products.
The European Frameless Style
Taking a different stance from American face frame cabinets, we have the European Frameless style that views the cabinet box as the main structure.
It goes to work with a thin edge connected to the cabinet box matching the exteriors. The material used for the cabinet box is also thicker and carries quite a bit of weight.
Also, instead of the face frame, the glides for the door and the drawers stay attached to the cabinet box itself. The white European kitchen cabinets also use concealed hinges, which is again chunkier compared to its American counterpart.
While such frameless cabinets can be easily ordered by referring to a catalog, most buyers opt for a custom made product.
Another glaring difference between the two cabinetry styles is how the European frameless renditions work with cabinet doors that are perfect squares, and all lines between the drawers and doors are straight, imparting consistency throughout.
Furthermore, the finishing detail instead of using trim molds are scribed and further cut to fit within the walls.
Delightful enough, one can have a European frameless cabinets customized to their liking, mood, and style. White European kitchen cabinets, unlike framed ones, can be made to look rustic, transitional, modern, or traditional, and could be even a blend of any two styles.
How Do You Know Which Is The Right Style For You?
As mentioned earlier, choosing a particular style of cabinetry is all dependent on your personal preference. However, there are a few merits and demerits to each style.
For instance, the white European kitchen cabinets are extremely high in demand and can offer a rich look and elegant feel to any space.
Even if you go for any other color other than the classic ones, it is the flexibility, the visually stunning appearance, and precise carpentry that goes in its favor.
Come-of-age cabinet makers have a wide range of white kitchen cabinets for sale to choose from. Cabinet DIY is one such professional and passionate cabinet maker that has helped many homeowners pick the right piece for their place. One can order from their website and get it shipped to their doorstep.
It's only evident why this carefully cut and sculpted cabinetry finds its place across leading home decor magazines and websites around the world.
The American face frame cabinets can seldom claim to match the elegance and timeless beauty of white European kitchen cabinets. Also, given the choice, European frameless cabinets have multiple doors and wide drawer banks offering adequate room for storage.
Most importantly, the hardware that goes into the making of a frameless cabinet has everything attached to the cabinet box which promises more longevity, compared to face frame renditions. While the former is more likely to stay the same over several years, the latter is prone to cracks appearing in places now and then, with slides and hinges fitted with screws.
Nevertheless, one of the standout reasons that might give American face frame cabinets an upper hand over European frameless cabinetry is budget.
American framed cabinets using much thinner finish material attributes to lower pricing. Also, given the fact that there isn't much room for exquisite designs, the budget is often an overpowering factor for many buyers.
Wrap up
For anyone who would like to order a cabinet that is aesthetically pleasing and promises endless customization and longevity will side with European frameless cabinets.
In doing so, it is quite probable that pricing won't be a hindrance as one wages the investment for the value the furniture adds to a living space. Something that American face framed cabinets can't seem to match up.
 Windy City Painters
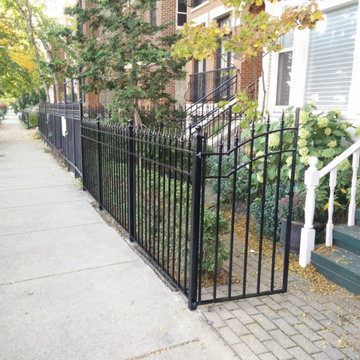
Iron Fence Painting Wicker Park Homeowners Can Trust: A Windy City Painters Case Study
Wicker Park is full of architectural character — ornate 1890s greystone two-flats, vintage brick facades, and wrought iron fencing that has framed these streets for well over a century. However, what iron fence painting Wicker Park properties require is not a simple weekend job. Winters here are brutal on metal, and consequently Windy City Painters has spent years perfecting the restoration process that keeps these fences standing strong. In particular, this case study walks through a recent project completed for a classic Wicker Park property.
Project Overview
The property featured a full wrought iron perimeter fence that had suffered years of freeze-thaw cycling and road salt exposure. Paint had failed across most of the pickets, and oxidation had progressed into active rust at several base rails. Consequently, the homeowners needed more than a fresh coat of paint. They needed a genuine metal restoration, and that is precisely what Windy City Painters delivered.
Materials Used
Windy City Painters selected products specifically rated for Chicago's climate extremes:
Rust-Oleum Professional Rust Inhibitor Primer
Sherwin-Williams DTM Acrylic Enamel (two finish coats)
3M rust converter gel for active oxidation zones
Wire brushes, angle grinders, and detail brushes for precision work
The Process: How Windy City Painters Restores Rusted Iron
Every iron fence painting Wicker Park project follows a disciplined, multi-stage process:
Preparation. Wire brushing and angle grinding remove all loose, flaking, and compromised material. Rust converter gel is applied directly to active oxidation zones, chemically stabilizing the metal underneath.
Repairs. Pitted sections and structurally weak joints are addressed before any coating touches the surface. Notably, skipping this step is the most common reason fence paint fails prematurely.
Priming. A full rust-inhibiting primer coat seals every bare metal surface, preventing moisture from reaching the iron beneath.
Application. Two finish coats of direct-to-metal enamel are applied by hand for even coverage across pickets, finials, and rail joints.
Finishing. A final inspection confirms full coverage, sharp lines, and a smooth, uniform sheen from every angle.
Furthermore, this same process protects the ornate details so common on Wicker Park fencing — decorative finials, scrollwork, and gate hardware — without losing the historic character that makes these properties special.
Advice for Wicker Park Homeowners
Before starting a similar project, homeowners in this neighborhood should keep a few things in mind:
Never paint over active rust. Untreated oxidation will continue spreading beneath the new coating, and the paint will fail within a season or two.
Always prime bare metal before applying a finish coat. Skipping primer is the single fastest path to peeling.
Choose coatings rated for temperature extremes, since Chicago's freeze-thaw cycles are harder on metal than most climates.
Inspect ground-contact areas each spring, as base rails typically rust fastest due to snow melt and road salt runoff.
Budget for prep time. In fact, most of the labor in a quality iron fence painting Wicker Park project happens before a single coat of paint is applied.
Similarly, ask whether the contractor uses rust converter on active oxidation, since skipping this step often shortens the life of the finish considerably.
Moreover, historic greystone properties often have decorative ironwork that requires extra care during grinding and priming so the original detailing is preserved rather than sanded away.
What to Expect: Timeline and Investment
Homeowners often ask how long an iron fence painting Wicker Park project takes from start to finish. In general, prep work — wire brushing, grinding, rust conversion, and repairs — takes up the largest share of the schedule, while primer and enamel application move relatively quickly once the surface is properly stabilized. Cure time between coats also affects the overall timeline, since rushing this stage undermines durability. Consequently, Windy City Painters builds a realistic schedule around weather conditions rather than forcing the job into a tight window. In addition, investment varies based on fence length, the amount of active rust present, and whether ornate detailing requires extra hand-finishing. Homeowners considering this project should request a full on-site walkthrough rather than a rough phone estimate, since rust severity is difficult to judge accurately without seeing the fence in person.
Why Wicker Park Homeowners Choose Windy City Painters
Windy City Painters has become the trusted painting contractor for Chicago's North Side and Near West Side, and iron fence painting Wicker Park residents request most often reflects that reputation directly. In contrast to quick-fix contractors who paint straight over rust, Windy City Painters treats every project as a full restoration. As a result, clients get a finish that holds up through multiple Chicago winters rather than one.
In addition, for related projects, Windy City Painters also offers interior painting, cabinet painting, drywall and plaster repair, and full metal refinishing services for fences, gates, and porches throughout the neighborhood. Ultimately, that range of services is what makes us a true one-stop contractor for Wicker Park homeowners.
See more of our work and request a free estimate at www.windypainters.com.
Ready to transform your Wicker Park home? Contact Windy City Painters for a free estimate — visit www.windypainters.com today. Proudly serving Wicker Park, West Town, Lincoln Park, Roscoe Village, Lakeview, Ukrainian Village, River North, and all of Chicago.


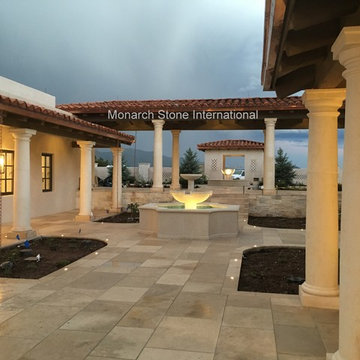
 Monarch Stone International
A stunning property in Santa Fe, New Mexico. Client selected French limestone in 'Limeyrat'.
Project included custom sizes in field tiles, risers and pool coping. Finish chosen was a rustic, antique finish.
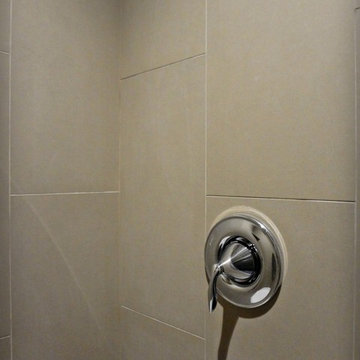
 Cherry City Interiors & Design
Materials and interior paint selected by Cherry City Interiors & Design
Freestanding bathtub - mid-sized contemporary master beige tile and ceramic tile porcelain tile freestanding bathtub idea in Portland with shaker cabinets, dark wood cabinets, white walls, a drop-in sink and tile countertops
Freestanding bathtub - mid-sized contemporary master beige tile and ceramic tile porcelain tile freestanding bathtub idea in Portland with shaker cabinets, dark wood cabinets, white walls, a drop-in sink and tile countertops

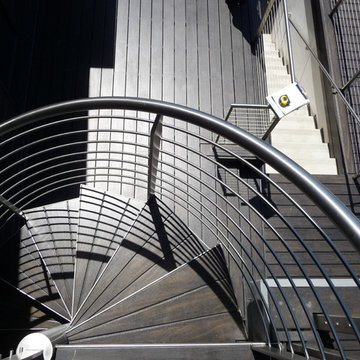
 Metal Innovations
Stainless Steel Spiral Rail Corona Del Mar
Staircase - contemporary staircase idea in Orange County
Staircase - contemporary staircase idea in Orange County
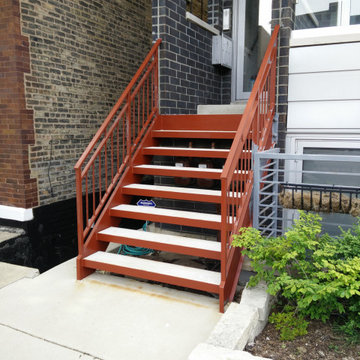 Windy City Painters
Does your iron fence look like Chicago winters have been winning the battle for years? That slow orange spread across pickets and rails is not just an eyesore - it is active corrosion undermining the structural integrity of metalwork that frames some of Chicago's most architecturally significant residential properties. Windy City Painters addresses iron fence rust at the source, using professional-grade rust conversion chemistry and direct-to-metal coatings engineered for the specific abuse Chicago's climate delivers.
PROJECT OVERVIEW
This project involved a heavily rusted ornamental iron fence on a Chicago North Side residential property. Rust had progressed beyond surface oxidation into moderate pitting on lower rails, a pattern Windy City Painters sees frequently on properties within blocks of treated roadways where salt drift accelerates corrosion. The scope included mechanical descaling, chemical rust conversion, DTM priming, and a durable gloss topcoat matched to the original fence color.
MATERIALS AND PRODUCTS
Ospho Rust Converter: A phosphoric acid-based treatment that chemically reacts with iron oxide, converting it to iron phosphate - a stable, paintable compound. Corroseal Water-Based Rust Converter is an alternative for situations requiring lower VOC handling. Rust-Oleum Professional DTM Primer and Sherwin-Williams DTM Acrylic Coating serve as the primary coating system, formulated for direct metal adhesion with built-in rust inhibitors. For structurally compromised sections, welding is coordinated before any chemical or coating work begins.
THE PROCESS
Step 1 - Mechanical Preparation: Wire wheel grinding on an angle grinder removes loose rust scale, mill scale, and flaking paint. For advanced pitting, Windy City Painters deploys a needle gun descaler, which impacts the metal surface thousands of times per minute to drive scale from deep cavities. This step determines whether the fence can be coated or needs welding first.
Step 2 - Chemical Rust Conversion: Ospho or Corroseal is brushed onto all remaining rust surface. These products do not simply seal rust - they react with it. The conversion process takes 24 hours to fully cure before topcoating. Skipping this step is the single most common reason iron fence paint jobs fail prematurely.
Step 3 - DTM Priming: Sherwin-Williams DTM or Rust-Oleum DTM primer is applied by brush to ensure full penetration around decorative elements, picket tips, and weld joints. Spray application is used on open sections for even film build. DTM formulations bond directly to prepared metal without a separate shop primer.
Step 4 - Finish Coating: A DTM topcoat in gloss or semi-gloss provides the final weather barrier. Gloss is preferred for iron fencing because the harder surface sheds water more effectively and resists dirt adhesion between maintenance cycles. Windy City Painters applies two finish coats for maximum film thickness.
CHICAGO-SPECIFIC CHALLENGES
Chicago's freeze-thaw cycle is the primary enemy of iron fence coatings. Water infiltrates micro-cracks in paint film, freezes, expands, and delaminate coating from beneath. Properties on the North Side and Near West Side also contend with lake-effect humidity that keeps metal surfaces damp for extended periods, slowing cure times and promoting under-film corrosion if preparation is inadequate. Greystones and Victorian brownstones typically feature ornate cast iron or wrought iron fencing with complex geometries that trap moisture and demand hand-brush application to fully coat recesses.
WHAT TO EXPECT LONG-TERM
A properly prepared and coated iron fence in Chicago should hold 5-8 years before requiring recoating. Annual inspection of weld joints, picket tips, and base rails closest to grade will identify early rust return. Addressing small spots with touch-up converter and primer extends service life significantly between full recoats.
PRO TIPS
Tip 1: Never pressure wash a rusted iron fence immediately before painting. Water drives moisture into pits and delays the surface drying needed for chemical converter adhesion. Allow 48 hours of dry weather before prep begins.
Tip 2: Picket tips and rail ends are the first failure points. These end-grain equivalent areas on metal concentrate corrosion. Ask your painter to apply an extra brush coat to every tip and terminus.
Tip 3: Black is the traditional and most durable color choice for iron fencing. Dark pigments absorb UV rather than reflecting it, reducing thermal cycling stress on the paint film at color change boundaries.
FAQ
Q: What does iron fence painting cost in Chicago?
A: Most residential iron fence painting in Chicago ranges from $400 to $1,200 depending on linear footage, rust severity, prep method required, and whether structural welding is needed before Windy City Painters can coat the surface.
Q: How do I know if my fence needs a welder before painting?
A: If you can press a screwdriver through a rail or picket, the metal wall has failed. Windy City Painters inspects all fencing before quoting and identifies weld-required sections so repairs happen before any coating investment.
Q: Is Ospho or Corroseal better for my fence?
A: Both convert rust effectively. Ospho is solvent-based and fast-acting, preferred for heavy rust. Corroseal is water-based with lower odor, preferred in enclosed or residential settings where off-gassing is a concern. Windy City Painters selects based on site conditions.
Q: Can iron fence painting be done in winter in Chicago?
A: Application requires temperatures above 50 degrees Fahrenheit for DTM coatings to cure properly. Most iron fence painting in Chicago runs April through October, with scheduling flexibility based on extended warm stretches.
Q: How do I maintain my fence between professional recoats?
A: Inspect annually in spring. Sand any rust spots to bare metal with 80-grit paper, apply Ospho, let cure 24 hours, then spot-prime with DTM primer and touch up with finish coat. Windy City Painters offers maintenance inspections.
Q: Do you paint courtyard building fences and coach house gates?
A: Yes. Multi-unit courtyard buildings and coach houses are common in the North Side neighborhoods Windy City Painters serves. We coordinate with property managers and HOAs for larger perimeter fence projects.
Q: How long after painting can I touch the fence?
A: DTM coatings are typically dry to touch in 2-4 hours and hard dry in 24 hours. Full cure for maximum hardness takes 7 days. Windy City Painters advises against pressure washing or heavy contact during that cure window.
Visit windypainters.com to request your free iron fence assessment and project quote.
8