
Search results for "Issues" in Home Design Ideas
 Mottram Architecture
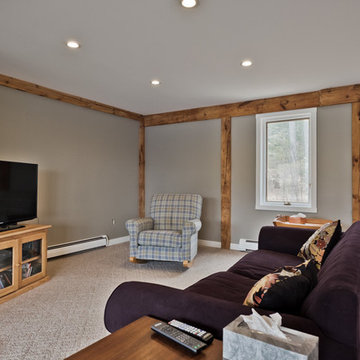
Timber frame homes offer unique challenges during a remodel. What often makes them beautiful and attractive to most homeowners, also makes them challenging for space requirements.
Context: The lovely couple that owned this home were struggling with some interesting floor plan challenges that just didn't work for their family. The loved the beautiful timbers and woodwork of their home, but the dramatically sloping ceilings on the second floor, particularly in the bathroom, just didn't work for this 1 1/2 bath home. Needing to use the skylight to approach the toilet was a less then ideal scenario. Although the bathroom footprint was more then adequate, the sloped ceiling only made half of the space useable. Check out the Before/After post on our blog to see the photos of the house pre-renovation. As much as they loved all the wood features in their home, another challenge they had was light. The wood ceiling made everything inside the house darker, even with a fantastic array of south facing windows, there were spaces in the home that felt dark and small. When they contacted us they wanted to know how could they make their brighter and more inviting, were there solutions to the 2nd floor sloped ceiling issues, and if they were going to do all of this work, how could they make their home more comfortable and efficient. A nagging water leak in the upstairs bathroom spurred them into action and here is how we solved their dilemma.
Conclusion: First, we added a little dormer to the rear of the house so we could get full headroom in nearly all of the upstairs bathroom! Then we decided to extend that dormer one more timber bay over to create a walk in closet with natural light and plenty of space. Since we were contemplating energy efficiency, we resolved a nagging issue that is present in a lot of timber frame construction, air tightness. Commonly found in timber frame construction, fiberglass insulation is installed in the rafter bays and board ceilings are installed over top. Unfortunately, board ceilings are anything but air tight, and fiberglass insulation needs to be in an airtight cavity for maximum effectiveness. So we were able to solve two issues at the same time for this homeowner. We removed the board ceiling and fiberglass insulation, we dense packed the rafter bays with cellulose insulation, and installed sheetrock in place of the boards. The boards were salvaged for re-use by the homeowner, and the space and light quality was dramatically improved. Some may think that losing the board ceiling took something away from the space, but what you'll see in the pictures is that it highly accentuates the heavy timbers and really makes them stand out in a beautiful way. Now with this added airtightness, better insulation, and brighter space, the homeowner hardly runs their wood stove, and it's so quiet in the space, an added bonus from changing the insulation. It became necessary to also add a sheetrock ceiling to the living room to hide the plumbing from the new bathroom layout above. Changing this ceiling gave the homeowner some real quality lighting that was lacking in the living room before. The brighter ceiling and new lighting layout completely transforms the living room into a space you want to hang out, even though the layout didn't change at all. When the homeowner saw the finished spaces she said "I can't believe this is my house, I want to live in this house"
Energy Efficiency: I touched a little on the efficiency above, but like all projects done with Mottram Architecture, we always want to leave you with a little extra. Timber frame construction with board ceilings and fiberglass insulation are notoriously leaky! If you want to know what we think about fiberglass insulation, check our our blog post on Why Fiberglass Insulation Sucks. By installing cellulose insulation and covering it with sheetrock we were able to greatly reduce the heat flowing out of this home. It not only improves cashflow it improves the comfort level in the space. Who wants to sit in their living room and feel a draft? Let us remind you, we are not saying cellulose insulation is an air barrier, we use the sheetrock to help with that, but it does significantly reduce the air flow over fiberglass insulation. And when we reduce the airflow, we reduce the heat flow. And when we reduce the heat flow, we reduce the need to re-heat that drafty air from outside. When it comes to energy efficiency the first and best place to start is air infiltration. We greatly reduced the air infiltration with the new insulation, but we also added a hat and warm boots. What I mean by that is, we improved the insulation in the roof, and we installed insulation in the basement. Maybe it's a silly analogy, but when you think about keeping warm, we always start with the hat and boots! With sustainability in mind, the next project will be to add a deck to the front of this house with rain catchment barrels from the metal roof. They are planning to plant a garden in the spring and the rain catchment system will help to irrigate the new garden.
Builder: East Shore Builders
Photographer: Michael Eric Berube
 Elzo Landscape
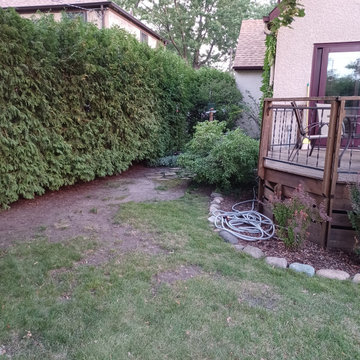
Before renovation: undefined circulation areas, compacted soil, and poor drainage contributed to patchy turf and underutilized space adjacent to the deck. The yard required regrading, structural bed definition, and improved water management to restore function.
 Lux Pad Interiors
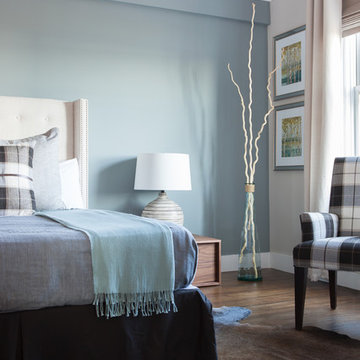
Example of a large classic guest medium tone wood floor and brown floor bedroom design in New York with blue walls and no fireplace
Find the right local pro for your project
 Laqfoil Ltd.
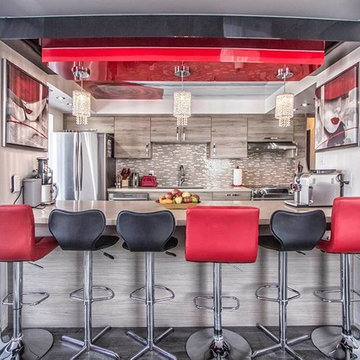
Example of a small minimalist galley medium tone wood floor open concept kitchen design in Toronto with a double-bowl sink, flat-panel cabinets, medium tone wood cabinets, granite countertops, beige backsplash, ceramic backsplash, stainless steel appliances and a peninsula
 Fowler Outdoor Co
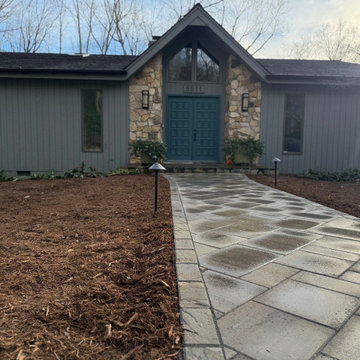
Drainage Solutions & Curb Appeal Transformation
This project focused on solving a persistent drainage issue that was impacting both the usability and appearance of the property. Standing water and poor grading were creating functional problems while diminishing the home’s overall curb appeal—an issue many homeowners face when water isn’t properly directed away from the home.
Fowler Outdoor Co. approached the project with a design-build mindset, addressing the root cause of the drainage problem through proper grading, water management, and structural solutions. By integrating effective drainage systems with thoughtfully designed hardscape elements, the team was able to redirect water flow, protect the property, and create a more stable foundation for the landscape.
Beyond functionality, the transformation elevated the front yard’s appearance with clean lines, intentional materials, and a cohesive layout that complements the home. The result is a space that not only performs better during heavy rain but also delivers a polished, welcoming first impression.
This project is a great example of how solving underlying issues like drainage can completely transform both the look and long-term performance of an outdoor space.
 PAGODA RED
Michael Del Piero Good Design
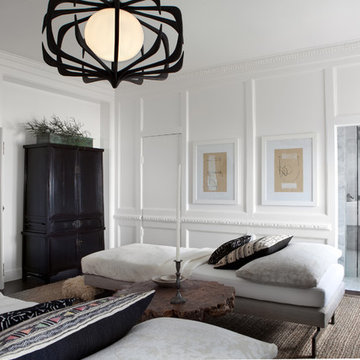
Inspiration for a contemporary home design remodel in Chicago
Inspiration for a contemporary home design remodel in Chicago

 Land Art
New garden complete. Pea gravel path leads users through a native plant garden with the essence of a geological feature. The grassland provides year-round interest, attracts birds and pollinators, and functions as a drainage solution, efficiently diverting enormous amounts of runoff away from the home where it had previously pooled after rain showers and spring snowmelts.
Photo by Jess Ray Photography
 Venezia Modular KITCHENS & INTERIORS THRISSUR
കുറഞ്ഞ ചിലവിൽ MODERN STYLE - HOME Modular കിച്ചൻ & ബെഡ് റൂം INTERIOR വർക്ക് ചെയ്യണോ? വിളിക്കു- 9400490326
1. മോഡുലാർ കിച്ചൻ
2 ബെഡ് റൂം കപ്ബോർഡ്സ്
3 TV Units
4 Ceilling Gypsum പണികൾ
5 Stainless സ്റ്റീൽ HANDRAILS /കോണിപ്പടികൾ
6 . അലൂമിനിയം കിച്ചൻ / ഫാബ്രിക്കേഷൻ പണികൾ (LOW COST)
7 PVC അടുക്കളകൾ
8. Mosquito Net ഫ്രെയിംസ് ( അലൂമിനിയം)
9 . അലൂമിനിയം Window Doors ( വുഡ് കളർ / പ്ലെയിൻ )
10 . SHOP / ഓഫീസ്/ അലൂമിനിയം ഇന്റീരിയർ/ GLASS partition വർക്സ്.... ഇപ്പോൾ തന്നെ വിളിക്കു -
9400400326
________________________________________
(NO ചിതൽ Issues - NO വെള്ളം പ്രശ്നം - വില കുറവും)
Main Aluminium Kitchen ഗുണങ്ങൾ എന്തെല്ലാം ?
--------------------------------------
1. ചിതൽ ഇല്ല ( NO Termites)
2. വെള്ളം പ്രശ്നമില്ല ( No Water issues)
3. വാഷ് ചെയ്യാം ( Washable kitchen)
4. തുരുമ്പു പിടിക്കില്ല ( NO RUST issues)
5. എല്ലാം നിറത്തിലും കിട്ടും ( Colours available)
6. മരത്തിന്റെ നിറത്തിലും കിട്ടും ( Wood finish)
7. വളരെ വില കുറവ് ( LOW COST)
8. പെട്ടെന്ന് ജോലി കഴിയും ( Quick installation)
9. ഗൾഫ് സ്റ്റൈൽ കിച്ചൻ ( Gulf style kitchens)
10. കുറഞ്ഞ മെയ്ന്റനൻസ് ( NO Maintanance
11. സ്റ്റീൽ കിച്ചിന്റെ പകരം ഉപയോഗിക്കാം (Alternative for Steel kitchens)
_________________________________________
കുറഞ്ഞ ചിലവിൽ ഒരു മോഡേൺ വീട് പണിയാണോ ? Call 9400490326 Now….
 McEssay
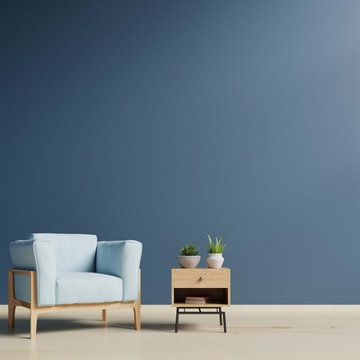
Regardless of the length of your trip abroad, you should know that packing is an essential step of your stay. This goes doubly so when it comes to students, so you must always keep a few things in mind when you’re getting ready, such as what you need to take. The following list from https://mcessay.com/write-my-essay/ will provide you with some useful tips on what you must do to have a trouble-free packing experience:
You should never be extra picky about your toiletries and personal hygiene products, but you should have a small supply of it if you have a favorite product. Face wash, shampoos and conditioners as well as other products may not be available as the same brands in the new place, so have a spare at least. Always make sure you have your liquids sealed in a plastic bag to avoid issues with airport security.
Make sure you pack some weather-appropriate clothing as part of your luggage. The last thing you’ll want to do is look for clothes in the new location if the climate is extreme, compared to your point of origin. You should look into the weather ahead of time so you can pack accordingly to avoid issues with it.
Use a backpack or a duffel bag that suits the airline requirements so you can haul your luggage with greater ease once you’re off the airport. This will help you be more mobile, while at the same time allowing you a choice between walking on foot without dragging luggage and using a cab or public transport.
Prepare a few international adapters, so you won’t have any issues powering your electronics at the new location. Different countries use different types of plugs, so you must make sure you have what you need. The last thing you’ll want to do is getting stuck in a foreign country without a chance to use your tech.
Prepare a list of things you must do during the semester so you won’t have to deal with the organizational aspects of it. You can start with a checklist, keeping it in a place where you’ll be able to see on a regular basis. You will need the preparation to ensure you do things right and on time.
Take at least two pairs of good walking shoes along, as well as your normal shoes. This will help you greatly if you need to walk around different towns or cities. Not all places have the same policy when it comes to sidewalks and public areas, so having a few pairs of good, comfortable shoes will go a long way.
Taking a cross-shoulder bag alongside your luggage will be a very comfortable option when it comes to urban exploration, travel and study. Its hard to rip off of you, easy to carry and also easy to use. Make sure you keep an eye on it from time to time though, as there’s always the possibility of meeting would-be thieves.
 Just in Thyme Landscape Design
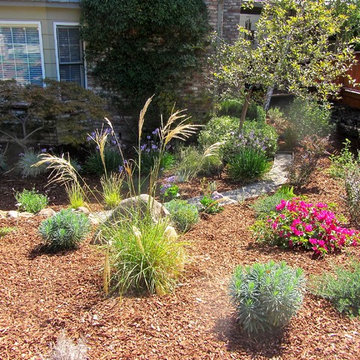
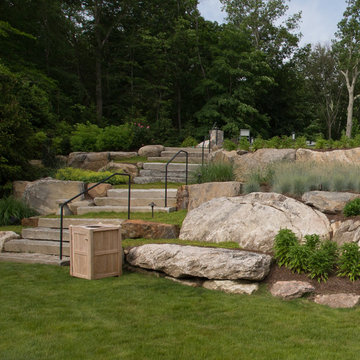
The owners had been battling gophers, deer, drainage issues, drought, and hard, rocky soil for years. They decided to eliminate their entire front lawn & add a pond-less water fountain as a focal point. I strove to provide year-round interest by adding evergreen trees and shrubs to their mostly deciduous & perennial existing plants & a variety of plants that flower at different times of the year. We terraced the yard to address the drainage issues and separated the levels with a dry-stacked fieldstone wall. Low-water, erosion control plants at the top of the hill & plants that tolerate more water at the bottom will help with the longevity of their landscape. A cool palette of purple, blue, and pink helps sooth and unify the design. The spiral of gravel & Dymondia ground-cover (will fill in the area in a couple of months) draws the eye towards the fountain & provides a large area to rest the eyes that won’t need to be watered. It was a challenge to choose plants that the deer & gophers would be less likely to destroy, that can grow under a large Oak tree, and that attract beneficial insects to help the garden last!
 The Lakeside Life
Craig Hudson - Hudson Photography
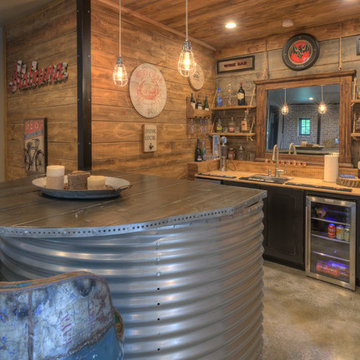
Example of a mountain style home bar design in Birmingham
Example of a mountain style home bar design in Birmingham
 Mottram Architecture
Timber frame homes offer unique challenges during a remodel. What often makes them beautiful and attractive to most homeowners, also makes them challenging for space requirements.
Context: The lovely couple that owned this home were struggling with some interesting floor plan challenges that just didn't work for their family. The loved the beautiful timbers and woodwork of their home, but the dramatically sloping ceilings on the second floor, particularly in the bathroom, just didn't work for this 1 1/2 bath home. Needing to use the skylight to approach the toilet was a less then ideal scenario. Although the bathroom footprint was more then adequate, the sloped ceiling only made half of the space useable. Check out the Before/After post on our blog to see the photos of the house pre-renovation. As much as they loved all the wood features in their home, another challenge they had was light. The wood ceiling made everything inside the house darker, even with a fantastic array of south facing windows, there were spaces in the home that felt dark and small. When they contacted us they wanted to know how could they make their brighter and more inviting, were there solutions to the 2nd floor sloped ceiling issues, and if they were going to do all of this work, how could they make their home more comfortable and efficient. A nagging water leak in the upstairs bathroom spurred them into action and here is how we solved their dilemma.
Conclusion: First, we added a little dormer to the rear of the house so we could get full headroom in nearly all of the upstairs bathroom! Then we decided to extend that dormer one more timber bay over to create a walk in closet with natural light and plenty of space. Since we were contemplating energy efficiency, we resolved a nagging issue that is present in a lot of timber frame construction, air tightness. Commonly found in timber frame construction, fiberglass insulation is installed in the rafter bays and board ceilings are installed over top. Unfortunately, board ceilings are anything but air tight, and fiberglass insulation needs to be in an airtight cavity for maximum effectiveness. So we were able to solve two issues at the same time for this homeowner. We removed the board ceiling and fiberglass insulation, we dense packed the rafter bays with cellulose insulation, and installed sheetrock in place of the boards. The boards were salvaged for re-use by the homeowner, and the space and light quality was dramatically improved. Some may think that losing the board ceiling took something away from the space, but what you'll see in the pictures is that it highly accentuates the heavy timbers and really makes them stand out in a beautiful way. Now with this added airtightness, better insulation, and brighter space, the homeowner hardly runs their wood stove, and it's so quiet in the space, an added bonus from changing the insulation. It became necessary to also add a sheetrock ceiling to the living room to hide the plumbing from the new bathroom layout above. Changing this ceiling gave the homeowner some real quality lighting that was lacking in the living room before. The brighter ceiling and new lighting layout completely transforms the living room into a space you want to hang out, even though the layout didn't change at all. When the homeowner saw the finished spaces she said "I can't believe this is my house, I want to live in this house"
Energy Efficiency: I touched a little on the efficiency above, but like all projects done with Mottram Architecture, we always want to leave you with a little extra. Timber frame construction with board ceilings and fiberglass insulation are notoriously leaky! If you want to know what we think about fiberglass insulation, check our our blog post on Why Fiberglass Insulation Sucks. By installing cellulose insulation and covering it with sheetrock we were able to greatly reduce the heat flowing out of this home. It not only improves cashflow it improves the comfort level in the space. Who wants to sit in their living room and feel a draft? Let us remind you, we are not saying cellulose insulation is an air barrier, we use the sheetrock to help with that, but it does significantly reduce the air flow over fiberglass insulation. And when we reduce the airflow, we reduce the heat flow. And when we reduce the heat flow, we reduce the need to re-heat that drafty air from outside. When it comes to energy efficiency the first and best place to start is air infiltration. We greatly reduced the air infiltration with the new insulation, but we also added a hat and warm boots. What I mean by that is, we improved the insulation in the roof, and we installed insulation in the basement. Maybe it's a silly analogy, but when you think about keeping warm, we always start with the hat and boots! With sustainability in mind, the next project will be to add a deck to the front of this house with rain catchment barrels from the metal roof. They are planning to plant a garden in the spring and the rain catchment system will help to irrigate the new garden.
Builder: East Shore Builders
Photographer: Michael Eric Berube

 Windy City Painters
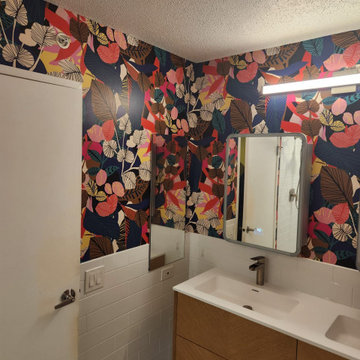
Expert wallpaper installer Lakeview services transform Chicago homes with precision and style. This stunning project showcases our commitment to quality craftsmanship in one of Chicago's most desirable neighborhoods.
Project Overview and Architecture
This beautiful Lakeview greystone required careful wallpaper installation that would complement the home's original architectural details. The vintage building's unique character demanded specialized techniques to ensure perfect results while preserving the historic charm that makes these homes so special.
Materials and Products
We utilized premium wallpaper adhesive, professional smoothing tools, and high-quality materials specifically chosen for Chicago's climate conditions. Our team selected products that work exceptionally well with the plaster walls common in vintage Lakeview homes.
Installation Process
First, we thoroughly prepared surfaces by repairing imperfections and priming walls. Next, we precisely measured and cut each strip, ensuring perfect pattern alignment. Then, we applied adhesive evenly and positioned wallpaper with expert precision. Finally, we eliminated bubbles, trimmed edges, and completed finishing touches.
Chicago Home Challenges
Lakeview's vintage homes present unique challenges including uneven plaster walls, settling issues, and temperature fluctuations. Our wallpaper installer Lakeview expertise addresses these concerns with specialized preparation techniques and climate-appropriate materials that ensure lasting results.
Results and Quality
The finished installation showcases flawless pattern matching, smooth surfaces, and crisp edges that enhance the room's architectural features. This wallpaper installer Lakeview project demonstrates our commitment to excellence and attention to detail.
Professional Tips
Homeowners should always hire experienced professionals for wallpaper installation. Proper surface preparation is crucial for longevity. Additionally, choosing quality materials appropriate for Chicago's climate ensures your investment lasts for years.
See more work and request free estimate at windypainters.com.
Q: Why choose professional wallpaper installer Lakeview services over DIY? / A: Professional installation prevents costly mistakes, ensures proper adhesion, and guarantees beautiful results that enhance your home's value and appearance.
Q: How do you handle vintage Lakeview home challenges? / A: Our wallpaper installer Lakeview team addresses plaster walls, settling issues, and architectural details with specialized techniques and appropriate materials.
Q: What preparation is required before wallpaper installation? / A: We repair wall imperfections, apply primer, ensure smooth surfaces, and address any moisture issues for optimal wallpaper installer Lakeview results.
Q: How long does professional wallpaper installation take? / A: Most rooms require 1-2 days depending on complexity, though our wallpaper installer Lakeview team works efficiently while maintaining quality standards.
Q: Can you work with designer or specialty wallpapers? / A: Absolutely, our wallpaper installer Lakeview experts handle luxury papers, grasscloth, murals, and specialty materials with appropriate techniques and care.
Q: Do you remove existing wallpaper before installation? / A: Yes, we provide complete removal services using safe methods that protect your walls and prepare surfaces for new wallpaper installer Lakeview projects.
Q: How do you ensure pattern alignment and matching? / A: Our wallpaper installer Lakeview professionals use precise measuring, professional tools, and years of experience to achieve perfect pattern continuity.
Q: What types of walls can accommodate wallpaper? / A: We install wallpaper on various surfaces including drywall, plaster, and painted walls after proper preparation for wallpaper installer Lakeview projects.
Q: How do you handle corners and trim work? / A: Our wallpaper installer Lakeview team uses specialized techniques for inside corners, outside corners, and detailed trim work ensuring professional results.
Q: What warranty do you provide on installation? / A: Windy City Painters guarantees our wallpaper installer Lakeview work with comprehensive warranty coverage protecting your investment and ensuring satisfaction.


 Lux Pad Interiors
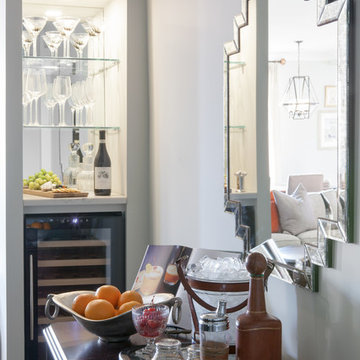
Example of a small trendy single-wall wet bar design in New York with open cabinets, marble countertops and mirror backsplash
 Mottram Architecture
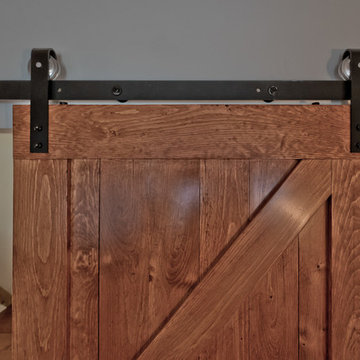
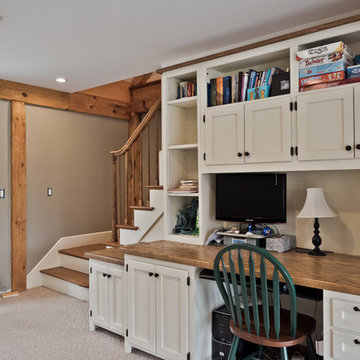
This custom piece of cabinetry was specially designed and built by the homeowner's father!
Timber frame homes offer unique challenges during a remodel. What often makes them beautiful and attractive to most homeowners, also makes them challenging for space requirements.
Context: The lovely couple that owned this home were struggling with some interesting floor plan challenges that just didn't work for their family. The loved the beautiful timbers and woodwork of their home, but the dramatically sloping ceilings on the second floor, particularly in the bathroom, just didn't work for this 1 1/2 bath home. Needing to use the skylight to approach the toilet was a less then ideal scenario. Although the bathroom footprint was more then adequate, the sloped ceiling only made half of the space useable. Check out the Before/After post on our blog to see the photos of the house pre-renovation. As much as they loved all the wood features in their home, another challenge they had was light. The wood ceiling made everything inside the house darker, even with a fantastic array of south facing windows, there were spaces in the home that felt dark and small. When they contacted us they wanted to know how could they make their brighter and more inviting, were there solutions to the 2nd floor sloped ceiling issues, and if they were going to do all of this work, how could they make their home more comfortable and efficient. A nagging water leak in the upstairs bathroom spurred them into action and here is how we solved their dilemma.
Conclusion: First, we added a little dormer to the rear of the house so we could get full headroom in nearly all of the upstairs bathroom! Then we decided to extend that dormer one more timber bay over to create a walk in closet with natural light and plenty of space. Since we were contemplating energy efficiency, we resolved a nagging issue that is present in a lot of timber frame construction, air tightness. Commonly found in timber frame construction, fiberglass insulation is installed in the rafter bays and board ceilings are installed over top. Unfortunately, board ceilings are anything but air tight, and fiberglass insulation needs to be in an airtight cavity for maximum effectiveness. So we were able to solve two issues at the same time for this homeowner. We removed the board ceiling and fiberglass insulation, we dense packed the rafter bays with cellulose insulation, and installed sheetrock in place of the boards. The boards were salvaged for re-use by the homeowner, and the space and light quality was dramatically improved. Some may think that losing the board ceiling took something away from the space, but what you'll see in the pictures is that it highly accentuates the heavy timbers and really makes them stand out in a beautiful way. Now with this added airtightness, better insulation, and brighter space, the homeowner hardly runs their wood stove, and it's so quiet in the space, an added bonus from changing the insulation. It became necessary to also add a sheetrock ceiling to the living room to hide the plumbing from the new bathroom layout above. Changing this ceiling gave the homeowner some real quality lighting that was lacking in the living room before. The brighter ceiling and new lighting layout completely transforms the living room into a space you want to hang out, even though the layout didn't change at all. When the homeowner saw the finished spaces she said "I can't believe this is my house, I want to live in this house"
Energy Efficiency: I touched a little on the efficiency above, but like all projects done with Mottram Architecture, we always want to leave you with a little extra. Timber frame construction with board ceilings and fiberglass insulation are notoriously leaky! If you want to know what we think about fiberglass insulation, check our our blog post on Why Fiberglass Insulation Sucks. By installing cellulose insulation and covering it with sheetrock we were able to greatly reduce the heat flowing out of this home. It not only improves cashflow it improves the comfort level in the space. Who wants to sit in their living room and feel a draft? Let us remind you, we are not saying cellulose insulation is an air barrier, we use the sheetrock to help with that, but it does significantly reduce the air flow over fiberglass insulation. And when we reduce the airflow, we reduce the heat flow. And when we reduce the heat flow, we reduce the need to re-heat that drafty air from outside. When it comes to energy efficiency the first and best place to start is air infiltration. We greatly reduced the air infiltration with the new insulation, but we also added a hat and warm boots. What I mean by that is, we improved the insulation in the roof, and we installed insulation in the basement. Maybe it's a silly analogy, but when you think about keeping warm, we always start with the hat and boots! With sustainability in mind, the next project will be to add a deck to the front of this house with rain catchment barrels from the metal roof. They are planning to plant a garden in the spring and the rain catchment system will help to irrigate the new garden.
Builder: East Shore Builders
Photographer: Michael Eric Berube
Michael Eric Berube, Maine Virtual Home Tours

27