
Search results for "Leading technology" in Home Design Ideas
 CAP Carpet & Flooring
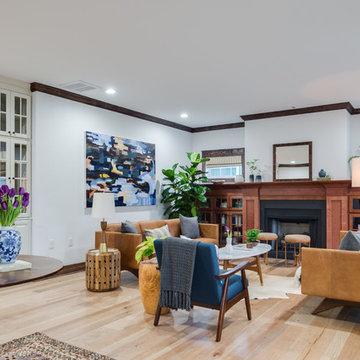
Wood floors can be a timeless, sophisticated, and breathtaking finishing touch to your home. With Mohawk Flooring's recent technology, you can have these beautiful floors in any room of your home. That is right! Any room. Any lifestyle. We have a wood flooring option for you.
CAP Carpet & Flooring is the leading provider of flooring & area rugs in the Twin Cities. CAP Carpet & Flooring is a locally owned and operated company, and we pride ourselves on helping our customers feel welcome from the moment they walk in the door. We are your neighbors. We work and live in your community and understand your needs. You can expect the very best personal service on every visit to CAP Carpet & Flooring and value and warranties on every flooring purchase. Our design team has worked with homeowners, contractors and builders who expect the best. With over 30 years combined experience in the design industry, Angela, Sandy, Sunnie,Maria, Caryn and Megan will be able to help whether you are in the process of building, remodeling, or re-doing. Our design team prides itself on being well versed and knowledgeable on all the up to date products and trends in the floor covering industry as well as countertops, paint and window treatments. Their passion and knowledge is abundant, and we're confident you'll be nothing short of impressed with their expertise and professionalism. When you love your job, it shows: the enthusiasm and energy our design team has harnessed will bring out the best in your project. Make CAP Carpet & Flooring your first stop when considering any type of home improvement project- we are happy to help you every single step of the way.
 CAP Carpet & Flooring
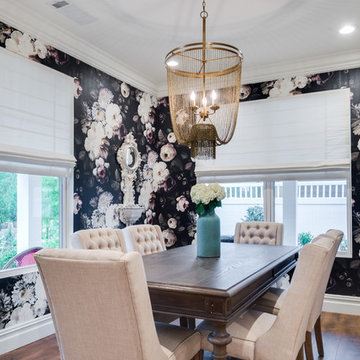
Wood floors can be a timeless, sophisticated, and breathtaking finishing touch to your home. With Mohawk Flooring's recent technology, you can have these beautiful floors in any room of your home. That is right! Any room. Any lifestyle. We have a wood flooring option for you.
CAP Carpet & Flooring is the leading provider of flooring & area rugs in the Twin Cities. CAP Carpet & Flooring is a locally owned and operated company, and we pride ourselves on helping our customers feel welcome from the moment they walk in the door. We are your neighbors. We work and live in your community and understand your needs. You can expect the very best personal service on every visit to CAP Carpet & Flooring and value and warranties on every flooring purchase. Our design team has worked with homeowners, contractors and builders who expect the best. With over 30 years combined experience in the design industry, Angela, Sandy, Sunnie,Maria, Caryn and Megan will be able to help whether you are in the process of building, remodeling, or re-doing. Our design team prides itself on being well versed and knowledgeable on all the up to date products and trends in the floor covering industry as well as countertops, paint and window treatments. Their passion and knowledge is abundant, and we're confident you'll be nothing short of impressed with their expertise and professionalism. When you love your job, it shows: the enthusiasm and energy our design team has harnessed will bring out the best in your project. Make CAP Carpet & Flooring your first stop when considering any type of home improvement project- we are happy to help you every single step of the way.
 CAP Carpet & Flooring
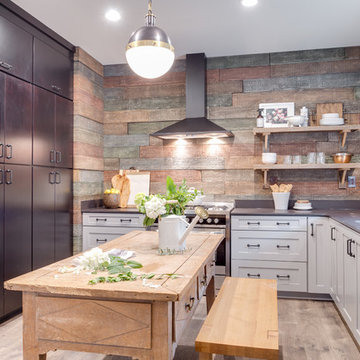
Wood floors can be a timeless, sophisticated, and breathtaking finishing touch to your home. With Mohawk Flooring's recent technology, you can have these beautiful floors in any room of your home. That is right! Any room. Any lifestyle. We have a wood flooring option for you.
CAP Carpet & Flooring is the leading provider of flooring & area rugs in the Twin Cities. CAP Carpet & Flooring is a locally owned and operated company, and we pride ourselves on helping our customers feel welcome from the moment they walk in the door. We are your neighbors. We work and live in your community and understand your needs. You can expect the very best personal service on every visit to CAP Carpet & Flooring and value and warranties on every flooring purchase. Our design team has worked with homeowners, contractors and builders who expect the best. With over 30 years combined experience in the design industry, Angela, Sandy, Sunnie,Maria, Caryn and Megan will be able to help whether you are in the process of building, remodeling, or re-doing. Our design team prides itself on being well versed and knowledgeable on all the up to date products and trends in the floor covering industry as well as countertops, paint and window treatments. Their passion and knowledge is abundant, and we're confident you'll be nothing short of impressed with their expertise and professionalism. When you love your job, it shows: the enthusiasm and energy our design team has harnessed will bring out the best in your project. Make CAP Carpet & Flooring your first stop when considering any type of home improvement project- we are happy to help you every single step of the way.
Find the right local pro for your project
 CAP Carpet & Flooring
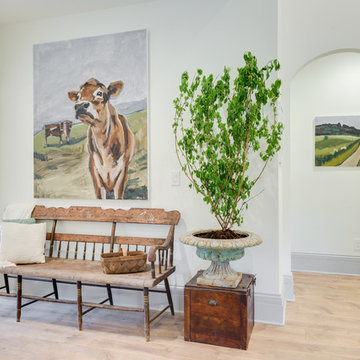
Wood floors can be a timeless, sophisticated, and breathtaking finishing touch to your home. With Mohawk Flooring's recent technology, you can have these beautiful floors in any room of your home. That is right! Any room. Any lifestyle. We have a wood flooring option for you.
CAP Carpet & Flooring is the leading provider of flooring & area rugs in the Twin Cities. CAP Carpet & Flooring is a locally owned and operated company, and we pride ourselves on helping our customers feel welcome from the moment they walk in the door. We are your neighbors. We work and live in your community and understand your needs. You can expect the very best personal service on every visit to CAP Carpet & Flooring and value and warranties on every flooring purchase. Our design team has worked with homeowners, contractors and builders who expect the best. With over 30 years combined experience in the design industry, Angela, Sandy, Sunnie,Maria, Caryn and Megan will be able to help whether you are in the process of building, remodeling, or re-doing. Our design team prides itself on being well versed and knowledgeable on all the up to date products and trends in the floor covering industry as well as countertops, paint and window treatments. Their passion and knowledge is abundant, and we're confident you'll be nothing short of impressed with their expertise and professionalism. When you love your job, it shows: the enthusiasm and energy our design team has harnessed will bring out the best in your project. Make CAP Carpet & Flooring your first stop when considering any type of home improvement project- we are happy to help you every single step of the way.
 Levi Design Build
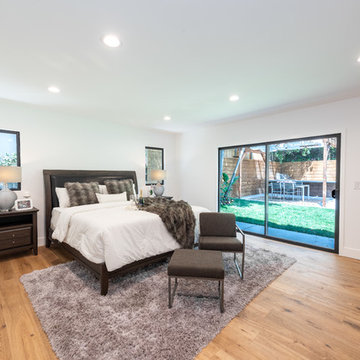
Located in Wrightwood Estates, Levi Construction’s latest residency is a two-story mid-century modern home that was re-imagined and extensively remodeled with a designer’s eye for detail, beauty and function. Beautifully positioned on a 9,600-square-foot lot with approximately 3,000 square feet of perfectly-lighted interior space. The open floorplan includes a great room with vaulted ceilings, gorgeous chef’s kitchen featuring Viking appliances, a smart WiFi refrigerator, and high-tech, smart home technology throughout. There are a total of 5 bedrooms and 4 bathrooms. On the first floor there are three large bedrooms, three bathrooms and a maid’s room with separate entrance. A custom walk-in closet and amazing bathroom complete the master retreat. The second floor has another large bedroom and bathroom with gorgeous views to the valley. The backyard area is an entertainer’s dream featuring a grassy lawn, covered patio, outdoor kitchen, dining pavilion, seating area with contemporary fire pit and an elevated deck to enjoy the beautiful mountain view.
Project designed and built by
Levi Construction
http://www.leviconstruction.com/
Levi Construction is specialized in designing and building custom homes, room additions, and complete home remodels. Contact us today for a quote.
 Drury Design
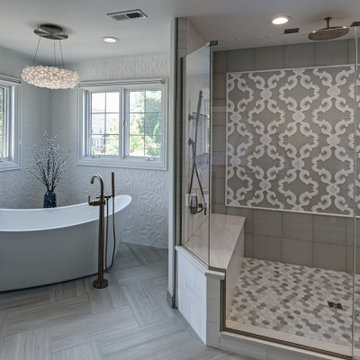
The original idea was to update the tile floor and the tub. That’s it.
A further discussion of wants and needs revealed intentions for an eventual larger shower and an improved vanity storage. It made sense to map out the possibilities and design our update with potential next steps in mind. The process was exciting, ultimately leading to the decision to do a full primary bath remodel.
Design Objectives:
-Maintain existing locations for all major bathroom functions
-Make the shower larger and more open
-Use luxurious materials throughout
-Improve vanity storage and define accessories for specific items
-Incorporate luxury shower fixtures
-Include the latest technology
Design Challenges
-Enlarging the shower in a typical rectangular shape would block the view and light from the alcove windows behind the tub
-Logical placement of the built-in shower caddy and all shower components in accordance with how and where they were to be used
-Keeping the long, back wall free from any shower modules to maintain the decorative tile design
-Combining the owner’s existing smart home system with a comprehensive shower system
-Planning cabinetry for hidden storage and use for various small appliances and make-up
-Integrating expensive shower wall tile with less expensive wall tile for aesthetic and budget purposes
-Incorporating special design features to balance the highly decorative shower tile
Design solutions:
-A clipped corner was planned for the shower bench seat – this allowed for a larger glass wall. The glass wall at the angled bench also brought more natural light into the shower
-Thoughtful shower space design prevented the crowding of features – the shower caddy and handheld shower head were placed on the full-height wall by the shower bench, the regular shower head and body sprays remained on the opposite wall, and the rain head was placed in the center of the shower
-A multi-port DTV system was installed, providing control of all shower components, including chromotherapy and music inside and outside the shower
-The lavish water-jet stone and glass decorative tile was paired with a less-expensive glass tile found in the mosaic
-Pull-out grooming organizers and electrical docking stations were incorporated into the cabinetry
Additional storage was created in the lower corner cabinet
The homeowners are thrilled with their new primary bathroom. Clear goals and carefully evaluated materials informed a fun and functional design that is both thoughtful and sumptuous!
 Levi Design Build
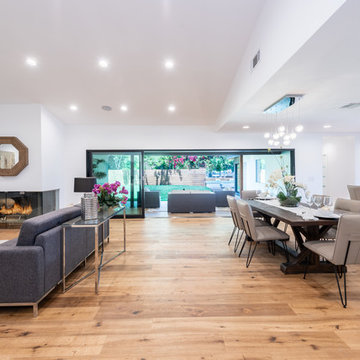
Located in Wrightwood Estates, Levi Construction’s latest residency is a two-story mid-century modern home that was re-imagined and extensively remodeled with a designer’s eye for detail, beauty and function. Beautifully positioned on a 9,600-square-foot lot with approximately 3,000 square feet of perfectly-lighted interior space. The open floorplan includes a great room with vaulted ceilings, gorgeous chef’s kitchen featuring Viking appliances, a smart WiFi refrigerator, and high-tech, smart home technology throughout. There are a total of 5 bedrooms and 4 bathrooms. On the first floor there are three large bedrooms, three bathrooms and a maid’s room with separate entrance. A custom walk-in closet and amazing bathroom complete the master retreat. The second floor has another large bedroom and bathroom with gorgeous views to the valley. The backyard area is an entertainer’s dream featuring a grassy lawn, covered patio, outdoor kitchen, dining pavilion, seating area with contemporary fire pit and an elevated deck to enjoy the beautiful mountain view.
Project designed and built by
Levi Construction
http://www.leviconstruction.com/
Levi Construction is specialized in designing and building custom homes, room additions, and complete home remodels. Contact us today for a quote.
Sponsored
Columbus, OH

Hope Restoration & General Contracting
Columbus Design-Build, Kitchen & Bath Remodeling, Historic Renovations
 Hillcrest Builders
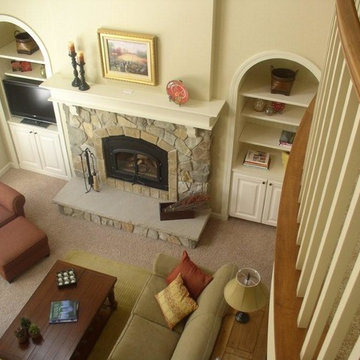
Our client wanted a SIP built home and we incorporated this and many other energy and sustainability features into this home which was in the Sheboygan County Parade of Homes.
Named "The Green Balanced Home", this project was all about creating practical and stunning living spaces that combined with sound environmental building materials and methods. By showcasing an assortment of leading-edge- green technologies, the Green Balanced Home was the talk of the Parade that year. In cooperation with our client, our methodology was:
Start with the site:
1. Protected tree lines
2. Drought resistant vegetation
3. High proportion of natural, plantings versus higher maintenance lawn
4. Optimal home placement on lot for solar exposure
5. Narrower streets
Build a high thermal envelope:
1. R-10 Gold Guard laminated EPS foam under basement, garage, and patio.
2. R-10 Gold Guard laminated EPS foam around exterior foundation walls.
3. R-10 ESP foam "shirt" around foundation
4. R-24 Structural Insulated panels (SIPs) for exterior walls, including garage
5. Sprayed foam in basement box sills and attic separation walls
6. R-15 garage door
7. R-60 blown cellulose attic insulation
Add efficient heating, cooling, ventilation, and electric utilization elements:
1. High efficiency fireplace with auxiliary ducting
2. Pull-out exterior wood-loading drawer
3. Air-to-air heat pump
4. 95% efficient, ultra-quiet variable capacity furnace
5. 19 SEER air conditioner
6. Five zones with programmable thermostats
7. Heat reclamation from hot water usage
8. LED lighting
9. Skylights
10. Energy Star appliances
11. Prep for in-floor heating system
12. Prep for photovoltaic (PV) solar
13. Prep for solar hot water
Incorporate water conservation:
1. Rain water recapture for toilet flushing and irrigation
2. Motion activated hot water circulation system
3. Power flush toilets
4. Dual flush toilets
Create high indoor air quality:
1. HEPA and UV filters
2. Air-to-air exchanger
3. Ultra-quiet bathroom fans with moisture sensor activation
Integrate sustainable, efficient materials:
* Expanded polystyrene (ESP) foam that does not emit HCFC "greenhouse" gases
* Oriented strand board (OSB) based siding, trim, and shutters
* SIPs panels that contain ESP an OSB
* Carpeting pads made from recycled materials
* Stewardship-certified cabinet manufacturing
* Job site recycling and reduce waste with SIPs
 Value Builders
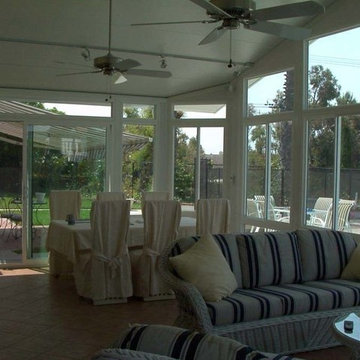
Have you ever wondered about the installation Process of a C-Thru Sunroom? Take a look at the Video Below to see the process from start to finish. Contact us for more information on a C-Thru Sunroom.
1- The first step in any sunroom build is pre-construction and demo. Here you can see our builders are setting forms for the foundation. A nice level foundation will ensure a water tight seal to last and last and prevent against perimeter leaks.
3 - In this particular sunroom the client wanted a higher roof so we built her what is called a roof saddle
4 - The benefits of a roof saddle include, extra height, better drainage, more light with upper glass transoms and even an option to match your existing roof
5- We have the safest delivery methods for your materials they will arrive in customized prepackaging.
6 - We carefully unload and stage materials in your backyard.
7- Here, our certified C Thru Installers are anchoring perimeter channels that holds the walls in place.
8 - These channels are specially designed with an anti-moisture system to prevent perimeter leaks Guaranteeing a moisture free environment.
9- Our installers are putting up the walls - carefully leveling and plumbing each section to the house, we can achieve a custom fit to any house wall with modifications as needed.
10- all though our roof systems are water tight as is, we offer composition roofing to match your existing roof and add to the over all aesthetics of the structure. Flooring, Heating and cooling, fans, lights, and many other custom interior and exterior aesthetic options are available.
While other sunroom additions are only available in stock sizes, or rely on panels and miscellaneous parts to be mixed and matched to fit your home as best they can, C-Thru sunrooms are individually designed and engineered according to the exact specifications of your home. Each and every piece of our sunrooms is fabricated with total precision in our innovative manufacturing facility using industry-leading Computer Aided Design technology. This means that every single sunroom we build is engineered with efficiency, perfect sizing, and optimal visual appeal in mind.
Custom Sunroom Additions for Every Home
When it comes to custom sunroom additions, C-Thru offers a multitude of options to fit your exact preferences and the specific needs of your home. And thanks to our efficient, precision manufacturing technology, a sunroom addition installation with us can be finished in a matter of days—not weeks. When you work with us, you’ll have access to a variety of energy efficient elements to choose from, including Roof Styles: Window Styles: Interior/Exterior Styles:
Make your sunroom truly your own, with options to personalize every feature to your preference. From heated flooring to cable-ready installation, we can make sure your sunroom is ready for its intended purpose.
Thank you for watching, for an estimate please do not hesitate to contact us! We are happy to help with your patio cover or sunroom project.
Contact us today for an estimate!
P: 1-650-339-1477
E: marco.truvaluebuilders@gmail.com
cthrusunroomsnocal.com
patiocoversgalore.com
https://www.youtube.com/watch?v=OoFZ3vZ_yfk&t=71s
#GabledSunrooms #PatioCovers #PatioEnclosures #ScreenRooms #StudioSunrooms #ThreeSeasonRooms #FourSeasonRooms #Enclosures #Solarium #Awning #Retractable #Awning #BayArea #SF #SanJose #SantaClara #Hayward #SanMateo #Burligame #EastBay #Concord #Penninsula #California #NorCal #NorthBayArea #sunroom #patioenclosure #pergola #patiocovering #shed #greenhouse #Solarium #sunroom
At C-Thru Sunrooms we have bi-parting windows and doors! Easy to operate door panels allow for quick opening and closing allowing for lots of ventilation and easy of movement in and out. These doors are great for entertaining a large croud or family event!
We are also one of the first sunroom manufactures to offer a solution to all your lighting needs. Our recessed lighting and fans are sure to illuminate your night!
Contact us today for an estimate!
P: 1-650-339-1477
E: marco.truvaluebuilders@gmail.com
cthrusunroomsnocal.com
patiocoversgalore.com
link to video
https://www.youtube.com/watch?v=esXIo3IA1uQ&t=56s
#GabledSunrooms #PatioCovers #PatioEnclosures #ScreenRooms #StudioSunrooms #ThreeSeasonRooms #FourSeasonRooms #Enclosures #Solarium #Awning #Retractable #Awning #BayArea #SF #SanJose #SantaClara #Hayward #SanMateo #Burligame #EastBay #Concord #Penninsula #California #NorCal #NorthBayArea #sunroom #patioenclosure #pergola #patiocovering #shed #greenhouse #Solarium #sunroom
 eLuxury LLC
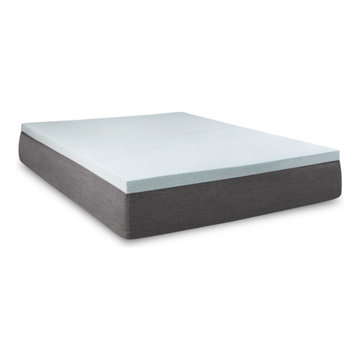
Specifications for the Gel Memory Foam 2.5 Inch Mattress Topper:
2.5 Inch Thick Foam
3.0 Pound (lbs) Density
Gel bead infusion and open cell technology increases air flow for a cool night's sleep
Eases back pain and helps relieve tired/sore muscles
Topper dimensions may be slightly smaller than your mattress. Size has been designed to allow any fitted sheet to fit easily over your new topper.
Made in the USA by veteran owned eLuxurySupply
Dimensions for the Gel Memory Foam 2.5 Inch Mattress Topper:
Twin Memory Foam Mattress Topper: 38.5" wide x 74.5 " long
Twin XL Memory Foam Mattress Topper: 38.5" wide x 79.5" long
Full Memory Foam Mattress Topper: 53.5" wide x 74.5" long
Queen Memory Foam Mattress Topper: 59.5" wide x 79.5" long
King Memory Foam Mattress Topper: 75.5" wide x 79.5" long
California King Memory Foam Mattress Topper: 71.5" wide x 83.5" long
The Gel Memory Foam 2.5 Inch Mattress Topper is made in the USA by some of the most skilled craftsman and suppliers available. Every Gel Memory Foam Mattress Topper is made by hand according to the highest standards to ensure a great nights sleep. This gel memory foam mattress topper provides great back and body support along with a great plush feeling for maximum comfort. The 2.5 inch gel bead infused foam adjusts to your body's shape, all the while properly aligning your spine and relieving pressure points. The foam is infused with millions of gel bead particles that help keep your body cool during the night and offers great support every day. All of our foam is also CertiPUR-US certified, which means it has no prohibited phthalates, no ozone depleters, no CFCs, no mercury, no lead or heavy metals, no formaldehyde, no PBDEs, and low emission (VOCs). This mattress topper meets federal flammability standard 16 CFR 1633.
 Drury Design
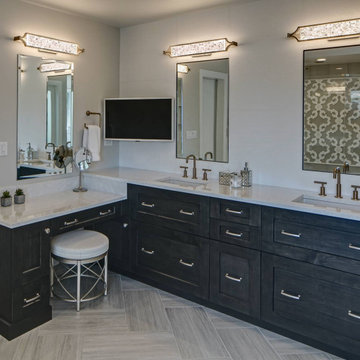
The original idea was to update the tile floor and the tub. That’s it.
A further discussion of wants and needs revealed intentions for an eventual larger shower and an improved vanity storage. It made sense to map out the possibilities and design our update with potential next steps in mind. The process was exciting, ultimately leading to the decision to do a full primary bath remodel.
Design Objectives:
-Maintain existing locations for all major bathroom functions
-Make the shower larger and more open
-Use luxurious materials throughout
-Improve vanity storage and define accessories for specific items
-Incorporate luxury shower fixtures
-Include the latest technology
Design Challenges
-Enlarging the shower in a typical rectangular shape would block the view and light from the alcove windows behind the tub
-Logical placement of the built-in shower caddy and all shower components in accordance with how and where they were to be used
-Keeping the long, back wall free from any shower modules to maintain the decorative tile design
-Combining the owner’s existing smart home system with a comprehensive shower system
-Planning cabinetry for hidden storage and use for various small appliances and make-up
-Integrating expensive shower wall tile with less expensive wall tile for aesthetic and budget purposes
-Incorporating special design features to balance the highly decorative shower tile
Design solutions:
-A clipped corner was planned for the shower bench seat – this allowed for a larger glass wall. The glass wall at the angled bench also brought more natural light into the shower
-Thoughtful shower space design prevented the crowding of features – the shower caddy and handheld shower head were placed on the full-height wall by the shower bench, the regular shower head and body sprays remained on the opposite wall, and the rain head was placed in the center of the shower
-A multi-port DTV system was installed, providing control of all shower components, including chromotherapy and music inside and outside the shower
-The lavish water-jet stone and glass decorative tile was paired with a less-expensive glass tile found in the mosaic
-Pull-out grooming organizers and electrical docking stations were incorporated into the cabinetry
Additional storage was created in the lower corner cabinet
The homeowners are thrilled with their new primary bathroom. Clear goals and carefully evaluated materials informed a fun and functional design that is both thoughtful and sumptuous!

 Allreno
How Can I Reduce the Cost of Remodeling a Bathroom? Allreno Design AI
Renovating a bathroom is an exciting but often expensive project. Homeowners frequently worry about how to balance quality with affordability. Fortunately, there are smart strategies to cut costs without sacrificing style. Whether you're updating a bathroom vanity, retiling the floor, or overhauling the entire space, making informed decisions can help you save thousands.
At Allreno, we understand that affordability and quality go hand in hand. That’s why we developed the Allreno Design App, a cutting-edge tool that simplifies the bath renovation process and helps homeowners make cost-effective choices. Here’s how you can reduce expenses on your next bathroom remodel:
1. Plan Ahead with a Budget
One of the biggest mistakes homeowners make is starting a renovation without a clear budget. Before you begin, list all the necessary expenses, including labor, materials, and unexpected costs. Using tools like the Allreno Design App, you can visualize your remodel and get instant cost estimates based on your selections.
2. Choose a Cost-Effective Bathroom Vanity
A bathroom vanity is often the focal point of a bathroom remodel. Instead of opting for a custom-built unit, consider ready-to-assemble or pre-designed vanities. Allreno partners with top manufacturers to offer stylish, high-quality vanities at competitive prices, helping you save money without compromising on design.
3. Keep the Plumbing Where It Is
Relocating plumbing fixtures—such as sinks, toilets, and showers—can significantly increase labor costs. Keeping your layout intact can save you thousands in contractor fees. The Allreno Design App allows you to experiment with different configurations while ensuring you stay within your budget.
4. Refinish Instead of Replacing
Instead of replacing your bathtub, tiles, or countertops, consider refinishing them. Reglazing a tub, repainting cabinets, or updating hardware can make a huge difference at a fraction of the cost. Small changes can have a big impact without the need for a full replacement.
5. Shop Smart for Materials
Purchasing materials strategically can lead to big savings. Look for clearance items, buy in bulk, and compare prices across different suppliers. Allreno simplifies this by connecting you with trusted vendors and providing access to exclusive discounts on bath renovation materials.
6. Do Some of the Work Yourself
While some tasks require professionals, there are many things you can do on your own, such as painting, installing new hardware, or even assembling a pre-made bathroom vanity. If you're comfortable with DIY projects, this can significantly reduce labor costs.
7. Use Technology to Your Advantage
The Allreno Design App is a game-changer in the renovation industry. It helps homeowners design their ideal bathroom, estimate costs, and even connect with local professionals. By using AI-driven recommendations, the app ensures you get the best value without unnecessary expenses.
Conclusion
Bathroom remodeling doesn’t have to break the bank. By planning ahead, making smart material choices, and leveraging technology like the Allreno Design App, you can achieve a beautiful, budget-friendly bathroom. Whether you're upgrading a bathroom vanity or tackling a full bath renovation, these strategies will help you save money while creating a space you love.
www.allreno.co
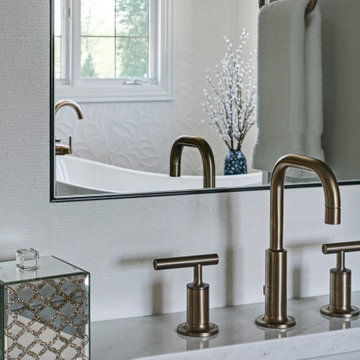 Drury Design
The original idea was to update the tile floor and the tub. That’s it.
A further discussion of wants and needs revealed intentions for an eventual larger shower and an improved vanity storage. It made sense to map out the possibilities and design our update with potential next steps in mind. The process was exciting, ultimately leading to the decision to do a full primary bath remodel.
Design Objectives:
-Maintain existing locations for all major bathroom functions
-Make the shower larger and more open
-Use luxurious materials throughout
-Improve vanity storage and define accessories for specific items
-Incorporate luxury shower fixtures
-Include the latest technology
Design Challenges
-Enlarging the shower in a typical rectangular shape would block the view and light from the alcove windows behind the tub
-Logical placement of the built-in shower caddy and all shower components in accordance with how and where they were to be used
-Keeping the long, back wall free from any shower modules to maintain the decorative tile design
-Combining the owner’s existing smart home system with a comprehensive shower system
-Planning cabinetry for hidden storage and use for various small appliances and make-up
-Integrating expensive shower wall tile with less expensive wall tile for aesthetic and budget purposes
-Incorporating special design features to balance the highly decorative shower tile
Design solutions:
-A clipped corner was planned for the shower bench seat – this allowed for a larger glass wall. The glass wall at the angled bench also brought more natural light into the shower
-Thoughtful shower space design prevented the crowding of features – the shower caddy and handheld shower head were placed on the full-height wall by the shower bench, the regular shower head and body sprays remained on the opposite wall, and the rain head was placed in the center of the shower
-A multi-port DTV system was installed, providing control of all shower components, including chromotherapy and music inside and outside the shower
-The lavish water-jet stone and glass decorative tile was paired with a less-expensive glass tile found in the mosaic
-Pull-out grooming organizers and electrical docking stations were incorporated into the cabinetry
Additional storage was created in the lower corner cabinet
The homeowners are thrilled with their new primary bathroom. Clear goals and carefully evaluated materials informed a fun and functional design that is both thoughtful and sumptuous!

Sponsored
Sunbury, OH

J.Holderby - Renovations
Franklin County's Leading General Contractors - 2X Best of Houzz!
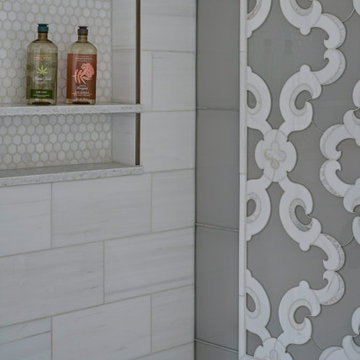 Drury Design
The original idea was to update the tile floor and the tub. That’s it.
A further discussion of wants and needs revealed intentions for an eventual larger shower and an improved vanity storage. It made sense to map out the possibilities and design our update with potential next steps in mind. The process was exciting, ultimately leading to the decision to do a full primary bath remodel.
Design Objectives:
-Maintain existing locations for all major bathroom functions
-Make the shower larger and more open
-Use luxurious materials throughout
-Improve vanity storage and define accessories for specific items
-Incorporate luxury shower fixtures
-Include the latest technology
Design Challenges
-Enlarging the shower in a typical rectangular shape would block the view and light from the alcove windows behind the tub
-Logical placement of the built-in shower caddy and all shower components in accordance with how and where they were to be used
-Keeping the long, back wall free from any shower modules to maintain the decorative tile design
-Combining the owner’s existing smart home system with a comprehensive shower system
-Planning cabinetry for hidden storage and use for various small appliances and make-up
-Integrating expensive shower wall tile with less expensive wall tile for aesthetic and budget purposes
-Incorporating special design features to balance the highly decorative shower tile
Design solutions:
-A clipped corner was planned for the shower bench seat – this allowed for a larger glass wall. The glass wall at the angled bench also brought more natural light into the shower
-Thoughtful shower space design prevented the crowding of features – the shower caddy and handheld shower head were placed on the full-height wall by the shower bench, the regular shower head and body sprays remained on the opposite wall, and the rain head was placed in the center of the shower
-A multi-port DTV system was installed, providing control of all shower components, including chromotherapy and music inside and outside the shower
-The lavish water-jet stone and glass decorative tile was paired with a less-expensive glass tile found in the mosaic
-Pull-out grooming organizers and electrical docking stations were incorporated into the cabinetry
Additional storage was created in the lower corner cabinet
The homeowners are thrilled with their new primary bathroom. Clear goals and carefully evaluated materials informed a fun and functional design that is both thoughtful and sumptuous!
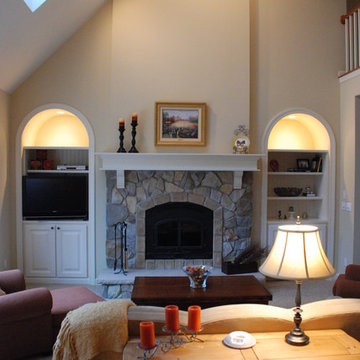 Hillcrest Builders
Our client wanted a SIP built home and we incorporated this and many other energy and sustainability features into this home which was in the Sheboygan County Parade of Homes.
Named "The Green Balanced Home", this project was all about creating practical and stunning living spaces that combined with sound environmental building materials and methods. By showcasing an assortment of leading-edge- green technologies, the Green Balanced Home was the talk of the Parade that year. In cooperation with our client, our methodology was:
Start with the site:
1. Protected tree lines
2. Drought resistant vegetation
3. High proportion of natural, plantings versus higher maintenance lawn
4. Optimal home placement on lot for solar exposure
5. Narrower streets
Build a high thermal envelope:
1. R-10 Gold Guard laminated EPS foam under basement, garage, and patio.
2. R-10 Gold Guard laminated EPS foam around exterior foundation walls.
3. R-10 ESP foam "shirt" around foundation
4. R-24 Structural Insulated panels (SIPs) for exterior walls, including garage
5. Sprayed foam in basement box sills and attic separation walls
6. R-15 garage door
7. R-60 blown cellulose attic insulation
Add efficient heating, cooling, ventilation, and electric utilization elements:
1. High efficiency fireplace with auxiliary ducting
2. Pull-out exterior wood-loading drawer
3. Air-to-air heat pump
4. 95% efficient, ultra-quiet variable capacity furnace
5. 19 SEER air conditioner
6. Five zones with programmable thermostats
7. Heat reclamation from hot water usage
8. LED lighting
9. Skylights
10. Energy Star appliances
11. Prep for in-floor heating system
12. Prep for photovoltaic (PV) solar
13. Prep for solar hot water
Incorporate water conservation:
1. Rain water recapture for toilet flushing and irrigation
2. Motion activated hot water circulation system
3. Power flush toilets
4. Dual flush toilets
Create high indoor air quality:
1. HEPA and UV filters
2. Air-to-air exchanger
3. Ultra-quiet bathroom fans with moisture sensor activation
Integrate sustainable, efficient materials:
* Expanded polystyrene (ESP) foam that does not emit HCFC "greenhouse" gases
* Oriented strand board (OSB) based siding, trim, and shutters
* SIPs panels that contain ESP an OSB
* Carpeting pads made from recycled materials
* Stewardship-certified cabinet manufacturing
* Job site recycling and reduce waste with SIPs
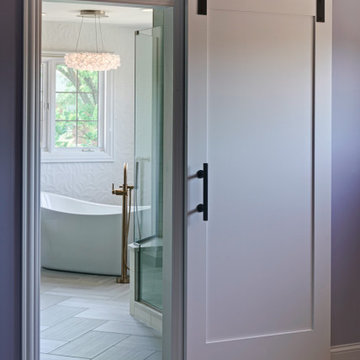 Drury Design
The original idea was to update the tile floor and the tub. That’s it.
A further discussion of wants and needs revealed intentions for an eventual larger shower and an improved vanity storage. It made sense to map out the possibilities and design our update with potential next steps in mind. The process was exciting, ultimately leading to the decision to do a full primary bath remodel.
Design Objectives:
-Maintain existing locations for all major bathroom functions
-Make the shower larger and more open
-Use luxurious materials throughout
-Improve vanity storage and define accessories for specific items
-Incorporate luxury shower fixtures
-Include the latest technology
Design Challenges
-Enlarging the shower in a typical rectangular shape would block the view and light from the alcove windows behind the tub
-Logical placement of the built-in shower caddy and all shower components in accordance with how and where they were to be used
-Keeping the long, back wall free from any shower modules to maintain the decorative tile design
-Combining the owner’s existing smart home system with a comprehensive shower system
-Planning cabinetry for hidden storage and use for various small appliances and make-up
-Integrating expensive shower wall tile with less expensive wall tile for aesthetic and budget purposes
-Incorporating special design features to balance the highly decorative shower tile
Design solutions:
-A clipped corner was planned for the shower bench seat – this allowed for a larger glass wall. The glass wall at the angled bench also brought more natural light into the shower
-Thoughtful shower space design prevented the crowding of features – the shower caddy and handheld shower head were placed on the full-height wall by the shower bench, the regular shower head and body sprays remained on the opposite wall, and the rain head was placed in the center of the shower
-A multi-port DTV system was installed, providing control of all shower components, including chromotherapy and music inside and outside the shower
-The lavish water-jet stone and glass decorative tile was paired with a less-expensive glass tile found in the mosaic
-Pull-out grooming organizers and electrical docking stations were incorporated into the cabinetry
Additional storage was created in the lower corner cabinet
The homeowners are thrilled with their new primary bathroom. Clear goals and carefully evaluated materials informed a fun and functional design that is both thoughtful and sumptuous!
 SCM Design Group
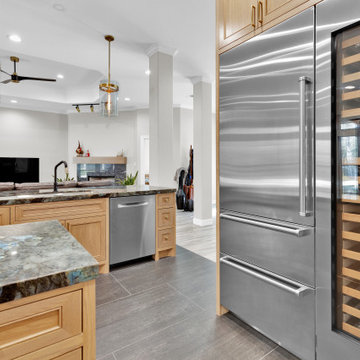
This luxury kitchen was designed to seamlessly integrate premium refrigeration into a timeless custom design. At first glance, the clean lines of the custom white oak cabinetry create a warm and inviting atmosphere, but hidden within are two of the kitchen's most impressive features: the fully integrated **Sub-Zero Designer Series refrigerator** and the **Sub-Zero Designer Series dual-zone wine column**.
The **30-inch Sub-Zero Designer Series panel-ready refrigerator** blends effortlessly behind custom cabinetry panels, preserving the uninterrupted beauty of the millwork while delivering industry-leading food preservation technology. Beside it, the **18-inch Sub-Zero Designer Series dual-zone wine and beverage column** provides independent temperature zones to perfectly store fine wines, champagne, and beverages at their ideal serving temperatures. Together, these appliances create a sophisticated entertaining space while maintaining the kitchen's clean, architectural appearance.
Surrounding the refrigeration wall, custom white oak cabinetry was handcrafted to maximize storage and create a furniture-inspired design with precise detailing and flawless integration. The warm natural wood tones contrast beautifully with the surrounding premium finishes, making the appliance wall a subtle yet luxurious focal point.
Every element of this kitchen was thoughtfully designed to combine performance with elegance. The integrated Sub-Zero refrigeration system disappears into the cabinetry, allowing the craftsmanship of the custom millwork to take center stage while providing the reliability and precision expected in a luxury home.
Designed for homeowners who appreciate exceptional quality and timeless design, this kitchen demonstrates how **Sub-Zero integrated refrigeration, a dedicated wine column, and custom white oak cabinetry** can transform everyday living into a refined culinary experience.
30-inch Sub-Zero Designer Series refrigerator
Sponsored
Sunbury, OH
J.Holderby - Renovations
Franklin County's Leading General Contractors - 2X Best of Houzz!
 Blanco Interior Design
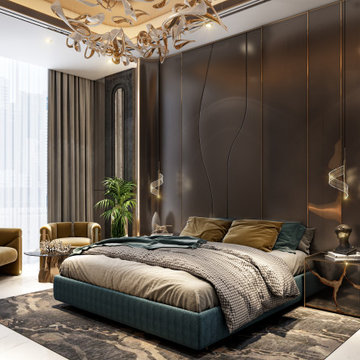
In the singular architectural landscape of Dubai, investing in a villa is a pursuit of the extraordinary. Navigating the financial architecture of such an investment is not merely a budgetary exercise, but a masterplan for excellence. At Blanco Interior Design we understand that designing in Dubai means commanding the finest resources of the world, ensuring that every square meter resonates with a level of opulence that seamlessly fuses timeless beauty with rigorous precision.
1. The Scope of Investment (Cost per Square Meter) :
In Dubai's market, professional design services and execution are generally categorized into three tiers. At Blanco, we specialize in the Luxury and Elite segments, ensuring that your investment reflects Design Mastery:
- Premium / Standard: AED 1,500 – AED 3,000 per sqm. This includes high-quality ready-made furniture and standard refined finishes.
- Luxury / High-End: AED 3,500 – AED 6,000 per sqm. This tier involves bespoke joinery, imported marbles, and sophisticated lighting systems—the hallmark of Blanco’s Executive Precision
- Ultra-Luxury (Elite): AED 7,000+ per sqm. This is the realm of limitless design, featuring rare materials, designer brands, and complex structural modifications managed through our Operational Accuracy.
2. Key Cost Drivers: The Blanco Perspective
To budget effectively, homeowners must consider the four pillars that influence the final invoice. At Blanco, we ensure we truly listen to your priorities to optimize these factors:
- Bespoke Joinery and Millwork.
- Material Selection.
- Smart Technology.
-Civil and Structural Works.
3. Professional Design and Management Fees:
Engaging a reputable firm like Blanco involves a structured approach to fees to ensure transparency:
1. Concept and Detailed Design Fee: A fixed fee for the creative vision, 2D layouts, and 3D renderings that bring your dream to life.
2. Supervision and Management Fee: To ensure the execution matches the approved blueprints perfectly, a management fee is applied, covering our rigorous quality control and Operational Accuracy.
Investing in a villa interior with Blanco offers unique advantage. Our position as a global hub provides access to the finest international materials with shorter lead times, managed through our Turnkey Solutions.
Investing in the interior of a Dubai villa is an investment in a lifestyle of distinction. While costs are influenced by the scale of ambition, the true value lies in creating a space that harmonizes unparalleled luxury with long-term functional excellence. With Blanco Interior Design, we turn your financial investment into an architectural legacy.
Blanco Interior Design: Your Vision, Perfectly Executed.
 Drury Design
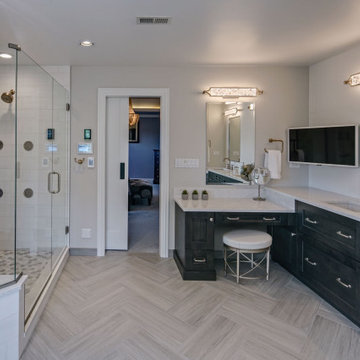
The original idea was to update the tile floor and the tub. That’s it.
A further discussion of wants and needs revealed intentions for an eventual larger shower and an improved vanity storage. It made sense to map out the possibilities and design our update with potential next steps in mind. The process was exciting, ultimately leading to the decision to do a full primary bath remodel.
Design Objectives:
-Maintain existing locations for all major bathroom functions
-Make the shower larger and more open
-Use luxurious materials throughout
-Improve vanity storage and define accessories for specific items
-Incorporate luxury shower fixtures
-Include the latest technology
Design Challenges
-Enlarging the shower in a typical rectangular shape would block the view and light from the alcove windows behind the tub
-Logical placement of the built-in shower caddy and all shower components in accordance with how and where they were to be used
-Keeping the long, back wall free from any shower modules to maintain the decorative tile design
-Combining the owner’s existing smart home system with a comprehensive shower system
-Planning cabinetry for hidden storage and use for various small appliances and make-up
-Integrating expensive shower wall tile with less expensive wall tile for aesthetic and budget purposes
-Incorporating special design features to balance the highly decorative shower tile
Design solutions:
-A clipped corner was planned for the shower bench seat – this allowed for a larger glass wall. The glass wall at the angled bench also brought more natural light into the shower
-Thoughtful shower space design prevented the crowding of features – the shower caddy and handheld shower head were placed on the full-height wall by the shower bench, the regular shower head and body sprays remained on the opposite wall, and the rain head was placed in the center of the shower
-A multi-port DTV system was installed, providing control of all shower components, including chromotherapy and music inside and outside the shower
-The lavish water-jet stone and glass decorative tile was paired with a less-expensive glass tile found in the mosaic
-Pull-out grooming organizers and electrical docking stations were incorporated into the cabinetry
Additional storage was created in the lower corner cabinet
The homeowners are thrilled with their new primary bathroom. Clear goals and carefully evaluated materials informed a fun and functional design that is both thoughtful and sumptuous!
 Techo-Bloc
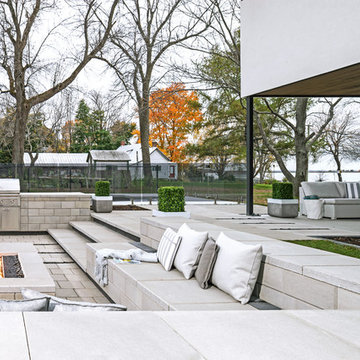
A contemporary slab, intended for commercial and municipal pedestrian use, Industria’s streigth edges will give each project a modern and exclusive appearance. Available in smooth, polished and Granitex finishes.
46