
Search results for "Local zoning" in Home Design Ideas

 VisionScapes
Would you appreciate if this home was the entrance to you your community? How would you thank your neighbour for raising your property value by at least 5 figures? Well, that is the case in Calgary's exclusive enclave "The Willows of Wentworth". With distinct style and class, this busy executive couple wanted the landscape of this former show home to match the grandeur of the interior of the home, and we think they hit a home run. The expansive custom water feature greets every homeowner who comes into this beautiful suburb. Surrounded by locally sourced stone retaining walls and a quaint front patio the entry to this home is nothing less than spectacular. The backyard doesn't miss a beat. With an expansive Indonesian hardwood deck, Mahogany privacy screens, stone columns, a stunning water feature, and built in BBQ with a searing station complete this home's grandeur.
Photo Credit: Jamen Rhodes
 Kasey Smith Interiors
This home was designed for a young professional with a busy career in tech who wanted a place to come home to and fully exhale. She's well traveled, loves Europe and knows her wine, and her favorite cities, Paris and New York among them, shaped every room. The result is warm, quiet and collected, with a little European soul.
In the living room, soft linen Roman shades, a slipcovered linen sofa and a velvet swivel chair set a calm, layered tone, while brass lighting and a dark stone fireplace add warmth and weight. A custom curved bench built by a local craftsman does triple duty as extra seating, a drop zone and her pup's favorite perch for watching the street.
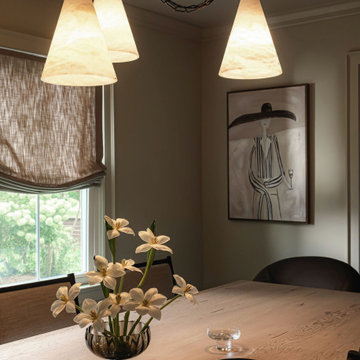
The dining room centers on a white oak table under alabaster cone pendants hung from oversized chain. Upholstered wood-frame chairs, velvet host chairs, a sculptural dark wood sideboard and a vintage rug make it feel like a place to linger over a good bottle of wine, and the art nods to her love of both wine and Paris.
The bathroom didn't exist before. We carved it out of a second living area and built it from scratch, with a mitered-edge natural stone vanity top, an integrated brass sink, brass fixtures, a sculptural mirror and dark stacked tile in a frameless glass shower. It feels like a small European hotel moment.
Transitional, European-inspired interior design in Wilmington, NC by Kasey Smith Interiors. Photos by Abigail Jackson Photography.
 Kasey Smith Interiors
This home was designed for a young professional with a busy career in tech who wanted a place to come home to and fully exhale. She's well traveled, loves Europe and knows her wine, and her favorite cities, Paris and New York among them, shaped every room. The result is warm, quiet and collected, with a little European soul.
In the living room, soft linen Roman shades, a slipcovered linen sofa and a velvet swivel chair set a calm, layered tone, while brass lighting and a dark stone fireplace add warmth and weight. A custom curved bench built by a local craftsman does triple duty as extra seating, a drop zone and her pup's favorite perch for watching the street.
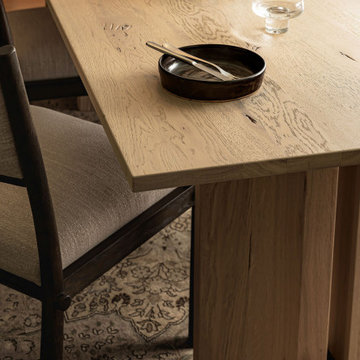
The dining room centers on a white oak table under alabaster cone pendants hung from oversized chain. Upholstered wood-frame chairs, velvet host chairs, a sculptural dark wood sideboard and a vintage rug make it feel like a place to linger over a good bottle of wine, and the art nods to her love of both wine and Paris.
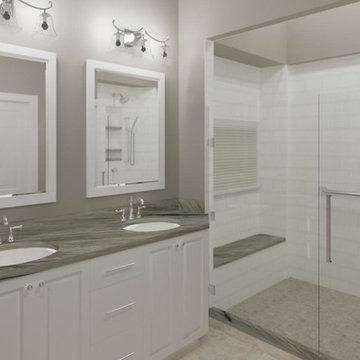
The bathroom didn't exist before. We carved it out of a second living area and built it from scratch, with a mitered-edge natural stone vanity top, an integrated brass sink, brass fixtures, a sculptural mirror and dark stacked tile in a frameless glass shower. It feels like a small European hotel moment.
Transitional, European-inspired interior design in Wilmington, NC by Kasey Smith Interiors. Photos by Abigail Jackson Photography.
Find the right local pro for your project

 Talon Construction Inc.
Designing and building a kitchen addition is a complex process that involves multiple steps and considerations. Here is a general outline to help you get started on your kitchen addition project:
Define Your Goals and Budget:
• Determine the purpose of the kitchen addition. Is it for more cooking space, a dining area, or a combination of both?
• Establish a realistic budget for your project. Consider all costs, including construction, permits, materials, and furnishings.
Hire a Design Professional:
• Seek the services of a design build company who specializes in kitchen additions.
• Discuss your vision, needs, and budget with the design professional to create a design concept.
Site Evaluation:
• Assess the existing space and structural condition of your home to ensure it can support the addition.
• Consider factors like zoning regulations, setbacks, and building codes.
Design Development:
• Collaborate with your design professional to refine the concept, including the layout, size, and architectural style.
• Choose materials, finishes, and fixtures that fit your design and budget.
Obtain Permits:
• Consult with your local design build contractor to determine the necessary permits and approvals.
• Prepare and submit all required documents, including architectural drawings and engineering plans.
Create Construction Documents:
• Work with your design build professional to develop detailed construction drawings and specifications.
• These documents will serve as a guide for contractors during construction.
Hire a design build contractor:
• Check references, credentials, and licenses before selecting a contractor.
• Sign a detailed contract that outlines the scope of work, timeline, and payment schedule.
Construction Phase:
• Demolition: If needed, remove any existing structures or walls.
• Foundation: Construct the foundation for the addition.
• Framing: Build the structural framework of the addition.
• Plumbing, Electrical, and HVAC: Install or update utilities as required.
• Insulation: Ensure proper insulation for energy efficiency.
• Drywall and Finish Work: Complete the walls and ceilings.
• Flooring and Cabinetry: Install flooring and kitchen cabinets.
• Appliances and Fixtures: Add appliances, plumbing fixtures, and lighting.
• Paint and Finish: Apply paint and finishes to achieve the desired look.
• Final Inspection: Schedule inspections to ensure compliance with building codes.
Final Inspections and Approvals:
• Arrange for final inspections to ensure the addition meets all safety and code requirements.
• Obtain any necessary certificates of occupancy or compliance.
Move In and Enjoy:
• Once all inspections and approvals are received, you can move into your new kitchen addition and start enjoying it.
Remember that every kitchen addition project is unique, so adapt this outline to your specific needs and circumstances. Consulting with professionals and obtaining the required permits and inspections is crucial to a successful and safe project.
 Talon Construction Inc.
Designing and building a kitchen addition is a complex process that involves multiple steps and considerations. Here is a general outline to help you get started on your kitchen addition project:
Define Your Goals and Budget:
• Determine the purpose of the kitchen addition. Is it for more cooking space, a dining area, or a combination of both?
• Establish a realistic budget for your project. Consider all costs, including construction, permits, materials, and furnishings.
Hire a Design Professional:
• Seek the services of a design build company who specializes in kitchen additions.
• Discuss your vision, needs, and budget with the design professional to create a design concept.
Site Evaluation:
• Assess the existing space and structural condition of your home to ensure it can support the addition.
• Consider factors like zoning regulations, setbacks, and building codes.
Design Development:
• Collaborate with your design professional to refine the concept, including the layout, size, and architectural style.
• Choose materials, finishes, and fixtures that fit your design and budget.
Obtain Permits:
• Consult with your local design build contractor to determine the necessary permits and approvals.
• Prepare and submit all required documents, including architectural drawings and engineering plans.
Create Construction Documents:
• Work with your design build professional to develop detailed construction drawings and specifications.
• These documents will serve as a guide for contractors during construction.
Hire a design build contractor:
• Check references, credentials, and licenses before selecting a contractor.
• Sign a detailed contract that outlines the scope of work, timeline, and payment schedule.
Construction Phase:
• Demolition: If needed, remove any existing structures or walls.
• Foundation: Construct the foundation for the addition.
• Framing: Build the structural framework of the addition.
• Plumbing, Electrical, and HVAC: Install or update utilities as required.
• Insulation: Ensure proper insulation for energy efficiency.
• Drywall and Finish Work: Complete the walls and ceilings.
• Flooring and Cabinetry: Install flooring and kitchen cabinets.
• Appliances and Fixtures: Add appliances, plumbing fixtures, and lighting.
• Paint and Finish: Apply paint and finishes to achieve the desired look.
• Final Inspection: Schedule inspections to ensure compliance with building codes.
Final Inspections and Approvals:
• Arrange for final inspections to ensure the addition meets all safety and code requirements.
• Obtain any necessary certificates of occupancy or compliance.
Move In and Enjoy:
• Once all inspections and approvals are received, you can move into your new kitchen addition and start enjoying it.
Remember that every kitchen addition project is unique, so adapt this outline to your specific needs and circumstances. Consulting with professionals and obtaining the required permits and inspections is crucial to a successful and safe project.
 Talon Construction Inc.
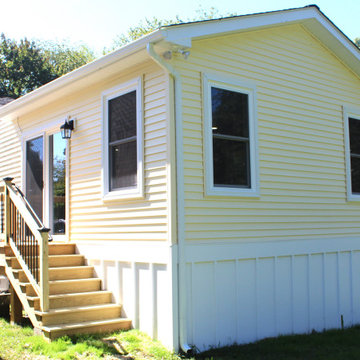
Designing and building a kitchen addition is a complex process that involves multiple steps and considerations. Here is a general outline to help you get started on your kitchen addition project:
Define Your Goals and Budget:
• Determine the purpose of the kitchen addition. Is it for more cooking space, a dining area, or a combination of both?
• Establish a realistic budget for your project. Consider all costs, including construction, permits, materials, and furnishings.
Hire a Design Professional:
• Seek the services of a design build company who specializes in kitchen additions.
• Discuss your vision, needs, and budget with the design professional to create a design concept.
Site Evaluation:
• Assess the existing space and structural condition of your home to ensure it can support the addition.
• Consider factors like zoning regulations, setbacks, and building codes.
Design Development:
• Collaborate with your design professional to refine the concept, including the layout, size, and architectural style.
• Choose materials, finishes, and fixtures that fit your design and budget.
Obtain Permits:
• Consult with your local design build contractor to determine the necessary permits and approvals.
• Prepare and submit all required documents, including architectural drawings and engineering plans.
Create Construction Documents:
• Work with your design build professional to develop detailed construction drawings and specifications.
• These documents will serve as a guide for contractors during construction.
Hire a design build contractor:
• Check references, credentials, and licenses before selecting a contractor.
• Sign a detailed contract that outlines the scope of work, timeline, and payment schedule.
Construction Phase:
• Demolition: If needed, remove any existing structures or walls.
• Foundation: Construct the foundation for the addition.
• Framing: Build the structural framework of the addition.
• Plumbing, Electrical, and HVAC: Install or update utilities as required.
• Insulation: Ensure proper insulation for energy efficiency.
• Drywall and Finish Work: Complete the walls and ceilings.
• Flooring and Cabinetry: Install flooring and kitchen cabinets.
• Appliances and Fixtures: Add appliances, plumbing fixtures, and lighting.
• Paint and Finish: Apply paint and finishes to achieve the desired look.
• Final Inspection: Schedule inspections to ensure compliance with building codes.
Final Inspections and Approvals:
• Arrange for final inspections to ensure the addition meets all safety and code requirements.
• Obtain any necessary certificates of occupancy or compliance.
Move In and Enjoy:
• Once all inspections and approvals are received, you can move into your new kitchen addition and start enjoying it.
Remember that every kitchen addition project is unique, so adapt this outline to your specific needs and circumstances. Consulting with professionals and obtaining the required permits and inspections is crucial to a successful and safe project.

 Windfall Lumber
This new custom house, completed in late 2012, was designed with an accessory dwelling unit to take advantage of an allowance in the single family zoning code in Seattle. The primary dwelling, 1300 square feet on the upper two stories houses a mother and teenager. The accessory dwelling, 750 square feet, provides a leasable smaller space that can be for a tenant or downsizing in the future.
Seattle based RE Store began by completely deconstructing the original home so that its salvaged parts could have a new life in other design applications. The new design for the home is modern with a sustainable theme, incorporating a palette of natural materials. The Paperstone, wood and steel staircase connects the open-plan living, dining areas and kitchen to the upstairs bedrooms and open library. Exterior decks extend the main interior living spaces while sliding glass panels allow the primary bedroom to connect.
Stylishly visible from all rooms in the open interior living spaces are two complementary objects, both lit from within, a frosted lexan pantry and a slatted reclaimed fir bathroom, with wood sourced from Windfall Lumber. Throughout the home, finishes are simple and minimal: polished concrete flooring, bright-white walls, and formaldehyde-free sapele and maple cabinetry. The main kitchen is outfitted with Ecotop counters and a custom sapele wood island that has large, handle-free pullout drawers on the cooking side and a built-in wine rack on the other. Maximizing storage, a custom built-in apple plywood bench and open wooden box shelves provide extra space.
A model of efficiency, the home maximizes the performance of the envelope of the building. The reclaimed fir car decking wrapped around the exterior from Windfall Lumber, creates the rainscreen siding and is sourced locally from a deconstructed warehouse in Tacoma WA. In addition, access to daylight through high-performance glazing, solar preheat for domestic hot water needs, in-floor radiant heating and a green roof created by the owner adds to the efficiency.
Photo Credit & Design: b9 architects
URL
http://www.windfalllumber.com
Photographer: Ed Sozinho
Sponsored
Columbus, OH

Trish Takacs Design
Award Winning & Highly Skilled Kitchen & Bath Designer in Columbus
 Talon Construction Inc.
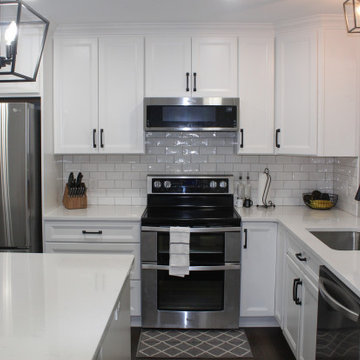
Designing and building a kitchen addition is a complex process that involves multiple steps and considerations. Here is a general outline to help you get started on your kitchen addition project:
Define Your Goals and Budget:
• Determine the purpose of the kitchen addition. Is it for more cooking space, a dining area, or a combination of both?
• Establish a realistic budget for your project. Consider all costs, including construction, permits, materials, and furnishings.
Hire a Design Professional:
• Seek the services of a design build company who specializes in kitchen additions.
• Discuss your vision, needs, and budget with the design professional to create a design concept.
Site Evaluation:
• Assess the existing space and structural condition of your home to ensure it can support the addition.
• Consider factors like zoning regulations, setbacks, and building codes.
Design Development:
• Collaborate with your design professional to refine the concept, including the layout, size, and architectural style.
• Choose materials, finishes, and fixtures that fit your design and budget.
Obtain Permits:
• Consult with your local design build contractor to determine the necessary permits and approvals.
• Prepare and submit all required documents, including architectural drawings and engineering plans.
Create Construction Documents:
• Work with your design build professional to develop detailed construction drawings and specifications.
• These documents will serve as a guide for contractors during construction.
Hire a design build contractor:
• Check references, credentials, and licenses before selecting a contractor.
• Sign a detailed contract that outlines the scope of work, timeline, and payment schedule.
Construction Phase:
• Demolition: If needed, remove any existing structures or walls.
• Foundation: Construct the foundation for the addition.
• Framing: Build the structural framework of the addition.
• Plumbing, Electrical, and HVAC: Install or update utilities as required.
• Insulation: Ensure proper insulation for energy efficiency.
• Drywall and Finish Work: Complete the walls and ceilings.
• Flooring and Cabinetry: Install flooring and kitchen cabinets.
• Appliances and Fixtures: Add appliances, plumbing fixtures, and lighting.
• Paint and Finish: Apply paint and finishes to achieve the desired look.
• Final Inspection: Schedule inspections to ensure compliance with building codes.
Final Inspections and Approvals:
• Arrange for final inspections to ensure the addition meets all safety and code requirements.
• Obtain any necessary certificates of occupancy or compliance.
Move In and Enjoy:
• Once all inspections and approvals are received, you can move into your new kitchen addition and start enjoying it.
Remember that every kitchen addition project is unique, so adapt this outline to your specific needs and circumstances. Consulting with professionals and obtaining the required permits and inspections is crucial to a successful and safe project.
 Talon Construction Inc.
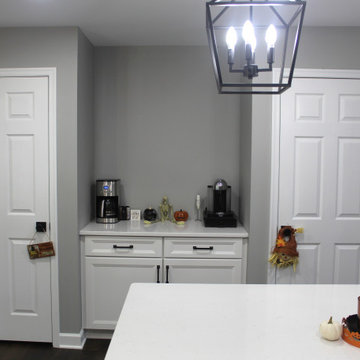
Designing and building a kitchen addition is a complex process that involves multiple steps and considerations. Here is a general outline to help you get started on your kitchen addition project:
Define Your Goals and Budget:
• Determine the purpose of the kitchen addition. Is it for more cooking space, a dining area, or a combination of both?
• Establish a realistic budget for your project. Consider all costs, including construction, permits, materials, and furnishings.
Hire a Design Professional:
• Seek the services of a design build company who specializes in kitchen additions.
• Discuss your vision, needs, and budget with the design professional to create a design concept.
Site Evaluation:
• Assess the existing space and structural condition of your home to ensure it can support the addition.
• Consider factors like zoning regulations, setbacks, and building codes.
Design Development:
• Collaborate with your design professional to refine the concept, including the layout, size, and architectural style.
• Choose materials, finishes, and fixtures that fit your design and budget.
Obtain Permits:
• Consult with your local design build contractor to determine the necessary permits and approvals.
• Prepare and submit all required documents, including architectural drawings and engineering plans.
Create Construction Documents:
• Work with your design build professional to develop detailed construction drawings and specifications.
• These documents will serve as a guide for contractors during construction.
Hire a design build contractor:
• Check references, credentials, and licenses before selecting a contractor.
• Sign a detailed contract that outlines the scope of work, timeline, and payment schedule.
Construction Phase:
• Demolition: If needed, remove any existing structures or walls.
• Foundation: Construct the foundation for the addition.
• Framing: Build the structural framework of the addition.
• Plumbing, Electrical, and HVAC: Install or update utilities as required.
• Insulation: Ensure proper insulation for energy efficiency.
• Drywall and Finish Work: Complete the walls and ceilings.
• Flooring and Cabinetry: Install flooring and kitchen cabinets.
• Appliances and Fixtures: Add appliances, plumbing fixtures, and lighting.
• Paint and Finish: Apply paint and finishes to achieve the desired look.
• Final Inspection: Schedule inspections to ensure compliance with building codes.
Final Inspections and Approvals:
• Arrange for final inspections to ensure the addition meets all safety and code requirements.
• Obtain any necessary certificates of occupancy or compliance.
Move In and Enjoy:
• Once all inspections and approvals are received, you can move into your new kitchen addition and start enjoying it.
Remember that every kitchen addition project is unique, so adapt this outline to your specific needs and circumstances. Consulting with professionals and obtaining the required permits and inspections is crucial to a successful and safe project.
 Talon Construction Inc.
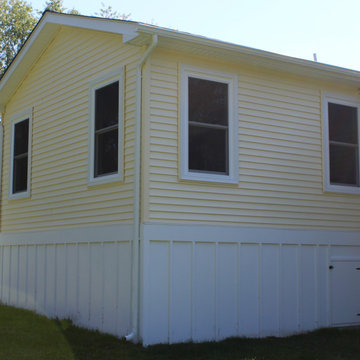
Designing and building a kitchen addition is a complex process that involves multiple steps and considerations. Here is a general outline to help you get started on your kitchen addition project:
Define Your Goals and Budget:
• Determine the purpose of the kitchen addition. Is it for more cooking space, a dining area, or a combination of both?
• Establish a realistic budget for your project. Consider all costs, including construction, permits, materials, and furnishings.
Hire a Design Professional:
• Seek the services of a design build company who specializes in kitchen additions.
• Discuss your vision, needs, and budget with the design professional to create a design concept.
Site Evaluation:
• Assess the existing space and structural condition of your home to ensure it can support the addition.
• Consider factors like zoning regulations, setbacks, and building codes.
Design Development:
• Collaborate with your design professional to refine the concept, including the layout, size, and architectural style.
• Choose materials, finishes, and fixtures that fit your design and budget.
Obtain Permits:
• Consult with your local design build contractor to determine the necessary permits and approvals.
• Prepare and submit all required documents, including architectural drawings and engineering plans.
Create Construction Documents:
• Work with your design build professional to develop detailed construction drawings and specifications.
• These documents will serve as a guide for contractors during construction.
Hire a design build contractor:
• Check references, credentials, and licenses before selecting a contractor.
• Sign a detailed contract that outlines the scope of work, timeline, and payment schedule.
Construction Phase:
• Demolition: If needed, remove any existing structures or walls.
• Foundation: Construct the foundation for the addition.
• Framing: Build the structural framework of the addition.
• Plumbing, Electrical, and HVAC: Install or update utilities as required.
• Insulation: Ensure proper insulation for energy efficiency.
• Drywall and Finish Work: Complete the walls and ceilings.
• Flooring and Cabinetry: Install flooring and kitchen cabinets.
• Appliances and Fixtures: Add appliances, plumbing fixtures, and lighting.
• Paint and Finish: Apply paint and finishes to achieve the desired look.
• Final Inspection: Schedule inspections to ensure compliance with building codes.
Final Inspections and Approvals:
• Arrange for final inspections to ensure the addition meets all safety and code requirements.
• Obtain any necessary certificates of occupancy or compliance.
Move In and Enjoy:
• Once all inspections and approvals are received, you can move into your new kitchen addition and start enjoying it.
Remember that every kitchen addition project is unique, so adapt this outline to your specific needs and circumstances. Consulting with professionals and obtaining the required permits and inspections is crucial to a successful and safe project.
 Talon Construction Inc.
Designing and building a kitchen addition is a complex process that involves multiple steps and considerations. Here is a general outline to help you get started on your kitchen addition project:
Define Your Goals and Budget:
• Determine the purpose of the kitchen addition. Is it for more cooking space, a dining area, or a combination of both?
• Establish a realistic budget for your project. Consider all costs, including construction, permits, materials, and furnishings.
Hire a Design Professional:
• Seek the services of a design build company who specializes in kitchen additions.
• Discuss your vision, needs, and budget with the design professional to create a design concept.
Site Evaluation:
• Assess the existing space and structural condition of your home to ensure it can support the addition.
• Consider factors like zoning regulations, setbacks, and building codes.
Design Development:
• Collaborate with your design professional to refine the concept, including the layout, size, and architectural style.
• Choose materials, finishes, and fixtures that fit your design and budget.
Obtain Permits:
• Consult with your local design build contractor to determine the necessary permits and approvals.
• Prepare and submit all required documents, including architectural drawings and engineering plans.
Create Construction Documents:
• Work with your design build professional to develop detailed construction drawings and specifications.
• These documents will serve as a guide for contractors during construction.
Hire a design build contractor:
• Check references, credentials, and licenses before selecting a contractor.
• Sign a detailed contract that outlines the scope of work, timeline, and payment schedule.
Construction Phase:
• Demolition: If needed, remove any existing structures or walls.
• Foundation: Construct the foundation for the addition.
• Framing: Build the structural framework of the addition.
• Plumbing, Electrical, and HVAC: Install or update utilities as required.
• Insulation: Ensure proper insulation for energy efficiency.
• Drywall and Finish Work: Complete the walls and ceilings.
• Flooring and Cabinetry: Install flooring and kitchen cabinets.
• Appliances and Fixtures: Add appliances, plumbing fixtures, and lighting.
• Paint and Finish: Apply paint and finishes to achieve the desired look.
• Final Inspection: Schedule inspections to ensure compliance with building codes.
Final Inspections and Approvals:
• Arrange for final inspections to ensure the addition meets all safety and code requirements.
• Obtain any necessary certificates of occupancy or compliance.
Move In and Enjoy:
• Once all inspections and approvals are received, you can move into your new kitchen addition and start enjoying it.
Remember that every kitchen addition project is unique, so adapt this outline to your specific needs and circumstances. Consulting with professionals and obtaining the required permits and inspections is crucial to a successful and safe project.
 Windfall Lumber
This new custom house, completed in late 2012, was designed with an accessory dwelling unit to take advantage of an allowance in the single family zoning code in Seattle. The primary dwelling, 1300 square feet on the upper two stories houses a mother and teenager. The accessory dwelling, 750 square feet, provides a leasable smaller space that can be for a tenant or downsizing in the future.
Seattle based RE Store began by completely deconstructing the original home so that its salvaged parts could have a new life in other design applications. The new design for the home is modern with a sustainable theme, incorporating a palette of natural materials. The Paperstone, wood and steel staircase connects the open-plan living, dining areas and kitchen to the upstairs bedrooms and open library. Exterior decks extend the main interior living spaces while sliding glass panels allow the primary bedroom to connect.
Stylishly visible from all rooms in the open interior living spaces are two complementary objects, both lit from within, a frosted lexan pantry and a slatted reclaimed fir bathroom, with wood sourced from Windfall Lumber. Throughout the home, finishes are simple and minimal: polished concrete flooring, bright-white walls, and formaldehyde-free sapele and maple cabinetry. The main kitchen is outfitted with Ecotop counters and a custom sapele wood island that has large, handle-free pullout drawers on the cooking side and a built-in wine rack on the other. Maximizing storage, a custom built-in apple plywood bench and open wooden box shelves provide extra space.
A model of efficiency, the home maximizes the performance of the envelope of the building. The reclaimed fir car decking wrapped around the exterior from Windfall Lumber, creates the rainscreen siding and is sourced locally from a deconstructed warehouse in Tacoma WA. In addition, access to daylight through high-performance glazing, solar preheat for domestic hot water needs, in-floor radiant heating and a green roof created by the owner adds to the efficiency.
Photo Credit & Design: b9 architects
 Jordan Design Build Group
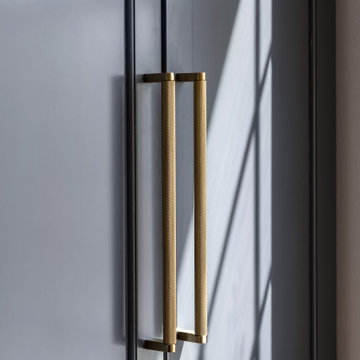
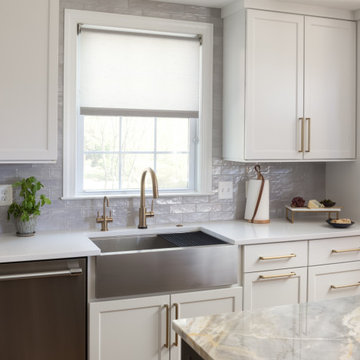
After more than a decade in their new Alexandria home, our clients decided their kitchen was ready for a major refresh, both in form and function. The original stained wood cabinets and granite countertops had served them well, but the traditional design no longer fit with their evolving style which had become less formal and more transitional. The homeowners liked the idea of two-toned kitchen cabinets, so we opted for a combination of pure white and charcoal gray for dramatic contrast. Brushed gold fixtures and statement brass pulls add warmth and sophistication. The distinctive marble counters are a showstopper, with unique veining and striking color variation, from blue to gray to ochre. The shimmering blue-gray backsplash unites the entire space.
The overall goal was to create an expansive entertaining kitchen that could accommodate our clients’ large gatherings of family and friends, and provide them with several zones for prepping, serving, seating, and socializing. Also high on the clients’ wish list: a more generous island, professional appliances, and better storage. We expanded the island in two directions to allow for comfortable seating at the counter with plenty of room for a table in the breakfast nook. An expandable bar height table in the adjacent dining area offers even more flexibility for eating and socializing.
We designed a custom hutch which has a multitude of storage options and functionality – open display shelves, roll-outs, drawers, extra counter/serving space, as well as a beverage fridge and appliance garage/coffee center. On the opposite side of the kitchen, we replaced a small pantry closet with a furniture style built-in that took advantage of underutilized space. Anticipating issues with supply chain, we opted to use a local cabinet maker on this project which allowed us to fully customize the cabinets for optimal functionality.
Other stand-out features include a Thermador appliance package, workstation farmhouse sink, ‘touch’ faucet, hot+cold water dispenser, and hidden toe-kick storage. Our clients now have a beautiful, cohesive space that reflects their personal style and fulfills their dream of a having an expansive kitchen where they can cook and entertain for years to come.
 Windfall Lumber
This new custom house, completed in late 2012, was designed with an accessory dwelling unit to take advantage of an allowance in the single family zoning code in Seattle. The primary dwelling, 1300 square feet on the upper two stories houses a mother and teenager. The accessory dwelling, 750 square feet, provides a leasable smaller space that can be for a tenant or downsizing in the future.
Seattle based RE Store began by completely deconstructing the original home so that its salvaged parts could have a new life in other design applications. The new design for the home is modern with a sustainable theme, incorporating a palette of natural materials. The Paperstone, wood and steel staircase connects the open-plan living, dining areas and kitchen to the upstairs bedrooms and open library. Exterior decks extend the main interior living spaces while sliding glass panels allow the primary bedroom to connect.
Stylishly visible from all rooms in the open interior living spaces are two complementary objects, both lit from within, a frosted lexan pantry and a slatted reclaimed fir bathroom, with wood sourced from Windfall Lumber. Throughout the home, finishes are simple and minimal: polished concrete flooring, bright-white walls, and formaldehyde-free sapele and maple cabinetry. The main kitchen is outfitted with Ecotop counters and a custom sapele wood island that has large, handle-free pullout drawers on the cooking side and a built-in wine rack on the other. Maximizing storage, a custom built-in apple plywood bench and open wooden box shelves provide extra space.
A model of efficiency, the home maximizes the performance of the envelope of the building. The reclaimed fir car decking wrapped around the exterior from Windfall Lumber, creates the rainscreen siding and is sourced locally from a deconstructed warehouse in Tacoma WA. In addition, access to daylight through high-performance glazing, solar preheat for domestic hot water needs, in-floor radiant heating and a green roof created by the owner adds to the efficiency.
Photo Credit & Design: b9 architects
URL
http://www.windfalllumber.com
Photographer: Ed Sozinho
 Jordan Design Build Group
After more than a decade in their new Alexandria home, our clients decided their kitchen was ready for a major refresh, both in form and function. The original stained wood cabinets and granite countertops had served them well, but the traditional design no longer fit with their evolving style which had become less formal and more transitional. The homeowners liked the idea of two-toned kitchen cabinets, so we opted for a combination of pure white and charcoal gray for dramatic contrast. Brushed gold fixtures and statement brass pulls add warmth and sophistication. The distinctive marble counters are a showstopper, with unique veining and striking color variation, from blue to gray to ochre. The shimmering blue-gray backsplash unites the entire space.
The overall goal was to create an expansive entertaining kitchen that could accommodate our clients’ large gatherings of family and friends, and provide them with several zones for prepping, serving, seating, and socializing. Also high on the clients’ wish list: a more generous island, professional appliances, and better storage. We expanded the island in two directions to allow for comfortable seating at the counter with plenty of room for a table in the breakfast nook. An expandable bar height table in the adjacent dining area offers even more flexibility for eating and socializing.
We designed a custom hutch which has a multitude of storage options and functionality – open display shelves, roll-outs, drawers, extra counter/serving space, as well as a beverage fridge and appliance garage/coffee center. On the opposite side of the kitchen, we replaced a small pantry closet with a furniture style built-in that took advantage of underutilized space. Anticipating issues with supply chain, we opted to use a local cabinet maker on this project which allowed us to fully customize the cabinets for optimal functionality.
Other stand-out features include a Thermador appliance package, workstation farmhouse sink, ‘touch’ faucet, hot+cold water dispenser, and hidden toe-kick storage. Our clients now have a beautiful, cohesive space that reflects their personal style and fulfills their dream of a having an expansive kitchen where they can cook and entertain for years to come.
 Windfall Lumber
This new custom house, completed in late 2012, was designed with an accessory dwelling unit to take advantage of an allowance in the single family zoning code in Seattle. The primary dwelling, 1300 square feet on the upper two stories houses a mother and teenager. The accessory dwelling, 750 square feet, provides a leasable smaller space that can be for a tenant or downsizing in the future.
Seattle based RE Store began by completely deconstructing the original home so that its salvaged parts could have a new life in other design applications. The new design for the home is modern with a sustainable theme, incorporating a palette of natural materials. The Paperstone, wood and steel staircase connects the open-plan living, dining areas and kitchen to the upstairs bedrooms and open library. Exterior decks extend the main interior living spaces while sliding glass panels allow the primary bedroom to connect.
Stylishly visible from all rooms in the open interior living spaces are two complementary objects, both lit from within, a frosted lexan pantry and a slatted reclaimed fir bathroom, with wood sourced from Windfall Lumber. Throughout the home, finishes are simple and minimal: polished concrete flooring, bright-white walls, and formaldehyde-free sapele and maple cabinetry. The main kitchen is outfitted with Ecotop counters and a custom sapele wood island that has large, handle-free pullout drawers on the cooking side and a built-in wine rack on the other. Maximizing storage, a custom built-in apple plywood bench and open wooden box shelves provide extra space.
A model of efficiency, the home maximizes the performance of the envelope of the building. The reclaimed fir car decking wrapped around the exterior from Windfall Lumber, creates the rainscreen siding and is sourced locally from a deconstructed warehouse in Tacoma WA. In addition, access to daylight through high-performance glazing, solar preheat for domestic hot water needs, in-floor radiant heating and a green roof created by the owner adds to the efficiency.
Photo Credit & Design: b9 architects
URL
http://www.windfalllumber.com
Photographer: Ed Sozinho
 Windfall Lumber
This new custom house, completed in late 2012, was designed with an accessory dwelling unit to take advantage of an allowance in the single family zoning code in Seattle. The primary dwelling, 1300 square feet on the upper two stories houses a mother and teenager. The accessory dwelling, 750 square feet, provides a leasable smaller space that can be for a tenant or downsizing in the future.
Seattle based RE Store began by completely deconstructing the original home so that its salvaged parts could have a new life in other design applications. The new design for the home is modern with a sustainable theme, incorporating a palette of natural materials. The Paperstone, wood and steel staircase connects the open-plan living, dining areas and kitchen to the upstairs bedrooms and open library. Exterior decks extend the main interior living spaces while sliding glass panels allow the primary bedroom to connect.
Stylishly visible from all rooms in the open interior living spaces are two complementary objects, both lit from within, a frosted lexan pantry and a slatted reclaimed fir bathroom, with wood sourced from Windfall Lumber. Throughout the home, finishes are simple and minimal: polished concrete flooring, bright-white walls, and formaldehyde-free sapele and maple cabinetry. The main kitchen is outfitted with Ecotop counters and a custom sapele wood island that has large, handle-free pullout drawers on the cooking side and a built-in wine rack on the other. Maximizing storage, a custom built-in apple plywood bench and open wooden box shelves provide extra space.
A model of efficiency, the home maximizes the performance of the envelope of the building. The reclaimed fir car decking wrapped around the exterior from Windfall Lumber, creates the rainscreen siding and is sourced locally from a deconstructed warehouse in Tacoma WA. In addition, access to daylight through high-performance glazing, solar preheat for domestic hot water needs, in-floor radiant heating and a green roof created by the owner adds to the efficiency.
Photo Credit & Design: b9 architects
URL
http://www.windfalllumber.com
Photographer: Ed Sozinho
 Windfall Lumber
This new custom house, completed in late 2012, was designed with an accessory dwelling unit to take advantage of an allowance in the single family zoning code in Seattle. The primary dwelling, 1300 square feet on the upper two stories houses a mother and teenager. The accessory dwelling, 750 square feet, provides a leasable smaller space that can be for a tenant or downsizing in the future.
Seattle based RE Store began by completely deconstructing the original home so that its salvaged parts could have a new life in other design applications. The new design for the home is modern with a sustainable theme, incorporating a palette of natural materials. The Paperstone, wood and steel staircase connects the open-plan living, dining areas and kitchen to the upstairs bedrooms and open library. Exterior decks extend the main interior living spaces while sliding glass panels allow the primary bedroom to connect.
Stylishly visible from all rooms in the open interior living spaces are two complementary objects, both lit from within, a frosted lexan pantry and a slatted reclaimed fir bathroom, with wood sourced from Windfall Lumber. Throughout the home, finishes are simple and minimal: polished concrete flooring, bright-white walls, and formaldehyde-free sapele and maple cabinetry. The main kitchen is outfitted with Ecotop counters and a custom sapele wood island that has large, handle-free pullout drawers on the cooking side and a built-in wine rack on the other. Maximizing storage, a custom built-in apple plywood bench and open wooden box shelves provide extra space.
A model of efficiency, the home maximizes the performance of the envelope of the building. The reclaimed fir car decking wrapped around the exterior from Windfall Lumber, creates the rainscreen siding and is sourced locally from a deconstructed warehouse in Tacoma WA. In addition, access to daylight through high-performance glazing, solar preheat for domestic hot water needs, in-floor radiant heating and a green roof created by the owner adds to the efficiency.
Photo Credit & Design: b9 architects
 Windfall Lumber
This new custom house, completed in late 2012, was designed with an accessory dwelling unit to take advantage of an allowance in the single family zoning code in Seattle. The primary dwelling, 1300 square feet on the upper two stories houses a mother and teenager. The accessory dwelling, 750 square feet, provides a leasable smaller space that can be for a tenant or downsizing in the future.
Seattle based RE Store began by completely deconstructing the original home so that its salvaged parts could have a new life in other design applications. The new design for the home is modern with a sustainable theme, incorporating a palette of natural materials. The Paperstone, wood and steel staircase connects the open-plan living, dining areas and kitchen to the upstairs bedrooms and open library. Exterior decks extend the main interior living spaces while sliding glass panels allow the primary bedroom to connect.
Stylishly visible from all rooms in the open interior living spaces are two complementary objects, both lit from within, a frosted lexan pantry and a slatted reclaimed fir bathroom, with wood sourced from Windfall Lumber. Throughout the home, finishes are simple and minimal: polished concrete flooring, bright-white walls, and formaldehyde-free sapele and maple cabinetry. The main kitchen is outfitted with Ecotop counters and a custom sapele wood island that has large, handle-free pullout drawers on the cooking side and a built-in wine rack on the other. Maximizing storage, a custom built-in apple plywood bench and open wooden box shelves provide extra space.
A model of efficiency, the home maximizes the performance of the envelope of the building. The reclaimed fir car decking wrapped around the exterior from Windfall Lumber, creates the rainscreen siding and is sourced locally from a deconstructed warehouse in Tacoma WA. In addition, access to daylight through high-performance glazing, solar preheat for domestic hot water needs, in-floor radiant heating and a green roof created by the owner adds to the efficiency.
Photo Credit & Design: b9 architects
 Windfall Lumber
This new custom house, completed in late 2012, was designed with an accessory dwelling unit to take advantage of an allowance in the single family zoning code in Seattle. The primary dwelling, 1300 square feet on the upper two stories houses a mother and teenager. The accessory dwelling, 750 square feet, provides a leasable smaller space that can be for a tenant or downsizing in the future.
Seattle based RE Store began by completely deconstructing the original home so that its salvaged parts could have a new life in other design applications. The new design for the home is modern with a sustainable theme, incorporating a palette of natural materials. The Paperstone, wood and steel staircase connects the open-plan living, dining areas and kitchen to the upstairs bedrooms and open library. Exterior decks extend the main interior living spaces while sliding glass panels allow the primary bedroom to connect.
Stylishly visible from all rooms in the open interior living spaces are two complementary objects, both lit from within, a frosted lexan pantry and a slatted reclaimed fir bathroom, with wood sourced from Windfall Lumber. Throughout the home, finishes are simple and minimal: polished concrete flooring, bright-white walls, and formaldehyde-free sapele and maple cabinetry. The main kitchen is outfitted with Ecotop counters and a custom sapele wood island that has large, handle-free pullout drawers on the cooking side and a built-in wine rack on the other. Maximizing storage, a custom built-in apple plywood bench and open wooden box shelves provide extra space.
A model of efficiency, the home maximizes the performance of the envelope of the building. The reclaimed fir car decking wrapped around the exterior from Windfall Lumber, creates the rainscreen siding and is sourced locally from a deconstructed warehouse in Tacoma WA. In addition, access to daylight through high-performance glazing, solar preheat for domestic hot water needs, in-floor radiant heating and a green roof created by the owner adds to the efficiency.
Photo Credit & Design: b9 architects
URL
http://www.windfalllumber.com
Photographer: Ed Sozinho
29