
Search results for "Loose dirt" in Home Design Ideas
 User
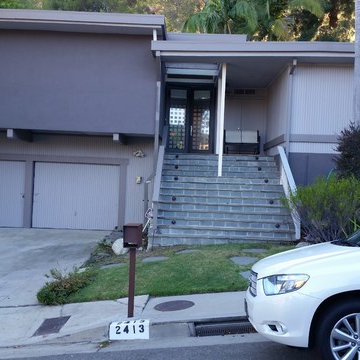
UserAfter: 8 Days to Complete, Total Cost Of Project $5,669
Power washed entire building to clean all surfaces of loose dirt, dust, grime and contaminants
Sanded to remove all loose paint
Removed loose window putty and glazed windows with new material
Trenched the entire perimeter to protect from water penetrating the building.
Sprayed chemical solution to kill mold, mildew and prevent musty odors.
Opened up stucco cracks, refilled and blended the texture to match existing stucco.
Maliciously caulked around windows and where the stucco meets the under-hang.
Covered project area with paper, plastic and canvas drops to catch paint drips,sprays and splatters
Applied primer to repaired areas which insured uniform appearance and adhesion to the finish top coat.
Sanded window sills and frames with multiple grits of sand paper to eliminate old paint and achieve a smooth paint ready surface.
Applied two finish top coats on stucco,windows,doors,trim, gutters, railing and fascia


Find the right local pro for your project

 Tile Doctor Ltd
My client had recently moved into a bungalow in Godalming where they inherited the Limestone tiled kitchen floor pictured below. The previous owner had not looked after the floor very well and by the time they moved in it was pretty filthy. Limestone is a natural but porous stone where, unless sealed, attracts dirt into its tiny holes and as you would expect Cream Limestone shows the dirt easily. The protective seal had long since worn off this floor and was now ingrained with dirt it was now looking permanently dirty.
Before quoting I conducted a small test clean to work out the best method to renovate the stone and this also gives the client a good idea of how the floor will look after its finished. They were delighted with the initial result and happy with my quote gave me the go ahead.
On arrival first I helped the customer remove his tables and chairs and I then set about tapping up the plinths in the kitchen and the skirtings to protect them from cleaning solutions and equipment. The cleaning equipment I have invested in works more efficiently in open spaces, so it’s worth spending time at the beginning preparing the area first.
Next, I used a deck brush to apply a mixture of water and Tile Doctor Pro-Clean to the dirtiest tiles. Tile Doctor Pro-Clean works well when left to dwell for ten minutes or so. I also applied the same product to the grout over half the room so it could get a head start breaking down the dirt. Then using a stiff brush, I scrubbed the grout clean. Once it was worked loose, I extracted the now dirty solution with a wet vacuum.
With the grout clean I turned my attention back to the tiles with where the Pro-Clean had been left to soak in. Giving them a quick brush, I noted that what appeared to be permanently ingrained dirt had now come loose. To get the tiles really clean I used a 17″ rotary machine fitted with diamond encrusted buffer pads. This removes the tiny dots of dirt on the stone and with it comes any existing sealer and dirt.
A set of four burnishing pads were used, starting with a 400-grit, and finishing with a 3000-grit pad. The first 400-grit pad is coarse, and the grits become smoother as you work through the set. Water is used to lubricate the process and the released dirt is extracted in-between using the wet vacuum mentioned earlier. This process does take time but by the end of day one the floor was looking a lot better.
The next step is sealing however the floor needs to be bone dry for that, so I left a couple of industrial fans in place and left the Limestone to dry off overnight.
Returning the following day my first job was to ensure the floor was dry by taking multiple moisture readings with a damp meter. The readings were good, so I was able to make a start applying the sealer which for this floor was Tile Doctor Ultra Seal.
Ultra-Seal is an impregnating sealer that soaks into those small holes in the stone I mentioned earlier, I occupies the pores thus preventing dirt from becoming ingrained. The other feature of this sealer is it doesn’t change the appearance or colour of the stone leaving it with a very natural finish. Two coats of sealer were applied, leaving the seal to dry between each coat.
After the final coat was dried, I gave it a final polish with a soft nylon pad and the floor was finished. Before leaving we discussed after care which for this floor, I recommended Tile Doctor Stone Soap and I requested that the customer to stay out of the kitchen for a couple of hours while the sealer cured. They were over the moon with the new floor and could not believe the difference it had made to their kitchen.
Rupert Mcleod
West Surrey Tile Doctor
 Burdge & Associates Architects
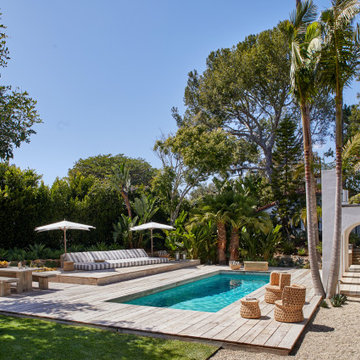
A Burdge Architects Mediterranean styled residence in Malibu, California. Large, open floor plan with sweeping ocean views. Pool and poolhouse
Inspiration for a large mediterranean side yard rectangular lap pool house remodel in Los Angeles with decking
Inspiration for a large mediterranean side yard rectangular lap pool house remodel in Los Angeles with decking

 User
User7 Days to Complete, Total Cost Of Project: $4,700
Power washed entire building to clean all surfaces of loose dirt, dust, grime and contaminants
Sanded to remove all loose paint
Removed loose window putty and glazed windows with new material
Trenched the entire perimeter to protect from water penetrating the building.
Sprayed chemical solution to kill mold, mildew and prevent musty odors.
Opened up stucco cracks, refilled and blended the texture to match existing stucco.
Maliciously caulked around windows and where the stucco meets the under-hang.
Covered project area with paper, plastic and canvas drops to catch paint drips,sprays and splatters
Applied primer to repaired areas which insured uniform appearance and adhesion to the finish top coat.
Sanded window sills and frames with multiple grits of sand paper to eliminate old paint and achieve a smooth paint ready surface.
Applied two finish top coats on stucco,windows,doors,trim, gutters, railing and fascia
 Norris Furniture & Interiors
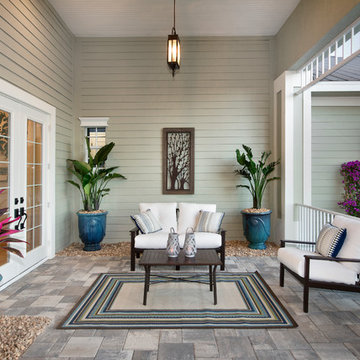
This is an example of a mid-sized tropical stone porch container garden design in Miami with a roof extension.


 Dixie Belle Paint Company
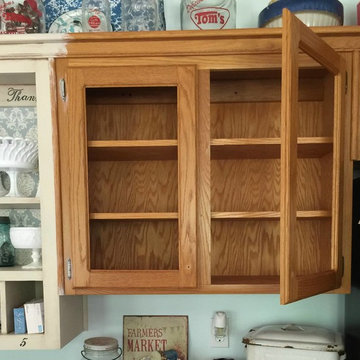
To achieve a professional appearance, choose to remove your cabinet doors, this will make painting the back side of the cabinet doors easy as well as the inside frame. We recommend labeling your doors and hardware so that it’s easy to put back together afterwards! Any loose pieces like screws or knobs place in a plastic bag or safe spot so you don’t lose them! First assess the cabinets and ask yourself If you are dealing with “high gloss finish” such as laminate. If so sand the high gloss area to scuff the surface. If the surface is not glossy, skip the sanding! Next, clean the surface with Dixie Belle Paint’s White Lightning a cleaner to rid grime, grease and dirt! Wipe down again with clean warm water and allow everything to completely dry.

 Lisa Tharp Design
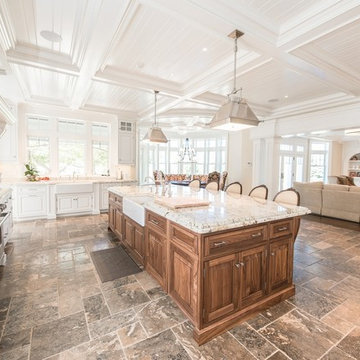
This new waterfront home is upgraded with architectural character. Custom furnishings and curated finds create a classically stylish backdrop to breezy barefoot living and frequent entertaining. Ocean views inspire the tranquil palette.
 Passacantando Architects AIA
Photographer: Kevin Colquhoun
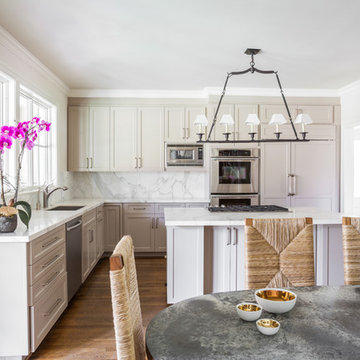
Open concept kitchen - huge traditional u-shaped porcelain tile open concept kitchen idea in New York with a farmhouse sink, white cabinets, granite countertops, white backsplash, mosaic tile backsplash, stainless steel appliances and an island
Open concept kitchen - huge traditional u-shaped porcelain tile open concept kitchen idea in New York with a farmhouse sink, white cabinets, granite countertops, white backsplash, mosaic tile backsplash, stainless steel appliances and an island
 Tile Doctor Ltd
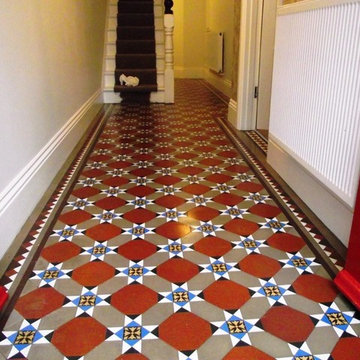
These Victorian hallway tiles were cleaned at a residence in the historic town of Bideford. As you can see from the photograph below the tiles were dull and had lost their vitality due to ingrained dirt, clearly it had been some time since they were given a good deep clean.
Cleaning a Victorian Floor
The first job was to protect the skirting with tape and then vacuum to remove any loose debris and grit. The next step was to cover the entire floor with a strong dilution of Tile Doctor Remove and Go which is a powerful cleaning and coating remover that is safe to use on tile and stone. It was left to dwell on the floor for twenty minutes so it could soak into the tile and make the job of removing any remaining sealer and ingrained dirt easier.
The solution was scrubbed into the tile using a black scrubbing pad fitted to a rotary machine and then the soiled cleaning solution rinsed off using a wet vacuum. This process was repeated a number of times until I was satisfied with the condition of the floor and followed with a final rinse with clean water to remove any trace of cleaning product. The water was extracted with the wet vacuum to get the floor as dry as possible before leaving for the day.
Sealing a Victorian Floor Sealing
The tiles were left to dry for 24 hours and I came back to seal the tiles using eight to nine coats of Tile Doctor Seal and Go which is an ideal sealer for Victorian Tiles as it leaves a nice sheen and provides excellent stain protection.
I think you will agree the hallway floor came up really well and now been given a new lease of life.
 Ross NW Watergardens
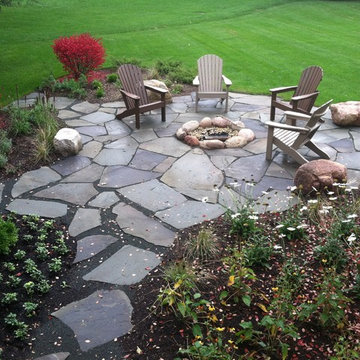
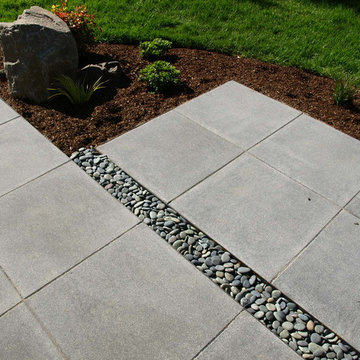
2" pebbles in the 6" gap between slabs of concrete pavers.
By Ben Bowen of Ross NW Watergardens, a Portland landscaping firm.
Photo of a small mid-century modern front yard concrete paver garden path in Portland.
Photo of a small mid-century modern front yard concrete paver garden path in Portland.

 Tile Doctor Ltd
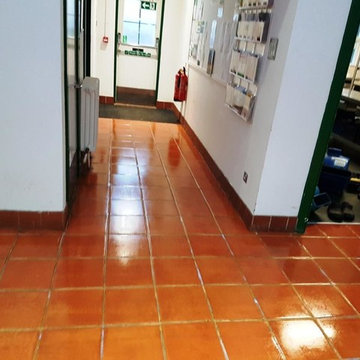
A local cleaning contractor called us in to work on the Terracotta tiled floors at a council building in Amersham. The Terracotta had not been deep cleaned and resealed for about ten years and the sealer had worn off leaving the tile vulnerable to dirt becoming ingrained in the pores of the tile. The grout had also suffered the same fate and had almost gone black in many areas.
This is a common problem with Terracotta which is quite porous and once those pores become ingrained with dirt the tile becomes difficult to clean effectively. The solution is to seal the tile however sealers wear off over time and this was basically the problem.
After discussing the issues we agreed on a plan of action to deep clean the Terracotta tile and grout and then re-seal to protect it. Due to the busy nature of the building we agreed to do the work between Christmas and New Year when we knew the building would be empty.
We started by applying a strong dilution of Tile Doctor Oxy-Gel which is a strong tile cleaning product that being in a gel form ensures it sits on the tile for longer, giving it a longer effective dwell time so it can really eat into and loose the dirt. After approximately twenty minutes the gel was scrubbed into the tile with a black scrubbing pad fitted to a rotary machine. This broke down most of the dirt and removed any remaining sealer. Once the whole floor had been treated in this manner it was rinsed thoroughly with water which was then extracted using a wet vacuum.
With the soiled cleaning solution removed I could see the next step would be to spot clean stubborn staining and clean the grout. For this task I used a strong dilution of Tile Doctor Pro-Clean scrubbing it in by hand using stiff brushes and aided with a hand-held steamer to help treat the stubborn staining. Once done the floor was given a final rinse and then as much moisture as possible removed with the wet vacuum.
We then left the floor to dry off completely and came back a couple of days later to seal the Terracotta tile.
I mentioned earlier that Terracotta is porous; in fact it’s probably the most porous material I deal with, so to fully seal the floor I had to apply eight coats of Tile Doctor Seal and Go which will provide complete and long lasting protection against staining and dirt. Seal and Go also adds an appealing satin sheen to the tile and the new seal will make it much easier to clean in future.
The floor tile and grout now look much healthier and I’m sure the council will be very impressed when they go back to work after the holidays.
Happy New Year…
Andrew Newstead
North Buckinghamshire Tile Doctor
 Seabreeze Sparkle Pressure Washing
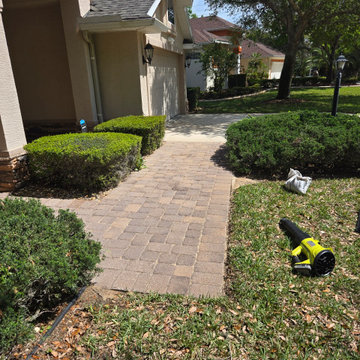
Seabreeze Sparkle Pressure Washing completed this paver cleaning, re-sanding, and sealing project in Port Orange, Florida. The pavers had built-up dirt, organic growth, faded color, and loose joint sand before service.
We pressure cleaned the surface, removed debris from the joints, applied fresh joint sand where needed, and sealed the pavers with a commercial-grade sealer to help enhance color, protect the surface, stabilize the joints, and improve curb appeal. This project shows the full process of professional paver cleaning, paver sanding, and paver sealing for a cleaner, brighter, longer-lasting outdoor space.
 Tile Doctor Ltd
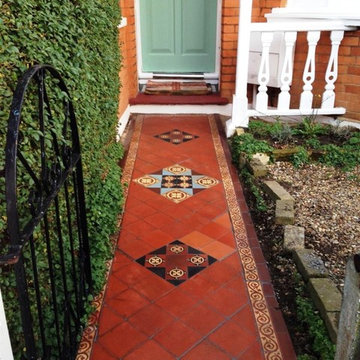
At first sight, this Victorian tiled pathway in Palmers Green, N13 did not appear to need too many repairs, with just a few obvious broken and loose tiles to be fixed. On closer inspection however it became clear it was in need of a deep clean and fresh seal.
To start, we applied Tile Doctor Remove & Go across the entire length of the pathway to break down and strip off the old sealer and provide an initial clean. In the more stubborn and difficult to reach areas where we saw the buildup of efflorescence, we applied Tile Doctor Acid Gel to neutralise the alkaline salts.
Acid Gel, as the name indicates, is a pH1 blend of Phosphoric and Hydrochloric acid in gel form, making it easier to apply to tricky areas, including sloped or vertical surfaces. Users should be aware not to use this type of product on acid-sensitive stone such as Limestone, as this can cause etching if left on too long.
Once the dirt and efflorescence buildups had been dealt with, I focused my attention towards the tile repairs, quickly realising that the extent of damage was greater than initially thought. Firstly, the numerous loose and broken tiles were removed and individually cleaned in a similar way to the rest of the floor. We then repaired the sub base ready for the existing and newly sourced tiles to be re-laid, before leaving the floor to set and dry overnight.
The next day, the pathway was grouted, before being sealed with Tile Doctor’s colour enhancing, impregnating sealer, Colour Grow to bring back the life and character to the Victorian tiles.
I was also asked to renovate the Edwardian hallway tiles in the house so once finished with the pathway they were deep cleaned using a strong dilution of Tile Doctor Pro Clean. This also helped to break down the old sealers and waxes – followed by a careful cleaning of the grout lines using Tile Doctor Grout Clean Up in combination with 3m black pads and detail brushes.
To ensure any pre existing sealer was completely removed, I followed up with a steam clean and left the tiles to dry overnight.
Upon my return to the property the next day, I completed re-grouting in the necessary areas, before sealing the tiles with five coats of Tile Doctor Seal & Go, providing an aesthetically pleasing satin finish. Seal & Go is a topical, solvent-based sealer which forms a layer of durable protection on the surface of the tiles, protecting against dirt and stains.
The hard work invested in restoring these two floors certainly paid off, as the client was exceptionally pleased with the results, going as far as to leave the following feedback:
“I wanted to restore my tired Edwardian tiled hallway and was given Rob Voyce’s
contact details. I was very impressed with Rob and his team; they were very
professional and friendly. Rob explained the stages of the work to be carried out and
we agreed a date and the job was completed much to my satisfaction. Very pleased.”
Nigel Voyce
North London Tile Doctor


2