
Search results for "M decor remove" in Home Design Ideas
 Tile Doctor Ltd
Sealers really do bring out the best in Terracotta tiles, however the catch is they will wear off over time and if you want to maintain that appearance you have to work out a regular maintenance plan. If you don’t maintain the sealer you will find that the sealer near the most heavily used areas such as doors etc. will wear away first and once that happens dirt will become ingrained in the tile and becomes difficult to clean resulting in a patchy appearance.
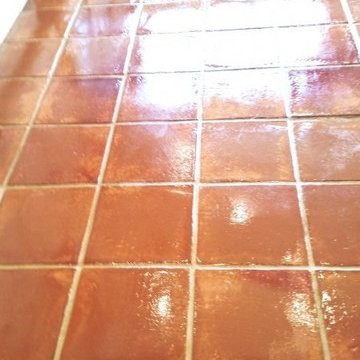
The remaining sealer on this Terracotta tiled kitchen floor at a house in the town of Wickford, Essex was no longer effective and had worn completely off in places. The solution was to strip off the old sealer, clean the Terracotta tile and gout and then re-seal with a fresh seal.
I started by giving the floor a deep clean with Tile Doctor Pro Clean diluted 2 parts water to 1 part cleaner. This is quite a strong dilution designed to allow the removal of the sealer and was left to dwell on the floor for ten minutes before working it into the floor using a scrubbing machine fitted with a black pad. Surprisingly the sealer was proving difficult to shift in certain areas and I had to repeat the process a few times and made sure to give the grout a good scrubbing as well.
I managed to get rid of most of the sealer using this process and for the remaining stubborn areas I used a stronger product called Tile Doctor Remove and Go which is a very effective coatings remover that is safe to use on tiles. This did the trick and the floor was now free of sealers and the grout was looking much better too, the resultant slurry was removed using a wet vacuum and I then rinsed the floor several times with water before leaving it to dry for weekend.
Tile Doctor Colour Grow which is an impregnating sealer that seeps into the pores of the tile to block them and prevent contaminates becoming ingrained in there and it also enhances the natural colours. Once this was dry I followed up with a number of coats of Tile Doctor Seal and Go which is topical sealer that will protect the surface and adds a nice sheen to the floor and is a popular choice for Terracotta and Quarry tiles.
I’m not sure my photographs do this post any justice however hopefully you can see that floor was quite transformed, the grout is much cleaner and the colours in the Terracotta have really come to life.
Nick Murphy
South Essex Tile Doctor
 Kitchen Solvers of Grayslake
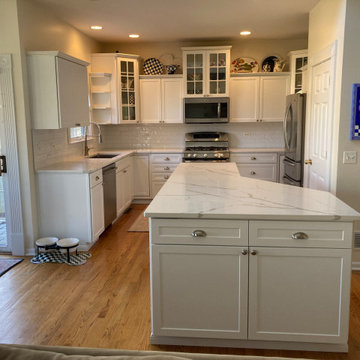
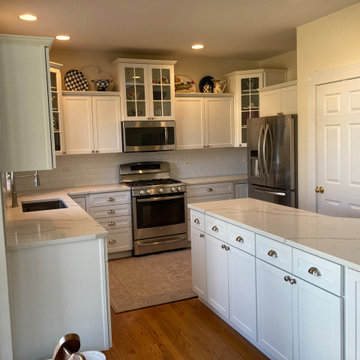
The homeowners were looking to refresh their kitchen and also replace some damaged doors. They decided to keep the same layout, but didn’t like the unused open shelving on the island end cap. We removed the shelves and installed a 12” cabinet for added storage. We also closed off one side of their dual access island cabinets with a decorative shaker panel and modified the front of the cabinets to be able to utilize full width rollout drawers for additional storage and utilization. The homeowner decided to reface the existing cabinets in Glacier White and a shaker style door. To finish the new look, we added decorative satin nickel finished hardware, new Calacatta Laza countertops and subway tile backsplash. The homeowners are pleased with their refreshed kitchen, and we were happy to provide them with the look and functionality they wanted.
 Nielsen's Remodeling & Construction
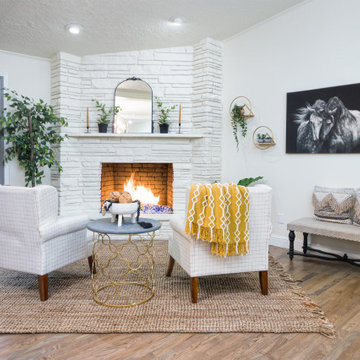
This house, built in 1974 in North Dallas had its original touches from the 70’s including old school cabinets with bronze exposed hinges, exposed AC returns underneath the bookshelves, as well as some windows that had been leaking for several years. The homeowner likes to exercise, practice yoga and meditate in the space while watching the sunset through the big windows. They wanted to be able to have easy access to the patio and open the windows to enjoy while entertaining friends and family. We removed the engineered hardwood floor and added some 2 1/4” solid hardwood, removed the existing cabinet and built a brand new bottom cabinet, upper floating shelves with a dimmable LED strip to create the perfect ambiance and accent the decor pieces and books. We also removed the windows and installed a custom 12’ french door with dual functionality and sidelights. The final design edit included removing all paneling and replacing it with a cozy white paint on the walls, ceiling and fireplace to accent their artwork.
Find the right local pro for your project
 EDR Design Build
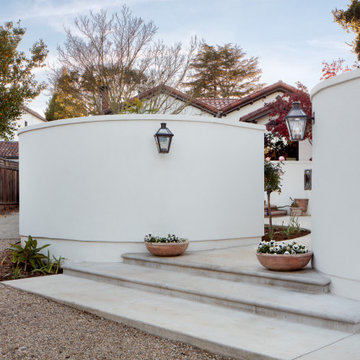
Custom new home construction from architectural design through final permitting and construction. EDR Design Build manages full project scope including site development, structural systems, electrical, plumbing, HVAC, and premium finishes. Specializes in high-end residential construction with emphasis on sustainable building practices, energy efficiency, and custom architectural integration. Projects range from $500K to $5M+ with completion timelines of 12-24 months depending on scope and complexity.
 Kitchen Solvers of Grayslake
The homeowners were looking to refresh their kitchen and also replace some damaged doors. They decided to keep the same layout, but didn’t like the unused open shelving on the island end cap. We removed the shelves and installed a 12” cabinet for added storage. We also closed off one side of their dual access island cabinets with a decorative shaker panel and modified the front of the cabinets to be able to utilize full width rollout drawers for additional storage and utilization. The homeowner decided to reface the existing cabinets in Glacier White and a shaker style door. To finish the new look, we added decorative satin nickel finished hardware, new Calacatta Laza countertops and subway tile backsplash. The homeowners are pleased with their refreshed kitchen, and we were happy to provide them with the look and functionality they wanted.


 Giffywalls
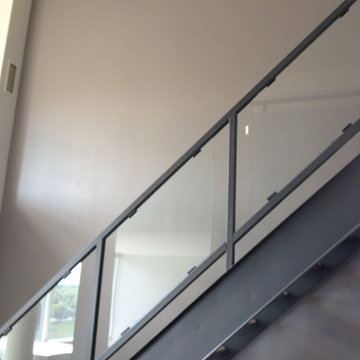
Our premium peel and stick wallpaper is made in the USA and designed to work with any interior design style. This wallcovering is easy to install, can be removed easily, and looks amazingly realistic. Available in 5 different pattern types.
Sponsored
Delaware, OH

Buckeye Basements, Inc.
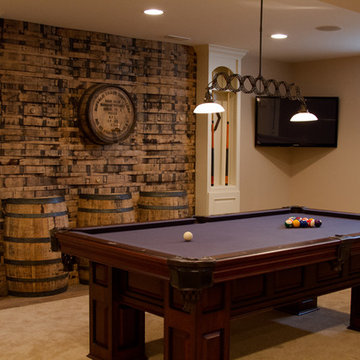
Central Ohio's Basement Finishing ExpertsBest Of Houzz '13-'21
 M&M Design Studio
Ben Elsass Photography
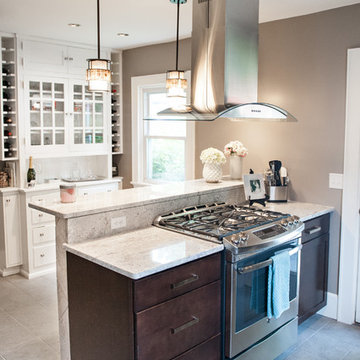
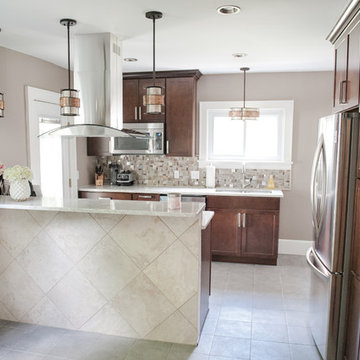
Example of a classic galley eat-in kitchen design in Cincinnati with an island
Example of a classic galley eat-in kitchen design in Cincinnati with an island
 Classic Papering and Painting, Inc
Spray-Finished Living Room Ceiling
One of the most technically demanding portions of the project was the decorative ceiling inside the living room.
Because of the intricate plaster design, brushing or rolling would have left unwanted texture and visible lap marks. Instead, the room was transformed into a temporary spray booth.
Every piece of furniture was removed.
Window treatments were taken down.
Every inch of crown molding was meticulously masked.
Floors, walls, and surrounding finishes were completely protected with plastic before the ceiling was professionally spray finished.
Between the decorative ceiling patterns, damaged areas were carefully repaired and blended before the final finish was applied, creating a uniform appearance while preserving the ceiling's original architectural beauty.
kitchen.jpg
Chef's Kitchen Woodgrain Finish
The chef's kitchen required a very different type of craftsmanship.
Rather than traditional staining, portions of the millwork were painted using specialty wood-graining techniques that recreated the warmth and depth of stained wood.
This decorative finishing process gives painted surfaces the appearance of authentic stained wood while maintaining consistency throughout the kitchen's architectural details.
Stairway Painting Around Historic Woodwork
Perhaps nowhere is craftsmanship more noticeable than on a staircase.
Historic stairways feature countless transitions between painted walls and stained wood trim, each requiring perfectly straight cut lines without damaging surrounding finishes.
Painting around original woodwork is often one of the most revealing indicators of an experienced painter.
Every transition throughout this Marble Cliff staircase was completed with careful attention to preserving the home's historic character.
dining.jpg
Dining Room Door Staining & Foyer Painting
The dining room opens directly onto the outdoor entertaining space through beautiful new wood French doors. To protect the new wood while highlighting its natural character, Classic applied:
Two carefully layered stain coats
Three coats of oil-based protective finish
The dining room ceiling was then painted to create a crisp contrast that allows the warmth of the wood doors to become a focal point within the space.
The foyer establishes the home's character immediately upon entry.
Classic carefully painted both the walls and ceiling, preserving the crisp transitions between the historic trim and surrounding architectural elements while creating a clean backdrop for the home's original craftsmanship.
Painting Historic Homes Throughout Marble Cliff & Upper Arlington
Many of Central Ohio's finest homes were built generations ago using materials and craftsmanship rarely found today.
Painting these homes requires patience, technical expertise, and an understanding of how each material responds to modern coating systems.
Whether restoring decorative plaster ceilings, staining new architectural woodwork, refinishing millwork, or completing whole-home interior painting, Classic Papering & Painting approaches every project with the same philosophy: Exceptional preparation produces exceptional finishes.
 M&M Design Studio
Ben Elsass Photography
Example of a classic galley eat-in kitchen design in Cincinnati with an island
Example of a classic galley eat-in kitchen design in Cincinnati with an island

 Tile Doctor Ltd
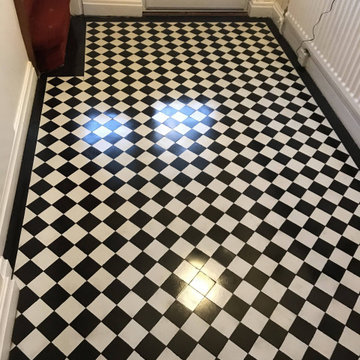
This is a great example of a Victorian Tiled floor refurbishment which I recently completed at a property in Stoke-on-Trent. If you look closely at the photographs below you will see the white tiles are looking grubby and paint splash staining from decorating. The owner was unhappy with how the floor now looked and wanted it refurbished.
Black and White Victorian tiles laid in a chequered diamond pattern is a classic style and a very popular choice for hallways at the turn of the 20th century. Over the years many have been replaced or covered up with carpet and those that survived are now a sought-after period feature that adds value to your property.
I initially cleaned the floor by applying a strong dilution of Tile Doctor Pro-Clean which was sprayed onto the floor and then left to soak in for ten minutes. Pro-Clean is our goto tile and grout cleaning product that is designed to break down dirt and remove old sealers. After ten minutes the solution was scrubbed in with a rotary machine fitted with a coarse 200-grit pad. The soil generated was rinsed off the tiles and extracted with a wet vacuum and the floor inspected.
I would see more work was needed to get the floor clean and free of staining, so I spot treated the problem areas with Tile Doctor Remove and Go which is a coatings remover. I worked in small sections leaving the product to dwell as before for 10 minutes, I then used a wallpaper steamer with handheld diamond blocks to get the ingrained dirt out of the floor. After a final rinse and extraction, the floor looked clean so, so much better than when I started.
I then left the floor to dry off overnight and came back the second day to seal the tiles first checking the moisture levels with a damp meter. Applying sealer to a damp floor will result in the floor looking patchy when it dries so I always check first. The readings were good, so I started to apply the first of five coats of sealer which for this floor I chose Tile Doctor Seal and Go Extra.
Old Victorian floors do not have a damp-proof membrane installed under the floor so its important to select a sealer that will allow moisture to rise through the tiles and evaporate on the surface, Seal and Go Extra allows for this. Choosing a non-breathable sealer can result in moisture being trapped under the floor where it can reach out to the walls leading to rising damp.
Once the floor dried it looked fantastic. In fact, my customer was so happy with the transformation she was taking pictures and sending them to her daughters as I worked; she couldn’t believe how well it was turning out.
Trevor Preece
Staffordshire Tile Doctor
 Tile Doctor Ltd
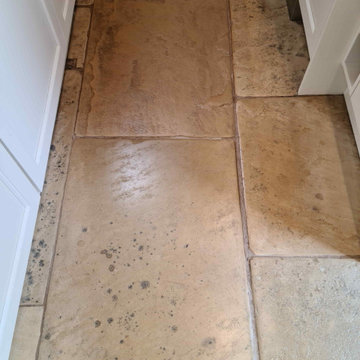
These pictures are of a beautiful Sandstone floor in Ilkley, the tiles were sourced from Lapicida of Harrogate and installed around twelve years prior. If you take a look at their website now you will see they are selling a similar London White Sandstone for nearly £100 per m2. This floor was 35 square metres so clearly this was a significant investment for the owner at the time.
After twelve years of use however the sealer had worn off the floor and dirt had become ingrained in the pores of the stone making it very difficult to keep clean. A good sealer takes a long time to wear off so the change to the appearance of the stone happens so slowly you don’t notice it. The floor was now looking permanently dirty, and the owner of the property had decided it was time to get it renovated.
Before quoting I paid a visit to the property to survey the floor and conduct an initial test clean which came out well. The test cleaning did not go as quickly as I had hoped it might however, due to traces of old satin sealer on some of the stone. It’s important to remove all the old sealer before applying new or you can end up with a patchy appearance. The remnants of old sealer proved challenging to remove as a result I had to try several products and methods before working out the right approach. In the end I resulted to using a product called Tile Doctor Wax Away. I had considered applying diamond burnishing pads which would have been a quicker option, but the flagstones had a riven finish, and the dirt was deeply pitted.
With a successful cleaning plan worked out I provided the client with a which was accepted, and a date agreed for my return.
The cleaning plan I had worked out was to apply a strong dilution of Tile Doctor Wax Away, leave it to soak into the stone for thirty minutes and then scrub it in with a rotary buffer fitted with a black scrubbing pad. The old sealer proved to be tough to remove and in total I used five litres of Tile Doctor Wax Away in the process, as I said it was a big floor!
On day three, I sealed the floor using three coats of Tile Doctor Seal and Go which gave the Sandstone a lovely satin finish that the client liked. This product is also water based so it doesn’t leave a smell as it dries.
Once done the floor was completely transformed, and my client very pleased with the floor which looked so much lighter and cleaner. For aftercare cleaning I recommended the use of Tile Doctor Neutral Tile Cleaner for maintenance, it is pH neutral so will ensure the newly applied seal is protected. It has a nice fresh smell and is gentle enough to use frequently keeping the newly renovated floor looking lovely.
Nigel Stoker
North West Yorkshire Tile Doctor
Sponsored
Sunbury, OH

J.Holderby - Renovations
Franklin County's Leading General Contractors - 2X Best of Houzz!
 Betty Wasserman Art & Interiors
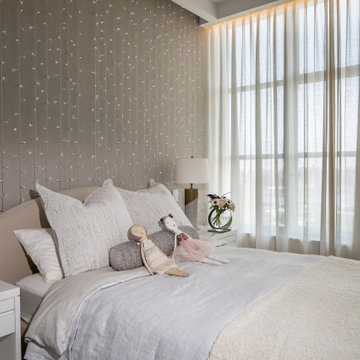
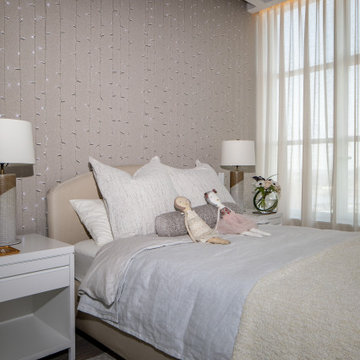
Our NYC studio designed this gorgeous condo for a family of four with the goal of maximizing space in a modest amount of square footage. A custom sectional in the living room was created to accommodate the family without feeling overcrowded, while the son's bedroom features a custom Murphy bed to optimize space during the day. To fulfill the daughter's wish for fairy lighting, an entire wall of them was installed behind her bed, casting a beautiful glow at night. In the kitchen, we added plenty of cabinets below the island for maximum efficiency. Storage units were incorporated in the bedroom and living room to house the TV and showcase decorative items. Additionally, the tub in the powder room was removed to create an additional closet for much-needed storage space.
 Betty Wasserman Art & Interiors
Our NYC studio designed this gorgeous condo for a family of four with the goal of maximizing space in a modest amount of square footage. A custom sectional in the living room was created to accommodate the family without feeling overcrowded, while the son's bedroom features a custom Murphy bed to optimize space during the day. To fulfill the daughter's wish for fairy lighting, an entire wall of them was installed behind her bed, casting a beautiful glow at night. In the kitchen, we added plenty of cabinets below the island for maximum efficiency. Storage units were incorporated in the bedroom and living room to house the TV and showcase decorative items. Additionally, the tub in the powder room was removed to create an additional closet for much-needed storage space.
 Betty Wasserman Art & Interiors
Our NYC studio designed this gorgeous condo for a family of four with the goal of maximizing space in a modest amount of square footage. A custom sectional in the living room was created to accommodate the family without feeling overcrowded, while the son's bedroom features a custom Murphy bed to optimize space during the day. To fulfill the daughter's wish for fairy lighting, an entire wall of them was installed behind her bed, casting a beautiful glow at night. In the kitchen, we added plenty of cabinets below the island for maximum efficiency. Storage units were incorporated in the bedroom and living room to house the TV and showcase decorative items. Additionally, the tub in the powder room was removed to create an additional closet for much-needed storage space.
 EDR Design Build
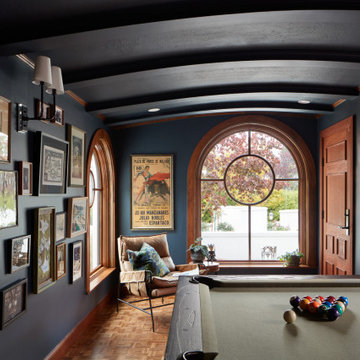
High-end residential remodeling specializing in kitchen renovations, bathroom upgrades, whole-home renovations, and luxury finishes. EDR Design Build provides architectural redesign, structural modifications, premium material sourcing, and integrated smart home systems. Services include project management, permit coordination, quality assurance, and timeline adherence for complex multi-trade projects. Focuses on transforming dated homes into modern luxury spaces while preserving character and adding contemporary functionality. Projects $200K-$2M+ depending on scope and finish specifications.
Sponsored
Sunbury, OH
J.Holderby - Renovations
Franklin County's Leading General Contractors - 2X Best of Houzz!
 Bella Designs
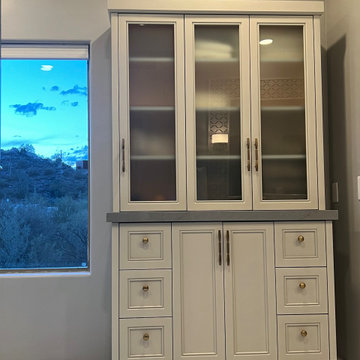
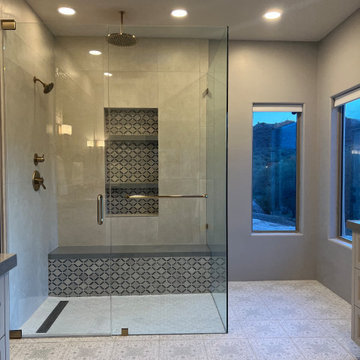
 designed this master bathroom with the request of the client to remove a built in tub, add a decorative storage cabinet, enlarge the shower, add a large shower bench, a zero entry shower, and additional lighting. The creative details were left to Bella Designs. Beautiful decorative tiles on the backsplash, shower bench, shower niche, shower floor, bathroom floor and champagne bronze cabinet hardware, fixtures, sconces and textured shades added the finishing touch.
 Crystal Kitchen + Bath
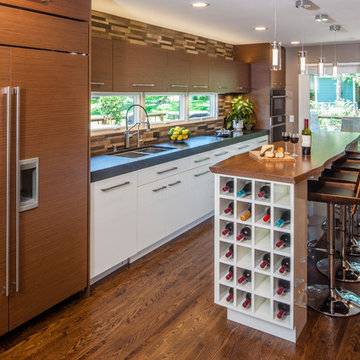
Objectives
· Functional work triangle
· 42” height snack bar for 4
· Tall storage
· Contemporary styling
· Tall clients = tall work surfaces
Design Challenges
· A step-down family room, client wanted it to be converted to the kitchen
· Room was narrow and long. Client wanted to add an island and tall storage
· Large window looked out onto neighbor’s back yard
· Garage door/entry, landed right into kitchen
Design Solutions
· Raised the floor, move/add all mechanical
· Galley kitchen put all appliances on one wall
· 38”height counters on appliance wall made a comfortable working height for the tall clients
· Shallow cabinets were installed on the kitchen side of the Island/snack bar at 42”height, with 12” over hang backside for 4 chairs
·Tall pantry cabinets for china, small appliances, food and brooms/vacuums storage, 12 feet in length and 15 inches deep
·Remove a large window and install 112” X 18” awing window in back splash. While giving up the unneeded view, it retained the natural light
· Added a bench and hooks by the garage door for coats and purses
Special Features
· Contemporary style with walnut wood and gloss-lacquer cabinets
· Black granite counter with 3.5” mitered edge, add the extra height the client requested
· Ash Wood (stained to match the walnut cabinets) counter top on island with live edge
· Brown marble tile back splash to blend with the tile elsewhere in the home
· Unique custom storage: tip up cabinet doors, pull out with containers for knives and utensils, Servo-drive double waste basket
· Hands-free faucet, bling pendant lights
 Bella Designs
 designed this master bathroom with the request of the client to remove a built in tub, add a decorative storage cabinet, enlarge the shower, add a large shower bench, a zero entry shower, and additional lighting. The creative details were left to Bella Designs. Beautiful decorative tiles on the backsplash, shower bench, shower niche, shower floor, bathroom floor and champagne bronze cabinet hardware, fixtures, sconces and textured shades added the finishing touch.
182