
Search results for "Measuring tapes" in Home Design Ideas
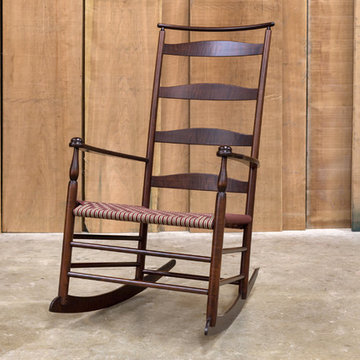
 Shaker Shoppe, Inc.
While at rest this rocker measures 25″ wide X 32″ deep X 41″ high. This is an over-all measurement that includes the entire rocker blade.
Example is shown crafted in Maple wood in a Fireside finish, the seat is woven with Burgundy Stripe & Red Shaker tape.
The seat measures 20-1/2″ wide X 19″ deep.
The front edge of the seat is 16-1/2″ above the floor with an occupant seated.
This Rocker is only available crafted of solid Maple wood in any of our paints & finishes.
Seats available include wood plank or woven with Shaker tape or Rush.
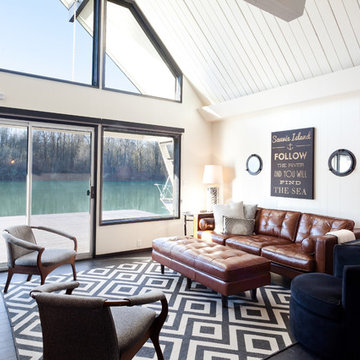
 Design Vision Studio
IDS (Interior Design Society) Designer of the Year - National Competition - 3rd Place award winning Living Space ($30,000 & Under category)
Photo by: Shawn St. Peter Photography -
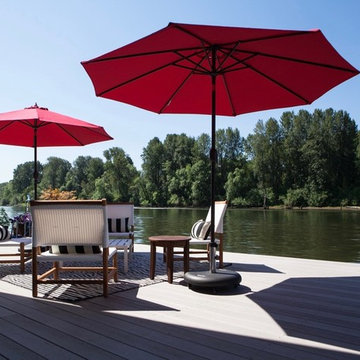
What designer could pass on the opportunity to buy a floating home like the one featured in the movie Sleepless in Seattle? Well, not this one! When I purchased this floating home from my aunt and uncle, I undertook a huge out-of-state remodel. Up for the challenge, I grabbed my water wings, sketchpad, & measuring tape. It was sink or swim for Patricia Lockwood to finish before the end of 2014. The big reveal for the finished houseboat on Sauvie Island will be in the summer of 2015 - so stay tuned.
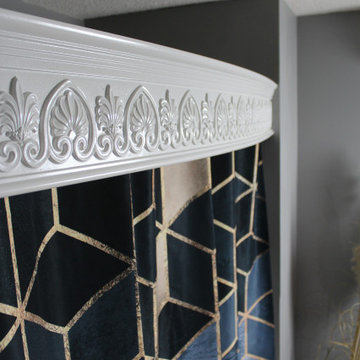
 ShowerCrown
Another unique ShowerCrown. "Acropolis" Incorporates a column faced design across it's length, symbolizing strength and durability of design, a great choice for a mans bath. Named for it's unique ability to capture and refract light and shadows along it's entire profile, Acropolis adds stature to any bathroom. Derived from Classical Greek and Roman architecture, it comes primed in white for painting, utilizes the same 15 second installation as with all ShowerCrowns. They are designed for use in humid environments. Dimensions: 7.25 inches tall, x 1.5 inches inch deep x approximately 60 inches long. Super durable, lightweight Polymer will never rot, mold or mildew. "Acropolis" is available in straight or curved varieties for use in front of straight or curved shower curtain rods. There is no faster and easier way to upgrade, remodel, makeover, redecorate your fiberglass bathroom shower, period! Tools necessary: (Phillips head) screw driver or screw gun, measuring tape, pencil, and a step stool are recommended. Optional: a level, speed square. Includes all mounting hardware and instructions, including video. Skill level : easy peazy.
Find the right local pro for your project
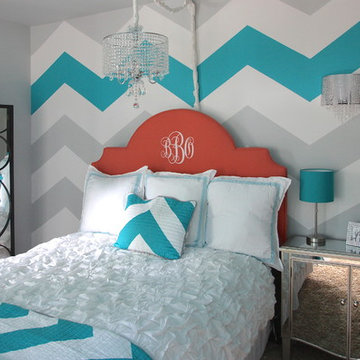
 J Malone Designs LLC
Teen Girls Bedroom "Suite" custom made monogrammed fabric headboard, chevron stripe painted wall with pops of teal and a teal ceiling not picture make this room one of a kind!
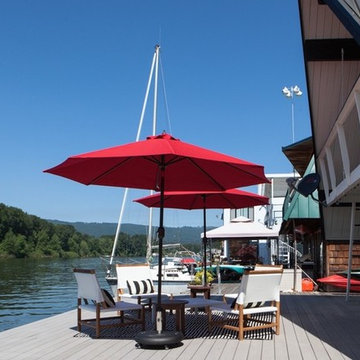 Design Vision Studio
Photo by: Shawn St. Peter Photography - What designer could pass on the opportunity to buy a floating home like the one featured in the movie Sleepless in Seattle? Well, not this one! When I purchased this floating home from my aunt and uncle, I didn’t know about floats and stringers and other issues specific to floating homes. Nor had I really thought about the hassle of an out of state remodel. Believing that I was up for the challenge, I grabbed my water wings, sketchpad, and measuring tape and jumped right in!
If you’ve ever thought of buying a floating home, I’ve already tripped over some of the hurdles you will face. So hop on board - hopefully you will enjoy the ride.
I have shared my story of this floating home remodel and accidental flip in my eBook "Sleepless in Portland." Just subscribe to our monthly design newsletter and you will be sent a link to view all the photos and stories in my eBook.
http://www.designvisionstudio.com/contact.html

 Industrial Projects
Creating a comfortable outdoor living space is a priority for many homeowners and DIY enthusiasts. With rising summer temperatures, installing a shade tarp in your backyard offers an affordable and effective solution for sun protection. We’ve developed this detailed, step-by-step guide to help you confidently install a shade tarp that not only shields you from the sun but also adds aesthetic appeal to your outdoor area.
Benefits of Installing a Backyard Shade Tarp
Before diving into the installation process, let’s explore the key benefits of having a backyard shade tarp:
Provides UV Protection: Keeps your family and guests safe from harmful sun exposure.
Reduces Outdoor Temperatures: Creates a cooler, more enjoyable outdoor space.
Protects Outdoor Furniture: Extends the life of patio furniture by reducing sun damage.
Enhances Outdoor Aesthetics: Adds a modern, stylish look to your yard.
Budget-Friendly: More affordable compared to permanent structures like pergolas.
Materials and Tools You’ll Need
To begin your DIY backyard shade project, gather the following materials and tools:
Materials:
Shade tarp (UV-resistant and breathable)
Sturdy posts or existing structures (trees, fences, walls)
Mounting hardware (eye bolts, D-rings, turnbuckles, snap hooks)
Nylon or polyester rope, or stainless-steel wire
Concrete (if installing new posts)
Tools:
Power drill
Measuring tape
Level
Ladder
Wrench or adjustable spanner
Post hole digger (if installing new posts)
Step 1: Plan Your Shade Tarp Layout
The first step in installing your backyard shade tarp is careful planning. Take time to assess your outdoor area and answer these key questions:
Where is the sun’s path throughout the day?
What size and shape of tarp best suits your space?
Will you anchor the tarp to existing structures or install new posts?
What height do you want the tarp to sit at for maximum shade and airflow?
Pro Tip: Use string or garden hoses to visualize the tarp layout on the ground before making permanent decisions.
Step 2: Measure and Mark Anchor Points
Once you’ve determined the tarp’s location and orientation:
Measure the tarp dimensions.
Mark the exact points where each corner of the tarp will be anchored.
Ensure that the anchor points are at least 5–10% longer than the tarp size to allow for tensioning and slight adjustments.
Consider slope angles for water runoff. Aim for at least a 20-degree angle to prevent water pooling on the tarp.
Step 3: Install Support Posts (If Necessary)
If your backyard lacks existing anchor points like trees or fences, you’ll need to install sturdy support posts:
Dig post holes at least 24 inches deep and 8-12 inches wide for stability.
Set posts in concrete, making sure they remain plumb and level.
Allow the concrete to cure for at least 24–48 hours before applying tension from the tarp.
We recommend using pressure-treated wood, galvanized steel poles, or aluminum posts for longevity and strength.
Step 4: Install Mounting Hardware
With your anchor points ready, it’s time to install the necessary hardware:
Attach eye bolts or pad eyes securely into walls, posts, or other fixed structures.
For added flexibility and adjustability, install turnbuckles or tensioners to fine-tune the tarp’s tightness.
Connect snap hooks, D-rings, or carabiners to make assembly and disassembly easier.
Make sure all hardware is rated for outdoor use to prevent rust and corrosion.
Step 5: Attach and Tension the Shade Tarp
Now it’s time for the most satisfying part—mounting the shade tarp:
Begin by attaching one corner of the tarp to an anchor point.
Gradually attach the remaining corners, moving diagonally for even tension.
Adjust each connection point using your turnbuckles, ropes, or cables.
Pull the tarp tight enough to avoid sagging, but not so tight that it risks tearing.
Check that the tarp maintains the desired slope for rainwater runoff and adjust tension as needed.
Step 6: Final Adjustments and Safety Check
Before enjoying your new shaded area:
Inspect all anchor points and hardware for stability.
Test the tarp’s tension and make adjustments for even distribution.
Ensure that no sharp edges or loose connections remain that could damage the tarp or pose a safety hazard.
Confirm that the tarp is secure in windy conditions by giving it a gentle tug.
If you live in an area with frequent high winds, consider removing the tarp during storms to prevent damage.
Step 7: Enjoy Your Shaded Backyard Oasis
Once installed, your backyard shade tarp provides a comfortable and protective space for outdoor gatherings, relaxation, or family activities. You can decorate underneath with outdoor furniture, string lights, or potted plants to create a personalized outdoor retreat.
Maintenance Tips for Long-Lasting Shade Tarp Performance
To extend the life of your shade tarp, follow these maintenance guidelines:
Regularly check for wear and tear, especially around anchor points and seams.
Clean the tarp periodically with mild soap and water to prevent mildew buildup.
Store the tarp indoors during harsh weather seasons if it's not designed for year-round use.
Tighten hardware as needed to maintain proper tension and avoid sagging.
By following these simple care steps, your shade tarp will continue to deliver years of sun protection and outdoor comfort.
Conclusion: Upgrade Your Outdoor Space with a DIY Shade Tarp
Installing a shade tarp in your backyard is a cost-effective and rewarding DIY project. With careful planning, quality materials, and proper installation techniques, you’ll enjoy cool, shaded outdoor living all season long. This step-by-step guide ensures your project goes smoothly from start to finish.

Sponsored
Delaware, OH

Buckeye Basements, Inc.
Central Ohio's Basement Finishing ExpertsBest Of Houzz '13-'21
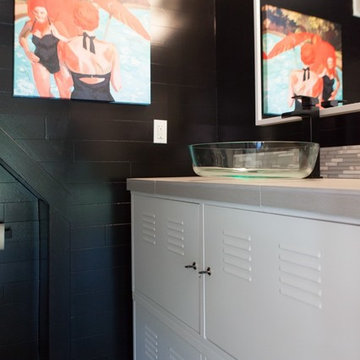 Design Vision Studio
Photo by: Shawn St. Peter Photography - What designer could pass on the opportunity to buy a floating home like the one featured in the movie Sleepless in Seattle? Well, not this one! When I purchased this floating home from my aunt and uncle, I didn’t know about floats and stringers and other issues specific to floating homes. Nor had I really thought about the hassle of an out of state remodel. Believing that I was up for the challenge, I grabbed my water wings, sketchpad, and measuring tape and jumped right in!
If you’ve ever thought of buying a floating home, I’ve already tripped over some of the hurdles you will face. So hop on board - hopefully you will enjoy the ride.
I have shared my story of this floating home remodel and accidental flip in my eBook "Sleepless in Portland." Just subscribe to our monthly design newsletter and you will be sent a link to view all the photos and stories in my eBook.
http://www.designvisionstudio.com/contact.html
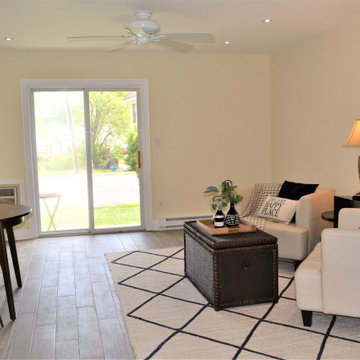
 Designs by Aneta
When looking at empty room buyers need to use their imagination and measuring tape to make sure their furniture will fit. Staging shows buyers this room has enough space for both seating area as well as dining area.
 Design Vision Studio
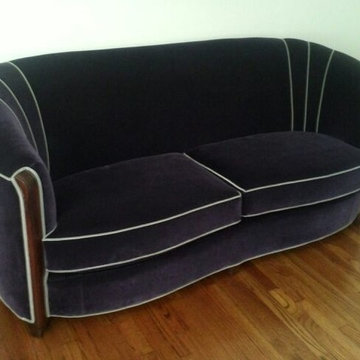
Photo by: Shawn St. Peter Photography - What designer could pass on the opportunity to buy a floating home like the one featured in the movie Sleepless in Seattle? Well, not this one! When I purchased this floating home from my aunt and uncle, I didn’t know about floats and stringers and other issues specific to floating homes. Nor had I really thought about the hassle of an out of state remodel. Believing that I was up for the challenge, I grabbed my water wings, sketchpad, and measuring tape and jumped right in!
If you’ve ever thought of buying a floating home, I’ve already tripped over some of the hurdles you will face. So hop on board - hopefully you will enjoy the ride.
I have shared my story of this floating home remodel and accidental flip in my eBook "Sleepless in Portland." Just subscribe to our monthly design newsletter and you will be sent a link to view all the photos and stories in my eBook.
http://www.designvisionstudio.com/contact.html
 Robin's Nest Interiors
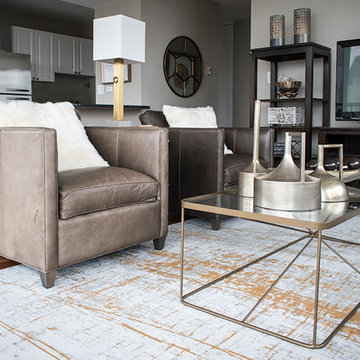
One of our Louisville clients showed her sister what we had done for her Great Room with our Personal Shopper Service, and her sister said, “Do they travel?” The answer is “Absolutely!” When we arrived in the Windy City, we were absolutely blown away by the view and were excited to put the finishing touches on this High Rise condo. We worked with the homeowner’s existing furniture pieces (sofa, club chairs, and media console with towers) and added personality with accent furniture, accessories, lighting, and artwork.
We opened up the seating area and made their beautiful rug more visible by selecting a sleek glass-topped coffee table.
Accessories in a range of metal tones complement the existing furniture and rug. Oil canisters in pewter tones look fantastic on the coffee table.
We added this concrete base lamp with square shade in between the club chairs. The white marble-topped two-tiered side table breaks up the dark leather of the club chairs.
The countertops in the small galley kitchen are a grey blue, so we pulled that color into living space by selecting these great nesting tables with a blue soapstone top. We topped it with a metal lamp and organic white vases to soften the edges.
The hallway prints and this beautiful blue watercolor pull the colors from the living space into the Entry.
The homeowner was not fond of the existing media cabinet, but not anymore! We accessorized with varying metal tones and lots of texture that bring interest to an otherwise generic furniture piece.

With limited space, we made the most of views by placing our favorite marble writing desk in the bay window. We plan to add upholstered arm chairs on either end that can serve as dining chairs or extra seating for the living area. The important thing is to keep that view as open as possible.
A big thanks to our Chicago client for having us up there to make her condo more of a home. Maybe we should change our motto to “Have paint deck & measuring tape, Will Travel!” Enjoy!
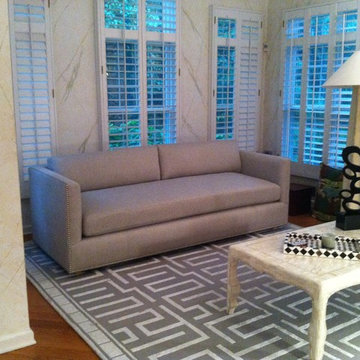
 TapeMeasure
Sofa designed and made for sunken fireplace area in family room. Tie back design with fabric pulls, Ralph Lauren flannel fabric.
Inspiration for a contemporary living room remodel in New York
Inspiration for a contemporary living room remodel in New York
 Shaker Shoppe, Inc.
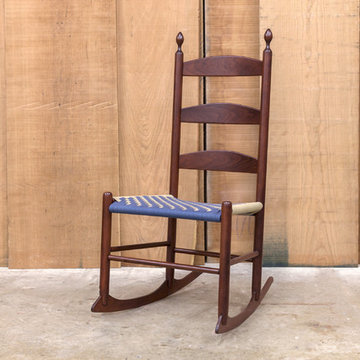
While at rest this rocker measures 19-3/4″ wide X 25-1/2″ deep X 40″ high. This is an over-all measurement that includes the entire rocker blade.
Example is shown crafted in Cherry wood in our fireside finish, the seat is woven with dark blue & tan Shaker tape.
The seat measures 19-3/4″ wide X 15-1/2″ deep.
The front edge of the seat is 15-1/2″ above the floor with an occupant seated.
This Rocker is available in Cherry & Maple woods.
Seats available include wood plank or woven with Shaker tape or Rush.
 TapeMeasure
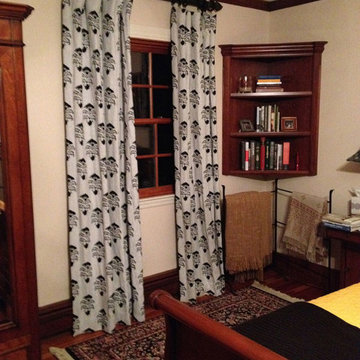
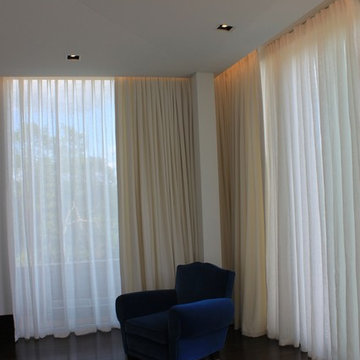
Master Bedroom Drapes and Sheers
recessed parallel drapery tracks
floor to ceiling inverted pleat draperies
Outer inverted-pleat privacy sheers
Bedroom - contemporary bedroom idea in New York
Bedroom - contemporary bedroom idea in New York
8