
Search results for "Obtaining care" in Home Design Ideas

 ESI Builders & Remodelers
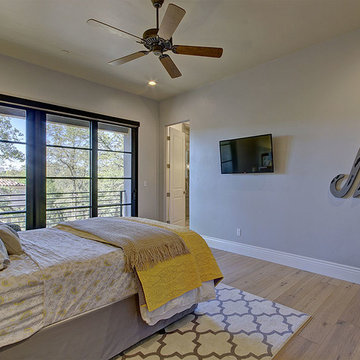
3,800sf, 4 bdrm, 3.5 bath with oversized 4 car garage and over 270sf Loggia; climate controlled wine room and bar, Tech Room, landscaping and pool. Solar, high efficiency HVAC and insulation was used which resulted in huge rebates from utility companies, enhancing the ROI. The challenge with this property was the downslope lot, sewer system was lower than main line at the street thus requiring a special pump system. Retaining walls to create a flat usable back yard.
ESI Builders is a subsidiary of EnergyWise Solutions, Inc. and was formed by Allan, Bob and Dave to fulfill an important need for quality home builders and remodeling services in the Sacramento region. With a strong and growing referral base, we decided to provide a convenient one-stop option for our clients and focus on combining our key services: quality custom homes and remodels, turnkey client partnering and communication, and energy efficient and environmentally sustainable measures in all we do. Through energy efficient appliances and fixtures, solar power, high efficiency heating and cooling systems, enhanced insulation and sealing, and other construction elements – we go beyond simple code compliance and give you immediate savings and greater sustainability for your new or remodeled home.
All of the design work and construction tasks for our clients are done by or supervised by our highly trained, professional staff. This not only saves you money, it provides a peace of mind that all of the details are taken care of and the job is being done right – to Perfection. Our service does not stop after we clean up and drive off. We continue to provide support for any warranty issues that arise and give you administrative support as needed in order to assure you obtain any energy-related tax incentives or rebates. This ‘One call does it all’ philosophy assures that your experience in remodeling or upgrading your home is an enjoyable one.
ESI Builders was formed by professionals with varying backgrounds and a common interest to provide you, our clients, with options to live more comfortably, save money, and enjoy quality homes for many years to come. As our company continues to grow and evolve, the expertise has been quickly growing to include several job foreman, tradesmen, and support staff. In response to our growth, we will continue to hire well-qualified staff and we will remain committed to maintaining a level of quality, attention to detail, and pursuit of perfection.
 ESI Builders & Remodelers
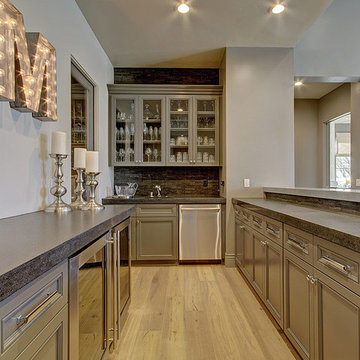
3,800sf, 4 bdrm, 3.5 bath with oversized 4 car garage and over 270sf Loggia; climate controlled wine room and bar, Tech Room, landscaping and pool. Solar, high efficiency HVAC and insulation was used which resulted in huge rebates from utility companies, enhancing the ROI. The challenge with this property was the downslope lot, sewer system was lower than main line at the street thus requiring a special pump system. Retaining walls to create a flat usable back yard.
ESI Builders is a subsidiary of EnergyWise Solutions, Inc. and was formed by Allan, Bob and Dave to fulfill an important need for quality home builders and remodeling services in the Sacramento region. With a strong and growing referral base, we decided to provide a convenient one-stop option for our clients and focus on combining our key services: quality custom homes and remodels, turnkey client partnering and communication, and energy efficient and environmentally sustainable measures in all we do. Through energy efficient appliances and fixtures, solar power, high efficiency heating and cooling systems, enhanced insulation and sealing, and other construction elements – we go beyond simple code compliance and give you immediate savings and greater sustainability for your new or remodeled home.
All of the design work and construction tasks for our clients are done by or supervised by our highly trained, professional staff. This not only saves you money, it provides a peace of mind that all of the details are taken care of and the job is being done right – to Perfection. Our service does not stop after we clean up and drive off. We continue to provide support for any warranty issues that arise and give you administrative support as needed in order to assure you obtain any energy-related tax incentives or rebates. This ‘One call does it all’ philosophy assures that your experience in remodeling or upgrading your home is an enjoyable one.
ESI Builders was formed by professionals with varying backgrounds and a common interest to provide you, our clients, with options to live more comfortably, save money, and enjoy quality homes for many years to come. As our company continues to grow and evolve, the expertise has been quickly growing to include several job foreman, tradesmen, and support staff. In response to our growth, we will continue to hire well-qualified staff and we will remain committed to maintaining a level of quality, attention to detail, and pursuit of perfection.
 ESI Builders & Remodelers
3,800sf, 4 bdrm, 3.5 bath with oversized 4 car garage and over 270sf Loggia; climate controlled wine room and bar, Tech Room, landscaping and pool. Solar, high efficiency HVAC and insulation was used which resulted in huge rebates from utility companies, enhancing the ROI. The challenge with this property was the downslope lot, sewer system was lower than main line at the street thus requiring a special pump system. Retaining walls to create a flat usable back yard.
ESI Builders is a subsidiary of EnergyWise Solutions, Inc. and was formed by Allan, Bob and Dave to fulfill an important need for quality home builders and remodeling services in the Sacramento region. With a strong and growing referral base, we decided to provide a convenient one-stop option for our clients and focus on combining our key services: quality custom homes and remodels, turnkey client partnering and communication, and energy efficient and environmentally sustainable measures in all we do. Through energy efficient appliances and fixtures, solar power, high efficiency heating and cooling systems, enhanced insulation and sealing, and other construction elements – we go beyond simple code compliance and give you immediate savings and greater sustainability for your new or remodeled home.
All of the design work and construction tasks for our clients are done by or supervised by our highly trained, professional staff. This not only saves you money, it provides a peace of mind that all of the details are taken care of and the job is being done right – to Perfection. Our service does not stop after we clean up and drive off. We continue to provide support for any warranty issues that arise and give you administrative support as needed in order to assure you obtain any energy-related tax incentives or rebates. This ‘One call does it all’ philosophy assures that your experience in remodeling or upgrading your home is an enjoyable one.
ESI Builders was formed by professionals with varying backgrounds and a common interest to provide you, our clients, with options to live more comfortably, save money, and enjoy quality homes for many years to come. As our company continues to grow and evolve, the expertise has been quickly growing to include several job foreman, tradesmen, and support staff. In response to our growth, we will continue to hire well-qualified staff and we will remain committed to maintaining a level of quality, attention to detail, and pursuit of perfection.
Find the right local pro for your project
 Zelaya Properties LLC
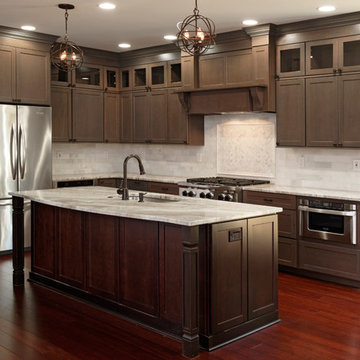
We used: Custom cherry cabinetry in Arts & Crafts Shaker style by Kabinart in Boulder and Espresso stains. Liberty Hardware Venetian bronze 1-1/2" cabinet knobs. KitchenAid Architect II Series 22 CF counter-depth French door refrigerator. KitchenAid Architect Series II 27" convection single wall oven. KitchenAid 36" 6-burner dual fuel freestanding commercial-style range. KitchenAid Architect II Series 24" dishwasher. Sharp Insight Pro Series 24" built-in microwave drawer (Model #KB6524PS). Crystorama Solaris 12" wide pendant lights in English bronze. Granite countertops in Brown Fantasy. 3"x6" polished marble backsplash.
Paint colors:
Walls: Glidden Silver Cloud 30YY 63/024
Ceilings/Trims/Doors: Glidden Swan White GLC23
Robert B. Narod Photography
 ESI Builders & Remodelers
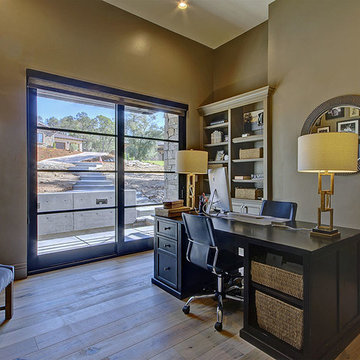
3,800sf, 4 bdrm, 3.5 bath with oversized 4 car garage and over 270sf Loggia; climate controlled wine room and bar, Tech Room, landscaping and pool. Solar, high efficiency HVAC and insulation was used which resulted in huge rebates from utility companies, enhancing the ROI. The challenge with this property was the downslope lot, sewer system was lower than main line at the street thus requiring a special pump system. Retaining walls to create a flat usable back yard.
ESI Builders is a subsidiary of EnergyWise Solutions, Inc. and was formed by Allan, Bob and Dave to fulfill an important need for quality home builders and remodeling services in the Sacramento region. With a strong and growing referral base, we decided to provide a convenient one-stop option for our clients and focus on combining our key services: quality custom homes and remodels, turnkey client partnering and communication, and energy efficient and environmentally sustainable measures in all we do. Through energy efficient appliances and fixtures, solar power, high efficiency heating and cooling systems, enhanced insulation and sealing, and other construction elements – we go beyond simple code compliance and give you immediate savings and greater sustainability for your new or remodeled home.
All of the design work and construction tasks for our clients are done by or supervised by our highly trained, professional staff. This not only saves you money, it provides a peace of mind that all of the details are taken care of and the job is being done right – to Perfection. Our service does not stop after we clean up and drive off. We continue to provide support for any warranty issues that arise and give you administrative support as needed in order to assure you obtain any energy-related tax incentives or rebates. This ‘One call does it all’ philosophy assures that your experience in remodeling or upgrading your home is an enjoyable one.
ESI Builders was formed by professionals with varying backgrounds and a common interest to provide you, our clients, with options to live more comfortably, save money, and enjoy quality homes for many years to come. As our company continues to grow and evolve, the expertise has been quickly growing to include several job foreman, tradesmen, and support staff. In response to our growth, we will continue to hire well-qualified staff and we will remain committed to maintaining a level of quality, attention to detail, and pursuit of perfection.

 Rachel Ashwell Shabby Chic Couture
Frilly frou-frou curtains and a chandelier over a freestanding tub set the stage for decadence.
Photo Credit: Amy Neunsinger
Inspiration for a shabby-chic style master marble floor freestanding bathtub remodel in Los Angeles with white walls
Inspiration for a shabby-chic style master marble floor freestanding bathtub remodel in Los Angeles with white walls
 Pennsylvania Landscape & Nursery Association
Kimicata Brothers, INC http://www.kimicatabrothers.com
Project Entry: Johnson
2014 PLNA Awards for Landscape Excellence Winner
Category: Hardscaping-Residential $30,000-$60,000
Award Level: Honorable Mention
Photo Description:
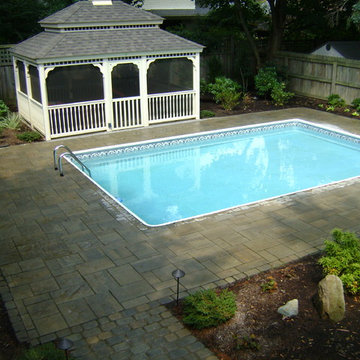
We were contacted by the Johnson’s to update their backyard fenced in pool area in the summer of 2012. Over the years the deck around the pool had deteriorated and the plants had become over grown and made walking around the deck difficult. The old concrete patio was small and only lit by bright 120 volt spot lights. What made this job difficult was the access to the backyard was limited to using a neighbor’s backyard for the project. We had to bring all debris out and materials in from a neighboring street, down the neighbor’s driveway, across the backyard, through an 8’ section that was in the far corner of the neighbor’s yard that corresponded to the entrance to Johnson’s backyard. They had a plan that they wanted to work from. Since access was a problem, we had to secure permission from the neighbor before we could consider bidding the job. After the neighbor’s permission was obtained we discussed materials for the drawing they had. It only included the hardscape and gazebo. Other difficulties included not damaging lighting and plumbing for the pool during excavation and construction. Also the ladders into the pool fit into cups screwed to the deck. These had to be replaced with precisely placed pipes mounted into the base for stability. Care had to be taken to make sure water would not drain from the deck into the pool. So we had to place channel drains between the patio area and pool deck area. A channel drain was placed between the exposed aggregate finished slab for the gazebo and the pool deck. This allowed for proper sloping of the hardscape to provide the drains to move rain away from the pool. We used polymeric sand in the paver joints to prevent breakdown of the installation and avoid wind and water moving sand into the pool. The slab for the gazebo was an exposed aggregate finish that measured 12’ 6” x 16’ 6”. The pagoda style roof for the gazebo and screening make it attractive and functional as a bug free area to entertain in. We discussed adding low voltage lighting, 120 volt plugs and drip irrigation early on so we could place conduits during the construction. After the hardscape installation we installed the low voltage lighting. We installed a transformer with a timer and an optional dusk to dawn photocell. The Johnsons did not like the old 120 volt spot light to light the back, they wanted something softer. We installed 20 path lights to illuminate the hardscape and 3 wall wash lights to add evening depth to the yard. We installed the plantings and Hunter drip irrigation system in the spring of 2013. It was easy to convince them that the drip system was the proper way to irrigate the area. There would be no spray to blow onto patio furniture or into the gazebo. Also drip irrigation uses less water so they are economical to operate. This gave them a low maintenance yard, a nice finished look and something blooming throughout the growing season. The Johnsons have been very happy with the look and the functionality of the pool deck, patio, lights, irrigation and gazebo.
 Pennsylvania Landscape & Nursery Association
Kimicata Brothers, INC http://www.kimicatabrothers.com
Project Entry: Johnson
2014 PLNA Awards for Landscape Excellence Winner
Category: Hardscaping-Residential $30,000-$60,000
Award Level: Honorable Mention
Photo Description:
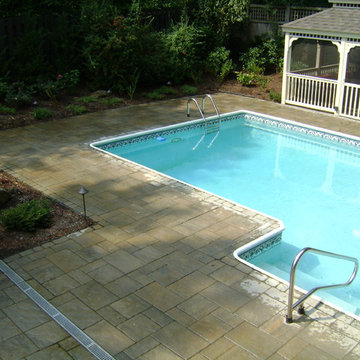
We were contacted by the Johnson’s to update their backyard fenced in pool area in the summer of 2012. Over the years the deck around the pool had deteriorated and the plants had become over grown and made walking around the deck difficult. The old concrete patio was small and only lit by bright 120 volt spot lights. What made this job difficult was the access to the backyard was limited to using a neighbor’s backyard for the project. We had to bring all debris out and materials in from a neighboring street, down the neighbor’s driveway, across the backyard, through an 8’ section that was in the far corner of the neighbor’s yard that corresponded to the entrance to Johnson’s backyard. They had a plan that they wanted to work from. Since access was a problem, we had to secure permission from the neighbor before we could consider bidding the job. After the neighbor’s permission was obtained we discussed materials for the drawing they had. It only included the hardscape and gazebo. Other difficulties included not damaging lighting and plumbing for the pool during excavation and construction. Also the ladders into the pool fit into cups screwed to the deck. These had to be replaced with precisely placed pipes mounted into the base for stability. Care had to be taken to make sure water would not drain from the deck into the pool. So we had to place channel drains between the patio area and pool deck area. A channel drain was placed between the exposed aggregate finished slab for the gazebo and the pool deck. This allowed for proper sloping of the hardscape to provide the drains to move rain away from the pool. We used polymeric sand in the paver joints to prevent breakdown of the installation and avoid wind and water moving sand into the pool. The slab for the gazebo was an exposed aggregate finish that measured 12’ 6” x 16’ 6”. The pagoda style roof for the gazebo and screening make it attractive and functional as a bug free area to entertain in. We discussed adding low voltage lighting, 120 volt plugs and drip irrigation early on so we could place conduits during the construction. After the hardscape installation we installed the low voltage lighting. We installed a transformer with a timer and an optional dusk to dawn photocell. The Johnsons did not like the old 120 volt spot light to light the back, they wanted something softer. We installed 20 path lights to illuminate the hardscape and 3 wall wash lights to add evening depth to the yard. We installed the plantings and Hunter drip irrigation system in the spring of 2013. It was easy to convince them that the drip system was the proper way to irrigate the area. There would be no spray to blow onto patio furniture or into the gazebo. Also drip irrigation uses less water so they are economical to operate. This gave them a low maintenance yard, a nice finished look and something blooming throughout the growing season. The Johnsons have been very happy with the look and the functionality of the pool deck, patio, lights, irrigation and gazebo.

 User
UserA whimsical bathroom created for my children, but sophisticated enough to be enjoyed by adults. It is wrapped in an aviary toile, and accented with a bold mirror. The lowest drawer pulls out and has a lid on it. It can hold up to 90 pounds and acts as a stepping stool for young children. When they grow, you can pop off the lid and it returns to full use as a drawer.
Home located in Star Valley Ranch, Wyoming. Designed by Tawna Allred Interiors, who also services Alpine, Auburn, Bedford, Etna, Freedom, Freedom, Grover, Thayne, Turnerville, Swan Valley, and Jackson Hole, Wyoming.
 Talon Construction Inc.
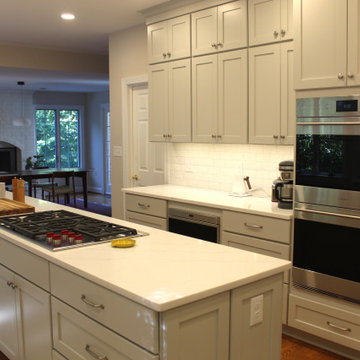
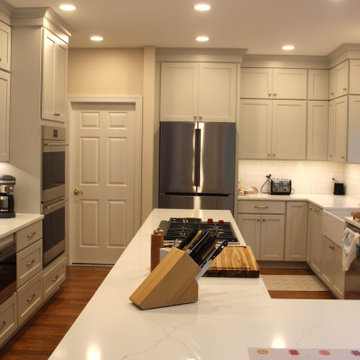
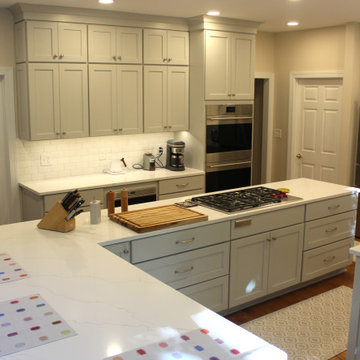
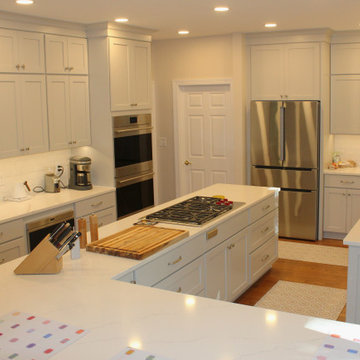
Renovating an open kitchen can be an exciting project that can improve the functionality, aesthetics, and value of your home. Here are some steps to guide you through the process:
Planning and Design:
Define your goals and budget for the renovation.
Determine the layout of your open kitchen. Consider factors like the work triangle (the relationship between the stove, sink, and refrigerator) and the flow of traffic.
Choose a design style and color scheme that suits your preferences and complements the rest of your home.
Research and Inspiration:
Collect inspiration from magazines, websites, and social media platforms to get ideas for your open kitchen design.
Create a mood board or vision board to help you visualize the final look.
Hiring Professionals:
Depending on the scale of your renovation, you may need to hire professionals, such as architects, interior designers, contractors, and electricians. Make sure to check references and get multiple quotes.
Demolition and Structural Work:
If your renovation involves structural changes, like removing walls, this is the time to do it. Ensure that the necessary permits are obtained.
Plumbing and Electrical Work:
Update or reconfigure plumbing and electrical systems as needed. This may include adding or moving outlets, switches, and lighting fixtures.
Cabinetry and Countertops:
Choose and install new kitchen cabinets and countertops. This is a significant part of your renovation and will greatly influence the kitchen's appearance and functionality.
Appliances:
Update or install new kitchen appliances, including the refrigerator, stove, oven, microwave, and dishwasher.
Flooring:
Select and install flooring that is suitable for a kitchen, such as hardwood, tile, laminate, or vinyl. Ensure it complements the overall design.
Backsplash and Wall Finishes:
Install a backsplash that matches your design and protects your walls. Consider materials like tile, glass, or stainless steel.
Lighting:
Choose and install various types of lighting, including ambient, task, and accent lighting. Pendant lights above an island or breakfast bar can add style and functionality.
Paint and Finishing Touches:
Paint the walls and ceiling in the colors you've selected. Add finishing touches like hardware, window treatments, and decorative elements.
Furniture and Accessories:
Bring in furniture, such as a dining table and chairs, barstools, and any other pieces you need to complete the space. Decorate with accessories like artwork, plants, and decorative items.
Final Inspection and Cleanup:
Ensure that all work meets safety and building code requirements. Clean the entire area thoroughly.
Enjoy Your New Kitchen:
Once the renovation is complete and everything is in its place, enjoy your beautiful, functional open kitchen.
Remember that open kitchen renovations can be complex and may require careful planning. It's essential to stay within your budget, communicate with your contractors and designers, and be flexible as unexpected issues may arise during the process. Ultimately, a well-executed open kitchen renovation can enhance the heart of your home and improve your overall living space.
 Talon Construction Inc.
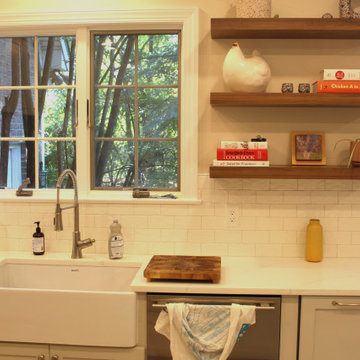
Renovating an open kitchen can be an exciting project that can improve the functionality, aesthetics, and value of your home. Here are some steps to guide you through the process:
Planning and Design:
Define your goals and budget for the renovation.
Determine the layout of your open kitchen. Consider factors like the work triangle (the relationship between the stove, sink, and refrigerator) and the flow of traffic.
Choose a design style and color scheme that suits your preferences and complements the rest of your home.
Research and Inspiration:
Collect inspiration from magazines, websites, and social media platforms to get ideas for your open kitchen design.
Create a mood board or vision board to help you visualize the final look.
Hiring Professionals:
Depending on the scale of your renovation, you may need to hire professionals, such as architects, interior designers, contractors, and electricians. Make sure to check references and get multiple quotes.
Demolition and Structural Work:
If your renovation involves structural changes, like removing walls, this is the time to do it. Ensure that the necessary permits are obtained.
Plumbing and Electrical Work:
Update or reconfigure plumbing and electrical systems as needed. This may include adding or moving outlets, switches, and lighting fixtures.
Cabinetry and Countertops:
Choose and install new kitchen cabinets and countertops. This is a significant part of your renovation and will greatly influence the kitchen's appearance and functionality.
Appliances:
Update or install new kitchen appliances, including the refrigerator, stove, oven, microwave, and dishwasher.
Flooring:
Select and install flooring that is suitable for a kitchen, such as hardwood, tile, laminate, or vinyl. Ensure it complements the overall design.
Backsplash and Wall Finishes:
Install a backsplash that matches your design and protects your walls. Consider materials like tile, glass, or stainless steel.
Lighting:
Choose and install various types of lighting, including ambient, task, and accent lighting. Pendant lights above an island or breakfast bar can add style and functionality.
Paint and Finishing Touches:
Paint the walls and ceiling in the colors you've selected. Add finishing touches like hardware, window treatments, and decorative elements.
Furniture and Accessories:
Bring in furniture, such as a dining table and chairs, barstools, and any other pieces you need to complete the space. Decorate with accessories like artwork, plants, and decorative items.
Final Inspection and Cleanup:
Ensure that all work meets safety and building code requirements. Clean the entire area thoroughly.
Enjoy Your New Kitchen:
Once the renovation is complete and everything is in its place, enjoy your beautiful, functional open kitchen.
Remember that open kitchen renovations can be complex and may require careful planning. It's essential to stay within your budget, communicate with your contractors and designers, and be flexible as unexpected issues may arise during the process. Ultimately, a well-executed open kitchen renovation can enhance the heart of your home and improve your overall living space.
 Talon Construction Inc.
Renovating an open kitchen can be an exciting project that can improve the functionality, aesthetics, and value of your home. Here are some steps to guide you through the process:
Planning and Design:
Define your goals and budget for the renovation.
Determine the layout of your open kitchen. Consider factors like the work triangle (the relationship between the stove, sink, and refrigerator) and the flow of traffic.
Choose a design style and color scheme that suits your preferences and complements the rest of your home.
Research and Inspiration:
Collect inspiration from magazines, websites, and social media platforms to get ideas for your open kitchen design.
Create a mood board or vision board to help you visualize the final look.
Hiring Professionals:
Depending on the scale of your renovation, you may need to hire professionals, such as architects, interior designers, contractors, and electricians. Make sure to check references and get multiple quotes.
Demolition and Structural Work:
If your renovation involves structural changes, like removing walls, this is the time to do it. Ensure that the necessary permits are obtained.
Plumbing and Electrical Work:
Update or reconfigure plumbing and electrical systems as needed. This may include adding or moving outlets, switches, and lighting fixtures.
Cabinetry and Countertops:
Choose and install new kitchen cabinets and countertops. This is a significant part of your renovation and will greatly influence the kitchen's appearance and functionality.
Appliances:
Update or install new kitchen appliances, including the refrigerator, stove, oven, microwave, and dishwasher.
Flooring:
Select and install flooring that is suitable for a kitchen, such as hardwood, tile, laminate, or vinyl. Ensure it complements the overall design.
Backsplash and Wall Finishes:
Install a backsplash that matches your design and protects your walls. Consider materials like tile, glass, or stainless steel.
Lighting:
Choose and install various types of lighting, including ambient, task, and accent lighting. Pendant lights above an island or breakfast bar can add style and functionality.
Paint and Finishing Touches:
Paint the walls and ceiling in the colors you've selected. Add finishing touches like hardware, window treatments, and decorative elements.
Furniture and Accessories:
Bring in furniture, such as a dining table and chairs, barstools, and any other pieces you need to complete the space. Decorate with accessories like artwork, plants, and decorative items.
Final Inspection and Cleanup:
Ensure that all work meets safety and building code requirements. Clean the entire area thoroughly.
Enjoy Your New Kitchen:
Once the renovation is complete and everything is in its place, enjoy your beautiful, functional open kitchen.
Remember that open kitchen renovations can be complex and may require careful planning. It's essential to stay within your budget, communicate with your contractors and designers, and be flexible as unexpected issues may arise during the process. Ultimately, a well-executed open kitchen renovation can enhance the heart of your home and improve your overall living space.
 Talon Construction Inc.
Renovating an open kitchen can be an exciting project that can improve the functionality, aesthetics, and value of your home. Here are some steps to guide you through the process:
Planning and Design:
Define your goals and budget for the renovation.
Determine the layout of your open kitchen. Consider factors like the work triangle (the relationship between the stove, sink, and refrigerator) and the flow of traffic.
Choose a design style and color scheme that suits your preferences and complements the rest of your home.
Research and Inspiration:
Collect inspiration from magazines, websites, and social media platforms to get ideas for your open kitchen design.
Create a mood board or vision board to help you visualize the final look.
Hiring Professionals:
Depending on the scale of your renovation, you may need to hire professionals, such as architects, interior designers, contractors, and electricians. Make sure to check references and get multiple quotes.
Demolition and Structural Work:
If your renovation involves structural changes, like removing walls, this is the time to do it. Ensure that the necessary permits are obtained.
Plumbing and Electrical Work:
Update or reconfigure plumbing and electrical systems as needed. This may include adding or moving outlets, switches, and lighting fixtures.
Cabinetry and Countertops:
Choose and install new kitchen cabinets and countertops. This is a significant part of your renovation and will greatly influence the kitchen's appearance and functionality.
Appliances:
Update or install new kitchen appliances, including the refrigerator, stove, oven, microwave, and dishwasher.
Flooring:
Select and install flooring that is suitable for a kitchen, such as hardwood, tile, laminate, or vinyl. Ensure it complements the overall design.
Backsplash and Wall Finishes:
Install a backsplash that matches your design and protects your walls. Consider materials like tile, glass, or stainless steel.
Lighting:
Choose and install various types of lighting, including ambient, task, and accent lighting. Pendant lights above an island or breakfast bar can add style and functionality.
Paint and Finishing Touches:
Paint the walls and ceiling in the colors you've selected. Add finishing touches like hardware, window treatments, and decorative elements.
Furniture and Accessories:
Bring in furniture, such as a dining table and chairs, barstools, and any other pieces you need to complete the space. Decorate with accessories like artwork, plants, and decorative items.
Final Inspection and Cleanup:
Ensure that all work meets safety and building code requirements. Clean the entire area thoroughly.
Enjoy Your New Kitchen:
Once the renovation is complete and everything is in its place, enjoy your beautiful, functional open kitchen.
Remember that open kitchen renovations can be complex and may require careful planning. It's essential to stay within your budget, communicate with your contractors and designers, and be flexible as unexpected issues may arise during the process. Ultimately, a well-executed open kitchen renovation can enhance the heart of your home and improve your overall living space.
 Talon Construction Inc.
Renovating an open kitchen can be an exciting project that can improve the functionality, aesthetics, and value of your home. Here are some steps to guide you through the process:
Planning and Design:
Define your goals and budget for the renovation.
Determine the layout of your open kitchen. Consider factors like the work triangle (the relationship between the stove, sink, and refrigerator) and the flow of traffic.
Choose a design style and color scheme that suits your preferences and complements the rest of your home.
Research and Inspiration:
Collect inspiration from magazines, websites, and social media platforms to get ideas for your open kitchen design.
Create a mood board or vision board to help you visualize the final look.
Hiring Professionals:
Depending on the scale of your renovation, you may need to hire professionals, such as architects, interior designers, contractors, and electricians. Make sure to check references and get multiple quotes.
Demolition and Structural Work:
If your renovation involves structural changes, like removing walls, this is the time to do it. Ensure that the necessary permits are obtained.
Plumbing and Electrical Work:
Update or reconfigure plumbing and electrical systems as needed. This may include adding or moving outlets, switches, and lighting fixtures.
Cabinetry and Countertops:
Choose and install new kitchen cabinets and countertops. This is a significant part of your renovation and will greatly influence the kitchen's appearance and functionality.
Appliances:
Update or install new kitchen appliances, including the refrigerator, stove, oven, microwave, and dishwasher.
Flooring:
Select and install flooring that is suitable for a kitchen, such as hardwood, tile, laminate, or vinyl. Ensure it complements the overall design.
Backsplash and Wall Finishes:
Install a backsplash that matches your design and protects your walls. Consider materials like tile, glass, or stainless steel.
Lighting:
Choose and install various types of lighting, including ambient, task, and accent lighting. Pendant lights above an island or breakfast bar can add style and functionality.
Paint and Finishing Touches:
Paint the walls and ceiling in the colors you've selected. Add finishing touches like hardware, window treatments, and decorative elements.
Furniture and Accessories:
Bring in furniture, such as a dining table and chairs, barstools, and any other pieces you need to complete the space. Decorate with accessories like artwork, plants, and decorative items.
Final Inspection and Cleanup:
Ensure that all work meets safety and building code requirements. Clean the entire area thoroughly.
Enjoy Your New Kitchen:
Once the renovation is complete and everything is in its place, enjoy your beautiful, functional open kitchen.
Remember that open kitchen renovations can be complex and may require careful planning. It's essential to stay within your budget, communicate with your contractors and designers, and be flexible as unexpected issues may arise during the process. Ultimately, a well-executed open kitchen renovation can enhance the heart of your home and improve your overall living space.
 Jordana Nicholson
Photo: Jordana Nicholson © 2016 Houzz
Inspiration for a country bathroom remodel in Nashville
Inspiration for a country bathroom remodel in Nashville

 GS Construction
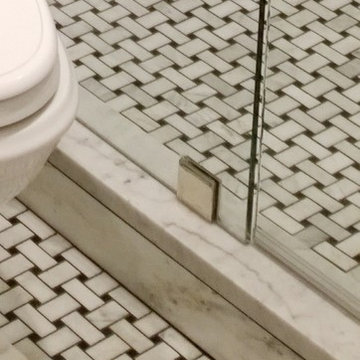
Example of a small classic 3/4 white tile and stone tile mosaic tile floor alcove shower design in Chicago with an undermount sink, recessed-panel cabinets, black cabinets, quartzite countertops, a two-piece toilet and gray walls
 Jack Calderone
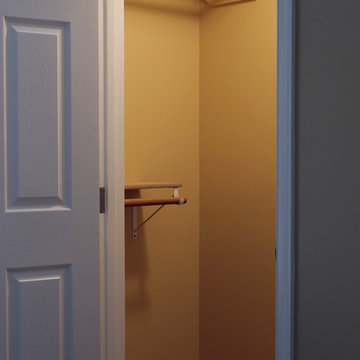
This bedroom and full bathroom are part of an adventuresome project my wife and I embarked upon to create a complete apartment in the basement of our townhouse. We designed a floor plan that creatively and efficiently used all of the 385-square-foot-space, without sacrificing beauty, comfort or function – and all without breaking the bank! To maximize our budget, we did the work ourselves and added everything from thrift store finds to DIY wall art to bring it all together.
A partial double closet bar adds a little extra space while still leaving room for longer hanging clothes.
 Custom Surface Solutions
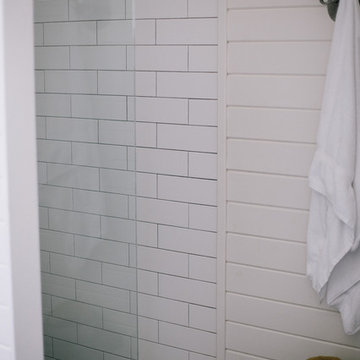
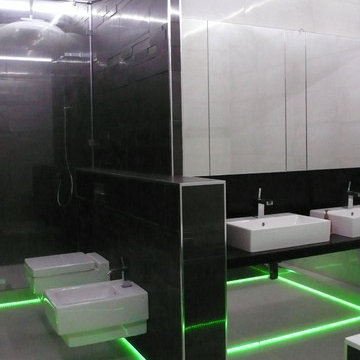
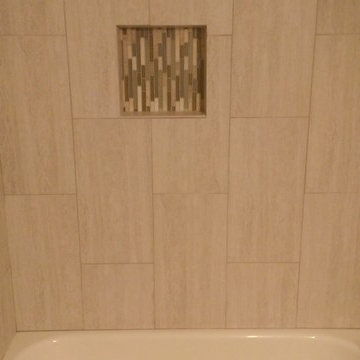
Custom Surface Solutions (www.css-tile.com) - Owner Craig Thompson (512) 430-1215. This project shows new 12 x 24 tile installed vertically with offset layout pattern on wall and floor. Includes shower box with linear glass accent tile back and vertical glass accent band. Tile edges are finished with Schluter Jolly satin aluminum profile edge trim.
10