
Search results for "One page" in Home Design Ideas

 RAJ Kitchen and Bath, LLC
“Full apartment design”.
IF you have not yet seen this apartment conversion before, we strongly urge you to go to the bottom left of this page and click on the short 2-minutes video. It would put a lot of things into perspective when you come back and continue reading this.
It is true we were literally handed the keys and told a list of things that they wanted to have happen and we were to go into the apartment, look at the space and come up with a design that would satisfy all of that need. UNTIL we showed up! The unit had really seen some better days but we knew we had to look past that and come up with a concept that would work for them.
The immediate challenges were centered around 3 big ideas:
1. Adding a second bedroom to the already small footprint
2. Figuring out a way to make the kitchen bigger, better and brighter
3. Creating a master room walk in closet
It’s always difficult to add new rooms into existing footprint without expanding out or up and not incurring any opportunity cost. In this case, that was exactly what we had to do. Item one and two above had to be tackled as one. We went ahead and switched out the location of the dining room and eliminating an area where there was a “nook” type eat-in area. By doing so, we were able to cut right into that footprint and change the layout of the kitchen.
That one move allowed us to dig into the kitchen design because it was now the main focal point in the apartment. It was no longer an option to keep it in that tiny hole where it was, so we had to ensure that this design was functional and aesthetically pleasing at the same time. By adding the table into the space where an Island typically would go, we were able to both cut cost and still provide a dining experience. The Table serves as an Island as well when cooking.
We then proceeded to block in the existing doorway to the dining room. By doing this, we were able to create a full room which allowed us to put a door on the other side and called that room Bedroom #2. This was easier to do because all of the mechanicals were already in that space (light, heater and windows). By shifting things around, we also achieved a huge wall to wall closet from inside. PERFECT!
Then we moved into the Single bedroom. We thought it was a big room with a small closet, so by creatively adding an L shaped wall and steal some footprint into the bedroom side, we were able to put a door on that new room and design it for the walk-in closet. Even after this, the bedroom still holds a queen size bed with 2 night stands, a TV on the wall, a sitting chair and plenty of room to walk around. This was done by rethinking the location for the bed and night stands.
The bathroom was gutted to make sure there was no leaks and rebuild from the ground up. We kept all of the plumbing where it was, added a new vanity, medicine cabinet, tiles and lighting and it was done.
From there, the rest of the unit had new flooring all throughout, paint, and lighting. After completion and walk through, this project was handed over back to the clients.
Execution and collaboration between all the trades were: Reggie and his team from Premier Interiors and Rohan from RD Mechanical Services.
p.s. Please see our website to see the video.
 RAJ Kitchen and Bath, LLC
“Full apartment design”.
IF you have not yet seen this apartment conversion before, we strongly urge you to go to the bottom left of this page and click on the short 2-minutes video. It would put a lot of things into perspective when you come back and continue reading this.
It is true we were literally handed the keys and told a list of things that they wanted to have happen and we were to go into the apartment, look at the space and come up with a design that would satisfy all of that need. UNTIL we showed up! The unit had really seen some better days but we knew we had to look past that and come up with a concept that would work for them.
The immediate challenges were centered around 3 big ideas:
1. Adding a second bedroom to the already small footprint
2. Figuring out a way to make the kitchen bigger, better and brighter
3. Creating a master room walk in closet
It’s always difficult to add new rooms into existing footprint without expanding out or up and not incurring any opportunity cost. In this case, that was exactly what we had to do. Item one and two above had to be tackled as one. We went ahead and switched out the location of the dining room and eliminating an area where there was a “nook” type eat-in area. By doing so, we were able to cut right into that footprint and change the layout of the kitchen.
That one move allowed us to dig into the kitchen design because it was now the main focal point in the apartment. It was no longer an option to keep it in that tiny hole where it was, so we had to ensure that this design was functional and aesthetically pleasing at the same time. By adding the table into the space where an Island typically would go, we were able to both cut cost and still provide a dining experience. The Table serves as an Island as well when cooking.
We then proceeded to block in the existing doorway to the dining room. By doing this, we were able to create a full room which allowed us to put a door on the other side and called that room Bedroom #2. This was easier to do because all of the mechanicals were already in that space (light, heater and windows). By shifting things around, we also achieved a huge wall to wall closet from inside. PERFECT!
Then we moved into the Single bedroom. We thought it was a big room with a small closet, so by creatively adding an L shaped wall and steal some footprint into the bedroom side, we were able to put a door on that new room and design it for the walk-in closet. Even after this, the bedroom still holds a queen size bed with 2 night stands, a TV on the wall, a sitting chair and plenty of room to walk around. This was done by rethinking the location for the bed and night stands.
The bathroom was gutted to make sure there was no leaks and rebuild from the ground up. We kept all of the plumbing where it was, added a new vanity, medicine cabinet, tiles and lighting and it was done.
From there, the rest of the unit had new flooring all throughout, paint, and lighting. After completion and walk through, this project was handed over back to the clients.
Execution and collaboration between all the trades were: Reggie and his team from Premier Interiors and Rohan from RD Mechanical Services.
p.s. Please see our website to see the video.
 RAJ Kitchen and Bath, LLC
“Full apartment design”.
IF you have not yet seen this apartment conversion before, we strongly urge you to go to the bottom left of this page and click on the short 2-minutes video. It would put a lot of things into perspective when you come back and continue reading this.
It is true we were literally handed the keys and told a list of things that they wanted to have happen and we were to go into the apartment, look at the space and come up with a design that would satisfy all of that need. UNTIL we showed up! The unit had really seen some better days but we knew we had to look past that and come up with a concept that would work for them.
The immediate challenges were centered around 3 big ideas:
1. Adding a second bedroom to the already small footprint
2. Figuring out a way to make the kitchen bigger, better and brighter
3. Creating a master room walk in closet
It’s always difficult to add new rooms into existing footprint without expanding out or up and not incurring any opportunity cost. In this case, that was exactly what we had to do. Item one and two above had to be tackled as one. We went ahead and switched out the location of the dining room and eliminating an area where there was a “nook” type eat-in area. By doing so, we were able to cut right into that footprint and change the layout of the kitchen.
That one move allowed us to dig into the kitchen design because it was now the main focal point in the apartment. It was no longer an option to keep it in that tiny hole where it was, so we had to ensure that this design was functional and aesthetically pleasing at the same time. By adding the table into the space where an Island typically would go, we were able to both cut cost and still provide a dining experience. The Table serves as an Island as well when cooking.
We then proceeded to block in the existing doorway to the dining room. By doing this, we were able to create a full room which allowed us to put a door on the other side and called that room Bedroom #2. This was easier to do because all of the mechanicals were already in that space (light, heater and windows). By shifting things around, we also achieved a huge wall to wall closet from inside. PERFECT!
Then we moved into the Single bedroom. We thought it was a big room with a small closet, so by creatively adding an L shaped wall and steal some footprint into the bedroom side, we were able to put a door on that new room and design it for the walk-in closet. Even after this, the bedroom still holds a queen size bed with 2 night stands, a TV on the wall, a sitting chair and plenty of room to walk around. This was done by rethinking the location for the bed and night stands.
The bathroom was gutted to make sure there was no leaks and rebuild from the ground up. We kept all of the plumbing where it was, added a new vanity, medicine cabinet, tiles and lighting and it was done.
From there, the rest of the unit had new flooring all throughout, paint, and lighting. After completion and walk through, this project was handed over back to the clients.
Execution and collaboration between all the trades were: Reggie and his team from Premier Interiors and Rohan from RD Mechanical Services.
p.s. Please see our website to see the video.
Find the right local pro for your project
 User
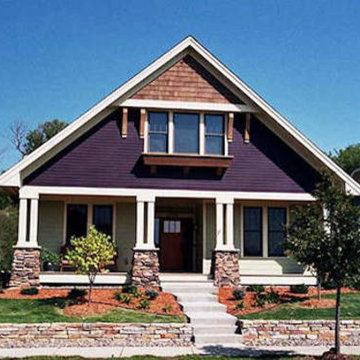
Craftsman house plan - 51-346 from Houseplans.com
Questions? Call us at 1-800-913-2350
ON SALE
Photographs may show modified designs. All images are copyrighted.
Plan 51-346
1665 sq ft
2 beds
1.50 baths
36' wide
80' deep
×
Plans
Main Floor Plan
Reverse
Specifications
Plan Styles
Craftsman
Bungalow
Ceiling
Main Ceiling Ft
9'
Dimension
Depth
80'
Height
26'
Width
36'
Garage
Rear Entry Garage
Rear Garage
Outdoor Spaces
Screened Porch Sunroom
Covered Front Porch
Designer Notes
Included
EXTERIOR ELEVATIONS
FOUNDATION AND DETAILS
FLOOR PLAN(S)
CROSS SECTION AND DETAILS
ROOF PLANS: Most plans included roof plans.
If this is important to you contact one of our sales representative at 888-705-1300 for verification.
NOTE:Plans do not include electrical or plumbing.
Bedroom Features
Walk In Closet
Kitchen Features
Kitchen Island
Peninsula Eating Bar
Entryway
Mud Room
Lot Characteristics
Suited For Narrow Lot
Area
Garage Sq Ft
583 sq ft
Basement Sq Ft
1665 sq ft
Total Sq Ft
1665 sq ft
Main Floor Sq Ft
1665 sq ft
Additional Rooms
Den Office Study Computer
Family Room Keeping Room
Basic Features
Potential Bedrooms
0
Garage Stalls
2
Bedrooms
2
Stories
1
Baths
1.50
Exterior Wall Framing
Framing
2"x6"
More
Empty Nester
Pricing
Plan Set
Price
5 Copy Set
$1160.00
PDF Set
$1425.00
Reproducible Set
$1440.00
8 Copy Set
$1550.00
CAD Set
$2040.00
Single Set
$990.00
Foundation
Price
Basement
+$0.00
Additional Construction Sets
$50.00/each
Right-Reading Reverse
$200.00
The Single Set and PDF Study Set are typically stamped "Not for Construction" and are to be used for studying / obtaining bids only. We do offer a 90% credit when you upgrade from a Single Set to a 5-Copy set (or greater).
Additional copies can be ordered at the time of purchase and within 90 days after your original purchase date.
Plan Content
Foundation Plan: Drawn to 1/4" scale, this page shows all necessary notations and dimensions including support columns, walls and excavated and unexcavated areas.
Exterior Elevations: A
 RAJ Kitchen and Bath, LLC
“Full apartment design”.
IF you have not yet seen this apartment conversion before, we strongly urge you to go to the bottom left of this page and click on the short 2-minutes video. It would put a lot of things into perspective when you come back and continue reading this.
It is true we were literally handed the keys and told a list of things that they wanted to have happen and we were to go into the apartment, look at the space and come up with a design that would satisfy all of that need. UNTIL we showed up! The unit had really seen some better days but we knew we had to look past that and come up with a concept that would work for them.
The immediate challenges were centered around 3 big ideas:
1. Adding a second bedroom to the already small footprint
2. Figuring out a way to make the kitchen bigger, better and brighter
3. Creating a master room walk in closet
It’s always difficult to add new rooms into existing footprint without expanding out or up and not incurring any opportunity cost. In this case, that was exactly what we had to do. Item one and two above had to be tackled as one. We went ahead and switched out the location of the dining room and eliminating an area where there was a “nook” type eat-in area. By doing so, we were able to cut right into that footprint and change the layout of the kitchen.
That one move allowed us to dig into the kitchen design because it was now the main focal point in the apartment. It was no longer an option to keep it in that tiny hole where it was, so we had to ensure that this design was functional and aesthetically pleasing at the same time. By adding the table into the space where an Island typically would go, we were able to both cut cost and still provide a dining experience. The Table serves as an Island as well when cooking.
We then proceeded to block in the existing doorway to the dining room. By doing this, we were able to create a full room which allowed us to put a door on the other side and called that room Bedroom #2. This was easier to do because all of the mechanicals were already in that space (light, heater and windows). By shifting things around, we also achieved a huge wall to wall closet from inside. PERFECT!
Then we moved into the Single bedroom. We thought it was a big room with a small closet, so by creatively adding an L shaped wall and steal some footprint into the bedroom side, we were able to put a door on that new room and design it for the walk-in closet. Even after this, the bedroom still holds a queen size bed with 2 night stands, a TV on the wall, a sitting chair and plenty of room to walk around. This was done by rethinking the location for the bed and night stands.
The bathroom was gutted to make sure there was no leaks and rebuild from the ground up. We kept all of the plumbing where it was, added a new vanity, medicine cabinet, tiles and lighting and it was done.
From there, the rest of the unit had new flooring all throughout, paint, and lighting. After completion and walk through, this project was handed over back to the clients.
Execution and collaboration between all the trades were: Reggie and his team from Premier Interiors and Rohan from RD Mechanical Services.
p.s. Please see our website to see the video.

 Cantoni Los Angeles
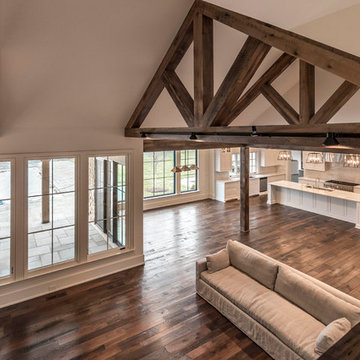
It’s warm in Southern California, and that’s exactly the feeling Andy and Liz sought to maintain inside their new Tuscan-style home as they embarked on a modern interior makeover. After all, the couple had two small children and a dog to consider. Empty and austere simply wasn’t a good fit for the young family whose interests include photography, art and lots of Lego’s.
Andy, an engineer, became intrigued with Cantoni after driving past the Irvine location on his daily commute. It wasn’t long before he and Liz decided to venture into the Los Angeles showroom, and that’s where they met Bernadette. By all accounts, the trio made for great collaboration, and the project that began in February 2012 is still a work in progress today.
“We were impressed by Bernadette,” says Andy. “We liked her and her work, and she won us over.”
The project began with pictures sent and an in-home walk-through where measurements were taken. The couple knew they wanted furnishings for the living, dining and family rooms, as well as the media room and a study. They were open to art and accent pieces, and hoped to incorporate natural elements into the mix. Bernadette set to work.
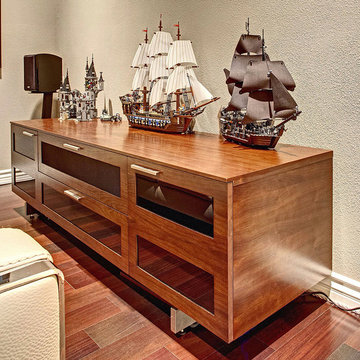
“It was fun touring our LA showroom and listening to Liz and Andy discuss their likes and dislikes. One thing was for sure,” she adds, “the Laguna Sectional was going in their theater room even if we needed to knock out a wall!”
UpstairsPhase I of the job is complete (as you can see from the stunning images), but instead of parting ways, Andy and Liz decided to have Bernadette help re-imagine the master bedroom and kitchen, next. The ongoing nature of this project illustrates a trend we see with most of our clients: we build trusted, long-term relationships. It’s not about the transaction, but about great design, the design process, and the ability of our talented staff to help clients create the lifestyles they want.
As always, there’s plenty to love about the products seen in our feature stories. To help you shop the look, we’re introducing a Featured Products page via a link to the images in each story. We’ve also redesigned our site to make sourcing and finding that just-right piece a breeze.

 Page Home Design
Mid-sized trendy master beige tile and stone slab light wood floor alcove bathtub photo in Denver with recessed-panel cabinets, white cabinets, a one-piece toilet, beige walls, an undermount sink and quartz countertops

 Cantoni Los Angeles
It’s warm in Southern California, and that’s exactly the feeling Andy and Liz sought to maintain inside their new Tuscan-style home as they embarked on a modern interior makeover. After all, the couple had two small children and a dog to consider. Empty and austere simply wasn’t a good fit for the young family whose interests include photography, art and lots of Lego’s.
Andy, an engineer, became intrigued with Cantoni after driving past the Irvine location on his daily commute. It wasn’t long before he and Liz decided to venture into the Los Angeles showroom, and that’s where they met Bernadette. By all accounts, the trio made for great collaboration, and the project that began in February 2012 is still a work in progress today.
“We were impressed by Bernadette,” says Andy. “We liked her and her work, and she won us over.”
The project began with pictures sent and an in-home walk-through where measurements were taken. The couple knew they wanted furnishings for the living, dining and family rooms, as well as the media room and a study. They were open to art and accent pieces, and hoped to incorporate natural elements into the mix. Bernadette set to work.
“It was fun touring our LA showroom and listening to Liz and Andy discuss their likes and dislikes. One thing was for sure,” she adds, “the Laguna Sectional was going in their theater room even if we needed to knock out a wall!”
UpstairsPhase I of the job is complete (as you can see from the stunning images), but instead of parting ways, Andy and Liz decided to have Bernadette help re-imagine the master bedroom and kitchen, next. The ongoing nature of this project illustrates a trend we see with most of our clients: we build trusted, long-term relationships. It’s not about the transaction, but about great design, the design process, and the ability of our talented staff to help clients create the lifestyles they want.
As always, there’s plenty to love about the products seen in our feature stories. To help you shop the look, we’re introducing a Featured Products page via a link to the images in each story. We’ve also redesigned our site to make sourcing and finding that just-right piece a breeze.

 New England Overhead Door
who may be interested in New England Overhead Door.
Photos
See All
https://scontent-bos3-1.xx.fbcdn.net/v/t1.0-0/s600x600/122440855_3699472876770453_5130193353790148903_o.jpg?_nc_cat=100&ccb=2&_nc_sid=730e14&_nc_ohc=lGeMWOi7CqsAX9lIFZf&_nc_ht=scontent-bos3-1.xx&tp=7&oh=48b39001fa3296300a8484061fbb3375&oe=5FBB631B
https://scontent-bos3-1.xx.fbcdn.net/v/t1.0-0/p235x350/118626633_3544956762222066_1401902762494421989_n.jpg?_nc_cat=105&ccb=2&_nc_sid=730e14&_nc_ohc=EZMzPh06OJIAX-ibWr0&_nc_ht=scontent-bos3-1.xx&tp=6&oh=a618cfd64ab9c7b902e5251abbef2323&oe=5FBC4E62
https://scontent-bos3-1.xx.fbcdn.net/v/t1.0-0/p350x350/116427838_3458805414170535_5439332882631817520_o.jpg?_nc_cat=110&ccb=2&_nc_sid=730e14&_nc_ohc=wl4prWyEzXIAX8OGcYr&_nc_ht=scontent-bos3-1.xx&tp=6&oh=48fdd935b7cebdea0512fd4043c1060b&oe=5FBC8302
https://scontent-bos3-1.xx.fbcdn.net/v/t1.0-0/p350x350/116429512_3458805754170501_8545399322401356846_o.jpg?_nc_cat=105&ccb=2&_nc_sid=730e14&_nc_ohc=fc_OgV9jUlQAX-gMs-K&_nc_ht=scontent-bos3-1.xx&tp=6&oh=ee517d3fd6c3066980b2854beb3b82e9&oe=5FBD5AA4
https://scontent-bos3-1.xx.fbcdn.net/v/t1.0-0/p350x350/116807883_3458805957503814_1531271228116251007_o.jpg?_nc_cat=104&ccb=2&_nc_sid=730e14&_nc_ohc=3eAk54bLZqwAX94XmLv&_nc_ht=scontent-bos3-1.xx&tp=6&oh=6a250d2f1ee1a7387f1bb012afee3f22&oe=5FBE16DA
https://scontent-bos3-1.xx.fbcdn.net/v/t1.0-0/p350x350/116429512_3458806180837125_8639440518626099217_o.jpg?_nc_cat=101&ccb=2&_nc_sid=730e14&_nc_ohc=zd8FPOXlfEYAX-hsqpn&_nc_ht=scontent-bos3-1.xx&tp=6&oh=3d0a36f0cbf94fb0d640160eae146428&oe=5FBD0A43
Videos
See All
We are your local garage door experts! Call Today (800) 696-7723 for all of your garage door needs. Email Us: sales@newenglandoverheaddoor.com Visit Us: https://www.newenglandoverheaddoor.com/ - - - #garagedoors #newgaragedoor #garagedoorinstallation #garagedooropener #garagedoorrepair #garagedoorservice
123 Views · 14 weeks ago
Page Transparency
See All
Facebook is showing information to help you better understand the purpose of a Page. See actions taken by the people who manage and post content.
Page created - June 21, 2011
Privacy · Terms · Advertising · Ad Choices · Cookies · · Facebook © 2020
Create
PINNED POST
OTHER POSTS
New England Overhead Door
tSpAuSnguonmssornsigthm 1e8do ·
Design your own door! At New England Overhead Door we have a 'Design Your Own Door' feature. We strive to fit every type and style of home and we look to meet all of our customers wants and needs. Installing a new garage door on your home can completely transform your house!
Click the link below to create the garage door of your dreams:
https://www.newenglandoverheaddoor.com/garage-doors
Comments
Comment as New England Overhead Door
New England Overhead Door
tSpAuSnguonmssornsigthm 1e7do ·
Garage Door Tips for Homeowners!
- Tighten up the Hardware
- Test the Garage Door Balance
- Inspect/Replace Rollers (Done by a Professional)… See More
Comments
Comment as New England Overhead Door
New England Overhead Door
tSpAuSnguonmssornsigthm 1e2do ·
Before & After of New Installation in Hopkinton, MA!
Labor and materials to furnish and install the following:
(2) 9'0" x 7'0" Haas Model 663 Steel Insulated Garage Doors.
Design: Recessed Long Panel. Color: White. Windows: 4 Pane Rectangular (DSB Glass Non Insulated). Window Section: 3rd Section. 12" Radius Tracking. Torsion Springs. Full Weather Seal (White) Heavy 45 Degree Corners (6) 9'. 1 3/8" Thick Door.… See More
Comments
Comment as New England Overhead Door
New England Overhead Door
AhstuSfgpoeeustanco sho1r1edh ·
Winchester, MA
11 Stars out of 10 - FABULOUS REVIEW!
"From my first call with Robyn to my last goodbye with Dave at the end of the job, New England Garage Doors received a score of 11 out of a possible 10! Having owned and run two companies of my own, I know excellent service and attention to detail is what makes one company a winner over another. You guys did a phenomenal job!
For anyone reading this as a reference, I do not take putting claims like this in writing light… See More
Comments
Comment as New England Overhead Door
New England Overhead Door
AhstuSfgpoeeustanco sho1r0edh ·
New England Overhead Door updated their website address.
New England Overhead Door updated their website address.
Comments
Comment as New England Overhead Door
New England Overhead Door updated their status.
AhstuSfgpoeeustanco sho1r0edh ·
Comments
Comment as New England Overhead Door
New England Overhead Door updated their status.
AuotgSugpdonssaoth crr1hmere0d ·
Garage doors are the main point of access and entry in many homes today. You always want to make sure your garage doors are safely operating and running properly.
Our technicians perform 12-point safety inspections and offer a wide variety of repair services.
Call today to schedule an appointment (800) 696-7723 or go online at https://www.newenglandoverheaddoor.com/.… See More
Comments
Comment as New England Overhead Door
New England Overhead Door
AtougShghpounsortesctdih hr7 ·
New Installation in Winchester, MA!
Labor and materials furnished and installed:
Size: (2) 9' 0" X 6' 3". Gallery® Steel - Premium Series with Intellicore® - GD2SU. 3-Layer. 2" Intellicore® Insulated. R-Value 18.4. c Color: Ultra-Grain® Oak Dark Finish. Design: Short Panel Bead Board. Top Section: Short Solid - Bead Board. Glass Type: Not Applicable With Solid Top Section. Spring: Extension. Track Size: 3" Low Headroom Track. Track Type: Standard Mount. Type: Bracket. Track … See More
Comments
Comment as New England Overhead Door
New England Overhead Door
AtougShghpounsortesctdih hr5 ·
Residential Service Call in Sudbury, MA!
Labor and materials furnished and installed:
Installed New High Lift Track with Springs Hardware and Side Mount Opener. Extension Cord. (3) 8’ 1”x 4” Inside Wood Jambs to Allow Track to Follow Wall Properly. 76” Inches of Space, 120 lbs. Door Weight. Wireless Keypad & Battery Backup Installed.
 Cantoni Los Angeles
It’s warm in Southern California, and that’s exactly the feeling Andy and Liz sought to maintain inside their new Tuscan-style home as they embarked on a modern interior makeover. After all, the couple had two small children and a dog to consider. Empty and austere simply wasn’t a good fit for the young family whose interests include photography, art and lots of Lego’s.
Andy, an engineer, became intrigued with Cantoni after driving past the Irvine location on his daily commute. It wasn’t long before he and Liz decided to venture into the Los Angeles showroom, and that’s where they met Bernadette. By all accounts, the trio made for great collaboration, and the project that began in February 2012 is still a work in progress today.
“We were impressed by Bernadette,” says Andy. “We liked her and her work, and she won us over.”
The project began with pictures sent and an in-home walk-through where measurements were taken. The couple knew they wanted furnishings for the living, dining and family rooms, as well as the media room and a study. They were open to art and accent pieces, and hoped to incorporate natural elements into the mix. Bernadette set to work.
“It was fun touring our LA showroom and listening to Liz and Andy discuss their likes and dislikes. One thing was for sure,” she adds, “the Laguna Sectional was going in their theater room even if we needed to knock out a wall!”
UpstairsPhase I of the job is complete (as you can see from the stunning images), but instead of parting ways, Andy and Liz decided to have Bernadette help re-imagine the master bedroom and kitchen, next. The ongoing nature of this project illustrates a trend we see with most of our clients: we build trusted, long-term relationships. It’s not about the transaction, but about great design, the design process, and the ability of our talented staff to help clients create the lifestyles they want.
As always, there’s plenty to love about the products seen in our feature stories. To help you shop the look, we’re introducing a Featured Products page via a link to the images in each story. We’ve also redesigned our site to make sourcing and finding that just-right piece a breeze.

 TOC design & construction inc.
Have fun with your color choices by: Tania Scardellato - TOC design
Every unforgettable living room design begins with a fabulous paint color. The right color scheme can set the tone for any space, embodying whichever mood or style you wish, whether it be elegantly traditional or edgy and modern. As you stand in front of that daunting display filled with hundreds of tiny paint swatches, each color more perfect than the next, you may be asking yourself how to choose just one shade. Selecting living room color schemes can be an easy and enjoyable process if you have fabulous inspiration and the right design tools.
A beautiful color palette will instantly transform any drab and outdated living room into a trendy contemporary den found on the pages of your favorite designer magazines. The right shade can set the tone for the entire space, embodying whichever décor concept you desire. For this reason, when searching those isles for the perfect color scheme it is very important to choose wisely, understanding the particular look and style that each hue will evoke. Every great design will begin with fabulous inspiration.. Imagine your room in a rainbow of outstanding new hues, and then select the color that best reflects your home’s personality and individual décor style.
The importance to color is repeat, Don’t use too much of the same color in large amounts and always repeat a small touch of that color in your open concept.
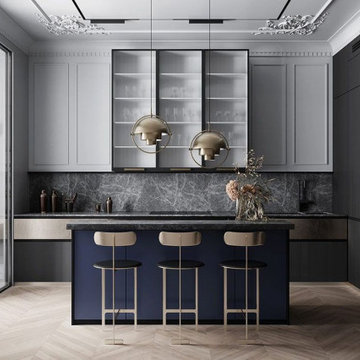
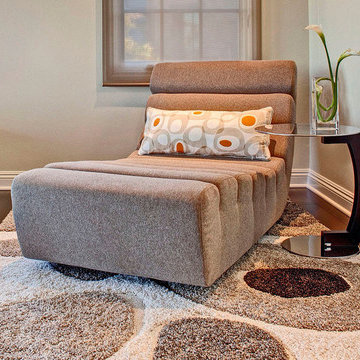
For This young couple we went with a neutral pallet as they desired pops of colors with their furnishings, The wall paint color acted as a canvas, and the furniture, painting and accessories as there focal point.
 TOC design & construction inc.
Have fun with your color choices by: Tania Scardellato - TOC design
Every unforgettable living room design begins with a fabulous paint color. The right color scheme can set the tone for any space, embodying whichever mood or style you wish, whether it be elegantly traditional or edgy and modern. As you stand in front of that daunting display filled with hundreds of tiny paint swatches, each color more perfect than the next, you may be asking yourself how to choose just one shade. Selecting living room color schemes can be an easy and enjoyable process if you have fabulous inspiration and the right design tools.
A beautiful color palette will instantly transform any drab and outdated living room into a trendy contemporary den found on the pages of your favorite designer magazines. The right shade can set the tone for the entire space, embodying whichever décor concept you desire. For this reason, when searching those isles for the perfect color scheme it is very important to choose wisely, understanding the particular look and style that each hue will evoke. Every great design will begin with fabulous inspiration.. Imagine your room in a rainbow of outstanding new hues, and then select the color that best reflects your home’s personality and individual décor style.
The importance to color is repeat, Don’t use too much of the same color in large amounts and always repeat a small touch of that color in your open concept.
For This young couple we went with a neutral pallet as they desired pops of colors with their furnishings, The wall paint color acted as a canvas, and the furniture, painting and accessories as there focal point.
 Cantoni Los Angeles
It’s warm in Southern California, and that’s exactly the feeling Andy and Liz sought to maintain inside their new Tuscan-style home as they embarked on a modern interior makeover. After all, the couple had two small children and a dog to consider. Empty and austere simply wasn’t a good fit for the young family whose interests include photography, art and lots of Lego’s.
Andy, an engineer, became intrigued with Cantoni after driving past the Irvine location on his daily commute. It wasn’t long before he and Liz decided to venture into the Los Angeles showroom, and that’s where they met Bernadette. By all accounts, the trio made for great collaboration, and the project that began in February 2012 is still a work in progress today.
“We were impressed by Bernadette,” says Andy. “We liked her and her work, and she won us over.”
The project began with pictures sent and an in-home walk-through where measurements were taken. The couple knew they wanted furnishings for the living, dining and family rooms, as well as the media room and a study. They were open to art and accent pieces, and hoped to incorporate natural elements into the mix. Bernadette set to work.
“It was fun touring our LA showroom and listening to Liz and Andy discuss their likes and dislikes. One thing was for sure,” she adds, “the Laguna Sectional was going in their theater room even if we needed to knock out a wall!”
UpstairsPhase I of the job is complete (as you can see from the stunning images), but instead of parting ways, Andy and Liz decided to have Bernadette help re-imagine the master bedroom and kitchen, next. The ongoing nature of this project illustrates a trend we see with most of our clients: we build trusted, long-term relationships. It’s not about the transaction, but about great design, the design process, and the ability of our talented staff to help clients create the lifestyles they want.
As always, there’s plenty to love about the products seen in our feature stories. To help you shop the look, we’re introducing a Featured Products page via a link to the images in each story. We’ve also redesigned our site to make sourcing and finding that just-right piece a breeze.

 TOC design & construction inc.
Have fun with your color choices by: Tania Scardellato - TOC design
Every unforgettable living room design begins with a fabulous paint color. The right color scheme can set the tone for any space, embodying whichever mood or style you wish, whether it be elegantly traditional or edgy and modern. As you stand in front of that daunting display filled with hundreds of tiny paint swatches, each color more perfect than the next, you may be asking yourself how to choose just one shade. Selecting living room color schemes can be an easy and enjoyable process if you have fabulous inspiration and the right design tools.
A beautiful color palette will instantly transform any drab and outdated living room into a trendy contemporary den found on the pages of your favorite designer magazines. The right shade can set the tone for the entire space, embodying whichever décor concept you desire. For this reason, when searching those isles for the perfect color scheme it is very important to choose wisely, understanding the particular look and style that each hue will evoke. Every great design will begin with fabulous inspiration.. Imagine your room in a rainbow of outstanding new hues, and then select the color that best reflects your home’s personality and individual décor style.
The importance to color is repeat, Don’t use too much of the same color in large amounts and always repeat a small touch of that color in your open concept.
For This young couple we went with a neutral pallet as they desired pops of colors with their furnishings, The wall paint color acted as a canvas, and the furniture, painting and accessories as there focal point.
 Cantoni Los Angeles
It’s warm in Southern California, and that’s exactly the feeling Andy and Liz sought to maintain inside their new Tuscan-style home as they embarked on a modern interior makeover. After all, the couple had two small children and a dog to consider. Empty and austere simply wasn’t a good fit for the young family whose interests include photography, art and lots of Lego’s.
Andy, an engineer, became intrigued with Cantoni after driving past the Irvine location on his daily commute. It wasn’t long before he and Liz decided to venture into the Los Angeles showroom, and that’s where they met Bernadette. By all accounts, the trio made for great collaboration, and the project that began in February 2012 is still a work in progress today.
“We were impressed by Bernadette,” says Andy. “We liked her and her work, and she won us over.”
The project began with pictures sent and an in-home walk-through where measurements were taken. The couple knew they wanted furnishings for the living, dining and family rooms, as well as the media room and a study. They were open to art and accent pieces, and hoped to incorporate natural elements into the mix. Bernadette set to work.
“It was fun touring our LA showroom and listening to Liz and Andy discuss their likes and dislikes. One thing was for sure,” she adds, “the Laguna Sectional was going in their theater room even if we needed to knock out a wall!”
UpstairsPhase I of the job is complete (as you can see from the stunning images), but instead of parting ways, Andy and Liz decided to have Bernadette help re-imagine the master bedroom and kitchen, next. The ongoing nature of this project illustrates a trend we see with most of our clients: we build trusted, long-term relationships. It’s not about the transaction, but about great design, the design process, and the ability of our talented staff to help clients create the lifestyles they want.
As always, there’s plenty to love about the products seen in our feature stories. To help you shop the look, we’re introducing a Featured Products page via a link to the images in each story. We’ve also redesigned our site to make sourcing and finding that just-right piece a breeze.
 User
House Plan 424-168 - Houseplans.com
Questions? Call us at 1-800-913-2350
Photographs may show modified designs. All images are copyrighted.
Plan 424-168
3147 sq ft
4 beds
2.50 baths
39' wide
64' deep
×
Plans
Main Floor Plan
Reverse
Upper Floor Plan
Reverse
Specifications
Plan Styles
Bungalow
Traditional
Craftsman
Ceiling
Upper Ceiling Ft
9'
Main Ceiling Ft
10'
Ceiling Details
10' Ceilings down except where noted
Roof
Secondary Pitch
7:12
Exterior Wall Framing
Framing
2"x4"
Area
Upper Floor Sq Ft
1152 sq ft
Total Sq Ft
3147 sq ft
Main Floor Sq Ft
1995 sq ft
Outdoor Spaces
Covered Front Porch
Grill Deck Sundeck
Dimension
Depth
64'
Height
31'
Width
39'
Kitchen Features
Kitchen Island
Additional Rooms
Family Room Keeping Room
Parlor
Library Room
Bedroom Features
Main Floor Master Bed Bath
Upstairs Bedrooms Bath
Walk In Closet
Basic Features
Potential Bedrooms
0
Stories
2
Bedrooms
4
Garage Stalls
0
Baths
2.50
Designer Notes
Included
Foundation plan:
1/4" scale monolithic slab showing locations of plumbing fixtures
Floor plan(s):
Shows electrical layout.
Sections:
Plan includes at least one cross section cut through main body of house and may include various construction details.
Other details and/or sections may be included on other sheets depending on the complexity of the plan.
Elevations:
1/4" scale drawings of the front, rear and sides.
May contain details specific to that plan.Roof plan:
1/8" scale or greater
Cabinet elevations:
1/4" scale or greater
Monolithic slab details and cornice details
Note:
Plans do not contain plumbing or mechanical drawings.
Pricing
Plan Set
Price
5 Copy Set
$750.00
8 Copy Set
$850.00
Reproducible Set
$850.00
Foundation
Price
Slab
+$0.00
Additional Construction Sets
$50.00/each
Mirror Reverse Sets
$50.00/each
Additional copies can be ordered at the time of purchase and within 90 days after your original purchase date.
Plan Content
All plans are drawn at ¼” scale or larger and include :
Foundation Plan: Drawn to 1/4" scale, this page s
 TOC design & construction inc.
Have fun with your color choices by Tania Scardellato - TOC design
Every unforgettable living room design begins with a fabulous paint color. The right color scheme can set the tone for any space, embodying whichever mood or style you wish, whether it be elegantly traditional or edgy and modern. As you stand in front of that daunting display filled with hundreds of tiny paint swatches, each color more perfect than the next, you may be asking yourself how to choose just one shade. Selecting living room color schemes can be an easy and enjoyable process if you have fabulous inspiration and the right design tools.
A beautiful color palette will instantly transform any drab and outdated living room into a trendy contemporary den found on the pages of your favorite designer magazines. The right shade can set the tone for the entire space, embodying whichever décor concept you desire. For this reason, when searching those isles for the perfect color scheme it is very important to choose wisely, understanding the particular look and style that each hue will evoke. Every great design will begin with fabulous inspiration.. Imagine your room in a rainbow of outstanding new hues, and then select the color that best reflects your home’s personality and individual décor style.
The importance to color is repeat, Don’t use too much of the same color in large amounts and always repeat a small touch of that color in your open concept.
For This young couple we went with a neutral pallet as they desired pops of colors with their furnishings, The wall paint color acted as a canvas, and the furniture, painting and accessories as there focal point.

 Cantoni Los Angeles
It’s warm in Southern California, and that’s exactly the feeling Andy and Liz sought to maintain inside their new Tuscan-style home as they embarked on a modern interior makeover. After all, the couple had two small children and a dog to consider. Empty and austere simply wasn’t a good fit for the young family whose interests include photography, art and lots of Lego’s.
Andy, an engineer, became intrigued with Cantoni after driving past the Irvine location on his daily commute. It wasn’t long before he and Liz decided to venture into the Los Angeles showroom, and that’s where they met Bernadette. By all accounts, the trio made for great collaboration, and the project that began in February 2012 is still a work in progress today.
“We were impressed by Bernadette,” says Andy. “We liked her and her work, and she won us over.”
The project began with pictures sent and an in-home walk-through where measurements were taken. The couple knew they wanted furnishings for the living, dining and family rooms, as well as the media room and a study. They were open to art and accent pieces, and hoped to incorporate natural elements into the mix. Bernadette set to work.
“It was fun touring our LA showroom and listening to Liz and Andy discuss their likes and dislikes. One thing was for sure,” she adds, “the Laguna Sectional was going in their theater room even if we needed to knock out a wall!”
UpstairsPhase I of the job is complete (as you can see from the stunning images), but instead of parting ways, Andy and Liz decided to have Bernadette help re-imagine the master bedroom and kitchen, next. The ongoing nature of this project illustrates a trend we see with most of our clients: we build trusted, long-term relationships. It’s not about the transaction, but about great design, the design process, and the ability of our talented staff to help clients create the lifestyles they want.
As always, there’s plenty to love about the products seen in our feature stories. To help you shop the look, we’re introducing a Featured Products page via a link to the images in each story. We’ve also redesigned our site to make sourcing and finding that just-right piece a breeze.
 Cantoni Los Angeles
It’s warm in Southern California, and that’s exactly the feeling Andy and Liz sought to maintain inside their new Tuscan-style home as they embarked on a modern interior makeover. After all, the couple had two small children and a dog to consider. Empty and austere simply wasn’t a good fit for the young family whose interests include photography, art and lots of Lego’s.
Andy, an engineer, became intrigued with Cantoni after driving past the Irvine location on his daily commute. It wasn’t long before he and Liz decided to venture into the Los Angeles showroom, and that’s where they met Bernadette. By all accounts, the trio made for great collaboration, and the project that began in February 2012 is still a work in progress today.
“We were impressed by Bernadette,” says Andy. “We liked her and her work, and she won us over.”
The project began with pictures sent and an in-home walk-through where measurements were taken. The couple knew they wanted furnishings for the living, dining and family rooms, as well as the media room and a study. They were open to art and accent pieces, and hoped to incorporate natural elements into the mix. Bernadette set to work.
“It was fun touring our LA showroom and listening to Liz and Andy discuss their likes and dislikes. One thing was for sure,” she adds, “the Laguna Sectional was going in their theater room even if we needed to knock out a wall!”
UpstairsPhase I of the job is complete (as you can see from the stunning images), but instead of parting ways, Andy and Liz decided to have Bernadette help re-imagine the master bedroom and kitchen, next. The ongoing nature of this project illustrates a trend we see with most of our clients: we build trusted, long-term relationships. It’s not about the transaction, but about great design, the design process, and the ability of our talented staff to help clients create the lifestyles they want.
As always, there’s plenty to love about the products seen in our feature stories. To help you shop the look, we’re introducing a Featured Products page via a link to the images in each story. We’ve also redesigned our site to make sourcing and finding that just-right piece a breeze.
 Bloomming
CUTTING-EDGE OFFICE FRONT DESK DESIGN
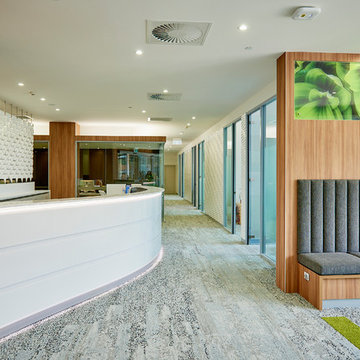
We have created the ultimate room divider for your professional workspace. Say hello to Facet – the best you can find in office front desk design. Facet is a fully modular system and available in any size. The separate facets can rotate. If you leave Facet as it is, you have a neat, polished look, but if you decide to turn some of the facets around you can create a quirky, fun screen for your office. It is all up to you! Either way, you are sure to impress your clients with this chic and unique modern office divider.
CREATE AN INSPIRING WORKSPACE WITH FACET
Having a welcoming and motivational workspace is very important. Your colleagues and you spend so much time at your office, you should be able to draw inspiration from it instead of feeling drained when you enter it. Having well-made furniture and beautifully designed pieces in your workspace, will help in creating an inspiring workspace. And that is why Facet office front desk design is ideal for an office environment. The craftsmanship and attention to detail in the design, will make anyone feel motivated to be creative and do their best.
Facet works perfectly as a backdrop behind reception to separate it from the rest of the office. This creates a calm and welcoming area at reception for your clients and guests. It also gives a stylish and professional first impression of your company. Choose Facet for on trend office front desk design décor.
GO FROM POLISHED TO PLAYFUL WITH FACET
The cool thing about Facet is that you can alter the look of it. You can turn around the diamond-shaped facets to change the look of the pattern and to adjust the amount that can be seen through it. Take a look at the sixth picture on this page. Drag the vertical line over the picture from left to right and back again. See how the screen goes from neat and polished to fun and playful? You can achieve the same look with our office front desk design screen by turning the facets around or keeping them as they are.
Facet room divider screens are available in any size, we just need your desired dimensions and will start assembling it. It is also available in a range of sophisticated colors. Choose one that fits your office interior, or we can develop a specific color if you want something that we don’t have on offer. Developing your own color will cost a bit more, contact us for the possibilities. We want you to be 100% happy with your office front desk design, so feel free to phone or email us if you have any questions or special requests!
This particular office divider is installed in a trendy medical clinic in Brisbane, Australia. It divides the reception area from the working area. Interior design is done by Louise Kollosche.
Project – Office Front Desk Design
Product – Room Divider Facet
Dimensions – Width 306cm x Height 171cm
Color – White
Ceiling Attachments – Brushed Stainless Steel
Location – Brisbane, Australia
Client – Karen Campbell, BCNC
Architect – Louise Kollosche, Kodesigned
Builder – Phillip Boon, Ulex Constructions
Photography – Cathy Taylor Photography
54