
Search results for "Overnight" in Home Design Ideas
 Tile Doctor Ltd
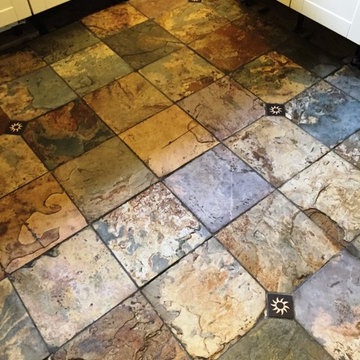
I recently visited a client living in the market town of Woodstock in Oxfordshire to rejuvenate a fantastic multi-coloured Slate floor that had been hidden under several years’ worth of dirt in their kitchen. Slate is a typically hard-wearing tile used for flooring high traffic areas of houses and public buildings but does need sealing to bring out its best features and in this case the sealer had long since worn off and dirt had become ingrained in the stone.
My first task in the cleaning process was to mix a strong solution of Tile Doctor Pro-Clean, which is a strong alkaline cleaner safe to use on Tile and Stone, and NanoTech HBU (Heavy Build-up Remover), which is a particularly powerful product that uses nano-sized particles to tackle muck in areas of the stone where typical cleaners simply can’t reach. I spread this solution across the floor and left it to seep into the stone, to get underneath and lift out the ingrained dirt.
After allowing the solution adequate time to dwell, I scrubbed the floor with a carbon brush to gradually reveal the fantastic natural colours of the Slate hidden beneath. Following this, I rinsed the entire floor several times with clean water, before soaking up the resulting soiled residue with a wet vacuum.
The next part of the cleaning process entailed paying particular attention to the grout lines. I used Tile Doctor Grout Clean-Up to scrub the grout lines and also to treat a small amount of efflorescence. The resulting residue was promptly extracted with the wet vacuum and I finished by giving the whole floor a rinse with Tile Doctor pH Neutral Tile Cleaner. This is a day to day tile cleaning product which is recommended for stone floors, many supermarket tile cleaning products are only suitable for ceramic tiles due to their acidic formula and can damage a floor over years of use so you should always read the label. I then left the floor to dry completely overnight.
On day two, the Slate tiled floor was dry and ready to seal. The floor had to be completely dry, as any excess moisture has the potential to the damage the performance of the sealer. Since my client had specifically requested a matte finish, I opted to use Tile Doctor Colour Grow. Colour Grow is an impregnating sealer that provides durable surface protection from within while also enhancing all of the natural mineral shades.
My client was very pleased with the results, particularly as they hadn’t realised they had such a great looking floor in their house when they had first purchased it!
Barry Woodward
Oxfordshire Tile Doctor
 Tile Doctor Ltd
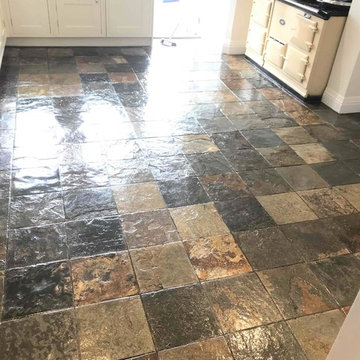
I recently completed the renovation of a Multi-Coloured Slate tiled kitchen floor in Sutton Coldfield. I was actually at the property before Christmas to survey the floor and quote for the work however the owners had planned to have a new kitchen installed in the new year, so we decided it was best for me to wait until after the installation to complete the work.
The slate was in good condition but like any stone floor you do need to maintain the sealer to prevent dirt becoming ingrained in the stone. Sealer do wear off overtime especially in the high foot traffic areas such as Kitchens and within a few years the tiles become dull and difficult to clean effectively.
The kitchen was installed on schedule and I got the call to arrange a visit to deep clean and reseal the floor which would take to two days, one to clean and one to seal.
To begin the restoration, I soaked the slate in a strong dilution of Tile Doctor Pro-Clean and left it to soak in for about ten minutes re-applying extra solution where it dried. Pro-Clean is a powerful tile cleaner that will strip old sealers when applied in concentrated form. I agitated the product using a black pad fitted to a rotary buffing machine. I paid particular attention to the grout which the customer had trouble keeping clean. The rotary pad struggles to reach into the recesses of the grout lines so I also made sure to scrub the solution into the grout with a grout brush.
Once I was satisfied that the Slate and the Grout was clean and clear of old sealers, I gave the whole floor a thorough rinse with water using a wet vacuum to extract the soil and get the floor as dry as possible. The floor was then left to dry off fully overnight.
Returning to the property the next day, I ran some quick damp tests to check for any excess moisture that might have prevented me from sealing the floor. We will always do this as excess moisture can affect the sealer curing.
The customer was very happy with the clean and the floor was dry, so we discussed sealer options to find out their preference for Matt or Satin finish. With the decision made to go with a Satin finish I began the application of the Tile Doctor Seal and Go which enhances the look of the stone with an aesthetically pleasing low-sheen finish, as well as providing on-going protection against ingrained dirt and staining.
A total of four coats of Seal and Go were needed to seal the Slate tiles and as you can see from the photos the sealer really put the life back into the floor.
Trevor Preece
Staffordshire Tile Doctor
 Tile Doctor Ltd
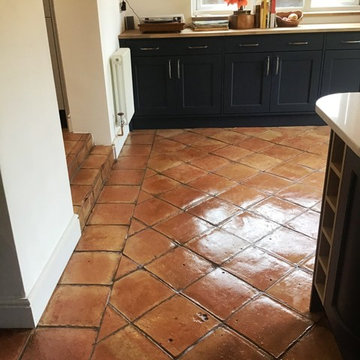
We were contacted by the owner of a property in Moulton with a problematic Terracotta tiled kitchen floor. She was seriously considering ripping up the entire area of tiling and replacing it as she was having a new kitchen installed. Both her and her husband were concerned that unless I could restore this floor to somewhere near to its original condition, they would need to replace it.
I went over to inspect the Terracotta tiles and could see the entire surface was deeply ingrained with soiling and the grout lines were filthy. After carrying out a test it became obvious that the previous sealer had been applied very sparingly and had mostly worn away, leaving the stone prone to staining. Terracotta is a very porous tile and dirt had become ingrained in the pores leaving it looking very dull and difficult to clean.
I completed the test on a small part of the floor and the customer could see the results which could be achieved. Happy with the result they agreed my quote and we set a date for my return to complete the floor.
The tiles turned out to be made of a fairly soft Terracotta which meant that we were able to deep clean them extremely effectively using a strong dilution of Tile Doctor Pro-Clean. We used Tile Doctor Remove and Go in particularly stubborn areas.
The process I use is to spray the Pro-Clean onto the floor and leave it to soak in for about ten minutes before being worked in using a heavy rotary machine fitted with a black scrubbing pad. The resulting slurry is removed using a wet pick up vacuum. All the dirt and virtually all of the old sealer was removed at this stage; the remaining patches around the edges of the area being finished by hand with a 200-grit burnishing block. The grout lines were then cleaned by hand with an angled grout brush.
Finally, the deep-seated oil stains in front of the cooker were brought out using Tile Doctor Oxy-Gel which was left to dwell on the marks for an hour before being agitated with a diamond burnishing pad and rinsed away with a wet pick up machine. The floor was rinsed with water and allowed to dry off overnight.
The following day I inspected the floor and checked it was ready to be sealed. All was well so I applied an initial coat of Tile Doctor Colour Grow which is an impregnating sealer that occupies the pores in the tile enhancing the natural colours of the Terracotta and provide a base layer of protection from staining.
I returned at a convenient time once the kitchen was completely installed to finish the job. This involves carrying out a light maintenance clean with Tile Doctor Neutral Cleaner and once the floor was dry, I applied 5 further coats of Tile Doctor Seal and Go which provides a pleasing satin finish which is really suited to this type of floor.
The customer was very happy with the results and has left the following feedback.
“We were really pleased with the results, thank you!”
Phil Vissian
Northamptonshire Tile Doctor
Find the right local pro for your project
 Tile Doctor Ltd
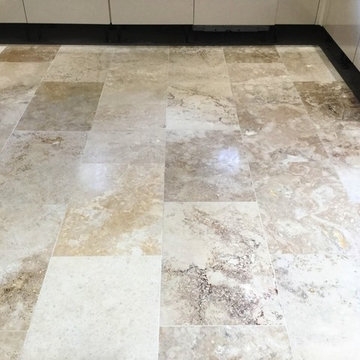
Travertine floor tiles are very appealing and very hardwearing, but without the protection of a sealer to stop dirt becoming ingrained in the pores of the stone their appearance will degrade. Fortunately, this can be remedied as demonstrated in these pictures of a Travertine floor I recently polished at a house in Weston Favell, Northampton.
This owner of the property had called me out as their kitchen floor was looking very sorry for itself and he was concerned that a lot of holes were appearing which was making cleaning the floor difficult as dirt was getting trapped in the holes. I went over and carried out a test clean on two separate tiles in the kitchen and the customer was amazed at how clean they came up and especially the grout.
The kitchen was stunning, but unfortunately the state of the Travertine tiled floor was bringing down its overall appearance. Impressed with the test clean they were keen to get the whole floor renovated so we agreed a price and I scheduled the work in for the following month.
I returned on the agreed data and made a start by protecting the kitchen units by removing the plinths and covering base units and the appliances with a protective film. We then commenced the cleaning process to remove surface dirt by cleaning with Tile Doctor Pro-Clean paying special attention to the grout lines. The holes in the Travertine were filled with a stone resin, mixing it to closely match the colours of the stone.
The resin was allowed to dry before starting to re-polish the Travertine using a set of Tile Doctor Diamond encrusted burnishing pads. These pads are applied individually to each tile in sequence starting with a coarse 400-grit pad before moving onto the 800-grit and finishing with the fine 1500 grit pad. A little water is used to lubricate the process along the way and the floor is rinsed in between each pad with the resulting residue extracted from the floor using a wet vacuum. The process takes some time, but it really brings up the polished appearance of the stone and the results are well worth the effort. After a final rinse the floor was inspected and then left to dry off fully overnight.
When we returned the next day, the floor had dried, and we were able to give the floor a final polish with a very fine 3000-grit burnishing pad applied with a little water sprayed onto the tile. Finally, the floor was then sealed with two coats of Tile Doctor Ultra-Seal which provides excellent protection without changing the colour of the stone to provide a natural look.
The client was over the moon with the outcome and surprised at the improvement. They were left with a floor that would be easy to clean and maintain.
Phil Vissian
Northamptonshire Tile Doctor
 Tile Doctor Ltd
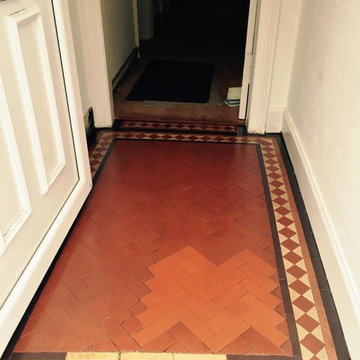
This job was at house in Polwarth, a small parish through which flows the Union Canal, running from Falkirk to Edinburgh. The client had requested a clean for a Victorian tiled hallway set in the narrow reception area of the house.
The tiled floor had been painted over by the previous owners of the house using a thick, red paint. Painting a tile floor in such a way can affect its wash-ability, and the paint can peel off over time especially in a high-traffic area such as a reception area or hallway such as this. The red paint would have to be removed in order to restore the tile underneath and reveal its natural state, as well as provide a thorough and much-needed clean.
The first step in the paint removal process was to spray the floor with a strong solution of Tile Doctor Pro-Clean mixed with Remove & Go. Pro-Clean is a heavy duty cleaner and degreaser, suitable for use on tile, stone and grout. Pro-Clean combines well with Remove and Go, which is a multi-purpose stripper capable of removing most sealers, adhesives and, particularly important for this case, paint. The solution was left to dwell after application to allow it to soak into the tile and soften the paint and dirt.
After 10 to 15 minutes we scrubbed the floor in order to remove as much of the paint as possible. The owner of the house was surprised to see the true colours of the tile appearing, which had been hidden beneath the paint for a significant period of time. As the red paint coating was particularly thick, we had to scrub the floor multiple times. In some areas the paint proved tricky to remove so it was necessary to use a steamer to steam clean the stubborn areas.
Once all of the paint had been successfully removed, the unveiled tile floor was treated to another clean using Pro-Clean, before being given a wash down and neutralised using Concentrated Neutral Tile & Stone Cleaner. It’s important to ensure any trace of strong cleaning products are removed from floor before the next step of sealing as it can impact the sealer leading to un-even results.
The floor was left to dry off overnight and we came back the next day to seal the tiles using four coats of Tile Doctor Seal & Go which is an ideal sealer for Victorian tiles as it provides stain protection whilst also bringing out the colours resulting in a subtle sheen appearance.
You can see from the photos that after a thorough cleaning and sealing the floor was back to looking its best. I do wonder why someone would want to paint over such a fantastic Victorian tiled floor!
 Tile Doctor Ltd
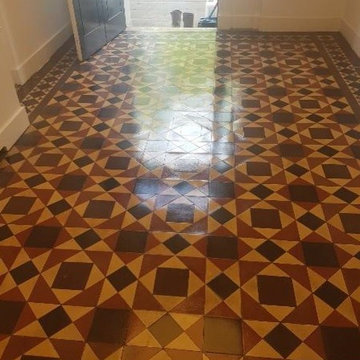
These are photos of a Victorian tiled floor we renovated at the new Scottish head office of the Peoples Postcode Lottery in the centre of Edinburgh City where the building was going through a multi million pound refurbishment. Edinburgh has a lot of Georgian and Victorian architecture, much of which is listed and as a result many still have original Victorian tiled flooring.
I’ve not really looked at the Postcode Lottery until now but put simply you give the lottery £10 a month and your postcode is your winning ticket number, there are prize draws every day and if your postcode comes up every one in the system with that postcode wins; they also give 31% to charity which is impressive.
You can see from the photograph that the floor was in good physical condition but was looking tired and dull. This is not unusual for Victorian tiles as once the sealer wears down dirt can penetrate into the pores of the tile causing it to lose its appearance.
On the first day we set about stripping the floor of what remained of the old sealant using a strong dilution of Tile Doctor Pro-Clean which is an industrial strength alkaline tile and grout cleaning product that is safe to use on Tile and Stone. The product is applied to the floor, left to soak in for ten minutes and the scrubbed into the tile using a black scrubbing pad fitted to a rotary bonnet machine. The floor was then rinsed and the now soiled cleaning solution extracted using a wet vacuum.
The process was repeated several times until we were happy the floor was clean and free of sealer and then given a final rinse with water. Before leaving for the day the floor was dried as much as possible using the wet vacuum to extract as much moisture as possible.
On the second day our first task was to check the floor with a damp meter in several places to ensure the tiles had dried off overnight. All was well and we began the process of sealing the floor with a Tile Doctor Seal and Go. This is a topical sealer which provides a high-quality low-sheen finish and protection against ingrained dirt and stains.
Victorian tiles are quite porous and five coats were needed to fully seal the floor. This took some time to complete as you have to wait until the first coat is dry before applying the next however it was well worth the effort as the floor looked fantastic afterwards.
Thomas Wilson
Edinburgh Tile Doctor
 Tile Doctor Ltd
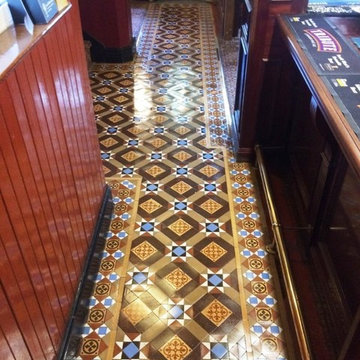
Here’s a really interesting commercial job for you, which I recently completed in the town of Hinckley, Leicestershire. I was asked to take a look at a Victorian Geometric and Encaustic tiled floor in the historic Queen’s Head pub.
This floor is over a century old and although in good condition for its age had suffered significant wear over the years, along with some cracked tiles and slight inherent moisture issues. What the pub landlord requested was a restorative clean to alleviate the aesthetically damaging effect of the wear, and to enhance the natural colours of the stone. I was also asked to seal the floor following the clean to achieve a semi-gloss finish.
The first step in the cleaning process was to mix a strong solution of one part Tile Doctor Pro-Clean to four parts clean water. Pro-Clean is a high alkaline cleaner which also contains stripping properties, allowing it to break down old sealer and tackle heavy soil build-up. The solution was applied to the floor and left to dwell for 15 minutes, giving it times to seep into the stone, get underneath the dirt and lift it to the surface.
I addressed several paint spots and areas suffering from glue contamination by using Tile Doctor Remove & Go, which is specially formulated to break down paint and adhesives on unpolished natural stone floors, amongst others. The entire floor was then scrubbed using a special floor cleaning pad, and the resulting slurry was vacuumed away using a wet-vac machine.
The final issue to deal with was the inherent efflorescence staining. This was treated using Tile Doctor Grout Clean-Up, an acid-based product which removes not just efflorescence but also grout haze, mineral deposits, and rust stains. The solution here was one part Grout Clean-Up diluted with four parts water.
After completing the clean, I thoroughly rinsed the floor with clean water to remove any trace of cleaning product and dried the floor as much as possible with a wet vacuum, then before leaving for the day i installed a couple of air movers to assist with drying overnight.
Upon my return the following day, I checked the floor for any excess moisture before sealing it with our topical, semi-gloss finish sealer, known as Seal & Go Extra which due to its formula is ideal for external or old internal floors where there is unlikely to be damp from membrane.
This unique product provides excellent protection, and allows the tiles to breath where floors are suffering from inherent moisture issues. It is suitable for both internal and external use, on Victorian floor tiles, Sandstone, Flagstones, Terracotta, and rough Slate.
As you can see from the photo, I was able to fulfil my client’s request to a high standard, bringing the pub’s old yet characterful Victorian tiled floor back to life again.
Kay Sylvester
Leicestershire Tile Doctor
 Tile Doctor Ltd
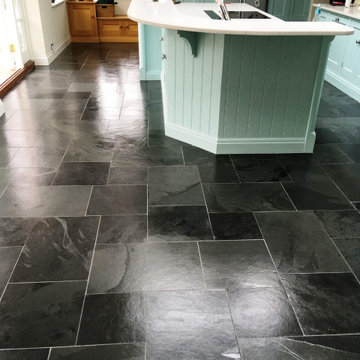
Our client had previously employed another company to tackle this large Slate floor in Walton on Thames but they hadn’t managed to remove the old sealer due to it being an old varnish seal. Varnish was used as a traditional way of sealing stone but can be damaged by scratching and it does little to improve the look of the stone. Varnish is also very difficult to break down which is a problem as it’s important to remove the old sealant before applying new, applying a new sealer onto Varnish simply wouldn’t work.
I visited the property to survey the floor and work out which combination of products and methods would work best and after some testing and I was able to confirm that not only could the old varnish be removed but once re-sealed with a modern sealer the slate would be transformed.
The client was over the moon to hear this news as they had thought there was nothing, they could do to improve the floor.
With a price and schedule agreed I returned to the property at a later date and started by tackling the varnish. The method I used was to apply Tile Doctor Remove and Go, let it soak into the floor for ten minutes and then work it in with a heavy rotary scrubbing machine fitted with a black pad. The soil was then rinsed with water and extracted off the floor with a wet vacuum.
The floor was then inspected, and each tile checked to ensure the varnish was completely gone, any stubborn areas were then spot treated and scrubbed by hand. Once I was satisfied, I set about giving the stone a deep clean by repeating the same process with Tile Doctor Pro-Clean. As before all the soil and cleaning products were then low pressure rinsed off the stone and vacuumed away. The floor was then left to dry overnight.
I returned the following day to apply a new modern sealer. First, I tested the floor was dry using the moisture meter. It was in the acceptable readings range, so I was able to start applying the sealer straight away.
For this floor I chose to apply Tile Doctor Seal and Go, it works really well on Slate tiles and as you can see from the photographs it completely transformed the appearance of the stone. Seal and Go is a water-based blend of acrylic polymers that provides both a stain resistant surface seal and a durable low-sheen finish, being water based it has the added advantage of not giving off any odour as it dries. The client had specified earlier that they didn’t want the floor to look shiny to the resultant silky appearance was the perfect solution. Thee coats were applied, and my client was very pleased with the finish.
Jonathan Oldham
South Middlesex Tile Doctor
 Tile Doctor Ltd
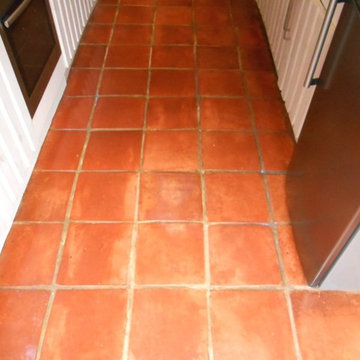
Not too long ago, I visited a house in the town of Fulwood in Preston, Lancashire. My client had a Terracotta tiled floor which had been neglected for many years and in their attempt to improve it had unfortunately been given some very poor advice by tile retailers, all of whom sold him different products, and each of which was unsuitable. Using these different products in succession had resulted in the depreciation of the floor’s texture and smoothness, in turn making the clay difficult to clean and maintain.
As per my usual process I ran a small test clean to demonstrate what could be done to improve the floor and I was commissioned to restore the floor back to its former glory.
I started by mixing a strong cleaning solution consisting of one part Tile Doctor Pro-Clean to three parts water. The solution was applied to the floor and left it to dwell for a short period. The high alkaline cleaner seeps into the pores of the tile getting underneath and lifting out the ingrained dirt and breaking down the old sealers. Then, I agitated the floor using a scrubbing pad fitted to a rotary floor machine before using a wet vacuum to suck up the resulting soiled solution.
There were a few paint marks dotted across the floor, but these were not noticeable until after I had given the Terracotta a deep clean. To remove the paint marks I used Tile Doctor Remove & Go, which is specially formulated to break down paint stains, adhesives and coatings. This product was used in combination with a steamer which, when applied directly to the tiles, helped to lift the paint out. Following this, I rinsed the entire floor a couple of times to remove any trace of cleaning product, and vacuumed up the excess moisture.
It’s always best to let the floor dry completely prior to sealing as applying sealer to a damp floor will affect the sealer. I left the house to allow this to take place overnight returning the next day. To get the best out of the Terracotta I sealed the floor using one coat of Tile Doctor Colour Grow, which is an impregnating sealer that soaks into the pores of the tile and acts as both as a bonding sealer enhancing the natural colours and darkening the clay (as requested by my client).
After the coat of Colour Grow had dried, I applied a further seven coats of Tile Doctor Seal & Go, which achieves a nice, low sheen Satin finish. Before leaving my happy client to enjoy his newly restored Terracotta floor, I made sure to provide some professional cleaning and long-term maintenance advice.
Russell Taylor
Lancashire Tile Doctor
 Tile Doctor Ltd
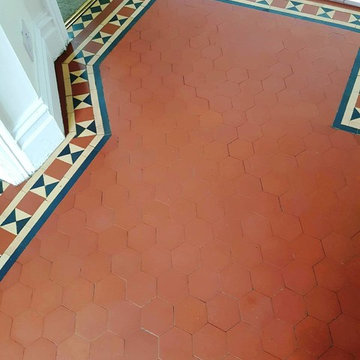
From The 1860s Victorian tiled floors started to appear in public buildings and by the 1890s they had become an essential feature in the most ordinary Victorian terraced houses. Although these floors fell out of fashion during the 1960s and ’70s, when many of them were covered over, they are now being rediscovered by their present owners and this is exactly what happened to my customer in the village of Littleover.
The customer had attempted to clean the floor by themselves but they couldn’t archive the result wanted, fortunately they discovered the Derbyshire Tile Doctor and after their call I went over and did a test for cleaning to make sure I can archive the needed results. They were happy with what they saw, so they booked me in to complete the work.
For cleaning the hallway I used a strong dilution of Tile Doctors Pro Clean which is strong multi-purpose high-alkaline cleaner. I left the Pro Clean to dwell for 10 minutes and then worked it in the tiles by using a strong black scrubbing pad fitted to my rotary machine. After scrubbing I rinsed the floor several times with clean water to remove any trace of cleaning product from the floor.
After successfully cleaning the hall I moved on to the porch which still had some old topical sealer on less walked areas. On these areas I had to use Tile Doctors own very effective stripper Remove and Go. Remove and Go has a long dwell time to remove any given sealer or wax so I left it to soak in for fifteen minutes followed by scrubbing it in with black pad fitted to rotary machine. The next step was to wash off the residue with water which was then removed using a wet vacuum.
Following this the tiles were given a rinse with Tile Doctor Grout Clean-up which is an acid based product that can remove grout smears and mineral deposits. Last step before sealing was to give the floor a thorough wash down with clean water to remove any cleaning product left on the tiles and then I left the floor to dry overnight.
Next day when I returned I used my damp tester to make sure that the floor is completely dry. Luckily for me floor was all dry and I started sealing. For sealing I used Tile Doctors Colour Grow Sealer which is colour enhancing breathable sealer. I applied 2 coats of the sealer and after every coat I polished off the excess with clean cotton cloths.
The result was really good and my customer was very happy with the work and said that now the floor looks transformed.
Tony Olmet
Derbyshire Tile Doctor

 Skyline Construction LLC
Located in the established Eagle Estates neighborhood of Evansville, Wyoming, this beautifully updated four-level home combines modern finishes, flexible living areas, and practical features for everyday life. With 2,034 square feet of finished living space, the residence offers 3 bedrooms, 3 bathrooms, a recently completed daylight basement, and an attached two-car garage.
The bright upper-level living area features vaulted ceilings and an open, welcoming atmosphere. Updated luxury vinyl plank flooring, fresh carpeting, modern hardware, and improved fixtures give the home a clean and cohesive appearance while preserving the comfortable character of the original design.
The renovated kitchen offers granite countertops, updated cabinetry and finishes, and a full collection of new appliances, including the refrigerator. Its connection to the dining and living areas provides an efficient layout for daily meals, entertaining, and family gatherings.
The primary bedroom includes a private bathroom and walk-in closet, creating a comfortable retreat with convenient storage. Two additional bedrooms and multiple bathrooms provide flexibility for family members, overnight guests, or a home office.
A recently finished daylight basement expands the home's usable space with a comfortable family room and additional bathroom. This lower level can accommodate a media area, recreation room, fitness space, playroom, or guest accommodations while benefiting from natural light.
Updates extend beyond the visible finishes and include improvements to plumbing, electrical components, hardware, and fixtures. Central air conditioning, forced-air natural gas heat, double-pane windows, and a sump pump contribute to year-round comfort and functionality. The roof was also replaced in 2025, adding meaningful long-term value.
The attached two-car garage has been insulated, drywalled, textured, and painted, creating a clean and versatile space for parking, storage, hobbies, or workshop use. Additional off-street parking provides room for an RV, recreational equipment, trailers, or extra vehicles.
Outside, mature front and backyard landscaping creates an inviting setting with established greenery and an automatic underground sprinkler system. The fully fenced backyard offers privacy and space for outdoor gatherings, pets, gardening, or recreation, while the covered front porch adds a welcoming finishing touch.
This renovated Eagle Estates home demonstrates how thoughtful updates can improve comfort, style, and functionality while making the most of an established residential property in Evansville and the greater Casper area.

 Bluworld of Water
Unique Custom Water Feature for Private Residence - Carlsbad, CA
Trendy home theater photo in Los Angeles
Trendy home theater photo in Los Angeles
 Tile Doctor Ltd
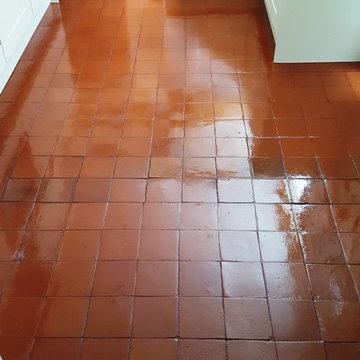
If you’re a first time buyer in the process of renovating or redecorating your new property, you may well discover some fantastic tiled floors hidden under your carpets. Certainly in my experience this happens quite often, so it came as no surprise when I got a call from a couple who had pulled up the carpet in the kitchen of their new house in Chester to find Quarry tiles, along with some fantastic Victorian tiles in the hallway.
While the Quarry tiles were in relatively good condition – having been shielded by carpet for many years – the couple were still understandably keen to get them back to looking their very best. I was more than happy to help them do just that.
Before beginning the restoration, I removed the kick boards from the kitchen cupboards so as not to damage them. I then applied a solution of our versatile, high alkaline cleaner, Tile Doctor Pro Clean, and let it soak into the tiles for a short period before scrubbing it in using a rotary machine fitted with a black scrubbing pad. Pro Clean is suitable for use on most natural stone tiles, including Quarry, Victorian and Slate, doing the trick to break down medium to heavy soil buildup.
The floor was then rinsed off with clean water, and the resulting slurry was promptly removed using a wet vac. I then left the floor dry out overnight.
I returned to the property the next morning, and started out by taking a couple of damp meter readings to make sure the floor was dry enough to seal. This is an essential task before sealing any tiled floor as even the smallest amount of excess moisture can cloud the sealer and damage its performance.
To seal the floor, I firstly applied one coat of Tile Doctor Colour Grow, which really brought out the natural reddish shades in the Quarry. As an impregnating sealer, Colour Colour fills the pores in the stone and prevents dirt from becoming ingrained. I followed the application of Colour Grow by applying three coats of Tile Doctor Seal and Go Extra. As a topical sealer, Seal and Go Extra forms an additional stain resistant seal on the surface of the tiles to protect against dirt and stains. It also gave the tiles a quality sheen finish as requested by the customer.
The customers were very happy with their newly restored Quarry tiled floor. They left the following feedback:
“We were both thrilled to bits with how nice the Quarry tiled kitchen floor looked, after being cleaned and sealed. Alastair was a pleasure to deal with and we would highly recommend him to anyone considering having their floor done.”
Alastair Robb
West Cheshire Tile Doctor
 Tile Doctor Ltd
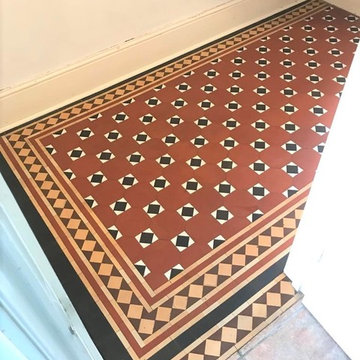
Our client had recently moved to a property in Newport, Gwent and when removing the carpet in the hallway she discovered this beautiful Victorian Tiled floor. The property had numerous period features and realising the value that the floor could add to the property she was keen to have it restored and so contacted Tile Doctor for help.
We popped round to survey the floor and except for a couple of broken tiles it had preserved well under the carpet. It was a shame the previous owner had covered the floor over but I was confident we could source some matching tiles to replace the broken ones and then restore the overall appearance. We gave the client a quote for the work which would take a couple of days. Pleased to hear that the floor could be restored and that it could soon be on show the quote was accepted and a date set to do the work.
We returned later the same month to renovate the floor and started by removing the broken tiles, cleaning out the old grout and adhesive and then relaying matching replacements. There are several specialist suppliers that can supply Victorian tiles so we can usually source reclaimed or reproduction tiles.
Some of the grout lines had dropped so as well as grouting around the replacement tiles more renovation work was needed to ensure the grout was level. We used quick setting products for this work, so I was able to move on to cleaning the floor later that afternoon.
To restore the appearance of the Victorian Tiles I used a strong dilution of Tile Doctor Pro-Clean combined with Tile Doctor Remove and Go which was left to soak in for ten minutes before being scrubbed into the tiles. This created a powerful cleaner/stripper cocktail which gets to work at removing dirt, grime and breaking down old sealers paint splashes.
After extracting the soil using a wet vacuum the floor was inspected. There were a few stubborn areas which were treated to a repeat clean and a wire brush to get the floor as clean as possible.
The floor was rinsed with water to remove any trace of cleaning products and then as much moisture as possible was extracted using a wet vacuum. The floor was left to dry off overnight and we arranged to return the next day to apply a sealer.
The following morning, we checked the floor was dry using a damp meter and this confirmed we were good to apply the sealer. The floor was sealed with Tile Doctor Colour Grow which is an impregnating sealer that protects the floor and enhances the beautiful colours in the tile. Three coats of the sealer were applied allowing each coat to dry before applying the next.
The client was very happy with the result and how beautiful the floor looked as you can see from the picture.
Paul Wales
Monmouthshire Tile Doctor

 Valerie J Johnson Custom Tailored Home Furnishings
All of the drapery panels throughout the main level of the house were hand embroidered down the leading of edge of the ivory linen face panels with this moorish inspired pattern. A natural, open weave, sheer fabric is attached to the backs of the panels, exposed at the leading edges. This application adds lovely texture from the outside of the home, softening the ivory and blending with the stone and stucco exterior.
 Housing & Building Association of Colorado Springs
The Home
Nestled in Jackson Ranch, Thurston House welcomes you to experience the solace and comfort of this warm and peaceful home.
As you step past the barnwood accented exterior, you enter a refined rustic interior with a barnwood wall and century-old beams
gracing the great room. Durable, luxury, vinyl, tile flooring leads you further in, past a front office with ample sunlight. Relax as you gaze upon the Front Range, through the pines, from the great room - while a wood-burning fire crackles nearby. Continue into the spacious kitchen, complete with custom cabinets and more amazing views. An expansive walk-in pantry gives way to an oversized garage, a builder and hobbyist’s dream space. Steps away from the kitchen, the master bedroom envelops you, providing those awe-inspiring views, while balancing privacy in the pines.
Whether you seek to entertain or to escape, the downstairs of Thurston House delivers. The stairs open to a lounge, complete with a
wood-burning fireplace and abundant screen space, while a wet bar is tucked away for close conversation. Additional bedrooms offer
comfort and privacy for overnight guests. A home gym leads to the privacy of your backyard among the pines, with mountain views to
motivate you.
The Builder
Custom Design Builders (CDB) provides a relational partnership aimed at building the home that exists in your mind. Founder and president, Ben Woody, draws on the practical creativity of his nearly 30 years of construction experience, along with the safety consciousness he acquired as a firefighter. Ben is skillful at building according to your desires, incorporating a thoughtful design that balances safety and functionality in a dynamic process. CDB relies on the expertise acquired from years of building partnerships with the most reliable tradesmen in the area. Our team of partners consistently delivers the highest quality products and services, which has helped drive our exponential growth via word-of-mouth referrals.
As a family-owned and operated business, CDB understands relationships. Engaging in a partnership with CDB is to take on an active role in designing and defining your project, while relying on the comfort and security that can only come from decades of experience.
The Interior Design
Thurston House brings a feeling of warmth, comfort and hospitality. Modern accents elevate your living experience by highlighting the character of century-old, hand-hewn beams and barnwood. A luxurious freestanding bathtub and Euro-style shower in the master bathroom encourage you to relax and recharge in your own spa-like retreat. Energy efficient HVAC and water systems, appliances and windows minimize your footprint. Durable flooring offers stability and longevity, and hand trowel-finished drywall with reclaimed wood accents provide a warm background for your life. The open floor plan lends itself to entertaining, and the views of the Front Range through the pines are enticing. These same spaces also feel private and individual. Whether training in the home gym for your next marathon, building your dream canoe in the garage, or relaxing while you listen to the crackle of a fire in your fireplace accented by those hand-hewn beams, Thurston House is a stunning place to call home.
 Story Homes
From Attic to Awesome
Many of the classic Tudor homes in Minneapolis are defined as 1 ½ stories. The ½ story is actually an attic; a space just below the roof and with a rough floor often used for storage and little more. The owners were looking to turn their attic into about 900 sq. ft. of functional living/bedroom space with a big bath, perfect for hosting overnight guests.
This was a challenging project, considering the plan called for raising the roof and adding two large shed dormers. A structural engineer was consulted, and the appropriate construction measures were taken to address the support necessary from below, passing the required stringent building codes.
The remodeling project took about four months and began with reframing many of the roof support elements and adding closed cell spray foam insulation throughout to make the space warm and watertight during cold Minnesota winters, as well as cool in the summer.
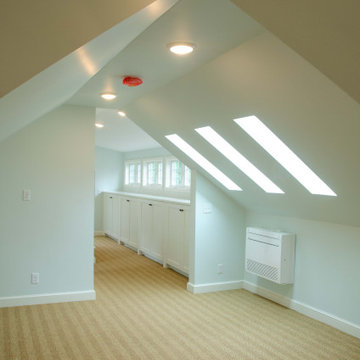
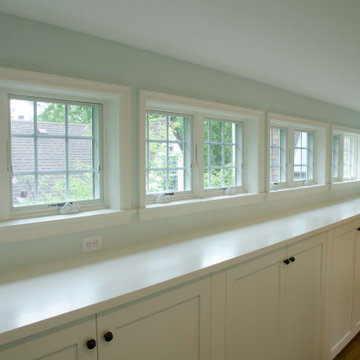
You enter the room using a stairway enclosed with a white railing that offers a feeling of openness while providing a high degree of safety. A short hallway leading to the living area features white cabinets with shaker style flat panel doors – a design element repeated in the bath. Four pairs of South facing windows above the cabinets let in lots of South sunlight all year long.
The 130 sq. ft. bath features soaking tub and open shower room with floor-to-ceiling 2-inch porcelain tiling. The custom heated floor and one wall is constructed using beautiful natural stone. The shower room floor is also the shower’s drain, giving this room an open feeling while providing the ultimate functionality. The other half of the bath consists of a toilet and pedestal sink flanked by two white shaker style cabinets with Granite countertops. A big skylight over the tub and another north facing window brightens this room and highlights the tiling with a shade of green that’s pleasing to the eye.
The rest of the remodeling project is simply a large open living/bedroom space. Perhaps the most interesting feature of the room is the way the roof ties into the ceiling at many angles – a necessity because of the way the home was originally constructed. The before and after photos show how the construction method included the maximum amount of interior space, leaving the room without the “cramped” feeling too often associated with this kind of remodeling project.
Another big feature of this space can be found in the use of skylights. A total of six skylights – in addition to eight South-facing windows – make this area warm and bright during the many months of winter when sunlight in Minnesota comes at a premium.
The main living area offers several flexible design options, with space that can be used with bedroom and/or living room furniture with cozy areas for reading and entertainment. Recessed lighting on dimmers throughout the space balances daylight with room light for just the right atmosphere.
The space is now ready for decorating with original artwork and furnishings. How would you furnish this space?
 Story Homes
From Attic to Awesome
Many of the classic Tudor homes in Minneapolis are defined as 1 ½ stories. The ½ story is actually an attic; a space just below the roof and with a rough floor often used for storage and little more. The owners were looking to turn their attic into about 900 sq. ft. of functional living/bedroom space with a big bath, perfect for hosting overnight guests.
This was a challenging project, considering the plan called for raising the roof and adding two large shed dormers. A structural engineer was consulted, and the appropriate construction measures were taken to address the support necessary from below, passing the required stringent building codes.
The remodeling project took about four months and began with reframing many of the roof support elements and adding closed cell spray foam insulation throughout to make the space warm and watertight during cold Minnesota winters, as well as cool in the summer.
You enter the room using a stairway enclosed with a white railing that offers a feeling of openness while providing a high degree of safety. A short hallway leading to the living area features white cabinets with shaker style flat panel doors – a design element repeated in the bath. Four pairs of South facing windows above the cabinets let in lots of South sunlight all year long.
The 130 sq. ft. bath features soaking tub and open shower room with floor-to-ceiling 2-inch porcelain tiling. The custom heated floor and one wall is constructed using beautiful natural stone. The shower room floor is also the shower’s drain, giving this room an open feeling while providing the ultimate functionality. The other half of the bath consists of a toilet and pedestal sink flanked by two white shaker style cabinets with Granite countertops. A big skylight over the tub and another north facing window brightens this room and highlights the tiling with a shade of green that’s pleasing to the eye.
The rest of the remodeling project is simply a large open living/bedroom space. Perhaps the most interesting feature of the room is the way the roof ties into the ceiling at many angles – a necessity because of the way the home was originally constructed. The before and after photos show how the construction method included the maximum amount of interior space, leaving the room without the “cramped” feeling too often associated with this kind of remodeling project.
Another big feature of this space can be found in the use of skylights. A total of six skylights – in addition to eight South-facing windows – make this area warm and bright during the many months of winter when sunlight in Minnesota comes at a premium.
The main living area offers several flexible design options, with space that can be used with bedroom and/or living room furniture with cozy areas for reading and entertainment. Recessed lighting on dimmers throughout the space balances daylight with room light for just the right atmosphere.
The space is now ready for decorating with original artwork and furnishings. How would you furnish this space?
 Tile Doctor Ltd
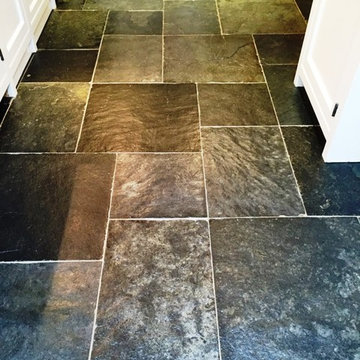
These photographs below are of a Slate Tiled Kitchen floor taken at a customer’s house in Henley-on-Thames which, as its name suggests, sits alongside the River Thames in Oxfordshire. My client’s Slate kitchen floor had recently been cleaned with unsuitable cleaning products which I suspect impacted the sealer leaving it looking dull. Sealers really to improve the look of a stone floor so unsurprisingly once the sealer had been damaged my client had been unable to find a cleaning product that could have any kind of positive effect on the tiles.
It’s fairly well known that many supermarket quality cleaners are only really designed for use on Ceramic or Porcelain tiled floors as they contain acids which strip away at sealers and acid sensitive stone floors, leaving the stone beneath vulnerable. So your select a cleaning product for your floor always read the small print on the back of the label and make sure you avoid anything that mentions not for use on acid sensitive stone; belter still Tile Doctor have a number of products for cleaning tiled floors including Neutral Cleaner and Stone Soap.
To clean the floor and remove any remaining sealer I first made a strong dilution of Tile Doctor Pro Clean which is a strong alkaline cleaner and then spread this over the floor, leaving it to dwell. This allows the cleaner to seep into the slate and get underneath, breakdown sealers and start to lift out ingrained dirt.
Following a dwelling period of roughly ten minutes, I agitated the floor periodically with a rotary machine fitted with a black scrubbing pad and scrubbed along the grout lines with a stiff grout brush. I then used a wet vacuum to extract the resultant slurry away and then followed up by rinsing the floor with clean water, and once again vacuumed up the residue.
Any stubborn areas were retreated until I was happy with the floor and then I left the floor to dry off completely overnight, in preparation for sealing the following day.
Upon my return to the house the following day, I ran some damp tests on different parts of the floor to check for any excess moisture which could potentially damage the performance of the sealer. Once I was satisfied that the floor was completely dry, I proceeded to seal the tiles using Tile Doctor Seal & Go. This will provide a robust surface seal for the future, along with an aesthetically pleasing low-sheen finish.
This sealer works particularly well on Slate tiles and, being a water-based sealant, additionally Seal & Go does not emit an unpleasant smell as it dries. Slate is quite a porous stone so I applied six coats of seal to provide long-lasting protection.
Barry Woodward
Oxfordshire Tile Doctor
 Tile Doctor Ltd
Bridgwater is known to be one of Somerset’s liveliest towns. With a history dating back over 1000 years, it has many traditions, including a carnival which happens every November, and is hailed as the world’s largest illumination procession.
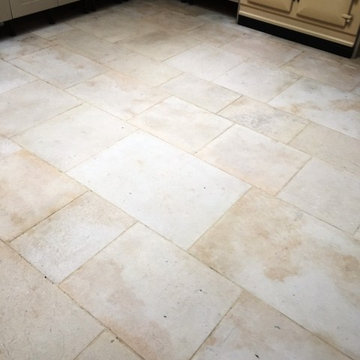
What wasn’t looking lively, however, was this Limestone tiled kitchen floor at a house in the town. It had been laid five years previously but at the time of laying hadn’t been sealed with adequate amounts of sealer.
As a result, the Limestone had absorbed a lot of wet footprints and other dirty stains. The sealer simply broke down after a while, leaving the homeowner with a floor that never looked clean no matter how much they cleaned it – using all kinds of products. In fact, the tiles looked blackened and mouldy, as you can see in the photos below.
It was time for the homeowner to seek out professional assistance, so she decided to contact her local Tile Doctor. I was asked to completely restore the look of the floor – something the homeowner had deemed impossible at this point.
In practice, I knew the floor could be restored using the right products and methods including a really deep clean and resealing with the right type of sealer for these tiles.
I scrubbed in Tile Doctor Remove and Go, which is a powerful coatings remover which draws out ingrained stains and strips away any old sealer remaining on the tiles. The floor was then rinsed thoroughly with plain water to neutralise it, and the resulting soiled solution was extracted using a wet vacuum. I repeated the process on stubborn areas, eventually transforming the floor back to its natural and clean state.
I allowed the Limestone to dry out completely overnight before returning to the property to seal the tiles. This is important as the slightest amount of excess moisture can damage the performance of the sealer, and we would’ve been back to square one!
After checking with a damp meter, I could see everything was fine, so I proceeded to seal the floor with Tile Doctor Colour Grow, which is not only a robust impregnating sealer that will protect the floor going forward but also enhancing the natural colours in the stone at the same time.
In the space of two days, the Limestone tiles had been completely transformed. Now it had been properly sealed, the floor will be much easier to clean and therefore should stay looking great for a long time to come. The customer was very happy to have finally resolved the problem with some assistance from the Somerset Tile Doctor!
Dave Hurst
Somerset Tile Doctor
63