
Search results for "Per order" in Home Design Ideas
 Kathleen Jennison
An Arts & Crafts Bungalow is one of my favorite styles of homes. We have quite a few of them in our Stockton Mid-Town area. And when C&L called us to help them remodel their 1923 American Bungalow, I was beyond thrilled.
As per usual, when we get a new inquiry, we quickly Google the project location while we are talking to you on the phone. My excitement escalated when I saw the Google Earth Image of the sweet Sage Green bungalow in Mid-Town Stockton. "Yes, we would be interested in working with you," I said trying to keep my cool.
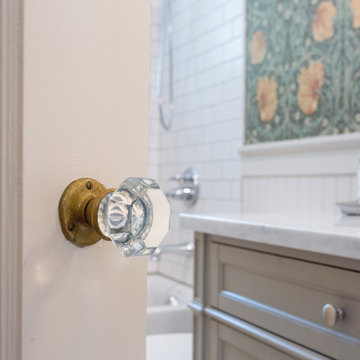
But what made it even better was meeting C&L and touring their home, because they are the nicest young couple, eager to make their home period perfect. Unfortunately, it had been slightly molested by some bad house-flippers, and we needed to bring the bathroom back to it "roots."
We knew we had to banish the hideous brown tile and cheap vanity quickly. But C&L complained about the condensation problems and the constant fight with mold. This immediately told me that improper remodeling had occurred and we needed to remedy that right away.
The Before: Frustrations with a Botched Remodel
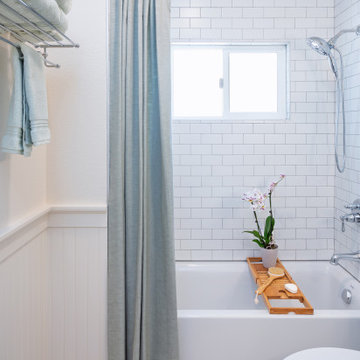
The bathroom needed to be brought back to period appropriate design with all the functionality of a modern bathroom. We thought of things like marble countertop, white mosaic floor tiles, white subway tile, board and batten molding, and of course a fabulous wallpaper.
This small (and only) bathroom on a tight budget required a little bit of design sleuthing to figure out how we could get the proper look and feel. Our goal was to determine where to splurge and where to economize and how to complete the remodel as quickly as possible because C&L would have to move out while construction was going on.
The Process: Hard Work to Remedy Design and Function
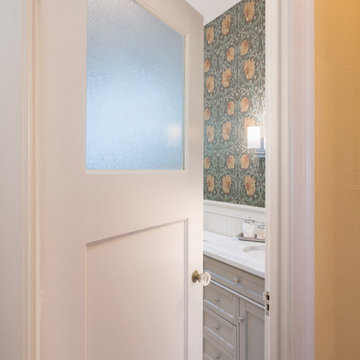
During our initial design study, (which included 2 hours in the owners’ home), we noticed framed images of William Morris Arts and Crafts textile patterns and knew this would be our design inspiration. We presented C&L with three options and they quickly selected the Pimpernel Design Concept.
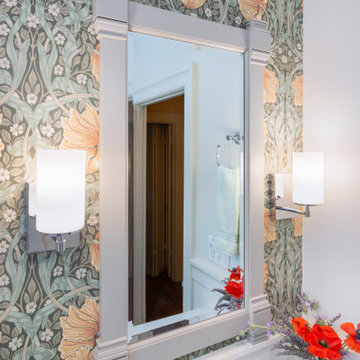
We had originally selected the Black and Olive colors with a black vanity, mirror, and black and white floor tile. C&L liked it but weren’t quite sure about the black, We went back to the drawing board and decided the William & Co Pimpernel Wallpaper in Bayleaf and Manilla color with a softer gray painted vanity and mirror and white floor tile was more to their liking.
After the Design Concept was approved, we went to work securing the building permit, procuring all the elements, and scheduling our trusted tradesmen to perform the work.
We did uncover some shoddy work by the flippers such as live electrical wires hidden behind the wall, plumbing venting cut-off and buried in the walls (hence the constant dampness), the tub barely balancing on two fence boards across the floor joist, and no insulation on the exterior wall.
All of the previous blunders were fixed and the bathroom put back to its previous glory. We could feel the house thanking us for making it pretty again.
The After Reveal: Cohesive Design Decisions
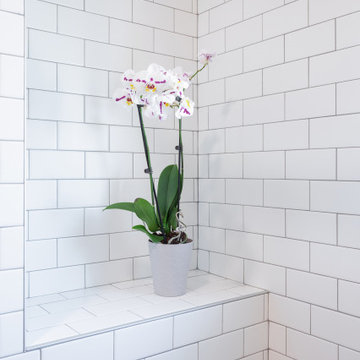
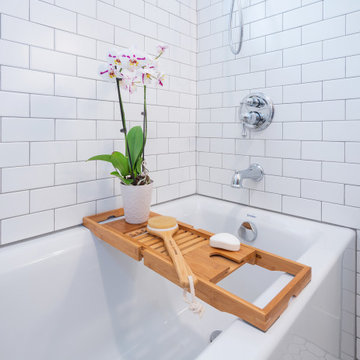
We selected a simple white subway tile for the tub/shower. This is always classic and in keeping with the style of the house.
We selected a pre-fab vanity and mirror, but they look rich with the quartz countertop. There is much more storage in this small vanity than you would think.
The Transformation: A Period Perfect Refresh
We began the remodel just as the pandemic reared and stay-in-place orders went into effect. As C&L were already moved out and living with relatives, we got the go-ahead from city officials to get the work done (after all, how can you shelter in place without a bathroom?).
All our tradesmen were scheduled to work so that only one crew was on the job site at a time. We stayed on the original schedule with only a one week delay.
The end result is the sweetest little bathroom I've ever seen (and I can't wait to start work on C&L's kitchen next).
Thank you for joining me in this project transformation. I hope this inspired you to think about being creative with your design projects, determining what works best in keeping with the architecture of your space, and carefully assessing how you can have the best life in your home.
 Kathleen Jennison
An Arts & Crafts Bungalow is one of my favorite styles of homes. We have quite a few of them in our Stockton Mid-Town area. And when C&L called us to help them remodel their 1923 American Bungalow, I was beyond thrilled.
As per usual, when we get a new inquiry, we quickly Google the project location while we are talking to you on the phone. My excitement escalated when I saw the Google Earth Image of the sweet Sage Green bungalow in Mid-Town Stockton. "Yes, we would be interested in working with you," I said trying to keep my cool.
But what made it even better was meeting C&L and touring their home, because they are the nicest young couple, eager to make their home period perfect. Unfortunately, it had been slightly molested by some bad house-flippers, and we needed to bring the bathroom back to it "roots."
We knew we had to banish the hideous brown tile and cheap vanity quickly. But C&L complained about the condensation problems and the constant fight with mold. This immediately told me that improper remodeling had occurred and we needed to remedy that right away.
The Before: Frustrations with a Botched Remodel
The bathroom needed to be brought back to period appropriate design with all the functionality of a modern bathroom. We thought of things like marble countertop, white mosaic floor tiles, white subway tile, board and batten molding, and of course a fabulous wallpaper.
This small (and only) bathroom on a tight budget required a little bit of design sleuthing to figure out how we could get the proper look and feel. Our goal was to determine where to splurge and where to economize and how to complete the remodel as quickly as possible because C&L would have to move out while construction was going on.
The Process: Hard Work to Remedy Design and Function
During our initial design study, (which included 2 hours in the owners’ home), we noticed framed images of William Morris Arts and Crafts textile patterns and knew this would be our design inspiration. We presented C&L with three options and they quickly selected the Pimpernel Design Concept.
We had originally selected the Black and Olive colors with a black vanity, mirror, and black and white floor tile. C&L liked it but weren’t quite sure about the black, We went back to the drawing board and decided the William & Co Pimpernel Wallpaper in Bayleaf and Manilla color with a softer gray painted vanity and mirror and white floor tile was more to their liking.
After the Design Concept was approved, we went to work securing the building permit, procuring all the elements, and scheduling our trusted tradesmen to perform the work.
We did uncover some shoddy work by the flippers such as live electrical wires hidden behind the wall, plumbing venting cut-off and buried in the walls (hence the constant dampness), the tub barely balancing on two fence boards across the floor joist, and no insulation on the exterior wall.
All of the previous blunders were fixed and the bathroom put back to its previous glory. We could feel the house thanking us for making it pretty again.
The After Reveal: Cohesive Design Decisions
We selected a simple white subway tile for the tub/shower. This is always classic and in keeping with the style of the house.
We selected a pre-fab vanity and mirror, but they look rich with the quartz countertop. There is much more storage in this small vanity than you would think.
The Transformation: A Period Perfect Refresh
We began the remodel just as the pandemic reared and stay-in-place orders went into effect. As C&L were already moved out and living with relatives, we got the go-ahead from city officials to get the work done (after all, how can you shelter in place without a bathroom?).
All our tradesmen were scheduled to work so that only one crew was on the job site at a time. We stayed on the original schedule with only a one week delay.
The end result is the sweetest little bathroom I've ever seen (and I can't wait to start work on C&L's kitchen next).
Thank you for joining me in this project transformation. I hope this inspired you to think about being creative with your design projects, determining what works best in keeping with the architecture of your space, and carefully assessing how you can have the best life in your home.
 Homestead Doors, Inc.
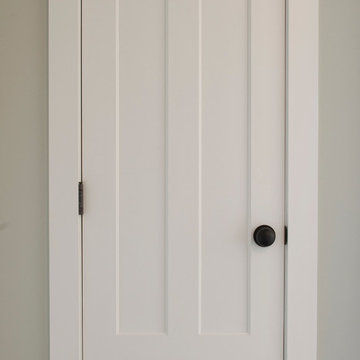
Door #10
FP3190
Flat 3 Panel Interior Door with Farmhouse Sticking
Solid Poplar stiles and rails
MDF panels
Painted White
1 x 4 door casing
1 x 6 baseboard
Bravura 336B door knob
Call us for a quote on your door project
419-684-9582
Visit https://www.door.cc
Find the right local pro for your project
 Get My Rugs LLC
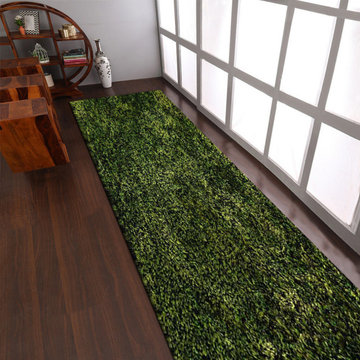
"Tremendousness is redefined by this hand tufted polyester rug which spread the prosperity in your home in the shade of green color. The solid pattern of this shag rug elaborates its beauty very well and fuels it with a much bolder look. Needless to say.
Product Features:-
Construction: Handmade
Technique: Hand Tufted shag
Shape: Runner
Color: Green
Pile: 1.5 inches
Pattern: Solid
Material: Polyester
Weight: 11.35 lbs
Origin of Manufacturing: India
Recommended Use: Indoor
Eco-Friendly: Yes
Shipping: Free Shipping
Handmade by skilled artisans enhancing in-depth color and product durabilitySolid designed and weaved by hand tufted technique.Soft polyester yarn with ultra-plush pile height of 1.5 inches for underfoot comfortSolid area rugs perfect for Living Room, Bedroom, Study Room, Dinning Room, Foyer.Free shipping and quick order dispatch. With quality product we deliver quality services to customers
Weave:- Weaving of a hand tufted shag rug is relatively easier than compared to other weaving techniques. The design is first sketched on a canvas and then material is made into it as per the design. The pile is kept very high to give it a furry look. Hand tufted rugs are very soft on face and are great for underfoot comfort. The rugs are very eye pleasing and the cost is very economical.
Material:- Polyester, an artificial fabric, have gained much popularity as rug weaving material. The polyester material rugs are highly sturdy and have gain acceptance due to its qualities like shine, wear & fade resistance, comfort, non-allergenic, moisture resistance, ease of cleaning, moth-proof, etc.
Pile:- Enjoy the high pile of this rug and place it at high footfall areas in your home, providing great underfoot comfort. This high pile rug is ideal one for the buyers who wants to place it on the flooring for the soft and cozy feel.
Proper Set Up & Care:- Hand Tufted rugs are heavy rugs and fits well with any kind of flooring. Unlike rugs of other weave the hand tufted rugs have a cotton backing which makes it anti-skid. These rugs are very durable if maintained properly.
Floor Protection:- Though hand tufted rugs have cotton backing which makes it anti-skid and harmless to the floor but you can always use a high quality rug pad to provide an extra level for floor protection.
Cleaning Methods:- For hand tufted shag rugs we recommend to go for gentle vacuum cleaning. For any stain, the users can opt for professional dry cleaning method."
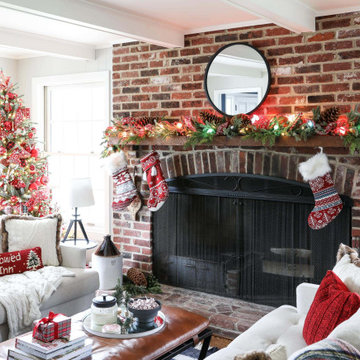
 SUPERIOR CHIMNEY SERVICES CORPORATION
A certified chimney inspection in Illinois is one of the key ‘to-do’s’ for the holidays. The last thing you need are a bunch of complaints because it’s too cold.
There’s a cold draft coming from the fireplace. Or the fire is nice and warm, but the kids playing are starting to cough because there’s a backup of smoke coming into the home. Now you have to open the windows and everyone is cold again. There are enough stresses the host must deal with, do we need to add another one?
What is a Certified Chimney Inspection?
According to the CSIA, a certified chimney inspection is an evaluation of the chimney or venting system to assess its condition and determine if it’s fit for use. Superior Chimney is certified by the CSIA to perform chimney inspections and chimney sweeps as well. What this means for you is that our technicians are trained to adhere to the NFPA 211 standard which states that the chimney and venting systems are to be inspected each year regardless if it’s a woodburning gas or unused fireplace and chimney.
Chimney Inspection Levels
A Level 1 inspection is the minimum required. How do you know this one is for you? A certified chimney inspection is when you have your chimney swept and inspected each year. Nothing has changed, you use it (or don’t use it) any differently than in the past.
A Level 2 inspection is when a change has been made to your system. This can include a change in the type of fuel being used such as changing over from gas to woodburning or from not using the fireplace to using it even if it is only once per year. Another change can also be the change to the shape of the flue or you had a new flue lining installed which is different that what you had prior.
A Level 2 is also necessary if you sold your home or if there’s been a tornado, bad storms or those (once in a few years) earthquakes.
Level 3 inspection is for more serious hazards and issues. The normal technician tools won’t do and they need special tools in order to inspect closed out portions that can’t be viewed easily.
Reason for a Yearly Inspection…
One of the main reason your chimney and fireplace needs an inspection…regardless if you use the fireplace or not…is the winter freeze thaw cycles. This is when the air temperature drops to 32 degrees or below to freeze the rain and/or snow and then goes right back up in temperature for the rain and/or snow to thaw.
As we have all experienced, winter and early spring are the perfect times of year to experience the freeze thaw cycle.
Finally…
Now that you know the stress your chimney and fireplace goes through each year, be sure to get it swept and inspected by a certified chimney technician from Superior Chimney. This will keep the holiday complaints down to a minimum. Contact us today at 877-CHIM-FIX (877-244-6349)
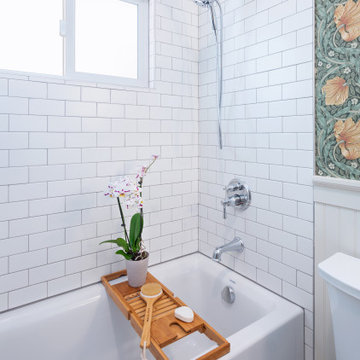 Kathleen Jennison
An Arts & Crafts Bungalow is one of my favorite styles of homes. We have quite a few of them in our Stockton Mid-Town area. And when C&L called us to help them remodel their 1923 American Bungalow, I was beyond thrilled.
As per usual, when we get a new inquiry, we quickly Google the project location while we are talking to you on the phone. My excitement escalated when I saw the Google Earth Image of the sweet Sage Green bungalow in Mid-Town Stockton. "Yes, we would be interested in working with you," I said trying to keep my cool.
But what made it even better was meeting C&L and touring their home, because they are the nicest young couple, eager to make their home period perfect. Unfortunately, it had been slightly molested by some bad house-flippers, and we needed to bring the bathroom back to it "roots."
We knew we had to banish the hideous brown tile and cheap vanity quickly. But C&L complained about the condensation problems and the constant fight with mold. This immediately told me that improper remodeling had occurred and we needed to remedy that right away.
The Before: Frustrations with a Botched Remodel
The bathroom needed to be brought back to period appropriate design with all the functionality of a modern bathroom. We thought of things like marble countertop, white mosaic floor tiles, white subway tile, board and batten molding, and of course a fabulous wallpaper.
This small (and only) bathroom on a tight budget required a little bit of design sleuthing to figure out how we could get the proper look and feel. Our goal was to determine where to splurge and where to economize and how to complete the remodel as quickly as possible because C&L would have to move out while construction was going on.
The Process: Hard Work to Remedy Design and Function
During our initial design study, (which included 2 hours in the owners’ home), we noticed framed images of William Morris Arts and Crafts textile patterns and knew this would be our design inspiration. We presented C&L with three options and they quickly selected the Pimpernel Design Concept.
We had originally selected the Black and Olive colors with a black vanity, mirror, and black and white floor tile. C&L liked it but weren’t quite sure about the black, We went back to the drawing board and decided the William & Co Pimpernel Wallpaper in Bayleaf and Manilla color with a softer gray painted vanity and mirror and white floor tile was more to their liking.
After the Design Concept was approved, we went to work securing the building permit, procuring all the elements, and scheduling our trusted tradesmen to perform the work.
We did uncover some shoddy work by the flippers such as live electrical wires hidden behind the wall, plumbing venting cut-off and buried in the walls (hence the constant dampness), the tub barely balancing on two fence boards across the floor joist, and no insulation on the exterior wall.
All of the previous blunders were fixed and the bathroom put back to its previous glory. We could feel the house thanking us for making it pretty again.
The After Reveal: Cohesive Design Decisions
We selected a simple white subway tile for the tub/shower. This is always classic and in keeping with the style of the house.
We selected a pre-fab vanity and mirror, but they look rich with the quartz countertop. There is much more storage in this small vanity than you would think.
The Transformation: A Period Perfect Refresh
We began the remodel just as the pandemic reared and stay-in-place orders went into effect. As C&L were already moved out and living with relatives, we got the go-ahead from city officials to get the work done (after all, how can you shelter in place without a bathroom?).
All our tradesmen were scheduled to work so that only one crew was on the job site at a time. We stayed on the original schedule with only a one week delay.
The end result is the sweetest little bathroom I've ever seen (and I can't wait to start work on C&L's kitchen next).
Thank you for joining me in this project transformation. I hope this inspired you to think about being creative with your design projects, determining what works best in keeping with the architecture of your space, and carefully assessing how you can have the best life in your home.
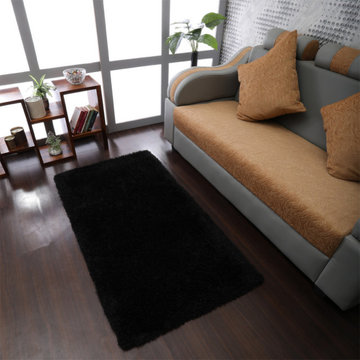 Get My Rugs LLC
"This polyester shags rug in the shade of black color not just looks ravishing but also offers the toughness to this polyester rug to face the high foot traffic efficiently. This shags rug is handmade which reminds you the bygone era when handicrafts were very much popular.
Product Features:-
Construction: Handmade
Technique: Hand Tufted shag
Shape: Rectangle
Color: Black
Pile: 1.5 inches
Pattern: Solid
Material: Polyester
Weight: 18.16 lbs
Origin of Manufacturing: India
Recommended Use: Indoor
Eco-Friendly: Yes
Shipping: Free Shipping
Handmade by skilled artisans enhancing in-depth color and product durabilitySolid designed and weaved by hand tufted technique.Soft polyester yarn with ultra-plush pile height of 1.5 inches for underfoot comfortSolid area rugs perfect for Living Room, Bedroom, Study Room, Dinning Room, Foyer.Free shipping and quick order dispatch. With quality product we deliver quality services to customers
Weave:- Weaving of a hand tufted shag rug is relatively easier than compared to other weaving techniques. The design is first sketched on a canvas and then material is made into it as per the design. The pile is kept very high to give it a furry look. Hand tufted rugs are very soft on face and are great for underfoot comfort. The rugs are very eye pleasing and the cost is very economical.
Material:- Polyester, an artificial fabric, have gained much popularity as rug weaving material. The polyester material rugs are highly sturdy and have gain acceptance due to its qualities like shine, wear & fade resistance, comfort, non-allergenic, moisture resistance, ease of cleaning, moth-proof, etc.
Pile:- Enjoy the high pile of this rug and place it at high footfall areas in your home, providing great underfoot comfort. This high pile rug is ideal one for the buyers who wants to place it on the flooring for the soft and cozy feel.
Proper Set Up & Care:- Hand Tufted rugs are heavy rugs and fits well with any kind of flooring. Unlike rugs of other weave the hand tufted rugs have a cotton backing which makes it anti-skid. These rugs are very durable if maintained properly.
Floor Protection:- Though hand tufted rugs have cotton backing which makes it anti-skid and harmless to the floor but you can always use a high quality rug pad to provide an extra level for floor protection.
Cleaning Methods:- For hand tufted shag rugs we recommend to go for gentle vacuum cleaning. For any stain, the users can opt for professional dry cleaning method."

Sponsored
Delaware, OH

Buckeye Basements, Inc.
Central Ohio's Basement Finishing ExpertsBest Of Houzz '13-'21
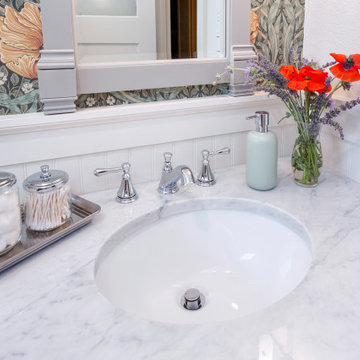 Kathleen Jennison
An Arts & Crafts Bungalow is one of my favorite styles of homes. We have quite a few of them in our Stockton Mid-Town area. And when C&L called us to help them remodel their 1923 American Bungalow, I was beyond thrilled.
As per usual, when we get a new inquiry, we quickly Google the project location while we are talking to you on the phone. My excitement escalated when I saw the Google Earth Image of the sweet Sage Green bungalow in Mid-Town Stockton. "Yes, we would be interested in working with you," I said trying to keep my cool.
But what made it even better was meeting C&L and touring their home, because they are the nicest young couple, eager to make their home period perfect. Unfortunately, it had been slightly molested by some bad house-flippers, and we needed to bring the bathroom back to it "roots."
We knew we had to banish the hideous brown tile and cheap vanity quickly. But C&L complained about the condensation problems and the constant fight with mold. This immediately told me that improper remodeling had occurred and we needed to remedy that right away.
The Before: Frustrations with a Botched Remodel
The bathroom needed to be brought back to period appropriate design with all the functionality of a modern bathroom. We thought of things like marble countertop, white mosaic floor tiles, white subway tile, board and batten molding, and of course a fabulous wallpaper.
This small (and only) bathroom on a tight budget required a little bit of design sleuthing to figure out how we could get the proper look and feel. Our goal was to determine where to splurge and where to economize and how to complete the remodel as quickly as possible because C&L would have to move out while construction was going on.
The Process: Hard Work to Remedy Design and Function
During our initial design study, (which included 2 hours in the owners’ home), we noticed framed images of William Morris Arts and Crafts textile patterns and knew this would be our design inspiration. We presented C&L with three options and they quickly selected the Pimpernel Design Concept.
We had originally selected the Black and Olive colors with a black vanity, mirror, and black and white floor tile. C&L liked it but weren’t quite sure about the black, We went back to the drawing board and decided the William & Co Pimpernel Wallpaper in Bayleaf and Manilla color with a softer gray painted vanity and mirror and white floor tile was more to their liking.
After the Design Concept was approved, we went to work securing the building permit, procuring all the elements, and scheduling our trusted tradesmen to perform the work.
We did uncover some shoddy work by the flippers such as live electrical wires hidden behind the wall, plumbing venting cut-off and buried in the walls (hence the constant dampness), the tub barely balancing on two fence boards across the floor joist, and no insulation on the exterior wall.
All of the previous blunders were fixed and the bathroom put back to its previous glory. We could feel the house thanking us for making it pretty again.
The After Reveal: Cohesive Design Decisions
We selected a simple white subway tile for the tub/shower. This is always classic and in keeping with the style of the house.
We selected a pre-fab vanity and mirror, but they look rich with the quartz countertop. There is much more storage in this small vanity than you would think.
The Transformation: A Period Perfect Refresh
We began the remodel just as the pandemic reared and stay-in-place orders went into effect. As C&L were already moved out and living with relatives, we got the go-ahead from city officials to get the work done (after all, how can you shelter in place without a bathroom?).
All our tradesmen were scheduled to work so that only one crew was on the job site at a time. We stayed on the original schedule with only a one week delay.
The end result is the sweetest little bathroom I've ever seen (and I can't wait to start work on C&L's kitchen next).
Thank you for joining me in this project transformation. I hope this inspired you to think about being creative with your design projects, determining what works best in keeping with the architecture of your space, and carefully assessing how you can have the best life in your home.
 Dimensions in Wood Inc
This Historical Home was built in the Columbia Country Club in 1925 and was ready for a new, modern kitchen which kept the traditional feel of the home. A previous sunroom addition created a dining room, but the original kitchen layout kept the two rooms divided. The kitchen was a small and cramped c-shape with a narrow door leading into the dining area.
The kitchen and dining room were completely opened up, creating a long, galley style, open layout which maximized the space and created a very good flow. Dimensions In Wood worked in conjuction with the client’s architect and contractor to complete this renovation.
Custom cabinets were built to use every square inch of the floorplan, with the cabinets extending all the way to the ceiling for the most storage possible. Our woodworkers even created a step stool, staining it to match the kitchen for reaching these high cabinets. The family already had a kitchen table and chairs they were happy with, so we refurbished them to match the kitchen’s new stain and paint color.
Crown molding top the cabinet boxes and extends across the ceiling where they create a coffered ceiling, highlighting the beautiful light fixtures centered on a wood medallion.
Columns were custom built to provide separation between the different sections of the kitchen, while also providing structural support.
Our master craftsmen kept the original 1925 glass cabinet doors, fitted them with modern hardware, repainted and incorporated them into new cabinet boxes. TASK LED Lighting was added to this china cabinet, highlighting the family’s decorative dishes.
Appliance Garage
On one side of the kitchen we built an appliance garage with doors that slide back into the cabinet, integrated power outlets and door activated lighting. Beside this is a small Galley Workstation for beverage and bar service which has the Galley Bar Kit perfect for sliced limes and more.
Baking Cabinet with Pocket Doors
On the opposite side, a baking cabinet was built to house a mixer and all the supplies needed for creating confections. Automatic LED lights, triggered by opening the door, create a perfect baker’s workstation. Both pocket doors slide back inside the cabinet for maximum workspace, then close to hide everything, leaving a clean, minimal kitchen devoid of clutter.
Super deep, custom drawers feature custom dividers beneath the baking cabinet. Then beneath the appliance garage another deep drawer has custom crafted produce boxes per the customer’s request.
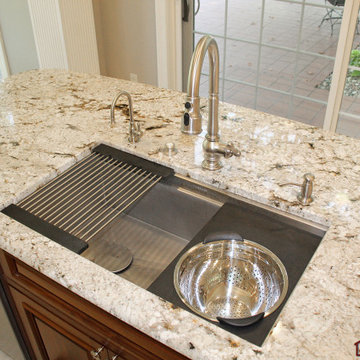
Central to the kitchen is a walnut accent island with a granite countertop and a Stainless Steel Galley Workstation and an overhang for seating. Matching bar stools slide out of the way, under the overhang, when not in use. A color matched outlet cover hides power for the island whenever appliances are needed during preparation.
The Galley Workstation has several useful attachments like a cutting board, drying rack, colander holder, and more. Integrated into the stone countertops are a drinking water spigot, a soap dispenser, garbage disposal button and the pull out, sprayer integrated faucet.
Directly across from the conveniently positioned stainless steel sink is a Bertazzoni Italia stove with 5 burner cooktop. A custom mosaic tile backsplash makes a beautiful focal point. Then, on opposite sides of the stove, columns conceal Rev-a-Shelf pull out towers which are great for storing small items, spices, and more. All outlets on the stone covered walls also sport dual USB outlets for charging mobile devices.
Stainless Steel Whirlpool appliances throughout keep a consistent and clean look. The oven has a matching microwave above it which also works as a convection oven. Dual Whirlpool dishwashers can handle all the family’s dirty dishes.
The flooring has black, marble tile inlays surrounded by ceramic tile, which are period correct for the age of this home, while still being modern, durable and easy to clean.
Finally, just off the kitchen we also remodeled their bar and snack alcove. A small liquor cabinet, with a refrigerator and wine fridge sits opposite a snack bar and wine glass cabinets. Crown molding, granite countertops and cabinets were all customized to match this space with the rest of the stunning kitchen.
Dimensions In Wood is more than 40 years of custom cabinets. We always have been, but we want YOU to know just how much more there is to our Dimensions.
The Dimensions we cover are endless: custom cabinets, quality water, appliances, countertops, wooden beams, Marvin windows, and more. We can handle every aspect of your kitchen, bathroom or home remodel.
 Goodall Custom Cabinetry
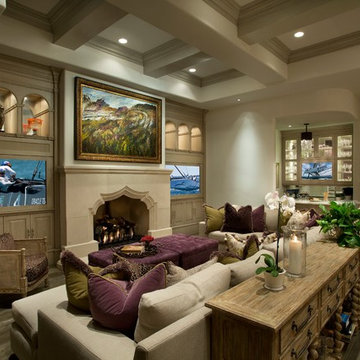
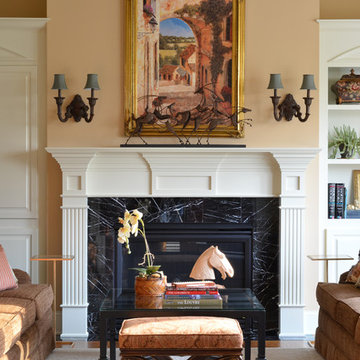
Living room - traditional formal dark wood floor living room idea in Phoenix with beige walls, a standard fireplace and a media wall
 Kathleen Jennison
An Arts & Crafts Bungalow is one of my favorite styles of homes. We have quite a few of them in our Stockton Mid-Town area. And when C&L called us to help them remodel their 1923 American Bungalow, I was beyond thrilled.
As per usual, when we get a new inquiry, we quickly Google the project location while we are talking to you on the phone. My excitement escalated when I saw the Google Earth Image of the sweet Sage Green bungalow in Mid-Town Stockton. "Yes, we would be interested in working with you," I said trying to keep my cool.
But what made it even better was meeting C&L and touring their home, because they are the nicest young couple, eager to make their home period perfect. Unfortunately, it had been slightly molested by some bad house-flippers, and we needed to bring the bathroom back to it "roots."
We knew we had to banish the hideous brown tile and cheap vanity quickly. But C&L complained about the condensation problems and the constant fight with mold. This immediately told me that improper remodeling had occurred and we needed to remedy that right away.
The Before: Frustrations with a Botched Remodel
The bathroom needed to be brought back to period appropriate design with all the functionality of a modern bathroom. We thought of things like marble countertop, white mosaic floor tiles, white subway tile, board and batten molding, and of course a fabulous wallpaper.
This small (and only) bathroom on a tight budget required a little bit of design sleuthing to figure out how we could get the proper look and feel. Our goal was to determine where to splurge and where to economize and how to complete the remodel as quickly as possible because C&L would have to move out while construction was going on.
The Process: Hard Work to Remedy Design and Function
During our initial design study, (which included 2 hours in the owners’ home), we noticed framed images of William Morris Arts and Crafts textile patterns and knew this would be our design inspiration. We presented C&L with three options and they quickly selected the Pimpernel Design Concept.
We had originally selected the Black and Olive colors with a black vanity, mirror, and black and white floor tile. C&L liked it but weren’t quite sure about the black, We went back to the drawing board and decided the William & Co Pimpernel Wallpaper in Bayleaf and Manilla color with a softer gray painted vanity and mirror and white floor tile was more to their liking.
After the Design Concept was approved, we went to work securing the building permit, procuring all the elements, and scheduling our trusted tradesmen to perform the work.
We did uncover some shoddy work by the flippers such as live electrical wires hidden behind the wall, plumbing venting cut-off and buried in the walls (hence the constant dampness), the tub barely balancing on two fence boards across the floor joist, and no insulation on the exterior wall.
All of the previous blunders were fixed and the bathroom put back to its previous glory. We could feel the house thanking us for making it pretty again.
The After Reveal: Cohesive Design Decisions
We selected a simple white subway tile for the tub/shower. This is always classic and in keeping with the style of the house.
We selected a pre-fab vanity and mirror, but they look rich with the quartz countertop. There is much more storage in this small vanity than you would think.
The Transformation: A Period Perfect Refresh
We began the remodel just as the pandemic reared and stay-in-place orders went into effect. As C&L were already moved out and living with relatives, we got the go-ahead from city officials to get the work done (after all, how can you shelter in place without a bathroom?).
All our tradesmen were scheduled to work so that only one crew was on the job site at a time. We stayed on the original schedule with only a one week delay.
The end result is the sweetest little bathroom I've ever seen (and I can't wait to start work on C&L's kitchen next).
Thank you for joining me in this project transformation. I hope this inspired you to think about being creative with your design projects, determining what works best in keeping with the architecture of your space, and carefully assessing how you can have the best life in your home.
 Kathleen Jennison
An Arts & Crafts Bungalow is one of my favorite styles of homes. We have quite a few of them in our Stockton Mid-Town area. And when C&L called us to help them remodel their 1923 American Bungalow, I was beyond thrilled.
As per usual, when we get a new inquiry, we quickly Google the project location while we are talking to you on the phone. My excitement escalated when I saw the Google Earth Image of the sweet Sage Green bungalow in Mid-Town Stockton. "Yes, we would be interested in working with you," I said trying to keep my cool.
But what made it even better was meeting C&L and touring their home, because they are the nicest young couple, eager to make their home period perfect. Unfortunately, it had been slightly molested by some bad house-flippers, and we needed to bring the bathroom back to it "roots."
We knew we had to banish the hideous brown tile and cheap vanity quickly. But C&L complained about the condensation problems and the constant fight with mold. This immediately told me that improper remodeling had occurred and we needed to remedy that right away.
The Before: Frustrations with a Botched Remodel
The bathroom needed to be brought back to period appropriate design with all the functionality of a modern bathroom. We thought of things like marble countertop, white mosaic floor tiles, white subway tile, board and batten molding, and of course a fabulous wallpaper.
This small (and only) bathroom on a tight budget required a little bit of design sleuthing to figure out how we could get the proper look and feel. Our goal was to determine where to splurge and where to economize and how to complete the remodel as quickly as possible because C&L would have to move out while construction was going on.
The Process: Hard Work to Remedy Design and Function
During our initial design study, (which included 2 hours in the owners’ home), we noticed framed images of William Morris Arts and Crafts textile patterns and knew this would be our design inspiration. We presented C&L with three options and they quickly selected the Pimpernel Design Concept.
We had originally selected the Black and Olive colors with a black vanity, mirror, and black and white floor tile. C&L liked it but weren’t quite sure about the black, We went back to the drawing board and decided the William & Co Pimpernel Wallpaper in Bayleaf and Manilla color with a softer gray painted vanity and mirror and white floor tile was more to their liking.
After the Design Concept was approved, we went to work securing the building permit, procuring all the elements, and scheduling our trusted tradesmen to perform the work.
We did uncover some shoddy work by the flippers such as live electrical wires hidden behind the wall, plumbing venting cut-off and buried in the walls (hence the constant dampness), the tub barely balancing on two fence boards across the floor joist, and no insulation on the exterior wall.
All of the previous blunders were fixed and the bathroom put back to its previous glory. We could feel the house thanking us for making it pretty again.
The After Reveal: Cohesive Design Decisions
We selected a simple white subway tile for the tub/shower. This is always classic and in keeping with the style of the house.
We selected a pre-fab vanity and mirror, but they look rich with the quartz countertop. There is much more storage in this small vanity than you would think.
The Transformation: A Period Perfect Refresh
We began the remodel just as the pandemic reared and stay-in-place orders went into effect. As C&L were already moved out and living with relatives, we got the go-ahead from city officials to get the work done (after all, how can you shelter in place without a bathroom?).
All our tradesmen were scheduled to work so that only one crew was on the job site at a time. We stayed on the original schedule with only a one week delay.
The end result is the sweetest little bathroom I've ever seen (and I can't wait to start work on C&L's kitchen next).
Thank you for joining me in this project transformation. I hope this inspired you to think about being creative with your design projects, determining what works best in keeping with the architecture of your space, and carefully assessing how you can have the best life in your home.
 Kathleen Jennison
An Arts & Crafts Bungalow is one of my favorite styles of homes. We have quite a few of them in our Stockton Mid-Town area. And when C&L called us to help them remodel their 1923 American Bungalow, I was beyond thrilled.
As per usual, when we get a new inquiry, we quickly Google the project location while we are talking to you on the phone. My excitement escalated when I saw the Google Earth Image of the sweet Sage Green bungalow in Mid-Town Stockton. "Yes, we would be interested in working with you," I said trying to keep my cool.
But what made it even better was meeting C&L and touring their home, because they are the nicest young couple, eager to make their home period perfect. Unfortunately, it had been slightly molested by some bad house-flippers, and we needed to bring the bathroom back to it "roots."
We knew we had to banish the hideous brown tile and cheap vanity quickly. But C&L complained about the condensation problems and the constant fight with mold. This immediately told me that improper remodeling had occurred and we needed to remedy that right away.
The Before: Frustrations with a Botched Remodel
The bathroom needed to be brought back to period appropriate design with all the functionality of a modern bathroom. We thought of things like marble countertop, white mosaic floor tiles, white subway tile, board and batten molding, and of course a fabulous wallpaper.
This small (and only) bathroom on a tight budget required a little bit of design sleuthing to figure out how we could get the proper look and feel. Our goal was to determine where to splurge and where to economize and how to complete the remodel as quickly as possible because C&L would have to move out while construction was going on.
The Process: Hard Work to Remedy Design and Function
During our initial design study, (which included 2 hours in the owners’ home), we noticed framed images of William Morris Arts and Crafts textile patterns and knew this would be our design inspiration. We presented C&L with three options and they quickly selected the Pimpernel Design Concept.
We had originally selected the Black and Olive colors with a black vanity, mirror, and black and white floor tile. C&L liked it but weren’t quite sure about the black, We went back to the drawing board and decided the William & Co Pimpernel Wallpaper in Bayleaf and Manilla color with a softer gray painted vanity and mirror and white floor tile was more to their liking.
After the Design Concept was approved, we went to work securing the building permit, procuring all the elements, and scheduling our trusted tradesmen to perform the work.
We did uncover some shoddy work by the flippers such as live electrical wires hidden behind the wall, plumbing venting cut-off and buried in the walls (hence the constant dampness), the tub barely balancing on two fence boards across the floor joist, and no insulation on the exterior wall.
All of the previous blunders were fixed and the bathroom put back to its previous glory. We could feel the house thanking us for making it pretty again.
The After Reveal: Cohesive Design Decisions
We selected a simple white subway tile for the tub/shower. This is always classic and in keeping with the style of the house.
We selected a pre-fab vanity and mirror, but they look rich with the quartz countertop. There is much more storage in this small vanity than you would think.
The Transformation: A Period Perfect Refresh
We began the remodel just as the pandemic reared and stay-in-place orders went into effect. As C&L were already moved out and living with relatives, we got the go-ahead from city officials to get the work done (after all, how can you shelter in place without a bathroom?).
All our tradesmen were scheduled to work so that only one crew was on the job site at a time. We stayed on the original schedule with only a one week delay.
The end result is the sweetest little bathroom I've ever seen (and I can't wait to start work on C&L's kitchen next).
Thank you for joining me in this project transformation. I hope this inspired you to think about being creative with your design projects, determining what works best in keeping with the architecture of your space, and carefully assessing how you can have the best life in your home.
Sponsored
Columbus, OH

Wannemacher Interiors
Customized Award-Winning Interior Design Solutions in Franklin Cnty OH
 aplusdesign
Designing the space impels a décor that needs to appeal to varied tastes. This apartment in Surat, Gujarat redefines the concept of a designer home, using color accents in otherwise light interior décor. It’s a simple functional house with all minimal requirements and less maintenance house.
As a part of interest our client was fond of paintings to be displayed so it played major role in designing aspect.
As we enter the passage area the use of wooden slatted main door with Smoke grey PU finished walls, soft finishes and clean lines dominate these, with metallic gold text ‘MODI’S” representing with iconic design symbol carved in MDF with touch of green makes it more welcoming.
Living space has an overpowering feature as the wooden cladded wall which highlights the space and marks the continuation into the dining area.
The palette of the project is simple, defining the three main elements that make it up: Italian marble flooring changing as per the functionality of the space, Ash Wood defining the objects, and grey finish.
The materials hold the space strongly with a particular color palette. On skinny metal legs, the furniture in this living room seems to be floating above the floor, bringing a sense of weightlessness to the space. This unique living space features Ash wood slatted panels on walls with a velvety finish rug matching the center table just right.
The design of the furniture in wood and metal is tradition but is executed in a modern minimalist way. The Indian swing seating makes it as divider to the space between informal seating and dining area yet comprising the space equally.
Bespoke furniture elements kept according to the client’s need.The furniture is a mix of contemporary with different design elements by our studio, which creates a classic and cozy atmosphere. The ash wood and the grey hue finish become the leaders of the colours and textures palette. The curved shaped edge ceiling designed according to functionality & also plays aesthetic role.The importance of them, almost visible from every spot.
The deep sea velvety sofa makes an argument to this palette by focusing attention to it.
A nonchalant elegance best describes the soul of the house. In order to make a dialogue between the contemporary with different textures, patterns and uniform colors have been used throughout the house.
The parallel shaped kitchen with a high spec modern technologies and artificial stone counter top with fresh furniture in white and grey and sleek open breakfast counter is designed to be a light space that beautifully blends in.
This volume integrates the access to the private area –bedroom, wash area and bathroom-, segregating this way the day area living and dining area.
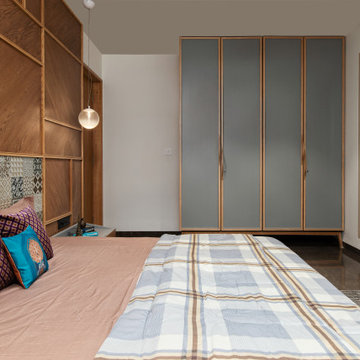
The Master Bedroom layout remodeled in accordance with contemporary trends and the client’s needs. The paintings which is inspired from the well-known artist and as strong believer in vaastu by the clients it has been displayed in right position which reflects good vibes.
The seamless panel running through bed back having grooves on them which forms symmetrical pattern on wood. Using the same material by forming the side tables in circular pattern with round shaped metal supports.
The Son’s bedroom is integrated with closet, TV unit and dressing table. The entire ceiling is connected with wood stripes panels running on the walls which starts from main door of the room and ends on the full height closet and subdivided by lime plaster in grey with grooves on it.
The graphics now a days plays major role in every design aspect, so we tried customized different athlete position in game play captured in frames and be part of the focal point in room.
Each details speaks the entire space is crafted with a confluence of contemporary art presented in a modern palette. You’ll find them throughout the home, right from the color, furniture selection, to the wall paneling style teamed up with modern artworks and artefacts.
Each bedroom has a character of its own based on the user. This room was designed with a picturesque composition was made to create a backdrop to compliment the minimalistic furniture in entire space.
The backdrop of the bed panel is veneer cladded in frame box placed in the form of Tetris. The geometric patchwork mosaic tiles placed in between the cladding so that it’s easy to maintain.
Sleek handle details with full height closet and fine thin leg supports makes it more classic and modern.
Thus, the apartment gained a contemporary atmosphere and it is ready to receive a new lifestyle, of a new generation and new values.
 Kathleen Jennison
An Arts & Crafts Bungalow is one of my favorite styles of homes. We have quite a few of them in our Stockton Mid-Town area. And when C&L called us to help them remodel their 1923 American Bungalow, I was beyond thrilled.
As per usual, when we get a new inquiry, we quickly Google the project location while we are talking to you on the phone. My excitement escalated when I saw the Google Earth Image of the sweet Sage Green bungalow in Mid-Town Stockton. "Yes, we would be interested in working with you," I said trying to keep my cool.
But what made it even better was meeting C&L and touring their home, because they are the nicest young couple, eager to make their home period perfect. Unfortunately, it had been slightly molested by some bad house-flippers, and we needed to bring the bathroom back to it "roots."
We knew we had to banish the hideous brown tile and cheap vanity quickly. But C&L complained about the condensation problems and the constant fight with mold. This immediately told me that improper remodeling had occurred and we needed to remedy that right away.
The Before: Frustrations with a Botched Remodel
The bathroom needed to be brought back to period appropriate design with all the functionality of a modern bathroom. We thought of things like marble countertop, white mosaic floor tiles, white subway tile, board and batten molding, and of course a fabulous wallpaper.
This small (and only) bathroom on a tight budget required a little bit of design sleuthing to figure out how we could get the proper look and feel. Our goal was to determine where to splurge and where to economize and how to complete the remodel as quickly as possible because C&L would have to move out while construction was going on.
The Process: Hard Work to Remedy Design and Function
During our initial design study, (which included 2 hours in the owners’ home), we noticed framed images of William Morris Arts and Crafts textile patterns and knew this would be our design inspiration. We presented C&L with three options and they quickly selected the Pimpernel Design Concept.
We had originally selected the Black and Olive colors with a black vanity, mirror, and black and white floor tile. C&L liked it but weren’t quite sure about the black, We went back to the drawing board and decided the William & Co Pimpernel Wallpaper in Bayleaf and Manilla color with a softer gray painted vanity and mirror and white floor tile was more to their liking.
After the Design Concept was approved, we went to work securing the building permit, procuring all the elements, and scheduling our trusted tradesmen to perform the work.
We did uncover some shoddy work by the flippers such as live electrical wires hidden behind the wall, plumbing venting cut-off and buried in the walls (hence the constant dampness), the tub barely balancing on two fence boards across the floor joist, and no insulation on the exterior wall.
All of the previous blunders were fixed and the bathroom put back to its previous glory. We could feel the house thanking us for making it pretty again.
The After Reveal: Cohesive Design Decisions
We selected a simple white subway tile for the tub/shower. This is always classic and in keeping with the style of the house.
We selected a pre-fab vanity and mirror, but they look rich with the quartz countertop. There is much more storage in this small vanity than you would think.
The Transformation: A Period Perfect Refresh
We began the remodel just as the pandemic reared and stay-in-place orders went into effect. As C&L were already moved out and living with relatives, we got the go-ahead from city officials to get the work done (after all, how can you shelter in place without a bathroom?).
All our tradesmen were scheduled to work so that only one crew was on the job site at a time. We stayed on the original schedule with only a one week delay.
The end result is the sweetest little bathroom I've ever seen (and I can't wait to start work on C&L's kitchen next).
Thank you for joining me in this project transformation. I hope this inspired you to think about being creative with your design projects, determining what works best in keeping with the architecture of your space, and carefully assessing how you can have the best life in your home.
 Grand Entrances
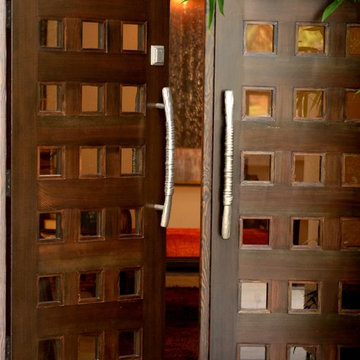
Inspiration for a mid-sized rustic travertine floor and beige floor front door remodel in San Diego with white walls and a dark wood front door
 Kathleen Jennison
An Arts & Crafts Bungalow is one of my favorite styles of homes. We have quite a few of them in our Stockton Mid-Town area. And when C&L called us to help them remodel their 1923 American Bungalow, I was beyond thrilled.
As per usual, when we get a new inquiry, we quickly Google the project location while we are talking to you on the phone. My excitement escalated when I saw the Google Earth Image of the sweet Sage Green bungalow in Mid-Town Stockton. "Yes, we would be interested in working with you," I said trying to keep my cool.
But what made it even better was meeting C&L and touring their home, because they are the nicest young couple, eager to make their home period perfect. Unfortunately, it had been slightly molested by some bad house-flippers, and we needed to bring the bathroom back to it "roots."
We knew we had to banish the hideous brown tile and cheap vanity quickly. But C&L complained about the condensation problems and the constant fight with mold. This immediately told me that improper remodeling had occurred and we needed to remedy that right away.
The Before: Frustrations with a Botched Remodel
The bathroom needed to be brought back to period appropriate design with all the functionality of a modern bathroom. We thought of things like marble countertop, white mosaic floor tiles, white subway tile, board and batten molding, and of course a fabulous wallpaper.
This small (and only) bathroom on a tight budget required a little bit of design sleuthing to figure out how we could get the proper look and feel. Our goal was to determine where to splurge and where to economize and how to complete the remodel as quickly as possible because C&L would have to move out while construction was going on.
The Process: Hard Work to Remedy Design and Function
During our initial design study, (which included 2 hours in the owners’ home), we noticed framed images of William Morris Arts and Crafts textile patterns and knew this would be our design inspiration. We presented C&L with three options and they quickly selected the Pimpernel Design Concept.
We had originally selected the Black and Olive colors with a black vanity, mirror, and black and white floor tile. C&L liked it but weren’t quite sure about the black, We went back to the drawing board and decided the William & Co Pimpernel Wallpaper in Bayleaf and Manilla color with a softer gray painted vanity and mirror and white floor tile was more to their liking.
After the Design Concept was approved, we went to work securing the building permit, procuring all the elements, and scheduling our trusted tradesmen to perform the work.
We did uncover some shoddy work by the flippers such as live electrical wires hidden behind the wall, plumbing venting cut-off and buried in the walls (hence the constant dampness), the tub barely balancing on two fence boards across the floor joist, and no insulation on the exterior wall.
All of the previous blunders were fixed and the bathroom put back to its previous glory. We could feel the house thanking us for making it pretty again.
The After Reveal: Cohesive Design Decisions
We selected a simple white subway tile for the tub/shower. This is always classic and in keeping with the style of the house.
We selected a pre-fab vanity and mirror, but they look rich with the quartz countertop. There is much more storage in this small vanity than you would think.
The Transformation: A Period Perfect Refresh
We began the remodel just as the pandemic reared and stay-in-place orders went into effect. As C&L were already moved out and living with relatives, we got the go-ahead from city officials to get the work done (after all, how can you shelter in place without a bathroom?).
All our tradesmen were scheduled to work so that only one crew was on the job site at a time. We stayed on the original schedule with only a one week delay.
The end result is the sweetest little bathroom I've ever seen (and I can't wait to start work on C&L's kitchen next).
Thank you for joining me in this project transformation. I hope this inspired you to think about being creative with your design projects, determining what works best in keeping with the architecture of your space, and carefully assessing how you can have the best life in your home.
 China Marmoglass Co.,Limited
Home > Products
Crystallized Glass,Crystallized stone 6
Crystallized Glass,Crystallized stone,Crystallized glass panel
Marmoglass,Nanoglass,Marmoglass Composite Collectively referred to as Crystallized Glass
Crystallized Glass Application:
1). Interior & external wall cladding
2). Flooring Tile, Stair, Column cladding
3). Basin, Countertop, Table, Bar
4). bath, Kitchen, any tops, round pillar and furniture decoration etc .
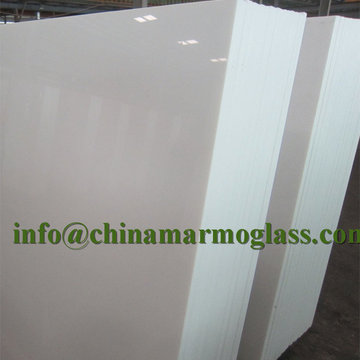
Crystal white is a kind of artificial stone . It is made of glass ,which should be burned in the oven for two days under the more than 1000C temperature . It is much different from natural stone from all sides.
1. Natural and soft texture,
2. Varied colors such white, beige, carrara white
3. Good weather resisting property and durability
4. Zero percent of water absorption , not be polluted easily
5. Green environmental building material
6. High-intensity, light weight
7. Bending formation, economical, time saving
8. scratch resistant ,withstand high-heat .
More details about it :
1. There are more than 10 colors of crystallized glass panel products available: Pure white, yellow, silver yellow, silver grey, grey in white, grey spot white, USA grey spot white, yellow in white….
2. Panel thickness: 10-30MM
3. Normal specifications (mm):
1800*3000*18 1200*2400*18 600*600*18 1200*1200*18
1600*2400*18 1800*3000*30 800*800*18 1000*1000*18
Thin tiles:
305*305*12mm, 450*450*12mm
457*457*12mm, 400*400*12mm
600*600*12mm 1200*2400*12mm
4. Material: crystal quartz sand
5. Packaging: Fumigated wooden crates, Bundles,foam
6. Brand name: China Marmoglass / Nanoglass
7. Place of origin: Xiamen, Fujian ,China
8. Model NO.: GS001, SN002, NANO2009, NNAO2011
9. Supply ability: 20000M2/MONTH, 30TON/DAY
10. Delivery time: generally within 10 days, after the order confirmed and the deposit received
11. Arc panel specifications (mm):
Thickness: 18-30mm
Diameter : 30cm-120cm
1.What is crystallized glass stone(Marmoglass SN002 )?
The micro crystal stone is an innovative product designed as a substitute for the rare natural white marble. It is superior to the natural white marble in terms of characteristics, where the micro crystal stone possesses extreme density making it anti-breakage, giving it zero water absorption qualities, and making it resistant to acidic and alkaline substances. at the pace that mankind is consuming the natural resources in today’s world, the micro crystal stone is the ultimate solution, the superior alternative for the external and internal applications. It is certainly a revolutionary product and the finest construction material of the 21st century.
2.Why choose crystallized glass stone(Marmoglass SN002)?
The micro-crystal stone, also known as the micro-crystal glass, Marmoglass, is a new type of high-level decoration material. It is derived from natural inorganic material through a high temperature process, and it possesses excellent characteristics including the followings:
1. High Performance
The micro-crystal stone has even texture and high density, which makes it crush resistant, anti-bending and high resistant resulting its performance being higher than natural stone. It can be used for long period with minimal damage.
2. Acid-proof alkalinity and anti-corrosion
Not only does the micro-crystal stone posses special micro-crystal characteristics, it also has special glass features such as a fine texture, shiny surface and light reflection effect.
3. Fine Texture
We have the flexibility to manufacture any colors as per customer requirements while also making up the defect of color differences, which exists in natural stone. While the product is widely used for interior and interior decoration of star-level hotels, subways, local landmark buildings, airports, and office building etc, it is more suitable for high-level home decoration.
4. Pollution-resistance and easy maintenance
The micro-crystal is a kind of inorganic crystalline material with stable chemical characteristics. Its acid proof alkalinity and anti-corrosion nature are superior to nature stone, specifically its anti-weather characteristics whereby it is unaffected by the wind or sunlight.
5.A wide application range
The water absorption rare of micro-crystal is quite low, close to zero. Several types of dirty pulps and dyed solution have difficulty in penetrating it. Any dirt on the surface is easily cleaned and it is convenient to mankind.
6. Heat-bend reformation
With the heating method, the micro-crystal can be made into various arched profiles and arched slabs. the process is simple and it allows us to save time, cost, material and resources.
7. No radioactive elements
In the process of manufacturing the micro-crystal stone, we have integrated the elimination of all the harmful radioactive elements that are found in natural stone from its components. It is therefore the safest and most environmentally friendly building material in our modern world.
Crystallized glass can be processed into slab, tile, countertop, column and vanity top, wash basin and etc. It is applicable for flooring, interior and exterior wall cladding, stairs and table. Contributed to the character of no color difference, so it is widely used for top grade hotel, business building shopping mall and such great construction.
Physical Parameter
Density
2.70 g/cm
Water Absorption
0.01%
Compressive Strength
126 Mpa
Radioactive
Class A (Suitable for indoor and outdoor)
Size
Slabs
2400/2600/2800/3000 x 1800/1600/1400/1500mm
Cut-to-size Tiles
30 / 40 / 50 / 60 / 80 / 100cm X 30 /40/50 /60/80 /100cm
12"x12", 24"X12", 24"x24" or customized size
Thickness
1.2cm,1.8cm (3/4'), 2.0cm, 2.5cm, 3.0cm,
Finishing
Polished, honed
Usage
Flooring, Walls, Stairs / Steps, Counter tops, Vanity, Paving / Curbstone, Pillar, Column, Border, Skirting, Window Sills
Quality Control
Thickness Tolerance
+- 1mm;
Polishing Grade
above 100 degree
Crack / Spot
EU / US Standard: zero
QC Standard
AQL2.5/4.0 ITS
Certificate
CE, ISO, GB/T19001-2008
Advantage
1. Own factory with stable supply;
2. Factory direct with good price and prompt delivery;
3. Good Management System for good quality;
4. Value-added service.
large glass white artificial stone of Packing
Inner Packing
Cover with foam and plastic film, corner paper board protection
Individual Carton
Individual carton packing with trademark is available upon request
Outer Packing
Plastic tapes in 6 sides, further strengthened with iron sheet in the corner
Shipping Mark
OEM
Port of Loading
Xiamen Port of China
Delivery Lead Time
Normally 10-15 days for one 20’ GP, faster delivery is available upon confirmation
Trade Term
FOB, CFR, CIF, etc.
Loading Info.
Thickness
Qty per pallet
Pallets per 20ft container
QTY per 20ft container
Square Meter per 20ft container
Weight per 20ft container
Big slab size
3000*1200mm
12mm
25pcs
7
175pcs
600-900 m2
21000kgs
3000*1400mm
15mm
20pcs
7
175pcs
500-700 m2
21000kgs
3000*1600mm
20mm
15pcs
7
105pcs
350-500 m2
21000kgs
3200*1600mm
30mm
10pcs
7
70pcs
250-358 m2
21000kgs
Installation Recommendations
Wall Cladding
1.Wall should be leveled and cleaned,
2.Fix the panel on the wall with wire and expansion screw tightly,
3.Fill the space between the panel and the wall with cement mortar of ratio 1:3,
4.Clean the extra mortar and dirt on the surface.
Floor Installation
1.Mark out the baseline of gound level,
2.Mix the mortar with ratio of 1 cement to 4 sand to have semi-day mortar,
3.Lay the mixed mortar in level with a layer of 3-4cm thickness,place the tile over the mortar and adjust the height properly to be leveled,
4.Remove the tile after level adjustment.Put a thin layer of cement powder on the mortar and add water on it to become wet,
5.Put the tile on top and gently knock with rubber hammer until it sealed with the mortar properly. Make sure the tile is leveled and has the same space between each other. Those tiles which are not leveled with others should be removed and repeat the leveling procedure in step 4.Genetally,the space between two tiles should be 2mm for water evaporation and normal expansion.
Daily maintenance of Micro Crystal Stone
1.The laying area of micro crystal stone can only be opened for use or stacking any item on top after at least 24 hours of filling the gap,
2.The ground must be covered with plywood or carpet for protection in case of doing other decoration work after the installation of micro crystal stone floor,
3.In areas like exit and entrance, the surface of micro crystal stone floor should be covered by carpet or plywood to protect it from the damage of abrasion of sand or other hard material.
4.Do not use general floor wax on micro crystal stone,General floor wax is an oil-based wax which is easily stuck to dust.
5.Please use rubber wheels for shopping cart and trolley on micro crystal stone floor, for the hard wheel may scratch and damage the surface,
6.Regular care and maintenance is the key for long lasting of micro crystal stone’s high glossy and reflection.
Important Notice
1.Make sure the ground of laying area is dry and clean before laying mortar. The ratio 1:3(volume ratio) must be strictly followed and no extra water added during the installation progress
2.In the choice of using white cement as the filling material, the strength and quality of the cement must be checked properly.
3.It is not recommended to store micro crystal stone outdoor for long time. It should be covered with rock wool in winter and moved into indoor 2 hours in advance before installation. It also needs to be covered with waterproof cloth when installing during the rainy days outdoor,
4.When using micro crystal stone as ground floor,2mm wild gap must be left between the joints for the benefit of the water vaporization and physical expansion. In the case of large-scale installation, it is recommended to leave an 8mm expansion joint,
5.It is recommended that the area of micro crystal stone to remain-not used-for at least 24 hours and kept 2-3 days before passing or storing items on top.
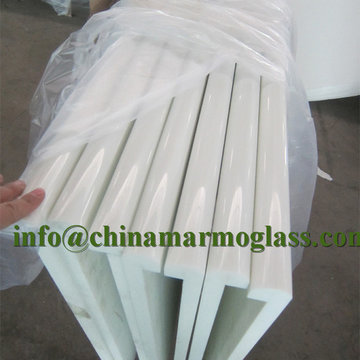
Marmoglass Polished Edge, Shining !
China Marmoglass SN002 Slabs Packing and Ready for ship
We not only make Slabs, we also can make:
- Project Tiles
- Countertop
- Tabletop
- Vanitytop
- Column
Tags: Marmoglass, Crystallized glass panel, nano crystallized glass panel, pore marmoglass, pore crystallized glass panel, Artificial Stone, Hole-Free Micro Crystal Stone, Pure white stone, Crystallized glass tile, Crystal glass tile, pure white artificial white marble, Marmo Glass, Glass Marble, White Marble, Marmoglass, nano marmoglass, no pore marmoglass, non-pore crystallized glass panel, glass marble, white marble, crystal white marble, white stone, white marble tile, Micro-crystal stone, Crystallized glass, Crystallized White Stone, Crystallized White Stone, Micro-crystallized composite tile, Hole-Free Micro Crystal Stone, Micro-crystallized composite tile, White Marble Tiles, pure white marble
China Marmoglass SN002 Strong Packing Crates
China Marmoglass SN002 and Nanoglass NANO3 Container Loading
Welcome to our product page of China Marmoglass, in which you can find detailed information of Marmoglass. China Marmoglass Co.,Limited offer Crystallized White Marmoglass is good in quality and competitive in price. China Marmoglass Co.,Limited is the manufacturer and supplier of Marmoglass,White Crystallized Glass Panel,Nanoglass. Crystallized Glass Stone,Crystallized Glass Panel,Crystallized Glass Stone Tile,Crystallized Glass Stone Countertop,Marmoglass also known as Nanoglass and White Crystallized Glass,Marmoglass, Crystallized Glasss is the popular materials for interior and exterior applications, including kitchen countertops, bathroom vanities, commercial foyer wall claddings, etc. China Marmoglass Co.,Limited is the Manufacturer and export Crystallized Glass and Crystallized Glass products. Crystallized Glass can be used Interior & external wall cladding, Flooring Tile, Stair, Column cladding, Basin, Countertop, Table, Bar, bath, Kitchen, any tops, round pillar and furniture decoration etc. Super White Nanoglass Slab, You Can Buy Various High Quality Super White Nanoglass Slab Products from Super White Nanoglass Slab Suppliers and Super White Nanoglass Slab Manufacturers at Chinamarmoglass.comcomposite tile, White Marble Tiles, pure white marble
 China Marmoglass Co.,Limited
Home > Products
Crystallized Glass,Crystallized stone 6
Crystallized Glass,Crystallized stone,Crystallized glass panel
Marmoglass,Nanoglass,Marmoglass Composite Collectively referred to as Crystallized Glass
Crystallized Glass Application:
1). Interior & external wall cladding
2). Flooring Tile, Stair, Column cladding
3). Basin, Countertop, Table, Bar
4). bath, Kitchen, any tops, round pillar and furniture decoration etc .
Crystal white is a kind of artificial stone . It is made of glass ,which should be burned in the oven for two days under the more than 1000C temperature . It is much different from natural stone from all sides.
1. Natural and soft texture,
2. Varied colors such white, beige, carrara white
3. Good weather resisting property and durability
4. Zero percent of water absorption , not be polluted easily
5. Green environmental building material
6. High-intensity, light weight
7. Bending formation, economical, time saving
8. scratch resistant ,withstand high-heat .
More details about it :
1. There are more than 10 colors of crystallized glass panel products available: Pure white, yellow, silver yellow, silver grey, grey in white, grey spot white, USA grey spot white, yellow in white….
2. Panel thickness: 10-30MM
3. Normal specifications (mm):
1800*3000*18 1200*2400*18 600*600*18 1200*1200*18
1600*2400*18 1800*3000*30 800*800*18 1000*1000*18
Thin tiles:
305*305*12mm, 450*450*12mm
457*457*12mm, 400*400*12mm
600*600*12mm 1200*2400*12mm
4. Material: crystal quartz sand
5. Packaging: Fumigated wooden crates, Bundles,foam
6. Brand name: China Marmoglass / Nanoglass
7. Place of origin: Xiamen, Fujian ,China
8. Model NO.: GS001, SN002, NANO2009, NNAO2011
9. Supply ability: 20000M2/MONTH, 30TON/DAY
10. Delivery time: generally within 10 days, after the order confirmed and the deposit received
11. Arc panel specifications (mm):
Thickness: 18-30mm
Diameter : 30cm-120cm
1.What is crystallized glass stone(Marmoglass SN002 )?
The micro crystal stone is an innovative product designed as a substitute for the rare natural white marble. It is superior to the natural white marble in terms of characteristics, where the micro crystal stone possesses extreme density making it anti-breakage, giving it zero water absorption qualities, and making it resistant to acidic and alkaline substances. at the pace that mankind is consuming the natural resources in today’s world, the micro crystal stone is the ultimate solution, the superior alternative for the external and internal applications. It is certainly a revolutionary product and the finest construction material of the 21st century.
2.Why choose crystallized glass stone(Marmoglass SN002)?
The micro-crystal stone, also known as the micro-crystal glass, Marmoglass, is a new type of high-level decoration material. It is derived from natural inorganic material through a high temperature process, and it possesses excellent characteristics including the followings:
1. High Performance
The micro-crystal stone has even texture and high density, which makes it crush resistant, anti-bending and high resistant resulting its performance being higher than natural stone. It can be used for long period with minimal damage.
2. Acid-proof alkalinity and anti-corrosion
Not only does the micro-crystal stone posses special micro-crystal characteristics, it also has special glass features such as a fine texture, shiny surface and light reflection effect.
3. Fine Texture
We have the flexibility to manufacture any colors as per customer requirements while also making up the defect of color differences, which exists in natural stone. While the product is widely used for interior and interior decoration of star-level hotels, subways, local landmark buildings, airports, and office building etc, it is more suitable for high-level home decoration.
4. Pollution-resistance and easy maintenance
The micro-crystal is a kind of inorganic crystalline material with stable chemical characteristics. Its acid proof alkalinity and anti-corrosion nature are superior to nature stone, specifically its anti-weather characteristics whereby it is unaffected by the wind or sunlight.
5.A wide application range
The water absorption rare of micro-crystal is quite low, close to zero. Several types of dirty pulps and dyed solution have difficulty in penetrating it. Any dirt on the surface is easily cleaned and it is convenient to mankind.
6. Heat-bend reformation
With the heating method, the micro-crystal can be made into various arched profiles and arched slabs. the process is simple and it allows us to save time, cost, material and resources.
7. No radioactive elements
In the process of manufacturing the micro-crystal stone, we have integrated the elimination of all the harmful radioactive elements that are found in natural stone from its components. It is therefore the safest and most environmentally friendly building material in our modern world.
Crystallized glass can be processed into slab, tile, countertop, column and vanity top, wash basin and etc. It is applicable for flooring, interior and exterior wall cladding, stairs and table. Contributed to the character of no color difference, so it is widely used for top grade hotel, business building shopping mall and such great construction.
Physical Parameter
Density
2.70 g/cm
Water Absorption
0.01%
Compressive Strength
126 Mpa
Radioactive
Class A (Suitable for indoor and outdoor)
Size
Slabs
2400/2600/2800/3000 x 1800/1600/1400/1500mm
Cut-to-size Tiles
30 / 40 / 50 / 60 / 80 / 100cm X 30 /40/50 /60/80 /100cm
12"x12", 24"X12", 24"x24" or customized size
Thickness
1.2cm,1.8cm (3/4'), 2.0cm, 2.5cm, 3.0cm,
Finishing
Polished, honed
Usage
Flooring, Walls, Stairs / Steps, Counter tops, Vanity, Paving / Curbstone, Pillar, Column, Border, Skirting, Window Sills
Quality Control
Thickness Tolerance
+- 1mm;
Polishing Grade
above 100 degree
Crack / Spot
EU / US Standard: zero
QC Standard
AQL2.5/4.0 ITS
Certificate
CE, ISO, GB/T19001-2008
Advantage
1. Own factory with stable supply;
2. Factory direct with good price and prompt delivery;
3. Good Management System for good quality;
4. Value-added service.
large glass white artificial stone of Packing
Inner Packing
Cover with foam and plastic film, corner paper board protection
Individual Carton
Individual carton packing with trademark is available upon request
Outer Packing
Plastic tapes in 6 sides, further strengthened with iron sheet in the corner
Shipping Mark
OEM
Port of Loading
Xiamen Port of China
Delivery Lead Time
Normally 10-15 days for one 20’ GP, faster delivery is available upon confirmation
Trade Term
FOB, CFR, CIF, etc.
Loading Info.
Thickness
Qty per pallet
Pallets per 20ft container
QTY per 20ft container
Square Meter per 20ft container
Weight per 20ft container
Big slab size
3000*1200mm
12mm
25pcs
7
175pcs
600-900 m2
21000kgs
3000*1400mm
15mm
20pcs
7
175pcs
500-700 m2
21000kgs
3000*1600mm
20mm
15pcs
7
105pcs
350-500 m2
21000kgs
3200*1600mm
30mm
10pcs
7
70pcs
250-358 m2
21000kgs
Installation Recommendations
Wall Cladding
1.Wall should be leveled and cleaned,
2.Fix the panel on the wall with wire and expansion screw tightly,
3.Fill the space between the panel and the wall with cement mortar of ratio 1:3,
4.Clean the extra mortar and dirt on the surface.
Floor Installation
1.Mark out the baseline of gound level,
2.Mix the mortar with ratio of 1 cement to 4 sand to have semi-day mortar,
3.Lay the mixed mortar in level with a layer of 3-4cm thickness,place the tile over the mortar and adjust the height properly to be leveled,
4.Remove the tile after level adjustment.Put a thin layer of cement powder on the mortar and add water on it to become wet,
5.Put the tile on top and gently knock with rubber hammer until it sealed with the mortar properly. Make sure the tile is leveled and has the same space between each other. Those tiles which are not leveled with others should be removed and repeat the leveling procedure in step 4.Genetally,the space between two tiles should be 2mm for water evaporation and normal expansion.
Daily maintenance of Micro Crystal Stone
1.The laying area of micro crystal stone can only be opened for use or stacking any item on top after at least 24 hours of filling the gap,
2.The ground must be covered with plywood or carpet for protection in case of doing other decoration work after the installation of micro crystal stone floor,
3.In areas like exit and entrance, the surface of micro crystal stone floor should be covered by carpet or plywood to protect it from the damage of abrasion of sand or other hard material.
4.Do not use general floor wax on micro crystal stone,General floor wax is an oil-based wax which is easily stuck to dust.
5.Please use rubber wheels for shopping cart and trolley on micro crystal stone floor, for the hard wheel may scratch and damage the surface,
6.Regular care and maintenance is the key for long lasting of micro crystal stone’s high glossy and reflection.
Important Notice
1.Make sure the ground of laying area is dry and clean before laying mortar. The ratio 1:3(volume ratio) must be strictly followed and no extra water added during the installation progress
2.In the choice of using white cement as the filling material, the strength and quality of the cement must be checked properly.
3.It is not recommended to store micro crystal stone outdoor for long time. It should be covered with rock wool in winter and moved into indoor 2 hours in advance before installation. It also needs to be covered with waterproof cloth when installing during the rainy days outdoor,
4.When using micro crystal stone as ground floor,2mm wild gap must be left between the joints for the benefit of the water vaporization and physical expansion. In the case of large-scale installation, it is recommended to leave an 8mm expansion joint,
5.It is recommended that the area of micro crystal stone to remain-not used-for at least 24 hours and kept 2-3 days before passing or storing items on top.
Marmoglass Polished Edge, Shining !
China Marmoglass SN002 Slabs Packing and Ready for ship
We not only make Slabs, we also can make:
- Project Tiles
- Countertop
- Tabletop
- Vanitytop
- Column
Tags: Marmoglass, Crystallized glass panel, nano crystallized glass panel, pore marmoglass, pore crystallized glass panel, Artificial Stone, Hole-Free Micro Crystal Stone, Pure white stone, Crystallized glass tile, Crystal glass tile, pure white artificial white marble, Marmo Glass, Glass Marble, White Marble, Marmoglass, nano marmoglass, no pore marmoglass, non-pore crystallized glass panel, glass marble, white marble, crystal white marble, white stone, white marble tile, Micro-crystal stone, Crystallized glass, Crystallized White Stone, Crystallized White Stone, Micro-crystallized composite tile, Hole-Free Micro Crystal Stone, Micro-crystallized composite tile, White Marble Tiles, pure white marble
China Marmoglass SN002 Strong Packing Crates
China Marmoglass SN002 and Nanoglass NANO3 Container Loading
Welcome to our product page of China Marmoglass, in which you can find detailed information of Marmoglass. China Marmoglass Co.,Limited offer Crystallized White Marmoglass is good in quality and competitive in price. China Marmoglass Co.,Limited is the manufacturer and supplier of Marmoglass,White Crystallized Glass Panel,Nanoglass. Crystallized Glass Stone,Crystallized Glass Panel,Crystallized Glass Stone Tile,Crystallized Glass Stone Countertop,Marmoglass also known as Nanoglass and White Crystallized Glass,Marmoglass, Crystallized Glasss is the popular materials for interior and exterior applications, including kitchen countertops, bathroom vanities, commercial foyer wall claddings, etc. China Marmoglass Co.,Limited is the Manufacturer and export Crystallized Glass and Crystallized Glass products. Crystallized Glass can be used Interior & external wall cladding, Flooring Tile, Stair, Column cladding, Basin, Countertop, Table, Bar, bath, Kitchen, any tops, round pillar and furniture decoration etc. Super White Nanoglass Slab, You Can Buy Various High Quality Super White Nanoglass Slab Products from Super White Nanoglass Slab Suppliers and Super White Nanoglass Slab Manufacturers at Chinamarmoglass.com
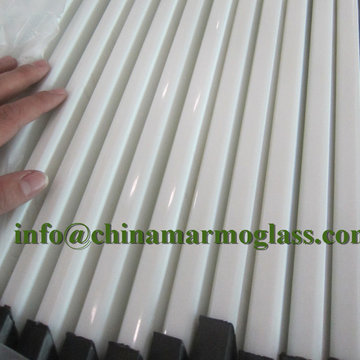 China Marmoglass Co.,Limited
Home > Products
Crystallized Glass,Crystallized stone 6
Crystallized Glass,Crystallized stone,Crystallized glass panel
Marmoglass,Nanoglass,Marmoglass Composite Collectively referred to as Crystallized Glass
Crystallized Glass Application:
1). Interior & external wall cladding
2). Flooring Tile, Stair, Column cladding
3). Basin, Countertop, Table, Bar
4). bath, Kitchen, any tops, round pillar and furniture decoration etc .
Crystal white is a kind of artificial stone . It is made of glass ,which should be burned in the oven for two days under the more than 1000C temperature . It is much different from natural stone from all sides.
1. Natural and soft texture,
2. Varied colors such white, beige, carrara white
3. Good weather resisting property and durability
4. Zero percent of water absorption , not be polluted easily
5. Green environmental building material
6. High-intensity, light weight
7. Bending formation, economical, time saving
8. scratch resistant ,withstand high-heat .
More details about it :
1. There are more than 10 colors of crystallized glass panel products available: Pure white, yellow, silver yellow, silver grey, grey in white, grey spot white, USA grey spot white, yellow in white….
2. Panel thickness: 10-30MM
3. Normal specifications (mm):
1800*3000*18 1200*2400*18 600*600*18 1200*1200*18
1600*2400*18 1800*3000*30 800*800*18 1000*1000*18
Thin tiles:
305*305*12mm, 450*450*12mm
457*457*12mm, 400*400*12mm
600*600*12mm 1200*2400*12mm
4. Material: crystal quartz sand
5. Packaging: Fumigated wooden crates, Bundles,foam
6. Brand name: China Marmoglass / Nanoglass
7. Place of origin: Xiamen, Fujian ,China
8. Model NO.: GS001, SN002, NANO2009, NNAO2011
9. Supply ability: 20000M2/MONTH, 30TON/DAY
10. Delivery time: generally within 10 days, after the order confirmed and the deposit received
11. Arc panel specifications (mm):
Thickness: 18-30mm
Diameter : 30cm-120cm
1.What is crystallized glass stone(Marmoglass SN002 )?
The micro crystal stone is an innovative product designed as a substitute for the rare natural white marble. It is superior to the natural white marble in terms of characteristics, where the micro crystal stone possesses extreme density making it anti-breakage, giving it zero water absorption qualities, and making it resistant to acidic and alkaline substances. at the pace that mankind is consuming the natural resources in today’s world, the micro crystal stone is the ultimate solution, the superior alternative for the external and internal applications. It is certainly a revolutionary product and the finest construction material of the 21st century.
2.Why choose crystallized glass stone(Marmoglass SN002)?
The micro-crystal stone, also known as the micro-crystal glass, Marmoglass, is a new type of high-level decoration material. It is derived from natural inorganic material through a high temperature process, and it possesses excellent characteristics including the followings:
1. High Performance
The micro-crystal stone has even texture and high density, which makes it crush resistant, anti-bending and high resistant resulting its performance being higher than natural stone. It can be used for long period with minimal damage.
2. Acid-proof alkalinity and anti-corrosion
Not only does the micro-crystal stone posses special micro-crystal characteristics, it also has special glass features such as a fine texture, shiny surface and light reflection effect.
3. Fine Texture
We have the flexibility to manufacture any colors as per customer requirements while also making up the defect of color differences, which exists in natural stone. While the product is widely used for interior and interior decoration of star-level hotels, subways, local landmark buildings, airports, and office building etc, it is more suitable for high-level home decoration.
4. Pollution-resistance and easy maintenance
The micro-crystal is a kind of inorganic crystalline material with stable chemical characteristics. Its acid proof alkalinity and anti-corrosion nature are superior to nature stone, specifically its anti-weather characteristics whereby it is unaffected by the wind or sunlight.
5.A wide application range
The water absorption rare of micro-crystal is quite low, close to zero. Several types of dirty pulps and dyed solution have difficulty in penetrating it. Any dirt on the surface is easily cleaned and it is convenient to mankind.
6. Heat-bend reformation
With the heating method, the micro-crystal can be made into various arched profiles and arched slabs. the process is simple and it allows us to save time, cost, material and resources.
7. No radioactive elements
In the process of manufacturing the micro-crystal stone, we have integrated the elimination of all the harmful radioactive elements that are found in natural stone from its components. It is therefore the safest and most environmentally friendly building material in our modern world.
Crystallized glass can be processed into slab, tile, countertop, column and vanity top, wash basin and etc. It is applicable for flooring, interior and exterior wall cladding, stairs and table. Contributed to the character of no color difference, so it is widely used for top grade hotel, business building shopping mall and such great construction.
Physical Parameter
Density
2.70 g/cm
Water Absorption
0.01%
Compressive Strength
126 Mpa
Radioactive
Class A (Suitable for indoor and outdoor)
Size
Slabs
2400/2600/2800/3000 x 1800/1600/1400/1500mm
Cut-to-size Tiles
30 / 40 / 50 / 60 / 80 / 100cm X 30 /40/50 /60/80 /100cm
12"x12", 24"X12", 24"x24" or customized size
Thickness
1.2cm,1.8cm (3/4'), 2.0cm, 2.5cm, 3.0cm,
Finishing
Polished, honed
Usage
Flooring, Walls, Stairs / Steps, Counter tops, Vanity, Paving / Curbstone, Pillar, Column, Border, Skirting, Window Sills
Quality Control
Thickness Tolerance
+- 1mm;
Polishing Grade
above 100 degree
Crack / Spot
EU / US Standard: zero
QC Standard
AQL2.5/4.0 ITS
Certificate
CE, ISO, GB/T19001-2008
Advantage
1. Own factory with stable supply;
2. Factory direct with good price and prompt delivery;
3. Good Management System for good quality;
4. Value-added service.
large glass white artificial stone of Packing
Inner Packing
Cover with foam and plastic film, corner paper board protection
Individual Carton
Individual carton packing with trademark is available upon request
Outer Packing
Plastic tapes in 6 sides, further strengthened with iron sheet in the corner
Shipping Mark
OEM
Port of Loading
Xiamen Port of China
Delivery Lead Time
Normally 10-15 days for one 20’ GP, faster delivery is available upon confirmation
Trade Term
FOB, CFR, CIF, etc.
Loading Info.
Thickness
Qty per pallet
Pallets per 20ft container
QTY per 20ft container
Square Meter per 20ft container
Weight per 20ft container
Big slab size
3000*1200mm
12mm
25pcs
7
175pcs
600-900 m2
21000kgs
3000*1400mm
15mm
20pcs
7
175pcs
500-700 m2
21000kgs
3000*1600mm
20mm
15pcs
7
105pcs
350-500 m2
21000kgs
3200*1600mm
30mm
10pcs
7
70pcs
250-358 m2
21000kgs
Installation Recommendations
Wall Cladding
1.Wall should be leveled and cleaned,
2.Fix the panel on the wall with wire and expansion screw tightly,
3.Fill the space between the panel and the wall with cement mortar of ratio 1:3,
4.Clean the extra mortar and dirt on the surface.
Floor Installation
1.Mark out the baseline of gound level,
2.Mix the mortar with ratio of 1 cement to 4 sand to have semi-day mortar,
3.Lay the mixed mortar in level with a layer of 3-4cm thickness,place the tile over the mortar and adjust the height properly to be leveled,
4.Remove the tile after level adjustment.Put a thin layer of cement powder on the mortar and add water on it to become wet,
5.Put the tile on top and gently knock with rubber hammer until it sealed with the mortar properly. Make sure the tile is leveled and has the same space between each other. Those tiles which are not leveled with others should be removed and repeat the leveling procedure in step 4.Genetally,the space between two tiles should be 2mm for water evaporation and normal expansion.
Daily maintenance of Micro Crystal Stone
1.The laying area of micro crystal stone can only be opened for use or stacking any item on top after at least 24 hours of filling the gap,
2.The ground must be covered with plywood or carpet for protection in case of doing other decoration work after the installation of micro crystal stone floor,
3.In areas like exit and entrance, the surface of micro crystal stone floor should be covered by carpet or plywood to protect it from the damage of abrasion of sand or other hard material.
4.Do not use general floor wax on micro crystal stone,General floor wax is an oil-based wax which is easily stuck to dust.
5.Please use rubber wheels for shopping cart and trolley on micro crystal stone floor, for the hard wheel may scratch and damage the surface,
6.Regular care and maintenance is the key for long lasting of micro crystal stone’s high glossy and reflection.
Important Notice
1.Make sure the ground of laying area is dry and clean before laying mortar. The ratio 1:3(volume ratio) must be strictly followed and no extra water added during the installation progress
2.In the choice of using white cement as the filling material, the strength and quality of the cement must be checked properly.
3.It is not recommended to store micro crystal stone outdoor for long time. It should be covered with rock wool in winter and moved into indoor 2 hours in advance before installation. It also needs to be covered with waterproof cloth when installing during the rainy days outdoor,
4.When using micro crystal stone as ground floor,2mm wild gap must be left between the joints for the benefit of the water vaporization and physical expansion. In the case of large-scale installation, it is recommended to leave an 8mm expansion joint,
5.It is recommended that the area of micro crystal stone to remain-not used-for at least 24 hours and kept 2-3 days before passing or storing items on top.
Marmoglass Polished Edge, Shining !
China Marmoglass SN002 Slabs Packing and Ready for ship
We not only make Slabs, we also can make:
- Project Tiles
- Countertop
- Tabletop
- Vanitytop
- Column
Tags: Marmoglass, Crystallized glass panel, nano crystallized glass panel, pore marmoglass, pore crystallized glass panel, Artificial Stone, Hole-Free Micro Crystal Stone, Pure white stone, Crystallized glass tile, Crystal glass tile, pure white artificial white marble, Marmo Glass, Glass Marble, White Marble, Marmoglass, nano marmoglass, no pore marmoglass, non-pore crystallized glass panel, glass marble, white marble, crystal white marble, white stone, white marble tile, Micro-crystal stone, Crystallized glass, Crystallized White Stone, Crystallized White Stone, Micro-crystallized composite tile, Hole-Free Micro Crystal Stone, Micro-crystallized composite tile, White Marble Tiles, pure white marble
China Marmoglass SN002 Strong Packing Crates
China Marmoglass SN002 and Nanoglass NANO3 Container Loading
Welcome to our product page of China Marmoglass, in which you can find detailed information of Marmoglass. China Marmoglass Co.,Limited offer Crystallized White Marmoglass is good in quality and competitive in price. China Marmoglass Co.,Limited is the manufacturer and supplier of Marmoglass,White Crystallized Glass Panel,Nanoglass. Crystallized Glass Stone,Crystallized Glass Panel,Crystallized Glass Stone Tile,Crystallized Glass Stone Countertop,Marmoglass also known as Nanoglass and White Crystallized Glass,Marmoglass, Crystallized Glasss is the popular materials for interior and exterior applications, including kitchen countertops, bathroom vanities, commercial foyer wall claddings, etc. China Marmoglass Co.,Limited is the Manufacturer and export Crystallized Glass and Crystallized Glass products. Crystallized Glass can be used Interior & external wall cladding, Flooring Tile, Stair, Column cladding, Basin, Countertop, Table, Bar, bath, Kitchen, any tops, round pillar and furniture decoration etc. Super White Nanoglass Slab, You Can Buy Various High Quality Super White Nanoglass Slab Products from Super White Nanoglass Slab Suppliers and Super White Nanoglass Slab Manufacturers at Chinamarmoglass.com
16