
Search results for "Prepare physical" in Home Design Ideas
 KSI Kitchen & Bath
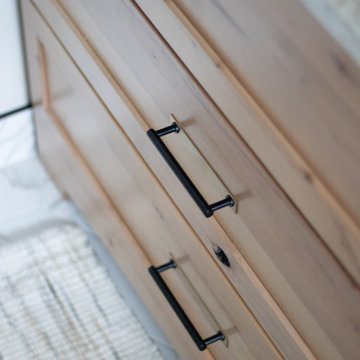
When culinary photographer, chef, and media personality Megan and her husband Mark came to us for his- and hers- bathroom remodels, We knew the collaboration would yield incredible results! They had exciting inspirations for their baths and were willing to explore some out-of-box design concepts that made the dual project especially enticing. In the hallway bath, they were hoping to make better use of adjacent space and enlarge the room to create a spa getaway for Megan. Meanwhile, their en suite master bath was outdated and seriously lacking in both style and storage for Mark's taste. They came prepared to our initial consultation with several inspiration photos to work off of for both space planning and material selections. Megan’s inspirations were light, airy, and leaned into some beautiful physical and visual textures. Mark’s inspirations were dark, moody, and included woodworking details and wainscoting reminiscent of a cigar lounge or country club.
 KSI Kitchen & Bath
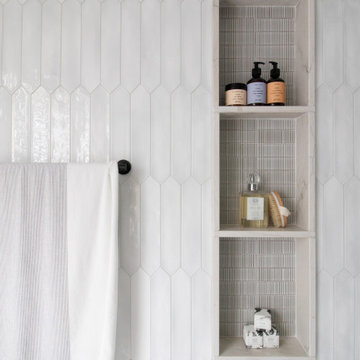
When culinary photographer, chef, and media personality Megan and her husband Mark came to us for his- and hers- bathroom remodels, We knew the collaboration would yield incredible results! They had exciting inspirations for their baths and were willing to explore some out-of-box design concepts that made the dual project especially enticing. In the hallway bath, they were hoping to make better use of adjacent space and enlarge the room to create a spa getaway for Megan. Meanwhile, their en suite master bath was outdated and seriously lacking in both style and storage for Mark's taste. They came prepared to our initial consultation with several inspiration photos to work off of for both space planning and material selections. Megan’s inspirations were light, airy, and leaned into some beautiful physical and visual textures. Mark’s inspirations were dark, moody, and included woodworking details and wainscoting reminiscent of a cigar lounge or country club.
 KSI Kitchen & Bath
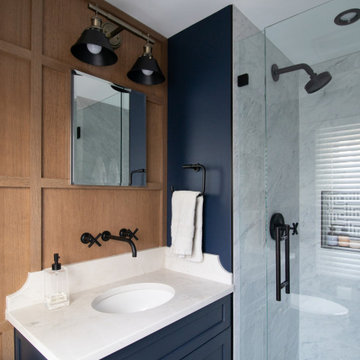
When culinary photographer, chef, and media personality Megan and her husband Mark came to us for his- and hers- bathroom remodels, We knew the collaboration would yield incredible results! They had exciting inspirations for their baths and were willing to explore some out-of-box design concepts that made the dual project especially enticing. In the hallway bath, they were hoping to make better use of adjacent space and enlarge the room to create a spa getaway for Megan. Meanwhile, their en suite master bath was outdated and seriously lacking in both style and storage for Mark's taste. They came prepared to our initial consultation with several inspiration photos to work off of for both space planning and material selections. Megan’s inspirations were light, airy, and leaned into some beautiful physical and visual textures. Mark’s inspirations were dark, moody, and included woodworking details and wainscoting reminiscent of a cigar lounge or country club.
Find the right local pro for your project
 KSI Kitchen & Bath
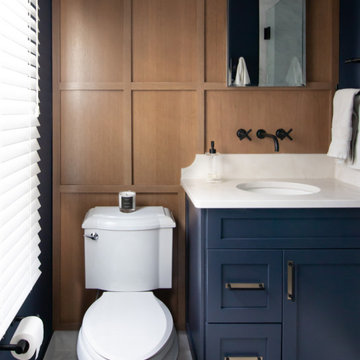
When culinary photographer, chef, and media personality Megan and her husband Mark came to us for his- and hers- bathroom remodels, We knew the collaboration would yield incredible results! They had exciting inspirations for their baths and were willing to explore some out-of-box design concepts that made the dual project especially enticing. In the hallway bath, they were hoping to make better use of adjacent space and enlarge the room to create a spa getaway for Megan. Meanwhile, their en suite master bath was outdated and seriously lacking in both style and storage for Mark's taste. They came prepared to our initial consultation with several inspiration photos to work off of for both space planning and material selections. Megan’s inspirations were light, airy, and leaned into some beautiful physical and visual textures. Mark’s inspirations were dark, moody, and included woodworking details and wainscoting reminiscent of a cigar lounge or country club.
 Katz Novoa Architects
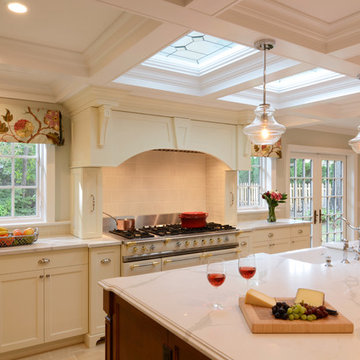
The Clients: two passionate chefs. The Commission: to help them design the perfect Kitchen in which to prepare myriad delectable dishes that they love to plan and execute. The Main Requirements: enough storage to accommodate countless spices, cooking equipment and implements; lots of natural light; and a traditionally detailed, but not overdone design.
We nearly doubled the size of the original galley kitchen by pushing out toward the backyard; laid out the appliances so as to maximize efficiency and work surface area; and designed custom built pull-outs for spice jars, and storage for special cookware, small appliances, cutlery and utensils.
The inspiration for the cabinetry design was the Clients’ impeccable selections of appliances and finishes, and their request for tasteful, simple detailing. The focal point, the heart of this Kitchen, is the beautiful porcelain French stove and custom-designed hood cover. Leaded glass panels in the coffered ceiling add charm and hide roof skylights included in the design to maximize natural light. The large island with porcelain farm sink offers the Clients ample work surface as well as informal seating and storage. A desk / hutch cabinet provides a “central control station” for the family’s activities, as well as display for the Clients’ formal dishes and stemware.
Other improvements included a much-needed Walk-In Pantry achieved by enclosing an existing side porch, and enhanced flow between the Kitchen and Family Room. We accomplished this by removing an existing column and beam which previously blocked the physical and visual connection between the two spaces.
We are delighted with the transformation of the original little galley into our Clients’ dream Kitchen … and our Clients are thrilled that their new Kitchen has cut in half their time spent in epic cooking sessions on the weekends!
 KSI Kitchen & Bath
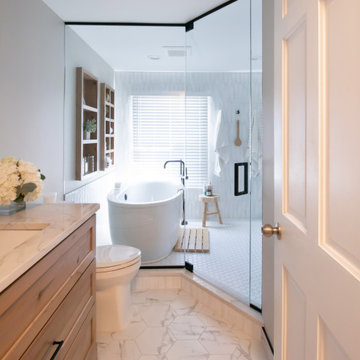
When culinary photographer, chef, and media personality Megan and her husband Mark came to us for his- and hers- bathroom remodels, We knew the collaboration would yield incredible results! They had exciting inspirations for their baths and were willing to explore some out-of-box design concepts that made the dual project especially enticing. In the hallway bath, they were hoping to make better use of adjacent space and enlarge the room to create a spa getaway for Megan. Meanwhile, their en suite master bath was outdated and seriously lacking in both style and storage for Mark's taste. They came prepared to our initial consultation with several inspiration photos to work off of for both space planning and material selections. Megan’s inspirations were light, airy, and leaned into some beautiful physical and visual textures. Mark’s inspirations were dark, moody, and included woodworking details and wainscoting reminiscent of a cigar lounge or country club.
 KSI Kitchen & Bath
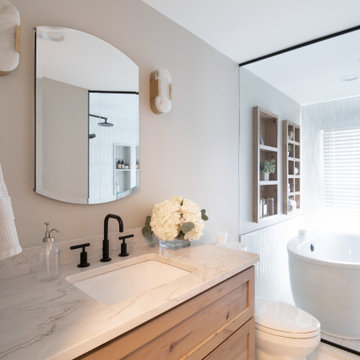
When culinary photographer, chef, and media personality Megan and her husband Mark came to us for his- and hers- bathroom remodels, We knew the collaboration would yield incredible results! They had exciting inspirations for their baths and were willing to explore some out-of-box design concepts that made the dual project especially enticing. In the hallway bath, they were hoping to make better use of adjacent space and enlarge the room to create a spa getaway for Megan. Meanwhile, their en suite master bath was outdated and seriously lacking in both style and storage for Mark's taste. They came prepared to our initial consultation with several inspiration photos to work off of for both space planning and material selections. Megan’s inspirations were light, airy, and leaned into some beautiful physical and visual textures. Mark’s inspirations were dark, moody, and included woodworking details and wainscoting reminiscent of a cigar lounge or country club.
 Katz Novoa Architects
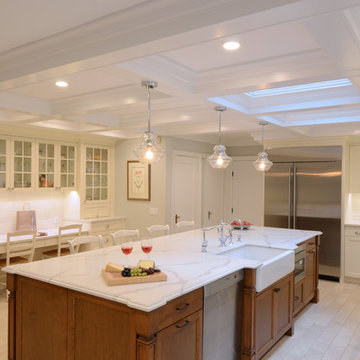
The Clients: two passionate chefs. The Commission: to help them design the perfect Kitchen in which to prepare myriad delectable dishes that they love to plan and execute. The Main Requirements: enough storage to accommodate countless spices, cooking equipment and implements; lots of natural light; and a traditionally detailed, but not overdone design.
We nearly doubled the size of the original galley kitchen by pushing out toward the backyard; laid out the appliances so as to maximize efficiency and work surface area; and designed custom built pull-outs for spice jars, and storage for special cookware, small appliances, cutlery and utensils.
The inspiration for the cabinetry design was the Clients’ impeccable selections of appliances and finishes, and their request for tasteful, simple detailing. The focal point, the heart of this Kitchen, is the beautiful porcelain French stove and custom-designed hood cover. Leaded glass panels in the coffered ceiling add charm and hide roof skylights included in the design to maximize natural light. The large island with porcelain farm sink offers the Clients ample work surface as well as informal seating and storage. A desk / hutch cabinet provides a “central control station” for the family’s activities, as well as display for the Clients’ formal dishes and stemware.
Other improvements included a much-needed Walk-In Pantry achieved by enclosing an existing side porch, and enhanced flow between the Kitchen and Family Room. We accomplished this by removing an existing column and beam which previously blocked the physical and visual connection between the two spaces.
We are delighted with the transformation of the original little galley into our Clients’ dream Kitchen … and our Clients are thrilled that their new Kitchen has cut in half their time spent in epic cooking sessions on the weekends!
 KSI Kitchen & Bath
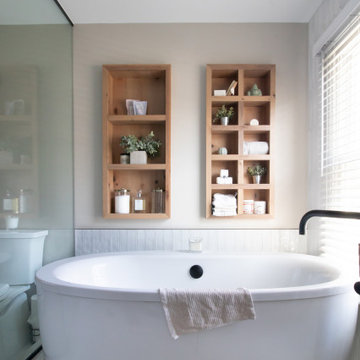
When culinary photographer, chef, and media personality Megan and her husband Mark came to us for his- and hers- bathroom remodels, We knew the collaboration would yield incredible results! They had exciting inspirations for their baths and were willing to explore some out-of-box design concepts that made the dual project especially enticing. In the hallway bath, they were hoping to make better use of adjacent space and enlarge the room to create a spa getaway for Megan. Meanwhile, their en suite master bath was outdated and seriously lacking in both style and storage for Mark's taste. They came prepared to our initial consultation with several inspiration photos to work off of for both space planning and material selections. Megan’s inspirations were light, airy, and leaned into some beautiful physical and visual textures. Mark’s inspirations were dark, moody, and included woodworking details and wainscoting reminiscent of a cigar lounge or country club.

 safe ZOnea
Staging a home for sale or for a major transition is a strange in-between state. You are still living in the space, but you are also preparing it to impress strangers, support showings, and remain functional until the final move-out day. That tension between “home” and “product” is where storage quietly becomes one of your smartest tools. Used well, storage lets you reduce clutter, protect important items, and create the kind of rooms that photograph beautifully and feel calm when buyers walk through the door.
A staged move is rarely just about shifting boxes from one address to another. It is about managing timing, presentation, and stress at the same time. When storage is built into the plan from day one, the entire process feels less rushed and more strategic. Rooms open up gradually, essentials stay accessible, and you never feel like you are drowning in half-packed chaos. Understanding how to use storage as a staging partner, not just a place to dump excess stuff, is what turns a messy transition into a controlled, professional-looking move.
Why Storage Is the Backbone of Every Staged Move
Visual space is emotional space. When every surface is covered, and every corner is full, buyers feel crowded before they have even evaluated the layout. Storage gives you a way to pull back without making drastic decisions about what to keep or donate. Seasonal décor, bulky furniture, duplicate items, archives, and personal collections can be moved out early, so the home reads cleaner and more open while still feeling lived-in. That balance between warmth and simplicity is exactly what good staging tries to achieve.
In more complex situations, such as live-work properties or home offices, storage becomes even more important. You may need to keep a business running while also presenting a polished environment to viewers. Partnering with local movers in Boston makes it easier to shift equipment, files, and nonessential pieces into storage in phases, so work can continue while the visible areas of the property stay controlled and presentable.
How Staging and Storage Work Together to Control Visual Impact
Staging works best when every object in a room has a clear purpose. A sofa frames a conversation. A table suggests gathering. A lamp softens the mood. Everything else that is not essential to that story competes for attention. Storage supports staging by giving you a clean staging bench off-site, where nonessential items can wait without being constantly shuffled between rooms or piled into overstuffed closets.
The art lies in deciding what stays and what goes. Family photos, extensive collections, excess seating, and rarely used appliances often move into storage first. What remains should be enough to show scale, comfort, and function without revealing the full weight of daily life. Commercial properties go through a similar filtering process. Extra desks, surplus equipment, outdated signage, and inactive files often move out early so the active workspace feels lean, efficient, and future-ready before a relocation supported by commercial movers takes place.
Strategic Timing of Storage before the Actual Move
The worst time to think about storage is when boxes are already stacked in the hallway. In a staged move, storage decisions ideally begin as soon as you know the property will be listed or the space will be transitioned. That might be a month or more before the main moving date. Starting early gives you time to sort, label, and prioritize instead of throwing things together in a panic.
An early storage phase also helps you test how the home feels with less in it. You may discover that removing a few large pieces transforms a cramped room into an open, inviting space. For commercial spaces, early storage lets operations continue with fewer interruptions. Departments can send nonessential items out in waves. When the main relocation comes, much of the excess is already safely stored, and what remains is easier for a commercial movers Boston team to handle with speed and care.
The Emotional Psychology behind Letting Storage Hold Your Belongings
Letting belongings leave the house ahead of you can feel unsettling. There is always a quiet fear that once something is out of sight, it will be forgotten, damaged, or harder to reclaim. That is why some people resist using storage even when they know it would make the staging process easier. Acknowledging that emotion instead of dismissing it helps you plan more honestly and avoids last-minute regret.
The reality is that good storage is not a black hole; it is a temporary pause. When items are packed thoughtfully, labeled clearly, and placed in an environment you trust, they become easier to manage than when they are tucked into random cupboards or stacked in spare rooms. For many people, living with fewer visible possessions during staging actually reduces tension. The home feels lighter and easier to maintain. Businesses notice the same effect when storage removes outdated equipment and clutter from the floor. The workspace looks more focused, and staff can concentrate on current tasks instead of navigating around accumulated history.
Protecting Assets While They Live in Storage
Sending belongings into storage is only a good idea if they come back in the same or better condition. That is where quality control matters. Furniture, textiles, electronics, files, and artwork each have different vulnerabilities. Moisture, temperature swings, dust, and rough handling can all damage them in ways that only become obvious later. Choosing the right type of storage and packing accordingly is central to the genius of using storage as part of a staged move rather than as a desperate overflow container.
Climate-controlled units, padded wrapping, elevated pallets, careful stacking, and clearly marked boxes all reduce risk. The goal is to handle items fewer times, not more. When storage is integrated into the move plan, belongings can travel directly from the home to storage and later from storage to the new address with minimal extra movement. Many owners coordinate those transfers through a well trusted movers in Boston, so the same team that moves items out early also manages their final delivery, preserving continuity and accountability.
How Storage Reduces Risk during Multi-Phase Moves
Few staged moves happen in a single clean step. There are often gaps between listing and selling, between selling and closing, between closing and final move-out. If renovations, inspections, or office reconfigurations are involved, the timeline becomes even more layered. Storage absorbs those gaps, so you are not forced to live among towers of boxes or stack equipment in hallways waiting for the next phase.
By treating storage as a flexible middle ground, you can move things out gradually while still having access when needed. For example, archived files can go first, followed by seasonal décor, then surplus furniture. As each stage ends, fewer items remain to be shifted on the final date. This phased approach reduces the risk of rushed, late-night packing sessions, careless stacking, and damaged items. It also makes it easier for commercial moving crews to work efficiently because they are handling a manageable volume of goods at each phase rather than everything at once.
Using Storage to Maintain Clean Show-Ready Conditions
One of the hardest parts of staging is keeping the property consistently show-ready. Every viewing becomes its own small event. Floors need to be cleared, surfaces wiped, and personal items tucked away. When too many belongings remain in the home, each showing takes a heavy amount of effort. Storage cuts that workload dramatically by taking nonessentials completely off the stage.
With fewer items to move and hide, maintaining a neutral, inviting look becomes much more realistic. You are not scrambling to stuff things into closets or push items under the bed. Instead, the home sits closer to show condition all the time, and the final touches before a viewing are minimal. In commercial environments, using storage helps maintain a professional appearance for clients and staff, even while the space is being prepared for a larger transition. Active tools and furniture stay in play, while inactive pieces quietly support the future from storage.
Storage as a Strategic Tool in Business Relocation Planning
For businesses, storage is more than a convenience; it is part of risk management. Office relocations and staged commercial moves have to juggle lease deadlines, equipment deliveries, IT cutovers, and staffing realities. Trying to shift everything in one move often results in downtime, lost files, and strained teams. Storage turns the move into a series of controlled steps instead of a single disruptive jump.
Unused furniture, archived documents, and non-critical inventory can be moved into storage weeks ahead of the main relocation. As the new space becomes ready, items can move out of storage and directly into position. This reduces double-handling and keeps the old and new locations from filling with half-unpacked material. A business that coordinates these flows with professional commercial movers in Boston usually experiences smoother transitions, because storage is treated as a working part of the operational plan rather than a leftover problem.
The Hidden Cost Benefits of Proper Storage Planning
On paper, storage looks like an extra expense. In reality, poorly managed moves cost far more. When everything is rushed into boxes at the last minute, items are damaged, misplaced, or transported multiple times. Extra labor hours, emergency packing supplies, replacement furniture, and extended timelines quickly outweigh the cost of well-used storage. Staging without storage also tends to keep homes and offices crowded longer, which can hurt impressions and, in the case of a sale, influence offers.
When storage is integrated from the beginning, you minimize waste. You handle items fewer times, you know where things are, and you avoid paying people to shift the same objects repeatedly. Staged homes that look better often sell faster or draw stronger interest, which helps recover investment on the back end. Businesses benefit from less downtime, safer handling of equipment, and predictable work schedules. Those gains are why many clients prefer partnering with a commercial moving company in Boston that understands storage as a cost-control tool, not just a place to park overflow.
Conclusion
The true genius of using storage during a staged home move is that it quietly rewrites the rules of transition. Instead of treating space as something that must absorb every box and belonging until the last possible moment, you treat storage as a flexible extension of the home or office. This shift in thinking opens rooms, clears sightlines, and makes every phase of the move more intentional. Staging becomes easier, maintenance becomes lighter, and the stress of living in a half-moved environment drops noticeably. When storage is chosen carefully, used early, and coordinated with the overall moving plan, it protects both physical assets and emotional energy. Buyers and visitors see a calm, collected space. You experience a less chaotic path from “here” to “there.” Whether you are selling a home, repositioning a business, or managing a complex phased relocation, storage can turn a disruptive event into a managed, almost elegant process.
For people who want that level of control and care during a staged move, Stairhopper movers have built a strong reputation by treating storage, timing, and transport as parts of one connected strategy. Their team is known for listening closely, planning around real-life constraints, and moving both residential and commercial clients through transitions with calm, steady execution. They approach every project as a partnership, aligning storage use, staging needs, and final delivery so that what matters most arrives safely, on schedule, and with as little disruption as possible.
Frequently Asked Questions
Q1. When should I arrange storage for a staged home move?
Ideally, four to six weeks before listing or transition, so clearing, packing, and staging can happen gradually without rushed decisions or last-minute stress.
Q2. Is climate-controlled storage necessary for staged moves?
It is highly recommended for wood furniture, electronics, artwork, and documents, since temperature and humidity swings can quietly damage materials over time.
Q3. How does storage help keep a home show-ready?
By moving nonessential items off-site, daily tidying becomes simpler, and each room can stay closer to a staged condition between viewings or inspections.
Q4. Can storage reduce the length of the final moving day?
Yes. When many items are moved into storage in advance, the final moving day focuses on essentials, which shortens timelines and reduces physical and mental strain.
Q5. Is storage useful for short-term business relocations?
Even in short relocations, storage helps prevent overcrowded offices and allows departments to move in phases without interrupting everyday operations.
Q6. How do I decide what should go into storage first?
Start with rarely used items, seasonal décor, surplus furniture, and archived materials, then work toward pieces that are visually distracting or make rooms feel cramped.
Q7. Will using storage make it harder to find things later?
Not if packing and labeling are done carefully. Clear categories, room-based labels, and simple inventories make stored items easier to locate than when scattered at home.
Q8. Does storage still make sense if my move happens in one day?
Yes, because staging and preparation begin well before that day. Storage keeps the home functional and attractive during the weeks leading up to the final move.
 Tile Doctor Ltd
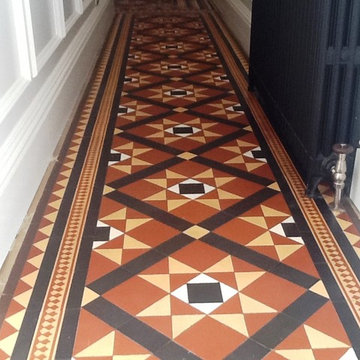
Here’s a job I completed just before Christmas last year, at a house in Northampton which has a rich history and mix of architectural styles. The run up to Christmas is always popular as people try to get their household projects finished off in time for celebrating the festive season with family so this is always a busy time for Tile Doctor.
The photos below show a neglected Victorian Quarry tiled floor in need of repair, with cracked tiles along the edges. These were caused by somebody in the past using brute force to remove carpet gripper rods which had been glued to the tiles. These cracks were present around the edges of the entire hallway, however; this particular type of tile is very hard to get hold of. Furthermore, it is a costly process to replace the tiles as the skirting boards would have had to have been removed.
As well as the physical issues the floor had a dull appearance due to the build-up of builder’s dust and the general wearing down of the paintwork over time. I agreed with the client that the best course of action would be to fill the tiles, and paint the damaged tiles using a colour that matched as close as possible. Many of my Tile Doctor colleagues would disagree with this approach opting to source the correct tile and rebuild the damaged section however unfortunately in this case we didn’t have the time or the budget.
My first action was to use a brush and vacuum to remove as much loose debris and dust as possible. I followed this by agitating the tiles with a dilution of Tile Doctor Pro Clean which is a strong alkaline product and safe to use on tile and stone. I use a combination of a coarse burnishing pad fitted to a rotary machine and hand held brushes, in order to get the floor clean. The resulting slurry was then rinsed and removed using a wet vacuum. This process was repeated twice followed by a thorough rinse to ensure any trace of cleaning agent had been removed and the floor neutralised.
As this was such an old property, I then used a steamer to heat up the tiles in order to draw out any contaminants and assist with the drying process. I installed a fan to dry the floor before starting repairs, mixing up some coloured grout and filling all holes and cracks along the edges, including the doormat area.
I allowed the coloured grout to dry overnight, before hand painting the black and Terracotta tiles. These were then given time to dry (about a couple of hours). Following this, I carefully painted in the other colours: brown and cream. The overall effect was quite convincing and you had to look very closely to notice.
Due to the fact that there were other tradesmen working in the house at the time, the floors were sheeted up to protect from additional dust and muck. I then left the house for a week, allowing the floor ample time to dry completely in preparation for sealing.
Upon my return, I took damp meter readings, and once satisfied with the dryness of the tiles, I began the sealing process with the impregnating, colour-enhancing sealer Tile Doctor Colour Grow. The sealer provides both durable surface protection and an aesthetically pleasing matte finish.
The below photos show how the product has enriched the colours with the two coats applied.
The process of restoring this wonderful Victorian Quarry tiled floor was certainly time consuming, but very rewarding. I am exceptionally pleased with the results myself, and my client couldn’t have been happier and I’m sure the newly revitalised hallway will have been a talking point for all their visitors during the Christmas break.
Phil Vissian
Northamptonshire Tile Doctor
 Spin Design Limited
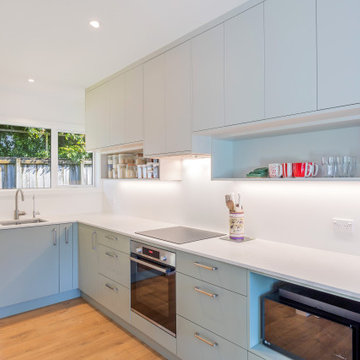
Removing a wall in a small two-bedroom unit has resulted in a significant transformation. By opening up the space, a seamless connection has been established between the kitchen, dining area, and living room, creating a multi-functional and versatile area. The removal of the wall has eliminated the physical barriers that previously separated these spaces, fostering a sense of openness and facilitating better communication and interaction among family members.
The kitchen extension resulting from the removal of the wall has provided several practical benefits. Firstly, it has allowed for the expansion of the bench space, providing more room for meal preparation, cooking, and other kitchen activities. Additionally, the kitchen extension has led to an improvement in storage capacity. This means that kitchen utensils, appliances, and ingredients can be neatly organized and easily accessible, reducing clutter and enhancing efficiency in the kitchen.
 Spin Design Limited
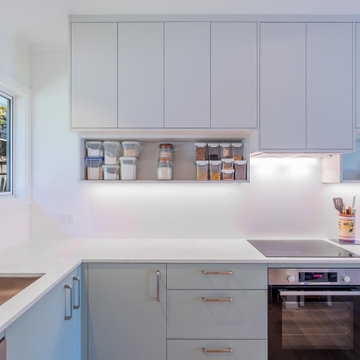
Removing a wall in a small two-bedroom unit has resulted in a significant transformation. By opening up the space, a seamless connection has been established between the kitchen, dining area, and living room, creating a multi-functional and versatile area. The removal of the wall has eliminated the physical barriers that previously separated these spaces, fostering a sense of openness and facilitating better communication and interaction among family members.
The kitchen extension resulting from the removal of the wall has provided several practical benefits. Firstly, it has allowed for the expansion of the bench space, providing more room for meal preparation, cooking, and other kitchen activities. Additionally, the kitchen extension has led to an improvement in storage capacity. This means that kitchen utensils, appliances, and ingredients can be neatly organized and easily accessible, reducing clutter and enhancing efficiency in the kitchen.
 Spin Design Limited
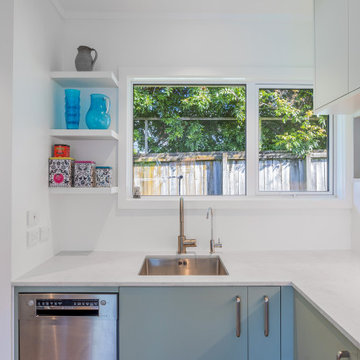
Removing a wall in a small two-bedroom unit has resulted in a significant transformation. By opening up the space, a seamless connection has been established between the kitchen, dining area, and living room, creating a multi-functional and versatile area. The removal of the wall has eliminated the physical barriers that previously separated these spaces, fostering a sense of openness and facilitating better communication and interaction among family members.
The kitchen extension resulting from the removal of the wall has provided several practical benefits. Firstly, it has allowed for the expansion of the bench space, providing more room for meal preparation, cooking, and other kitchen activities. Additionally, the kitchen extension has led to an improvement in storage capacity. This means that kitchen utensils, appliances, and ingredients can be neatly organized and easily accessible, reducing clutter and enhancing efficiency in the kitchen.
 KSI Kitchen & Bath
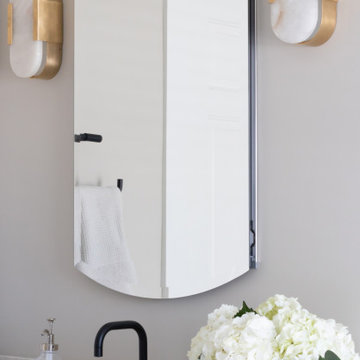
When culinary photographer, chef, and media personality Megan and her husband Mark came to us for his- and hers- bathroom remodels, We knew the collaboration would yield incredible results! They had exciting inspirations for their baths and were willing to explore some out-of-box design concepts that made the dual project especially enticing. In the hallway bath, they were hoping to make better use of adjacent space and enlarge the room to create a spa getaway for Megan. Meanwhile, their en suite master bath was outdated and seriously lacking in both style and storage for Mark's taste. They came prepared to our initial consultation with several inspiration photos to work off of for both space planning and material selections. Megan’s inspirations were light, airy, and leaned into some beautiful physical and visual textures. Mark’s inspirations were dark, moody, and included woodworking details and wainscoting reminiscent of a cigar lounge or country club.
 safe ZOnea
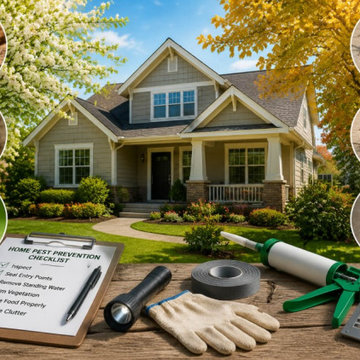
Maintaining a pest-free home requires attention throughout the year. Seasonal changes affect pest behavior, and understanding these patterns can save homeowners from costly damage and health hazards. In this guide, we will explore practical strategies for spring pest prevention tips, ensuring your property stays protected through every season. From spotting early signs to implementing proactive measures, these steps empower homeowners to take control before infestations occur.
Understanding Seasonal Pest Patterns
Pests adapt to changing weather, and knowing their patterns helps prevent infestations effectively.
Spring: Awakening Pests
Spring signals the end of winter dormancy for many pests. Rodents, ants, and termites start seeking food and warmth. Effective spring pest prevention tips include:
● Cleaning gutters and removing debris
● Sealing cracks and gaps in exterior walls
● Inspecting wood piles and compost areas
● Monitoring early signs of termite activity
Pro Tip: Conduct a termite inspection or a professional evaluation to catch infestations early before they spread.
Summer: Peak Pest Season
Warm temperatures accelerate pest breeding cycles. For a comprehensive summer pest prevention guide:
● Maintain lawns and trim vegetation away from homes
● Check window and door screens for tears
● Store food in sealed containers
● Inspect water sources that attract mosquitoes
Do You Know? Mosquitoes can lay eggs in a teaspoon of water. Eliminating stagnant water is crucial to reducing their population.
Fall: Preparing for Winter
As temperatures drop, pests search for warm indoor spaces. Key actions include:
● Inspecting for winter rodent entry points
● Sealing attic vents, crawl spaces, and foundation gaps
● Cleaning storage areas to minimize hiding spots
● Checking chimney and fireplace openings
Quick Fact: Rodents can enter homes through openings as small as ¼ inch.
Seasonal Pest Checklist for Homeowners
Creating a structured seasonal pest checklist simplifies preventive measures and ensures nothing is overlooked.
Season
Key Actions
Spring
Inspect for termites, seal exterior gaps, clean gutters, and check compost
Summer
Repair screens, trim vegetation, remove standing water, and secure food
Fall
Seal entry points, inspect attic/crawlspace, clear debris, and prepare storage
Winter
Monitor indoor activity, keep firewood away from walls, and maintain traps
Inspection & Maintenance Tips
● Schedule annual pest inspections by professional Virginia pest control consultation to detect hidden problems
● Keep a log of pest sightings and treatment dates
● Regularly replace weather stripping and caulk cracks
Note: Even small preventive steps, when consistently applied, drastically reduce infestations.
Common Pests and Their Seasonal Behaviors
Understanding how different pests behave each season helps homeowners take timely action to protect their property.
● Ants and Termites: Ants emerge in spring seeking food, while termites become active and can damage wood unnoticed. Early detection is critical.
● Rodents and Mice: Fall and winter increase rodent intrusions. Block all entry points and keep food sealed.
● Mosquitoes and Flies: Summer creates the ideal breeding environment for mosquitoes. Eliminate standing water and use physical barriers like nets.
● Spiders and Other Insects: Seasonal shifts cause spiders to move indoors. Regular vacuuming and decluttering reduce hiding spots.
Eco-Friendly Prevention Methods
● Use natural repellents like peppermint oil or diatomaceous earth
● Encourage beneficial insects, such as ladybugs, to reduce pest populations
● Plant pest-deterring plants near home boundaries, like marigolds or lavender
Integrated Pest Management (IPM)
Adopt an IPM approach by combining physical barriers, monitoring, and environmentally safe treatments. This minimizes chemical use while maintaining a pest-free home.
Quote: “Prevention is the most effective form of pest control.” – National Pest Management Association
Seasonal Pest Prevention Tools
● Snap traps and humane rodent traps
● Sticky traps for insects
● Outdoor perimeter sprays (eco-friendly)
● Moisture meters to detect early termite or mold problems
Pro Tip: Keep tools organized and accessible to act quickly when pest activity is noticed.
Planning: Annual Pest Calendar
Month
Recommended Action
March-April
Spring pest prevention tips: Inspect, seal, clean gutters
June-July
Summer pest prevention guide: Screens, standing water, food storage
September
Seasonal pest checklist: Seal entries, declutter, prep storage
November
Winter rodent entry points: Monitor indoors, maintain traps
Key Takeaways
● Seasonal awareness prevents infestations and property damage
● Consistent inspections and maintenance are essential
● Simple eco-friendly measures can significantly reduce pests
● Use a structured checklist and calendar for effective prevention
Conclusion
Homeowners who stay proactive and follow spring pest prevention tips, along with year-round monitoring, ensure their properties remain safe and comfortable. Using a summer pest prevention guide, checking winter rodent entry points, and maintaining a seasonal pest checklist ensure your home remains safe and comfortable. Remember to combine inspections, physical barriers, and environmentally friendly methods for the best results.
FAQs
Q1: How often should I perform a termite inspection?
A1: Conduct inspections annually, especially in spring, to detect early signs of termite activity and prevent extensive damage.
Q2: Can pests enter my home during winter?
A2: Yes, rodents and insects seek warmth and shelter indoors. Sealing entry points and monitoring for activity is crucial.
Q3: What is the most effective eco-friendly method for pest prevention?
A3: Using natural repellents, encouraging beneficial insects, and eliminating water sources effectively reduces pest populations without chemicals.
Ensure your home is ready for every season. Schedule a professional Virginia pest control consultation or a termite inspection in Suffolk, VA, today and stay ahead of potential infestations.
 KSI Kitchen & Bath
When culinary photographer, chef, and media personality Megan and her husband Mark came to us for his- and hers- bathroom remodels, We knew the collaboration would yield incredible results! They had exciting inspirations for their baths and were willing to explore some out-of-box design concepts that made the dual project especially enticing. In the hallway bath, they were hoping to make better use of adjacent space and enlarge the room to create a spa getaway for Megan. Meanwhile, their en suite master bath was outdated and seriously lacking in both style and storage for Mark's taste. They came prepared to our initial consultation with several inspiration photos to work off of for both space planning and material selections. Megan’s inspirations were light, airy, and leaned into some beautiful physical and visual textures. Mark’s inspirations were dark, moody, and included woodworking details and wainscoting reminiscent of a cigar lounge or country club.

 KSI Kitchen & Bath
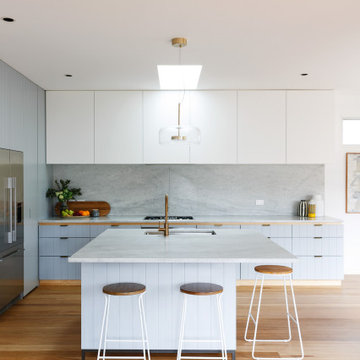
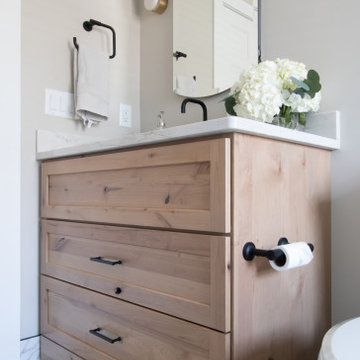
When culinary photographer, chef, and media personality Megan and her husband Mark came to us for his- and hers- bathroom remodels, We knew the collaboration would yield incredible results! They had exciting inspirations for their baths and were willing to explore some out-of-box design concepts that made the dual project especially enticing. In the hallway bath, they were hoping to make better use of adjacent space and enlarge the room to create a spa getaway for Megan. Meanwhile, their en suite master bath was outdated and seriously lacking in both style and storage for Mark's taste. They came prepared to our initial consultation with several inspiration photos to work off of for both space planning and material selections. Megan’s inspirations were light, airy, and leaned into some beautiful physical and visual textures. Mark’s inspirations were dark, moody, and included woodworking details and wainscoting reminiscent of a cigar lounge or country club.
 KSI Kitchen & Bath
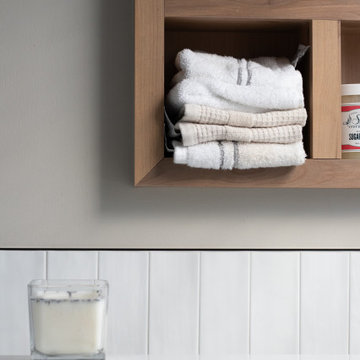
When culinary photographer, chef, and media personality Megan and her husband Mark came to us for his- and hers- bathroom remodels, We knew the collaboration would yield incredible results! They had exciting inspirations for their baths and were willing to explore some out-of-box design concepts that made the dual project especially enticing. In the hallway bath, they were hoping to make better use of adjacent space and enlarge the room to create a spa getaway for Megan. Meanwhile, their en suite master bath was outdated and seriously lacking in both style and storage for Mark's taste. They came prepared to our initial consultation with several inspiration photos to work off of for both space planning and material selections. Megan’s inspirations were light, airy, and leaned into some beautiful physical and visual textures. Mark’s inspirations were dark, moody, and included woodworking details and wainscoting reminiscent of a cigar lounge or country club.
2