Search results for "Prepared" in Home Design Ideas
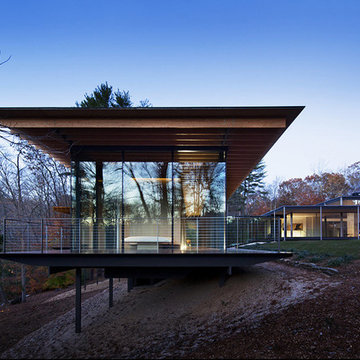
A sleeping alcove tucked into one end of a guest room just off the main living area provides respite even when the rest of the home is busy.
Images | Kurt Jordan Photography
Find the right local pro for your project

Sally Painter
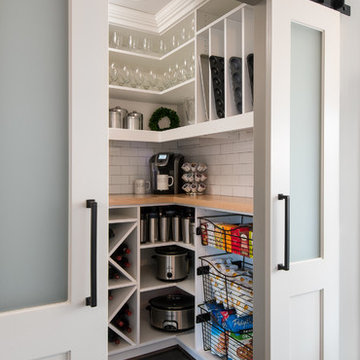
Enclosed kitchen - craftsman u-shaped medium tone wood floor enclosed kitchen idea in Portland with a farmhouse sink, recessed-panel cabinets, white cabinets, wood countertops, white backsplash, subway tile backsplash and stainless steel appliances

Wolf 30" M Series Contemporary Convection Steam Oven Black | CSO30CM
Available at Universal Appliance and Kitchen Center | uakc.com
Easy-access water tank:
The oven’s large water tank provides 90 minutes of continuous steam cooking. Thoughtfully designed, it can be refilled when needed without opening the oven door and interrupting the cooking process.
Largest interior capacity:
More than 25 percent larger than similar units, large enough to roast a 15-pound turkey, Wolf’s steam oven lets you prepare larger items and even multiple dishes at once.
Design flexibility:
Install the unit flush with cabinetry to seamlessly integrate it into your kitchen design. And since the unit isn’t plumbed, it can be installed anywhere without requiring special water lines.
10 cooking modes:
Precisely control heat, steam and airflow for the best results with any dish with 10 cooking modes: Steam, Reheat, Auto Steam Bake, Convection, Convection Humid, Convection Steam, Gourmet, Slow Roast, Recipes, and Keep Warm.
Steam mode:
Steam mode heats with steam and hot air, achieving a temperature range from 85°F-210°F. From vegetables, poultry and fish to grains, beans, pasta and egg dishes, gentle steam heat is ideal for capturing nutrition, color and flavor.
Reheat mode:
Reheat mode uses steam and hot air to rehydrate food gently. Using convection and the right amount of moisture, Reheat mode warms one to four pans of food evenly and without drying with a temperature range from 210°F to 300°F.
Auto Steam Bake mode:
By heating with steam first, then using convection heat to finish, bagels, breads, buns, rolls and pastries acquire a tender interior and a natural shine without the need for brushing with an egg wash. Auto Steam Bake mode temperatures range from 210°F to 445°F.
Convection mode:
A fan circulates hot air from a heating element at the back of the oven to distribute heat evenly around food for consistent results and browning. Convection mode temperatures range from 85°F to 445°F.
Convection Humid mode:
In Convection Humid mode, a heating element at the back of the oven produces heat and oven ventilation is sealed so that moisture produced during cooking remains in the oven. Convection Humid temperatures range from 85°F to 445°F.
Convection Steam mode:
Use Convection Steam for any foods you want to be tender inside and roasted or crisped outside. Convection steam mode temperatures range from 85°F to 445°F.
Gourmet mode:
Gourmet mode uses a climate sensor to adjust time, temperature and humidity for ideal results with no guesswork.
Slow Roast mode:
Slow Roast mode is an ultimate convenience. Insert the probe into your prepared meat, select a slow roast setting for the dish you're preparing, tell the oven what time you want it done, and come home to a perfectly cooked meal.
Recipes mode:
Use Recipes mode and the collection of built-in recipes to harness the power of the oven's many different cooking modes to easily cook entire meals from appetizers and entrees to desserts.
Keep Warm mode:
The combination of convection and steam heat preserves food’s taste, texture, looks and quality so every bite is as delicious as if it were fresh from the oven. Keep multiple dinner plates warm at once, making staggered meal times more convenient.
Temperature probe:
The temperature probe alerts you when your dish has reached the desired temperature, eliminating guesswork when preparing roasts and other meats.
Multiple pans and rack positions:
Two included pans can be placed in any of four rack positions. Both pans are stainles steel – one solid, and the other with a perforated bottom that is particularly well-suited for dishes prepared in Steam mode.
Delayed start:
What time would you like your dish to be ready? Simply program in a time. The oven turns on at the right moment and adjusts the cooking process so the food is ready to serve precisely when you want it.
Technical Features:
Shipping Weight (lbs): 80
Electrical Requirements: 220/240V, 60Hz, 20 amp dedicated circuit
Dimensions: 29 7/8"W x 17 7/8"H x 21 1/2"D
Star-K Kosher certified as Sabbath and holiday-compliant

Richard Leo Johnson
Wall Color: Super White - Regal Aqua Satin, Latex Flat (Benjamin Moore)
Trim Color: Super White - Oil, Semi Gloss (Benjamin Moore)
Floor Color: Super White - Oil, Semi Gloss (Benjamin Moore)
Wallpaper: Orissa Silk TT62702 - Seabrook
Window Treatment: Custom White Linen Roman Shade (Maureen Eason Designs)
Chandelier: Hidden Galleries
Curtain System: Covoc
Curtain Fabric: Mazane Saraille - Designer's Guild

Wolf 30" M Series Transitional Convection Steam Oven Black | CSO30TM
Available at Universal Appliance and Kitchen Center | uakc.com
Easy-access water tank:
The oven’s large water tank provides 90 minutes of continuous steam cooking. Thoughtfully designed, it can be refilled when needed without opening the oven door and interrupting the cooking process.
Largest interior capacity:
More than 25 percent larger than similar units, large enough to roast a 15-pound turkey, Wolf’s steam oven lets you prepare larger items and even multiple dishes at once.
Design flexibility:
Install the unit flush with cabinetry to seamlessly integrate it into your kitchen design. And since the unit isn’t plumbed, it can be installed anywhere without requiring special water lines.
10 cooking modes:
Precisely control heat, steam and airflow for the best results with any dish with 10 cooking modes: Steam, Reheat, Auto Steam Bake, Convection, Convection Humid, Convection Steam, Gourmet, Slow Roast, Recipes, and Keep Warm.
Steam mode:
By heating with steam first, then using convection heat to finish, bagels, breads, buns, rolls and pastries acquire a tender interior and a natural shine without the need for brushing with an egg wash. Auto Steam Bake mode temperatures range from 210°F to 445°F.
Reheat mode:
Reheat mode uses steam and hot air to rehydrate food gently. Using convection and the right amount of moisture, Reheat mode warms one to four pans of food evenly and without drying with a temperature range from 210°F to 300°F.
Auto Steam Bake mode:
By heating with steam first, then using convection heat to finish, bagels, breads, buns, rolls and pastries acquire a tender interior and a natural shine without the need for brushing with an egg wash. Auto Steam Bake mode temperatures range from 210°F to 445°F.
Convection mode:
A fan circulates hot air from a heating element at the back of the oven to distribute heat evenly around food for consistent results and browning. Convection mode temperatures range from 85°F to 445°F.
Convection Humid mode:
In Convection Humid mode, a heating element at the back of the oven produces heat and oven ventilation is sealed so that moisture produced during cooking remains in the oven. Convection Humid temperatures range from 85°F to 445°F.
Convection Steam mode:
Use Convection Steam for any foods you want to be tender inside and roasted or crisped outside. Convection steam mode temperatures range from 85°F to 445°F.
Gourmet mode:
Gourmet mode uses a climate sensor to adjust time, temperature and humidity for ideal results with no guesswork.
Slow Roast mode:
Slow Roast mode is an ultimate convenience. Insert the probe into your prepared meat, select a slow roast setting for the dish you're preparing, tell the oven what time you want it done, and come home to a perfectly cooked meal.
Recipes mode:
Use Recipes mode and the collection of built-in recipes to harness the power of the oven's many different cooking modes to easily cook entire meals from appetizers and entrees to desserts.
Keep Warm mode:
The combination of convection and steam heat preserves food’s taste, texture, looks and quality so every bite is as delicious as if it were fresh from the oven. Keep multiple dinner plates warm at once, making staggered meal times more convenient.
Temperature probe:
The temperature probe alerts you when your dish has reached the desired temperature, eliminating guesswork when preparing roasts and other meats.
Multiple pans and rack positions:
Two included pans can be placed in any of four rack positions. Both pans are stainles steel – one solid, and the other with a perforated bottom that is particularly well-suited for dishes prepared in Steam mode.
Delayed start:
What time would you like your dish to be ready? Simply program in a time. The oven turns on at the right moment and adjusts the cooking process so the food is ready to serve precisely when you want it.
Technical Features:
Shipping Weight (lbs): 80
Electrical Requirements: 220/240V, 60Hz, 20 amp dedicated circuit
Dimensions: 29 7/8"W x 17 7/8"H x 21 1/2"D
Star-K Kosher certified as Sabbath and holiday-compliant

Professional wallpaper installation Old Town requires expertise that honors the neighborhood's historic character while delivering modern durability and beauty.
Project Overview and Architecture
This Old Town wallpaper installation showcased our ability to work with the area's distinctive architecture, from classic greystones to renovated vintage condos that define this prestigious neighborhood.
Materials and Products
We selected premium wallpaper materials specifically designed for Chicago's climate conditions, using high-quality adhesives and primers that ensure long-lasting adhesion on various surface types.
Installation Process
Step 1: Surface preparation including cleaning, smoothing, and addressing imperfections common in older buildings
Step 2: Professional repairs to walls ensuring perfect foundation for wallpaper application
Step 3: Quality primer application designed specifically for wallpaper adhesion and longevity
Step 4: Expert wallpaper installation with precise pattern matching and seamless application techniques
Chicago-Specific Challenges
Old Town homes present unique challenges including weather exposure, aging building materials, potential lead paint considerations, and vintage surfaces requiring specialized preparation techniques.
Results Achieved
Windy City Painters delivered flawless wallpaper installation that enhanced the room's aesthetic while respecting the architectural integrity of this historic Old Town property.
Professional Tips
Homeowners should always hire experienced professionals for wallpaper installation, especially in historic properties where surface preparation and material selection significantly impact long-term success and beauty.
See more work and request free estimate at windypainters.com.
FAQs
Q: Why hire professionals for wallpaper installation Old Town homes? / A: Expert installation prevents costly mistakes, ensures proper adhesion, and preserves historic property values through quality craftsmanship.
Q: What wallpaper materials work best in Chicago climate? / A: High-quality papers with proper backing designed for humidity fluctuations and temperature changes typical in Chicago homes.
Q: How do you prepare Old Town walls for wallpaper? / A: Thorough cleaning, surface smoothing, repairs, and specialized primers ensure optimal wallpaper installation adhesion and longevity.
Q: Can wallpaper be installed over existing paint? / A: Sometimes, but professional assessment determines if surface preparation or primer application is needed for successful wallpaper installation.
Q: How long does professional wallpaper installation take? / A: Most rooms completed within one day, depending on size, pattern complexity, and surface preparation requirements.
Q: What about removing old wallpaper first? / A: We safely remove existing wallpaper using proper techniques that protect walls and prepare surfaces for new installation.
Q: Do you offer design consultation for wallpaper selection? / A: Yes, we help choose patterns and materials that complement Old Town architectural character and personal style preferences.
Q: How do you handle pattern matching across walls? / A: Precise measurements and expert techniques ensure seamless wallpaper installation with perfect pattern alignment throughout rooms.
Q: What's your wallpaper installation warranty coverage? / A: Comprehensive warranties cover both materials and workmanship, giving you confidence in your wallpaper installation investment.
Q: Can you work around furniture and schedules? / A: Absolutely! We coordinate timing and setup to minimize disruption during your professional wallpaper installation project.

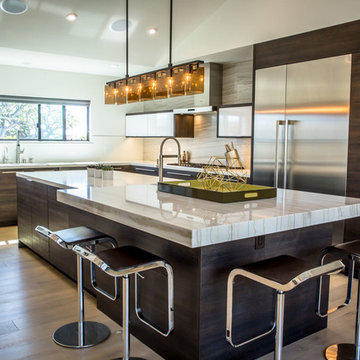
We began our design in this OKC kitchen by re-orientating the layout of the kitchen and all work zones. The homeowners wanted a larger island with space to prepare meals while capturing the impressive lake views to the rear of the home. We replaced the closed in Highbar with an open and expansive island showcasing a lowered eating area, perfect for breakfast and entertaining while meals are prepared. Our mitered door custom cabinets are presented with a sophisticated and up and coming color palette for those that are leaning away from basic white cabinets. To bring more warmth into the space, we stained the rift sawn oak in medium brown and finished with a soft glaze. We then contrast this with matte black interiors in the glass cabinets. The matte black is repeated on the venthood which has been accented with high gloss striping. The large pull-outs flanking the fridge provide plenty of storage, while the integrated backsplash shelf provides architectural interest with additional space for bottles and spices near the induction cooktop. The brushed gold hardware provides the perfect jewelry for the kitchen – now warm, inviting, and irresistible!

Kitchen is open to the dining area and the living room. Mix of quart finishes and wood colors to create interest.
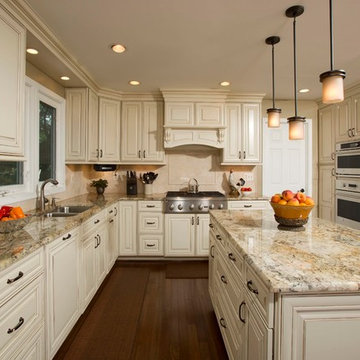
Open concept kitchen - mid-sized transitional l-shaped dark wood floor and brown floor open concept kitchen idea in Charlotte with a single-bowl sink, shaker cabinets, white cabinets, quartz countertops, white backsplash, porcelain backsplash, stainless steel appliances, an island and multicolored countertops

Photo: Nanette Wong © 2014 Houzz
Example of a transitional kids' room design in San Francisco

SKI Design - Suzy Kennedy, Smook Architecture and Design, Eric Roth Photography
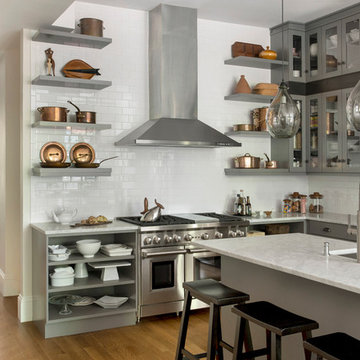
Example of a classic dark wood floor open concept kitchen design in Boston with an undermount sink, raised-panel cabinets, white cabinets, multicolored backsplash, stainless steel appliances, an island and multicolored countertops

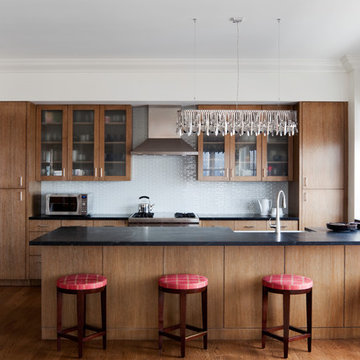
The kitchen island leads into the family room, where glowing floral lighting call to the gardens outside. Nature inspired artwork by Kaoru Mansour and Joyce Gehl hang on the walls, creating another conversation with the plant life outside.A Calacata Avorio marble island offers a large surface to prepare food, or enjoy breakfast while admiring exterior views. Stacks of produce are at the ready for convenient snacking, with vegan cookbooks close at hand in preparation for larger meals. A custom niche was designed to display a pottery collection, and offers another space for plant life to grow. Golden hues in the marble add warmth. Wooden bar stools neatly tuck into the island, perfect for socializing and conversation while preparing meals. The kitchen was made with natural materials to inspire peace, and encourage a connection between the environment when considering the food being prepared. A custom knife drawer as part of cabinetry made in collaboration with a local artisan, conveniently located near the oven for easy preparation. FSC certified no VOC apple ply was used for the cabinetry. Custom silverware drawers give ample space for a variety of flatware. Fresh fruit available for healthy snacking doubles as colorful decor. Artwork by Karen Sikie provides a permanent bouquet when flowers begin to wilt. The pantry, featuring a large concealed fridge to match the cabinetry. On the left, two freezer drawers sit below the counter, with additional storage for dried goods and spices. Custom cabinets made in collaboration with a local craftsperson are painted in a warm grey to bring out the dove tones in the marble. The counter tops were specified to reach the clients ideal height for food preparation. The kitchen is designed for ease of use and calm, creating a mindful experience for cooking.

Differences in Installation:
Concrete slab is somewhat easy to install, but the material takes time to dry and cure. The installation process includes excavation, grading, preparation of the foundation, setting forms, and pouring the concrete. One of the major downsides to concrete is it can crack when the ground below flexes. It is also very important to get the grading just right with a concrete installation, as it can be a very costly error to fix once the concrete has been poured. Improper concrete grading can lead to low spots which will retain water, leaving discolorations and staining.
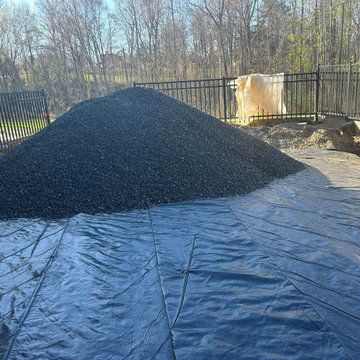
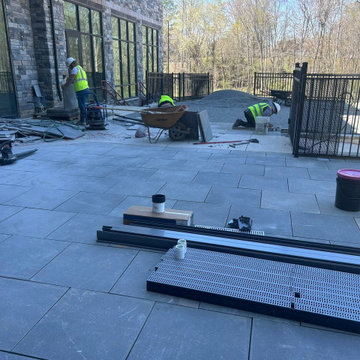
Paving stones require a lot more preparation which makes for a more labor intensive installation. The paver installation process includes: excavation, grading, sub-base compaction, geotextile fiber install, base preparation, base compaction, sand preparation, lay the pavers, cut the borders, prepare the bond beam, compact the stones, and finally seal the pavers upon completion. Since there is no curing time with paving stones, the paver installation is ready to use immediately upon completion. Also, if the grading happened to be slightly off or settling occurred later down the line, the pavers can easily be readjusted to correct the issue.

Coco coir is a versatile and sustainable growing medium that is gaining popularity among gardeners. Made from the fibrous husk of coconuts, it’s an eco-friendly alternative to peat moss and can greatly enhance the quality of your soil. In gardening, it is often utilized in systems like Coco Coir Hydroponic, where it helps create an efficient water and nutrient delivery system.
What is Coco Coir?
Coco coir is a natural fiber extracted from coconut husks. It has a neutral pH, excellent water retention, and is reusable, making it a favorite among gardeners who prefer organic and sustainable practices. It is available in different forms such as blocks, bricks, or loose coir, each requiring some preparation before use in gardening.
Benefits of Using Coco Coir in Gardening
Coco coir offers several advantages for gardening. Here are the benefits of using coco coir in gardening:
Holds up to 10 times its weight in water, ensuring plants have consistent moisture.
Promotes oxygen flow to plant roots, leading to healthier root systems.
Coco coir is a renewable and eco-friendly alternative to peat moss.
It can be washed, rehydrated, and reused, reducing waste.
Naturally pH neutral, making it suitable for various plants without major adjustments.
Enhances the texture and moisture retention of garden soil.
How to Prepare Coco Coir for Planting
Preparing coco coir for planting involves a few essential steps. First, you need to hydrate the coir block, as it typically comes in a compressed form. Place the block in a large container and add warm water, allowing the block to expand and absorb the water. Once fully expanded, the coir should be fluffed up by breaking it apart with your hands or a tool to ensure it becomes loose and airy. After the coir has been fluffed, it is important to drain any excess water, as overly wet coir can lead to root suffocation. Finally, since coco coir is inert and does not contain nutrients, it’s a good idea to add organic compost or liquid fertilizer to enrich the coir before planting.
Do You Need to Soak Coco Coir Before Planting?
Yes, soaking coco coir before planting is necessary. Since it comes in a compressed form, it needs to be broken down and hydrated for proper use. The soaking process allows the coir to expand and release the fibers, making it usable as a growing medium. After soaking, the coir should be fluffed to ensure the water is evenly distributed. Draining any excess water is crucial because overly wet coir may impede plant root health.
How to Prepare Coco Peat for Planting
Coco peat, a fine, powdery form of coco coir, is highly beneficial for seed starting and improving water retention in soil. To prepare coco peat, it first needs to be hydrated, similar to how you prepare coir blocks. Slowly add water to the peat in a container and allow it to absorb and fluff up. Once hydrated, coco peat can be used on its own or mixed with other growing media such as perlite or vermiculite for added aeration and drainage. It is advisable to check the pH level of your final mix, as coco peat generally has a neutral pH, but adjustments may be necessary depending on the plants being grown.
Can You Use Just Coco Coir for Plants?
Yes, coco coir can be used by itself to grow plants, especially in hydroponic systems or as a seed-starting medium. However, because coco coir does not naturally contain nutrients, you will need to provide regular fertilizer to support plant growth. This makes it particularly suitable for plants grown in controlled environments, such as hydroponics, where nutrient solutions can be carefully managed. In traditional soil-based gardening, mixing coco coir with other organic materials like compost is recommended to provide essential nutrients and improve the overall soil structure.
How to Use Coco Coir in Hydroponics
Coco coir is widely used in hydroponic systems due to its water retention and aeration properties. To use coco coir in hydroponics, it first needs to be soaked and hydrated, as discussed earlier. Once the coir is fully prepared, it can be placed in the hydroponic system. Since coco coir does not contain natural nutrients, you will need to supply a balanced nutrient solution tailored for hydroponic plants. Regular monitoring of water and nutrient levels is essential to prevent nutrient imbalances or root rot. One of the benefits of coco coir in hydroponics is its reusability. After completing a growing cycle, the coir can be washed, rehydrated, and used again in future plantings.
Using Coco Coir as a Soil Amendment
Coco coir is also an excellent soil amendment, as it improves the texture and moisture retention of garden soil. To use coco coir in this way, mix loose coir with your existing garden soil at a ratio of one part coco coir to two parts soil. This will help retain moisture without compacting the soil, improving both water drainage and root growth. For optimal results, you can also add organic compost to the mix, ensuring that the nutrient levels are sufficient for plant growth. Coco coir works particularly well in raised beds, where it helps maintain proper soil structure over time.
Advantages of Using Coco Coir Over Peat Moss
While peat moss has been traditionally used as a growing medium, coco coir offers several advantages over it. Coco coir is a renewable resource, as it is a byproduct of coconut processing, while peat moss is harvested from peat bogs that take centuries to regenerate. Coco coir is also more durable, as it can be reused multiple times without breaking down, while peat moss disintegrates after a single use. Another key benefit is its neutral pH, whereas peat moss is more acidic and may require balancing to meet the needs of specific plants.
Conclusion
Coco coir is a highly versatile and sustainable growing medium that benefits both novice and experienced gardeners alike. Whether you are using it for hydroponics, as a soil amendment, or as a standalone medium for growing plants, knowing how to properly prepare and use it is key to maximizing its benefits. By following the steps detailed above, you can improve water retention, aeration, and overall plant health in your garden, all while contributing to eco-friendly gardening practices.

The kitchen island leads into the family room, where glowing floral lighting call to the gardens outside. Nature inspired artwork by Kaoru Mansour and Joyce Gehl hang on the walls, creating another conversation with the plant life outside.A Calacata Avorio marble island offers a large surface to prepare food, or enjoy breakfast while admiring exterior views. Stacks of produce are at the ready for convenient snacking, with vegan cookbooks close at hand in preparation for larger meals. A custom niche was designed to display a pottery collection, and offers another space for plant life to grow. Golden hues in the marble add warmth. Wooden bar stools neatly tuck into the island, perfect for socializing and conversation while preparing meals. The kitchen was made with natural materials to inspire peace, and encourage a connection between the environment when considering the food being prepared. A custom knife drawer as part of cabinetry made in collaboration with a local artisan, conveniently located near the oven for easy preparation. FSC certified no VOC apple ply was used for the cabinetry. Custom silverware drawers give ample space for a variety of flatware. Fresh fruit available for healthy snacking doubles as colorful decor. Artwork by Karen Sikie provides a permanent bouquet when flowers begin to wilt. The pantry, featuring a large concealed fridge to match the cabinetry. On the left, two freezer drawers sit below the counter, with additional storage for dried goods and spices. Custom cabinets made in collaboration with a local craftsperson are painted in a warm grey to bring out the dove tones in the marble. The counter tops were specified to reach the clients ideal height for food preparation. The kitchen is designed for ease of use and calm, creating a mindful experience for cooking.

The kitchen island leads into the family room, where glowing floral lighting call to the gardens outside. Nature inspired artwork by Kaoru Mansour and Joyce Gehl hang on the walls, creating another conversation with the plant life outside.A Calacata Avorio marble island offers a large surface to prepare food, or enjoy breakfast while admiring exterior views. Stacks of produce are at the ready for convenient snacking, with vegan cookbooks close at hand in preparation for larger meals. A custom niche was designed to display a pottery collection, and offers another space for plant life to grow. Golden hues in the marble add warmth. Wooden bar stools neatly tuck into the island, perfect for socializing and conversation while preparing meals. The kitchen was made with natural materials to inspire peace, and encourage a connection between the environment when considering the food being prepared. A custom knife drawer as part of cabinetry made in collaboration with a local artisan, conveniently located near the oven for easy preparation. FSC certified no VOC apple ply was used for the cabinetry. Custom silverware drawers give ample space for a variety of flatware. Fresh fruit available for healthy snacking doubles as colorful decor. Artwork by Karen Sikie provides a permanent bouquet when flowers begin to wilt. The pantry, featuring a large concealed fridge to match the cabinetry. On the left, two freezer drawers sit below the counter, with additional storage for dried goods and spices. Custom cabinets made in collaboration with a local craftsperson are painted in a warm grey to bring out the dove tones in the marble. The counter tops were specified to reach the clients ideal height for food preparation. The kitchen is designed for ease of use and calm, creating a mindful experience for cooking.

Wolf 30" M Series Contemporary Convection Steam Oven Black | CSO30CM
Available at Universal Appliance and Kitchen Center | uakc.com
Easy-access water tank:
The oven’s large water tank provides 90 minutes of continuous steam cooking. Thoughtfully designed, it can be refilled when needed without opening the oven door and interrupting the cooking process.
Largest interior capacity:
More than 25 percent larger than similar units, large enough to roast a 15-pound turkey, Wolf’s steam oven lets you prepare larger items and even multiple dishes at once.
Design flexibility:
Install the unit flush with cabinetry to seamlessly integrate it into your kitchen design. And since the unit isn’t plumbed, it can be installed anywhere without requiring special water lines.
10 cooking modes:
Precisely control heat, steam and airflow for the best results with any dish with 10 cooking modes: Steam, Reheat, Auto Steam Bake, Convection, Convection Humid, Convection Steam, Gourmet, Slow Roast, Recipes, and Keep Warm.
Steam mode:
Steam mode heats with steam and hot air, achieving a temperature range from 85°F-210°F. From vegetables, poultry and fish to grains, beans, pasta and egg dishes, gentle steam heat is ideal for capturing nutrition, color and flavor.
Reheat mode:
Reheat mode uses steam and hot air to rehydrate food gently. Using convection and the right amount of moisture, Reheat mode warms one to four pans of food evenly and without drying with a temperature range from 210°F to 300°F.
Auto Steam Bake mode:
By heating with steam first, then using convection heat to finish, bagels, breads, buns, rolls and pastries acquire a tender interior and a natural shine without the need for brushing with an egg wash. Auto Steam Bake mode temperatures range from 210°F to 445°F.
Convection mode:
A fan circulates hot air from a heating element at the back of the oven to distribute heat evenly around food for consistent results and browning. Convection mode temperatures range from 85°F to 445°F.
Convection Humid mode:
In Convection Humid mode, a heating element at the back of the oven produces heat and oven ventilation is sealed so that moisture produced during cooking remains in the oven. Convection Humid temperatures range from 85°F to 445°F.
Convection Steam mode:
Use Convection Steam for any foods you want to be tender inside and roasted or crisped outside. Convection steam mode temperatures range from 85°F to 445°F.
Gourmet mode:
Gourmet mode uses a climate sensor to adjust time, temperature and humidity for ideal results with no guesswork.
Slow Roast mode:
Slow Roast mode is an ultimate convenience. Insert the probe into your prepared meat, select a slow roast setting for the dish you're preparing, tell the oven what time you want it done, and come home to a perfectly cooked meal.
Recipes mode:
Use Recipes mode and the collection of built-in recipes to harness the power of the oven's many different cooking modes to easily cook entire meals from appetizers and entrees to desserts.
Keep Warm mode:
The combination of convection and steam heat preserves food’s taste, texture, looks and quality so every bite is as delicious as if it were fresh from the oven. Keep multiple dinner plates warm at once, making staggered meal times more convenient.
Temperature probe:
The temperature probe alerts you when your dish has reached the desired temperature, eliminating guesswork when preparing roasts and other meats.
Multiple pans and rack positions:
Two included pans can be placed in any of four rack positions. Both pans are stainles steel – one solid, and the other with a perforated bottom that is particularly well-suited for dishes prepared in Steam mode.
Delayed start:
What time would you like your dish to be ready? Simply program in a time. The oven turns on at the right moment and adjusts the cooking process so the food is ready to serve precisely when you want it.
Technical Features:
Shipping Weight (lbs): 80
Electrical Requirements: 220/240V, 60Hz, 20 amp dedicated circuit
Dimensions: 29 7/8"W x 17 7/8"H x 21 1/2"D
Star-K Kosher certified as Sabbath and holiday-compliant
5