
Search results for "Prevent damage" in Home Design Ideas
 Kairos Home Improvement Inc.
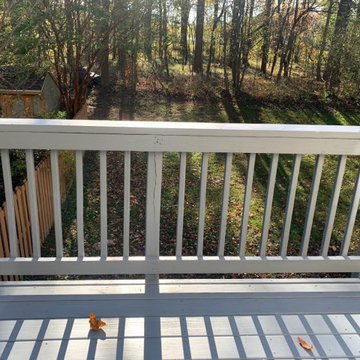
Installation of new wooden planks on deck where needed and painted over for a brighter look. Pickets were re-enforced where needed and painted the same color. We finished with deck over to prevent weather damage.
 Nova Remodeling Inc
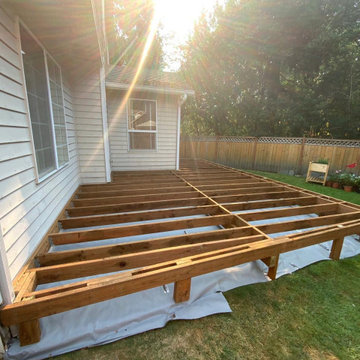
his Burien deck project transformed a basic backyard into a stunning outdoor living space.
We started by laying a solid foundation with pressure-treated framing to ensure structural stability. A weather-resistant barrier was installed beneath to prevent moisture damage and enhance longevity. The deck surface was crafted with high-performance composite decking, offering a sleek, modern appearance with minimal maintenance required.
A custom wrap-around design was integrated, expanding functionality and creating multiple entertaining zones. Sturdy steps and seamless edging provided a polished, finished look. The project was completed with a stylish planter box, blending natural elements into the design while maximizing outdoor comfort.
The result is a high-end deck built to withstand the elements while elevating the home’s curb appeal and usability. This Burien deck renovation showcases expert craftsmanship and high-quality materials, making it the perfect spot for relaxation and gatherings.
 Jans Awning Products
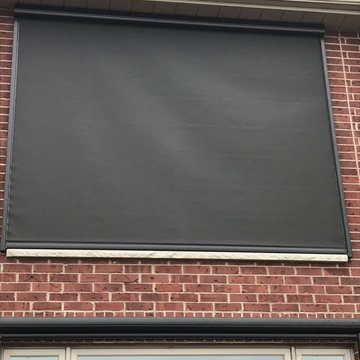
Retractable screens optimize your comfort and privacy while also providing superior solar protection by preventing UV damage. Retractable screens are totally personalized to your needs; they provide shade when you need it most and when not in use, the screen retracts into a 5” panel box.
Find the right local pro for your project
 Nova Remodeling Inc
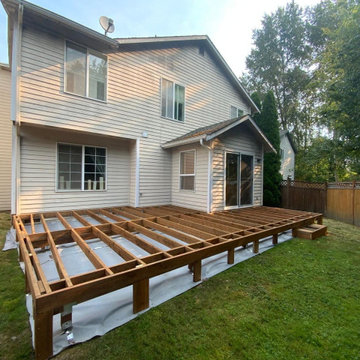
his Burien deck project transformed a basic backyard into a stunning outdoor living space.
We started by laying a solid foundation with pressure-treated framing to ensure structural stability. A weather-resistant barrier was installed beneath to prevent moisture damage and enhance longevity. The deck surface was crafted with high-performance composite decking, offering a sleek, modern appearance with minimal maintenance required.
A custom wrap-around design was integrated, expanding functionality and creating multiple entertaining zones. Sturdy steps and seamless edging provided a polished, finished look. The project was completed with a stylish planter box, blending natural elements into the design while maximizing outdoor comfort.
The result is a high-end deck built to withstand the elements while elevating the home’s curb appeal and usability. This Burien deck renovation showcases expert craftsmanship and high-quality materials, making it the perfect spot for relaxation and gatherings.

 Allreno
In What Order Should You Renovate a Kitchen? Revolutionizing Kitchen and Bath Renovation with Allreno's Design AI
Renovating a kitchen can be one of the most exciting and rewarding home improvement projects. However, with so many decisions to make, it can also be overwhelming. From selecting kitchen cabinets to choosing countertops and appliances, the process often involves careful planning and organization. So, how do you ensure the renovation goes smoothly? One important factor is knowing the right order in which to tackle the project.
The Right Order for Kitchen Renovation
Renovating a kitchen involves multiple steps, and knowing the proper order of operations is crucial for both time efficiency and cost savings. Here’s a general guideline for how to approach your kitchen renovation:
1. Planning and Design: The first step in any renovation is planning. This includes deciding on the layout, design, and features you want in your kitchen. At this stage, you’ll also need to think about your budget and timeline. It’s essential to finalize these details before moving forward with the actual work.
2. Demolition: Once the design is set, it’s time to remove old fixtures, cabinets, appliances, and flooring. Demolition can be a messy process, but it’s necessary for starting fresh. Having a professional handle this phase is often a smart move to ensure everything is safely removed.
3. Structural Work: If you plan on altering the layout of the kitchen by knocking down walls or adding new plumbing or electrical work, now is the time to do it. Structural changes can be complicated and costly, so it’s important to ensure these are completed before installing any new elements.
4. Plumbing and Electrical Work: With the structure in place, you can begin installing plumbing and electrical systems. This might include adding new water lines, sinks, or electrical outlets for appliances. It’s best to bring in licensed professionals for this stage, as electrical and plumbing work requires expert knowledge.
5. Cabinet Installation: Once the plumbing and electrical work are in place, you can install the kitchen cabinets. Cabinets are one of the most important elements of the kitchen, and the Allreno design AI can make this process easier. Allreno's AI-driven platform allows you to visualize how different kitchen cabinets will fit into your space, ensuring you make the best choice based on your preferences and layout.
6. Countertops: After the cabinets are installed, it’s time to add countertops. Whether you choose granite, quartz, or a more budget-friendly option, countertops are a focal point of the kitchen, and they should complement the cabinets and other design elements.
7. Flooring: Now that the major structural elements are in place, it’s time to install your flooring. Whether you opt for tile, hardwood, or vinyl, flooring should be installed after the cabinets and countertops to prevent any damage during the installation process.
8. Appliances and Fixtures: With the foundation in place, you can now add your appliances (oven, refrigerator, dishwasher, etc.) and fixtures (sink, faucets, lighting). Allreno’s AI can also help here by offering kitchen design recommendations based on available appliances and space dimensions.
9. Final Touches: The last step is adding the finishing touches to your kitchen. This includes painting the walls, adding backsplash tiles, and installing accessories like handles and knobs on your cabinets. This is also the stage where you can implement any stylistic choices to make the space uniquely yours.
How Allreno's AI Transforms the Renovation Process
One of the biggest challenges of a kitchen renovation is visualizing how everything will come together. Allreno’s design AI changes that by offering an intuitive platform that brings your ideas to life. Here’s how:
• Personalized Design Recommendations: Allreno’s AI suggests design elements based on your preferences, style, and space dimensions. Whether it’s selecting the perfect kitchen cabinets or countertop finishes, the AI ensures everything works together cohesively.
• 3D Visualization: With Allreno’s AI-driven design tools, you can visualize your kitchen layout in 3D before any work begins. This allows you to see how different elements will fit into your space and make adjustments as needed.
• Efficient Project Management: Allreno helps you streamline the entire renovation process by generating accurate material lists, estimates, and timelines. This means you can avoid costly errors and keep your renovation on track.
Conclusion
Renovating a kitchen is an exciting project, but it requires careful planning and organization to ensure it’s done right. By following a strategic order of operations and leveraging cutting-edge technology like Allreno’s design AI, homeowners can streamline the process, save time and money, and bring their dream kitchen to life with ease. Allreno not only simplifies the design process but also provides innovative solutions that make kitchen and bath renovations faster and more efficient than ever before.
Ready to get started with your kitchen renovation? Allreno's AI-powered design platform is here to help you every step of the way.
 Christopher Scott Cabinetry and Design Inc.
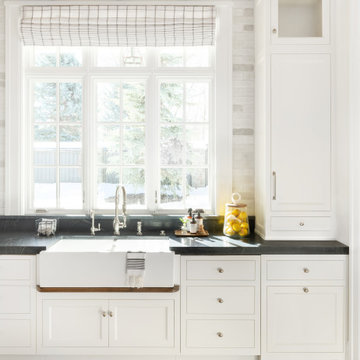
You may overlook small details in your cabinetry if you aren't an expert cabinet maker. For example, the drip protection under the sink- simply adding a wood lip prevents water damage to the cabinetry below the sink.
 Nova Remodeling Inc
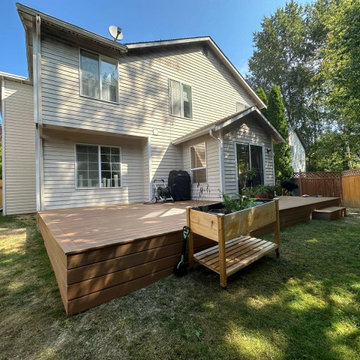
his Burien deck project transformed a basic backyard into a stunning outdoor living space.
We started by laying a solid foundation with pressure-treated framing to ensure structural stability. A weather-resistant barrier was installed beneath to prevent moisture damage and enhance longevity. The deck surface was crafted with high-performance composite decking, offering a sleek, modern appearance with minimal maintenance required.
A custom wrap-around design was integrated, expanding functionality and creating multiple entertaining zones. Sturdy steps and seamless edging provided a polished, finished look. The project was completed with a stylish planter box, blending natural elements into the design while maximizing outdoor comfort.
The result is a high-end deck built to withstand the elements while elevating the home’s curb appeal and usability. This Burien deck renovation showcases expert craftsmanship and high-quality materials, making it the perfect spot for relaxation and gatherings.
 Econize Closets & Blinds
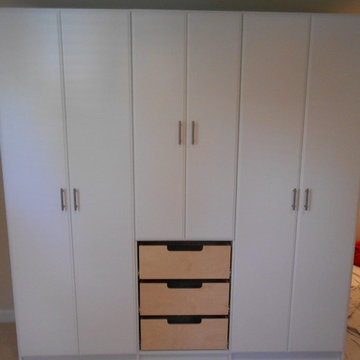
Built-in with Arctic White Finish, Molded doors and drawer fronts, Maple scooped front drawers, and T-pull handles.
Trendy basement photo in DC Metro
Trendy basement photo in DC Metro
 Tile Doctor Ltd
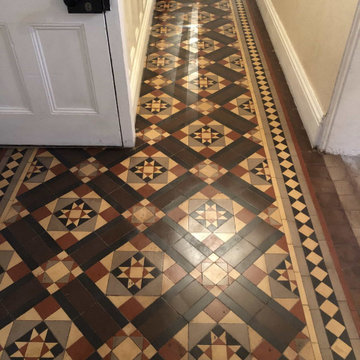
I received this Tile Doctor enquiry from a customer in the historic market town of Kidderminster who had a Victorian Minton Tiled hallway floor that had been covered in carpet for a long time. The carpet had since been removed and now the floor was fully exposed you could see it was covered in carpet glue and dirty with ingrained grime.
I arranged an appointment to inspect the floor thoroughly and provide a quote; you can never be sure what issues you might find, so surveying the floor first ensures I can give an accurate price. As anticipated the entire floor was covered in thick glue, fortunately apart from a few loose tiles the floor was in good order. I explained to the client the process I would use on the floor and that I was confident the floor could be restored for them. My quote was accepted, and we arranged a date to carry out the work.
I often get customers claiming to have an original Minton Tiled floor however there were many manufacturers creating similar patterns at the end of the 19th century, the only way to be certain is to lift a tile and look to see what’s stamped on the back. In this case we had a few loose ones that needed relaying, so I was able to confirm that quite easily.
I arrived on the booked day and the first step was to tape up the surrounding area to prevent any damage from splashing. I was then ready to tackle the glue. I applied a strong solution of Tile Doctor Remove and Go and covered the floor with industrial cling film to allow the solution to get to work without drying out. The film was removed after an hour and then the Remove and Go was worked into the tiles using a coarse 200-grit milling pad to cut through the glue and resurface the tiles.
Afterwards the floor was rinsed with water and the soil removed with a wet vacuum. Some of the glue proved very stubborn to remove and had to be dealt with carefully by hand using an industrial scraper, sometimes a bit of elbow grease is the only way to get the job done.
The floor was then given an Acid Rinse with Tile Doctor Acid Gel, this is designed to further clean the tiles and counter any efflorescent salts that might be present in the tiles due to the lack of damp proof membrane.
After another rinse and soil removal I turned my attention to the loose tiles which were secured by removing the tile, scraping out the adhesive and re-fixing. The appearance of the floor was much improved after day and the floor was then left overnight to dry out in preparation or the sealing process.
Returning the next day, I first checked the floor was dry using a damp meter. Once I was satisfied it was dry, I started to seal the floor. I had selected to use Tile Doctor Seal and Go Extra for sealing. It adds a richness to the colour of the tiles and a subtle sheen finish. I applied three coats, waiting for each one to dry before applying the next.
The pattern on the floor was really nice and the colours were now very vibrant. The client was very pleased and left a great review copied below:
“Our floor wasn’t easy as it had some form of coating on it which was difficult to remove but Mark took a lot of time to ensure the surface was thoroughly clean before the sealant was put down. Very pleased with how it looks. K. B, Kidderminster”
Mark Conway
Worcestershire Tile Doctor
 Iboy Construction Services
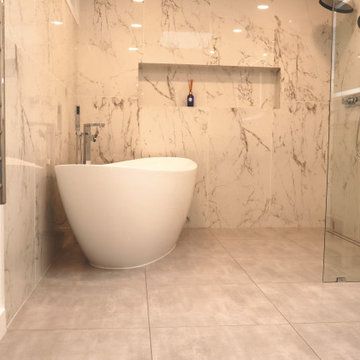
Identify and resolve any current leaks and moisture issues within the bathroom to prevent further damage. Focus on maximizing the available space to create a functional yet elegant design. The centerpiece will be a luxurious two-person walk-in shower with ample space and modern fixtures for a comfortable experience.
 UpperKey
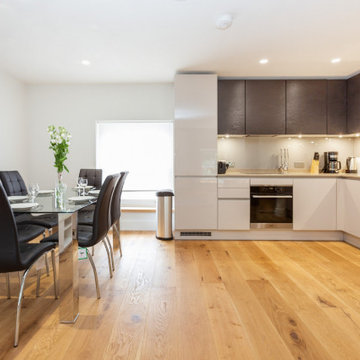
London's kitchens are a great place to install laminate flooring. The floors are easy to clean, durable, and come in a wide variety of colors and styles. Laminate flooring is also a cost-effective solution for homeowners who want a stylish, modern look for their kitchen. Laminate flooring helps to prevent water damage, is scratch-resistant, and can add warmth and beauty to any space. In addition, laminate flooring is a great choice for those who are looking for an affordable option that is easy to install and maintain.

 Care Free Homes, Inc.
This beautiful colonial in Marion, Massachusetts is even more gorgeous with its new GAF Timberline HD roof!
There is more to a roof than shingles – in fact there are several components to a professionally installed GAF Lifetime Roofing System. Here is the anatomy of our Marion homeowner’s roof:
GAF Timberline HD Shingles Marion, MAGAF Timberline HD Roof Shingles: A beautiful architectural shingle at an affordable price! This is our most popular roof shingle here at Care Free Homes! Our Marion customer selected the classic color, Charcoal. This high performance shingle features a 130 mph wind rating and highest possible fire rating.
Underlayment: A felt/paper product that is installed over the entire roof deck, underlayment provides an additional layer of protection between the roof deck and the roof shingles.
Ice Dam and Water Shield: After a brutal winter and unprecedented snow fall, many New England homes suffered damage from ice dams. Ice Dam and Water Shield provides added protection for eves, rakes, valleys as well as flashed areas around vent pipes, chimneys, dormers, and skylights. Whether it’s a winter wonderland or a hurricane, this homeowner will not have to worry about ice dams or driving rain.
GAF Timberline HD, Marion, MA Dormers
Premium Aluminum Drip Edge: Installed along the rakes, drip edge serves several purposes. It improves the efficiency of water shedding, prevents leaking from a wind-driven rain as well as movement between the deck and fascia boards. Drip edge also keeps pesky insects from infiltrating the space between the roof deck and the fascia boards. With a choice of three colors, white, brown and gray, it provides a finished look for a roof.
GAF Pro-Start Eave/Rake Starter Strip: Every story has a beginning and every roof should have a starter strip. Here in New England we’ve got to have our roof be tougher than mother nature. To prevent shingle blow off, an ultra-adhered starter strip properly secures shingles in place during a storm. In contrast, the amateur roofer will often use cut-up shingles as a starter course. This weakened “starter course” lowers the wind resistance of a roof and makes it more susceptible to both wind and water damage. With straighter edges, Dura-Grip adhesive, and outstanding warranties – starter strip will provide beauty, performance and peace of mind.
GAF Cobra Ridge Vent: Ridge vents provide necessary airflow to remove excess heat and moisture in an attic. It inhibits the growth of mold and protects the health of the homeowners as well as their stored possessions. A properly vented attic will also protect homes in harsh winter climates from ice damming.
Why wait? Contact us today and make your house a Care Free home!

 Southern Perfection Painting Inc.
Exterior Painters Tip: Get Rid Of Ice Dams
read more https://soperfectpaint.com/exterior-painters-tip-get-rid-of-ice-dams/
#exteriorpainter #housepainter #painteratlanta #paintcontractor #commercialpainter #residentialpainter #housepainteratlanta #exteriorpainteratlanta #interiorpainter #MondayTips
 Coastal Kitchens & Floors
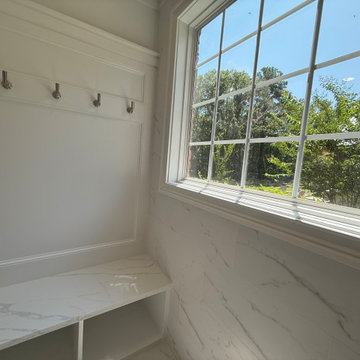
The custom bench and trim are composed of pvc waterproof materials to prevent water damage and remain maintenance friendly.
Large transitional master ceramic tile, white floor and double-sink shower bench photo in Charleston with shaker cabinets, white cabinets, white walls, quartz countertops, white countertops and a built-in vanity
Large transitional master ceramic tile, white floor and double-sink shower bench photo in Charleston with shaker cabinets, white cabinets, white walls, quartz countertops, white countertops and a built-in vanity
 Kairos Home Improvement Inc.
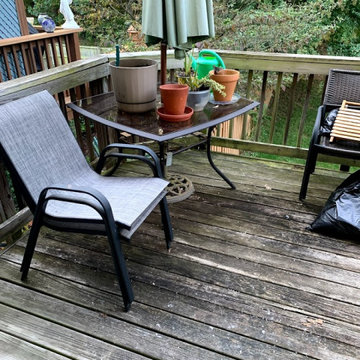
BEFORE -Installation of new wooden planks on deck where needed and painted over for a brighter look. Pickets were re-enforced where needed and painted the same color. We finished with deck over to prevent weather damage.
 Custom Creations "N" Repair
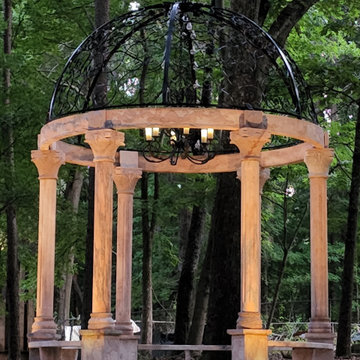
This Italian marble gazebo was rescued from a ruble pile in Alabama where it had sat for 20 years before I brought it to Atlanta to restore.
The marble had been stained by the dirt it had laid in for decades requiring the development of several customized cleaning processes to prevent further damage. After cleaning all the components, we poured a foundation and slab to build it on.
the stones were delicate and very heavy 200 - 300 lbs each and had to be placed very precisely. to accomplish this, we built custom scaffolding and a custom gantry crane to place each stone. Then we restored the wrought Iron work and installed it on top tying all the components together.
where it will stand for decades of garden tours.
 Kang Contractors LLC
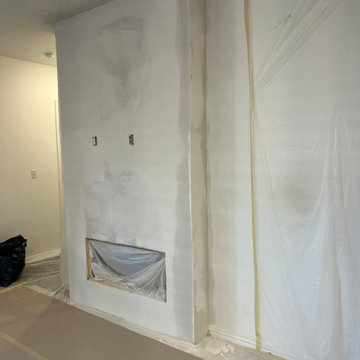
As you can see, we tape off the entire area we do work in to prevent any damages.
We also relocated the electrical from the bottom to the top where the TV will be mounted and will have all of the necessary plugs.

 Brooklyn City Furniture
The Circuit Modular Series is a contemporary seating collection that brings minimalist style to spaces large or small. Circuit’s three sleek components—an armless chair, corner and ottoman—feature rounded profiles, with pleasing curves that invite relaxed entertaining and interaction. Rounded, solid natural ash legs complete the look by giving each piece an airy, floating quality perfect for small spaces. Combine the components to create a custom seating configuration that suits your home or work environment—Circuit’s compact footprint is particularly well suited to lobbies, breakout rooms, hallways, and urban condominiums. Constructed with kiln-dried 100% FSC®-Certified hardwood in support of responsible forest management.
Circuit Modular Series utilizes 3 different modular components - Armless, Corner & Ottoman.
All modular components can be joined using integrated, concealed connectors on underside to securely join them to each other while in sectional, sofa or chaise formation.
Tight seat and back.
Upholstered with high resilience polyurethane foam covered in a Dacron wrap.
Frame is kiln-dried 100% FSC®-Certified hardwood (FSC® 092551).
Cylindrical, solid FSC®-Certified ash legs are finished in a water-based, clear coat finish.
Plastic bumpers on all legs to prevent floor damage.
All joints have been stress tested.
9 gauge No-Sag, injection-molded sinuous spring clip system.
Manufactured to meet California TB117-2013 fire safety standards without the use of flame retardant additives in the upholstery foam.
* Fabric samples available upon request
Need help? Chat with us online or send us an email to info@cityfurnitureshop.com
 Streamline Exteriors
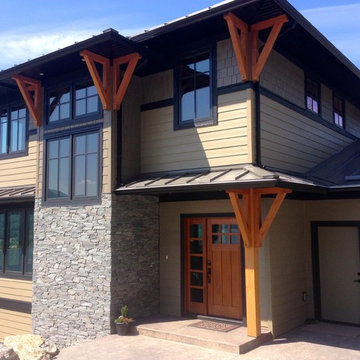
Hardie siding with Hardie shakes on the top third with aluminum soffits, gutters, and downspouts. Anodized Gutter-glove gutter guard installed in black gutters to prevent snow damage.
 Jans Awning Products
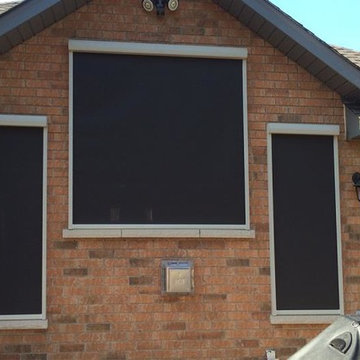
Retractable screens optimize your comfort and privacy while also providing superior solar protection by preventing UV damage. Retractable screens are totally personalized to your needs; they provide shade when you need it most and when not in use, the screen retracts into a 5” panel box.
15