
Search results for "Prevent wear" in Home Design Ideas
 ESF Home Textile LLC.
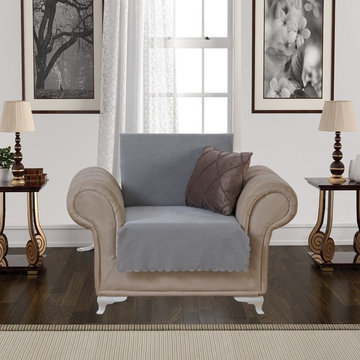
Chiara Rose Anti-slip Armless Sofa Cover Furniture Protector Chair Size Diamond
Dimensions: 29 Inch X 70 Inch
BEST SOFA PROTECTOR - This Slipcover is Extremely Sturdy, as well as an Instant, Magical Solution to Renew your Old Furniture with an Elegant Look! Ultrasonically welded seams prevent ripping apart and unraveling. The Edges are Laser-Cut to give a Chenille Trim Effect. Its Velvety Texture is Soft and also functions like a Warm Pet Bed giving a Sense of Security while your Pet is Resting. Our Covers are absolutely Pet-Friendly.
PROTECTIVE! Best Protection for ANIMAL SCRATCHES FUR SHED-HAIR DIRT FOOD SPILLS WEAR TEAR! STAIN PROOF! Perfect Guard against Cats Dogs Kids Children!
DECORATIVE! Great Stylish Coverage and Luxury Decoration in Living, Sitting Room with Full Solid Colors and Beautiful Printed, Patterned Designs, Extra Deluxe Décor, Nice Plush Texture! New Modern Look! CUSTOM-FIT! Relaxed fitted in Wing-back, Club, Rocker, Single Chair and a Half, one two three Pillow Coach, 1 2 Seaters, Box, T cushion, L, U shape Seaters! Big Large Long Wide Couches! Leather Velour Denim Twill Linen Sofas!
NON SLIDE! Slid-Resistant with PLASTIC DROP BACKING! No More Slipping Off / Sliding Over! Plastic Dots firmly Grip Upholstery! Stays in Place! No Zipper, Mat, Elastic Strap! No Pads under!
EASY CARE & WASH, DURABLE, DETERRENT! Machine Washable! Easily Removable Ready Made Furniture Throws! Cheap and Inexpensive! Heavy Duty Fabric! Stretch Enough to Cloth up Perfectly and Look Form Fit! NO ARMS! Slipcovers with Armrests DON’T properly FIT IN the Armrests and always create Fitting Problems. You know, they also have an Ugly Look. But with Chiara Rose no Need to Worry about Armrests anymore!
• PLEASE MAKE SURE TO READ DETAILED PRODUCT INFORMATION BELOW!
________________________________________
Product Description
WHY CHIARA ROSE SOFA COVERS?
Kids and Pets; We love them but we also love our furniture. Cleaning furniture is one of the most difficult chores and that’s why you need to protect it from dirt. The easiest and economical way of preserving your furniture is Chiara Rose Sofa Protector. Just put the sofa protector on your sofas (futon or couch) and stop worrying about stains and spills. It is perfect for homes with kids and pets. Pets love to scratch upholstery of the furniture. The enduring 220 gsm polyester fabric of Chiara Rose Sofa Protectors prevents tears and any kind of debris on your sofas. Its sturdy texture doesn’t let any spill and dirt penetrate the upholstery.
Besides being durable, Chiara Rose Sofa Cover is suitable to all types of decoration. To express your own personal style, you can choose from a variety of color and design options that fit perfectly to your home décor. With brilliant colors and attractive patterns, Chiara Rose Sofa Covers will give your room a completely new outlook. Unlike other covers, you don’t need to remove Chiara Rose Sofa Protector when you have guests. It will both protect your furniture and become a part of your home decoration.
WHY CHIARA ROSE SOFA PROTECTOR IS DURABLE?
The most common problem with traditional sofa covers is that after a short time of use the stitches come apart. The edges of Chiara Rose Sofa Cover are manufactured with ultrasonic laser cut technology. This technology prevents the edges from unraveling. What’s more, the 220 gsm polyester knitted fabric is the most long lasting fabric used in furniture protectors. While being durable, this fabric gives a warm sense
of touch and pleasure to sit upon.
WHY CHIARA ROSE IS THE BEST ANTI-SLIP SOFA PROTECTOR?
We always use the most contemporary technology to develop our products. That’s why we decided to use the patented plastic drop design on the back side of our covers to create the anti slip effect. These plastic drops firmly grip the upholstery of furniture so that the cover doesn’t slip off the seat easily. Even after your kids and pets jump on the sofa, Chiara Rose Sofa Cover holds on to your furniture. A quick adjustment is all it takes to get it back to look smooth. Chiara Rose Sofa Cover is the only sofa protector that uses this new technology.
WHY IT IS EASY TO USE CHIARA ROSE SOFA PROTECTORS?
No zippers, no elastic straps, no metal hooks!!! The anti-slip drops will take care of everything! , As shown on the image, just lay Chiara Rose Sofa Cover on your sofa, and tuck it between the cushion and the arms of the sofa. That’s all you need to do to put it on.
Chiara Rose Sofa Protector doesn’t allow everyday dirt, pet hair and food spills reach your sofa. The pattern of the fabric prevents accumulation of dirt on it. You can easily take off this dirt. In order to get best results, use a vacuum cleaner or shake your cover off before machine wash.
Chiara Rose Sofa Protector is easy care. It can be machine washed on max. 30°C or 85°F water temperature. Don’t use bleacher. Machine dryer can be used on low heat setting. To avoid wrinkles, use gentle cycle on washing machine and hang from a line while drying. If necessary, iron at low temperature.
 Tile Doctor Ltd
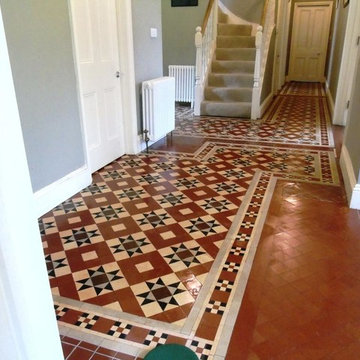
Victorian tiles are very hard-wearing and historically a popular choice for heavy traffic areas such as hallways. Still popular today they are nonetheless like most tiles and can become ingrained with dirt over time.
This particular floor, located in a property in the old market town of Tewkesbury is a good example of a floor that was in good physical condition, but heavily ingrained with dirt due to a lack of regular maintenance. At a loss for how to remedy the situation by themselves, the property owner asked me to pay a visit to restore the tiles back to their best possible condition.
In this particular scenario, I opted to mix and apply a solution of different cleaning products from our professional range, each serving a different purpose. These products were Tile Doctor Pro Clean, Tile Doctor Remove and Go, and Tile Doctor NanoTech HBU. Remove and Go serves the purpose of stripping away any old sealer on the tiles, while Pro Clean is an alkaline cleaner that reliably removes dirt and staining. NanoTech HBU is a particularly powerful cleaner which utilises nano-sized particles to penetrate deep into the pores of the stone, get underneath difficult stains and lift them out.
I spread this potent solution across the length and width of the tiled hallway and left it to soak for approximately 10 minutes, before using a black scrubbing pad fitted to my buffing machine to give the tiles a deep scrub. Next, I rinsed the soiled solution away and neutralised the chemicals with plain water, before extracting any residue using a wet vacuum. I repeated the cleaning process several times to achieve the best results possible, and I also employed the aid of a steam cleaner to spot clean any particularly stubborn marks.
Cleaning the floor took two days in total. At the end of the second day, I gave the floor a thorough and final rinse before leaving it to dry completely overnight. The next day, I returned to the property to seal the floor after checking the floor was dry. Ensuring before sealing that the floor is completely dry is crucial – even the smallest quantity of moisture remaining can potentially cloud the sealer and damage its performance.
My choice of sealer was Tile Doctor Colour Grow, an impregnating sealer that penetrates and fills the pores of the tile to prevent trapped dirt and makes regular cleaning much easier. Colour Grow is a great choice of sealer for Victorian tiles because it really enhances the colourful patterns which are characteristic of this type of tile.
My customer was very impressed with the service and remarked on the huge improvement to the appearance of the floor. You can see this for yourself – just take a look at the before and after photos!
Malcolm Crowther
Gloucester Tile Doctor
 Five Star Tree Care
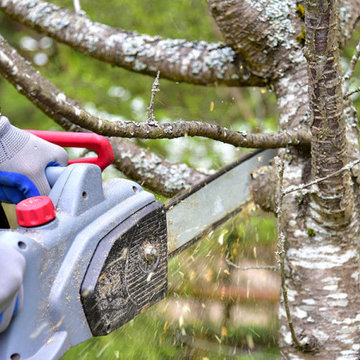
Using a chainsaw is a quick way to make work of fallen branches, damaged trees, and more. However, unless you have been plenty of experience, you may not be able to use this tool safely. For those who have never used a chainsaw before, it is a good idea to start with a lighter saw to prevent injury. It is also a good idea to enroll in a training course. If you plan to use a chainsaw in a professional company, it is even mandatory. Five Star Tree Services has created a quick guide that will help you decide if using a chainsaw is the best option for you.
Chainsaw Maintenance
Before you start using a chainsaw, you need to know if the blades are properly sharpened. Dull blades can cause jagged cuts or even cause injury. A sharp blade allows the saw to cut smoothly and produce straight cuts. The next step is to review is the cutting chain. It should be adjusted to the right tension, so the chain doesn’t move when the engine is idle. Make sure there are no loose screws and that the chain brake is in proper working order.
Operating a Chainsaw
Once you ensure that the chainsaw is safe to operate, it is time to get it started. Do you know the right amount of throttle and pressure to use? What about which cut would be best for your current project? Each type of cut will affect the wood differently, so it is important to keep these factors in mind when using a chainsaw. Situational awareness is also an important part of chainsaw use. No one should be within 10 feet while you are cutting. Also, avoid getting distracted by people seeking your attention since it only takes a second for a grave mistake to occur.
Protection During Chainsaw Operation
Proper protection is essential when operating machinery. When using a chainsaw, you should have on personal protection equipment such as; chainsaw pants, steel toe boots, gloves, ear protection, high visibility clothing, a helmet, and eye protection. All of these items should be in good working order and made from high-quality materials. Protecting your face, neck, chest, and abdomen is critical when working with any type of cutting tool.
The best way to keep yourself protected while wearing your personal protective equipment (PPE) is to maintain control over the chainsaw. Gloves may reduce control for many people, but a firm stance and proper balance can work wonders for maintaining control. PPE usage is very important, but it is equally important not to get lulled into a false sense of security by wearing it.
Practice Makes Perfect
It is best to practice using your chainsaw before taking on big projects. This will help you learn to move your body and your head in a safe way and a way that supports a clean cut. Most often, work with chainsaws is completed on ground that is uneven or covered in obstacles. Practicing will ensure that you can adapt to your environment without risking damage to your property or bodily harm.
How We Can Help
Working with chainsaws can make tree care simpler, but without the proper training and protection, it can be hazardous. Instead of taking the risk, hire the professionals here at Five Star Tree Services for all of your Richmond Hill tree removal and tree care needs. Give us a call at (416) 990-3355 to find out more about our rates and services.
Find the right local pro for your project
 Tile Doctor Ltd
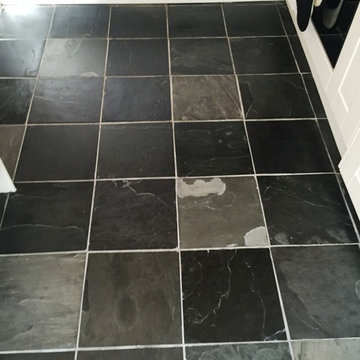
These Slate kitchen floor tiles at a property in Oxford were in good physical condition, but had become dull over time due to heavy usage, and upon close inspection the grout was stained. The customer contacted me as she was keen to get the tiles back to looking their best. This would require a thorough clean and the application of a fresh sealer.
While Slate floor tiles are reputed to be hard wearing and damage resistant – and are therefore a popular choice for high traffic areas like kitchens – this does not exclude them from needing regular maintenance.
To begin, I mixed a strong solution of Tile Doctor Pro Clean and water. Pro-Clean is a versatile cleaner that when used in a weak dilution can be used as a regular cleaner for most types of natural stone floor, including more sensitive stones such as Limestone and Marble.
The cleaning was then spread across the surface area of the floor, and left it to dwell for ten minutes to allow the solution to seep into the pores of the stone and lift the ingrained dirt to the surface. Pro-Clean in a strong dilution also functions as a stripping product, meaning it works to strip away any old and ineffectual sealer.
I then scrubbed the solution into the floor using a stiff scrubbing brush, paying particular attention to the grout in order to break down the visible staining. The tiles and grout lines came up really well during the cleaning process – this became clear once I had rinsed the floor and removed the residue using a wet vacuum.
With the customer eager to have the job completed quickly, I installed portable room dryers and utilised a heat gun to dry the floor, allowing me to seal it on the same day.
Once I had ensured the floor was completely dry, I commenced the sealing process by firstly applying a coat of Tile Doctor Stone Oil, a product which is designed to bring out all of the natural dark shades in the Slate.
When this was dry, I applied a single coat of Tile Doctor Colour Grow. This is an impregnating sealer, meaning that it soaks into pores of the stone to provide durable protection from within against ingrained dirt and stains. Colour Grow also enhances the natural colours in the stone even further.
The customer was amazed by just how big a difference could be made to the tiles in the space of just a day. Although the tiles were generally in very good nick, my main task was to be liven them up – judging by the before and after photos, I think this was achieved. And, now that they have been treated to a fresh seal, the tiles will be prevented from quickly becoming dull again.
Barry Woodward
Oxfordshire Tile Doctor
 Tile Doctor Ltd
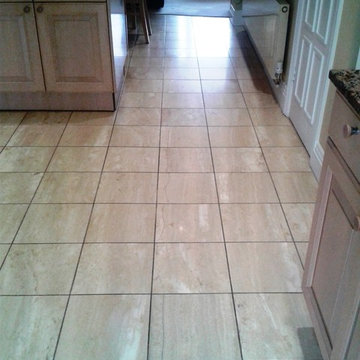
Every now and again, I get a call from a client located on the small peninsula of Sandbanks, Poole. Sandbanks, sometimes referred to as ‘Britain’s Palm Beach’, is known for its fantastic beach and high value property. My client asked me to take a look at a Travertine floor in his kitchen which was, in fact, more highly polished than he had wanted. The polished finish had worn off the travertine tiles where they had been walked on, leaving a dull trackway running down the centre of the kitchen. With its distinct characteristics, travertine is a popular choice for kitchen flooring, although it is also quite often used in bathrooms. In any case Travertine tiles will need regular maintenance to keep them looking their best.
Unfortunately, the kitchen floor must have experienced some sort of settlement or shrinkage as a long crack has appeared, which ran along the same line as the dull trackway. It is not uncommon for Travertine tiles to crack due to wear over time, or even bad fitting in some cases. While the exact cause of the crack was unclear, the homeowner concluded that the floor was certainly in need of restoration.
Repairing a crack in a Travertine tiled floor
Replacing the Travertine tiles was not an option due to a lack of spare tiles, so I opted instead to fill the crack in the floor using Harbro Stone Filler, an epoxy stone filler, matching the colour of the tile as closely as possible. I left this to set, before sanding down the excess filler.
My next action was to use a set of Tile Doctor Diamond burnishing pads to sand out any scratches and restore a more even shine to the floor, as per the client’s request. For polished stone, I recommend using a set of four burnishing pads applied in order: Coarse, Medium, Fine, and Very Fine. I used these one after the other with a little water to lubricate and restore the surface polish to the desired level.
Sealing a Travertine tiled floor
The next day, I returned to seal the floor with a couple of coats of Tile Doctor Colour Grow sealer. Colour Grow is a colour enhancing, impregnating sealer which penetrates deeply into the pores of the stone, thereby preventing dirt from becoming ingrained within. This particular sealer also enhances the natural colours within the Travertine tile, whilst also providing long term durable protection.
Although the crack could not be made to disappear completely, its appearance was much improved. The customer was also very pleased with the long-lasting lower sheen provided, describing it as “the finish I had wanted in the first place when the tiles were fitted”.
 Tile Doctor Ltd
Sandstone is a particularly popular choice for kitchen and hallway floors amongst home owners in the UK. It not only possesses beautiful natural shades and features, but it is also typically hard wearing, making it an ideal stone for tiled flooring in high traffic areas of a house and can often be found laid as large riven flagstones in pubs and other commercial premises.
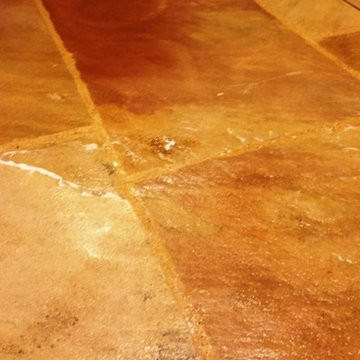
Naturally, just like any other type of tiled floor, Sandstone needs to be maintained using appropriate products and methods. A lack of adequate surface sealer in particular leaves Sandstone susceptible to ingrained dirt, and can leave distinct, unsightly patches such as those in the photograph below.
In this instance, I visited a client in the old Essex town of Thaxted, who believed that her four square meter Sandstone tiled floor might be suffering from damp issues after lifting up the mats covering the area.
However, when I arrived at the property and ran damp tests, I found the issue to be superficial. The Sandstone floor however did require attention in the form of a deep clean and a fresh seal to tackle the white patches and prevent further discolouration.
To begin the cleaning process I spread Tile Doctor Remove & Go evenly across the floor. It was left to dwell for approximately 15 minutes, during which time it worked to break down the old sealer remaining on the tiles. I then agitated the area twice over with both a black scrubbing pad fitted to a rotation machine lift away any dirt.
The resultant slurry was removed using a wet vacuum and the floor was then rinsed with water and then mixed a strong solution of one part Tile Doctor Pro Clean to three parts water which was used to give the floor a final clean and scrub the grout clean before using the wet vacuum again and giving the floor a final rinse with water.
After completing the cleaning process I left the floor to dry over the weekend. Upon my return to the house I proceeded to seal the tiles with three coats of Tile Doctor Colour Grow which is an impregnating sealer that soaks into the pores of the stone and provide durable surface protection going forward. Colour Grow is also specially designed to let the floor breathe and enhance the natural colours in the stone and, in this case, really helped to intensify the natural sand-coloured shades in the tiles.
The difference made to these Sandstone tiles was really noticeable, with the white patches completely removed and the surface more generally back to looking like new, needless to say, my client was very happy with the results.
Nick Murphy
South Essex Tile Doctor
 Inhabit | Space
Whon Photography
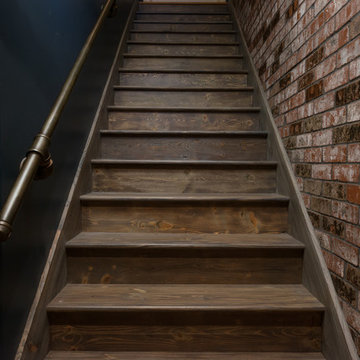
Large urban underground carpeted staircase photo in Indianapolis with gray walls and no fireplace
Large urban underground carpeted staircase photo in Indianapolis with gray walls and no fireplace

Sponsored
Columbus, OH

Wannemacher Interiors
Customized Award-Winning Interior Design Solutions in Franklin Cnty OH
 Tile Doctor Ltd
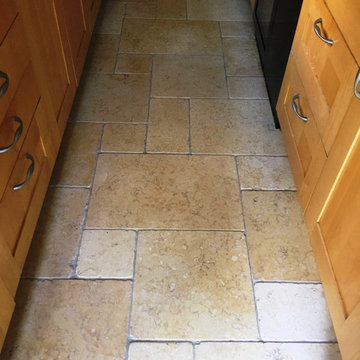
This customer from the south side Shepperton has a galley kitchen installed around twelve years ago with a Limestone floor. Since that time the floor had not been professionally cleaned or the stone re-sealed. The old sealer had long since worn down and was no longer providing any protection to the floor allowing soil and grease from cooking to penetrate the stone and darken the grout. It was now looking permanently dirty and the owner decided it was time to have it renovated.
Shepperton is a suburban village in the borough of Spelthorne, the Thames river is to the south and much of the east. It is set between the towns of Chertsey and Sunbury-on-Thames. The village has a long history and is even mentioned in a document of 959 AD and in the Domesday Book when it was primary farm land, it’s also my base of operation.
To deep clean the stone floor and grout I started with a mixture of Tile Doctor Remove and Go combined 50:50 with Tile Doctor Pro-Clean. This cocktail of sealer remover and cleaning agent was applied to the floor and left to soak in for ten minutes in order to get to work breaking down all the dirt, grease and what was left of the old sealer.
The solution was then worked into the Limestone tiles and grout using a rotary machine fitted with a black scrubbing pad. These pads can struggle to reach into the recesses of the grout lines, so afterwards the grout was scrubbed by hand using a stiff brush along with the more difficult to reach corners that the machine had missed. The floor was then rinsed with water and the products and soil vacuumed off the floor. I repeated the process in a couple of areas where the dirt was a little stubborn. The floor was then clean and after drying out overnight it would be ready for a new seal.
The following day I returned to apply the sealer first checking the floor was dry using a moisture meter. The readings were good, so I set about applying a colour enhancing impregnator sealer Tile Doctor Colour Grow to the Limestone. Tile Doctor Colour Grow works by seeping into the pores of the stone intensifying natural colour, preventing staining and providing a durable protection. Two coats of sealer were applied to the Limestone tile and grout which was all that was needed to return the floor back to its original condition.
The client was very happy with the finished floor and wanted to know how to keep it looking its best going forward. I explained that the best way to keep it looking good is to get maximum longevity from the sealer which will wear down over time but can be prematurely damaged with strong cleaning products. So, for aftercare I recommended the use of Tile Doctor Stone Soap which is designed for everyday cleaning of sealed stone floors.
Jonathan Oldham
South Middlesex Tile Doctor
 Editor
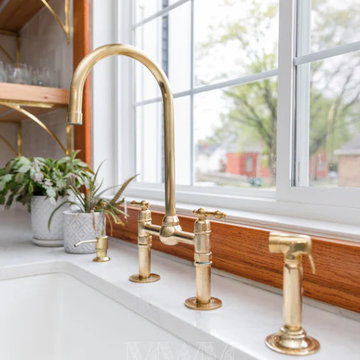
When it comes to selecting fixtures for your kitchen or bathroom, few options offer the blend of elegance, durability, and functionality like brass bridge faucets. These faucets, with their vintage charm and modern efficiency, bring a unique aesthetic and practical benefits to any space. This article explores the appeal of brass bridge faucets, their key features, benefits, and tips on how to choose and maintain them.
The Charm of Brass Bridge Faucets
Classic Aesthetic
Brass bridge faucets are known for their classic, timeless look. The warm, golden hue of brass adds a touch of luxury and sophistication, making these faucets a focal point in any kitchen or bathroom. Their vintage design can seamlessly blend with various décor styles, from rustic to contemporary.
Durability
One of the standout qualities of brass is its durability. Brass is resistant to corrosion and can withstand daily wear and tear, ensuring that your faucet remains in excellent condition for years. This makes brass bridge faucets a long-term investment for your home.
Versatility
Available in various finishes such as polished, brushed, or antique brass, these faucets can complement a wide range of design themes. Whether you want a shiny, reflective finish or a more subdued, matte look, there’s a brass bridge faucet to suit your taste.
Key Features of Brass Bridge Faucets
Elevated Bridge Design
The distinctive feature of bridge faucets is the elevated connecting pipe that links the hot and cold water lines. This bridge not only enhances the faucet's aesthetic appeal but also provides additional clearance, making it easier to clean large pots and pans or to accommodate larger sinks.
Dual Handles
Brass bridge faucets typically feature dual handles, allowing for precise control over water temperature. This functionality ensures a balanced mix of hot and cold water, providing you with the perfect temperature for your needs.
Classic Spout Designs
These faucets often come with high-arc or gooseneck spouts, which are both practical and stylish. The high spout design provides ample space for washing and filling containers, adding to the faucet’s functionality.
Benefits of Brass Bridge Faucets
Visual Appeal
Brass bridge faucets serve as a statement piece in any room. Their elegant design and warm finish add a touch of luxury and can elevate the overall aesthetic of your kitchen or bathroom.
Functionality
Beyond their beauty, brass bridge faucets are highly functional. The dual-handle design allows for precise temperature control, while the elevated bridge offers extra clearance for various tasks. This combination of form and function makes them a practical choice for busy households.
Hygienic Properties
Brass has natural antimicrobial properties, making it a hygienic choice for kitchen and bathroom fixtures. This can be particularly beneficial in spaces where cleanliness is paramount.
Choosing the Right Brass Bridge Faucet
Finish Options
When selecting a brass bridge faucet, consider the finish that best matches your existing décor. Polished brass offers a shiny, reflective surface, while antique brass provides a more vintage, weathered look. Brushed brass has a matte finish that hides fingerprints and water spots.
Coordination with Other Fixtures
Ensure that your brass bridge faucet complements other fixtures in your kitchen or bathroom. Coordinating the faucet with cabinet handles, lighting fixtures, and other hardware can create a cohesive and harmonious look.
Installation Requirements
Check the installation requirements before purchasing a brass bridge faucet. These faucets typically require a three-hole installation, so make sure your sink or countertop is compatible.
Maintenance Tips
Regular Cleaning
To maintain the luster of your brass bridge faucet, clean it regularly with a soft cloth and mild soap. Avoid using abrasive cleaners or scrubbers that can scratch the surface.
Preventing Water Spots
After cleaning, dry the faucet thoroughly to prevent water spots. This is particularly important for polished brass finishes, which are more prone to showing spots and fingerprints.
Addressing Tarnish
Brass can tarnish over time. To address this, use a brass cleaner or a mixture of lemon juice and baking soda to gently polish the surface. Regular polishing can keep your faucet looking its best.
Conclusion
Brass bridge faucets are a beautiful and functional addition to any home. Their timeless design, durability, and practicality make them a worthwhile investment for your kitchen or bathroom. By choosing the right finish and maintaining it properly, you can enjoy the elegance and charm of a brass bridge faucet for years to come. Embrace the classic appeal of brass and elevate the look of your home with this stunning fixture.


 Tile Doctor Ltd
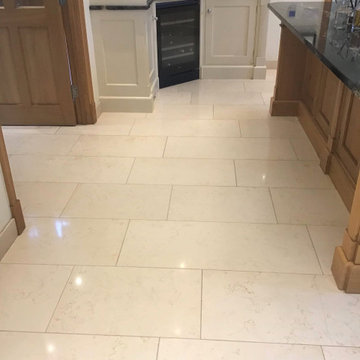
These photos are of a four-year-old Limestone kitchen floor at a property in Boughton that the customer was finding hard to keep clean and maintain a shine. Part of the problem was he owned two dogs and we often warn about the problems of dog urine on sealed tile and stone due to it being high in nitrogen.
On my initial visit I was able to ascertain that the sealer had almost completely worn off, leaving the stone vulnerable to dirt becoming ingrained into the pores of the stone. I come across this problem a lot, in my experience when stone floors are installed by tilers, they generally apply a single coat of sealant which wears off over time, and as discussed earlier can be prematurely degraded by strong chemicals.
My quote to renovate the Limestone floor was accepted and included a deep clean to the stone and grout, stone polish and then re-seal.
I arrived on site on the arranged date and began by scrubbing all the grout lines with Tile Doctor grout brushes and a 3:1 dilution of Tile Doctor Pro-Clean. I then moved on to a small handheld polishing machine to clean around the tile edges using 800 and 1500 grit diamond encrusted burnishing pad to achieve a deep clean.
The process was then repeated throughout the rest of the area using larger 17” burnishing pads fitted to a floor polishing machine. The burnishing pads I used come in a set of four starting with 400-grit and moving up to 800, 1500 and 3000 grit, after each pad is applied the floor is rinsed with water and the soil extracted with a wet vacuum.
It took me much of the day to complete this stage of the renovation and the floor was still damp so once done I left for the day, allowing the floor to dry off overnight.
I returned the following day to complete the final polish using the 3000-grit burnishing pad, this gave a high polished finish which the customer had requested. This last pad is applied dry with only a little water splashed onto the tile, a process we call a spray burnish.
The floor was then sealed with three applications of Tile Doctor Ultra Seal Sealant to protect the newly restored and polished tiles. Ultra-Seal is a penetrating sealer that soaks into those recently cleaned pores in the stone, occupying the space and preventing any dirt from becoming ingrained there. It’s also a natural look sealer so it doesn’t change the colour of the stone in anyway and is almost indetectable once applied.
“Hard work from Philip has left us with a kitchen floor brought back to life – cleaned and sealed in little over 24 hours – brilliant job – Thanks”
Before leaving I gave the customer some tips on maintenance and a complimentary bottle of Tile Doctor Stone Soap to enable him to keep the floor looking its best, this product works well with the sealant we applied and is PH neutral so won’t degrade the new sealer.
Phil Vissian
Northamptonshire Tile Doctor

 Moderne Builders
Gorgeous master bath with dramatic retro "wave" tile. Peak Photography
Example of a 1950s bathroom design in Los Angeles
Example of a 1950s bathroom design in Los Angeles


 Tile Doctor Ltd
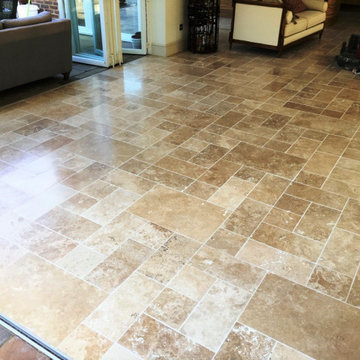
This property in Godalming had the whole downstairs floor tiled with Fired Earth Limestone tiles nine years prior and had never had it cleaned or maintained professionally. The once beautiful stone was now looking dull and the grout had turned black with dirt leaving the floor looking uninviting.
This is quite normal for stone floors as it is the sealer that protects the stone from dirt and enhances its look. Most sealers wear off after three to four years sealer and in this case after nine years it was well overdue a deep clean and reseal.
I visited the property to survey the floor. It was indeed looking in need of some attention and the kitchen was particularly bad. To restore the appearance of the Limestone tile and grout the floor would need to be stripped of what remains of the old sealer, then deep cleaned with attention to the grout, polished with burnishing pads and then finally resealed. I was confident I could get it restored to a nearly new finish and to prove it I completed a small demonstration clean which the homeowner was very happy with. They agreed to my quote and we scheduled in a couple of days to carry out the work.
On day one I started by cleaning the grout using a strong dilution of Tile Doctor Pro-Clean. its run along the grout line and then left to soak in for about ten minutes so it can get to work breaking down dirt and old sealer. The grout is then scrubbed using a grout brush which is then scrubbed backwards and forwards along the grout line until clean. The area is then rinsed with water and all the waste removed with a wet vacuum cleaner.
Next, I turned my attention to the Limestone tiles which needed stripping of any remaining sealer, cleaned and polished. I find the best way to do this is by apply a set of diamond encrusted Burnishing pads in sequence starting with a coarse 400-grit followed by 800, 1500 and finally finishing with an extra fine 3000 grit. Water is used to lubricate the burnishing process and the slurry is rinsed and extracted off the floor between pads. Each pad is run over the tiles three times, and it was a large floor so as you can imagine this process took most of the day.
I left the floor to dry out overnight and returned the next day to seal the Limestone. Before doing that, I reviewed my previous day’s work and I cleaned up any areas that needed further attention. Next step was to ensure the floor was dry as I don’t recommend applying a sealer to damp tile as you won’t get an even appearance, so before sealing a floor I tested for moisture using a damp meter.
To seal the floor, I applied two coats of Tile Doctor Ultra Seal which is an impregnating sealer that works by occupying the small pores in the stone to prevent dirt becoming ingrained there. Limestone is a light stone and most customers like that appearance so I find it best not to use a colour enhancing sealer as it can darken the stone. Ultra-Seal doesn’t contain any colour enhancer and leaves the floor with a natural finish whilst allowing the stone variations and patterns to show through.
Once the sealer was dry, I gave it a further polish with the 3000-grit pad which further brought out the natural beauty of the stone. My client was very happy with the floor, it really lifted the who area and the Kitchen in particular.
Rupert Mcleod
West Surrey Tile Doctor
 Windy City Painters
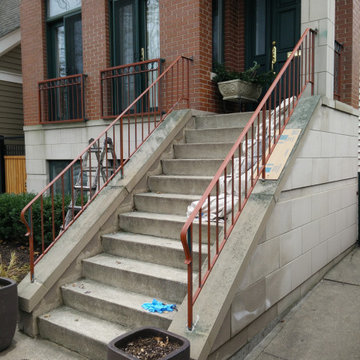
This Gold Coast porch required comprehensive metal refinishing to restore beauty and prevent structural rust damage. The homeowner noticed rust bleeding through existing paint on decorative railings and support posts—a common problem in Chicago after harsh winters. Windy City Painters assessed the damage, stripped everything to bare metal, and applied industrial-grade protection designed for freeze-thaw climates. The result: railings that look new and won't rust again for years.
MATERIALS AND PRODUCTS
Windy City Painters uses only proven products for Chicago's metal challenges. RustDestroyer rust-converting primer chemically bonds to bare steel, converting any remaining rust molecules into a stable base. Sherwin-Williams Corothane Aliphatic Urethane provides superior adhesion and UV resistance compared to standard enamels. Two topcoats ensure maximum durability against road salt spray and freeze-thaw stress. This combination is the North American standard for metal exposed to harsh seasonal climates.
THE PROCESS
Step 1: Wire wheel attachment on a drill removes all loose paint, rust scale, and oxidation down to bare metal. We work methodically to avoid gouging, checking progress frequently. Bare metal is essential—no primer bonds properly over paint or rust. This step typically takes 2-3 hours depending on rail complexity and surface area.
Step 2: Apply RustDestroyer rust-converting primer in a single coat, following manufacturer specs for dry time and coverage. The primer chemically converts any remaining ferrous oxide into a stable compound, then dries to a dark gray or burgundy base. This base is then sealed by the topcoat. Dry time is 24 hours before topcoat application.
Step 3: First coat of Sherwin-Williams Corothane Aliphatic Urethane, applied with a quality brush or roller. Corothane levels beautifully and resists sagging better than traditional polyurethane. We maintain temperature and humidity control during application—critical for proper cure. Tack-free time is 4 hours; full cure requires 7 days.
Step 4: Second topcoat applied after the first coat fully cures. Two coats provide redundant protection against UV fading, moisture penetration, and mechanical wear. The second coat also fills any micro-voids and creates a seamless, glossy finish. Final inspection confirms even color, smooth surface, and no drips or sags.
CHICAGO-SPECIFIC CHALLENGES
North Side and Gold Coast porches face unique stressors. Road salt spray from De-Icing—not ocean salt—deposits chlorides on every metal surface. Winter freeze-thaw cycles force moisture into tiny cracks, expanding and contracting metal, stressing paint adhesion. Spring humidity and Lake Michigan microclimate variations accelerate oxidation. Summer UV radiation fades standard enamels rapidly. Windy City Painters' two-coat Corothane system is engineered for exactly these conditions. The aliphatic urethane resists UV and moisture far better than acrylic-latex or oil-based paints.
WHAT TO EXPECT LONG-TERM
Proper refinishing delivers 5-7 years of reliable protection in Chicago's harsh environment. You'll notice no rust bleeding, no paint lifting, and no color fading within 3-4 years. Minor weathering may appear after year 5-6 if rails face direct salt spray. Routine maintenance—rinsing railings after winter thaw, checking for debris—extends the finish lifespan. Windy City Painters recommends annual inspection of porches facing north or lakeside, where salt and moisture exposure is heaviest.
PRO TIPS
1. Never paint over existing rust. The rust will continue expanding beneath the new paint, lifting and cracking it within months. Windy City Painters always strips to bare metal—it costs more upfront but prevents costly repainting.
2. Time your refinishing for spring or early summer. Corothane requires stable temperatures (50-85°F) and low humidity for optimal cure. Chicago's May through August window is ideal. Fall and winter refinishing risks slow cure and poor adhesion.
3. Inspect end grain, fasteners, and joint areas carefully. These spots collect moisture and corrode first. Windy City Painters applies extra primer attention to crevices and seams.
FAQ
Q: How is Corothane different from Rust-Oleum or other spray paints? A: Corothane is a professional two-part polyurethane with superior hardness, adhesion, and UV resistance. Spray paints are single-stage and fade quickly. Windy City Painters uses Corothane because it's built for architectural metal in harsh climates.
Q: Can you refinish ornamental iron railings on two-flats? A: Yes. Windy City Painters regularly refinishes cast-iron railings on Gold Coast greystones and North Side two-flats. The process is identical—strip, prime with RustDestroyer, topcoat with Corothane.
Q: My railings have been painted many times. Will one wire-wheeling remove all layers? A: We wire wheel aggressively to remove all loose paint and rust. Thin paint layers that are well-adhered can stay if bare metal is exposed beneath. We always reach bare metal in crevices and end grain.
Q: Do I need to prep my porch before Windy City Painters arrives? A: No. We bring all equipment and clean up afterward. Just ensure we have access to electrical outlets and clear floor space around railings.
Q: How long until I can pressure wash my railings after finishing? A: Wait at least 2 weeks. Corothane continues cross-linking and hardening for 7 days. Pressure washing sooner may damage the finish.
Q: What if my railings show rust again within a year? A: Proper application with bare metal prep and two topcoats prevents this. If rust appears, it indicates either prep failure or damage during installation. Contact Windy City Painters immediately for assessment.
Q: Can Corothane be tinted to match my porch trim exactly? A: Sherwin-Williams offers hundreds of colorants. Bring a paint chip or sample, and we'll tint Corothane to your specification.
Q: Is the smell strong during application? A: Corothane has moderate VOC and requires ventilation. Smell dissipates within 24 hours of finishing. Windy City Painters opens windows and positions fans for rapid air exchange.
Q: What if I want a matte finish instead of glossy? A: Corothane comes in gloss, satin, and flat sheens. Matte finishes show dust more readily but suit certain architectural styles. Discuss preference with Windy City Painters during the estimate.
Q: Do you serve Gold Coast and North Side equally? A: Yes. Windy City Painters operates throughout Chicago's north shore. Travel time is built into estimates, but pricing is consistent across neighborhoods.
Contact Windy City Painters at windypainters.com or 773-818-6331 for a free metal refinishing estimate.

 Custom Surface Solutions
 (www.css-tile.com) - Owner Craig Thompson (512) 430-1215. This project shows the remodel of a small 1950's vintage home master bathroom. 8"" x 18" Calcutta gold marble tile was used on the shower walls and floor wall base and ceramic gray penny tile on the floor. Shower includes curbless pan / floor, dual shower boxes, frameless glass slider, trough duel fixture sink and chrome fixtures.
 Publisher
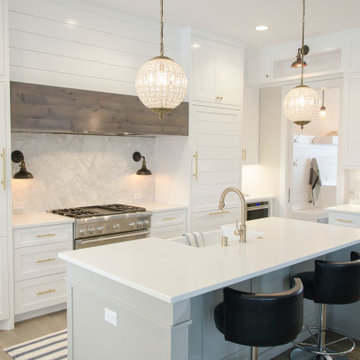
The kitchen, often considered the heart of the home, is a space where functionality and aesthetics coalesce. Among the myriad choices homeowners face when designing or renovating their kitchens, selecting a suitable kitchen splashback is crucial. In recent years, glass splashbacks have emerged as a versatile and universally appealing option. This article delves into the reasons why a glass kitchen splashback is suitable for everyone, blending seamlessly with diverse preferences, lifestyles, and design aesthetics.
Versatility in Design
One of the key factors that make glass kitchen splashbacks universally suitable is their versatility in design. Glass offers a neutral and timeless aesthetic, effortlessly complementing various interior styles, from modern and minimalist to classic and eclectic. Whether your kitchen embodies a sleek, contemporary vibe or a rustic, traditional charm, a glass splashback seamlessly integrates into the design landscape.
Furthermore, the transparency of glass allows it to adapt to any colour scheme or pattern in the surrounding space. Whether you prefer bold and vibrant hues or a more subdued palette, a glass splashback can be customised to match your preferences, making it an ideal choice for homeowners seeking design flexibility.
Enhanced Perception of Space
Glass has a unique ability to create an illusion of space and openness in a room. This quality is particularly beneficial for smaller kitchens or those with limited natural light. A glass kitchen splashback reflects sunlight, making the space brighter and more expansive. By enhancing the perception of the room, glass splashbacks contribute to an overall sense of airiness and openness, creating an inviting atmosphere that suits various home sizes and layouts.
Easy Maintenance and Hygiene
Practicality is a paramount consideration in kitchen design, and glass splashbacks excel in ease of maintenance and hygiene. Unlike porous materials such as tiles or grout, glass provides a smooth, non-absorbent surface that is easy to clean and maintain. Spills and splatters can be effortlessly wiped away with a damp cloth, ensuring a hygienic and sanitary kitchen environment.
The non-porous nature of glass also prevents mould and bacteria growth, making it a suitable choice for families with young children or individuals with allergies. The low-maintenance aspect of glass makes it a universally appealing option for those who value a clean and sanitary kitchen without the hassle of extensive upkeep.
Durability and Longevity
Glass kitchen splashbacks are known for their durability and longevity. The tempered glass commonly used in splashbacks is heat-resistant, ensuring it can withstand the rigours of a busy kitchen without compromising its integrity. This durability makes glass splashbacks suitable for households with avid home cooks who frequently use high-temperature cooking techniques.
Moreover, the longevity of glass ensures that it remains a sustainable and cost-effective choice over the long term. Unlike some materials that may wear out or become dated, a well-maintained glass splashback retains its aesthetic appeal and functionality for years, making it an investment that stands the test of time.
Customisation Options
Personalisation is a crucial aspect of home design, and glass kitchen splashbacks offer various customisation options. From selecting the colour and pattern to incorporating personalised designs or digitally printed images, homeowners can tailor their glass splashbacks to reflect their style and preferences.
The ability to customise glass splashbacks makes them suitable for everyone, allowing individuals to express their creativity and personality in the heart of their homes. Whether you opt for a bold, statement-making design or a subtle, elegant finish, the customisation options inherent in glass splashbacks ensure a perfect fit for diverse tastes.
Conclusion
In conclusion, the universality of glass kitchen splashbacks lies in their ability to seamlessly integrate into various design styles, enhance the perception of space, offer easy maintenance and hygiene, exhibit durability, and provide many customisation options. As a versatile and timeless choice, glass splashbacks cater to homeowners' preferences and practical needs across different demographics.
Whether you reside in a compact urban apartment or a spacious suburban home, whether your aesthetic leans towards modern minimalism or classic elegance, a glass kitchen splashback is a fitting and universal solution. Its adaptability to different lifestyles and design preferences positions it as a versatile and enduring element in the ever-evolving kitchen design landscape.
 Get My Rugs LLC
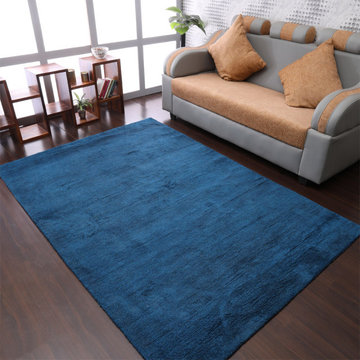
Modify your living room or bedroom into an exquisite retreat with the perfect area rug, an essential element that combines both style and practicality. A thoughtfully selected rug not only anchors the space but also infuses it with warmth, texture, and personality. Whether you're enhancing a cozy bedroom or designing a spacious living area, choosing the right rug is crucial to creating a harmonious and inviting environment.
The design of your area rug can profoundly influence the overall ambiance of your room. For a touch of opulence, consider hand-tufted or hand-knotted rugs, which are renowned for their intricate patterns and luxurious textures. These rugs, crafted with meticulous attention to detail, make a sophisticated statement in any setting. If a contemporary aesthetic appeals to you, machine-woven rugs are an excellent choice. They are available in an array of vibrant patterns and hues and are engineered to endure high foot traffic with their durable heat-set fibers. For a versatile and classic option, flat-woven rugs, such as kilims, offer a reversible design that seamlessly integrates with both modern and traditional decor.
When selecting a rug, the choice of material significantly impacts both its look and feel. Shag and flokati rugs are ideal for creating a sumptuous, inviting atmosphere. Their long, soft fibers provide unparalleled comfort underfoot, enhancing the coziness of your living room or bedroom. Hand-loomed rugs deliver unique textures and artisanal craftsmanship, while braided and hand-hooked rugs bring a delightful, handcrafted charm. For ease of maintenance, machine washable rugs are highly practical. They allow for effortless cleaning and help maintain a pristine appearance with minimal effort.
In addition to aesthetics, the functionality of your rug is paramount. Stain-resistant and water-resistant rugs are perfect for managing spills and everyday wear, ensuring your rug remains pristine over time. Non-slip and adhesive backings are crucial for safety, particularly on hardwood floors, preventing any risk of slipping and ensuring the rug stays securely in place. Furthermore, cushioned rugs enhance comfort, making your space not only stylish but also extraordinarily comfortable.
Personalize your space with bespoke or custom rug options. An 8x10 area rug is ideal for covering substantial areas and can be customized to fit specific dimensions or design preferences. Custom features, such as elegant fringe details or organic textures, allow you to craft a rug that reflects your unique style and complements your existing decor.
The selection of the top 15 area rugs available today encompasses a wide range of styles and features to meet diverse needs. From distressed designs that impart character to sleek contemporary patterns that offer a modern touch, there is a rug to suit every taste. Large rugs for living rooms and bedrooms can define and unify the space, while oversized carpets can create a dramatic focal point. Consider the practical aspects of each rug to ensure it not only enhances your decor but also withstands the rigors of daily use.
Ultimately, selecting the ideal area rug involves a delicate balance between aesthetic appeal and functional utility. Whether you opt for a luxurious hand-tufted piece, a resilient machine-woven design, or a versatile flat-woven style, the right rug will elevate your living space into a stylish and comfortable haven. By exploring a variety of options and carefully considering both design and practicality, you can find the perfect rug to transform your room into a beautifully appointed retreat.
 Get My Rugs LLC
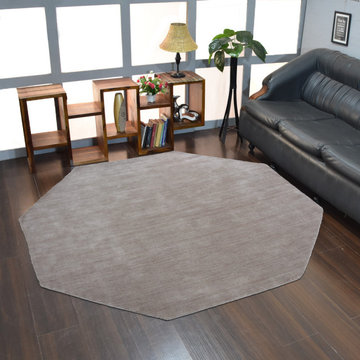
Modern Style your living room or bedroom into an exquisite retreat with the perfect area rug, an essential element that combines both style and practicality. A thoughtfully selected rug not only anchors the space but also infuses it with warmth, texture, and personality. Whether you're enhancing a cozy bedroom or designing a spacious living area, choosing the right rug is crucial to creating a harmonious and inviting environment.
The design of your area rug can profoundly influence the overall ambiance of your room. For a touch of opulence, consider hand-tufted or hand-knotted rugs, which are renowned for their intricate patterns and luxurious textures. These rugs, crafted with meticulous attention to detail, make a sophisticated statement in any setting. If a contemporary aesthetic appeals to you, machine-woven rugs are an excellent choice. They are available in an array of vibrant patterns and hues and are engineered to endure high foot traffic with their durable heat-set fibers. For a versatile and classic option, flat-woven rugs, such as kilims, offer a reversible design that seamlessly integrates with both modern and traditional decor.
When selecting a rug, the choice of material significantly impacts both its look and feel. Shag and flokati rugs are ideal for creating a sumptuous, inviting atmosphere. Their long, soft fibers provide unparalleled comfort underfoot, enhancing the coziness of your living room or bedroom. Hand-loomed rugs deliver unique textures and artisanal craftsmanship, while braided and hand-hooked rugs bring a delightful, handcrafted charm. For ease of maintenance, machine washable rugs are highly practical. They allow for effortless cleaning and help maintain a pristine appearance with minimal effort.
In addition to aesthetics, the functionality of your rug is paramount. Stain-resistant and water-resistant rugs are perfect for managing spills and everyday wear, ensuring your rug remains pristine over time. Non-slip and adhesive backings are crucial for safety, particularly on hardwood floors, preventing any risk of slipping and ensuring the rug stays securely in place. Furthermore, cushioned rugs enhance comfort, making your space not only stylish but also extraordinarily comfortable.
Personalize your space with bespoke or custom rug options. An 8x10 area rug is ideal for covering substantial areas and can be customized to fit specific dimensions or design preferences. Custom features, such as elegant fringe details or organic textures, allow you to craft a rug that reflects your unique style and complements your existing decor.
The selection of the top 15 area rugs available today encompasses a wide range of styles and features to meet diverse needs. From distressed designs that impart character to sleek contemporary patterns that offer a modern touch, there is a rug to suit every taste. Large rugs for living rooms and bedrooms can define and unify the space, while oversized carpets can create a dramatic focal point. Consider the practical aspects of each rug to ensure it not only enhances your decor but also withstands the rigors of daily use.
Ultimately, selecting the ideal area rug involves a delicate balance between aesthetic appeal and functional utility. Whether you opt for a luxurious hand-tufted piece, a resilient machine-woven design, or a versatile flat-woven style, the right rug will elevate your living space into a stylish and comfortable haven. By exploring a variety of options and carefully considering both design and practicality, you can find the perfect rug to transform your room into a beautifully appointed retreat.
 Get My Rugs LLC
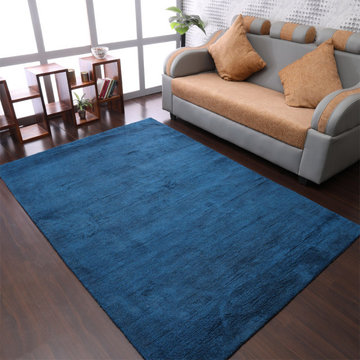
Modern Style your living room or bedroom into an exquisite retreat with the perfect area rug, an essential element that combines both style and practicality. A thoughtfully selected rug not only anchors the space but also infuses it with warmth, texture, and personality. Whether you're enhancing a cozy bedroom or designing a spacious living area, choosing the right rug is crucial to creating a harmonious and inviting environment.
The design of your area rug can profoundly influence the overall ambiance of your room. For a touch of opulence, consider hand-tufted or hand-knotted rugs, which are renowned for their intricate patterns and luxurious textures. These rugs, crafted with meticulous attention to detail, make a sophisticated statement in any setting. If a contemporary aesthetic appeals to you, machine-woven rugs are an excellent choice. They are available in an array of vibrant patterns and hues and are engineered to endure high foot traffic with their durable heat-set fibers. For a versatile and classic option, flat-woven rugs, such as kilims, offer a reversible design that seamlessly integrates with both modern and traditional decor.
When selecting a rug, the choice of material significantly impacts both its look and feel. Shag and flokati rugs are ideal for creating a sumptuous, inviting atmosphere. Their long, soft fibers provide unparalleled comfort underfoot, enhancing the coziness of your living room or bedroom. Hand-loomed rugs deliver unique textures and artisanal craftsmanship, while braided and hand-hooked rugs bring a delightful, handcrafted charm. For ease of maintenance, machine washable rugs are highly practical. They allow for effortless cleaning and help maintain a pristine appearance with minimal effort.
In addition to aesthetics, the functionality of your rug is paramount. Stain-resistant and water-resistant rugs are perfect for managing spills and everyday wear, ensuring your rug remains pristine over time. Non-slip and adhesive backings are crucial for safety, particularly on hardwood floors, preventing any risk of slipping and ensuring the rug stays securely in place. Furthermore, cushioned rugs enhance comfort, making your space not only stylish but also extraordinarily comfortable.
Personalize your space with bespoke or custom rug options. An 8x10 area rug is ideal for covering substantial areas and can be customized to fit specific dimensions or design preferences. Custom features, such as elegant fringe details or organic textures, allow you to craft a rug that reflects your unique style and complements your existing decor.
The selection of the top 15 area rugs available today encompasses a wide range of styles and features to meet diverse needs. From distressed designs that impart character to sleek contemporary patterns that offer a modern touch, there is a rug to suit every taste. Large rugs for living rooms and bedrooms can define and unify the space, while oversized carpets can create a dramatic focal point. Consider the practical aspects of each rug to ensure it not only enhances your decor but also withstands the rigors of daily use.
Ultimately, selecting the ideal area rug involves a delicate balance between aesthetic appeal and functional utility. Whether you opt for a luxurious hand-tufted piece, a resilient machine-woven design, or a versatile flat-woven style, the right rug will elevate your living space into a stylish and comfortable haven. By exploring a variety of options and carefully considering both design and practicality, you can find the perfect rug to transform your room into a beautifully appointed retreat.
7