
Search results for "Problem solvers ready" in Home Design Ideas
 Howell Custom Building Group
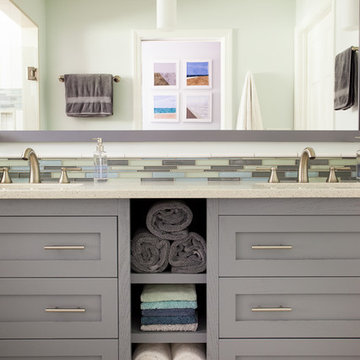
This project consisted of remodeling an existing master bath and closet. The owners asked for a
functional and brighter space that would more easily accommodate two people simultaneously getting ready for work. The original bath had multiple doors that opened into each other, a small dark shower, and little natural light. The solution was to add a new shed dormer to expand the room’s footprint. This proved to be an interesting structural problem, as the owners did not want to involve any of the first floor spaces in the project. So, the new shed was hung off of the existing rafters (in a sense this bath is hanging from the rafters.)
The expanded space allowed for a generous window in the shower, with a high window sill height to provide privacy from the back yard. The Strasser vanities were a great value and had the desired finish. The mirror frame and center shelves were painted to match the cabinet finish. The shower can easily function for two, allowing for their busy morning schedules. All of the fixtures matched nicely in a brushed nickel finish.
Toto Eco Dartmouth toilet; Farimont undermount Rectangular sinks; Toto widespread lav faucet; Toto multispray handshower and showerhead
Photography by Emily O'brien
 Valentini Kids Furniture Brooklyn NY
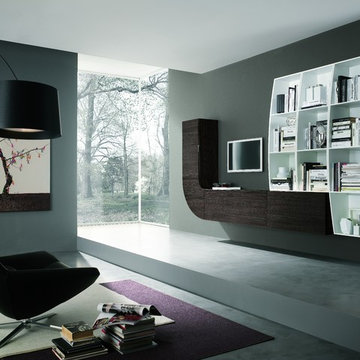
Modern Wall Unit Velvet Millenium 941 by Artigian Mobili Italy
Made in Italy
Velvet Millenium by ArtigianMobili is an innovative Italian wall units and entertainment centers collection that can be a perfect solution for extraordinary individuals and their modern interiors. The collection fascinates with its really new designs, original shapes and top quality, being manufactured by skillful Italian artisans. The Velvet Millenium wall unit line is modular and enumerates a variety of units that are available in different sizes, making possible to customize any composition according particular dimensions, design and functional requirements, offering lots of storage opportunities. Color is also not a problem within this collection as far as all the units can be ordered wood finished, wood open pore matt lacquered, or lacquered even in your custom RAL COLOR, either gloss or matt! Feel free to select from our "as shown" wall unit compositions or build the wall unit of your dreams from sketch!
Contact our Office regarding customization of this wall unit - we are always ready to help!
MATERIAL/CONSTRUCTION:
Structure is made of 18 mm (0.7") thick wooden particles melamine panels
The lacquered structures and fronts are made of REAL LACQUERING, which is non toxic and non allergic product
Lights (if any) CE marked and comply with the directives 93/68/EEC and 92/31/EEC
The starting price is for the Wall Unit Composition Velvet Millenium 941 as shown in the main picture in Dark Oak / White finishes.
Dimensions:
Wall Unit: W130" x D14.6" x H71"
 Kitchen Solvers of Miami
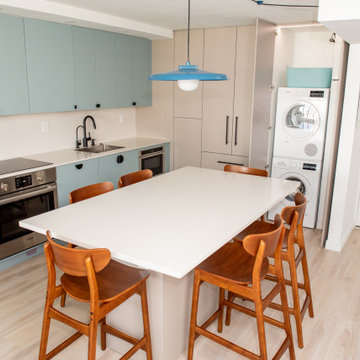
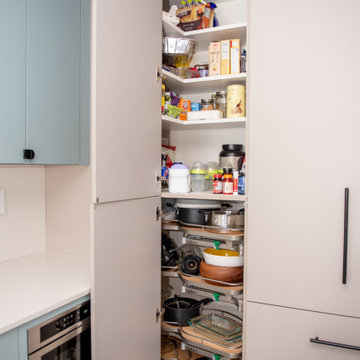
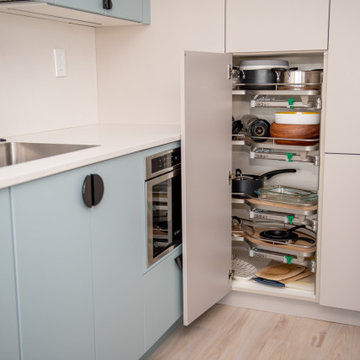
This was an interesting kitchen remodel as we opened the walls and remove the soffit to make the space taller at the same height of the rest of the apartment. We installed new custom cabinets from Bellmont Cabinets 1900 series. The cabinets by the stove were done in the Seaside door style in Aqua while the rest of the cabinets were done in the Porta door in Mocaccino-Matte. We next installed a new Quartz COMPAC countertop and backsplash in Luna for the kitchen while the countertop for the island was done in Moon. We placed a cable lamp on top of the island so that we didn’t have to keep the soffit. All appliances are panel ready flush installed. We also installed a tall blind corner pullout, a dish drying rack inside a cabinet and a special closet to conceal washer/dryer with sensor lights inside. To finish the new look we installed black Matte faucets and black half moon handles and pulls.
Find the right local pro for your project
 Florida Green Construction Inc.
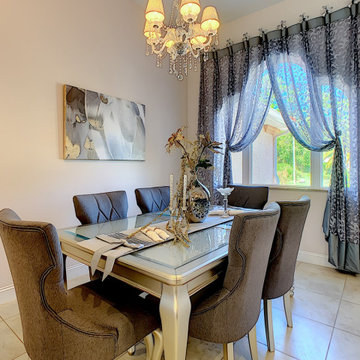
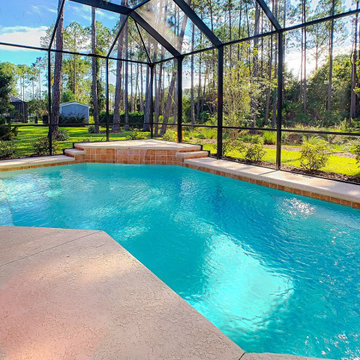
LUXURY BUILDER’S MODEL HOME FOR SALE
Save approx. $30,000 or more over 10 years in this Green home. Plus, continued savings over the lifetime of your home.
GRAND AWARD AND GRAND REALTORS CHOICE AWARD FROM THE PARADE OF HOMES 2017
ESTIMATED HOMEOWNERS’ MONTHLY EXPENSES TO LIVE IN THIS GREEN HOME.
Your monthly utility bills for electricity and water are about $ 150 per month. Homeowners’ insurance about $ 60 per month. Total of all your required payments are approximately $ 210 per month in this home.
You will live without financial problems in this elegant, economical and healthy to live in luxury home, in a certified Green City Palm Coast with a comfortable climate and a clean environment.
If you are not ready to move, we provide full-service property management for you.
 Kitchen Solvers of Miami
This was an interesting kitchen remodel as we opened the walls and remove the soffit to make the space taller at the same height of the rest of the apartment. We installed new custom cabinets from Bellmont Cabinets 1900 series. The cabinets by the stove were done in the Seaside door style in Aqua while the rest of the cabinets were done in the Porta door in Mocaccino-Matte. We next installed a new Quartz COMPAC countertop and backsplash in Luna for the kitchen while the countertop for the island was done in Moon. We placed a cable lamp on top of the island so that we didn’t have to keep the soffit. All appliances are panel ready flush installed. We also installed a tall blind corner pullout, a dish drying rack inside a cabinet and a special closet to conceal washer/dryer with sensor lights inside. To finish the new look we installed black Matte faucets and black half moon handles and pulls.
 KITCHEN SOLVERS - La Crosse
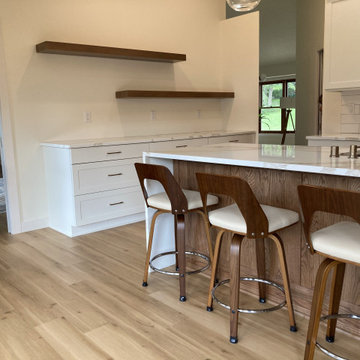
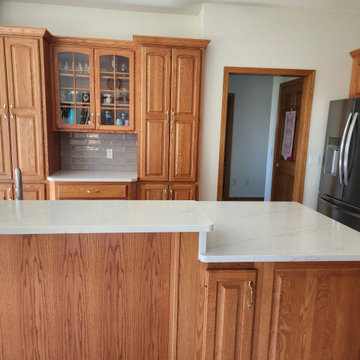
For this kitchen remodeling project, the homeowners were looking to open up their kitchen and give it a more contemporary look. We removed the cabinets over the existing island to really open up the space. We next tore out all the existing cabinets to get the space ready for their new cabinets and island. For the kitchen cabinets, they went with an oak simple shaker door in a white color, while the island was done in an oak mission door in a cashew stain. To really make the kitchen stand out, they went with a quartz Vivalioro countertop with a waterfall edge for the island. To finish this new look, they chose a 4” x 6” arctic white matte backsplash, floating shelves and a farm sink. Now this is the dream kitchen they have been hoping for.
 Florida Green Construction Inc.
LUXURY BUILDER’S MODEL HOME FOR SALE
Save approx. $30,000 or more over 10 years in this Green home. Plus, continued savings over the lifetime of your home.
GRAND AWARD AND GRAND REALTORS CHOICE AWARD FROM THE PARADE OF HOMES 2017
ESTIMATED HOMEOWNERS’ MONTHLY EXPENSES TO LIVE IN THIS GREEN HOME.
Your monthly utility bills for electricity and water are about $ 150 per month. Homeowners’ insurance about $ 60 per month. Total of all your required payments are approximately $ 210 per month in this home.
You will live without financial problems in this elegant, economical and healthy to live in luxury home, in a certified Green City Palm Coast with a comfortable climate and a clean environment.
If you are not ready to move, we provide full-service property management for you.
 Kitchen Solvers of Miami
This was an interesting kitchen remodel as we opened the walls and remove the soffit to make the space taller at the same height of the rest of the apartment. We installed new custom cabinets from Bellmont Cabinets 1900 series. The cabinets by the stove were done in the Seaside door style in Aqua while the rest of the cabinets were done in the Porta door in Mocaccino-Matte. We next installed a new Quartz COMPAC countertop and backsplash in Luna for the kitchen while the countertop for the island was done in Moon. We placed a cable lamp on top of the island so that we didn’t have to keep the soffit. All appliances are panel ready flush installed. We also installed a tall blind corner pullout, a dish drying rack inside a cabinet and a special closet to conceal washer/dryer with sensor lights inside. To finish the new look we installed black Matte faucets and black half moon handles and pulls.
 Kitchen Solvers of Spring Hill
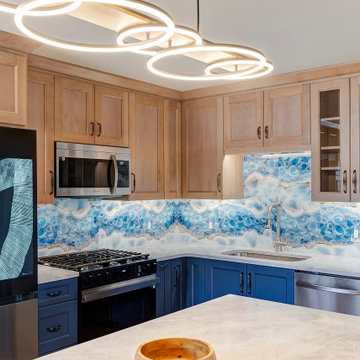
These homeowners had purchased a home planning to make it a multi-generation home, and they were finally ready to build the upstairs kitchen in the bonus room! In the spirit of color and personality we selected the perfect shade of blue and a stained Alder that worked beautifully with the oak floors. And though it started off with a bold blue vein quartz they ended up falling in love with a gorgeous, leathered dolomite that is soft and luxurious. Then, knowing they did not want tile and grout, we suggested IMAGIO tempered glass and Marty found the perfect image of a geode (one of the homeowners collects them) to add the touch of fun and personality to the space! With this space needing to accommodate separate living, we designed and built a custom laundry cabinet and pantry cabinet that can handle all the storage and cooking needs all wrapped up in a cool and functional package! This one was a blast to do for this fun family!
 Kitchen Solvers of Allentown
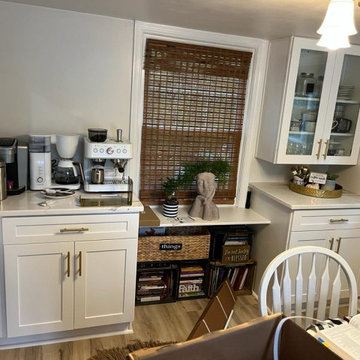
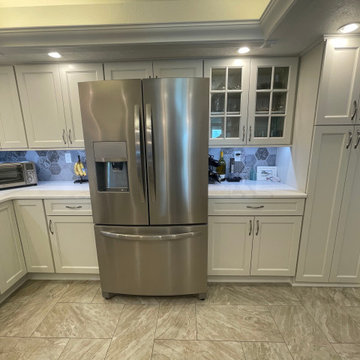
Beautiful kitchen remodeling project where the homeowner wanted to give their kitchen a new look while also changing the layout. We started by tearing out the existing cabinets and repositioning the refrigerator and oven onto different walls. We were then ready to start installing the new cabinets. They went with the Nantucket door in a polar white color. Next, we installed a new Calacatta with dark grey vein quartz countertop and a blue hexagon shaped backsplash. To finish the new look, we added a new vinyl floor. Now this homeowner has a beautiful new kitchen.
 Innovative Renovation Services
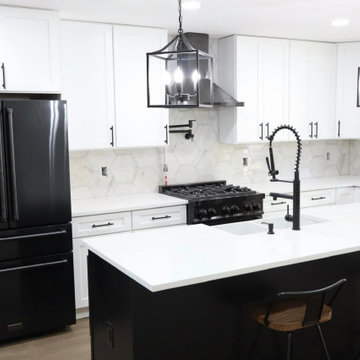
Innovative Renovation Services handles kitchen remodel Orange County projects from demolition through final finishing, so each stage of the work is ready for the next. We focus on the construction and installation quality that determines whether a renovated kitchen holds up or starts showing problems within a year.
 Kitchen Solvers of North Raleigh
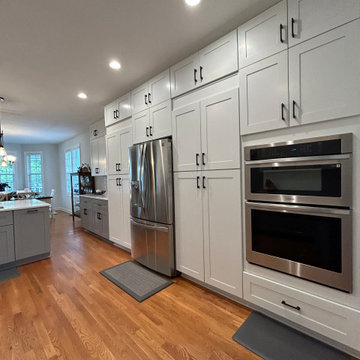
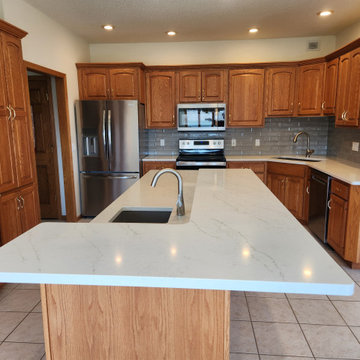
For this kitchen remodeling project, the homeowner wanted to change the look of their kitchen while also adding more storage space. We got busy tearing out the existing cabinets, countertops and backsplash to get the space ready for the new cabinets. They went with a shaker door for the entire kitchen. For the perimeter and wall cabinets they went with a polar white color, while the peninsula and base cabinets were done in a pebble gray color. For the backsplash, they decided to go with a linear white subway tile for the perimeter walls and a white herringbone for the stove/vent area. To pull the new look together, they went with the Sterling quartz countertop. To finish this kitchen transformation, we added several new storage solution items like a tray divider, a mixer, trash can, and pantry pullouts. Now these homeowners have the kitchen they have been dreaming of.
 Kitchen Solvers of Rochester
Our clients contacted us to help them update their kitchen. They wanted to first update the countertops, while also adding a backsplash and pullout drawers to their existing pantries. Some of their existing drawers were falling apart and they wanted to update those to soft closed drawer boxes as well. There was also an old appliance garage that they no longer used and wanted to know what we could do to remove that. We proposed to remove the existing cabinet and cut the appliance garage down. This really opened up the space for them, which they loved. We were now ready to install a new Calacatta Lucia quartz countertop and a Raku silver glossy tile backsplash. We also replaced the main and prep sink with new concrete undermount sinks. To finish this transformation, we installed all new dovetailed wood drawer boxes with full-extension undermount soft-close glides in all their existing drawers and the two pantries. Now our homeowners finally have the kitchen of their dreams!
 Windy City Painters
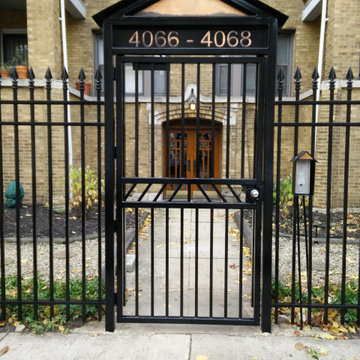
s your ornamental iron fence flaking rust onto the sidewalk every time Chicago wind kicks up? That is not a cosmetic problem - it is a sign that bare metal is exposed to moisture and the corrosion cycle is accelerating. Windy City Painters restores iron fencing on Chicago greystones, two-flats, Victorian brownstones, and courtyard buildings using professional-grade rust conversion and rust-inhibitive systems designed for the Midwest climate.
PROJECT OVERVIEW
Ornamental iron fence painting in Chicago is a multi-stage restoration process, not a simple brush-and-go job. Chicago properties - particularly the dense residential streetscapes of the North Side and Near West Side - feature decorative iron fencing that ranges from simple tubular picket to elaborate spear-top and scroll designs. When paint fails on iron, rust accelerates quickly. Windy City Painters evaluates each fence for structural rust-through, surface rust, and paint adhesion before recommending a scope of work.
MATERIALS AND PRODUCTS
Rust conversion: Ospho (phosphoric acid-based) or Corroseal (latex rust converter) depending on rust severity and surface porosity. Both chemically convert iron oxide into a stable compound that primer bonds to permanently rather than simply coating over active rust.
Primer: Rust-Oleum DTM (Direct to Metal) rust-inhibitive primer or Sherwin-Williams DTM Acrylic Coating primer, both formulated to penetrate weld seams, crevices, and pitted metal surfaces where brush application is essential.
Finish coat: Sherwin-Williams DTM Acrylic in satin or semi-gloss for UV resistance, color retention, and flexibility through freeze-thaw cycles. Two finish coats applied by brush for full coverage on ornamental profiles.
THE PROCESS
Step 1 - Mechanical Preparation: Wire wheel grinding with angle grinders removes loose rust and failing paint across flat rail surfaces. Needle gun descaling reaches weld joints, picket bases, and decorative scroll details where wire wheels cannot access. Windy City Painters inspects for rust-through after mechanical prep and flags any sections needing welding before painting proceeds.
Step 2 - Rust Conversion: Ospho or Corroseal is applied by brush to all remaining rust-affected surfaces. Ospho reacts with iron oxide over 24 hours, converting it to iron phosphate. Corroseal encapsulates and converts simultaneously. Both products create a chemically stable surface that dramatically improves primer adhesion on previously rusted iron fence sections.
Step 3 - Primer Application: Rust-Oleum DTM or Sherwin-Williams DTM rust-inhibitive primer is worked into every joint, crevice, and ornamental detail by brush - never sprayed alone on open ironwork where overspray and thin coverage risk undercutting. Full wet film thickness is verified before drying. Windy City Painters does not rush cure times between coats.
Step 4 - Finish Coats: Two coats of Sherwin-Williams DTM Acrylic topcoat are applied by brush for maximum film build on vertical pickets and horizontal rails. Color is matched to original or updated per homeowner preference. Semi-gloss finish resists dirt accumulation and makes future cleaning easier between repainting cycles.
CHICAGO-SPECIFIC CHALLENGES
Chicago presents iron fence painting conditions that milder climates do not. Road salt spray from city streets migrates onto fence bases through snowplow activity and foot traffic. Freeze-thaw cycling - sometimes occurring 30 or more times per winter - expands and contracts metal faster than paint can flex if film build is inadequate. High summer humidity slows cure times and risks blushing in topcoats applied too early in the morning. Windy City Painters schedules iron fence work during appropriate temperature and humidity windows and never applies coatings when rain is forecast within 24 hours.
WHAT TO EXPECT LONG-TERM
A properly prepped and primed iron fence in Chicago should hold a quality DTM finish for 5-8 years before needing significant maintenance. Annual inspection of base welds and picket bottoms - areas where water pools - catches early rust before it requires full mechanical prep again. Touch-up painting of isolated spots extends coating life significantly.
PRO TIPS
Tip 1: Never let a painter skip straight to topcoat on a rusty fence. Active rust under paint fails within one or two seasons. Ospho or Corroseal conversion is non-negotiable on Chicago iron.
Tip 2: Inspect fence picket bases at ground level every fall. That is where water collects, salt concentrates, and rust begins its worst work. Early touch-up costs far less than full restoration.
Tip 3: Request brush application on ornamental ironwork rather than spray-only. Brush work ensures wet paint is physically worked into every joint and crevice where rust originates.
Ready to restore your iron fence? Visit windypainters.com to schedule a free estimate with Windy City Painters.
Q: What does iron fence painting cost in Chicago? A: Iron fence painting in Chicago typically runs $8-$18 per linear foot. Rust severity, fence height, ornamental detail complexity, and whether welding repairs are needed all affect the final cost for professional iron fence restoration.
Q: How do you treat rust before painting an iron fence? A: Windy City Painters uses Ospho or Corroseal rust converters after mechanical prep. These products chemically neutralize iron oxide, creating a stable surface that rust-inhibitive primer bonds to permanently rather than painting over active corrosion.
Q: What primer is best for painting a rusty iron fence in Chicago? A: Rust-Oleum DTM and Sherwin-Williams DTM rust-inhibitive primers are our go-to products for iron fence painting in Chicago. Both are formulated for direct metal application and resist the moisture and freeze-thaw stress Chicago winters produce.
Q: How long does painted iron fencing last in Chicago? A: A professionally prepped and primed iron fence in Chicago holds a quality DTM finish for 5-8 years. Annual inspection of base welds and low points, with spot touch-up as needed, extends that service life considerably.
Q: Do I need a welder before painting my iron fence? A: If rust has eaten through fence rails or pickets structurally, Windy City Painters will identify those sections during prep and recommend welding before any primer or paint is applied. Painting over structurally failed metal is a waste of money.
Q: Can I paint an iron fence myself? A: DIY iron fence painting without proper rust conversion and DTM primer systems almost always fails within two seasons in Chicago. Professional prep, product selection, and application technique are why Windy City Painters results last 5-8 years.
Q: What neighborhoods does Windy City Painters serve for iron fence work? A: Windy City Painters serves Chicago North Side and Near West Side neighborhoods, working on greystones, two-flats, Victorian brownstones, courtyard buildings, and coach houses throughout the city.
 Corvus Construction
Sometimes great things come from small things and this entryway project was exactly like that. This very small yet interesting project started almost by accident.
Entryway TileI had completed a tile job a few months before and had some high quality porcelain tile left over. It was nice tile so I was hesitant to toss it out but after moving the pile around my shop for several months I finally decided to throw it away. While loading my pickup with miscellaneous construction garbage – and this great tile – one of my neighbors stopped by for a chat about some of my recent projects.
I showed him the great left over tile that I was throwing away and asked him if he had any interest in taking it off my hands – for free. He said he was actually thinking about replacing his existing tile landing at his house because although it had been redone just a few years ago, it had cracked. We went over and took a look at his landing and decided the scrap tile might be a perfect solution.
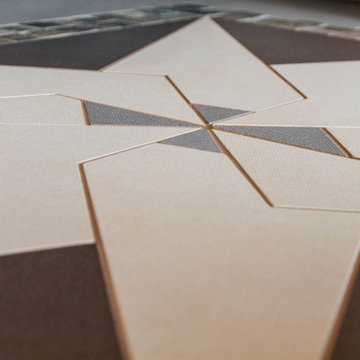
tile floorI told my neighbor “you come up with any design you want, and I’ll bring that to life.” He came up with an idea and sketched out the idea within a couple of days. As soon as I looked at the sketches, I knew it was going to be a very challenging project, but I also knew it would be a rewarding project I would be proud to put the Corvus name on.
We took the final sketch and imported it into a graphics design program to make the focal point of the design work within the existing space and fine tune the look of the project to fit the available space of the entryway. This was going to be a highly customized undertaking that was going to be all about the details.
Because every tile had to be custom cut, I printed out the final design from the program to create a stencil to trace the outline on each tile. After all of the painstaking tile cutting, I laid it out in a mock-up on the entry floor. Then we were ready to overcome our next challenge – the flexing and moving sub floor.
The existing tile landing that we were replacing had been installed just a few years earlier but had already cracked down the center. This fracture made me realize that we needed to find a way to somehow decouple the substrate from the finished tile surface to prevent the same problem from cropping up again.
tile floor entrywayI decided to go with a Schluter-DITRA™ tile underlay for this job. Working with DITRA™ was surprisingly simple. The only thing you need to remember is to use unmodified thinset mortar when setting tile over this substrate, because modified thinset would take a very long time to cure. We also decided to use QuartzLock™ urethane grout for the floor because it expands and contracts when the floor flexes under foot traffic and could help prevent future cracking.
In the end the project came out great! My neighbor is thrilled and can’t wait to show it off to anyone that stops by. This is a great example of how custom work can really amp up the appeal of your home and how a small change can make a big difference in the look of your home.
 Kitchen Solvers of Grayslake
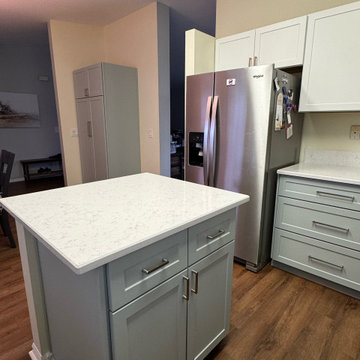
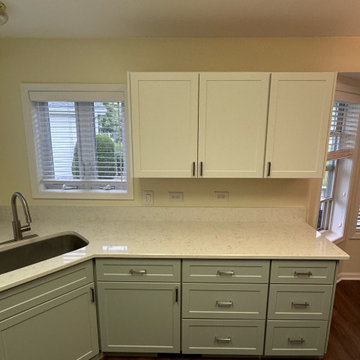
We recently had the pleasure of transforming this kitchen with a stunning refacing project! Our client wanted a fresh, modern look, and we delivered with a beautiful combination of Stratus White Shaker doors for the upper cabinets and Aloe SuperMatte for the lower cabinets and pantry. To complete the transformation, the countertops were replaced with quartz in Fairy White, adding a touch of elegance and durability to this gorgeous kitchen. We also enhanced functionality by modifying several cabinets to create additional drawer stacks and customized the pantry with full-width rollouts, making it easier than ever to access everything they need. The result? A kitchen that's as functional as it is beautiful! Our homeowner is absolutely thrilled with their newly remodeled space, and we're so grateful to have been part of this transformation. Ready to give your kitchen a makeover? Contact us today to schedule your consultation!
 KITCHEN SOLVERS - La Crosse
Our clients contacted us to help them update their kitchen. They wanted to first update the countertops, while also adding a backsplash and pullout drawers to their existing pantries. Some of their existing drawers were falling apart and they wanted to update those to soft closed drawer boxes as well. There was also an old appliance garage that they no longer used and wanted to know what we could do to remove that. We proposed to remove the existing cabinet and cut the appliance garage down. This really opened up the space for them, which they loved. We were now ready to install a new Calacatta Lucia quartz countertop and a Raku silver glossy tile backsplash. We also replaced the main and prep sink with new concrete undermount sinks. To finish this transformation, we installed all new dovetailed wood drawer boxes with full-extension undermount soft-close glides in all their existing drawers and the two pantries. Now our homeowners finally have the kitchen of their dreams!
 Kitchen Solvers of Grayslake
We recently had the pleasure of transforming this kitchen with a stunning refacing project! Our client wanted a fresh, modern look, and we delivered with a beautiful combination of Stratus White Shaker doors for the upper cabinets and Aloe SuperMatte for the lower cabinets and pantry. To complete the transformation, the countertops were replaced with quartz in Fairy White, adding a touch of elegance and durability to this gorgeous kitchen. We also enhanced functionality by modifying several cabinets to create additional drawer stacks and customized the pantry with full-width rollouts, making it easier than ever to access everything they need. The result? A kitchen that's as functional as it is beautiful! Our homeowner is absolutely thrilled with their newly remodeled space, and we're so grateful to have been part of this transformation. Ready to give your kitchen a makeover? Contact us today to schedule your consultation!
 Kitchen Solvers of the Gulf Coast
For this kitchen remodeling project, the homeowners were looking to transform their kitchen into a more eye-catching and modern space. We got the space ready by tearing out all the old cabinets and countertop. For the new cabinets, they went with a Hamilton door in maple and in an ArticWhite color. We next installed a new eye-catching backsplash done in a hexagon shape and in the Virtue Gray. To finish this new kitchen transformation, we installed a new Riviera quartz countertop along with LED under cabinet light strips. Now this is truly a kitchen they love to share with their friends and family.
 Total Fitouts | Australia
Our Gold Coast shopfitters created an outstanding cafe fitout for these small business owners. This being the second of two cafes, the owners of Kaffe Co. wanted something a little different to their original space, opening up the kitchen and front counter area to allow customers to see right into the kitchen and preparation spaces.
The client’s hope for the fitout was to have all the space well utilised to allow for a full kitchen while catering for plenty of dine-in customers. The cafe design was all about creating an inviting and relaxing space for customers to sit and enjoy a meal on a break from shopping.
Our Gold Coast shopfitters worked around many other builds happening in the new shopping centre at the time which called for a high level of organisation and some problem solving to ensure the smooth operation of the build.
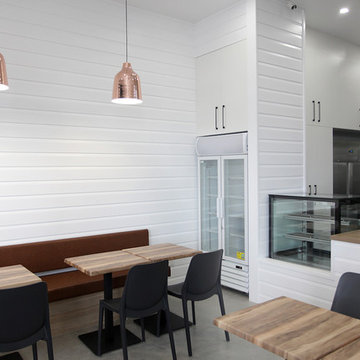
The cafe offers a clean, minimalistic style with polished concrete floors, Hamptons inspired white timber walls and a beautiful timber bench top – all finished off with on-trend copper light fixtures creating a comfortable and pleasant eatery for shoppers in the midst of a busy arena. The cafe owners are now all set with a fresh new look – a space ready to be filled with coffee aromas, delicious foods and plenty of chatter!
Love this cafe fitout? Get in touch with our Hope Island shopfitters or call 1300 654 634 to find a Total Fitouts near you.
42