
Search results for "Properly handle" in Home Design Ideas

 Martine Paquin Design
lucas Fladzinski
Inspiration for a contemporary beige tile and porcelain tile porcelain tile bathroom remodel in San Francisco with an integrated sink, flat-panel cabinets, dark wood cabinets, a two-piece toilet and quartz countertops
Inspiration for a contemporary beige tile and porcelain tile porcelain tile bathroom remodel in San Francisco with an integrated sink, flat-panel cabinets, dark wood cabinets, a two-piece toilet and quartz countertops
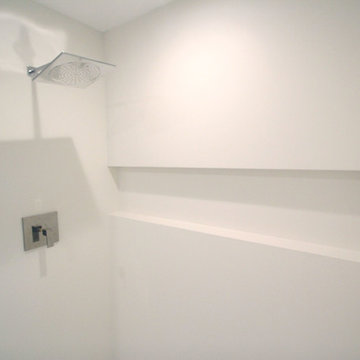


 Morgante Wilson Architects
Inspiration for a contemporary multicolored tile bathroom remodel in Chicago with an undermount sink, flat-panel cabinets, medium tone wood cabinets, wood countertops and white walls
Find the right local pro for your project
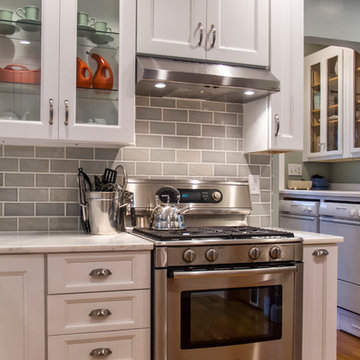
 BENDER
Bender was able to take an old, closed in 1927 kitchen and transform it into an open transitional kitchen that functions properly for a 2014 family. Durable and washable cabinets make for ease of use, while sealed marble countertops give this space a luxurious feel.
Photo Credit: Jim Fuhrmann

 HSH Interiors
David Duncan Livingston
Transitional master gray tile and cement tile bathroom photo in San Francisco with recessed-panel cabinets, white cabinets, marble countertops, white walls and a console sink
Transitional master gray tile and cement tile bathroom photo in San Francisco with recessed-panel cabinets, white cabinets, marble countertops, white walls and a console sink

 Saint Clair Kitchen & Home
This award winning kitchen in Maplewood, NJ features St Clair Fine Handcrafted Cabinetry. The curved banquette is attached to an ebony stained birch island. Subzero-Wolf Appliances include ovens, 48" range top, 60"stainless hood and paneled 48" refrigerator. The island top is Carrara marble and the perimeter features Absolute black granite. The back splash is Calacatta marble with gray glass accents, framed with mother of pearl. The oval table is custom made of distressed walnut. Photography by Peter Rymwid
See more pics and details here: http://www.subzero-wolf.com/Photos/View/Nantucket-Now"> http://www.subzero-wolf.com/Photos/View/Nantucket-Now"> http://www.subzero-wolf.com/Photos/View/Nantucket-Now
 BENDER
Bender was able to take an old, closed in 1927 kitchen and transform it into an open transitional kitchen that functions properly for a 2014 family. Durable and washable cabinets make for ease of use, while sealed marble countertops give this space a luxurious feel.
Photo Credit: Jim Fuhrmann
Sponsored
Sunbury, OH

J.Holderby - Renovations
Franklin County's Leading General Contractors - 2X Best of Houzz!
 BENDER
Bender was able to take an old, closed in 1927 kitchen and transform it into an open transitional kitchen that functions properly for a 2014 family. Durable and washable cabinets make for ease of use, while sealed marble countertops give this space a luxurious feel.
Photo Credit: Jim Fuhrmann
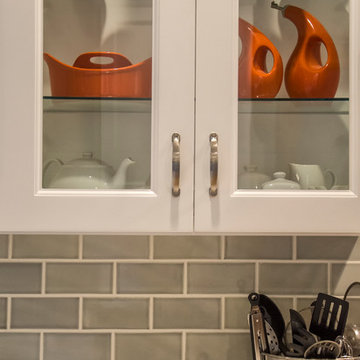 BENDER
Bender was able to take an old, closed in 1927 kitchen and transform it into an open transitional kitchen that functions properly for a 2014 family. Durable and washable cabinets make for ease of use, while sealed marble countertops give this space a luxurious feel.
Photo Credit: Jim Fuhrmann

 Refined & Co
Large elegant l-shaped medium tone wood floor eat-in kitchen photo in Milwaukee with an undermount sink, shaker cabinets, gray cabinets, an island, quartzite countertops, beige backsplash, ceramic backsplash and stainless steel appliances
 BENDER
Bender was able to take an old, closed in 1927 kitchen and transform it into an open transitional kitchen that functions properly for a 2014 family. Durable and washable cabinets make for ease of use, while sealed marble countertops give this space a luxurious feel.
Photo Credit: Jim Fuhrmann

 Windy City Painters
Professional wallpaper installation Old Town requires expertise that honors the neighborhood's historic character while delivering modern durability and beauty.
Project Overview and Architecture
This Old Town wallpaper installation showcased our ability to work with the area's distinctive architecture, from classic greystones to renovated vintage condos that define this prestigious neighborhood.
Materials and Products
We selected premium wallpaper materials specifically designed for Chicago's climate conditions, using high-quality adhesives and primers that ensure long-lasting adhesion on various surface types.
Installation Process
Step 1: Surface preparation including cleaning, smoothing, and addressing imperfections common in older buildings
Step 2: Professional repairs to walls ensuring perfect foundation for wallpaper application
Step 3: Quality primer application designed specifically for wallpaper adhesion and longevity
Step 4: Expert wallpaper installation with precise pattern matching and seamless application techniques
Chicago-Specific Challenges
Old Town homes present unique challenges including weather exposure, aging building materials, potential lead paint considerations, and vintage surfaces requiring specialized preparation techniques.
Results Achieved
Windy City Painters delivered flawless wallpaper installation that enhanced the room's aesthetic while respecting the architectural integrity of this historic Old Town property.
Professional Tips
Homeowners should always hire experienced professionals for wallpaper installation, especially in historic properties where surface preparation and material selection significantly impact long-term success and beauty.
See more work and request free estimate at windypainters.com.
FAQs
Q: Why hire professionals for wallpaper installation Old Town homes? / A: Expert installation prevents costly mistakes, ensures proper adhesion, and preserves historic property values through quality craftsmanship.
Q: What wallpaper materials work best in Chicago climate? / A: High-quality papers with proper backing designed for humidity fluctuations and temperature changes typical in Chicago homes.
Q: How do you prepare Old Town walls for wallpaper? / A: Thorough cleaning, surface smoothing, repairs, and specialized primers ensure optimal wallpaper installation adhesion and longevity.
Q: Can wallpaper be installed over existing paint? / A: Sometimes, but professional assessment determines if surface preparation or primer application is needed for successful wallpaper installation.
Q: How long does professional wallpaper installation take? / A: Most rooms completed within one day, depending on size, pattern complexity, and surface preparation requirements.
Q: What about removing old wallpaper first? / A: We safely remove existing wallpaper using proper techniques that protect walls and prepare surfaces for new installation.
Q: Do you offer design consultation for wallpaper selection? / A: Yes, we help choose patterns and materials that complement Old Town architectural character and personal style preferences.
Q: How do you handle pattern matching across walls? / A: Precise measurements and expert techniques ensure seamless wallpaper installation with perfect pattern alignment throughout rooms.
Q: What's your wallpaper installation warranty coverage? / A: Comprehensive warranties cover both materials and workmanship, giving you confidence in your wallpaper installation investment.
Q: Can you work around furniture and schedules? / A: Absolutely! We coordinate timing and setup to minimize disruption during your professional wallpaper installation project.
 Windy City Painters
Professional wallpaper installation Chicago dining room showcases expert craftsmanship in this stunning transformation that perfectly complements the home's architectural character.
## Project Overview
This comprehensive wallpaper installation project involved both walls and ceiling application in a formal dining room within a vintage Chicago greystone. The intricate pattern required precise alignment and professional techniques to achieve seamless results that honor the home's historic charm while adding contemporary elegance.
## Materials and Products
We utilized premium wallpaper adhesive specifically formulated for Chicago's climate variations, along with professional-grade smoothing tools and precision cutting equipment. High-quality primer ensured optimal surface preparation for lasting adhesion across both vertical and horizontal applications.
## Installation Process
First, comprehensive surface preparation included removing existing materials and repairing any imperfections. Second, application of specialized primer designed for wallpaper adhesion. Third, precise measurement and cutting with careful attention to pattern alignment. Finally, professional installation with meticulous corner work and ceiling transitions.
## Chicago-Specific Challenges
Chicago homes present unique wallpaper installation challenges including settling foundations that affect wall surfaces, humidity fluctuations impacting adhesive performance, and older plaster surfaces requiring specialized preparation techniques. Additionally, vintage buildings often have irregular walls demanding expert adjustment skills.
## Results and Quality
The completed wallpaper installation creates a sophisticated dining environment that seamlessly integrates with the home's architectural character. Perfect pattern matching across walls and ceiling demonstrates the precision possible with professional installation techniques.
## Professional Tips
Before starting wallpaper installation, always test adhesion in inconspicuous areas first. Maintain consistent room temperature throughout the process. Choose quality materials designed for Chicago's climate. Plan pattern layout carefully to minimize waste and ensure optimal visual flow.
See more work and request free estimate at windypainters.com - Windy City Painters delivers exceptional results.
Q: How long does wallpaper installation take?
A: Professional wallpaper installation typically requires 1-2 days depending on room size, pattern complexity, and surface preparation needs.
Q: Can you install wallpaper on textured walls?
A: Yes, textured wall wallpaper installation requires proper surface preparation and specialized techniques for optimal adhesion results.
Q: Do you remove old wallpaper first?
A: Complete old wallpaper removal is essential before new wallpaper installation to ensure proper adhesion and smooth finish.
Q: What about ceiling wallpaper installation?
A: Ceiling wallpaper installation requires specialized equipment and techniques - Windy City Painters handles this expertly and safely.
Q: How do you ensure pattern matching?
A: Professional wallpaper installation includes precise measuring, cutting, and alignment techniques for seamless pattern matching throughout the space.
Q: Can wallpaper installation work in humid areas?
A: Proper wallpaper installation with quality adhesives designed for humidity variations ensures lasting results in Chicago's climate.
Q: What surfaces accept wallpaper installation?
A: Most properly prepared surfaces including drywall, plaster, and previously painted walls can accept professional wallpaper installation successfully.
Q: Do you handle corner installations?
A: Corner wallpaper installation requires specialized techniques for inside and outside corners - we ensure perfect alignment.
Q: What's included in the service?
A: Complete wallpaper installation service includes surface preparation, removal if needed, professional application, cleanup, and quality guarantee.
Q: How do you prepare surfaces?
A: Surface preparation for wallpaper installation includes cleaning, repairing imperfections, priming, and ensuring optimal conditions for adhesion.
Sponsored
Sunbury, OH
J.Holderby - Renovations
Franklin County's Leading General Contractors - 2X Best of Houzz!

 Ferguson Bath, Kitchen & Lighting Gallery
Synergy Design & Construction
Example of a large transitional porcelain tile and brown floor eat-in kitchen design in DC Metro with an undermount sink, white cabinets, beige backsplash, stainless steel appliances, two islands, shaker cabinets, quartzite countertops and stone tile backsplash
Example of a large transitional porcelain tile and brown floor eat-in kitchen design in DC Metro with an undermount sink, white cabinets, beige backsplash, stainless steel appliances, two islands, shaker cabinets, quartzite countertops and stone tile backsplash
 Editor
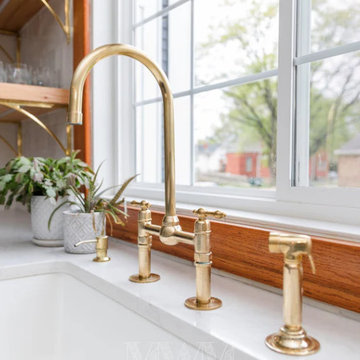
When it comes to selecting fixtures for your kitchen or bathroom, few options offer the blend of elegance, durability, and functionality like brass bridge faucets. These faucets, with their vintage charm and modern efficiency, bring a unique aesthetic and practical benefits to any space. This article explores the appeal of brass bridge faucets, their key features, benefits, and tips on how to choose and maintain them.
The Charm of Brass Bridge Faucets
Classic Aesthetic
Brass bridge faucets are known for their classic, timeless look. The warm, golden hue of brass adds a touch of luxury and sophistication, making these faucets a focal point in any kitchen or bathroom. Their vintage design can seamlessly blend with various décor styles, from rustic to contemporary.
Durability
One of the standout qualities of brass is its durability. Brass is resistant to corrosion and can withstand daily wear and tear, ensuring that your faucet remains in excellent condition for years. This makes brass bridge faucets a long-term investment for your home.
Versatility
Available in various finishes such as polished, brushed, or antique brass, these faucets can complement a wide range of design themes. Whether you want a shiny, reflective finish or a more subdued, matte look, there’s a brass bridge faucet to suit your taste.
Key Features of Brass Bridge Faucets
Elevated Bridge Design
The distinctive feature of bridge faucets is the elevated connecting pipe that links the hot and cold water lines. This bridge not only enhances the faucet's aesthetic appeal but also provides additional clearance, making it easier to clean large pots and pans or to accommodate larger sinks.
Dual Handles
Brass bridge faucets typically feature dual handles, allowing for precise control over water temperature. This functionality ensures a balanced mix of hot and cold water, providing you with the perfect temperature for your needs.
Classic Spout Designs
These faucets often come with high-arc or gooseneck spouts, which are both practical and stylish. The high spout design provides ample space for washing and filling containers, adding to the faucet’s functionality.
Benefits of Brass Bridge Faucets
Visual Appeal
Brass bridge faucets serve as a statement piece in any room. Their elegant design and warm finish add a touch of luxury and can elevate the overall aesthetic of your kitchen or bathroom.
Functionality
Beyond their beauty, brass bridge faucets are highly functional. The dual-handle design allows for precise temperature control, while the elevated bridge offers extra clearance for various tasks. This combination of form and function makes them a practical choice for busy households.
Hygienic Properties
Brass has natural antimicrobial properties, making it a hygienic choice for kitchen and bathroom fixtures. This can be particularly beneficial in spaces where cleanliness is paramount.
Choosing the Right Brass Bridge Faucet
Finish Options
When selecting a brass bridge faucet, consider the finish that best matches your existing décor. Polished brass offers a shiny, reflective surface, while antique brass provides a more vintage, weathered look. Brushed brass has a matte finish that hides fingerprints and water spots.
Coordination with Other Fixtures
Ensure that your brass bridge faucet complements other fixtures in your kitchen or bathroom. Coordinating the faucet with cabinet handles, lighting fixtures, and other hardware can create a cohesive and harmonious look.
Installation Requirements
Check the installation requirements before purchasing a brass bridge faucet. These faucets typically require a three-hole installation, so make sure your sink or countertop is compatible.
Maintenance Tips
Regular Cleaning
To maintain the luster of your brass bridge faucet, clean it regularly with a soft cloth and mild soap. Avoid using abrasive cleaners or scrubbers that can scratch the surface.
Preventing Water Spots
After cleaning, dry the faucet thoroughly to prevent water spots. This is particularly important for polished brass finishes, which are more prone to showing spots and fingerprints.
Addressing Tarnish
Brass can tarnish over time. To address this, use a brass cleaner or a mixture of lemon juice and baking soda to gently polish the surface. Regular polishing can keep your faucet looking its best.
Conclusion
Brass bridge faucets are a beautiful and functional addition to any home. Their timeless design, durability, and practicality make them a worthwhile investment for your kitchen or bathroom. By choosing the right finish and maintaining it properly, you can enjoy the elegance and charm of a brass bridge faucet for years to come. Embrace the classic appeal of brass and elevate the look of your home with this stunning fixture.
 Danze & Davis Architects, Inc.
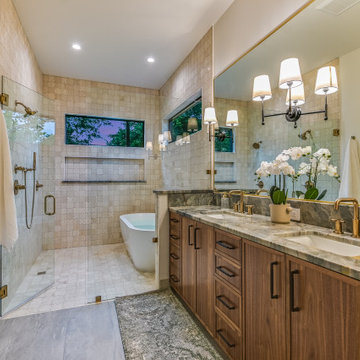
Bathroom - transitional master beige tile and stone tile ceramic tile, gray floor and double-sink bathroom idea in Austin with recessed-panel cabinets, medium tone wood cabinets, white walls, an undermount sink, quartz countertops, a hinged shower door, gray countertops and a built-in vanity

 Coates Landscape Company
This client wanted to install a bluestone expansion to their existing patio. We used square bluestone material with limestone bullnose coping. We also ensured all drainage was properly handled and beautifully tied in the existing landscape. Irrigation adjustments were also made to cover new planting material. This project ended up beautifully and we were able to be conscientious with their existing landscape and home.
Sponsored
Sunbury, OH
J.Holderby - Renovations
Franklin County's Leading General Contractors - 2X Best of Houzz!
 Astro Design Inc.
This kitchen was designed with the intent of hosting large family gatherings, upwards of twenty people at a time. Locating the kitchen adjacent to the informal eating area, the family room and the patio, was the ideal choice for entertaining. The implementation of a large double island, in an unexpected “L” shape, allowed for a ton of extra space without consequently feeling like an industrial environment.
The choice to panel the expansive fridge and freezer allowed the mirrored stainless-steel display cabinets to really become a focal point in the space. These cabinets worked perfectly to house the client’s large stemware collection. Repeating the mirrored finish on the other side of the room, with a refined hood fan exudes glamour. Lastly, the sophisticated hardware and sculptural light fixtures elevate this kitchen to the contemporary, yet traditional, formal style found throughout the rest of the home.

 safe ZOnea
Every year, the same thing happens. The first real snowfall arrives, demand for de-icing materials spikes overnight, and the businesses that waited too long find themselves scrambling for supply at the worst possible moment. Facility managers, property owners, contractors, and municipalities all depend on a steady supply of salt and ice melt to keep their properties safe and operational through winter. The ones who plan ahead sail through. The ones who don't pay more, wait longer, and take on real risk.
Sourcing de-icing materials well is not complicated, but it does require thinking ahead and understanding the options. The choices you make about what to buy, how to buy it, and who to buy it from have a direct effect on your costs, your reliability, and your ability to keep people safe when conditions turn dangerous. This article lays out what matters.
Why Your Choice of Supplier Matters More Than You Think
It is easy to treat de-icing material as a commodity, something you grab whenever you need it without much thought about where it comes from. That works fine until the moment it doesn't, usually in the middle of a storm when everyone needs supply at once and the casual sources have run dry. At that point, the relationships you built before the season become the difference between staying stocked and being stuck.
Reliable supply is the whole game in winter operations. A property that runs out of ice melt during a storm faces safety hazards, liability exposure, and disruption, none of which can wait for a back-ordered shipment. This is why establishing relationships with dependable rock salt suppliers before the season starts is one of the smartest moves a facility manager or contractor can make. It locks in supply, often locks in better pricing, and removes a major source of mid-winter stress.
The lesson here is to treat sourcing as a planning decision rather than a last-minute errand. The businesses that come through winter smoothly are almost always the ones that secured their supply chain early, chose suppliers who could actually deliver when it counted, and never had to gamble on finding material during a shortage. Reliability bought in advance is far cheaper than scarcity paid for in a crisis.
Bagged or Bulk: Matching the Material to the Job
One of the first practical decisions is whether to buy de-icing material in bags or in bulk, and the right answer depends entirely on the operation. Each format has clear advantages, and many operations end up using both for different purposes.
Bagged material offers convenience, control, and easy storage. It is simple to handle, easy to distribute to different locations or crews, straightforward to store without special equipment, and convenient for spot application by hand. It suits smaller properties, businesses without bulk storage, and situations where portion control and tidiness matter. Bulk material, on the other hand, tends to make sense for large operations that go through high volumes, where buying in quantity lowers the per-unit cost and the operation has the equipment and space to store and handle it. The tradeoff is between the convenience and flexibility of bags and the volume economics of bulk.
For many operations, the right approach is a mix: bulk for the high-volume core of the work and bags for flexibility, spot treatment, and locations where bulk handling is impractical. The key is to match the format to how the material will actually be stored, moved, and applied, rather than defaulting to one or the other out of habit. Thinking this through in advance avoids both the waste of over-buying bulk you can't handle and the expense of relying entirely on bags for a large operation.
Rock Salt Is Not Your Only Option
Rock salt, or sodium chloride, is the workhorse of winter de-icing for good reason. It is effective, widely available, and cost-efficient, which makes it the default choice for most operations most of the time. But it has limits, and understanding the alternatives helps you choose the right material for the conditions you actually face.
The most important limitation is temperature. Rock salt becomes less effective as temperatures drop, and in genuinely cold conditions it can struggle to do the job at all. This is where alternatives come in. Calcium chloride, for instance, works at much lower temperatures than rock salt and acts quickly, which makes it valuable when conditions are severe or when fast melting matters. Operations that face hard freezes or need dependable performance in extreme cold often keep calcium chloride for sale on hand for exactly those situations, using it alongside rock salt rather than instead of it.
The practical approach is to understand the conditions your property faces and stock accordingly. For many operations, rock salt handles the bulk of the work while a faster, colder-rated material like calcium chloride covers the extreme days when ordinary salt falls short. Matching the material to the temperature and the urgency of the situation is what separates an operation that stays ahead of winter from one that is constantly reacting to it.
Securing Your Supply Before the Season
Knowing what to buy is only half the equation. The other half is making sure you can actually get it when you need it, which means securing your supply before winter arrives rather than after it has already started. Timing is one of the most underrated factors in winter operations.
The logic is simple. Demand for de-icing materials is highly seasonal and spikes sharply during storms, when everyone needs supply simultaneously. Prices and availability both move against the buyer at exactly those moments. By contrast, planning ahead, estimating your needs and arranging supply before the season, puts you in a far stronger position. Working with established rock salt suppliers ahead of time means your material is accounted for before the rush, often at better pricing and with the confidence that it will be there when the first storm hits.
This kind of planning also lets you think clearly rather than react under pressure. You can estimate your seasonal needs based on your property and past winters, decide on the right mix of materials and formats, and arrange storage in advance. Operations that do this consistently spend less, worry less, and never find themselves making frantic calls during a storm. The effort of planning ahead is modest, and the payoff in reliability and cost savings is substantial.
Storing and Handling What You Buy
Securing supply is not much use if the material degrades before you can use it, which makes proper storage and handling an important and often overlooked part of the equation. De-icing materials are sensitive to moisture, and poor storage can turn a good supply into a clumped, hardened mess that is difficult to apply.
The fundamentals are straightforward. Keep material dry and protected from moisture, since salt and ice melt readily absorb water and can harden if exposed. Store it in a way that suits the format, whether that means a proper bulk storage area or a dry space for stacked bags. Keep it accessible, so crews can get to it quickly when a storm hits and time is short. And handle it with the right equipment for the format and volume, which protects both the material and the people working with it. None of this is complicated, but neglecting it can undermine even a well-planned supply.
Good storage practices protect the investment you made in securing supply early. There is little point in arranging your materials ahead of the season only to have them degrade before use. Treating storage and handling as part of the overall plan, rather than an afterthought, ensures that the material you secured is actually usable when the moment comes. It is the final link in a supply chain built to perform under winter conditions.
Estimating How Much You Actually Need
One question trips up operations of every size: how much de-icing material to buy. Order too little and you risk running short during a storm. Order too much and you tie up money and storage space in material you may not use. Getting the estimate reasonably right is a meaningful part of sourcing well.
Several factors shape the answer. The size and type of the areas you treat, sidewalks, lots, entrances, and drive lanes, set the baseline for how much material each application consumes. The local climate matters too, since colder regions and those with frequent snowfall go through far more material than milder ones. Application frequency depends on how often storms hit and how quickly surfaces need to be cleared, which varies with the kind of property and the expectations of the people who use it. And the type of material plays a role, since different products are applied at different rates.
Past experience is often the best guide. Operations that track what they used in previous winters, adjusted for the size of the property and the severity of the season, can estimate their needs with reasonable confidence. For newer operations without that history, it helps to plan conservatively and to work with a supplier who can replenish stock reliably, so that a low estimate does not turn into a mid-storm shortage.
The goal is not perfect precision but a sound, slightly cautious estimate paired with a dependable supply relationship. That combination lets an operation keep enough material on hand to handle the season without over-committing to volume it cannot store or use. Thinking this through before winter, rather than guessing during it, is one more way that planning ahead pays off when the snow starts to fall.
The Bottom Line
Sourcing de-icing materials well comes down to a few straightforward principles: plan ahead, choose reliable suppliers before the season, match your materials and formats to your actual needs and conditions, and store what you buy properly. The operations that follow these principles move through winter with confidence, while those that improvise pay more and take on needless risk.
Winter is predictable in one respect: it arrives every year, and demand for de-icing material spikes the moment it does. The businesses that prepare for that reality, rather than being surprised by it, are the ones that keep their properties safe, their costs controlled, and their operations running no matter what the season throws at them. A little foresight before the first snowfall pays off through every storm that follows.

8