
Search results for "Protective machine learning" in Home Design Ideas
 Tile Doctor Ltd
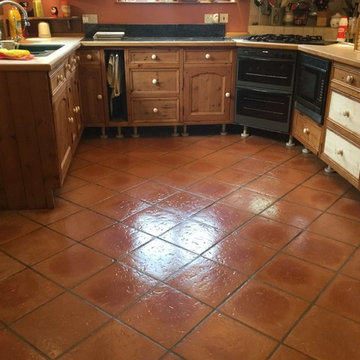
This Terracotta tiled floor was installed in the kitchen of a cottage in the small village of Maidford near Towcester. The tiles were not looking their best and the owner of the property realised it was time to do something about it and contacted Tile Doctor to have the floor stripped and resealed. Stripping and Sealing tile and stone floors is our bread and butter so I was more than happy to pop round and survey the floor which was approximately 9m2.
The grout had darkened with dirt and the previous tile sealer was failing so dirt was now getting ingrained in the Terracotta making it difficult to clean in places and leading to a patchy appearance. We discussed the work involved, my quote was accepted, and a date agreed for me to return and complete the work which would take two days, one to clean and one to seal.
After tidying up the Kitchen and removing the kickboards from underneath the kitchen units I set about working on cleaning and stripping the Terracotta floor of old sealers. To start I tested a small area with a strong dilution of Tile Doctor Wax Away. Wax was quite often used on Terracotta so I figured this product would be a good place to start. My suspicions were proved correct, and I found this to be the best product for removing the many layers of sealant on the floor. Wax Away is a new alkaline product by Tile Doctor and ideal for cleaning clay-based tiles such as Terracotta.
With my sights set on the rest of the floor Wax Away was scrubbed into the tile using a 17” rotary floor scrubbing machine and a black scrubbing pad running on a slow speed which helps to reduce splashing. This activity soon brought the dirt off the floor and the soiled cleaning solution was removed using a wet vacuum and the floor was rinsed down with clean water. The cleaning process was repeated a couple of times until I was happy with the floor, a stiff hand brush was then used along the grout lines with a dilution of Tile Doctor Pro-Clean to clean up the grout.
After rinsing and extracting the floor again the floor was inspected, and I noticed there were a few stubborn paint splashes on the tiles. I managed to remove these and these by spot treating the affected area with Tile Doctor Remove and Go and a steamer to lift the stain out of the clay tile. Once happy the floor was clean it was given a thorough rinse to neutralise it and remove any trace of cleaning products and then left it to dry.
I allowed the floor to dry for several days before returning to seal the Terracotta using numerous coats of Tile Doctor Seal and Go which is an ideal sealer for Terracotta and provides durable stain protection together with a low sheen finish. Terracotta is by its nature very porous and so it’s not unknown for it to take up to nine coats of sealer, which can take some time to apply as like paint you have to wait until it’s dry before it will take the next coat.
The customer was so impressed by the results I achieved in their kitchen they decided to go ahead and book me in to carry out this process throughout the whole of the ground floor which included lounge, study and hallway.
Phil Vissian
Northamptonshire Tile Doctor
 Sweet Smiling Landscape Design
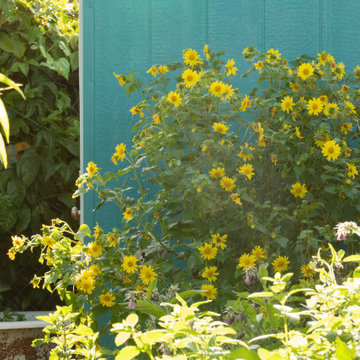
This very social couple were tying the knot and looking to create a space to host their friends and community, while also adding much needed living space to their 900 square foot cottage. The couple had a strong emphasis on growing edible and medicinal plants. With many friends from a community garden project they were involved in and years of learning about permaculture, they wanted to incorporate many of the elements that the permaculture movement advocates for.
We came up with a California native and edible garden that incorporates three composting systems, a gray water system, rain water harvesting, a cob pizza oven, and outdoor kitchen. A majority of the materials incorporated into the hardscape were found on site or salvaged within 20-mile of the property. The garden also had amenities like an outhouse and shower for guests they would put up in the converted garage.
Coming into this project there was and An old clawfoot bathtub on site was used as a worm composting bin, and for no other reason than the cuteness factor, the bath tub composter had to stay. Added to that was a compost tumbler, and last but not least we erected an outhouse with a composting toilet system (The Nature's Head Composting Toilet).
We developed a gray water system incorporating the water that came out of the washing machine and from the outdoor shower to help water bananas, gingers, and canailles. All the down spouts coming off the roof were sent into depressions in the front yard. The depressions were planted with carex grass, which can withstand, and even thrive on, submersion in water that rain events bring to the swaled-out area. Aesthetically, carex reads as a lawn space in keeping with the cottage feeling of the home.
As with any full-fledged permaculture garden, an element of natural building needed to be incorporated. So, the heart and hearth of the garden is a cob pizza oven going into an outdoor kitchen with a built-in bench. Cob is a natural building technique that involves sculpting a mixture of sand, soil, and straw around an internal structure. In this case, the internal structure is comprised of an old built-in brick incinerator, and rubble collected on site.
Besides using the collected rubble as a base for the cob structure, other salvaged elements comprise major features of the project: the front fence was reconstructed from the preexisting fence; a majority of the stone edging was created by stones found while clearing the landscape in preparation for construction; the arbor was constructed from old wash line poles found on site; broken bricks pulled from another project were mixed with concrete and cast into vegetable beds, creating durable insulated planters while reducing the amount of concrete used ( and they also just have a unique effect); pathways and patio areas were laid using concrete broken out of the driveway and previous pathways. (When a little more broken concrete was needed, we busted out an old pad at another project a few blocks away.)
Far from a perfectly polished garden, this landscape now serves as a lush and inviting space for my clients, their friends and family to gather and enjoy each other’s company. Days after construction was finished the couple hosted their wedding reception in the garden—everyone danced, drank and celebrated, christening the garden and the union!
 Sweet Smiling Landscape Design
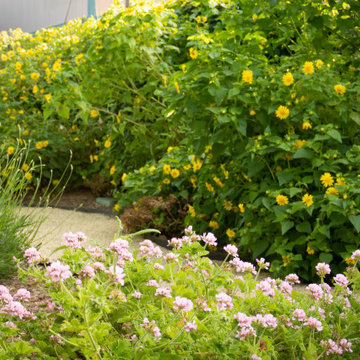
This very social couple were tying the knot and looking to create a space to host their friends and community, while also adding much needed living space to their 900 square foot cottage. The couple had a strong emphasis on growing edible and medicinal plants. With many friends from a community garden project they were involved in and years of learning about permaculture, they wanted to incorporate many of the elements that the permaculture movement advocates for.
We came up with a California native and edible garden that incorporates three composting systems, a gray water system, rain water harvesting, a cob pizza oven, and outdoor kitchen. A majority of the materials incorporated into the hardscape were found on site or salvaged within 20-mile of the property. The garden also had amenities like an outhouse and shower for guests they would put up in the converted garage.
Coming into this project there was and An old clawfoot bathtub on site was used as a worm composting bin, and for no other reason than the cuteness factor, the bath tub composter had to stay. Added to that was a compost tumbler, and last but not least we erected an outhouse with a composting toilet system (The Nature's Head Composting Toilet).
We developed a gray water system incorporating the water that came out of the washing machine and from the outdoor shower to help water bananas, gingers, and canailles. All the down spouts coming off the roof were sent into depressions in the front yard. The depressions were planted with carex grass, which can withstand, and even thrive on, submersion in water that rain events bring to the swaled-out area. Aesthetically, carex reads as a lawn space in keeping with the cottage feeling of the home.
As with any full-fledged permaculture garden, an element of natural building needed to be incorporated. So, the heart and hearth of the garden is a cob pizza oven going into an outdoor kitchen with a built-in bench. Cob is a natural building technique that involves sculpting a mixture of sand, soil, and straw around an internal structure. In this case, the internal structure is comprised of an old built-in brick incinerator, and rubble collected on site.
Besides using the collected rubble as a base for the cob structure, other salvaged elements comprise major features of the project: the front fence was reconstructed from the preexisting fence; a majority of the stone edging was created by stones found while clearing the landscape in preparation for construction; the arbor was constructed from old wash line poles found on site; broken bricks pulled from another project were mixed with concrete and cast into vegetable beds, creating durable insulated planters while reducing the amount of concrete used ( and they also just have a unique effect); pathways and patio areas were laid using concrete broken out of the driveway and previous pathways. (When a little more broken concrete was needed, we busted out an old pad at another project a few blocks away.)
Far from a perfectly polished garden, this landscape now serves as a lush and inviting space for my clients, their friends and family to gather and enjoy each other’s company. Days after construction was finished the couple hosted their wedding reception in the garden—everyone danced, drank and celebrated, christening the garden and the union!
Find the right local pro for your project
 Sweet Smiling Landscape Design
This very social couple were tying the knot and looking to create a space to host their friends and community, while also adding much needed living space to their 900 square foot cottage. The couple had a strong emphasis on growing edible and medicinal plants. With many friends from a community garden project they were involved in and years of learning about permaculture, they wanted to incorporate many of the elements that the permaculture movement advocates for.
We came up with a California native and edible garden that incorporates three composting systems, a gray water system, rain water harvesting, a cob pizza oven, and outdoor kitchen. A majority of the materials incorporated into the hardscape were found on site or salvaged within 20-mile of the property. The garden also had amenities like an outhouse and shower for guests they would put up in the converted garage.
Coming into this project there was and An old clawfoot bathtub on site was used as a worm composting bin, and for no other reason than the cuteness factor, the bath tub composter had to stay. Added to that was a compost tumbler, and last but not least we erected an outhouse with a composting toilet system (The Nature's Head Composting Toilet).
We developed a gray water system incorporating the water that came out of the washing machine and from the outdoor shower to help water bananas, gingers, and canailles. All the down spouts coming off the roof were sent into depressions in the front yard. The depressions were planted with carex grass, which can withstand, and even thrive on, submersion in water that rain events bring to the swaled-out area. Aesthetically, carex reads as a lawn space in keeping with the cottage feeling of the home.
As with any full-fledged permaculture garden, an element of natural building needed to be incorporated. So, the heart and hearth of the garden is a cob pizza oven going into an outdoor kitchen with a built-in bench. Cob is a natural building technique that involves sculpting a mixture of sand, soil, and straw around an internal structure. In this case, the internal structure is comprised of an old built-in brick incinerator, and rubble collected on site.
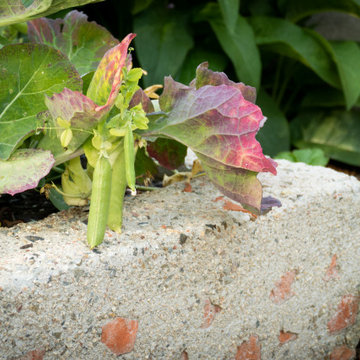
Besides using the collected rubble as a base for the cob structure, other salvaged elements comprise major features of the project: the front fence was reconstructed from the preexisting fence; a majority of the stone edging was created by stones found while clearing the landscape in preparation for construction; the arbor was constructed from old wash line poles found on site; broken bricks pulled from another project were mixed with concrete and cast into vegetable beds, creating durable insulated planters while reducing the amount of concrete used ( and they also just have a unique effect); pathways and patio areas were laid using concrete broken out of the driveway and previous pathways. (When a little more broken concrete was needed, we busted out an old pad at another project a few blocks away.)
Far from a perfectly polished garden, this landscape now serves as a lush and inviting space for my clients, their friends and family to gather and enjoy each other’s company. Days after construction was finished the couple hosted their wedding reception in the garden—everyone danced, drank and celebrated, christening the garden and the union!
 Sweet Smiling Landscape Design
This very social couple were tying the knot and looking to create a space to host their friends and community, while also adding much needed living space to their 900 square foot cottage. The couple had a strong emphasis on growing edible and medicinal plants. With many friends from a community garden project they were involved in and years of learning about permaculture, they wanted to incorporate many of the elements that the permaculture movement advocates for.
We came up with a California native and edible garden that incorporates three composting systems, a gray water system, rain water harvesting, a cob pizza oven, and outdoor kitchen. A majority of the materials incorporated into the hardscape were found on site or salvaged within 20-mile of the property. The garden also had amenities like an outhouse and shower for guests they would put up in the converted garage.
Coming into this project there was and An old clawfoot bathtub on site was used as a worm composting bin, and for no other reason than the cuteness factor, the bath tub composter had to stay. Added to that was a compost tumbler, and last but not least we erected an outhouse with a composting toilet system (The Nature's Head Composting Toilet).
We developed a gray water system incorporating the water that came out of the washing machine and from the outdoor shower to help water bananas, gingers, and canailles. All the down spouts coming off the roof were sent into depressions in the front yard. The depressions were planted with carex grass, which can withstand, and even thrive on, submersion in water that rain events bring to the swaled-out area. Aesthetically, carex reads as a lawn space in keeping with the cottage feeling of the home.
As with any full-fledged permaculture garden, an element of natural building needed to be incorporated. So, the heart and hearth of the garden is a cob pizza oven going into an outdoor kitchen with a built-in bench. Cob is a natural building technique that involves sculpting a mixture of sand, soil, and straw around an internal structure. In this case, the internal structure is comprised of an old built-in brick incinerator, and rubble collected on site.
Besides using the collected rubble as a base for the cob structure, other salvaged elements comprise major features of the project: the front fence was reconstructed from the preexisting fence; a majority of the stone edging was created by stones found while clearing the landscape in preparation for construction; the arbor was constructed from old wash line poles found on site; broken bricks pulled from another project were mixed with concrete and cast into vegetable beds, creating durable insulated planters while reducing the amount of concrete used ( and they also just have a unique effect); pathways and patio areas were laid using concrete broken out of the driveway and previous pathways. (When a little more broken concrete was needed, we busted out an old pad at another project a few blocks away.)
Far from a perfectly polished garden, this landscape now serves as a lush and inviting space for my clients, their friends and family to gather and enjoy each other’s company. Days after construction was finished the couple hosted their wedding reception in the garden—everyone danced, drank and celebrated, christening the garden and the union!
 Sweet Smiling Landscape Design
This very social couple were tying the knot and looking to create a space to host their friends and community, while also adding much needed living space to their 900 square foot cottage. The couple had a strong emphasis on growing edible and medicinal plants. With many friends from a community garden project they were involved in and years of learning about permaculture, they wanted to incorporate many of the elements that the permaculture movement advocates for.
We came up with a California native and edible garden that incorporates three composting systems, a gray water system, rain water harvesting, a cob pizza oven, and outdoor kitchen. A majority of the materials incorporated into the hardscape were found on site or salvaged within 20-mile of the property. The garden also had amenities like an outhouse and shower for guests they would put up in the converted garage.
Coming into this project there was and An old clawfoot bathtub on site was used as a worm composting bin, and for no other reason than the cuteness factor, the bath tub composter had to stay. Added to that was a compost tumbler, and last but not least we erected an outhouse with a composting toilet system (The Nature's Head Composting Toilet).
We developed a gray water system incorporating the water that came out of the washing machine and from the outdoor shower to help water bananas, gingers, and canailles. All the down spouts coming off the roof were sent into depressions in the front yard. The depressions were planted with carex grass, which can withstand, and even thrive on, submersion in water that rain events bring to the swaled-out area. Aesthetically, carex reads as a lawn space in keeping with the cottage feeling of the home.
As with any full-fledged permaculture garden, an element of natural building needed to be incorporated. So, the heart and hearth of the garden is a cob pizza oven going into an outdoor kitchen with a built-in bench. Cob is a natural building technique that involves sculpting a mixture of sand, soil, and straw around an internal structure. In this case, the internal structure is comprised of an old built-in brick incinerator, and rubble collected on site.
Besides using the collected rubble as a base for the cob structure, other salvaged elements comprise major features of the project: the front fence was reconstructed from the preexisting fence; a majority of the stone edging was created by stones found while clearing the landscape in preparation for construction; the arbor was constructed from old wash line poles found on site; broken bricks pulled from another project were mixed with concrete and cast into vegetable beds, creating durable insulated planters while reducing the amount of concrete used ( and they also just have a unique effect); pathways and patio areas were laid using concrete broken out of the driveway and previous pathways. (When a little more broken concrete was needed, we busted out an old pad at another project a few blocks away.)
Far from a perfectly polished garden, this landscape now serves as a lush and inviting space for my clients, their friends and family to gather and enjoy each other’s company. Days after construction was finished the couple hosted their wedding reception in the garden—everyone danced, drank and celebrated, christening the garden and the union!

 LEDER illumination Manufacturer
Elevating the Field: A Masterclass in Professional Sports Lighting
After two decades leading LED product development and global exports, I’ve learned that stadium lighting isn't just about brightness—it’s about precision, player comfort, and long-term economic viability.
Our latest installation showcased here represents the perfect synergy between advanced optical engineering and rugged durability. Here is why this project stands as a benchmark for modern sports infrastructure.
1. Professional-Grade Optical Precision
For this project, we didn't just "flood" the field with light. We engineered a solution:
Asymmetric Beam Control: We utilized custom-engineered lenses to direct light strictly onto the playing surface. This eliminates "sky glow" and light pollution for the surrounding community.
Anti-Glare Technology: By controlling the peak intensity angles, we’ve ensured that athletes can track the ball in the air without being blinded, a critical factor for high-speed sports performance.
Uniformity Excellence: The lighting distribution achieves a high uniformity ratio, eliminating dark spots and shadows that can lead to player injury.
2. Industrial-Strength Thermal Management
The secret to a 10-year lifespan isn't the LED chip; it's the heat dissipation.
Aero-Grade Heat Sinks: These fixtures feature high-purity aluminum housing with a vertical thermal flow design.
Longevity in Harsh Conditions: Designed to withstand extreme outdoor temperatures, the system ensures that lumen depreciation is kept to a minimum, protecting the client’s investment for years to come.
3. Global Compliance & Export Quality
From a trade perspective, we understand that reliability is the only currency that matters in international projects.
Certified Durability: The system carries full IP66 waterproof and IK08 impact ratings, making it resilient against heavy storms and physical impact.
International Standards: Fully compliant with CE, RoHS, and DLC Premium requirements, ensuring seamless integration into power grids worldwide and eligibility for green-energy subsidies.
4. The ROI: Efficiency Meets Sustainability
Switching to this high-efficiency LED system resulted in a 65% reduction in energy consumption compared to the previous metal halide installation. With integrated smart-control compatibility, the facility can now manage lighting levels based on usage, further accelerating the payback period.
The Bottom Line:
Lighting a sports facility is an investment in the community and the athletes. We don't just provide lamps; we provide a professional environment where the game can be played at its best, long after the sun goes down.
Are you looking to upgrade your facility to international standards? Let’s discuss how our 20 years of expertise can illuminate your next project.
Sponsored
Sunbury, OH

J.Holderby - Renovations
Franklin County's Leading General Contractors - 2X Best of Houzz!

 User
Think of the Noon Starter Kit as mission control center, but for your house. Play music, and even control your lighting with your voice using Amazon Alexa or Google Assistant.

 Accent Window Fashions LLC
LUMINETTE® Privacy Sheers
Endless light-control possibilities
For wide windows and sliding doors, our Luminette® Privacy Sheers come in an array of sheer and drapery-like fabrics for unlimited light-control and privacy options.
Light Control SUPERVISE THE SUN
The 180-degree rotating, vertical fabric vanes of the Luminette Collection put you in control of your natural light and privacy.
Transform harsh exterior light by diffusing it with our sheer fabrics, spreading it evenly throughout your room, so you can maximize daylight hours and reduce your need for artificial light.
Our beautiful sheer fabrics as well as our modern drapery panels filter out brightness, glare, and UV rays—protecting your furniture and flooring from fading.
Exclusive Hardware Systems BEAUTY IN THE DETAILS
When your sheers are closed, our SofTrak™ hardware system conceals the headrail with fabric for a refined, elegant look.
Exclusive Hardware Systems BEAUTY IN THE DETAILS
Providing a choice of adorned rail styles and finials, Manhattan™ hardware can add an element of sophistication.
Accents by the Yard™ FABRICS FOR YOUR ROOM DECOR
The sheer face fabrics of Luminette® are available by the yard, so you can create decorative accents for any room with matching fabric.
Platinum™ Technology CONTROL FROM YOUR PHONE OR TABLET
Controlling your window treatments with a mobile device means you can set your blinds to movie mode, work mode, or 8 a.m. mode with the touch of a button, without leaving your seat. It’s effortless, fun and smart—with perfectly smooth operation.
Lifetime Guarantee FOR LIFE
Hunter Douglas products are designed and custom-assembled in the U.S. with the highest level of quality. But just in case, every window treatment from Hunter Douglas is covered by the Hunter Douglas lifetime limited guarantee. Read the Hunter Douglas Warranty to learn more.
Hunter Douglas Luminette® Privacy Sheers with Combination Wand/Cord System
Hunter Douglas Luminette® Privacy Sheers with Combination Wand/Cord System
Fabric: Sheer Linen
Color: Créme de la Créme
Operating Systems: Combination Wand/Cord System
Room: Home Office
Room Styles: Contemporary, Casual
Available from Accent Window Fashions LLC
Hunter Douglas Showcase Priority Dealer
Hunter Douglas Certified Installer
Hunter Douglas Certified Professional Dealer
#Hunter_Douglas #Luminette #Privacy #Sheers #Combination #Wand #Cord_System #Home_Office #Contemporary #Casual #Window_Coverings #Window_Treatments #HunterDouglas #Accent_Window_Fashions
Copyright 2001-2014 Hunter Douglas, Inc. All rights reserved.
 Tile Doctor Ltd
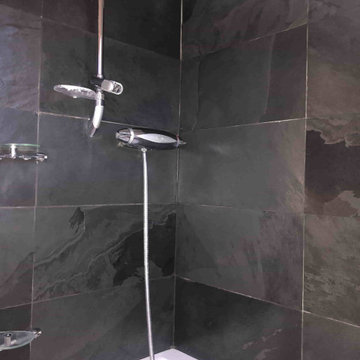
The photographs below are from a bathroom in Maida Vale W9 which had a lovely Slate tiled wall over a bath with shower. Unfortunately, the Slate tiles had been ruined by the use of harsh cleaning chemicals in an attempt to remove the limescale caused by hard water. The slate had now lost all its natural colour and looked completely washed out. The property had recently changed hands and the new owner was keen to have it renovated.
I went over to take a look and work out a solution, this in itself is a lot trickier these days with all the COVID precautions we need to take when working in someone’s house. It was clear that a strong acidic limescale remover had been used on the slate and this had etched the stone, leached all the natural oils away and generally ruined its appearance.
Fortunately, we have a solution for this (see below) and after conducting a small test I was able to confirm the problem could be resolved and gave them a quote which included a day’s labour, abrasive pads, stone oil and sealer. Our quote was gratefully accepted, and we booked a time in to carry out the work.
I returned to the property and I set about burnishing the slate wall tiles using a very coarse 200-grit six-inch burnishing pad fitted to a handheld buffing machine. This process resurfaces the stone slightly to remove the etching caused by the limescale remover. I used a medium dilution of Tile Doctor Grout Clean-up to lubricate the process and to remove the remaining limescale. Once done the slurry that is generated is rinsed off with more water. In a bathroom, it is easy the slurry can just be drained away. In other areas we would use a wet vacuum.
After the 200-grit pad the surface of the Slate was further refined using a 400-grit pad and then an 800-grit pad, this time only using water and giving the stone a thorough rinse after each pad to remove the soil.
The slate was then left to dry off over lunch and given more encouragement with a heat gun afterwards so I could move onto the next step. This involved applying a coat of Tile Doctor Stone Oil which puts back the natural oils back into the stone improving its appearance.
Once the Stone Oil had fully dried, I moved onto sealing for which I applied two coats of Tile Doctor Ultra-Seal; this is penetrating sealer that soaks into the stone to provide maximum stain protection without changing the colour of the stone. It is also an excellent grout sealer which is a bonus.
Before leaving I talked the client about how best to maintain the Slate and left them a complimentary bottle of Tile Doctor Aqua Pro tile cleaner which will help keep the limescale at bay. It is gentle enough to use every day but will help prevent the previous build-up and unlike the previous products used will not damage the newly applied sealer.
Jackson Davis
Central London Tile Cleaning
 Tile Doctor Ltd
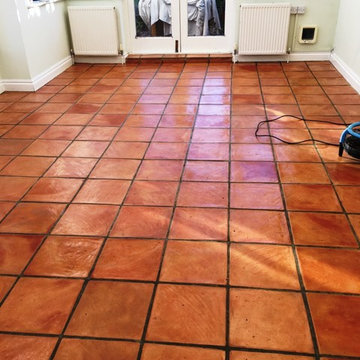
This couple, who live in the seaside resort of Brighton, had purchased their house four months before Christmas and wanted to have the fantastic Terracotta tiled floor in the kitchen and conservatory looking its best before the festive period, since they had family visiting. The floor was looking washed out and it was clear the sealer had failed in the high traffic areas and was now allowing dirt to penetrate into the pores of the tile making it difficult to clean.
We often get calls from new home owners keen to put their own stamp on a property shortly after moving in; stone floors rarely come with cleaning instructions so if you have a stone floor it makes sense to get in touch, so we can advise you on how best to maintain it.
We provided a quote which included stripping the floor of old sealers, cleaning, oiling and then sealing it again to restore cleanliness and character to the Terracotta. There was a lot to do and two areas to clean so I anticipated it would take four days to complete.
Having accepted the quote our first task upon returning to the property was to give the Terracotta tiles a deep clean and remove any remaining sealer present on the tile. This was achieved by applying a strong combination of Tile Doctor Pro-Clean and Tile Doctor NanoTech HBU to the tiles and then covering it in a plastic sheet, so it wouldn’t dry out. This method allows the products to really soak into the pores of the Terracotta and draw out the dirt. I should also mention that Pro-Clean is a very effective Tile and Grout cleaner whilst HBU enhances it by adding nano-sized cleaning particles.
The plastic blanket was left in place for a few hours before being peeled off and then the cleaning products scrubbed into the tile and grout using a black pad fitted to a rotary floor machine and hand brushes. The now soiled product was rinsed off with water which was then extracted using a wet vacuum. The floor was inspected, and stubborn marks spot treated until the floor was clean.
After thoroughly cleaning the Terracotta over two days, we left the floor to completely dry off over the weekend. The tiles would need to be sufficiently dry to receive fresh sealant, as excess moisture can cloud the sealant and prevent it from working correctly.
When we returned to the property, we proceeded to apply Tile Doctor Stone Oil to the tiles. Stone Oil is a sealer which restores the colour and texture of tiled floors, as well as mechanical strength once cured.
We applied a single coat of the Stone Oil before topping it up with multiple coats of Tile Doctor Seal and Go, a topical sealer which provides a high-quality sheen finish to help accentuate the appearance of the Terracotta tiles as well as adding protection.
You can see the results of the restoration below. The couple were so impressed that they have now agreed to have Tile Doctor visit once a year (at a fraction of the cost of the original restoration) to complete a maintenance clean. This will make sure this Terracotta is always looking at its best!
Mick Conlon
East Sussex Tile Doctor
 Tile Doctor Ltd
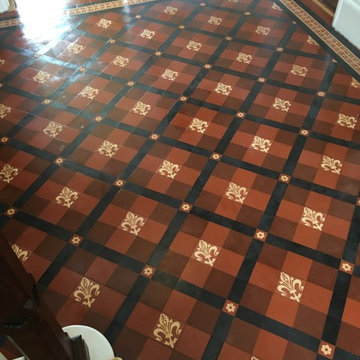
It’s always a great surprise to find old tiled flooring hidden underneath carpet or linoleum which appears especially common with 19th century properties where it’s not unusual for the owners to uncover fantastically patterned, original Victorian tiled floors and, naturally, they want to restore them to their former glory. If you have a property of this type you might want to look under the carpets.
The majority of the time, however, these tiles have been covered up for decades, allowing for thick layers of muck to build-up and are invariably damaged carpet grippers, surface glue and adhesive tape.
This was pretty much the case with this customer who lives in the town of Warminster and was keen to have her own newly discovered Victorian hallway brought back to life, and called me down to see what could be done. Upon arrival at the property, I determined that the tiles would definitely require a very deep clean, including the remove of numerous glue stains, followed by the application of a new seal.
Before I could begin the deep cleaning process, I needed to remove the carpet grippers and surface glue, attempting to remove as much as possible by hand using a scraper.
For the particularly stubborn areas, I applied Tile Doctor Remove & Go, a powerful stripper specially designed to break down adhesives and solvents, and left it to dwell for 20 minutes to eat through the glue deposits. I then attached a black pad to a rotary machine and scrubbed the area thoroughly to clean the affected areas, before removing the resulting slurry using a wet vacuum and rinsed with clean water.
Once I was satisfied that all of the glue had been removed, I proceeded to soak the floor using a solution of the high alkaline cleaner known as Tile Doctor Pro Clean. This is a versatile product that can be used on a wide range of natural stone floors to deal with heavy soil build-up.
I left the Pro-Clean to dwell for ten minutes, and then scrubbed it into the tiles to remove the ingrained dirt and also to break down any old and ineffectual seals. The floor was then once again rinsed thoroughly with clean water which was then extracted using a wet vacuum before being left to dry for a couple of days.
Upon our return to the property I immediately tested the floor for damp using a damp meter. This is an extremely important test to carry out before sealing any kind of tiled flooring, due to the fact that excess moisture left over from cleaning can cloud the sealer and damage its ability to protect against dirt and stains.
Thankfully, the damp test revealed no excess moisture, and I was able to proceed with sealing the tiles. My choice of sealer was Tile Doctor Seal and Go, a water-based topical sealer that simultaneously provides both a stain resistant surface seal and a durable and aesthetically pleasing low sheen finish, also being water based it doesn’t give off a smell as it dries.
This is a very cost effective product that is highly suitable for use on Victorian and Quarry tiles, I applied five costs to achieve the desired finish.
The customer was very pleased with the final results. It’s always satisfying to restore original Victorian tiled floors to looking their best once again – and this one was no exception.
Stuart Ford
Wiltshire Tile Doctor
 Tile Doctor Ltd
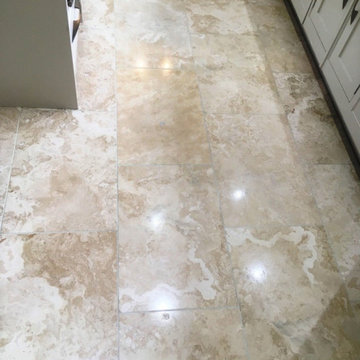
This is a Travertine tiled floor installed at a property in the popular Cheshire town of Wilmslow around 16 years prior. It had previously been maintained by a Tile Doctor colleague about three years ago and the owner was hoping the floor could be given a simple maintenance clean and seal. This is a service we provide as part of an annual maintenance plan, unfortunately after surveying the floor it was clear they had left it far too long, the floor had lost its shine and it would now need to be resurfaced with a set of diamond burnishing pads and then resealed.
Naturally burnishing the floor costs more than a simple seal and polish but if you are going to opt for the quicker maintenance plan route it does need to be done at least annually and possibly more frequently if it’s a floor in frequent use such as a kitchen. We agreed a price for the work, and I arranged a time with them to return and renovate the floor.
To restore the polished appearance of the Travertine I used a set of four burnishing pads which are applied to the floor with a rotary machine. You start with a coarse 400-grit pad using water to lubricate and running it over each tile at least three times. This first pad cleans up the stone and removes old sealers. This is then followed with the finer 800-grit, 1500-grit and finally a 3000-grit pad. Except for the 3000-grit, each pad is applied with water and the floor is rinsed and the soil extracted afterwards with the wet vacuum.
The Grout lines were also deep cleaned with a scrubbing brush and Tile Doctor Pro-Clean tile and grout cleaner. The product really gets to into deep seated dirt and grease which tends to accumulate in the grout. After a final rinse and extraction, the floor was then left to dry off overnight.
I returned on the second day and started by checking the floor was dry by taking several moisture readings with a damp meter. The readings were good, so I proceeded to seal the floor using a couple of coats of Tile Doctor Colour Grow. Colour Grow is an ideal sealer for Travertine as it seeps into the pores of the stone enhancing the natural brown colours in the process. It also offers great protection going forward.
Whilst I was there I had noticed that one of the doors had scratched the floor, fortunately the polishing process had got the scratches out of the stone but to prevent future scratching I helped them remove the door so a carpenter could shave off a few mm’s from the bottom.
My customer left the following feedback:
“Second time had Travertine floor restored, cleaned & sealed, the first time was 3 years ago. Great job done then by Simon Bywater. This time Kamila did a really professional job on the kitchen limestone floor. A bit more expensive this time, but a good job was done. Have left instructions for her to contact me in 12 months time for annual maintenance on the same floor, hopefully to prevent restoration being required! Highly recommend the service.”
The floor looked great and they should now be able to maintain it in between the maintenance visits, with day to day cleaning using Tile Doctor Neutral Tile Cleaner.
Kamila Logonzy
East Cheshire Tile Doctor
Sponsored
Sunbury, OH
J.Holderby - Renovations
Franklin County's Leading General Contractors - 2X Best of Houzz!
 Windo VanGo
Hunter Douglas Product Photography
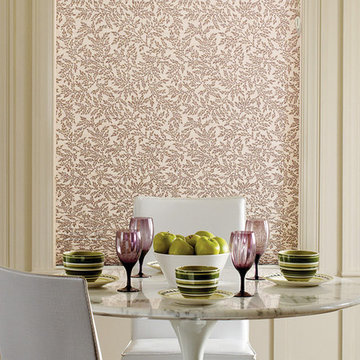
Dining room - contemporary dining room idea in Baltimore
Dining room - contemporary dining room idea in Baltimore
 Tile Doctor Ltd
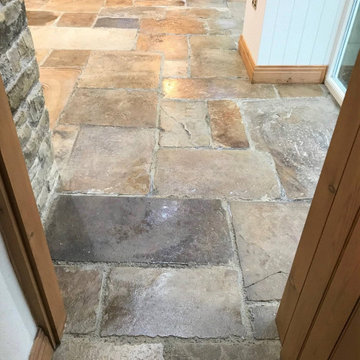
We had been to maintain this Sandstone floor about two years previously at a property in the pretty area of Windermere in the English Lake District. The client had run out of our Tile Doctor Neutral Tile Cleaner that we left after completing the job and had started using a standard cleaner instead (a well-known ecological cleaner). Unfortunately, this product has a 5% non-ionic surfactant in its chemical structure, which will strip a coat of stone sealer off the surface within 6 months, once that topcoat has been removed the sealed surface is only 50% as strong as it should be.
Readers of this article should be aware that even washing up liquid which is a degreaser will strip sealers although it will take many months of regular use before you will start to notice an issue. Stronger bleach-based cleaning products such as Flash and Domestos will cause instant damage to stone sealer which will often go an off-white colour as a result. So, the importance of using the right cleaner is imperative. Having used our services on this floor previously he client knew what to expect and was happy to go ahead with our quote.
My first task would be to clean the floor and completely remove what was left of the old sealer to ensure the floor would have a consistent appearance. On this occasion I used a strong 1:3 dilution of Tile Doctor Pro-Clean worked into the floor with a Black buffing pad fitted to a rotary buffing machine. The Sandstone floor was then rinsed with water, scrubbed again and then the waste extracted using a wet vacuum.
This was followed with acid rinse using a 1:5 dilution of Tile Doctor Grout Clean-Up, this is a Phosphoric Acid (not a Brick Acid). After being scrubbed into the tile it was rinsed off the floor as before using water and the wet vacuum. This process further cleans the stone and neutralises the floor after the use of the strong alkaline Pro-Clean used earlier.
Before leaving for the day I gave the floor one final rinse with water and then dried the floor as much as possible with the wet vacuum. The floor was now clean and free of sealer and left to fully dry off overnight.
I came back the following morning and started by testing the floor with the moisture meter. I always do this as I know from experience how important it is to ensure the floor is dry before applying a sealer.
Happy the Sandstone was dry I then proceed to apply the first of what would be four coats of sealer. For this I used Tile Doctor Seal and Go which leaves a nice low sheen finish. This product is specially formulated blend of acrylic polymers that provides will protect the floor from ingrained dirt and staining; it will make the floor easy to clean and has the added advantage of being water based so it doesn’t leave a solvent smell as it dries.
The client was left another complimentary bottle of Tile Doctor Neutral cleaner and hopefully the seal will last a long longer the 2nd time around. The client was pleased the floor had been restored and vowed to use nothing but Tile Doctor products on it in the future.
Heidi Taylor
South Cumbria Tile Doctor
 Tile Doctor Ltd
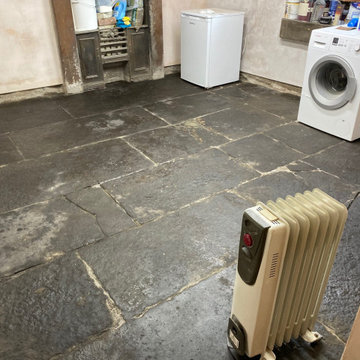
I was contacted by a client in Kendal to see if I could help with their Black Flagstone basement floor. As you can see from the photographs it was in a bit of a state and the stone looked mostly White rather than Black.
I carried out a site visit, to survey the floor and work out the best approach to restore its appearance. After testing a few different products and techniques I worked out an effective restoration plan and discussed this with the owner. Happy with my plan and costing’s we agreed a date to start the work. Being in the basement of the property had its challenges but it would mean we could work socially distanced from the owner.
To restore the floors appearance, I started with a set of coarse wire (60 and 120 grit) brushes lubricated with Tile Doctor Remove and Go which is a strong coatings remover. I had considered using milling pads on the tiles to reveal a new surface underneath but that does involve the use of an expensive set of coarse pads and given it was a basement the owners didn’t feel the extra expense would be justified.
The wire grits work well on rough stone floors when attached to a weighted buffing machine and we add some Tile Doctor Remove and Go to the mix. Once clean the floor was rinsed with water and the slurry extracted using an industrial wet vacuum. After cleaning the floor, it looked transformed, some pointing was required so we carried this out after the main clean.
The stone was left to dry out for a few days before returning to apply a sealer. For this floor I felt Tile Doctor X-Tra seal would be the best product and applied two coats. I chose X-Tra seal for this job as it ticks a lot of boxes, it’s a breathable oil-based resin sealer which being breathable will allow moisture to rise through the floor. Old floors like this don’t have a damp proof membrane so it is important to choose a sealer that can allow the floor to breath and not let damp build up under the floor where it can reach out to the walls and cause rising damp.
I also chose X-Tra Seal as it has a great ability to bring out the colour of the darker stone due to its high oil content, the oil will deter salts from forming if efflorescence is an issue. This is a unique property of this sealer as we never know if efflorescent salts are going to form or not so having this in place as a sealer is a great plus for a Tile Doctor, it is new to the market and is already proving popular on floors like this and for protecting external stone.
If the tiles are smooth Tile Doctor X-Tra Seal adds a bit of a sheen to the appearance of the stone however this stone was very rough, so we didn’t manage a shine, but the customer was happy with the matt finish and the slightly honed effect.
The floor looked great and much more appealing making the space more attractive and likely to be used. For aftercare I recommended Tile Doctor Neutral Tile Cleaner which will clean the floor without impacting the sealer which can be a problem with many of the stronger products you find in supermarkets.
Heidi Taylor
South Cumbria Tile Doctor
 Tile Doctor Ltd
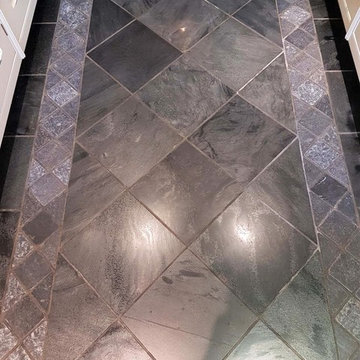
I was recently asked to survey an unusual stone floor at a house in in Harrogate comprising of Slate inlaid with Granite. The client advised that it had not been cleaned properly for 20 years and wanted it renovating! It was now definitely overdue a deep clean and professional attention. Fortunately, having worked on these floors for many years I knew I could make a substantial impact and transform its appearance. Fossilized slate is a beautiful stone when cleaned and sealed correctly.
The owner confessed they had actually been sealing the floor every two years but without a deep clean first, so they were effectively sealing in the dirt each time. I discussed with them the process I would use to clean and re-seal the floor and we agreed a price to carry to out the work.
To remove the layers of old sealer and dirt used a set of Tile Doctor Diamond Burnishing pads. The pads are attached to a rotary floor machine starting with the coarse 400-grit pad which was lubricated with a dilution of Tile Doctor Remove and Go to help strip the floor of dirt and layers of sealer. After rinsing and extracting the soil I worked through the different grades of pads in sequence finishing with the 1500-grit and this time using just water for lubrication.
A set of diamond handheld burnishing blocks were then used to clean up the edges and corners where the large 17” pads struggle to reach. This ensures all areas are treated and free of dirt and old sealer.
The floor was then rinsed and extracted again to remove the remaining soil. I find a wet vacuum is an invaluable tool for this. The floor was then left to dry out overnight ready for sealing the next day.
I returned the next day to seal the floor, first checking with a damp meter that the floor was dry, and the moisture reading was below the acceptable level. These results were fine, so I had a green light to continue and seal the stone.
The customer wanted a shine on the floor so rather than apply a satin sealer which I felt wouldn’t adhere to the stone properly I decided to polish the floor further with a the last of the four burnishing pads which is a very fine 3000-grit pad. You don’t need to use a lot of water with this last pad just a small amount sprayed onto the floor using a technique we refer to as a ‘Spray Burnish’.
To seal the floor, two coats of Tile Doctor Colour Grow were applied. This is an impregnating matt sealer which intensifies the natural colours of this beautiful stone and provides long lasting durable protection.
Even I was impressed with the finished result but more importantly the client was over the moon. To keep the floor looking its best I recommended they use Tile Doctor Stone Soap which is pH neutral. You should always read the label in detail when choosing a floor cleaning product as many are too strong and not recommended for sealed stone surfaces as they will prematurely erode the sealer.
Nigel Stoker
North West Yorkshire Tile Doctor
 Tile Doctor Ltd
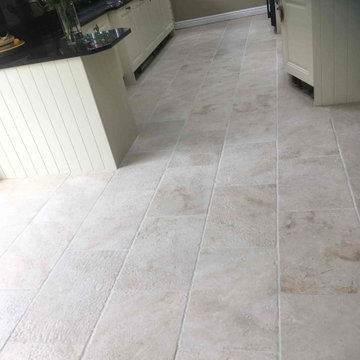
This client from Nantwich had a beautiful Travertine tiled floor installed in their very large kitchen and utility area. Realising that their tiles didn’t look as good as when they were installed, they got in touch to ask if I could clean and re-seal the tiles and grouting.
I went over to survey the floor and could see the grout had darkened (it was originally white) and the travertine was trapping dirt in the natural pits of the stone. I conducted a test clean on the grout and Travertine which responded well, the client was impressed, and I was asked to do the whole floor. Happy with my quote for restoring the tile and grout we scheduled a date to do the work.
Nantwich is a medieval market town in Cheshire, well known for its Tudor and Georgian architecture. It has one of the highest concentrations of listed buildings in England and many of these properties have very old floors.
We scheduled in a date for the work, and I began by cleaning the floor with a strong solution of Tile Doctor Remove and Go worked into the grout and pitting with hand brushes. I then used a wire brush on the grout to get it really clean. The soiled solution was rinsed off with water and extracted with a wet vacuum.
Once done the Travertine was burnished using a series of Tile Doctor burnishing pads from 400 through to 1500-grit attached to the rotary machine, rinsing with water in between to remove the soiling. The pads are encrusted with diamond and after being worked over each pad three times do an amazing job of removing ingrained dirt and bringing up the polish on the stone.
The floor needs to be dry before I can apply the sealer so once the burnishing was done, I gave it a final finish and extracted as much moisture as possible with the wet vacuum.
The Travertine was left to dry off overnight and I returned the next day to apply a sealer, first checking the floor was dry with a damp meter. The readings were acceptable, so I was able to get on with the sealing. My client had requested a natural finish, so I had recommended Tile Doctor Ultra-Seal which is almost invisible sealer that provides protection but doesn’t change the look of the stone. Only a couple of coats are required and being an impregnating sealer, it works by soaking into stone and occupying the pores so dirt can’t become ingrained there.
Once the sealer had dried the floor looked so much cleaner and I had a very happy customer who left the following feedback:
“Kamilla has totally transformed our tumbled travertine kitchen floor. It looks like new again, we are so pleased. Kamilla explained the whole process and was a pleasure to deal with. We are delighted with the end result, Kamilla worked so hard, would highly recommend.”
For aftercare cleaning and maintenance, I recommended they use Tile Doctor Stone Soap which is pH neutral and mild enough to use every day. You must be careful when choosing a cleaner for sealed floors as many products are too strong and will reduce the lifespan of the sealer.
Kamila Logonzy
East Cheshire Tile Doctor
 Tile Doctor Ltd
This beautiful Limestone kitchen tiled floor at a property in Peel Green was only a year old and, while it wasn’t in too bad of a state, the customer told me the floor had not been sealed properly due to issues with retaining moisture. The lack of an adequate sealer had allowed the Limestone to become duller over time after exposure to dirt and muck. It also had some more obvious marks and stains in some place and needed some grouting to be done around the corners and edges of the room.
I travelled to the property in Peel Green, which is within the Greater City of Salford in Greater Manchester, to see what could be done to restore the condition of the tiles.
Upon closer inspection of the tiles, I recommended to the customer that we proceed with the process known as burnishing, which we use primarily on Limestone, Marble, and Travertine. Burnishing, which involves the application of diamond encrusted burnishing pads, breaks down old sealers, gets rid of marks, stains and ingrained dirt, and gradually builds and evens out the polish on the tiles.
I started burnishing the Limestone kitchen tiles straight away when I arrived at the property as it was a big area and would require lots of hard work to achieve the desired results within the space of a day.
Our burnishing system consists of four diamond encrusted pads: Coarse, Medium, a Fine and Very Fine. Each pad was applied to the Limestone in sequence in tandem with a small amount of water to act as lubrication, gradually smoothing and polishing the surface of the tiles. After every pad, I also used my wet vac machine to remove any dirty water left on the floor and, after the Fine pad I rinsed the floor thoroughly to remove any dirt left on floor. I then left it to dry.
When I was satisfied that the floor was completely dry, it was time to seal the Limestone tiles. However, I first went over the floor with Very Fine grit pad to provide a final polish before sealing.
My choice of sealer was the impregnating Tile Doctor Colour Grow, a product which enhances the natural colours in the stone whilst also offering robust protection against dirt and stains. Remembering that the tiles had never been properly sealed, I applied plenty of sealer and left it to dry for 10 minutes. Following this, I carefully removed any excess sealer left on the surface with a dry cotton cloth. After sealing I went over the floor once final time with the Very Fine pad, just to smoothen things down and leave an exceptionally neat finish.
When the job was finished, I gave the owner some tips and recommendations on the cleaning of the floor going forward and a complimentary bottle of neutral cleaner to get them started.
The customer was very pleased with the finish, so much so that she opted and take up the Tile Doctor Maintenance Plan to keep the floor looking good for years to come! This involves popping round every 6-12 months to top up the sealer and give the floor a quick polish.
Tony Olmet
Greater Manchester Tile Doctor

 Stone Action
California Brown granite is shown in this project!
Search "California Brown" granite, see more granite or other stone options: http://www.stoneaction.com
Learn more about granite to see if it’s right for you:
Granite countertops can last a lifetime. It contains no harmful chemicals and do not emit harmful radiation or gasses. Granite is heat resistant and is one of the most heat-resistant countertops on the market. You can place a hot pan out of the oven directly onto the countertop surface. Experts do recommend the use of a trivet when using appliances that emit heat for long periods of time, such as crockpots. Since the material is so dense, there is a small possibility heating one area of the top and not the entire thing, could cause the countertop to crack.
Granite is scratch resistant. You can cut on it, but it will dull your knives! Granite scores a seven on Moh’s hardness scale.
Granite countertops are considered to be a low maintenance countertop surface. The likelihood of needing to be repaired or resurfaced is low. Granite is a porous material. Most fabricators will apply a sealer to granite countertops before they are installed which will protect them from absorbing liquids too quickly. Many sealers last more than 10 years before needing to be reapplied. When they do need to be reapplied, it is something that most homeowners can do on their own as the process is similar to cleaning. Darker granites are very dense and sometimes don’t even require a sealer.
When it comes to pricing, there are a lot of variables such as edge profile, total square footage, backsplash, etc. Don’t be fooled by the stereotype that all granite is expensive. Lower-range granites will cost less than high-range laminate. Though granite countertops are not considered “low range” in pricing, there are a lot of affordable options.
If you are looking for something truly unique, consider an exotic granite. Some quarries are not easily accessible and/or only able to be quarried for short periods of time throughout the year. If these circumstances exist in a quarry with gorgeous stone, the price will be driven upward.
You won’t find a lot of solid patterns or bright colors, but both do exist. Also, watch for a large range of color and pattern within the same color of stone. It’s always a good idea to view the exact slab(s) that will be fabricated for your kitchen to make sure they are what you expected to see from the sample. Another factor is that many exotic types of granite have huge flowing waves, and a small sample will not be an accurate representation of the whole slab.
Granite countertops are very resistant to chemicals. Acids and bases will not harm the material.
41