
Search results for "Quick time period" in Home Design Ideas
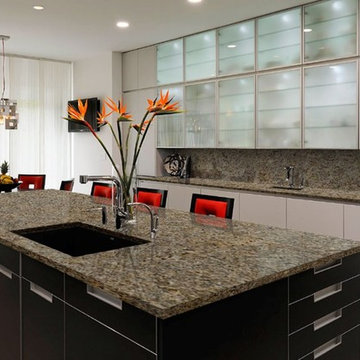
 Stone Action
Butterfly Gold granite is shown in this project!
Search "Butterfly Gold" granite, see more granite or other stone options: http://www.stoneaction.com
Learn more about granite to see if it’s right for you:
Granite countertops can last a lifetime. It contains no harmful chemicals and do not emit harmful radiation or gasses. Granite is heat resistant and is one of the most heat-resistant countertops on the market. You can place a hot pan out of the oven directly onto the countertop surface. Experts do recommend the use of a trivet when using appliances that emit heat for long periods of time, such as crockpots. Since the material is so dense, there is a small possibility heating one area of the top and not the entire thing, could cause the countertop to crack.
Granite is scratch resistant. You can cut on it, but it will dull your knives! Granite scores a seven on Moh’s hardness scale.
Granite countertops are considered to be a low maintenance countertop surface. The likelihood of needing to be repaired or resurfaced is low. Granite is a porous material. Most fabricators will apply a sealer to granite countertops before they are installed which will protect them from absorbing liquids too quickly. Many sealers last more than 10 years before needing to be reapplied. When they do need to be reapplied, it is something that most homeowners can do on their own as the process is similar to cleaning. Darker granites are very dense and sometimes don’t even require a sealer.
When it comes to pricing, there are a lot of variables such as edge profile, total square footage, backsplash, etc. Don’t be fooled by the stereotype that all granite is expensive. Lower-range granites will cost less than high-range laminate. Though granite countertops are not considered “low range” in pricing, there are a lot of affordable options.
If you are looking for something truly unique, consider an exotic granite. Some quarries are not easily accessible and/or only able to be quarried for short periods of time throughout the year. If these circumstances exist in a quarry with gorgeous stone, the price will be driven upward.
You won’t find a lot of solid patterns or bright colors, but both do exist. Also, watch for a large range of color and pattern within the same color of stone. It’s always a good idea to view the exact slab(s) that will be fabricated for your kitchen to make sure they are what you expected to see from the sample. Another factor is that many exotic types of granite have huge flowing waves, and a small sample will not be an accurate representation of the whole slab.
Granite countertops are very resistant to chemicals. Acids and bases will not harm the material.
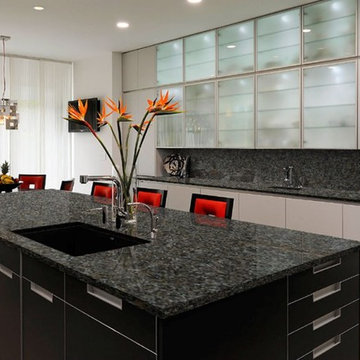 Stone Action
Butterfly Beige granite is shown in this project!
Search "Butterfly Beige" granite, see more granite or other stone options: http://www.stoneaction.com
Learn more about granite to see if it’s right for you:
Granite countertops can last a lifetime. It contains no harmful chemicals and do not emit harmful radiation or gasses. Granite is heat resistant and is one of the most heat-resistant countertops on the market. You can place a hot pan out of the oven directly onto the countertop surface. Experts do recommend the use of a trivet when using appliances that emit heat for long periods of time, such as crockpots. Since the material is so dense, there is a small possibility heating one area of the top and not the entire thing, could cause the countertop to crack.
Granite is scratch resistant. You can cut on it, but it will dull your knives! Granite scores a seven on Moh’s hardness scale.
Granite countertops are considered to be a low maintenance countertop surface. The likelihood of needing to be repaired or resurfaced is low. Granite is a porous material. Most fabricators will apply a sealer to granite countertops before they are installed which will protect them from absorbing liquids too quickly. Many sealers last more than 10 years before needing to be reapplied. When they do need to be reapplied, it is something that most homeowners can do on their own as the process is similar to cleaning. Darker granites are very dense and sometimes don’t even require a sealer.
When it comes to pricing, there are a lot of variables such as edge profile, total square footage, backsplash, etc. Don’t be fooled by the stereotype that all granite is expensive. Lower-range granites will cost less than high-range laminate. Though granite countertops are not considered “low range” in pricing, there are a lot of affordable options.
If you are looking for something truly unique, consider an exotic granite. Some quarries are not easily accessible and/or only able to be quarried for short periods of time throughout the year. If these circumstances exist in a quarry with gorgeous stone, the price will be driven upward.
You won’t find a lot of solid patterns or bright colors, but both do exist. Also, watch for a large range of color and pattern within the same color of stone. It’s always a good idea to view the exact slab(s) that will be fabricated for your kitchen to make sure they are what you expected to see from the sample. Another factor is that many exotic types of granite have huge flowing waves, and a small sample will not be an accurate representation of the whole slab.
Granite countertops are very resistant to chemicals. Acids and bases will not harm the material.
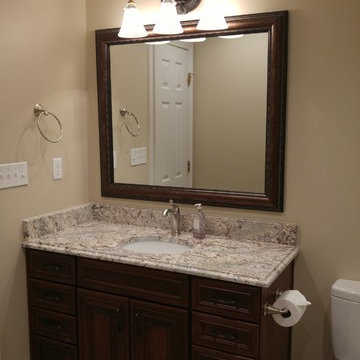
 Mission Kitchen & Bath
When people think of remodeling their homes, they often immediately consider starting with rooms like the dining area, living room, or basement – rooms where the most amount of people spend the most amount of time. While those rooms are important, recent remodeling trends are pointing toward the popularity of re-creating a more private place – the master bath.
In fact, we are in the midst of The Year of the Master Bath. Current home improvement practices show that, not only is redoing your master bath a fun and stylish choice, but it also is a wise way to add value to your home.
For homes built in the 1990’s with master baths over 200 square feet in size, now is the ideal time to remodel and upgrade to a more efficient, stylish, and worth-while setup. Most homes built during this time period were completed with a typical master bath that included a large jetted tub, and a separate small shower. Both of these elements are quickly becoming recognizable as features of the past, and are being replaced by new and improved technologies.
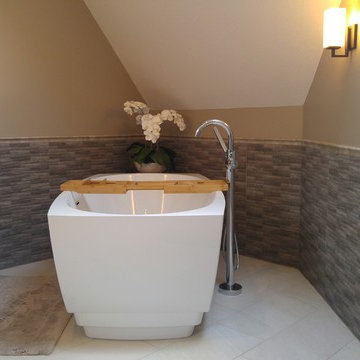
For instance, many homeowners have taken it upon themselves to remove the large jetted bath, and replace it with a free standing tub. These free standing tubs allow for the room to open up in a more modern fashion, and provide endless style and aesthetic choices. Homeowners are also expanding their small showers to create a luxury environment. By pushing out walls to make more shower space, adding skylights and hinged doors, or even designing an accent tile pattern, homeowners are able to take their simple shower and turn it into a relaxing space that rivals even the best spa.
The remodeling of a master bath even allows for homeowners to get creative with storage space and style. Many emerging trends include higher vanity height, and even additional built-in towers with extra outlets so that no one is without power while curling their hair or charging a razor.
When you take the time to customize your master bath, you will add a level of value to your home that you can experience each and every day, and that will also add to your home’s worth in the long run. Join in on The Year of the Master Bath, and enjoy your improved space for decades to come!
Find the right local pro for your project
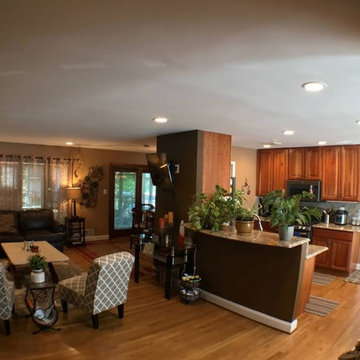 Stone Action
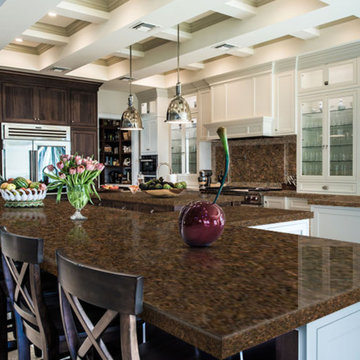
The living room has our Crema Marfil coffee table.
The kitchen has a Typhoon Bordeaux granite that blends perfectly with the cherry cabinets and wooden floors.
See more crema marfil marble: http://stoneaction.net/website/?s=crema+marfil
See more Typhoon Bordeaux granite:
http://stoneaction.net/website/?s=typhoon+bordeaux
Project completed by Jcabido Remodeling! http://jcabidoremodeling.com/
 Stone Action
Brownie granite is shown in this project!
Search "Brownie" granite, see more granite or other stone options: http://www.stoneaction.com
Learn more about granite to see if it’s right for you:
Granite countertops can last a lifetime. It contains no harmful chemicals and do not emit harmful radiation or gasses. Granite is heat resistant and is one of the most heat-resistant countertops on the market. You can place a hot pan out of the oven directly onto the countertop surface. Experts do recommend the use of a trivet when using appliances that emit heat for long periods of time, such as crockpots. Since the material is so dense, there is a small possibility heating one area of the top and not the entire thing, could cause the countertop to crack.
Granite is scratch resistant. You can cut on it, but it will dull your knives! Granite scores a seven on Moh’s hardness scale.
Granite countertops are considered to be a low maintenance countertop surface. The likelihood of needing to be repaired or resurfaced is low. Granite is a porous material. Most fabricators will apply a sealer to granite countertops before they are installed which will protect them from absorbing liquids too quickly. Many sealers last more than 10 years before needing to be reapplied. When they do need to be reapplied, it is something that most homeowners can do on their own as the process is similar to cleaning. Darker granites are very dense and sometimes don’t even require a sealer.
When it comes to pricing, there are a lot of variables such as edge profile, total square footage, backsplash, etc. Don’t be fooled by the stereotype that all granite is expensive. Lower-range granites will cost less than high-range laminate. Though granite countertops are not considered “low range” in pricing, there are a lot of affordable options.
If you are looking for something truly unique, consider an exotic granite. Some quarries are not easily accessible and/or only able to be quarried for short periods of time throughout the year. If these circumstances exist in a quarry with gorgeous stone, the price will be driven upward.
You won’t find a lot of solid patterns or bright colors, but both do exist. Also, watch for a large range of color and pattern within the same color of stone. It’s always a good idea to view the exact slab(s) that will be fabricated for your kitchen to make sure they are what you expected to see from the sample. Another factor is that many exotic types of granite have huge flowing waves, and a small sample will not be an accurate representation of the whole slab.
Granite countertops are very resistant to chemicals. Acids and bases will not harm the material.
 Mission Kitchen & Bath
When people think of remodeling their homes, they often immediately consider starting with rooms like the dining area, living room, or basement – rooms where the most amount of people spend the most amount of time. While those rooms are important, recent remodeling trends are pointing toward the popularity of re-creating a more private place – the master bath.
In fact, we are in the midst of The Year of the Master Bath. Current home improvement practices show that, not only is redoing your master bath a fun and stylish choice, but it also is a wise way to add value to your home.
For homes built in the 1990’s with master baths over 200 square feet in size, now is the ideal time to remodel and upgrade to a more efficient, stylish, and worth-while setup. Most homes built during this time period were completed with a typical master bath that included a large jetted tub, and a separate small shower. Both of these elements are quickly becoming recognizable as features of the past, and are being replaced by new and improved technologies.
For instance, many homeowners have taken it upon themselves to remove the large jetted bath, and replace it with a free standing tub. These free standing tubs allow for the room to open up in a more modern fashion, and provide endless style and aesthetic choices. Homeowners are also expanding their small showers to create a luxury environment. By pushing out walls to make more shower space, adding skylights and hinged doors, or even designing an accent tile pattern, homeowners are able to take their simple shower and turn it into a relaxing space that rivals even the best spa.
The remodeling of a master bath even allows for homeowners to get creative with storage space and style. Many emerging trends include higher vanity height, and even additional built-in towers with extra outlets so that no one is without power while curling their hair or charging a razor.
When you take the time to customize your master bath, you will add a level of value to your home that you can experience each and every day, and that will also add to your home’s worth in the long run. Join in on The Year of the Master Bath, and enjoy your improved space for decades to come!
 Stephen Graver
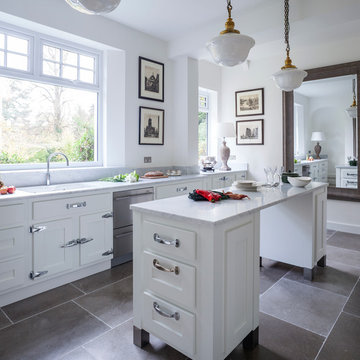
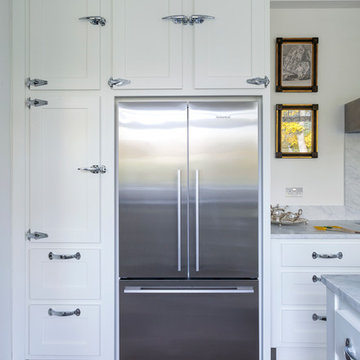
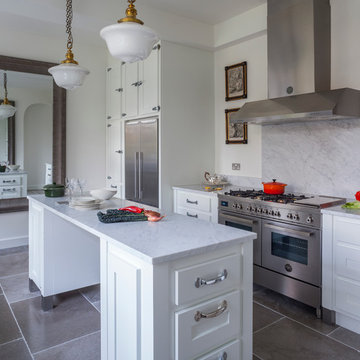
The clients had just moved into an impressive Victorian house and the existing kitchen was in a very poor state. After seeing one of our adverts they made an appointment to visit the studio for an initial consultation, and after spending some time with Stephen they invited him to visit the house to begin the design process. He quickly came up with some concept ideas that initially included removing two internal walls which would really open up the existing space, yet considering the timescale the clients decided to concentrate on creating just a beautiful kitchen.
With concept designs done and budgets considered they decided to instruct us for the complete project. We began with the building works that would allow a new kitchen to be fitted, this comprised of removal of the existing kitchen, installation of a new sub-floor and electric underfloor heating. The floors were finished with natural Limestone which just left installation of new power and lighting and a complete re-plaster. Including fitting the new bespoke kitchen, the project was completed over an eight week time period and on budget.
 Stephen Graver
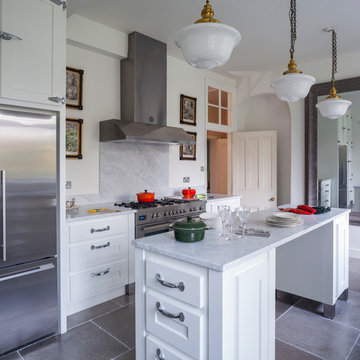
The clients had just moved into an impressive Victorian house and the existing kitchen was in a very poor state. After seeing one of our adverts they made an appointment to visit the studio for an initial consultation, and after spending some time with Stephen they invited him to visit the house to begin the design process. He quickly came up with some concept ideas that initially included removing two internal walls which would really open up the existing space, yet considering the timescale the clients decided to concentrate on creating just a beautiful kitchen.
With concept designs done and budgets considered they decided to instruct us for the complete project. We began with the building works that would allow a new kitchen to be fitted, this comprised of removal of the existing kitchen, installation of a new sub-floor and electric underfloor heating. The floors were finished with natural Limestone which just left installation of new power and lighting and a complete re-plaster. Including fitting the new bespoke kitchen, the project was completed over an eight week time period and on budget.
 Stephen Graver
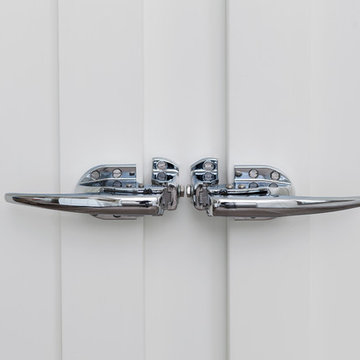
The clients had just moved into an impressive Victorian house and the existing kitchen was in a very poor state. After seeing one of our adverts they made an appointment to visit the studio for an initial consultation, and after spending some time with Stephen they invited him to visit the house to begin the design process. He quickly came up with some concept ideas that initially included removing two internal walls which would really open up the existing space, yet considering the timescale the clients decided to concentrate on creating just a beautiful kitchen.
With concept designs done and budgets considered they decided to instruct us for the complete project. We began with the building works that would allow a new kitchen to be fitted, this comprised of removal of the existing kitchen, installation of a new sub-floor and electric underfloor heating. The floors were finished with natural Limestone which just left installation of new power and lighting and a complete re-plaster. Including fitting the new bespoke kitchen, the project was completed over an eight week time period and on budget.
 Stephen Graver
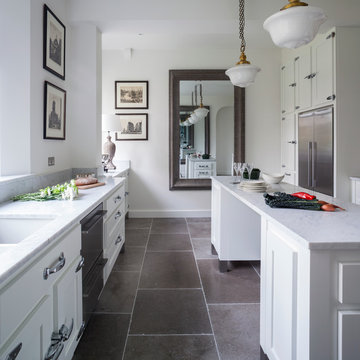
The clients had just moved into an impressive Victorian house and the existing kitchen was in a very poor state. After seeing one of our adverts they made an appointment to visit the studio for an initial consultation, and after spending some time with Stephen they invited him to visit the house to begin the design process. He quickly came up with some concept ideas that initially included removing two internal walls which would really open up the existing space, yet considering the timescale the clients decided to concentrate on creating just a beautiful kitchen.
With concept designs done and budgets considered they decided to instruct us for the complete project. We began with the building works that would allow a new kitchen to be fitted, this comprised of removal of the existing kitchen, installation of a new sub-floor and electric underfloor heating. The floors were finished with natural Limestone which just left installation of new power and lighting and a complete re-plaster. Including fitting the new bespoke kitchen, the project was completed over an eight week time period and on budget.
 Stephen Graver
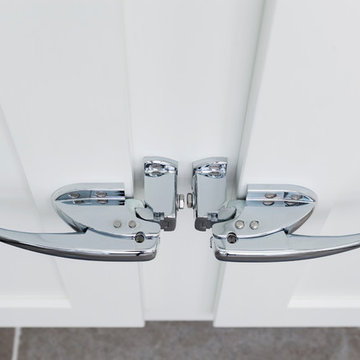
The clients had just moved into an impressive Victorian house and the existing kitchen was in a very poor state. After seeing one of our adverts they made an appointment to visit the studio for an initial consultation, and after spending some time with Stephen they invited him to visit the house to begin the design process. He quickly came up with some concept ideas that initially included removing two internal walls which would really open up the existing space, yet considering the timescale the clients decided to concentrate on creating just a beautiful kitchen.
With concept designs done and budgets considered they decided to instruct us for the complete project. We began with the building works that would allow a new kitchen to be fitted, this comprised of removal of the existing kitchen, installation of a new sub-floor and electric underfloor heating. The floors were finished with natural Limestone which just left installation of new power and lighting and a complete re-plaster. Including fitting the new bespoke kitchen, the project was completed over an eight week time period and on budget.
 Stephen Graver
The clients had just moved into an impressive Victorian house and the existing kitchen was in a very poor state. After seeing one of our adverts they made an appointment to visit the studio for an initial consultation, and after spending some time with Stephen they invited him to visit the house to begin the design process. He quickly came up with some concept ideas that initially included removing two internal walls which would really open up the existing space, yet considering the timescale the clients decided to concentrate on creating just a beautiful kitchen.
With concept designs done and budgets considered they decided to instruct us for the complete project. We began with the building works that would allow a new kitchen to be fitted, this comprised of removal of the existing kitchen, installation of a new sub-floor and electric underfloor heating. The floors were finished with natural Limestone which just left installation of new power and lighting and a complete re-plaster. Including fitting the new bespoke kitchen, the project was completed over an eight week time period and on budget.
 Stephen Graver
The clients had just moved into an impressive Victorian house and the existing kitchen was in a very poor state. After seeing one of our adverts they made an appointment to visit the studio for an initial consultation, and after spending some time with Stephen they invited him to visit the house to begin the design process. He quickly came up with some concept ideas that initially included removing two internal walls which would really open up the existing space, yet considering the timescale the clients decided to concentrate on creating just a beautiful kitchen.
With concept designs done and budgets considered they decided to instruct us for the complete project. We began with the building works that would allow a new kitchen to be fitted, this comprised of removal of the existing kitchen, installation of a new sub-floor and electric underfloor heating. The floors were finished with natural Limestone which just left installation of new power and lighting and a complete re-plaster. Including fitting the new bespoke kitchen, the project was completed over an eight week time period and on budget.
 Stephen Graver
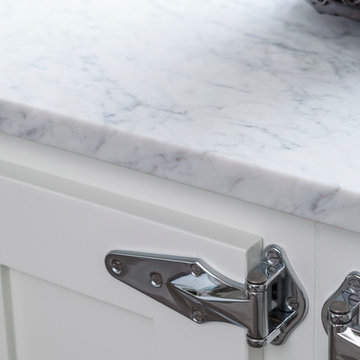
The clients had just moved into an impressive Victorian house and the existing kitchen was in a very poor state. After seeing one of our adverts they made an appointment to visit the studio for an initial consultation, and after spending some time with Stephen they invited him to visit the house to begin the design process. He quickly came up with some concept ideas that initially included removing two internal walls which would really open up the existing space, yet considering the timescale the clients decided to concentrate on creating just a beautiful kitchen.
With concept designs done and budgets considered they decided to instruct us for the complete project. We began with the building works that would allow a new kitchen to be fitted, this comprised of removal of the existing kitchen, installation of a new sub-floor and electric underfloor heating. The floors were finished with natural Limestone which just left installation of new power and lighting and a complete re-plaster. Including fitting the new bespoke kitchen, the project was completed over an eight week time period and on budget.
 BUNNYFiSH studio
Photos by Francis and Francis Photography
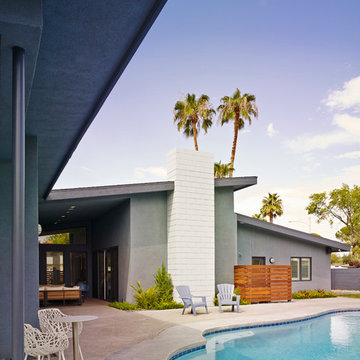
The Anderson Residence is ‘practically’ a new home in one of Las Vegas midcentury modern neighborhoods McNeil. The house is the current home of Ian Anderson the local Herman Miller dealer and Shanna Anderson of Leeland furniture family. When Ian first introduced CSPA studio to the project it was burned down house. Turns out that the house is a 1960 midcentury modern sister of two homes that was destroyed by arson in a dispute between landlord and tenant. Once inside the burned walls it was quite clear what a wonderful house it once was. Great care was taken to try and restore the house to a similar splendor. The reality is the remodel didn’t involve much of the original house, by the time the fire damage was remediated there wasn’t much left. The renovation includes an additional 1000 SF of office, guest bedroom, laundry, mudroom, guest toilet outdoor shower and a garage. The roof line was raised in order to accommodate a forced air mechanical system, but care was taken to keep the lines long and low (appearing) to match the midcentury modern style.
The House is an H-shape. Typically houses of this time period would have small rooms with long narrow hallways. However in this case with the walls burned out one can see from one side of the house to other creating a huge feeling space. It was decided to totally open the East side of the house and make the kitchen which gently spills into the living room and wood burning fireplace the public side. New windows and a huge 16’ sliding door were added all the way around the courtyard so that one can see out and across into the private side. On the west side of the house the long thin hallway is opened up by the windows to the courtyard and the long wall offers an opportunity for a gallery style art display. The long hallway opens to two bedrooms, shared bathroom and master bedroom. The end of the hallway opens to a casual living room and the swimming pool area.
The house has no formal dining room but a 15’ custom crafted table by Ian’s sculptor father that is an extension of the kitchen island.
The H-shape creates two covered areas, one is the front entry courtyard, fenced in by a Brazilian walnut enclosure and crowned by a steel art installation by Ian’s father. The rear covered courtyard is a breezy spot for chilling out on a hot desert day.
The pool was re-finished and a shallow soaking deck added. A new barbeque and covered patio added. Some of the large plant material was salvaged and nursed back to health and a complete new desert landscape was re-installed to bring the exterior to life.
 Tile Doctor Ltd
If you have a tiled shower area in your home, it’s very likely you’ve experienced problems with the grout becoming excessively dirty and ridden with displeasing black spots of mould. The underlying issue is due to inadequate ventilation which can be a real problem in modern insulated houses and occasionally the grout can get so imbued with contamination that the problem needs to be resolved professionally.
In the case of this Ceramic tiled shower area, located at a property in Galgate, Lancashire, mould had turned the grout black and had got into the sealant strip around the base. The property owner had tried using the run-of-the-mill cleaning products you can buy in superstores, but they simply couldn’t get the job done. So, she contacted me to see what could be done.
At Tile Doctor, we come across the problem of mouldy shower tiles very often. Excess soaps and shampoos – many of which contain chemicals that harmful to the grout – can quickly build-up if not removed, causing mould and soap scum to emerge quickly, and before you know it, you have a problem like this one.
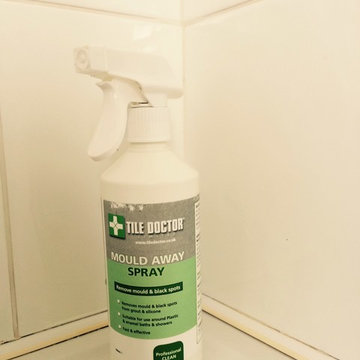
Thankfully, with the right strength product and cleaning methods, mould can be removed quite easily. The cleaning product used here was Tile Doctor Mould Away, which does what it says on the bottle and can quickly remove mould and black spots from grout and silicone. I applied Mould Away to the grout and surrounding Ceramic tiles and left it to dwell for a short period, before starting to clean the affected areas carefully using soft nail brushes and a small amount of water.
Sometimes it is necessary to repeat this process several times to achieve the best possible results, but in this case two attempts was all it took to get the grout looking like new once again.
Following the cleaning, the area was rinsed thoroughly with water, before bring dried off quickly with a heat gun on a low setting. I then sealed the grout with a single coat of Tile Doctor Wall Grout Sealer, which is a water-based sealer designed to protect against water, oil and acid-based contaminants, and stop them from spoiling the appearance of the grout. It also provides a transparent finish that does not diminish the original colouring of the grout. To add the finishing touches, I polished off the Ceramic tiles as these were already fully glazed and did not require any extra sealer.
The before and after photos are a testament to how significantly the condition and appearance of the grout was quickly improved and needless to say, the customer was very satisfied with the result.
Russell Taylor
Lancashire Tile Doctor
 Tile Doctor Ltd
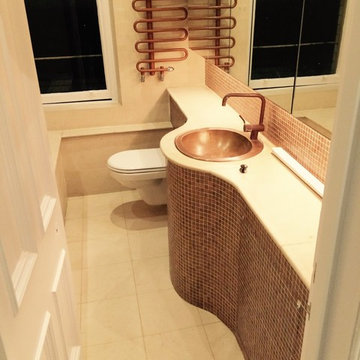
This was a substantial engagement at a luxury rental apartment in Brighton rejuvenating the Limestone tiles in two bathrooms and a hallway taking six days of hard work. In addition, I would be working around two decorators, making for even more testing work conditions.
I first set to work on the smallest bathroom, which featured limestone tiles from floor to ceiling, as well as a large bath, copper sink and a tiled surround. Limestone is a very popular choice for interior and exterior decoration, but the tiles in this bathroom were in need of some care to get them looking their best again. My initial task was to strip away any previous sealer by hand; this was done using a mixture of warm water and Tile Doctor Pro-Clean which, along with Limestone, is also suitable for use on other types of natural stone, such as Granite, Slate and Travertine. Pro-Clean serves both as an effective stripper and cleaner, meaning that once the sealer had been stripped away, the tiles also received a thorough clean. Once I had cleaned the tiles, I sucked up any excess water and residue using a Wet-Dry Vac machine.
Since the tiles would have to be left to dry for a couple of days, I offered to restore the copper sink for the customer, even though this was not actually part of my job description. After conducting some research into copper cleaning, I opted to use a combination of lemon juice, vinegar and salt. The research paid off as, once I began to apply the solution to the sink, the bright orange and brown colours of the copper quickly rose to the surface. Within the space of an hour, I had transformed what initially appeared to be a ruined sink into a lovely, shimmering copper feature for the bathroom. Both the decorators and I were truly amazed at the results – but all credit goes to Google!
The larger of the two bathrooms was a much stiffer test for the Tile Doctor products. It had not been left in great condition, as the shower area had clearly not been sealed correctly, and the tiles had been left in such a manner that soap scum from shampoos, soaps and shower gels had built up on the window sill. In fact, the damage was significant enough that I had to explain to the customer before starting the work that whilst I could greatly improve the appearance of the tiles, I would not be able to restore them to new. This is because many shampoo and body wash products are acidic and can cause permanent damage to stone work especially when left to dwell for a long time.
My choice of product was Tile Doctor Mould Away, a formula which, over time, seeps deeply into the pores of the stone, effectively lifting away the muck. In cases of particularly stubborn areas, it is necessary to apply another covering of Mould Away and leave it for an extended period of time. This is exactly what I did over the next few days, leaving the product overnight to work its magic. The change was certainly drastic, if not perfect.
As both bathrooms required extended periods of drying, I spent two days working on the hallway, which had been partially covered with a plastic sealing for the previous six months due to building work. Needless to say, the hallway was in need of a good clean. I set about cleaning the hallway with a solution of warm water and Tile Doctor Pro-Clean, before once again using a Wet-Dry Vac machine to remove any excess water to prepare the floor for sealing at a later point. It is very important to remove any residue of cleaning solution before sealing, as this may impact the performance of the sealer. Following this, I left the hallway to dry for two days, providing the builders with strict instructions to cover it with blankets for protection while they were working.
While the floor was drying, I sealed the bathrooms – both now fully dried – with Tile Doctor Colour Grow Sealer, a solvent-based sealer that was highly effective at enhancing the colour of the brown tiles around the sinks. The product will also provide durable surface protection. I spent the final of the six days sealing the hallway floor with Tile Doctor Seal & Go, which provides both a stain-resistant surface seal and a durable, low-sheen finish. This was an ideal choice of product, as the customer requested a hard-wearing, yet shiny finish.
The hard work really paid off, as both the customer and the decorators were very impressed with the final results in the two bathrooms and the hallway. I was extremely pleased that I was able to complete this big job to the highest possible standards.

 Five Star Tree Care
During the summer, certain tree pests are particularly active and bent on the destruction of your beloved trees. Spider mites are one of these pests that like to make themselves at home all over your plants. Their only goal in life is to eat plant leaves. A great way to stop their destruction is being able to recognize the warning signs of their infestation. Once you have identified them, you can take care of them and put in precautions in order to keep them away and stop any future problems from them. We here at Five Star Tree Services have come up with ways that you can identify this pest and get rid of it before it’s too late for your precious plants.
Some Info on Spider Mites
You might have seen these little pests before but didn’t know what they were. They are these tiny creatures that are related to ticks and spiders.
What They Look Like
In order to see them properly, you will need to look at them through a magnifying glass. These little bugs come in a number of different patterns and colours. Being so incredibly small, they are roughly a millimeter at the most. For reverence, that’s about as thick as your credit card. Trying to look at them without a magnifying glass, all you might see are these tiny moving dots that might be brown, red, black, or yellow.
Causes of Spider Mites
Due to their shier tininess, these little invaders can waltz right into your gardens undetected. It’s even possible that you have bought a plant for a nursery or garden center that has had spider mites on them. They can even be brought into your garden by the wind. These little pests have the ability to spread very quickly due to their ability to eat a number of different plants. They are not very picky when it comes to eating your plants. They like outdoor and indoor plants, deciduous and evergreen, virtually nothing is safe from them.
How To Tell You Have Spider Mites
Spider mites prefer to cut and feed on the bottoms of tree leaves, however, the damage they do can be seen at the top of the leaf. Three key things to look for that indicate you have a spider mite infestations are:
Yellowing or bronze look to your tree in one or many different areas (common with a big infestation)
Silky webs that are woven around the leaves and stems
Little yellow or white spots appearing at the top of the leaves/needles
If you are suspicious that your plant has spider mites, one way to know for sure is holding a sheet of paper under an infected branch and shaking it. You will be able to see the little mites on the paper.
Rid Your Plants of Spider Mites
Whether it’s the summer or winter, follow these tips for treating spider mites.
Summer:
You can use a forceful water spray to knock them off of your tree. Once they are gone, periodically use your hose to rinse your trees for the season. Make sure to get the bottom of the leaves because this is where the mites like to live.
Winter:
This also includes any time before the buds come out in the spring. If your tree has spider mites, during this time, you will only see the eggs settled on the branches of your tree. Apply dormant oil to all the eggs before they hatch.
It is also handy to know what natural predators eat spider mites. Certain rival insects such as lacewings and predator beetles will aid in getting rid of your pesky mites.
Preventing Spider Mites
Spider mites are most active during drought season. When trees are stressed, this is when they attack. If you are experiencing extended hot days and long dry periods, it is important to keep your trees hydrated. This means giving them at least an inch of water a week and making sure you have enough mulch around them.
How Five Star Tree Service Can Help
Spider mites are a pest. Catching them before they do any permanent damage is important. If using the dormant oil or spraying your tree with water doesn’t seem to be working, you can give us at Five Star Tree Services a call at (416) 990-3355 and we will come and help take care of them. Visit our website to see a full list of our available tree care services in Toronto!
 Tile Doctor Ltd
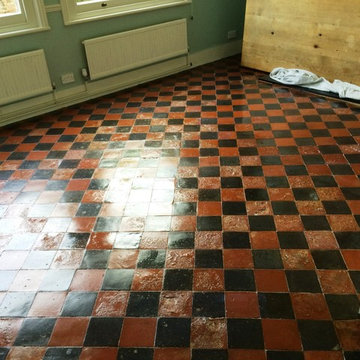
I was contacted recently by a client in East Grinstead, who asked me to restore a large area of damaged Quarry tiles in his house. East Grinstead actually dates back to the 14th century and is a town known for its many interesting houses and historic buildings. Hard-wearing Quarry tiles are most often used in high traffic areas, such as reception areas and hallways, although they are also commonly used for patio areas and porches. In these busy areas, the tiles can get dirty quickly, and this can lead to damage over time if they are not regularly tended to.
In this case, the damage to the tiles had actually been caused by regular flooding over a period of several years. The damage was so extreme that I advised my client that the only means of total restoration was re-tiling. However, my client informed me that the property was currently on the market for sale and this wasn’t an option. Instead, he settled on a deep clean and seal which, while not a complete restoration, would still significantly improve the condition of the tiled floor.
My first day of work was spent moving a significant amount of large furniture out of the room and into the garden. Once the area was completely clear, I was able to apply a layer of Tile Doctor Pro-Clean, using a stiff deck brush to really work it into the damaged stone. Pro-Clean helped to lift out a huge amount of the muck and ingrained dirt revealing, unfortunately, yet more damage beneath.
Once I had finished for the day, my client opened the windows to allow the warm sunshine to dry up any remaining moisture. This was important, as any excess moisture left on the floor may have affected the performance of the sealer when I returned to complete the sealing.
I allowed the floor a two-day drying period, during which time my client decided to colour some of the tiles with red doorstep paint. He counted up to two thousand tiles before giving up!
When I returned after 48 hours, I set about sealing the floor using Tile Doctor Seal & Go, which provided the eye-catching gloss finish and durable protection the client wanted whilst the house was still on the market. As it was another warm day, the homeowners went out cycling around the Ashdown forest, leaving me to complete the sealing carefully and without distraction.
When they returned a few hours later, they were amazed by the results! Although a complete re-tiling was not possible under the circumstances, both myself and my clients were extremely pleased with how great the Quarry tiles were now looking, especially after such significant water damage.
 Simply Home Decorating
This beautiful North Vancouver home belongs to a nature-loving and health-conscious couple, Emma and Vince (names changed), their two young children, and their dog, Jasper. When they contacted us about renovating and furnishing their kitchen and family room, we walked in and saw a world of potential waiting to be uncovered.
Before: Larkhall Crescent Home:
Like many original North Vancouver homes, the interior was definitely dated. We encountered late ‘80s finishes in powder pink and teal green, old carpet, and a kitchen that wasn’t maximized to suit this family’s modern-day lifestyle. However, the size of the rooms offered us a ton of space with which to get creative.
Knowing our clients’ love of cooking, need for work spaces (Emma and Vince both work remotely), and growing family, we developed a design concept that would increase usable space, optimize storage, and create intimacy in this large area. As for the style, we were inspired by their European roots, inventing a new and modern take on “Belgian Farmhouse” style. Now, the home is truly one-of-a-kind.
After: Warm & Cozy Family Room:
Fresh, bright, and comfortable, this living area has been transformed! We started with the fireplace as a focal point, selecting aged brick tiles for added texture and a crisp wood mantle. The taupe-coloured sectional infuses the room with visual warmth and serves the added purpose of separating the family room from the kitchen.
Emma and Vince were also keen on using non-toxic materials in their home, and we were happy to oblige. To meet their needs, we sourced natural wood elements and sought out Canadian-made products - that adhere to high health standards - whenever possible.
Look closer at the elements of this space, and you will find this stunning, honeycomb-patterned rug in earthy gold, beige, and charcoal tones. It’s plush to the touch and full of visual texture that brings this room’s colour palette together. We sourced these two-tone chairs with caning, petrified wood side table, black sconces, and botanical prints in greyscale from local artist, Heather Johnston.
We topped off the space with this dark wood and rattan console that offers storage facing the kitchen and presents an opportunity to display cherished items. The result is a cozy lounging space brimming with comfort and functionality. It’s perfect for enjoying quality family time, or Emma can simply slide the coffee table away to make room for her morning yoga practice.
Now, let’s turn around and give some attention to the kitchen. Do you remember what the original kitchen looked like? If not, scroll back up, because the transformation is shocking…
Moody & Welcoming Kitchen for Healthy Living:
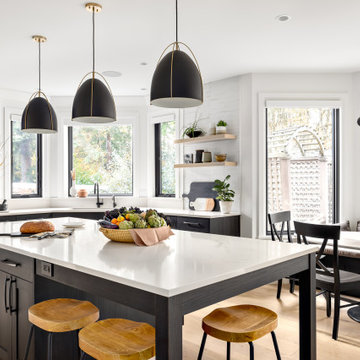
This kitchen looks very different from how it started, right? Though we didn’t touch any walls, the kitchen has almost doubled in usable space! We created a long, extended island with storage, an outlet for small appliances, and seating for comfortable prep, after-school snacking, or mingling among friends.
On the other side of the island, the family has even more storage and an integrated dishwasher within easy reach of the sink, perfect for quick clean-up. From this angle, you can also see the expansive custom Shaker cabinetry in white and the integrated double ovens. These facilitate their cooking experience and gave us the opportunity to add an additional surprise…
A coffee garage station and more hidden storage! Keeping these items located along the perimeter allows them to be accessed by the family or their guests without someone getting under the cook’s feet. These are the little details that make everyday life easier and more enjoyable.
Moving deeper into the kitchen, the seamless induction cooktop topped with a freestanding concealed hood fan commands attention in a soft yet prominent way. The natural wood accent mirrors the fireplace mantle, and the choice of off-black wood-grain cabinets not only continues our black-and-white colour palette but adds a sense of depth and contrast. The corner sink is located to the right and perfectly positioned with a view of their thriving backyard.
To invite more of this family’s character into the space, we mixed metals for interest — matte black, dark pewter, and warm brass — and created open shelves in white oak for their plants and decor. You can also glimpse the tumbled edge of the backsplash tile, which echoes the rustic brick of the fireplace. It adds that farmhouse charm while still feeling timeless and sophisticated.
Last but not least, we designed this dining banquette in the bay window (with integrated bench storage, of course), where the family can share a meal together, the kids can do homework, or Emma and Vince can work and enjoy a change of scenery from their offices. Like the other spaces in the home, it was designed to be beautiful, multi-functional, and long-lasting.
Praise from Our Clients:
It is clear that we love this home, but what did our clients have to say?
“Lori is a visionary and masters execution to the finest detail all at the same time. When she first met us to know more about who we are and how we live, she could right away envision how we could use the space in our kitchen and living room…The results exceeded our expectations.
Lori and her team were also a delight to work with — coordination with all the trades, fast problem-solving, regular updates, professional and friendly attitude of her entire team — made it the dream team. Thank you SHD for making our space so beautiful!”
In turn, we are so grateful for this family’s trust, their open communication, and for being wonderful people with whom to work. (So, thank you!)
9