
Search results for "Recommend permanent" in Home Design Ideas
 James David Custom Homes
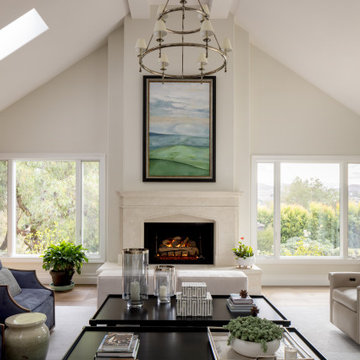
Transitional medium tone wood floor, brown floor and vaulted ceiling living room photo in Orange County with beige walls and a standard fireplace
 Statewide Windows & Doors
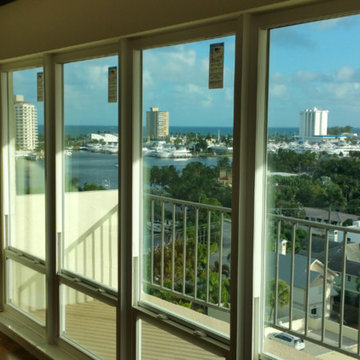
Inspiration for a mid-sized contemporary deck remodel in Miami with no cover
 Kasper Custom Home Remodeling
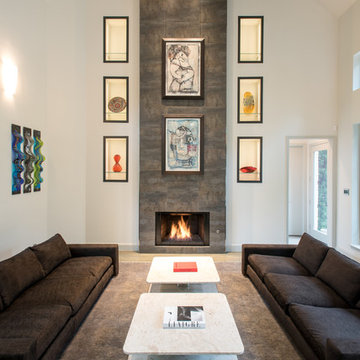
This shot of the formal living room provides a more intimate view of the seating area and adjacent art. All this room needs is a fine wine, a charcuterie board, and a few friends to make it feel complete.
Designer: Debra Owens
Photographer: Michael Hunter
Find the right local pro for your project

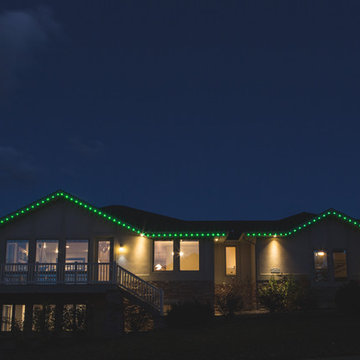
 Oelo Lighting Solutions
With a subtle tan channel, the glimmering light system on this house comes as a pleasant surprise once the sun sets. Approximately 140 linear feet of multicolor engine lighting runs along the rooflines, adding simple elegance at certain times and a festive holiday gleam at others.

 Industrial Projects
Creating a comfortable outdoor living space is a priority for many homeowners and DIY enthusiasts. With rising summer temperatures, installing a shade tarp in your backyard offers an affordable and effective solution for sun protection. We’ve developed this detailed, step-by-step guide to help you confidently install a shade tarp that not only shields you from the sun but also adds aesthetic appeal to your outdoor area.
Benefits of Installing a Backyard Shade Tarp
Before diving into the installation process, let’s explore the key benefits of having a backyard shade tarp:
Provides UV Protection: Keeps your family and guests safe from harmful sun exposure.
Reduces Outdoor Temperatures: Creates a cooler, more enjoyable outdoor space.
Protects Outdoor Furniture: Extends the life of patio furniture by reducing sun damage.
Enhances Outdoor Aesthetics: Adds a modern, stylish look to your yard.
Budget-Friendly: More affordable compared to permanent structures like pergolas.
Materials and Tools You’ll Need
To begin your DIY backyard shade project, gather the following materials and tools:
Materials:
Shade tarp (UV-resistant and breathable)
Sturdy posts or existing structures (trees, fences, walls)
Mounting hardware (eye bolts, D-rings, turnbuckles, snap hooks)
Nylon or polyester rope, or stainless-steel wire
Concrete (if installing new posts)
Tools:
Power drill
Measuring tape
Level
Ladder
Wrench or adjustable spanner
Post hole digger (if installing new posts)
Step 1: Plan Your Shade Tarp Layout
The first step in installing your backyard shade tarp is careful planning. Take time to assess your outdoor area and answer these key questions:
Where is the sun’s path throughout the day?
What size and shape of tarp best suits your space?
Will you anchor the tarp to existing structures or install new posts?
What height do you want the tarp to sit at for maximum shade and airflow?
Pro Tip: Use string or garden hoses to visualize the tarp layout on the ground before making permanent decisions.
Step 2: Measure and Mark Anchor Points
Once you’ve determined the tarp’s location and orientation:
Measure the tarp dimensions.
Mark the exact points where each corner of the tarp will be anchored.
Ensure that the anchor points are at least 5–10% longer than the tarp size to allow for tensioning and slight adjustments.
Consider slope angles for water runoff. Aim for at least a 20-degree angle to prevent water pooling on the tarp.
Step 3: Install Support Posts (If Necessary)
If your backyard lacks existing anchor points like trees or fences, you’ll need to install sturdy support posts:
Dig post holes at least 24 inches deep and 8-12 inches wide for stability.
Set posts in concrete, making sure they remain plumb and level.
Allow the concrete to cure for at least 24–48 hours before applying tension from the tarp.
We recommend using pressure-treated wood, galvanized steel poles, or aluminum posts for longevity and strength.
Step 4: Install Mounting Hardware
With your anchor points ready, it’s time to install the necessary hardware:
Attach eye bolts or pad eyes securely into walls, posts, or other fixed structures.
For added flexibility and adjustability, install turnbuckles or tensioners to fine-tune the tarp’s tightness.
Connect snap hooks, D-rings, or carabiners to make assembly and disassembly easier.
Make sure all hardware is rated for outdoor use to prevent rust and corrosion.
Step 5: Attach and Tension the Shade Tarp
Now it’s time for the most satisfying part—mounting the shade tarp:
Begin by attaching one corner of the tarp to an anchor point.
Gradually attach the remaining corners, moving diagonally for even tension.
Adjust each connection point using your turnbuckles, ropes, or cables.
Pull the tarp tight enough to avoid sagging, but not so tight that it risks tearing.
Check that the tarp maintains the desired slope for rainwater runoff and adjust tension as needed.
Step 6: Final Adjustments and Safety Check
Before enjoying your new shaded area:
Inspect all anchor points and hardware for stability.
Test the tarp’s tension and make adjustments for even distribution.
Ensure that no sharp edges or loose connections remain that could damage the tarp or pose a safety hazard.
Confirm that the tarp is secure in windy conditions by giving it a gentle tug.
If you live in an area with frequent high winds, consider removing the tarp during storms to prevent damage.
Step 7: Enjoy Your Shaded Backyard Oasis
Once installed, your backyard shade tarp provides a comfortable and protective space for outdoor gatherings, relaxation, or family activities. You can decorate underneath with outdoor furniture, string lights, or potted plants to create a personalized outdoor retreat.
Maintenance Tips for Long-Lasting Shade Tarp Performance
To extend the life of your shade tarp, follow these maintenance guidelines:
Regularly check for wear and tear, especially around anchor points and seams.
Clean the tarp periodically with mild soap and water to prevent mildew buildup.
Store the tarp indoors during harsh weather seasons if it's not designed for year-round use.
Tighten hardware as needed to maintain proper tension and avoid sagging.
By following these simple care steps, your shade tarp will continue to deliver years of sun protection and outdoor comfort.
Conclusion: Upgrade Your Outdoor Space with a DIY Shade Tarp
Installing a shade tarp in your backyard is a cost-effective and rewarding DIY project. With careful planning, quality materials, and proper installation techniques, you’ll enjoy cool, shaded outdoor living all season long. This step-by-step guide ensures your project goes smoothly from start to finish.
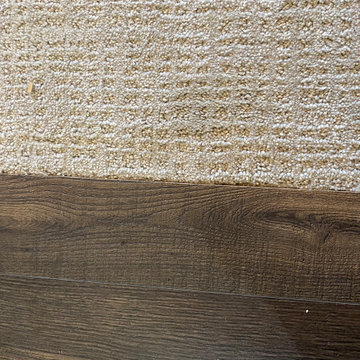
 The Design House
Many homeowners think they have to rip out all their carpet to have a "pet-proof" home. That is a myth. For this project, we installed a strategic combination of Shaw Pet Perfect™ Carpet in the bedrooms and Heavy-Duty Luxury Vinyl Plank (LVP) in the main living areas, creating a home that is cozy and indestructible.
Why We Recommend Shaw Pet Perfect™:
LifeGuard Spill-Proof Backing: This is the game-changer. Unlike standard carpet where accidents soak through to the pad (creating permanent odors), Shaw’s blue LifeGuard® backing keeps spills on the surface for easy cleaning. It literally saves your subfloor.
Bleach & Fade Resistant: The high-performance fibers resist bleaching from harsh cleaners and fading from sunlight.
Easy-Clean Hair Release: Designed specifically to release pet hair when vacuumed, rather than trapping it deep in the fibers.
The Vinyl Advantage:
We paired the soft carpet with Commercial-Grade LVP in high-traffic zones. It is 100% waterproof and features a reinforced wear layer to stop claw marks at the door.
The Result: A home that feels warm and soft where you want it, and tough as nails where you need it. Come see our Shaw Pet Perfect display in Denton today.
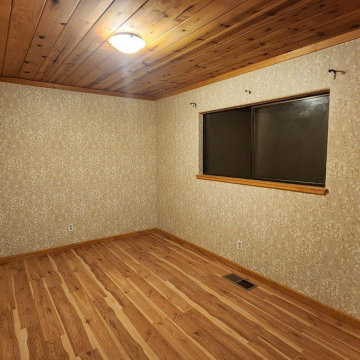
 A&W Wallcovering
Portfolio Description:
"Luxury Guest Room Wallpaper Installation in Elizabeth – Create a welcoming retreat with professional wallpapering that impresses visitors. As an expert wallpaper installer and wallpaper hanger, I specialize in:
✔ Custom Wallpaper Designs – Tailored patterns for a unique, upscale look
✔ Flawless Pattern Alignment – Precision wallpaper installation for seamless elegance
✔ Peel-and-Stick & Traditional Options – Easy-change or permanent wallcovering solutions
✔ Accent Wall Transformations – Bold mural wallpaper or textured finishes for depth
✔ Wallpaper Repair & Removal – Fixing imperfections or refreshing outdated styles
Why Choose Us?
✅ Residential & Commercial Expertise – Perfect for Airbnb hosts and homeowners
✅ Quick, Hassle-Free Process – Installed before your guests arrive
✅ Premium Materials – High-end vinyl wallpaper, eco-friendly adhesives
✅ Free Design Consultations – Personalized style recommendations
Popular Guest Room Styles:
• Cozy Elegance – Soft neutrals, linen textures, and subtle metallics
• Bold & Artistic – Statement accent walls or scenic murals
• Modern Minimalist – Clean lines and muted tones for a serene vibe
• Classic Charm – Timeless damasks, stripes, or botanical prints
Serving Elizabeth homes, rentals, and boutique hotels—elevate your guest experience with professional wallpaper installation today!"
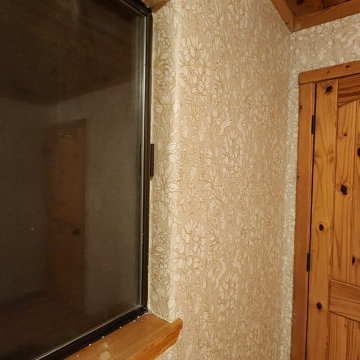 A&W Wallcovering
Portfolio Description:
"Luxury Guest Room Wallpaper Installation in Elizabeth – Create a welcoming retreat with professional wallpapering that impresses visitors. As an expert wallpaper installer and wallpaper hanger, I specialize in:
✔ Custom Wallpaper Designs – Tailored patterns for a unique, upscale look
✔ Flawless Pattern Alignment – Precision wallpaper installation for seamless elegance
✔ Peel-and-Stick & Traditional Options – Easy-change or permanent wallcovering solutions
✔ Accent Wall Transformations – Bold mural wallpaper or textured finishes for depth
✔ Wallpaper Repair & Removal – Fixing imperfections or refreshing outdated styles
Why Choose Us?
✅ Residential & Commercial Expertise – Perfect for Airbnb hosts and homeowners
✅ Quick, Hassle-Free Process – Installed before your guests arrive
✅ Premium Materials – High-end vinyl wallpaper, eco-friendly adhesives
✅ Free Design Consultations – Personalized style recommendations
Popular Guest Room Styles:
• Cozy Elegance – Soft neutrals, linen textures, and subtle metallics
• Bold & Artistic – Statement accent walls or scenic murals
• Modern Minimalist – Clean lines and muted tones for a serene vibe
• Classic Charm – Timeless damasks, stripes, or botanical prints
Serving Elizabeth homes, rentals, and boutique hotels—elevate your guest experience with professional wallpaper installation today!"
 Tile Doctor Ltd
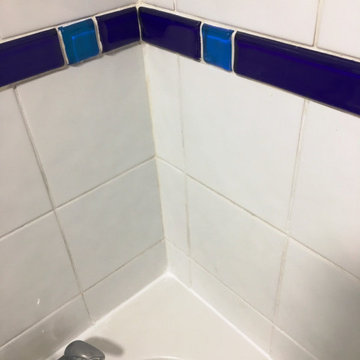
A family living in Guildford were in touch recently about restoring the appearance of their Ceramic tiled shower and bathroom. They were about to put the property up for sale and were concerned the grubby grout might put off potential buyers. First impressions do count so renovating a bathroom or kitchen before selling is a really good idea and will help you achieve a better price.
In this case the Ceramic tiles were dirty and black with mould in places which looked unhygienic and uninviting. Additionally, the mastic sealant between the tile and bath was tired and worn to the extent that water could end up leaking behind the seal. After visiting the property, they were pleased to hear I could help and happily accepted our quote which was based around a days work and some materials.
Firstly, I cleaned the grout using a Tile Doctor product called Duo Clean which is designed to tackle dirty grout and mould. I sprayed the product along all the grout lines and left it to soak in for about fifteen minutes. Once ready I brushed them with a firm wire brush then rinsed off with water. Next, I cleaned the tiles using a strong dilution of Tile Doctor Pro-Clean which was decanted into a spray bottle and sprayed onto the wall tiles. After ten minutes I then used a handheld buffing machine fitted with a small white buffing pad to shift the dirt and buff up the white tiles. After rinsing the slurry off with water you could see a marked improvement.
I hand dried the tile and grout with a cloth and then set about stripping out the old white mastic sealer with a sharp knife. This took some time, as you have to be careful not to scratch the bath or the tile.
By this time the grout had dried off fully and I was able to see if more work was required. To achieve a uniform colour throughout. Mould and some cleaning products can discolour grout permanently and, in this case, there was some grout staining I was unable to remove. We had discussed this possibility earlier and how it would be best resolved using a white grout colourant. So, I carefully applied Tile Doctor Grout Colour which is painted on with a small brush with any excess wiped off the tile before it can set. This resulted in a uniform white grout throughout and really gave the whole bathroom a lift.
With the cleaning process completed I applied a new white mastic between the bath and tile and along the verticals. This is done with the bath filled with water and then left for 24 hours to allow the silicone to fully cure.
After the grout colour had dried, I applied an aerosol Tile and Grout sealer over the whole surface and then lightly polished off any excess with a clean cloth. This does two things; one it adds a further layer of protection to the new grout colour and to the surface of the tiles. Secondly Ceramic tiles are non-porous, but bacterial dirt can still get a grip on the surface, with the sealer in place you will find water quickly runs off without getting a chance to get a hold.
Sealers do wear off, so I recommended re-applying it every year. I had plenty left over and gave it to the customer when I finished using it. For regular cleaning of tiled shower areas, I recommend they use Tile Doctor Aqua-Pro this will neutralise any acid build-up caused by acidic shampoos etc.
West Surrey Tile Doctor
Rupert Mcleod
 Tile Doctor Ltd
My client had recently moved into a bungalow in Godalming where they inherited the Limestone tiled kitchen floor pictured below. The previous owner had not looked after the floor very well and by the time they moved in it was pretty filthy. Limestone is a natural but porous stone where, unless sealed, attracts dirt into its tiny holes and as you would expect Cream Limestone shows the dirt easily. The protective seal had long since worn off this floor and was now ingrained with dirt it was now looking permanently dirty.
Before quoting I conducted a small test clean to work out the best method to renovate the stone and this also gives the client a good idea of how the floor will look after its finished. They were delighted with the initial result and happy with my quote gave me the go ahead.
On arrival first I helped the customer remove his tables and chairs and I then set about tapping up the plinths in the kitchen and the skirtings to protect them from cleaning solutions and equipment. The cleaning equipment I have invested in works more efficiently in open spaces, so it’s worth spending time at the beginning preparing the area first.
Next, I used a deck brush to apply a mixture of water and Tile Doctor Pro-Clean to the dirtiest tiles. Tile Doctor Pro-Clean works well when left to dwell for ten minutes or so. I also applied the same product to the grout over half the room so it could get a head start breaking down the dirt. Then using a stiff brush, I scrubbed the grout clean. Once it was worked loose, I extracted the now dirty solution with a wet vacuum.
With the grout clean I turned my attention back to the tiles with where the Pro-Clean had been left to soak in. Giving them a quick brush, I noted that what appeared to be permanently ingrained dirt had now come loose. To get the tiles really clean I used a 17″ rotary machine fitted with diamond encrusted buffer pads. This removes the tiny dots of dirt on the stone and with it comes any existing sealer and dirt.
A set of four burnishing pads were used, starting with a 400-grit, and finishing with a 3000-grit pad. The first 400-grit pad is coarse, and the grits become smoother as you work through the set. Water is used to lubricate the process and the released dirt is extracted in-between using the wet vacuum mentioned earlier. This process does take time but by the end of day one the floor was looking a lot better.
The next step is sealing however the floor needs to be bone dry for that, so I left a couple of industrial fans in place and left the Limestone to dry off overnight.
Returning the following day my first job was to ensure the floor was dry by taking multiple moisture readings with a damp meter. The readings were good, so I was able to make a start applying the sealer which for this floor was Tile Doctor Ultra Seal.
Ultra-Seal is an impregnating sealer that soaks into those small holes in the stone I mentioned earlier, I occupies the pores thus preventing dirt from becoming ingrained. The other feature of this sealer is it doesn’t change the appearance or colour of the stone leaving it with a very natural finish. Two coats of sealer were applied, leaving the seal to dry between each coat.
After the final coat was dried, I gave it a final polish with a soft nylon pad and the floor was finished. Before leaving we discussed after care which for this floor, I recommended Tile Doctor Stone Soap and I requested that the customer to stay out of the kitchen for a couple of hours while the sealer cured. They were over the moon with the new floor and could not believe the difference it had made to their kitchen.
Rupert Mcleod
West Surrey Tile Doctor
 Kebony
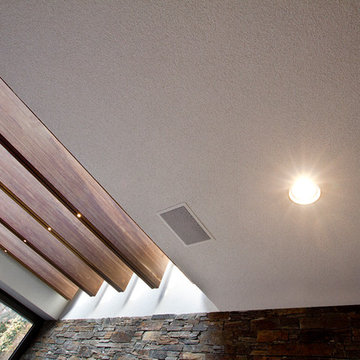
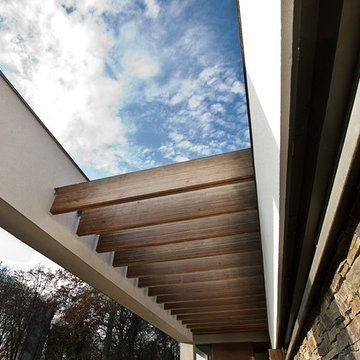
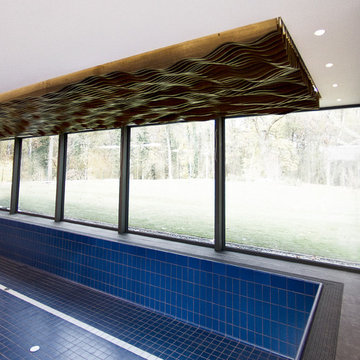
M-S Pro Architects announce the completion of an indoor swimming pool in a state-of-the-art, single storey family home set in a picturesque location on the outskirts of Bratislava - one of Europe’s youngest capital cities. Kebony, a beautiful wood recommended by leading architects, was chosen to craft the ceiling of the swimming pool, which is designed to emulate rippling waves as well as for the terrace deck and structural beams.
Sustainability and a desire to recreate the close proximity often seen between wood and water in the natural environment were primary focuses in the design of this project. This led a requirement for a low maintenance wood, compatible humidity and with advanced durability, for the swimming pool ceiling. In addition, a high level of precision when cutting the wood was required in order to achieve the desired appearance of waves.
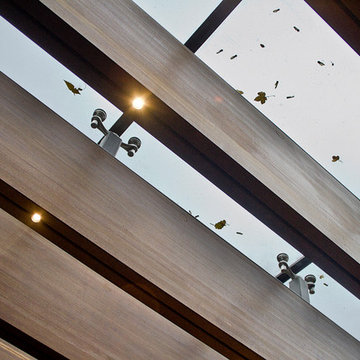
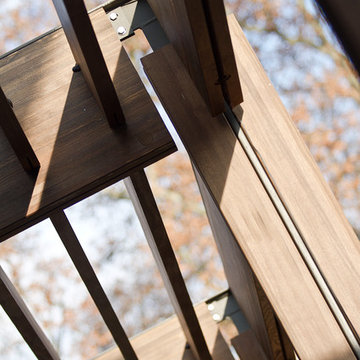
Supplied by Leading Market, Kebony was carefully selected for the pool ceiling, which consists of 490 lamellae of timber, due to its versatility, durability and environmental credentials. Kebony was also installed throughout the exterior of this property, both for the spacious outdoor terrace and the exterior and interior beams. One of the reasons to choose Kebony was the unified look of wood in all these different applications.
Developed in Norway, the patented Kebony technology uses an environmentally friendly process, which permanently enhances the properties of sustainable softwood with a bio-based liquid derived from agricultural crop waste. By polymerising the wood’s cell wall with furfuryl alcohol, the wood gains greatly improved durability and dimensional stability, giving it characteristics similar to those of tropical hardwood. In creating a wood with comparable properties to tropical hardwood that can be grown in a FSC certified, sustainably managed forest, the demand for tropical woods is reduced, allowing timber to once again be an important part of sustainable construction.
Tomáš Hubinský, Lead Architect at M-S Pro, commented: “From conception through to completion, the creation of this ceiling has been a real feat. Despite the challenges faced by such an intricate design, Kebony was the perfect material to convey our desired effect of waves rippling along the ceiling. We will continue to incorporate Kebony into our interior and exterior designs, with wood fast becoming the first choice material for all architects.”
Mette Valen, Sales Manager Norway at Kebony, explained: “The distinctive nature of this design cleverly portrays the capability of Kebony, demonstrating both the aesthetic and performance qualities of the product. We would be honoured to work with M-S Pro in the future and look forward to seeing how they utilise Kebony in their future projects.”
 Kebony
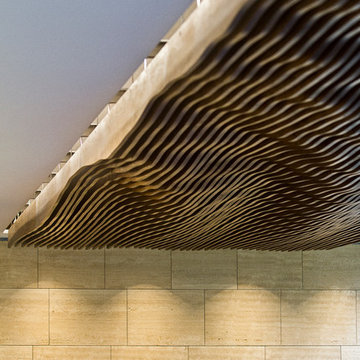
M-S Pro Architects announce the completion of an indoor swimming pool in a state-of-the-art, single storey family home set in a picturesque location on the outskirts of Bratislava - one of Europe’s youngest capital cities. Kebony, a beautiful wood recommended by leading architects, was chosen to craft the ceiling of the swimming pool, which is designed to emulate rippling waves as well as for the terrace deck and structural beams.
Sustainability and a desire to recreate the close proximity often seen between wood and water in the natural environment were primary focuses in the design of this project. This led a requirement for a low maintenance wood, compatible humidity and with advanced durability, for the swimming pool ceiling. In addition, a high level of precision when cutting the wood was required in order to achieve the desired appearance of waves.
Supplied by Leading Market, Kebony was carefully selected for the pool ceiling, which consists of 490 lamellae of timber, due to its versatility, durability and environmental credentials. Kebony was also installed throughout the exterior of this property, both for the spacious outdoor terrace and the exterior and interior beams. One of the reasons to choose Kebony was the unified look of wood in all these different applications.
Developed in Norway, the patented Kebony technology uses an environmentally friendly process, which permanently enhances the properties of sustainable softwood with a bio-based liquid derived from agricultural crop waste. By polymerising the wood’s cell wall with furfuryl alcohol, the wood gains greatly improved durability and dimensional stability, giving it characteristics similar to those of tropical hardwood. In creating a wood with comparable properties to tropical hardwood that can be grown in a FSC certified, sustainably managed forest, the demand for tropical woods is reduced, allowing timber to once again be an important part of sustainable construction.
Tomáš Hubinský, Lead Architect at M-S Pro, commented: “From conception through to completion, the creation of this ceiling has been a real feat. Despite the challenges faced by such an intricate design, Kebony was the perfect material to convey our desired effect of waves rippling along the ceiling. We will continue to incorporate Kebony into our interior and exterior designs, with wood fast becoming the first choice material for all architects.”
Mette Valen, Sales Manager Norway at Kebony, explained: “The distinctive nature of this design cleverly portrays the capability of Kebony, demonstrating both the aesthetic and performance qualities of the product. We would be honoured to work with M-S Pro in the future and look forward to seeing how they utilise Kebony in their future projects.”
 Tile Doctor Ltd
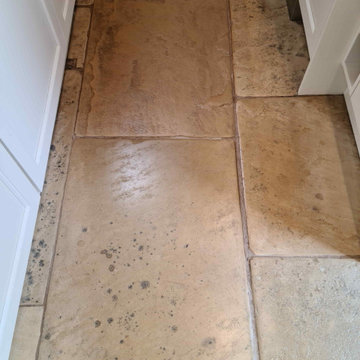
These pictures are of a beautiful Sandstone floor in Ilkley, the tiles were sourced from Lapicida of Harrogate and installed around twelve years prior. If you take a look at their website now you will see they are selling a similar London White Sandstone for nearly £100 per m2. This floor was 35 square metres so clearly this was a significant investment for the owner at the time.
After twelve years of use however the sealer had worn off the floor and dirt had become ingrained in the pores of the stone making it very difficult to keep clean. A good sealer takes a long time to wear off so the change to the appearance of the stone happens so slowly you don’t notice it. The floor was now looking permanently dirty, and the owner of the property had decided it was time to get it renovated.
Before quoting I paid a visit to the property to survey the floor and conduct an initial test clean which came out well. The test cleaning did not go as quickly as I had hoped it might however, due to traces of old satin sealer on some of the stone. It’s important to remove all the old sealer before applying new or you can end up with a patchy appearance. The remnants of old sealer proved challenging to remove as a result I had to try several products and methods before working out the right approach. In the end I resulted to using a product called Tile Doctor Wax Away. I had considered applying diamond burnishing pads which would have been a quicker option, but the flagstones had a riven finish, and the dirt was deeply pitted.
With a successful cleaning plan worked out I provided the client with a which was accepted, and a date agreed for my return.
The cleaning plan I had worked out was to apply a strong dilution of Tile Doctor Wax Away, leave it to soak into the stone for thirty minutes and then scrub it in with a rotary buffer fitted with a black scrubbing pad. The old sealer proved to be tough to remove and in total I used five litres of Tile Doctor Wax Away in the process, as I said it was a big floor!
On day three, I sealed the floor using three coats of Tile Doctor Seal and Go which gave the Sandstone a lovely satin finish that the client liked. This product is also water based so it doesn’t leave a smell as it dries.
Once done the floor was completely transformed, and my client very pleased with the floor which looked so much lighter and cleaner. For aftercare cleaning I recommended the use of Tile Doctor Neutral Tile Cleaner for maintenance, it is pH neutral so will ensure the newly applied seal is protected. It has a nice fresh smell and is gentle enough to use frequently keeping the newly renovated floor looking lovely.
Nigel Stoker
North West Yorkshire Tile Doctor
 Kebony
M-S Pro Architects announce the completion of an indoor swimming pool in a state-of-the-art, single storey family home set in a picturesque location on the outskirts of Bratislava - one of Europe’s youngest capital cities. Kebony, a beautiful wood recommended by leading architects, was chosen to craft the ceiling of the swimming pool, which is designed to emulate rippling waves as well as for the terrace deck and structural beams.
Sustainability and a desire to recreate the close proximity often seen between wood and water in the natural environment were primary focuses in the design of this project. This led a requirement for a low maintenance wood, compatible humidity and with advanced durability, for the swimming pool ceiling. In addition, a high level of precision when cutting the wood was required in order to achieve the desired appearance of waves.
Supplied by Leading Market, Kebony was carefully selected for the pool ceiling, which consists of 490 lamellae of timber, due to its versatility, durability and environmental credentials. Kebony was also installed throughout the exterior of this property, both for the spacious outdoor terrace and the exterior and interior beams. One of the reasons to choose Kebony was the unified look of wood in all these different applications.
Developed in Norway, the patented Kebony technology uses an environmentally friendly process, which permanently enhances the properties of sustainable softwood with a bio-based liquid derived from agricultural crop waste. By polymerising the wood’s cell wall with furfuryl alcohol, the wood gains greatly improved durability and dimensional stability, giving it characteristics similar to those of tropical hardwood. In creating a wood with comparable properties to tropical hardwood that can be grown in a FSC certified, sustainably managed forest, the demand for tropical woods is reduced, allowing timber to once again be an important part of sustainable construction.
Tomáš Hubinský, Lead Architect at M-S Pro, commented: “From conception through to completion, the creation of this ceiling has been a real feat. Despite the challenges faced by such an intricate design, Kebony was the perfect material to convey our desired effect of waves rippling along the ceiling. We will continue to incorporate Kebony into our interior and exterior designs, with wood fast becoming the first choice material for all architects.”
Mette Valen, Sales Manager Norway at Kebony, explained: “The distinctive nature of this design cleverly portrays the capability of Kebony, demonstrating both the aesthetic and performance qualities of the product. We would be honoured to work with M-S Pro in the future and look forward to seeing how they utilise Kebony in their future projects.”
 Kebony
M-S Pro Architects announce the completion of an indoor swimming pool in a state-of-the-art, single storey family home set in a picturesque location on the outskirts of Bratislava - one of Europe’s youngest capital cities. Kebony, a beautiful wood recommended by leading architects, was chosen to craft the ceiling of the swimming pool, which is designed to emulate rippling waves as well as for the terrace deck and structural beams.
Sustainability and a desire to recreate the close proximity often seen between wood and water in the natural environment were primary focuses in the design of this project. This led a requirement for a low maintenance wood, compatible humidity and with advanced durability, for the swimming pool ceiling. In addition, a high level of precision when cutting the wood was required in order to achieve the desired appearance of waves.
Supplied by Leading Market, Kebony was carefully selected for the pool ceiling, which consists of 490 lamellae of timber, due to its versatility, durability and environmental credentials. Kebony was also installed throughout the exterior of this property, both for the spacious outdoor terrace and the exterior and interior beams. One of the reasons to choose Kebony was the unified look of wood in all these different applications.
Developed in Norway, the patented Kebony technology uses an environmentally friendly process, which permanently enhances the properties of sustainable softwood with a bio-based liquid derived from agricultural crop waste. By polymerising the wood’s cell wall with furfuryl alcohol, the wood gains greatly improved durability and dimensional stability, giving it characteristics similar to those of tropical hardwood. In creating a wood with comparable properties to tropical hardwood that can be grown in a FSC certified, sustainably managed forest, the demand for tropical woods is reduced, allowing timber to once again be an important part of sustainable construction.
Tomáš Hubinský, Lead Architect at M-S Pro, commented: “From conception through to completion, the creation of this ceiling has been a real feat. Despite the challenges faced by such an intricate design, Kebony was the perfect material to convey our desired effect of waves rippling along the ceiling. We will continue to incorporate Kebony into our interior and exterior designs, with wood fast becoming the first choice material for all architects.”
Mette Valen, Sales Manager Norway at Kebony, explained: “The distinctive nature of this design cleverly portrays the capability of Kebony, demonstrating both the aesthetic and performance qualities of the product. We would be honoured to work with M-S Pro in the future and look forward to seeing how they utilise Kebony in their future projects.”
 Kebony
M-S Pro Architects announce the completion of an indoor swimming pool in a state-of-the-art, single storey family home set in a picturesque location on the outskirts of Bratislava - one of Europe’s youngest capital cities. Kebony, a beautiful wood recommended by leading architects, was chosen to craft the ceiling of the swimming pool, which is designed to emulate rippling waves as well as for the terrace deck and structural beams.
Sustainability and a desire to recreate the close proximity often seen between wood and water in the natural environment were primary focuses in the design of this project. This led a requirement for a low maintenance wood, compatible humidity and with advanced durability, for the swimming pool ceiling. In addition, a high level of precision when cutting the wood was required in order to achieve the desired appearance of waves.
Supplied by Leading Market, Kebony was carefully selected for the pool ceiling, which consists of 490 lamellae of timber, due to its versatility, durability and environmental credentials. Kebony was also installed throughout the exterior of this property, both for the spacious outdoor terrace and the exterior and interior beams. One of the reasons to choose Kebony was the unified look of wood in all these different applications.
Developed in Norway, the patented Kebony technology uses an environmentally friendly process, which permanently enhances the properties of sustainable softwood with a bio-based liquid derived from agricultural crop waste. By polymerising the wood’s cell wall with furfuryl alcohol, the wood gains greatly improved durability and dimensional stability, giving it characteristics similar to those of tropical hardwood. In creating a wood with comparable properties to tropical hardwood that can be grown in a FSC certified, sustainably managed forest, the demand for tropical woods is reduced, allowing timber to once again be an important part of sustainable construction.
Tomáš Hubinský, Lead Architect at M-S Pro, commented: “From conception through to completion, the creation of this ceiling has been a real feat. Despite the challenges faced by such an intricate design, Kebony was the perfect material to convey our desired effect of waves rippling along the ceiling. We will continue to incorporate Kebony into our interior and exterior designs, with wood fast becoming the first choice material for all architects.”
Mette Valen, Sales Manager Norway at Kebony, explained: “The distinctive nature of this design cleverly portrays the capability of Kebony, demonstrating both the aesthetic and performance qualities of the product. We would be honoured to work with M-S Pro in the future and look forward to seeing how they utilise Kebony in their future projects.”
 Kebony
M-S Pro Architects announce the completion of an indoor swimming pool in a state-of-the-art, single storey family home set in a picturesque location on the outskirts of Bratislava - one of Europe’s youngest capital cities. Kebony, a beautiful wood recommended by leading architects, was chosen to craft the ceiling of the swimming pool, which is designed to emulate rippling waves as well as for the terrace deck and structural beams.
Sustainability and a desire to recreate the close proximity often seen between wood and water in the natural environment were primary focuses in the design of this project. This led a requirement for a low maintenance wood, compatible humidity and with advanced durability, for the swimming pool ceiling. In addition, a high level of precision when cutting the wood was required in order to achieve the desired appearance of waves.
Supplied by Leading Market, Kebony was carefully selected for the pool ceiling, which consists of 490 lamellae of timber, due to its versatility, durability and environmental credentials. Kebony was also installed throughout the exterior of this property, both for the spacious outdoor terrace and the exterior and interior beams. One of the reasons to choose Kebony was the unified look of wood in all these different applications.
Developed in Norway, the patented Kebony technology uses an environmentally friendly process, which permanently enhances the properties of sustainable softwood with a bio-based liquid derived from agricultural crop waste. By polymerising the wood’s cell wall with furfuryl alcohol, the wood gains greatly improved durability and dimensional stability, giving it characteristics similar to those of tropical hardwood. In creating a wood with comparable properties to tropical hardwood that can be grown in a FSC certified, sustainably managed forest, the demand for tropical woods is reduced, allowing timber to once again be an important part of sustainable construction.
Tomáš Hubinský, Lead Architect at M-S Pro, commented: “From conception through to completion, the creation of this ceiling has been a real feat. Despite the challenges faced by such an intricate design, Kebony was the perfect material to convey our desired effect of waves rippling along the ceiling. We will continue to incorporate Kebony into our interior and exterior designs, with wood fast becoming the first choice material for all architects.”
Mette Valen, Sales Manager Norway at Kebony, explained: “The distinctive nature of this design cleverly portrays the capability of Kebony, demonstrating both the aesthetic and performance qualities of the product. We would be honoured to work with M-S Pro in the future and look forward to seeing how they utilise Kebony in their future projects.”
 Builddirect
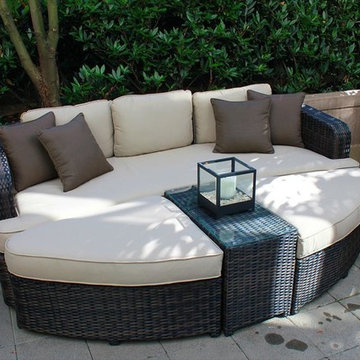
Kontiki assembled patio furniture sets are made from all-weather resin wicker and produced to fulfill your needs for high quality. Unlike many other wicker products on the market, resin wicker will not fade, shrink, loose its strength or snap. Another advantage of this material is its high resistance against sunlight and water. It has especially been improved to withstand North American weather.
The aluminum is lightweight and rust-free. The cushions that come with the patio sets underline the elegance of all Kontiki patio furniture while providing permanent comfort. The cushions come with covers that are specially treated with liquid resistant coatings and are hand washable.
Due to the high quality materials used, Kontiki patio furniture sets can be left outside in any weather or season, although it is recommended to cover the furniture in the winter months. Each and every piece is checked to ensure quality standards are met. It is ideal for both domestic and commercial use. All patio sets come with a two year warranty, although, the expected life of Kontiki Patio Furniture sets before they start losing the original look is 7-8 years.
 Kebony
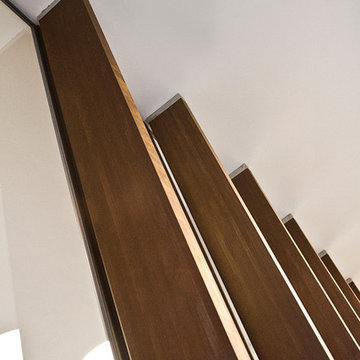
M-S Pro Architects announce the completion of an indoor swimming pool in a state-of-the-art, single storey family home set in a picturesque location on the outskirts of Bratislava - one of Europe’s youngest capital cities. Kebony, a beautiful wood recommended by leading architects, was chosen to craft the ceiling of the swimming pool, which is designed to emulate rippling waves as well as for the terrace deck and structural beams.
Sustainability and a desire to recreate the close proximity often seen between wood and water in the natural environment were primary focuses in the design of this project. This led a requirement for a low maintenance wood, compatible humidity and with advanced durability, for the swimming pool ceiling. In addition, a high level of precision when cutting the wood was required in order to achieve the desired appearance of waves.
Supplied by Leading Market, Kebony was carefully selected for the pool ceiling, which consists of 490 lamellae of timber, due to its versatility, durability and environmental credentials. Kebony was also installed throughout the exterior of this property, both for the spacious outdoor terrace and the exterior and interior beams. One of the reasons to choose Kebony was the unified look of wood in all these different applications.
Developed in Norway, the patented Kebony technology uses an environmentally friendly process, which permanently enhances the properties of sustainable softwood with a bio-based liquid derived from agricultural crop waste. By polymerising the wood’s cell wall with furfuryl alcohol, the wood gains greatly improved durability and dimensional stability, giving it characteristics similar to those of tropical hardwood. In creating a wood with comparable properties to tropical hardwood that can be grown in a FSC certified, sustainably managed forest, the demand for tropical woods is reduced, allowing timber to once again be an important part of sustainable construction.
Tomáš Hubinský, Lead Architect at M-S Pro, commented: “From conception through to completion, the creation of this ceiling has been a real feat. Despite the challenges faced by such an intricate design, Kebony was the perfect material to convey our desired effect of waves rippling along the ceiling. We will continue to incorporate Kebony into our interior and exterior designs, with wood fast becoming the first choice material for all architects.”
Mette Valen, Sales Manager Norway at Kebony, explained: “The distinctive nature of this design cleverly portrays the capability of Kebony, demonstrating both the aesthetic and performance qualities of the product. We would be honoured to work with M-S Pro in the future and look forward to seeing how they utilise Kebony in their future projects.”
5