
Search results for "Rectify" in Home Design Ideas

 The Outdoor Lights
A loft building in downtown Rome, Georgia with lighting designed by The Outdoor Lights.
Photo of an industrial landscaping in Atlanta.
Photo of an industrial landscaping in Atlanta.

 Decorative Pool Tiles
 at Waterline, for historic home built in 1920's in Los Angeles.
Pattern: Molino 6" x 6"
Pool - mediterranean pool idea in Los Angeles
Pool - mediterranean pool idea in Los Angeles


Find the right local pro for your project

 Altera Landscape
Living walls by Scott Hutcheon of Seasons Landscaping
This is an example of a contemporary courtyard landscaping in Orange County.
This is an example of a contemporary courtyard landscaping in Orange County.

 Renovisions
The owners of this 1980’s built-home wanted to create a completely new look for their outdated master bath and turned to Renovisions for design and build services. Having perused Renovisions website, they were confident they made the right choice to help them transform their ordinary space into something truly extraordinary. The design team created several configurations for the homeowners review until they nailed down one particular design that would create that wow factor.
The main challenges were creating an open, spacious feel and maximizing natural light and ventilation with plenty of storage and customizations. The addition of a second window allows ample light into the space throughout the day along with the recessed and sconce lights which were perfectly placed. Storage, which was a key element of this design, includes two separate vanity cabinets (his and hers) with plenty of space for needed toiletries, a matching framed medicine cabinet for her and a custom built cubby for him. Built on site was a linen closet with both roll out and stationary shelves for towels and shower supplies. The spacious walk-in, all tiled shower boasts ‘no door’ access with lineal drain, traditional fixed and hand-held shower heads and a rounded shower seat. Polished black granite was used inside the cubby and topping both the threshold and seat creating a nice contrast to and tying in with the floor. The decorative grab bar ensures safety for these homeowners while showering. The heated floors added throughout the bath take the edge off when stepping out of the warm shower and are conveniently operated by a 24 hour programmable thermostat. Classic white subway tile and chair rail trims adorne all walls and tie in nicely to each vanity station. Carrera look quartz was the perfect choice for countertops creating a clean fresh look. Stunning marble basket-weave mosaic floor tile set the stage in this exquisite bath as the beautiful white painted cabinetry softened the overall feel of the space.
These homeowners are not saving spa retreats for once-a-year vacations anymore, they now enjoy a relaxing spa-like shower experience every day in their own home!


 White Oak Custom Builders
Inspiration for a small timeless u-shaped porcelain tile enclosed kitchen remodel in Raleigh with a farmhouse sink, shaker cabinets, white cabinets, quartzite countertops, white backsplash, ceramic backsplash, stainless steel appliances and a peninsula
 Tile Doctor Ltd
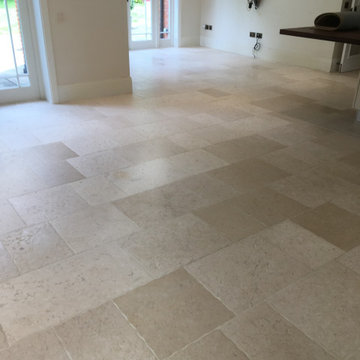
Our client had inherited this Travertine floor when purchasing in a lovely street in Walton-On-Thames, close by was the River Thames which runs all the way into London. The new owners were unhappy with the floor in that it did not look very clean, and they were keen to get this rectified. I arranged a site visit to survey the floor and see what could be done to restore its appearance.
The floor itself was in good physical condition, however, it was apparent from the level of dirt ingrained in the stone that it had not been maintained very well by the previous owner. I carried out a small test clean which came out well and they could see straight away what the floor should look really like! They were happy with my renovation quote and we agreed a mutually convenient time where I could work in relation to the COVID guidelines.
The Travertine floor was scrubbed using a mixture of Tile Doctor Pro Clean and Remove and Go. These are heavy duty cleaning products designed for use on tile and stone can be combined to form a powerful cleaning/stripping solution which is left to dwell on the floor surface. After a short while the solution was worked into the stone using a rotary machine fitted with a black scrubbing pad.
This cleaning recipe works extremely well breaking down dirt, stains, and grease in the stone. Following a machine scrub and a more manual hand scrub of the grout lines, we then pressure rinsed the soil away and then it was extracted using an industrial wet vacuum. In a couple of areas, it was necessary to repeat the process to ensure it was completely clean. Once we were satisfied that the stone was fresh and clean, the floor was left to dry off overnight, so it would be ready for sealing the following day.
After drying overnight, the floor was checked with a damp meter to make sure it was dry. Once reassured I started with the application of the fresh sealer to the floor using Tile Doctor Colour Grow Sealer which is a colour enhancing sealer that works from within by soaking into the pores of the stone. Several coats were applied allowing each one to dry before applying the next. This sealer does not provide a glossy finish, just a nice natural sheen. This brought back the contrast and natural colours in the stone, whilst adding protection to stone for many years to come.
The client was very happy with the work we carried out, the floor had come up much better than they had expected, and it really made a difference to the lovely kitchen space. The floor looked like new. I recommended the regular use of Tile Doctor Stone Soap for future cleaning which will keep the floor in great condition and ensure the longevity of the newly applied sealant.
Jonathan Oldham
South Middlesex Tile Doctor

 Mark Mobley Architecture
Mid-sized arts and crafts front porch idea in Baltimore with decking and a roof extension
 Tile Doctor Ltd
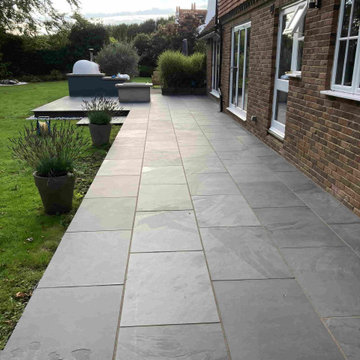
Our client in the villager of Pembury was feeling really deflated after having a Slate Patio laid adjacent to the full length of her house, however the builder had not applied the sealer correctly creating a mess which ruined the appearance of the stone.
Unfortunately, it is not that unusual to be contacted about this sort of situation, applying a sealer is not as easy as manufactures make out. There are lots of factors to consider, choosing the right sealer, is the stone damp, how do you know if you have applied too much, and it often catches tradesmen out. I was able to reassure them that with the right combination of products and equipment the problem could be rectified.
The first job was to strip off the old sealer which was done using a product called Tile Doctor Remove and Go. The name of this product pretty much says it all and once applied to the stone it is left to soak in for ten to twenty minutes before being scrubbed in with a rotary machine fitted with an abrasive burnishing pad.
Tile Doctor Remove and Go is a multi-purpose stripper which will remove most coatings and sealers, including epoxy grout haze which is another common problem we encounter when tradesmen have not cleaned up properly after grouting. It is also good for removing heavy build ups of grease. I used several burnishing pads of different grits going from coarse to smooth on this patio, rinsing and extracting the soil after each pad.
It was a large area, so this process took up most of the day on its own, fortunately I use a van mounted high pressure cleaning and extraction system to remove the soil which is very efficient and leaves the stone bright clean and reasonably dry afterwards. This ensures the process can be carried out with minimal mess.
It was a nice warm summers day and although cloudy we didn’t get any rain overnight, so after checking the forecast I was able to return the next day and apply a fresh sealer to the Slate.
My client wanted a natural look, so I used Tile Doctor Ultra Seal. This product is a no-sheen, natural-look, impregnating sealer which is formulated to provide maximum stain protection. These impregnating sealers work by penetrating the stone, occupying its pores, and thus preventing dirt from residing there.
The client was so happy and relieved to see the results on what a very expensive patio and commented she was eager to get the first barbecue of the season underway.
We recommended that a regular with the jet wash should keep the patio in good condition and in a few years time we could return to reapply the sealer for them.
Michael Conlon
South Kent Tile Doctor




 BAUFORMAT
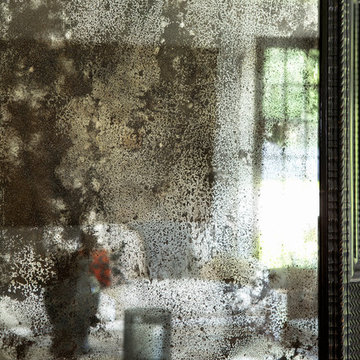
concrete looking luxury tile which looks like wallpapers. Perfect for urban style condo or loft or luxury house.
Bathroom - modern bathroom idea in Los Angeles
Bathroom - modern bathroom idea in Los Angeles

 JM Carpets
Example of a mid-sized transitional 3/4 mosaic tile floor bathroom design in Milwaukee with shaker cabinets, white cabinets and yellow walls


 Davis Home Pros
Example of a mid-sized mid-century modern master white tile and mosaic tile marble floor freestanding bathtub design in San Francisco with flat-panel cabinets, dark wood cabinets, a one-piece toilet, white walls, an undermount sink and quartz countertops


 Tile Doctor Ltd
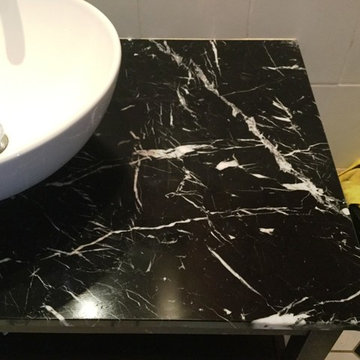
Marble is known for its premium quality, toughness and aesthetic, making it a very popular choice for bathroom countertops, such as this one at a house in Northampton. However just because it’s tough doesn’t mean that Marble can be cleaned with the usual household cleaners. Like all natural stone, Marble is acid sensitive and unsuitable products can have a very damaging effect on its appearance.
In this situation, the property owner had used a limescale remover to remove some unsightly marks from the countertop. Unfortunately, the product was acid-based and instead of making an improvement it just made it worse and caused severe etching.
The first photo above shows the limescale marks from where toiletries have been placed on the side whilst wet. Since Northampton is a hard water area, the limescale deposits over time caused these marks to appear.
The only way to effectively remove the Limestone deposits – while at the same time rectifying the damaged caused by the botched cleaning attempt – was to use a system of hand-held diamond encrusted pads and hand help blocks of various grits to cut back the stone and re-polish it, a process we call burnishing.
Before officially beginning the burnishing process, I ran a few tests to determine the type of pad I would need to use to achieve the best results. I found that, in most areas, I would need to use the Tile Doctor 400 Grit (Coarse) pad to resurface the tile and remove the damaged layer of stone, but in some areas where the etching was worse, I would need to use the 200 Grit (Very Coarse) pad.
After burnishing the affected areas with the Coarse and Very Coarse grit pads, I started to incrementally polish the stone to achieve a high-quality shine, working my up through the Medium, Fine and Very grit pads.
No chemicals were used during this process – only water for lubrication, combined with the six-inch diamond encrusted burnishing pads fitted to a hand-held buffing machine.
The final part of the restoration was to seal the stone to maintain a long-lasting, deep polished appearance. To do this, I used Tile Doctor Shine Powder, which is a crystallising sealer in powder form. The powder is applied directly and combined with water, before being worked into the stone to seal it.
The customer was very happy with the results and the level of shine achieved. I gave the customer a complimentary bottle of Tile Doctor Stone Soap, which is our aftercare cleaner for polished natural stone, along with instructions on periodic maintenance to help maintain the finish we had achieved for as long as possible.
Phil Vissian
Northamptonshire Tile Doctor
75