
Search results for "Reduce light years" in Home Design Ideas

 Brett Helsham Designs
Mid-sized transitional master dark wood floor bedroom photo in New York with purple walls and no fireplace


Find the right local pro for your project


 Reader & Swartz Architects, P.C.
View up through the glass floor that is located in the living room.
Photography by Nathan Webb, AIA
Mid-sized minimalist ceramic tile hallway photo in DC Metro with blue walls
Mid-sized minimalist ceramic tile hallway photo in DC Metro with blue walls

 User
Here, we flared the bottom portion of the window opening. this was the only window in this basement and we wanted to maximize the amount of natural light available.

 Alyson Abby Interiors
built in bench seat with storage and fish hooks above.
Single front door - coastal light wood floor, vaulted ceiling and shiplap wall single front door idea with a glass front door
Single front door - coastal light wood floor, vaulted ceiling and shiplap wall single front door idea with a glass front door
Sponsored
Westerville, OH

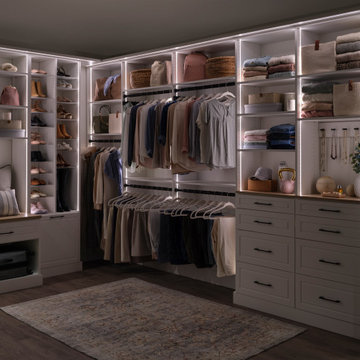
Inspired Closets Columbus
Innovative & Creative Custom Closet Designer Servicing Franklin County
 Maxim Lighting International
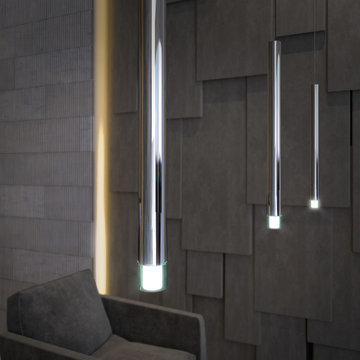
The Picolo http://www.et2online.com/familydisp2.aspx?familyid=PICO
Tall-scale tubular shades of Polished Chrome are draped in a choice of unique configurations. Light provided by the energy efficient and low maintenance 40,000 rated life hour 3500 K LED source mysteriously radiates from the bottom of the tube and highlights the Clear Acrylic diffuser on the bottom.


 The Nielsen Collection
Photography by Christi Nielsen
Inspiration for a large contemporary u-shaped light wood floor open concept kitchen remodel in Dallas with a farmhouse sink, flat-panel cabinets, gray cabinets, solid surface countertops, white backsplash, metal backsplash, stainless steel appliances and an island
Inspiration for a large contemporary u-shaped light wood floor open concept kitchen remodel in Dallas with a farmhouse sink, flat-panel cabinets, gray cabinets, solid surface countertops, white backsplash, metal backsplash, stainless steel appliances and an island
 Drury Design
THE SETUP
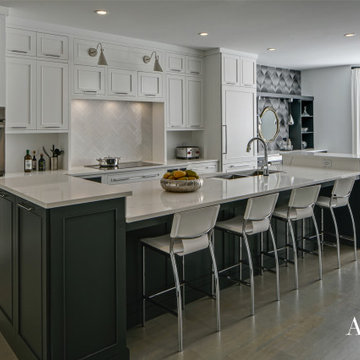
Sam’s client had lived in her downtown townhome home for less than a year when she decided to remodel the spacious second level. This open area consisted of three sections: a TV and fireplace zone, a sparsely furnished dining area, and a dominant central kitchen. The kitchen featured a long back wall with three segmented sections and a massive island housing the cooktop. She found the kitchen’s functionality lacking and its presence overwhelming – it dominated the entire floor, regardless of where you stood.
Design objectives:
- Reconfigure key kitchen elements (sink, cooktop, oven) while minimizing the kitchen’s visual impact
- Optimize the kitchen’s back wall, eliminating existing dead space
- Create a purposeful, well-defined dining area
- Establish a distinct, comfortable living area
- Reuse existing appliances and flooring
- Maintain an overall modern design aesthetic
THE REMODEL
Design challenges to be solved:
- Redesign the island to reduce its overwhelming presence
- Create a comfortable, dedicated living room within the available space
- Establish a distinct, inviting dining area within spatial constraints
- Enhance kitchen functionality and style without dominating the entire floor
THE RENEWED SPACE
Design solutions:
- Sam created raised end caps for the island. This separated the kitchen from adjacent living and dining areas while focusing the kitchen’s functionality. The new sink location offers ample workspace, allowing the cook to interact with guests seated at the island. The redesigned island also provides additional storage.
- For the living area, Sam opted for a functional-yet-minimalist approach. Large-format tile creates a natural stone look for the fireplace and TV wall. The recessed TV and extended fireplace shelf maintain a sleek profile. - Artistic wallpaper adds depth and texture, while the intentional lack of extensive shelving keeps the space open and distinct.
- Sam transformed the dining area’s blank wall into a feature, adding a unique dry bar with counter space, open shelves, cabinet storage and a beverage fridge. - - - Wallpaper behind and above the bar contributes to the area’s personality. A mirror adds depth while pendant lights add style and visual interest.
Relocating the cooktop to the back wall facilitates hidden ventilation, reducing visual clutter. Sam balanced transitional and modern elements for a contemporary yet comfortable feel. The digital control panel on the convection cooktop maintains a sleek look, while the wall oven is now at an easy-to-use height. ----- Mirrored base cabinet fronts and a paneled fridge prevent cabinetry monotony.
The redesign has delighted Sam’s client, achieving her main goal of creating a more inviting and visually appealing space. Each section now has its own visual personality and functionality while harmonizing within a monochromatic palette. The entire floor offers wow-factor pop upon first glance, with each area maintaining its distinct character while contributing to a cohesive, modern aesthetic.
 Drury Design
THE SETUP
Sam’s client had lived in her downtown townhome home for less than a year when she decided to remodel the spacious second level. This open area consisted of three sections: a TV and fireplace zone, a sparsely furnished dining area, and a dominant central kitchen. The kitchen featured a long back wall with three segmented sections and a massive island housing the cooktop. She found the kitchen’s functionality lacking and its presence overwhelming – it dominated the entire floor, regardless of where you stood.
Design objectives:
- Reconfigure key kitchen elements (sink, cooktop, oven) while minimizing the kitchen’s visual impact
- Optimize the kitchen’s back wall, eliminating existing dead space
- Create a purposeful, well-defined dining area
- Establish a distinct, comfortable living area
- Reuse existing appliances and flooring
- Maintain an overall modern design aesthetic
THE REMODEL
Design challenges to be solved:
- Redesign the island to reduce its overwhelming presence
- Create a comfortable, dedicated living room within the available space
- Establish a distinct, inviting dining area within spatial constraints
- Enhance kitchen functionality and style without dominating the entire floor
THE RENEWED SPACE
Design solutions:
- Sam created raised end caps for the island. This separated the kitchen from adjacent living and dining areas while focusing the kitchen’s functionality. The new sink location offers ample workspace, allowing the cook to interact with guests seated at the island. The redesigned island also provides additional storage.
- For the living area, Sam opted for a functional-yet-minimalist approach. Large-format tile creates a natural stone look for the fireplace and TV wall. The recessed TV and extended fireplace shelf maintain a sleek profile. - Artistic wallpaper adds depth and texture, while the intentional lack of extensive shelving keeps the space open and distinct.
- Sam transformed the dining area’s blank wall into a feature, adding a unique dry bar with counter space, open shelves, cabinet storage and a beverage fridge. - - - Wallpaper behind and above the bar contributes to the area’s personality. A mirror adds depth while pendant lights add style and visual interest.
Relocating the cooktop to the back wall facilitates hidden ventilation, reducing visual clutter. Sam balanced transitional and modern elements for a contemporary yet comfortable feel. The digital control panel on the convection cooktop maintains a sleek look, while the wall oven is now at an easy-to-use height. ----- Mirrored base cabinet fronts and a paneled fridge prevent cabinetry monotony.
The redesign has delighted Sam’s client, achieving her main goal of creating a more inviting and visually appealing space. Each section now has its own visual personality and functionality while harmonizing within a monochromatic palette. The entire floor offers wow-factor pop upon first glance, with each area maintaining its distinct character while contributing to a cohesive, modern aesthetic.
Sponsored
Sunbury, OH

J.Holderby - Renovations
Franklin County's Leading General Contractors - 2X Best of Houzz!

 Carla Bast Design
ehlencreative
Powder room - small contemporary porcelain tile powder room idea in Minneapolis with a wall-mount toilet, a wall-mount sink and brown walls
Powder room - small contemporary porcelain tile powder room idea in Minneapolis with a wall-mount toilet, a wall-mount sink and brown walls

 Knoll Landscape Design Miami
Designer Brent Knoll
Knoll Landscape Design Miami
Bamboo Retreat/Landscape Design
Bamboo forest
Example of an island style home design design in Miami
Example of an island style home design design in Miami



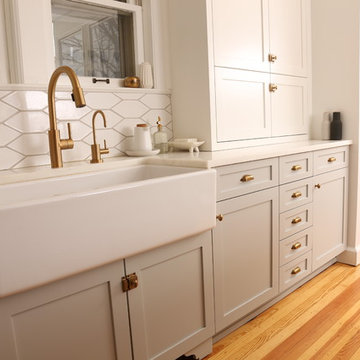
Sponsored
Columbus, OH

Snider & Metcalf Interior Design, LTD
Leading Interior Designers in Columbus, Ohio & Ponte Vedra, Florida


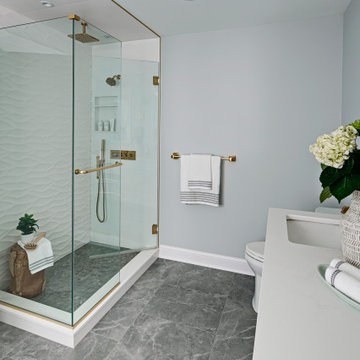 Drury Design
The Setup
For this primary bathroom project, the homeowners sought to transform their outdated, beige-toned space into a bright, functional sanctuary. The existing bathroom felt cramped and lifeless, with a small shower and limited storage options. The goal was to create a fresh, updated bathroom that maximizes the existing footprint while addressing specific desires for a more open, organized space with timeless materials.
Design objectives:
Brighten the bathroom and eliminate the dated beige color scheme
Install a freestanding tub in a compact space
Create a larger, more open shower without encroaching on the existing foot print too much
Incorporate hidden storage solutions
Maintain the existing bathroom layout while improving functionality
Update lighting and fixtures to create a contemporary feel
The Remodel
Design challenges to be solved:
- Compact Space Utilization – The small bathroom required careful planning to accommodate a freestanding tub while maintaining functionality and avoiding overcrowding.
- Hidden Storage Integration – The clients wanted a discreet hamper solution that wouldn’t clutter the limited floor space.
- Shower Niche Placement – With plumbing limitations and the clients’ desire to preserve their wavy accent tile wall, finding the perfect niche spot became a creative puzzle.
- Tile and Finish Coordination – Selecting complementary white tile and floor materials that worked harmoniously together.
- Larger Shower Space – Make the shower feel more open and brighter
The Renewed Space
Design solutions:
- Strategic Tub Placement – The freestanding tub was carefully positioned to maximize space, with its faucet strategically placed to allow easy access while preserving walking room. We reduced the counter depth just a bit by the tub, allowing more room for hamper cabinet and window access.
- Concealed Hamper Storage – A custom pull-out hamper was integrated into the vanity (right side, by tub), providing discreet storage within an 18-inch depth constraint.
- Shower Plumbing Wall Niche – We shifted the niche left, just enough to work around the plumbing infrastructure and still score a roomy storage spot that looks intentional.
- Sophisticated Selections – Porcelanosa curvy white tile, Kohler brushed gold fixtures, and a neutral grey tile floor created a simple, timeless aesthetic that will be loved years to come.
- Open Shower – Replacing the side wall with a clear glass surround, continuing the tile on the ceiling and extending the footprint opened up this area to the room while allowing more natural lighting into the shower space.
This bathroom transformation shows how thoughtful design turns challenges into opportunities. Brushed gold fixtures add warmth to the fresh white palette, while the perfectly balanced floor tile brings just the right depth. A partially glass-fronted vanity introduces subtle charm, giving the space a unique edge. Once cramped and outdated, this bathroom now feels bright, spacious, and serene—a testament to how every design detail makes a difference.

 Hillcrest Builders
Our client wanted a SIP built home and we incorporated this and many other energy and sustainability features into this home which was in the Sheboygan County Parade of Homes.
Named "The Green Balanced Home", this project was all about creating practical and stunning living spaces that combined with sound environmental building materials and methods. By showcasing an assortment of leading-edge- green technologies, the Green Balanced Home was the talk of the Parade that year. In cooperation with our client, our methodology was:
Start with the site:
1. Protected tree lines
2. Drought resistant vegetation
3. High proportion of natural, plantings versus higher maintenance lawn
4. Optimal home placement on lot for solar exposure
5. Narrower streets
Build a high thermal envelope:
1. R-10 Gold Guard laminated EPS foam under basement, garage, and patio.
2. R-10 Gold Guard laminated EPS foam around exterior foundation walls.
3. R-10 ESP foam "shirt" around foundation
4. R-24 Structural Insulated panels (SIPs) for exterior walls, including garage
5. Sprayed foam in basement box sills and attic separation walls
6. R-15 garage door
7. R-60 blown cellulose attic insulation
Add efficient heating, cooling, ventilation, and electric utilization elements:
1. High efficiency fireplace with auxiliary ducting
2. Pull-out exterior wood-loading drawer
3. Air-to-air heat pump
4. 95% efficient, ultra-quiet variable capacity furnace
5. 19 SEER air conditioner
6. Five zones with programmable thermostats
7. Heat reclamation from hot water usage
8. LED lighting
9. Skylights
10. Energy Star appliances
11. Prep for in-floor heating system
12. Prep for photovoltaic (PV) solar
13. Prep for solar hot water
Incorporate water conservation:
1. Rain water recapture for toilet flushing and irrigation
2. Motion activated hot water circulation system
3. Power flush toilets
4. Dual flush toilets
Create high indoor air quality:
1. HEPA and UV filters
2. Air-to-air exchanger
3. Ultra-quiet bathroom fans with moisture sensor activation
Integrate sustainable, efficient materials:
* Expanded polystyrene (ESP) foam that does not emit HCFC "greenhouse" gases
* Oriented strand board (OSB) based siding, trim, and shutters
* SIPs panels that contain ESP an OSB
* Carpeting pads made from recycled materials
* Stewardship-certified cabinet manufacturing
* Job site recycling and reduce waste with SIPs
248