
Search results for "Reduce offer" in Home Design Ideas
 Windy City Painters
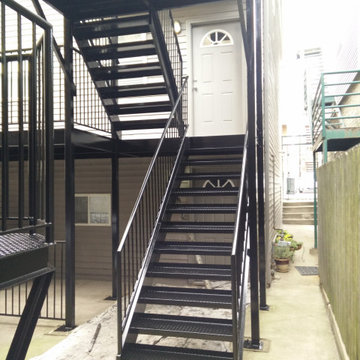
Title: Exterior Metal Porch & Staircase Restoration in West Town, Chicago
Project Overview:
In Chicago’s West Town and Near West Side neighborhoods, multi-unit two-flats, three-flats, and rear coach houses feature heavy-duty steel and iron porches, fire escapes, and railings. Over time, road salt, rain, and extreme freeze-thaw cycles strip away the protective finish, leading to unsightly rust and structural pitting.
Windy City Painters recently completed this multi-tier metal staircase and deck railing repainting project in West Town, Chicago. Here is how proper prep work extends the lifespan of Chicago metalwork by 5 to 8 years.
Why Exterior Metal Prep Matters in Chicago
Rust never stops at the surface. Once moisture penetrates a cracked paint film, oxidation spreads laterally underneath. By the time orange bleeding or paint bubbling is visible, damage is far more extensive.
Our 4-Step Metal Restoration Process:
Mechanical Rust Removal & Scraping: Stripping loose, flaking paint down to solid, bonded metal.
Chemical Rust Conversion: Applying Ospho or Corroseal to chemically convert active surface oxidation into a stable, paintable iron phosphate barrier.
Rust-Inhibitive Priming: Locking out moisture with industrial-grade DTM (Direct-To-Metal) primer.
Protective Topcoat: Finishing with a weather-resistant DTM enamel engineered to withstand heavy foot traffic and Chicago winter conditions.
4 Warning Signs Your Metal Railings or Porch Need Painting:
Orange Bleeding: Rust staining pushing through topcoat paint.
Bubbling or Blistering: Trapped moisture lifting paint from the base metal.
Pitting Metal: Soft, flaking areas when tested with a screwdriver.
Cracked Welds: Structural joints separating (requires welding repair before painting).
Frequently Asked Questions (FAQ)
Q: How much does exterior metal porch or railing painting cost in Chicago?
A: Residential metal railings and porch stairs typically range between $500–$2,500+ depending on linear footage, height, rust severity, and detail work. Windy City Painters offers free, transparent per-project estimates.
Q: Can rusty metal stairs and railings be saved?
A: Yes! Most iron and steel structures can be fully restored with proper mechanical prep and rust converters. Only severely pitted or structurally compromised sections require welding repair prior to painting.
Q: How long does a DTM paint job last on exterior metal?
A: A properly prepped and coated metal porch or railing holds up for 5 to 8 years in Chicago. Skipping rust conversion reduces paint life to just 2 to 3 years.
Q: Do you work with property managers and multi-unit buildings?
A: Yes, Windy City Painters works with homeowners, landlords, HOA boards, and property management companies across West Town, Ukrainian Village, Logan Square, and the North Side.
Work with West Town’s trusted local painting specialists.
? Windy City Painters | Chicago, IL
? windypainters.com | ? 773-818-6331



 Industrial Projects
Creating a comfortable outdoor living space is a priority for many homeowners and DIY enthusiasts. With rising summer temperatures, installing a shade tarp in your backyard offers an affordable and effective solution for sun protection. We’ve developed this detailed, step-by-step guide to help you confidently install a shade tarp that not only shields you from the sun but also adds aesthetic appeal to your outdoor area.
Benefits of Installing a Backyard Shade Tarp
Before diving into the installation process, let’s explore the key benefits of having a backyard shade tarp:
Provides UV Protection: Keeps your family and guests safe from harmful sun exposure.
Reduces Outdoor Temperatures: Creates a cooler, more enjoyable outdoor space.
Protects Outdoor Furniture: Extends the life of patio furniture by reducing sun damage.
Enhances Outdoor Aesthetics: Adds a modern, stylish look to your yard.
Budget-Friendly: More affordable compared to permanent structures like pergolas.
Materials and Tools You’ll Need
To begin your DIY backyard shade project, gather the following materials and tools:
Materials:
Shade tarp (UV-resistant and breathable)
Sturdy posts or existing structures (trees, fences, walls)
Mounting hardware (eye bolts, D-rings, turnbuckles, snap hooks)
Nylon or polyester rope, or stainless-steel wire
Concrete (if installing new posts)
Tools:
Power drill
Measuring tape
Level
Ladder
Wrench or adjustable spanner
Post hole digger (if installing new posts)
Step 1: Plan Your Shade Tarp Layout
The first step in installing your backyard shade tarp is careful planning. Take time to assess your outdoor area and answer these key questions:
Where is the sun’s path throughout the day?
What size and shape of tarp best suits your space?
Will you anchor the tarp to existing structures or install new posts?
What height do you want the tarp to sit at for maximum shade and airflow?
Pro Tip: Use string or garden hoses to visualize the tarp layout on the ground before making permanent decisions.
Step 2: Measure and Mark Anchor Points
Once you’ve determined the tarp’s location and orientation:
Measure the tarp dimensions.
Mark the exact points where each corner of the tarp will be anchored.
Ensure that the anchor points are at least 5–10% longer than the tarp size to allow for tensioning and slight adjustments.
Consider slope angles for water runoff. Aim for at least a 20-degree angle to prevent water pooling on the tarp.
Step 3: Install Support Posts (If Necessary)
If your backyard lacks existing anchor points like trees or fences, you’ll need to install sturdy support posts:
Dig post holes at least 24 inches deep and 8-12 inches wide for stability.
Set posts in concrete, making sure they remain plumb and level.
Allow the concrete to cure for at least 24–48 hours before applying tension from the tarp.
We recommend using pressure-treated wood, galvanized steel poles, or aluminum posts for longevity and strength.
Step 4: Install Mounting Hardware
With your anchor points ready, it’s time to install the necessary hardware:
Attach eye bolts or pad eyes securely into walls, posts, or other fixed structures.
For added flexibility and adjustability, install turnbuckles or tensioners to fine-tune the tarp’s tightness.
Connect snap hooks, D-rings, or carabiners to make assembly and disassembly easier.
Make sure all hardware is rated for outdoor use to prevent rust and corrosion.
Step 5: Attach and Tension the Shade Tarp
Now it’s time for the most satisfying part—mounting the shade tarp:
Begin by attaching one corner of the tarp to an anchor point.
Gradually attach the remaining corners, moving diagonally for even tension.
Adjust each connection point using your turnbuckles, ropes, or cables.
Pull the tarp tight enough to avoid sagging, but not so tight that it risks tearing.
Check that the tarp maintains the desired slope for rainwater runoff and adjust tension as needed.
Step 6: Final Adjustments and Safety Check
Before enjoying your new shaded area:
Inspect all anchor points and hardware for stability.
Test the tarp’s tension and make adjustments for even distribution.
Ensure that no sharp edges or loose connections remain that could damage the tarp or pose a safety hazard.
Confirm that the tarp is secure in windy conditions by giving it a gentle tug.
If you live in an area with frequent high winds, consider removing the tarp during storms to prevent damage.
Step 7: Enjoy Your Shaded Backyard Oasis
Once installed, your backyard shade tarp provides a comfortable and protective space for outdoor gatherings, relaxation, or family activities. You can decorate underneath with outdoor furniture, string lights, or potted plants to create a personalized outdoor retreat.
Maintenance Tips for Long-Lasting Shade Tarp Performance
To extend the life of your shade tarp, follow these maintenance guidelines:
Regularly check for wear and tear, especially around anchor points and seams.
Clean the tarp periodically with mild soap and water to prevent mildew buildup.
Store the tarp indoors during harsh weather seasons if it's not designed for year-round use.
Tighten hardware as needed to maintain proper tension and avoid sagging.
By following these simple care steps, your shade tarp will continue to deliver years of sun protection and outdoor comfort.
Conclusion: Upgrade Your Outdoor Space with a DIY Shade Tarp
Installing a shade tarp in your backyard is a cost-effective and rewarding DIY project. With careful planning, quality materials, and proper installation techniques, you’ll enjoy cool, shaded outdoor living all season long. This step-by-step guide ensures your project goes smoothly from start to finish.
Find the right local pro for your project
 kmjee
Pepper plants are a delightful addition to any garden, offering a vibrant burst of color and spice to your culinary creations. However, even experienced gardeners can encounter challenges when growing pepper plants. In this blog, we'll explore some common issues you might face and provide practical solutions to help your pepper plants thrive.
1. Slow or Stunted Growth
Issue: Slow or stunted growth in pepper plants can be discouraging, but there are specific steps you can take to address this issue effectively.
Solution:
a. Soil Health:
- Well-Draining Soil: Ensure your pepper plants are in well-draining soil to prevent waterlogged roots, which can inhibit growth.
- Organic Matter: Incorporate plenty of organic matter, such as compost or well-rotted manure, into the soil to improve its texture and nutrient content.
- pH Level: Test the soil pH and adjust it to the ideal range between 6.0 and 6.8 using lime or sulfur as needed.
b. Fertilization:
- Balanced Fertilizer: Use a balanced, slow-release fertilizer designed for vegetables to provide essential nutrients steadily throughout the growing season.
- Compost: Amend the soil with compost to enhance nutrient availability and soil structure. This can promote healthier growth.
c. Watering:
- Consistent Moisture: Maintain consistent soil moisture levels by watering your pepper plants regularly but avoid waterlogging. Aim for 1-2 inches of water per week, adjusting based on your local climate and weather conditions.
- Mulching: Apply mulch around the base of the plants to retain soil moisture and regulate temperature.
2. Yellowing Leaves
Issue: Yellowing leaves can be a sign of various underlying problems, but addressing them promptly can restore the vibrancy of your pepper plants.
Solution:
a. Nutrient Deficiencies:
- Balanced Fertilization: Use a well-balanced fertilizer that includes micronutrients to address nutrient deficiencies.
- Specific Nutrients: If you suspect a particular deficiency, such as magnesium, iron, or nitrogen, apply the appropriate nutrient supplement following package instructions.
b. Pest and Disease Control:
- Pest Inspection: Regularly inspect the leaves and stems for common pests like aphids and mites. Remove affected leaves and treat with organic pesticides if necessary.
- Disease Management: Look out for signs of diseases like bacterial leaf spot or fungal issues. Apply organic fungicides or bactericides as recommended.
3. Blossom Drop
Issue: When pepper plants drop their blossoms prematurely, it can hinder fruit development and lead to disappointment.
Solution:
a. Temperature Control:
- Stable Temperatures: Ensure your pepper plants are exposed to consistent temperatures between 70°F and 80°F (21°C to 27°C) during flowering. Avoid sudden temperature fluctuations by providing shelter or using row covers.
b. Pollination:
- Assist with Pollination: If growing peppers indoors or in a greenhouse, help with pollination by gently shaking the plants or using a small brush to transfer pollen between flowers. Outdoor pepper plants are usually pollinated by insects.
4. Wilting Plants
Issue: Wilting or drooping pepper plants can be a sign of various problems, but proper care can revive them.
Solution:
a. Watering:
- Consistent Moisture: Adjust your watering routine to keep the soil consistently moist but not waterlogged. Water early in the day to prevent fungal issues.
- Drainage: Ensure proper soil drainage by amending the soil or using raised beds to prevent waterlogged roots.
b. Pest Control:
- Pest Inspection: Examine the undersides of leaves for signs of pests like aphids, spider mites, or whiteflies. Treat infestations promptly with biological insecticides.
5. Curling Leaves
Issue: Curling or misshapen leaves indicate stress in pepper plants, which can be caused by various factors.
Solution:
a. Environmental Stress:
- Stable Conditions: Ensure your pepper plants are in an environment with stable humidity, temperature, and adequate air circulation. Avoid sudden changes in conditions.
- Proper Ventilation: Adequate air circulation can reduce humidity and prevent fungal issues.
b. Pest and Disease Management:
- Pest Inspection: Regularly inspect your plants for pests and diseases, addressing them promptly with organic remedies as needed.
6. Sunscald
Issue: Sunscald can lead to discolored, leathery patches on pepper fruits when exposed to intense sunlight.
Solution:
a. Shade Cloth:
- Sun Protection: Shield your pepper plants from harsh sunlight during the hottest part of the day using shade cloth or by planting them where they receive some filtered sunlight.
b. Pruning:
- Fruit Shading: Prune excess foliage to allow better fruit shading, reducing the risk of sunscald. Ensure that there's a balance between foliage and fruit.
7. Pepper Plant Pests and Diseases
Issue: Aphids, mites, whiteflies, and various diseases can affect pepper plants, but you can manage them effectively.
Solution:
a. Regular Inspection:
- Vigilant Monitoring: Regularly inspect your pepper plants for signs of pests or diseases, paying close attention to the undersides of leaves and stems.
b. Organic Remedies:
- Pest Control: Use organic remedies like neem oil, insecticidal soap, or diatomaceous earth for pest control.
- Disease Management: Apply organic fungicides or bactericides as recommended to manage diseases like powdery mildew or bacterial spot.
While growing pepper plants can present various challenges, these common issues are manageable with the right knowledge and care. Regular monitoring, proper soil preparation, and timely intervention can help you enjoy a bountiful harvest of vibrant, spicy peppers. Remember that gardening is a learning experience, and each challenge you face is an opportunity to improve your skills and enjoy the rewards of homegrown peppers in your favorite dishes.

 Lisa Tharp Design
Governor's House Entry by Lisa Tharp. 2019 Bulfinch Award - Interior Design. Photo by Michael J. Lee
Transitional painted wood floor foyer photo with white walls and a black front door
Transitional painted wood floor foyer photo with white walls and a black front door

 Adar Moy
Travel is more than just the act of going from one place to another; it’s an exploration of new perspectives, cultures, and experiences. Whether you’re a seasoned globetrotter or a first-time adventurer, the journey holds the power to change you in unexpected ways. Exoticca Helps a lot to Travel.
1. Embrace the Journey, Not Just the Destination
Too often, we focus on reaching the destination, ticking off items on our travel bucket list. But some of the most memorable moments in travel happen when we slow down and engage with the world around us. Take time to walk through a bustling market, share a meal with a local family, or simply sit on a beach at sunset. These moments allow us to experience the true essence of a place beyond its landmarks.
2. Travel with Purpose
In today’s fast-paced world, many travelers are seeking deeper, more meaningful experiences. Whether it’s volunteering in a foreign country, participating in eco-tourism, or learning a new skill, travel can be a gateway to personal growth. Traveling with purpose adds value to your journey and ensures that it impacts not only you but the places you visit. Volunteering in a community, helping preserve nature, or supporting local artisans can leave you with a sense of accomplishment and connection to the world.
3. The Magic of Cultural Immersion
One of the best ways to travel is to truly immerse yourself in the culture of the place you’re visiting. Skip the tourist traps and spend time in local neighborhoods. Try the street food, learn a few words in the local language, and embrace local traditions. The more you engage with the culture, the richer your experience will be. This immersion leads to a greater understanding and respect for different ways of life, fostering deeper connections between people across the globe.
4. Sustainable Travel: A Responsibility for the Future
As travelers, we must recognize the impact our journeys can have on the environment. Sustainable travel practices are becoming more essential than ever before. From reducing plastic usage to supporting eco-friendly accommodations, there are many ways to ensure that our travels leave a positive legacy. Before your trip, research sustainable activities, respect wildlife, and consider how your visit affects local ecosystems. This mindset not only protects the planet but enhances your overall travel experience by aligning it with a purpose.
5. Travel Challenges: Growth Through Adversity
It’s not always smooth sailing. Missed flights, language barriers, unexpected weather, or cultural misunderstandings can make travel seem daunting. However, these challenges can also offer some of the most rewarding experiences. Overcoming adversity while traveling encourages adaptability, patience, and resilience. These moments allow you to connect more deeply with yourself and the world, turning what could be a frustrating experience into an unforgettable lesson in growth.
6. Rediscovering Yourself Through Travel
The act of leaving behind your daily routine and exploring new places often leads to self-reflection. Away from the distractions of everyday life, you have space to reconnect with yourself. Whether it’s finding peace in nature, discovering a new passion, or challenging your comfort zone, travel is a powerful tool for self-discovery. Many travelers report feeling more energized, inspired, and aware of their true desires after a meaningful journey.
7. Tips for a Seamless Travel Experience
To make the most of your travels, planning is key. Here are a few tips for a smooth and enjoyable journey:
Research your destination: Learn about the local culture, customs, and etiquette to show respect and avoid misunderstandings.
Pack smart: Pack light and include only essentials to keep your travels stress-free. A good travel bag and comfortable shoes are a must!
Stay flexible: Sometimes, plans go awry. Stay adaptable and be open to spontaneous adventures.
Engage with locals: The best recommendations often come from those who live in the area. Don't be afraid to ask for tips or hidden gems.
Capture memories: While it’s important to live in the moment, capturing photos or journaling your experiences can help you relive your journey long after it ends.
8. The Future of Travel: Trends to Watch
As we look to the future, the way we travel is evolving. Virtual reality and AI are changing the way we plan and experience destinations, allowing for more personalized and immersive adventures. Moreover, the rise of wellness travel is focusing on mental and physical health, with more travelers seeking destinations that offer relaxation and rejuvenation. Regardless of how travel continues to evolve, the spirit of discovery and connection will always remain at the heart of every journey.
Conclusion: Traveling for a Better World
Travel is a transformative experience that connects us to the world, broadens our understanding, and enriches our lives. By approaching travel with an open mind, a sense of responsibility, and a desire for authentic experiences, we not only enhance our journeys but contribute to the global community. As you pack your bags for your next adventure, remember that every step you take is an opportunity to learn, grow, and contribute to a more interconnected world.

 KINGDOM WOODWORKS
Collaboration with Canonbury Homes and Frank Neely Design Associates.
Inspiration for a timeless open concept kitchen remodel in Atlanta with beaded inset cabinets and two islands
Inspiration for a timeless open concept kitchen remodel in Atlanta with beaded inset cabinets and two islands

Sponsored
Columbus, OH
Free consultation for landscape design!

Peabody Landscape Group
Franklin County's Reliable Landscape Design & Contracting


 ETO Doors
Please note: White Oak Exterior Doors are supplied unfinished (the pictures may depict a finished door)
Elevate the aesthetic and security of your home or office with our Rome flush vertical lite white oak door. Constructed with a solid core, this door combines timeless elegance with exceptional durability, making it a perfect choice for entryways, front doors, back doors, patio doors, garage side doors, or any other exterior application. Ideal for residential homes and commercial properties alike, this door provides a sophisticated blend of style and functionality, making it a versatile option for a range of uses. Whether you're refreshing your front entryway or upgrading the side entrance, this white oak door is designed to meet your needs with lasting performance.
The white laminated glass installed in our white oak entry doors is also known as safety glass. The engineered construction of our white oak exterior doors utilizes a solid white oak core with a 3mm thick clear face veneer for superior appearance and strength. This solid white oak core door construction offers greater protection against warping, cracking, and splitting. Solid white oak core exterior door construction provides for a much quieter environment. Our unique integral panel design will not shrink or split and there is no possibility of stile and rail separation.
Free Samples: Request a Free Exterior White Oak Door Corner Sample to See the ETO Quality Difference.
PRO Discounts: Pro discount program trade pricing available for contractors, architects, and designers on all our Exterior White Oak doors.
Lowest Prices Nationwide: At ETO Doors, we leverage our mass production to manufacture these high-quality solid core Exterior White Oak doors at the lowest prices in the country, passing significant savings directly to you.
Versatile Usage: Our Exterior White Oak doors are perfect for residential and commercial settings, including new construction and remodeling projects. Our slim vertical lite Exterior White Oak doors are installed in places with high traffic volumes such as multifamily homes, office buildings, and hotels.
Customization Available: We understand that every project is unique. Our white oak wood doors can be customized to fit your specific size and design requirements, ensuring a perfect fit and look for any application.
Brand You Can Trust—a leader in the industry for over 20 years, delivering top-quality doors nationwide and worldwide.
Optional Features (at an additional cost)
Low-E Glass: Dual tempered low-e glass combined with our exterior white oak doors reduces noise, air conditioning, and heating bills.
Pre-hanging: Our solid core white oak Exterior White Oak doors can be pre-hung for interior or exterior applications with matching engineered white oak jambs or finger joint white primed jambs as pre-hung single doors or pre-hung double door units. Side-lites are also available.
Impact Hurricane Certification: Our Exterior White Oak doors are available with a Miami Dade hurricane impact wood door approval in both in-swing and out-swing configurations. Our wood Exterior White Oak storm doors certifications are equivalent to “Miami-Dade NOA," the highest hurricane approval standard for wood doors in the country. Each of our white oak Exterior White.
 ETO Doors
Please note: White Oak Exterior Doors are supplied unfinished (the pictures may depict a finished door)
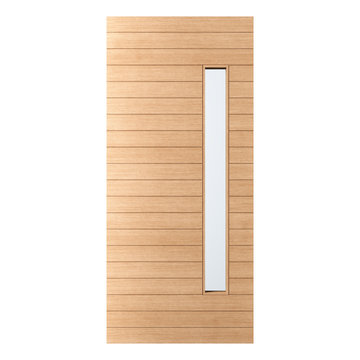
Elevate the aesthetic and security of your home or office with our Albany horizontal plank with slim vertical lite white oak door. Constructed with a solid core, this door combines timeless elegance with exceptional durability, making it a perfect choice for entryways, front doors, back doors, patio doors, garage side doors, or any other exterior application. Ideal for residential homes and commercial properties alike, this door provides a sophisticated blend of style and functionality, making it a versatile option for a range of uses. Whether you're refreshing your front entryway or upgrading the side entrance, this white oak door is designed to meet your needs with lasting performance.
The white laminated glass installed in our white oak entry doors is also known as safety glass. The engineered construction of our white oak exterior doors utilizes a solid white oak core with a 3mm thick clear face veneer for superior appearance and strength. This solid white oak core door construction offers greater protection against warping, cracking, and splitting. Solid white oak core exterior door construction provides for a much quieter environment. Our unique integral panel design will not shrink or split and there is no possibility of stile and rail separation.
Free Samples: Request a Free Exterior White Oak Door Corner Sample to See the ETO Quality Difference.
PRO Discounts: Pro discount program trade pricing available for contractors, architects, and designers on all our Exterior White Oak doors.
Lowest Prices Nationwide: At ETO Doors, we leverage our mass production to manufacture these high-quality solid core Exterior White Oak doors at the lowest prices in the country, passing significant savings directly to you.
Versatile Usage: Our Exterior White Oak doors are perfect for residential and commercial settings, including new construction and remodeling projects. Our slim vertical lite Exterior White Oak doors are installed in places with high traffic volumes such as multifamily homes, office buildings, and hotels.
Customization Available: We understand that every project is unique. Our white oak wood doors can be customized to fit your specific size and design requirements, ensuring a perfect fit and look for any application.
Brand You Can Trust a leader in the industry for over 20 years, delivering top-quality doors nationwide and worldwide.
Optional Features (at an additional cost)
Low-E Glass: Dual tempered low-e glass combined with our exterior white oak doors reduces noise, air conditioning, and heating bills.
Pre-hanging: Our solid core white oak Exterior White Oak doors can be pre-hung for interior or exterior applications with matching engineered white oak jambs or finger joint white primed jambs as pre-hung single doors or pre-hung double door units. Side-lites are also available.
Impact Hurricane Certification: Our Exterior White Oak doors are available with a Miami Dade hurricane impact wood door approval in both in-swing and out-swing configurations. Our wood Exterior White Oak storm doors certifications are equivalent to a "Miami-Dade NOA," the highest hurricane approval standard for wood doors in the country. Each of our white oak Exterior White Oak doors can be assembled with the appropriate components to be Florida Building Code Compliant.

 CairnsCraft Design & Remodel
Great spacious bathroom with lot of amenities.
Photographer: Jon Upson
Large elegant master beige tile and porcelain tile drop-in bathtub photo in San Diego with an undermount sink, raised-panel cabinets, medium tone wood cabinets, granite countertops, beige walls and a two-piece toilet
Large elegant master beige tile and porcelain tile drop-in bathtub photo in San Diego with an undermount sink, raised-panel cabinets, medium tone wood cabinets, granite countertops, beige walls and a two-piece toilet

 John
Coco coir is a versatile and sustainable growing medium that is gaining popularity among gardeners. Made from the fibrous husk of coconuts, it’s an eco-friendly alternative to peat moss and can greatly enhance the quality of your soil. In gardening, it is often utilized in systems like Coco Coir Hydroponic, where it helps create an efficient water and nutrient delivery system.
What is Coco Coir?
Coco coir is a natural fiber extracted from coconut husks. It has a neutral pH, excellent water retention, and is reusable, making it a favorite among gardeners who prefer organic and sustainable practices. It is available in different forms such as blocks, bricks, or loose coir, each requiring some preparation before use in gardening.
Benefits of Using Coco Coir in Gardening
Coco coir offers several advantages for gardening. Here are the benefits of using coco coir in gardening:
Holds up to 10 times its weight in water, ensuring plants have consistent moisture.
Promotes oxygen flow to plant roots, leading to healthier root systems.
Coco coir is a renewable and eco-friendly alternative to peat moss.
It can be washed, rehydrated, and reused, reducing waste.
Naturally pH neutral, making it suitable for various plants without major adjustments.
Enhances the texture and moisture retention of garden soil.
How to Prepare Coco Coir for Planting
Preparing coco coir for planting involves a few essential steps. First, you need to hydrate the coir block, as it typically comes in a compressed form. Place the block in a large container and add warm water, allowing the block to expand and absorb the water. Once fully expanded, the coir should be fluffed up by breaking it apart with your hands or a tool to ensure it becomes loose and airy. After the coir has been fluffed, it is important to drain any excess water, as overly wet coir can lead to root suffocation. Finally, since coco coir is inert and does not contain nutrients, it’s a good idea to add organic compost or liquid fertilizer to enrich the coir before planting.
Do You Need to Soak Coco Coir Before Planting?
Yes, soaking coco coir before planting is necessary. Since it comes in a compressed form, it needs to be broken down and hydrated for proper use. The soaking process allows the coir to expand and release the fibers, making it usable as a growing medium. After soaking, the coir should be fluffed to ensure the water is evenly distributed. Draining any excess water is crucial because overly wet coir may impede plant root health.
How to Prepare Coco Peat for Planting
Coco peat, a fine, powdery form of coco coir, is highly beneficial for seed starting and improving water retention in soil. To prepare coco peat, it first needs to be hydrated, similar to how you prepare coir blocks. Slowly add water to the peat in a container and allow it to absorb and fluff up. Once hydrated, coco peat can be used on its own or mixed with other growing media such as perlite or vermiculite for added aeration and drainage. It is advisable to check the pH level of your final mix, as coco peat generally has a neutral pH, but adjustments may be necessary depending on the plants being grown.
Can You Use Just Coco Coir for Plants?
Yes, coco coir can be used by itself to grow plants, especially in hydroponic systems or as a seed-starting medium. However, because coco coir does not naturally contain nutrients, you will need to provide regular fertilizer to support plant growth. This makes it particularly suitable for plants grown in controlled environments, such as hydroponics, where nutrient solutions can be carefully managed. In traditional soil-based gardening, mixing coco coir with other organic materials like compost is recommended to provide essential nutrients and improve the overall soil structure.
How to Use Coco Coir in Hydroponics
Coco coir is widely used in hydroponic systems due to its water retention and aeration properties. To use coco coir in hydroponics, it first needs to be soaked and hydrated, as discussed earlier. Once the coir is fully prepared, it can be placed in the hydroponic system. Since coco coir does not contain natural nutrients, you will need to supply a balanced nutrient solution tailored for hydroponic plants. Regular monitoring of water and nutrient levels is essential to prevent nutrient imbalances or root rot. One of the benefits of coco coir in hydroponics is its reusability. After completing a growing cycle, the coir can be washed, rehydrated, and used again in future plantings.
Using Coco Coir as a Soil Amendment
Coco coir is also an excellent soil amendment, as it improves the texture and moisture retention of garden soil. To use coco coir in this way, mix loose coir with your existing garden soil at a ratio of one part coco coir to two parts soil. This will help retain moisture without compacting the soil, improving both water drainage and root growth. For optimal results, you can also add organic compost to the mix, ensuring that the nutrient levels are sufficient for plant growth. Coco coir works particularly well in raised beds, where it helps maintain proper soil structure over time.
Advantages of Using Coco Coir Over Peat Moss
While peat moss has been traditionally used as a growing medium, coco coir offers several advantages over it. Coco coir is a renewable resource, as it is a byproduct of coconut processing, while peat moss is harvested from peat bogs that take centuries to regenerate. Coco coir is also more durable, as it can be reused multiple times without breaking down, while peat moss disintegrates after a single use. Another key benefit is its neutral pH, whereas peat moss is more acidic and may require balancing to meet the needs of specific plants.
Conclusion
Coco coir is a highly versatile and sustainable growing medium that benefits both novice and experienced gardeners alike. Whether you are using it for hydroponics, as a soil amendment, or as a standalone medium for growing plants, knowing how to properly prepare and use it is key to maximizing its benefits. By following the steps detailed above, you can improve water retention, aeration, and overall plant health in your garden, all while contributing to eco-friendly gardening practices.

 safe ZOnea
In 2026, DIY home design and renovation will become easier than ever. Free mobile apps like Houzz, Homestyler, and Planner 5D will put professional tools in everyone’s pocket, letting users visualize layouts, test colors, and estimate costs before buying materials. Experts predict that over 50% of homeowners will use apps to plan upgrades. It will save money and reduce costly mistakes. Even now, about 54% prefer mobile tools.
Why Mobile Apps are Changing Home Renovation
DIY renovation has changed a lot in recent years. Homeowners don’t have to rely on sketches or guesswork anymore. Thanks to AR, AI, and 3D renderings, apps can show exactly how furniture and cabinets will fit. By 2026, many of these tools will be free - and packed with features that rival expensive software. With just a smartphone, anyone can try out layouts, test colors, and even create detailed floor plans.
The Tech Behind Modern Design Apps
Most renovation apps now leverage AI to generate design suggestions. They are based on your space and preferences. Upload a photo of your room. The algorithms will check the sizes, lighting, and features. Then, they’ll suggest furniture layouts or color schemes. Some apps use your phone’s camera and sensor. They make accurate measurements, so you won’t need tape measures or notepads.
Top Free Apps Transforming DIY Projects
Houzz continues to lead the pack with its massive photo library and ability to connect users with local contractors. The platform now gives AI design suggestions. It looks at your style preferences across millions of professional spaces.
For anyone serious about planning their next project, exploring comprehensive resources helps narrow down what works. It’s just like in iGaming, where review platforms like Slotzilla help gamblers to find casinos with user-friendly tools, bonus rounds, and progressive jackpots that will work for them.
Planner 5D shines with realistic 3D renderings and a huge furniture catalog, letting you switch between 2D plans and 3D walkthroughs - even in VR. Room Planner helps you design practical layouts. You can easily arrange furniture and check dimensions. It offers real-time 3D views and features items from real brands.
Apps for Specific Renovation Tasks
Not every project needs full 3D renderings - sometimes you just want to try paint colors or test tile patterns. ColorSnap by Sherwin-Williams uses AR to show colors on your actual walls and even matches shades from photos. Magicplan makes creating floor plans easy by measuring rooms with your phone as you walk around. Both apps help plan renovations and communicate ideas without the guesswork.
Budget Tracking and Project Management
Renovation apps do more than make spaces look good - managing budgets and timelines is just as important. HomeZada even uses AI to predict your budget and track material prices, so DIYers don’t get hit with surprise costs. Trello is a lifesaver - set deadlines, track progress, and share updates with anyone helping on the project.
How Apps Reflect 2026 Design Trends
This year’s popular apps reflect the largest home design trends. Colorful rooms are on the rise. Zillow shows a 149% increase in listings. Plus, apps like Houzz let users test bold shades before making a choice. Cozy reading nooks are also on the rise, showing up in nearly half of listings. Renovation apps now provide templates. They include tips for shelves and lighting. This helps create cozy, thoughtful spaces.
Here’s a quick comparison of what different free apps offer:
App name
Best feature
Learning curve
Platform
Houzz
25M+ inspiration photos
Easy
iOS, Android
Planner 5D
Photorealistic 3D renders
Moderate
iOS, Android, Web
Room Planner
Accurate measurements
Easy
iOS, Android
Magicplan
Auto floor plan creation
Easy
iOS, Android
Natural materials and earthy tones will lead design trends in 2026. Warm neutrals will take over from the grey-and-white minimalism of the last ten years.
The AI Revolution in Home Design
AI is no longer just a gimmick in renovation apps. Chat features can suggest furniture layouts, color palettes, and materials for your budget. It’s like having a designer on call. Renovate AI turns photos of your room into multiple style ideas in seconds, from mid-century to rustic farmhouse. It’s great for brainstorming and getting past the “I don’t know what I want” stage.
Practical Tips for Using Renovation Apps
Getting the most from design apps requires a strategic approach. Here are essential steps every DIYer should follow:
Start by gathering inspiration. Look through photo libraries on Houzz or Pinterest. Then, dive into detailed planning.
Don’t rely solely on screen colors; get actual paint chips and fabric swatches.
Save multiple design versions. Create variations of your plan to compare options side-by-side.
This workflow helps you avoid common mistakes. It leads to better design choices before you buy anything.
When Apps Aren’t Enough
Digital tools can’t do everything. Big structural changes, electrical work, or plumbing always need a pro. Apps are great for planning and talking with contractors, but they can’t replace expertise. And always check textures in real life - that sofa might look perfect on screen, but feel different.
The Future of DIY Renovation
In 2026, renovation apps will become smarter. They’ll have voice control and better AR. Improved AI will make DIY design feel more like professional services. Creating beautiful, functional spaces is easier than ever. For homeowners, it’s important to use apps that match local materials and building codes. The biggest benefit is confidence - seeing your design in 3D makes projects far less intimidating.
Sponsored
Columbus, OH
Free consultation for landscape design!
Peabody Landscape Group
Franklin County's Reliable Landscape Design & Contracting
 Save home
Why are White Shaker Cabinets Still Considered a Classic?
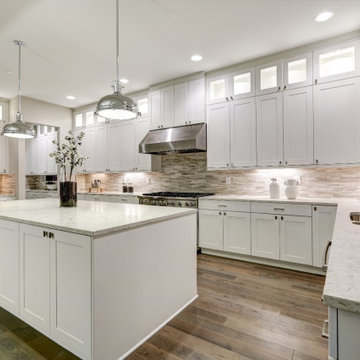
Every few years, if you remodel your kitchen because it feels old, then white shaker cabinets are what you need. Most homeowners feel the need to revamp their kitchen not because the cabinets have worn out but because the interior is a bit old-fashioned. One of the best solutions to this issue is to utilize white shaker cabinets. These are classic, timeless kitchen elements that last longer complements everything, and rarely make your kitchen look outdated.
For this reason, in this article, we have discussed why you need white shaker cabinets in your kitchen and how you can style them.
What is a White Shaker Cabinet?
White shaker cabinets are not new. In fact, these cabinets date back to 1700 when this style was found in every home. These cabinets have a classic look because of recessed door panels, a five-piece door, and a traditional look of pine, maple, or chestnut. Of course. white shaker cabinets are unique and attractive at the same time.
The material used to make these cabinets also makes them durable. You can easily purchase it in less pricing than other wood cabinets, and you can clean it easily. The simplistic structure of white shaker cabinets also makes them complement every type of kitchen; modern or traditional. You can find these cabinets in other light finishes as well, such as peach, off-white, brown, wood brown, etc. The reason we are focusing on white is that this color is timeless and the design of the shaker cabinet is too, which together makes the best combination. You can perfectly strike a chord between every kitchen element if you pair it with white shaker cabinets .
Why White?
The color which is always in style is white. It is highly unlikely to ruin your interior with this color if well-coordinated and properly lit. This is why white shaker cabinets are highly preferred by users.
Here are some reasons to choose white shaker cabinets over other options:
Timeless
Over years, our idea of perfect design changes, and our understanding of the interior also modify. This changes the way we want our kitchen interiors. Hence, if you select vibrant kitchen cabinets and off colors for your countertop, flooring, and paint, then you may end up changing it every few years.
To avoid that from happening, just use white shaker cabinets. In multiple decades, white shaker cabinets have never ceased being classic. White is timeless and it never goes out of trend. Even when you need to change the paint or fittings, you can reduce the cost of cabinets for multiple years.
Versatile
White shaker cabinets are versatile because you have an array of options. You can incorporate multiple elements in your kitchen and tweak color coding and design of countertop, flooring, and paint. For instance, with white shaker cabinets, you can pair white textured back tiles. You can even pair your white cabinets with a black marble countertop; two timeless interior elements together!
Clean
White is the color of clean. In hospitals, bathrooms, and hotel rooms, we find a lot of white because it is clean, fresh, and peaceful. This is why everyone is automatically attracted to this color; it looks clean.
However, you may actually have to make efforts to keep these white shaker cabinets clean from dust and dirt.
Complements Everything
Since cabinets form a big portion of your kitchen, it is necessary to make cabinets complement other interior elements. With white shaker cabinets, you don’t even need to worry about that. White compliments every choice of appliance, countertop, artwork, and flooring. If you decide to get marble grey flooring with white cabinets, you can make that work. If you want colorful kitchen furniture, white complements that too. If you wish to use artwork or warm lighting in your kitchen, white automatically goes well with it.
How to Style White Shaker Cabinets?
If you are styling your kitchen with new white shaker cabinets, here’s what you should keep in mind:
• If your kitchen is small, then white is definitely your color. It reflects more light, hence, makes your space look larger and shinier.
• When you have an open kitchen, you need to follow the same theme to the adjoining rooms and slowly phase it out. This consistency won’t make anything look odd.
• If the rest of the house is filled with artwork and colors, you need the same for your kitchen as well. All white may steal away the classic of shaker cabinets.
• Pair your wall textures and flooring choices with appliances, white cabinets, knobs, and other elements for the best look.
• If the theme for the rest of the house is subtle, then you can even design an all-white kitchen with white shaker cabinets.
Conclusion
Whether you are planning to revamp your kitchen/house or sell your property, white shaker cabinets are always classic. They make a statement in your kitchen and offer a new and clean look all the time. Just focus on coordinating other interior elements of your kitchen and stop worrying about cabinets. White shaker cabinets are durable, beautiful, and timeless! Purchase these classic units now.
For this reason, in this article, we have discussed why you need white shaker cabinets in your kitchen and how you can style them.
What is a White Shaker Cabinet?
White shaker cabinets are not new. In fact, these cabinets date back to 1700 when this style was found in every home. These cabinets have a classic look because of recessed door panels, a five-piece door, and a traditional look of pine, maple, or chestnut. Of course. white shaker cabinets are unique and attractive at the same time.
The material used to make these cabinets also makes them durable. You can easily purchase it in less pricing than other wood cabinets, and you can clean it easily. The simplistic structure of white shaker cabinets also makes them complement every type of kitchen; modern or traditional. You can find these cabinets in other light finishes as well, such as peach, off-white, brown, wood brown, etc. The reason we are focusing on white is that this color is timeless and the design of the shaker cabinet is too, which together makes the best combination. You can perfectly strike a chord between every kitchen element if you pair it with white shaker cabinets .
Why White?
The color which is always in style is white. It is highly unlikely to ruin your interior with this color if well-coordinated and properly lit. This is why white shaker cabinets are highly preferred by users.
Here are some reasons to choose white shaker cabinets over other options:
Timeless
Over years, our idea of perfect design changes, and our understanding of the interior also modify. This changes the way we want our kitchen interiors. Hence, if you select vibrant kitchen cabinets and off colors for your countertop, flooring, and paint, then you may end up changing it every few years.
To avoid that from happening, just use white shaker cabinets. In multiple decades, white shaker cabinets have never ceased being classic. White is timeless and it never goes out of trend. Even when you need to change the paint or fittings, you can reduce the cost of cabinets for multiple years.
Versatile
White shaker cabinets are versatile because you have an array of options. You can incorporate multiple elements in your kitchen and tweak color coding and design of countertop, flooring, and paint. For instance, with white shaker cabinets, you can pair white textured back tiles. You can even pair your white cabinets with a black marble countertop; two timeless interior elements together!
Clean
White is the color of clean. In hospitals, bathrooms, and hotel rooms, we find a lot of white because it is clean, fresh, and peaceful. This is why everyone is automatically attracted to this color; it looks clean.
However, you may actually have to make efforts to keep these white shaker cabinets clean from dust and dirt.
Complements Everything
Since cabinets form a big portion of your kitchen, it is necessary to make cabinets complement other interior elements. With white shaker cabinets, you don’t even need to worry about that. White compliments every choice of appliance, countertop, artwork, and flooring. If you decide to get marble grey flooring with white cabinets, you can make that work. If you want colorful kitchen furniture, white complements that too. If you wish to use artwork or warm lighting in your kitchen, white automatically goes well with it.
How to Style White Shaker Cabinets?
If you are styling your kitchen with new white shaker cabinets, here’s what you should keep in mind:
• If your kitchen is small, then white is definitely your color. It reflects more light, hence, makes your space look larger and shinier.
• When you have an open kitchen, you need to follow the same theme to the adjoining rooms and slowly phase it out. This consistency won’t make anything look odd.
• If the rest of the house is filled with artwork and colors, you need the same for your kitchen as well. All white may steal away the classic of shaker cabinets.
• Pair your wall textures and flooring choices with appliances, white cabinets, knobs, and other elements for the best look.
• If the theme for the rest of the house is subtle, then you can even design an all-white kitchen with white shaker cabinets.
Conclusion
Whether you are planning to revamp your kitchen/house or sell your property, white shaker cabinets are always classic. They make a statement in your kitchen and offer a new and clean look all the time. Just focus on coordinating other interior elements of your kitchen and stop worrying about cabinets. White shaker cabinets are durable, beautiful, and timeless! Purchase these classic units now.
 Free Lancing
Effective residential construction project management is crucial in today’s fast-moving building industry. It means overseeing every step of building a home, from planning to finishing, to ensure projects are completed time, within budget, and with high quality. Unlike commercial projects, residential projects require special attention to meet homeowners' unique needs and wishes, requiring a customized approach from the beginning to the end.
In 2025, the construction sector will use advanced technologies like AI and integrated project delivery (IPD) to streamline processes and improve stakeholder collaboration. However, project managers face significant challenges, including managing risks, maintaining quality control, and ensuring effective communication among team members.
A WIP Report (Work-in-Progress Report) is a key tool that helps track a project's budget, progress, and resource use. It provides clear insights, making managing costs easier, avoiding delays, and making informed decisions.
By adopting best practices and using modern construction management tools, project managers can overcome these challenges and deliver successful residential construction projects that meet client expectations and contribute to a sustainable future.
This article provides a brief overview of residential construction project management, highlights its importance, and touches on the challenges faced by project managers while incorporating the latest trends and technologies in the field.
Types of Residential Construction Management
Here are the different types of Residential Construction Management:
Single-Family Homes: These are standalone houses built for individual families. Managing these projects involves overseeing construction from planning to completion, ensuring that the home meets the owner's preferences and budget.
Multi-Family Housing: This includes apartments, condominiums, and townhouses. Projects of this type require managing multiple units, often with shared facilities, and ensuring compliance with local building codes.
Custom Home Building: This involves constructing homes tailored to specific client needs. Close collaboration with architects and designers is required to ensure the house reflects the owner's personality and preferences.
Home Renovation and Remodeling: These projects focus on updating or expanding existing homes. They often involve working with subcontractors for specialized tasks like electrical or plumbing work.
Components of Residential Construction Project Management
Managing a residential construction project requires carefully coordinating people, materials, and timelines. A well-structured approach ensures efficiency, cost control, and high-quality results.
Roles and Responsibilities
A project manager plays a vital role in residential construction. They oversee every step from planning to completion and ensure the project stays on schedule, within budget, and meets quality standards.
Project Manager’s Role in Home Construction
The project manager is responsible for organizing tasks, managing resources, and solving problems that arise during construction. They coordinate between different teams, track progress, and ensure safety regulations are followed.
Collaboration with Contractors, Architects, and Stakeholders
Successful residential construction requires teamwork. Project managers work closely with architects to bring designs to new heights, coordinate with contractors to manage labor and materials, and keep stakeholders (such as homeowners and investors) informed about project updates.
Client Communication and Expectations Management
Clear communication with clients is essential. The project manager keeps homeowners updated on timelines, changes, and challenges. Setting realistic expectations and providing regular updates, they help avoid misunderstandings and keep the project running smoothly.
Project Scope & Planning
Practical project planning sets the foundation for a successful residential construction project. It ensures clear goals, minimizes risks, and keeps the project on track.
Defining Project Objectives and Deliverables:
Clearly outlining what needs to be done and what the final result should look like is essential. This involves setting specific, measurable goals that align with the homeowner's vision and budget.
Managing Homeowner Expectations and Scope Creep:
Homeowners often have changing needs or ideas. Effective project managers must manage these expectations to prevent "scope creep," which can delay projects and increase costs. This involves open communication and setting clear boundaries.
Ensuring Compliance with Zoning Laws and Permits:
Before construction begins, it's crucial to ensure that all necessary permits are obtained and that the project complies with local zoning laws. This step avoids costly fines and delays, ensuring the project moves forward smoothly.
Budgeting & Cost Control
Proper budgeting is essential for keeping residential construction projects financially viable. Effective cost management prevents overspending and ensures profitability.
Accurate Cost Estimation for Residential Projects
A precise cost estimate considers labor, materials, permits, and unexpected expenses. Using historical data and Sage 300 CRE for financial management improves accuracy and helps set realistic budgets.
Budget Allocation and Tracking
Allocating funds efficiently ensures that each phase of the project receives the necessary resources. Tracking expenses through Construction & Financial Dashboards allows for real-time monitoring and early detection of budget deviations.
Preventing Budget Overruns
Uncontrolled costs can derail a project. Regular financial reviews, automated alerts for overspending, and contingency planning help keep expenses in check and prevent financial strain.
Scheduling & Timeline Management
Timely project completion is crucial in residential construction. Effective scheduling minimizes delays and ensures a smooth workflow.
Creating Detailed Project Schedules
A structured schedule outlines all tasks, deadlines, and dependencies. Breaking down the project into phases, planning, execution, and finishing, helps maintain order and clarity.
Preventing Delays & Meeting Deadlines
Delays can result from labor shortages, weather conditions, or supply chain issues. To avoid problems, it’s good to check for risks ahead of time, add extra time to schedules, and keep everyone on the same page.
Using Gantt Charts and Critical Path Methods
CPM for Construction helps identify critical activities that directly impact project completion, while Gantt charts provide a visual timeline of tasks. Both tools optimize scheduling and improve efficiency.
Residential Construction Project Management Phases
Managing a residential construction project effectively requires a structured approach through various phases. Each phase plays a critical role in ensuring the project's success, from initial planning to completion.
Pre-Construction Phase
The pre-construction phase sets the foundation for a smooth and efficient building process. Proper planning at this stage helps prevent costly changes and delays later.
Site Analysis & Approvals: A thorough site analysis assesses soil conditions, topography, and environmental factors. Feasibility studies evaluate project viability, including costs and regulatory compliance. Obtaining zoning approvals, permits, and other legal clearances is crucial before breaking ground.
Selecting Materials and Procurement Strategies: Choosing the right materials impacts durability, sustainability, and cost efficiency. A well-planned procurement strategy, including bulk purchasing and reliable supplier partnerships, ensures timely delivery and cost savings. Using Sage 300 CRE for procurement management helps streamline material sourcing and financial planning.
Construction Phase
The construction phase transforms plans into reality. Effective coordination and strict quality control ensure a successful build.
Resource Allocation and Workflow Coordination: Efficiently managing labor, equipment, and materials is key to maintaining progress. Using CPM for Construction, project managers can allocate resources strategically, prevent bottlenecks, and optimize workflows for timely completion.
Project Closeout & Handover
The final phase of residential construction project management is crucial for ensuring a smooth transition from construction to occupancy. Proper closeout procedures guarantee quality, client satisfaction, and long-term project success.
Final Inspections and Quality Assurance: Before finishing the project, a final inspection checks that everything meets safety rules and quality standards. Any problems need to be fixed quickly. Using Procore helps make inspections and tracking issues easier, ensuring a high-quality final product.
Client Walkthrough and Support: A final check helps homeowners see the finished work, ask questions, and make sure it meets their expectations. This is also a chance to explain important home features and maintenance tips. Good communication here builds trust and strengthens relationships.
Warranty Management and Feedback: Efficient warranty management ensures clients get quick help for any issues after construction. A clear process for tracking requests and keeping in touch with homeowners boosts satisfaction. Collecting feedback helps improve future projects. Using S-Curve Forecasting tracks performance trends and refines management strategies.
Software for Residential Construction Project Management
The integration of technology in residential construction project management has revolutionized the way projects are planned, executed, and monitored. Digital tools streamline operations, reduce costs, and improve communication, making them essential for modern construction firms.
Importance of Digital Tools
Investing in digital tools is crucial for construction firms as it transforms the industry by enhancing efficiency, accuracy, and collaboration across the entire project lifecycle. They also improve project management by streamlining processes, automating tasks, and facilitating real-time stakeholder communication.
Top Construction Management Software for Residential Projects
Several software solutions are available for managing residential construction projects:
Procore: Known for its comprehensive project management features, including document management and collaboration tools.
Sage 300 CRE: Offers robust accounting and financial management capabilities, ideal for large-scale construction projects.
Buildertrend: Specializes in residential construction, providing tools for project scheduling, budgeting, and client communication.
CoConstruct: Focuses on custom home building and remodeling, offering features for estimating, scheduling, and project management.
WIP Reports: Useful for tracking work-in-progress and managing project finances effectively.
Features Comparison and Best Use Cases:
Procore: Best for large projects requiring extensive collaboration and document management.
Sage 300 CRE: Ideal for firms needing robust financial management.
Buildertrend: Suitable for residential builders focusing on client communication and project scheduling.
CoConstruct: Perfect for custom home builders who need detailed estimating and scheduling tools.
WIP Reports: Useful for firms needing to track project finances closely.
How Software Improves Project Efficiency
Construction management software significantly enhances project efficiency in several ways:
Automating Accounting and Job Costing: Software like Sage 300 CRE automates financial tasks, reducing manual errors and improving budget tracking.
Streamlining Document Management and Communication: Tools like Procore centralize documents and facilitate real-time communication among team members, reducing misunderstandings and delays.
Mobile-Friendly Solutions for Real-Time Tracking: Mobile apps from platforms like Buildertrend allow for on-site access to project data, enabling real-time tracking and decision-making.
These digital tools and software solutions are essential for modern residential construction project management, offering benefits such as improved efficiency, enhanced collaboration, and better financial control.
Challenges in Residential Construction Project Management
Residential construction projects face a variety of challenges that can impact their success. Here are some of the key issues project managers encounter:
Managing Subcontractors and Labor Shortages
One of the biggest challenges in residential construction is managing subcontractors and dealing with labor shortages. Subcontractors often have their own schedules and priorities, which can lead to delays if not coordinated properly. Additionally, labor shortages can slow down projects and increase costs due to the need for overtime or hiring temporary workers.
Budget Overruns and Unexpected Costs
Budget overruns are common in residential construction due to factors like material price fluctuations, unexpected site conditions, or changes in project scope. Effective budget management involves regularly monitoring expenses and having contingency plans for unexpected costs.
Changing Construction and Eco Rules
Construction and Eco Rules are always changing, so project managers need to keep up with the latest regulations. This involves following guidelines for saving energy, protecting the environment, and ensuring safety. Ignoring these rules can lead to fines, delays, or even stopping the project.
Best Practices
To ensure your residential construction projects run smoothly and successfully, follow these essential best practices:
Setting Clear Project Goals and Milestones
Clearly defining what you want to achieve is the first step to success. Set specific, measurable, achievable, relevant, and time-bound (SMART) goals. This helps everyone involved understand what needs to be done and by when. For example, instead of saying "build a house," say "build a house with three bedrooms and two bathrooms within the next nine months."
Stakeholder Collaboration
Good communication is key to keeping everyone on the same page. Regular meetings with contractors, suppliers, and homeowners help prevent misunderstandings and ensure that everyone knows what's happening and what's next. This open dialogue also helps resolve issues quickly, preventing small problems from becoming big delays.
Using Data-Driven Insights for Decision-Making
Making decisions based on facts rather than guesses is crucial. Use data and analytics to understand project progress, identify potential issues early, and make informed decisions. For instance, if data shows that a particular material is consistently causing delays, you can plan ahead to avoid those delays in the future.
Proactive Risk Management Strategies
Things don't always go as planned, so being prepared is essential. Identify potential risks early and have a plan to manage them. This might include having backup suppliers, planning for weather conditions, or setting aside extra funds for unexpected expenses. Being proactive can prevent small issues from turning into major problems.
Conclusion
Effective residential construction project management requires careful planning, clear communication, and the right digital tools. From single-family homes to multi-family housing and custom projects, managing timelines, budgets, and quality is essential for success.
By following best practices, using project management software, and staying ahead of industry trends, project managers can ensure smooth execution and client satisfaction despite challenges like labor shortages, budget overruns, and regulatory compliance; modern technology and strategic planning help mitigate risks.
Construction firms can improve efficiency, enhance collaboration, and maintain financial control by adopting advanced tools like Procore, Sage 300 CRE, and Buildertrend. A well-managed project delivers a quality home and builds trust and long-term success in the industry.
FAQs
What is residential construction project management?
It involves overseeing all aspects of building residential properties, from initial planning and design to construction and completion, ensuring projects are completed on time, within budget, and to the desired quality standards.
How can I prevent budget overruns in my construction project?
Accurate cost estimation, continuous budget tracking, and having contingency plans for unexpected expenses are key strategies to prevent budget overruns.
What are the main stages of a residential construction project?
The primary stages include design, pre-construction, procurement, and construction.
How does construction management software improve project efficiency?
It streamlines processes like scheduling, budgeting, and communication, providing real-time data access and collaboration among stakeholders, which enhances overall project efficiency.
How can I ensure my project complies with local building codes and regulations?
Engage professionals familiar with local laws, obtain all necessary permits before starting, and conduct regular inspections to ensure adherence to building codes and regulations.
 SabaRehman Abdulrehman
Bathrooms are no longer just functional spaces; they’re mini sanctuaries where we unwind, reset, and start or end the day. One of the biggest trends driving modern bathroom design is the move towards open, spacious layouts – and at the centre of that look is the wet room shower screen.
At BathroomNation, we’ve helped countless homeowners transform traditional bathrooms into sleek, practical wet rooms using high-quality wet room shower screens. In this blog, we’ll explain what a wet room shower screen is, why it’s such a smart choice, how to plan and style it, and what to look for when choosing the perfect one for your home.
What Is a Wet Room Shower Screen?
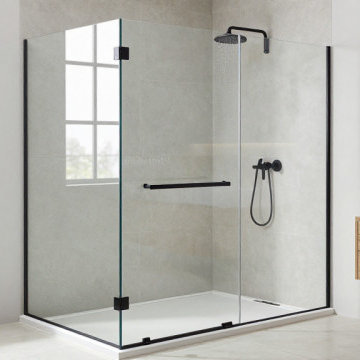
A wet room shower screen is a fixed or semi-fixed glass panel designed to separate your shower area from the rest of the bathroom floor, without enclosing it like a traditional cubicle. Instead of a full tray and door, you have:
- A level or gently sloped floor (often fully tiled)
- A walk-in, open shower space
- One or more glass panels providing splash protection
- Small bathrooms that feel cramped
- Rooms with limited or no natural light
- Long, narrow spaces where every inch counts
- Ideal for people with limited mobility
- Safer for older users and children
- More comfortable for everyday use
- Almost invisible glass boundaries
- Minimal metal hardware and framing
- A seamless link between shower and non-shower areas
- Quick to wipe down after a shower
- Simple to clean with standard glass cleaner
- Less prone to discoloured seals and hard-to-reach dirt
- The shower head is positioned sensibly to minimise overspray
- Your bathroom is medium or large in size
- You want an ultra‑open, walk‑in feel
- Extends coverage
- Helps keep more water inside the shower area
- Still keeps the openness of a walk‑in design
- Increase the effective width of protection during showering
- Fold the panel away slightly when not in use to open up the space
- 8mm toughened safety glass as standard
- 10mm toughened glass for an even more solid, premium feel
- Prevent water spots and mineral build-up
- Make daily and weekly cleaning quicker
- Keep your wet room shower screen looking clear and new for longer
- Taller screens (often 1900mm or more) provide better splash control
- Various widths let you create both compact and expansive walk-in areas
- Enhance rigidity and safety
- Are typically mounted at the top, near the ceiling or wall
- Can be designed in finishes that match your brassware (chrome, black, brass, etc.)
- Chrome
- Brushed nickel
- Matt black
- Brushed brass or gold tone
- Where the shower head will be placed (ceiling, wall‑mounted, or both)
- How water will naturally fall and drain
- How much splash you’re comfortable with elsewhere in the room
- The floor needs a gentle, even fall towards the drain
- You can use a central drain or linear (channel) drain
- Waterproofing (tanking) is essential beneath tiles or flooring
- Catch most of the spray from your shower head
- Shield the main walkway and dry areas
- Clear, frameless-style glass panel
- Large-format light grey or stone‑effect tiles
- Wall‑mounted rainfall shower head with matching controls
- Floating vanity and wall-hung toilet
- Wet room shower screen with black profile and support bar
- Concrete or stone-look tiles on floor and walls
- Black rainfall shower and matching mixer valve
- Simple timber stool or bench for warmth
- Ultra-clear glass wet room shower screen
- Natural stone or stone‑effect tiles in warm tones
- Brushed brass shower fittings
- Niche shelving built into the wall for toiletries
- Open, walk-in design
- Easier access, especially for mobility needs
- More airy look, less visual clutter
- Simpler to clean (fewer frames and corners)
- Fully enclosed, more contained water
- Usually involves a tray and door
- Can feel more “boxed in” in smaller rooms
 California Doors and Windows
The Evolution of the Bathtub Ends Here…
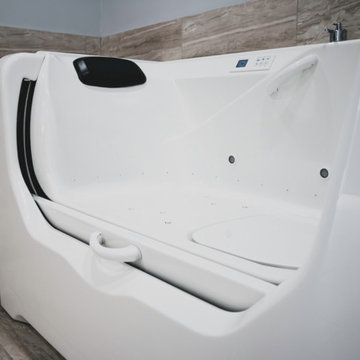
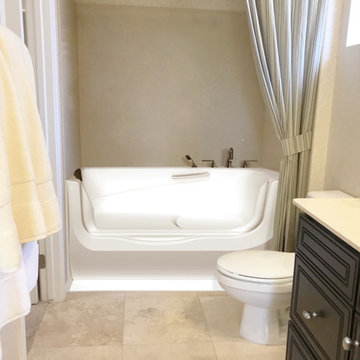
The Ultimate Healing Bathtub is a Brand-New Revolutionary Slide-In Bathtub, designed and engineered by the most brilliant minds on the Planet and in the Industry. This incredible Bathtub, took 5-long hard years, along with millions of dollars to invent, engineer and develop. No safety or ease of use features have been taken for granted or overlooked. This Amazing Bathtub will help people of all ages, ethnic cultures and backgrounds to relax and enjoy life, while they are cleansing themselves from the toxins of the world, safely along with shouting their pain and discomforts. The beautiful, sleek, aerodynamic design is not only practical, it is Gorgeous.
Can you Imagine, Owning the Safest, Most Revolutionary and Luxurious Bathtub in the World?
How would that increase the Quality of Your Life?
You Can own this Awesome Bathtub…and You Deserve To have One...or Two… Or maybe Three…
The Sky is the Limit…
It is Affordable…
And I’m going to help and assist you, on how to get this Ultra-Unique Invention into Your Home.
So, you can rest assured, that when you get home, after working a long hard day, tired, sore, stressed and confused.
Call today to learn more about the amazing features and opportunities that were offering!
The ”Ultimate Healing Bathtub”, will be waiting for you…
With Wide Open Doors… Strong, Powerful Air Jets…. along with Soft Hot Water and Chromotherapy, to help and assist you to:
Reduce the Swelling and Inflammation in your Sore Muscles, Tenons and Bones
Decrease your Muscle Tension
Improve the Circulation of your Blood
Give you Satisfying Relief of Seasonal Affective Disorder (SAD)
Increase your Ligaments Range of Motion
Release Toxins Out of your Body
Revitalize Loose and Wrinkled Skin
Enjoy a Gentle but Powerful Message
Regulate Your Mood Swings
Improve your Sleeping Patterns
Gain Tremendous Anti-Aging Benefits
Live a Higher Quality of Life
Live More Comfortable
Live Happier
Live Longer
Get all this…. and more, along with the Safest and Most Technical Bathtub on the Planet…
The Benefits and Features on this Miraculous Bathtub are Astounding.
The Ultimate Healing Bathtub comes standard with:
4-Computers (YES -I said Four CPU’s)
Drains in 10-15 Seconds
Equipped with a Catch Basin Reservoir underneath the bathtub to allow for quick drainage
The Pressurized Door Seal is the same seal the United States Air Force uses on the F-18 Fighter Jet Plane to seal the Canopy to the top of the Cockpit
Medical Grade Stainless Steel Main Frame that will stay 99% Bacterial Free
Removable Medical Grade Stainless Steel Drain Filter for easy maintenance along with access to the main floor drain
2-12 Volt Back-Up Batteries in case of a power failure
Numerous Fail -Safe Features-In case of Power Failure this bathtub automatically Drains in 10-15 seconds, then the door drops so you can get out of the bathtub
The door rises from underneath the bathtub for maximum immersion and has 3-positions (Down, Center and Top)
Weight of less that one (1) pound of force to open and close the door
Door Automatically Latches
Easy Ingress and egress from a walker or a wheelchair
The bathtub is at chair level for easy positioning
Extra foot drain so you can add more hot water without emptying the bathtub water too fast
Consumption of less than 40 Gallons of Water
Ships in 2-different pieces, that weigh 160 LBS each, for easy installation and attaches together with 4-screws
Low Voltage Heated Backrest (Low and High Heat positions)
Soft Gel Pillow
Numerous Self-Cleaning and Self-Drying Air Jets placed along the entire length of the bathtub that shoot millions of gentle massaging bubbles
No chance of contamination and residue buildup from use of soaps and oils
Upper Control Panel so you can control all of the benefits and features of the Ultimate Healing Bathtub with a push of a button
Hand Held Sprayer for simple caregiving and easy cleaning
Dual-Temperature Water Control Valve
Anti-Scald Valve so the hot water can’t burn you
Water Volume Valve
Door latches in center position for easy usage for a care giver or to bathe children and pets
Requires 1-110 -20-amp Duplex Receptacle
Water and Drain lines come equipped with quick connecting couplings for easy installation
Shell is made of Acrylic not Fiberglass for easy patching in case bathtub gets damaged
Back and Foot Message Air Jets
Grab Bar inside bathtub for Safety Access and Egress
At no point is the user standing in the Bathtub, so there is no chance of slipping or falling
Ultimate Healing Bathtub dimensions fit easily into existing bathrooms (60” X 32” X 42”)
Extra Long Ultimate Healing Bathtub Dimensions (72” X 32” X 42”)
Chromotherapy
Bring dignity, autonomy and relaxation back into the bathing experience with this remarkable Ultimate Healing Bathtub.


 California Doors and Windows
The Evolution of the Bathtub Ends Here…
The Ultimate Healing Bathtub is a Brand-New Revolutionary Slide-In Bathtub, designed and engineered by the most brilliant minds on the Planet and in the Industry. This incredible Bathtub, took 5-long hard years, along with millions of dollars to invent, engineer and develop. No safety or ease of use features have been taken for granted or overlooked. This Amazing Bathtub will help people of all ages, ethnic cultures and backgrounds to relax and enjoy life, while they are cleansing themselves from the toxins of the world, safely along with shouting their pain and discomforts. The beautiful, sleek, aerodynamic design is not only practical, it is Gorgeous.
Can you Imagine, Owning the Safest, Most Revolutionary and Luxurious Bathtub in the World?
How would that increase the Quality of Your Life?
You Can own this Awesome Bathtub…and You Deserve To have One...or Two… Or maybe Three…
The Sky is the Limit…
It is Affordable…
And I’m going to help and assist you, on how to get this Ultra-Unique Invention into Your Home.
So, you can rest assured, that when you get home, after working a long hard day, tired, sore, stressed and confused.
Call today to learn more about the amazing features and opportunities that were offering!
The ”Ultimate Healing Bathtub”, will be waiting for you…
With Wide Open Doors… Strong, Powerful Air Jets…. along with Soft Hot Water and Chromotherapy, to help and assist you to:
Reduce the Swelling and Inflammation in your Sore Muscles, Tenons and Bones
Decrease your Muscle Tension
Improve the Circulation of your Blood
Give you Satisfying Relief of Seasonal Affective Disorder (SAD)
Increase your Ligaments Range of Motion
Release Toxins Out of your Body
Revitalize Loose and Wrinkled Skin
Enjoy a Gentle but Powerful Message
Regulate Your Mood Swings
Improve your Sleeping Patterns
Gain Tremendous Anti-Aging Benefits
Live a Higher Quality of Life
Live More Comfortable
Live Happier
Live Longer
Get all this…. and more, along with the Safest and Most Technical Bathtub on the Planet…
The Benefits and Features on this Miraculous Bathtub are Astounding.
The Ultimate Healing Bathtub comes standard with:
4-Computers (YES -I said Four CPU’s)
Drains in 10-15 Seconds
Equipped with a Catch Basin Reservoir underneath the bathtub to allow for quick drainage
The Pressurized Door Seal is the same seal the United States Air Force uses on the F-18 Fighter Jet Plane to seal the Canopy to the top of the Cockpit
Medical Grade Stainless Steel Main Frame that will stay 99% Bacterial Free
Removable Medical Grade Stainless Steel Drain Filter for easy maintenance along with access to the main floor drain
2-12 Volt Back-Up Batteries in case of a power failure
Numerous Fail -Safe Features-In case of Power Failure this bathtub automatically Drains in 10-15 seconds, then the door drops so you can get out of the bathtub
The door rises from underneath the bathtub for maximum immersion and has 3-positions (Down, Center and Top)
Weight of less that one (1) pound of force to open and close the door
Door Automatically Latches
Easy Ingress and egress from a walker or a wheelchair
The bathtub is at chair level for easy positioning
Extra foot drain so you can add more hot water without emptying the bathtub water too fast
Consumption of less than 40 Gallons of Water
Ships in 2-different pieces, that weigh 160 LBS each, for easy installation and attaches together with 4-screws
Low Voltage Heated Backrest (Low and High Heat positions)
Soft Gel Pillow
Numerous Self-Cleaning and Self-Drying Air Jets placed along the entire length of the bathtub that shoot millions of gentle massaging bubbles
No chance of contamination and residue buildup from use of soaps and oils
Upper Control Panel so you can control all of the benefits and features of the Ultimate Healing Bathtub with a push of a button
Hand Held Sprayer for simple caregiving and easy cleaning
Dual-Temperature Water Control Valve
Anti-Scald Valve so the hot water can’t burn you
Water Volume Valve
Door latches in center position for easy usage for a care giver or to bathe children and pets
Requires 1-110 -20-amp Duplex Receptacle
Water and Drain lines come equipped with quick connecting couplings for easy installation
Shell is made of Acrylic not Fiberglass for easy patching in case bathtub gets damaged
Back and Foot Message Air Jets
Grab Bar inside bathtub for Safety Access and Egress
At no point is the user standing in the Bathtub, so there is no chance of slipping or falling
Ultimate Healing Bathtub dimensions fit easily into existing bathrooms (60” X 32” X 42”)
Extra Long Ultimate Healing Bathtub Dimensions (72” X 32” X 42”)
Chromotherapy
Bring dignity, autonomy and relaxation back into the bathing experience with this remarkable Ultimate Healing Bathtub.
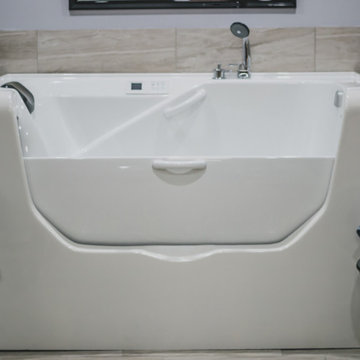 California Doors and Windows
The Evolution of the Bathtub Ends Here…
The Ultimate Healing Bathtub is a Brand-New Revolutionary Slide-In Bathtub, designed and engineered by the most brilliant minds on the Planet and in the Industry. This incredible Bathtub, took 5-long hard years, along with millions of dollars to invent, engineer and develop. No safety or ease of use features have been taken for granted or overlooked. This Amazing Bathtub will help people of all ages, ethnic cultures and backgrounds to relax and enjoy life, while they are cleansing themselves from the toxins of the world, safely along with shouting their pain and discomforts. The beautiful, sleek, aerodynamic design is not only practical, it is Gorgeous.
Can you Imagine, Owning the Safest, Most Revolutionary and Luxurious Bathtub in the World?
How would that increase the Quality of Your Life?
You Can own this Awesome Bathtub…and You Deserve To have One...or Two… Or maybe Three…
The Sky is the Limit…
It is Affordable…
And I’m going to help and assist you, on how to get this Ultra-Unique Invention into Your Home.
So, you can rest assured, that when you get home, after working a long hard day, tired, sore, stressed and confused.
Call today to learn more about the amazing features and opportunities that were offering!
The ”Ultimate Healing Bathtub”, will be waiting for you…
With Wide Open Doors… Strong, Powerful Air Jets…. along with Soft Hot Water and Chromotherapy, to help and assist you to:
Reduce the Swelling and Inflammation in your Sore Muscles, Tenons and Bones
Decrease your Muscle Tension
Improve the Circulation of your Blood
Give you Satisfying Relief of Seasonal Affective Disorder (SAD)
Increase your Ligaments Range of Motion
Release Toxins Out of your Body
Revitalize Loose and Wrinkled Skin
Enjoy a Gentle but Powerful Message
Regulate Your Mood Swings
Improve your Sleeping Patterns
Gain Tremendous Anti-Aging Benefits
Live a Higher Quality of Life
Live More Comfortable
Live Happier
Live Longer
Get all this…. and more, along with the Safest and Most Technical Bathtub on the Planet…
The Benefits and Features on this Miraculous Bathtub are Astounding.
The Ultimate Healing Bathtub comes standard with:
4-Computers (YES -I said Four CPU’s)
Drains in 10-15 Seconds
Equipped with a Catch Basin Reservoir underneath the bathtub to allow for quick drainage
The Pressurized Door Seal is the same seal the United States Air Force uses on the F-18 Fighter Jet Plane to seal the Canopy to the top of the Cockpit
Medical Grade Stainless Steel Main Frame that will stay 99% Bacterial Free
Removable Medical Grade Stainless Steel Drain Filter for easy maintenance along with access to the main floor drain
2-12 Volt Back-Up Batteries in case of a power failure
Numerous Fail -Safe Features-In case of Power Failure this bathtub automatically Drains in 10-15 seconds, then the door drops so you can get out of the bathtub
The door rises from underneath the bathtub for maximum immersion and has 3-positions (Down, Center and Top)
Weight of less that one (1) pound of force to open and close the door
Door Automatically Latches
Easy Ingress and egress from a walker or a wheelchair
The bathtub is at chair level for easy positioning
Extra foot drain so you can add more hot water without emptying the bathtub water too fast
Consumption of less than 40 Gallons of Water
Ships in 2-different pieces, that weigh 160 LBS each, for easy installation and attaches together with 4-screws
Low Voltage Heated Backrest (Low and High Heat positions)
Soft Gel Pillow
Numerous Self-Cleaning and Self-Drying Air Jets placed along the entire length of the bathtub that shoot millions of gentle massaging bubbles
No chance of contamination and residue buildup from use of soaps and oils
Upper Control Panel so you can control all of the benefits and features of the Ultimate Healing Bathtub with a push of a button
Hand Held Sprayer for simple caregiving and easy cleaning
Dual-Temperature Water Control Valve
Anti-Scald Valve so the hot water can’t burn you
Water Volume Valve
Door latches in center position for easy usage for a care giver or to bathe children and pets
Requires 1-110 -20-amp Duplex Receptacle
Water and Drain lines come equipped with quick connecting couplings for easy installation
Shell is made of Acrylic not Fiberglass for easy patching in case bathtub gets damaged
Back and Foot Message Air Jets
Grab Bar inside bathtub for Safety Access and Egress
At no point is the user standing in the Bathtub, so there is no chance of slipping or falling
Ultimate Healing Bathtub dimensions fit easily into existing bathrooms (60” X 32” X 42”)
Extra Long Ultimate Healing Bathtub Dimensions (72” X 32” X 42”)
Chromotherapy
Bring dignity, autonomy and relaxation back into the bathing experience with this remarkable Ultimate Healing Bathtub.
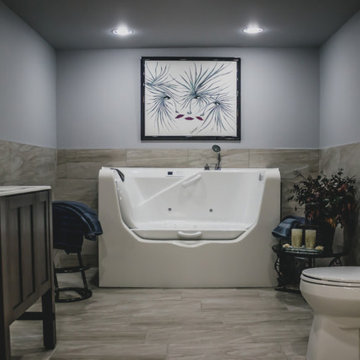 California Doors and Windows
The Evolution of the Bathtub Ends Here…
The Ultimate Healing Bathtub is a Brand-New Revolutionary Slide-In Bathtub, designed and engineered by the most brilliant minds on the Planet and in the Industry. This incredible Bathtub, took 5-long hard years, along with millions of dollars to invent, engineer and develop. No safety or ease of use features have been taken for granted or overlooked. This Amazing Bathtub will help people of all ages, ethnic cultures and backgrounds to relax and enjoy life, while they are cleansing themselves from the toxins of the world, safely along with shouting their pain and discomforts. The beautiful, sleek, aerodynamic design is not only practical, it is Gorgeous.
Can you Imagine, Owning the Safest, Most Revolutionary and Luxurious Bathtub in the World?
How would that increase the Quality of Your Life?
You Can own this Awesome Bathtub…and You Deserve To have One...or Two… Or maybe Three…
The Sky is the Limit…
It is Affordable…
And I’m going to help and assist you, on how to get this Ultra-Unique Invention into Your Home.
So, you can rest assured, that when you get home, after working a long hard day, tired, sore, stressed and confused.
Call today to learn more about the amazing features and opportunities that were offering!
The ”Ultimate Healing Bathtub”, will be waiting for you…
With Wide Open Doors… Strong, Powerful Air Jets…. along with Soft Hot Water and Chromotherapy, to help and assist you to:
Reduce the Swelling and Inflammation in your Sore Muscles, Tenons and Bones
Decrease your Muscle Tension
Improve the Circulation of your Blood
Give you Satisfying Relief of Seasonal Affective Disorder (SAD)
Increase your Ligaments Range of Motion
Release Toxins Out of your Body
Revitalize Loose and Wrinkled Skin
Enjoy a Gentle but Powerful Message
Regulate Your Mood Swings
Improve your Sleeping Patterns
Gain Tremendous Anti-Aging Benefits
Live a Higher Quality of Life
Live More Comfortable
Live Happier
Live Longer
Get all this…. and more, along with the Safest and Most Technical Bathtub on the Planet…
The Benefits and Features on this Miraculous Bathtub are Astounding.
The Ultimate Healing Bathtub comes standard with:
4-Computers (YES -I said Four CPU’s)
Drains in 10-15 Seconds
Equipped with a Catch Basin Reservoir underneath the bathtub to allow for quick drainage
The Pressurized Door Seal is the same seal the United States Air Force uses on the F-18 Fighter Jet Plane to seal the Canopy to the top of the Cockpit
Medical Grade Stainless Steel Main Frame that will stay 99% Bacterial Free
Removable Medical Grade Stainless Steel Drain Filter for easy maintenance along with access to the main floor drain
2-12 Volt Back-Up Batteries in case of a power failure
Numerous Fail -Safe Features-In case of Power Failure this bathtub automatically Drains in 10-15 seconds, then the door drops so you can get out of the bathtub
The door rises from underneath the bathtub for maximum immersion and has 3-positions (Down, Center and Top)
Weight of less that one (1) pound of force to open and close the door
Door Automatically Latches
Easy Ingress and egress from a walker or a wheelchair
The bathtub is at chair level for easy positioning
Extra foot drain so you can add more hot water without emptying the bathtub water too fast
Consumption of less than 40 Gallons of Water
Ships in 2-different pieces, that weigh 160 LBS each, for easy installation and attaches together with 4-screws
Low Voltage Heated Backrest (Low and High Heat positions)
Soft Gel Pillow
Numerous Self-Cleaning and Self-Drying Air Jets placed along the entire length of the bathtub that shoot millions of gentle massaging bubbles
No chance of contamination and residue buildup from use of soaps and oils
Upper Control Panel so you can control all of the benefits and features of the Ultimate Healing Bathtub with a push of a button
Hand Held Sprayer for simple caregiving and easy cleaning
Dual-Temperature Water Control Valve
Anti-Scald Valve so the hot water can’t burn you
Water Volume Valve
Door latches in center position for easy usage for a care giver or to bathe children and pets
Requires 1-110 -20-amp Duplex Receptacle
Water and Drain lines come equipped with quick connecting couplings for easy installation
Shell is made of Acrylic not Fiberglass for easy patching in case bathtub gets damaged
Back and Foot Message Air Jets
Grab Bar inside bathtub for Safety Access and Egress
At no point is the user standing in the Bathtub, so there is no chance of slipping or falling
Ultimate Healing Bathtub dimensions fit easily into existing bathrooms (60” X 32” X 42”)
Extra Long Ultimate Healing Bathtub Dimensions (72” X 32” X 42”)
Chromotherapy
Bring dignity, autonomy and relaxation back into the bathing experience with this remarkable Ultimate Healing Bathtub.
76