
Search results for "Reduce steps" in Home Design Ideas

 Andover Landscape Design & Construction
We were asked by the client to develop the rear of the property for entertaining family & friends. The wish list included a pool, a generous deck, a hot tub, a lounge area, a sunning deck, and a screened room retreat located within the trees. Pulling off the home’s contemporary architecture, we kept the design linear and simple. An 18 x 36 gunite pool with wedding cake style steps is the visual centerpiece of this back yard sanctuary. Two bluestone terraces are on either side of the pool; one supporting the chaise lounges that face south for optimum tanning while the other is home to the dining area that also provides a transition to the rest of the yard. Large bluestone steppers with lawn joints connect both areas without the heavy feel of a solid walkway.
The existing deck was modified which allowed us to sink the hot tub into the frame. This reduced the overall height and kept the sight lines from the home’s interior intact. A vertical cedar screen was built for added privacy and that same material, albeit proportionally smaller, was used to wrap the hot tub for a cohesive look.
 Wiler Fence Company
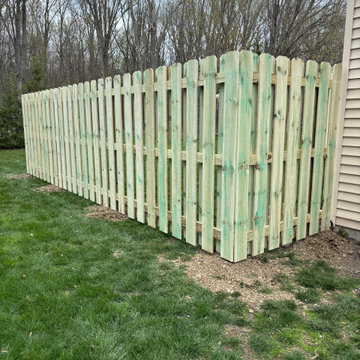
Building a Shadowbox Wood Privacy Fence in Avon Lake, Ohio | Step-by-Step Installation | Wiler Fence CompanyWatch us build a classic shadowbox style wood privacy fence from start to finish in beautiful Avon Lake, Ohio (Lorain County).This 6-foot tall privacy fence provides excellent screening while allowing gentle airflow, making it a perfect choice for Northeast Ohio backyards. In this time-lapse and step-by-step video, you’ll see the entire professional installation process: Phase 1: Installing the 4x4 Posts
We begin by carefully laying out the fence line, digging precise post holes, and setting heavy-duty 4x4 pressure-treated posts in concrete. Each post is plumbed and braced to ensure a rock-solid foundation that will stand up to Ohio’s freeze-thaw cycles for years to come. Phase 2: Installing the 2x4 Framing
Once the posts are set and cured, we attach the top and bottom 2x4 rails, followed by the middle rail. This strong framing system creates the backbone of the fence and ensures the structure stays straight and sturdy. Phase 3: Installing the Shadowbox Pickets
The final step is attaching the privacy pickets in the classic shadowbox pattern — alternating boards on the front and back sides of the rails. This design gives you near-complete privacy from both sides while still allowing air circulation to reduce wind load and prevent warping.The result is a beautiful, durable wood privacy fence that blends naturally with the neighborhood and gives the homeowners the private backyard they’ve been wanting.Project Location: Avon Lake, Ohio – Lorain County
Fence Style: 6ft Shadowbox Wood Privacy Fence
Materials: Pressure-treated pine with protective stainAt Wiler Fence Company, we take pride in every detail — from proper post depth and concrete setting to clean, professional picket installation.Ready for your own wood privacy fence in Avon Lake, Lorain County, or anywhere in Northeast Ohio?
Call us for a free estimate: (216) 714-3337
wiler.org

 ZeroEnergy Design
This modern green home offers both a vacation destination on Cape Cod near local family members and an opportunity for rental income.
FAMILY ROOTS. A West Coast couple living in the San Francisco Bay Area sought a permanent East Coast vacation home near family members living on Cape Cod. As academic professionals focused on sustainability, they sought a green, energy efficient home that was well-aligned with their values. With no green homes available for sale on Cape Cod, they decided to purchase land near their family and build their own.
SLOPED SITE. Comprised of a 3/4 acre lot nestled in the pines, the steeply sloping terrain called for a plan that embraced and took advantage of the slope. Of equal priority was optimizing solar exposure, preserving privacy from abutters, and creating outdoor living space. The design accomplished these goals with a simple, rectilinear form, offering living space on the both entry and lower/basement levels. The stepped foundation allows for a walk-out basement level with light-filled living space on the down-hill side of the home. The traditional basement on the eastern, up-hill side houses mechanical equipment and a home gym. The house welcomes natural light throughout, captures views of the forest, and delivers entertainment space that connects indoor living space to outdoor deck and dining patio.
MODERN VISION. The clean building form and uncomplicated finishes pay homage to the modern architectural legacy on the outer Cape. Durable and economical fiber cement panels, fixed with aluminum channels, clad the primary form. Cedar clapboards provide a visual accent at the south-facing living room, which extends a single roof plane to cover the entry porch.
SMART USE OF SPACE. On the entry level, the “L”-shaped living, dining, and kitchen space connects to the exterior living, dining, and grilling spaces to effectively double the home’s summertime entertainment area. Placed at the western end of the entry level (where it can retain privacy but still claim expansive downhill views) is the master suite with a built-in study. The lower level has two guest bedrooms, a second full bathroom, and laundry. The flexibility of the space—crucial in a house with a modest footprint—emerges in one of the guest bedrooms, which doubles as home office by opening the barn-style double doors to connect it to the bright, airy open stair leading up to the entry level. Thoughtful design, generous ceiling heights and large windows transform the modest 1,100 sf* footprint into a well-lit, spacious home. *(total finished space is 1800 sf)
RENTAL INCOME. The property works for its owners by netting rental income when the owners are home in San Francisco. The house especially caters to vacationers bound for nearby Mayo Beach and includes an outdoor shower adjacent to the lower level entry door. In contrast to the bare bones cottages that are typically available on the Cape, this home offers prospective tenants a modern aesthetic, paired with luxurious and green features. Durable finishes inside and out will ensure longevity with the heavier use that comes with a rental property.
COMFORT YEAR-ROUND. The home is super-insulated and air-tight, with mechanical ventilation to provide continuous fresh air from the outside. High performance triple-paned windows complement the building enclosure and maximize passive solar gain while ensuring a warm, draft-free winter, even when sitting close to the glass. A properly sized air source heat pump offers efficient heating & cooling, and includes a carefully designed the duct distribution system to provide even comfort throughout the house. The super-insulated envelope allows us to significantly reduce the equipment capacity, duct size, and airflow quantities, while maintaining unparalleled thermal comfort.
ENERGY EFFICIENT. The building’s shell and mechanical systems play instrumental roles in the home’s exceptional performance. The building enclosure reduces the most significant energy glutton: heating. Continuous super-insulation, thorough air sealing, triple-pane windows, and passive solar gain work together to yield a miniscule heating load. All active energy consumers are extremely efficient: an air source heat pump for heating and cooling, a heat pump hot water heater, LED lighting, energy recovery ventilation (ERV), and high efficiency appliances. The result is a home that uses 70% less energy than a similar new home built to code requirements.
OVERALL. The home embodies the owners’ goals and values while comprehensively enabling thermal comfort, energy efficiency, a vacation respite, and supplementary income.
PROJECT TEAM
ZeroEnergy Design - Architect & Mechanical Designer
A.F. Hultin & Co. - Contractor
Pamet Valley Landscape Design - Landscape & Masonry
Lisa Finch - Original Artwork
European Architectural Supply - Windows
Eric Roth Photography - Photography
Find the right local pro for your project
 Wiler Fence Company
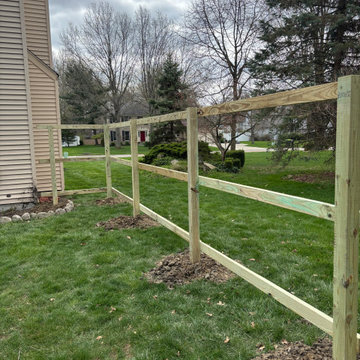
Building a Shadowbox Wood Privacy Fence in Avon Lake, Ohio | Step-by-Step Installation | Wiler Fence CompanyWatch us build a classic shadowbox style wood privacy fence from start to finish in beautiful Avon Lake, Ohio (Lorain County).This 6-foot tall privacy fence provides excellent screening while allowing gentle airflow, making it a perfect choice for Northeast Ohio backyards. In this time-lapse and step-by-step video, you’ll see the entire professional installation process: Phase 1: Installing the 4x4 Posts
We begin by carefully laying out the fence line, digging precise post holes, and setting heavy-duty 4x4 pressure-treated posts in concrete. Each post is plumbed and braced to ensure a rock-solid foundation that will stand up to Ohio’s freeze-thaw cycles for years to come. Phase 2: Installing the 2x4 Framing
Once the posts are set and cured, we attach the top and bottom 2x4 rails, followed by the middle rail. This strong framing system creates the backbone of the fence and ensures the structure stays straight and sturdy. Phase 3: Installing the Shadowbox Pickets
The final step is attaching the privacy pickets in the classic shadowbox pattern — alternating boards on the front and back sides of the rails. This design gives you near-complete privacy from both sides while still allowing air circulation to reduce wind load and prevent warping.The result is a beautiful, durable wood privacy fence that blends naturally with the neighborhood and gives the homeowners the private backyard they’ve been wanting.Project Location: Avon Lake, Ohio – Lorain County
Fence Style: 6ft Shadowbox Wood Privacy Fence
Materials: Pressure-treated pine with protective stainAt Wiler Fence Company, we take pride in every detail — from proper post depth and concrete setting to clean, professional picket installation.Ready for your own wood privacy fence in Avon Lake, Lorain County, or anywhere in Northeast Ohio?
Call us for a free estimate: (216) 714-3337
wiler.org
 Andover Landscape Design & Construction
We were asked by the client to develop the rear of the property for entertaining family & friends. The wish list included a pool, a generous deck, a hot tub, a lounge area, a sunning deck, and a screened room retreat located within the trees. Pulling off the home’s contemporary architecture, we kept the design linear and simple. An 18 x 36 gunite pool with wedding cake style steps is the visual centerpiece of this back yard sanctuary. Two bluestone terraces are on either side of the pool; one supporting the chaise lounges that face south for optimum tanning while the other is home to the dining area that also provides a transition to the rest of the yard. Large bluestone steppers with lawn joints connect both areas without the heavy feel of a solid walkway.
The existing deck was modified which allowed us to sink the hot tub into the frame. This reduced the overall height and kept the sight lines from the home’s interior intact. A vertical cedar screen was built for added privacy and that same material, albeit proportionally smaller, was used to wrap the hot tub for a cohesive look.


 Lighthouse Studios Residential Design
Zoon media
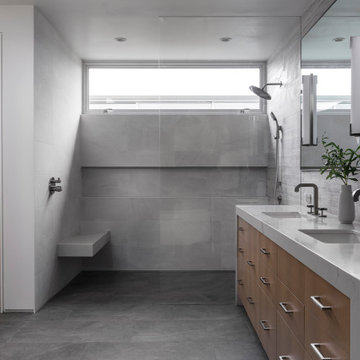
Inspiration for a mid-sized 1960s master blue tile and ceramic tile porcelain tile and white floor alcove shower remodel in Calgary with furniture-like cabinets, medium tone wood cabinets, a two-piece toilet, white walls, an undermount sink, a hinged shower door and quartz countertops
Inspiration for a mid-sized 1960s master blue tile and ceramic tile porcelain tile and white floor alcove shower remodel in Calgary with furniture-like cabinets, medium tone wood cabinets, a two-piece toilet, white walls, an undermount sink, a hinged shower door and quartz countertops

 Wiler Fence Company
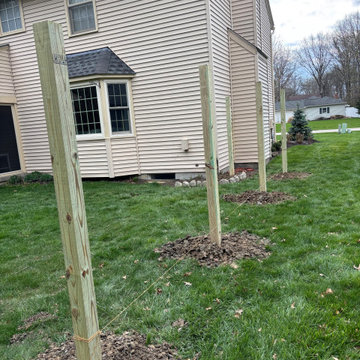
Building a Shadowbox Wood Privacy Fence in Avon Lake, Ohio | Step-by-Step Installation | Wiler Fence CompanyWatch us build a classic shadowbox style wood privacy fence from start to finish in beautiful Avon Lake, Ohio (Lorain County).This 6-foot tall privacy fence provides excellent screening while allowing gentle airflow, making it a perfect choice for Northeast Ohio backyards. In this time-lapse and step-by-step video, you’ll see the entire professional installation process: Phase 1: Installing the 4x4 Posts
We begin by carefully laying out the fence line, digging precise post holes, and setting heavy-duty 4x4 pressure-treated posts in concrete. Each post is plumbed and braced to ensure a rock-solid foundation that will stand up to Ohio’s freeze-thaw cycles for years to come. Phase 2: Installing the 2x4 Framing
Once the posts are set and cured, we attach the top and bottom 2x4 rails, followed by the middle rail. This strong framing system creates the backbone of the fence and ensures the structure stays straight and sturdy. Phase 3: Installing the Shadowbox Pickets
The final step is attaching the privacy pickets in the classic shadowbox pattern — alternating boards on the front and back sides of the rails. This design gives you near-complete privacy from both sides while still allowing air circulation to reduce wind load and prevent warping.The result is a beautiful, durable wood privacy fence that blends naturally with the neighborhood and gives the homeowners the private backyard they’ve been wanting.Project Location: Avon Lake, Ohio – Lorain County
Fence Style: 6ft Shadowbox Wood Privacy Fence
Materials: Pressure-treated pine with protective stainAt Wiler Fence Company, we take pride in every detail — from proper post depth and concrete setting to clean, professional picket installation.Ready for your own wood privacy fence in Avon Lake, Lorain County, or anywhere in Northeast Ohio?
Call us for a free estimate: (216) 714-3337
wiler.org
 ZeroEnergy Design
 (ZED) created this modern home for a progressive family in the desirable community of Lexington.
Thoughtful Land Connection. The residence is carefully sited on the infill lot so as to create privacy from the road and neighbors, while cultivating a side yard that captures the southern sun. The terraced grade rises to meet the house, allowing for it to maintain a structured connection with the ground while also sitting above the high water table. The elevated outdoor living space maintains a strong connection with the indoor living space, while the stepped edge ties it back to the true ground plane. Siting and outdoor connections were completed by ZED in collaboration with landscape designer Soren Deniord Design Studio.
Exterior Finishes and Solar. The exterior finish materials include a palette of shiplapped wood siding, through-colored fiber cement panels and stucco. A rooftop parapet hides the solar panels above, while a gutter and site drainage system directs rainwater into an irrigation cistern and dry wells that recharge the groundwater.
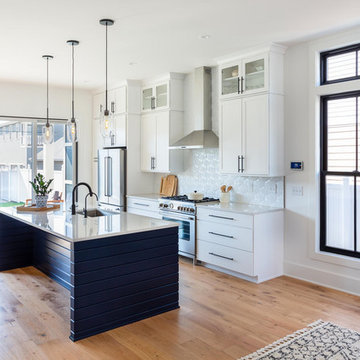
Cooking, Dining, Living. Inside, the kitchen, fabricated by Henrybuilt, is located between the indoor and outdoor dining areas. The expansive south-facing sliding door opens to seamlessly connect the spaces, using a retractable awning to provide shade during the summer while still admitting the warming winter sun. The indoor living space continues from the dining areas across to the sunken living area, with a view that returns again to the outside through the corner wall of glass.
Accessible Guest Suite. The design of the first level guest suite provides for both aging in place and guests who regularly visit for extended stays. The patio off the north side of the house affords guests their own private outdoor space, and privacy from the neighbor. Similarly, the second level master suite opens to an outdoor private roof deck.
Light and Access. The wide open interior stair with a glass panel rail leads from the top level down to the well insulated basement. The design of the basement, used as an away/play space, addresses the need for both natural light and easy access. In addition to the open stairwell, light is admitted to the north side of the area with a high performance, Passive House (PHI) certified skylight, covering a six by sixteen foot area. On the south side, a unique roof hatch set flush with the deck opens to reveal a glass door at the base of the stairwell which provides additional light and access from the deck above down to the play space.
Energy. Energy consumption is reduced by the high performance building envelope, high efficiency mechanical systems, and then offset with renewable energy. All windows and doors are made of high performance triple paned glass with thermally broken aluminum frames. The exterior wall assembly employs dense pack cellulose in the stud cavity, a continuous air barrier, and four inches exterior rigid foam insulation. The 10kW rooftop solar electric system provides clean energy production. The final air leakage testing yielded 0.6 ACH 50 - an extremely air tight house, a testament to the well-designed details, progress testing and quality construction. When compared to a new house built to code requirements, this home consumes only 19% of the energy.
Architecture & Energy Consulting: ZeroEnergy Design
Landscape Design: Soren Deniord Design
Paintings: Bernd Haussmann Studio
Photos: Eric Roth Photography
 Heffner Design Team, PLLC
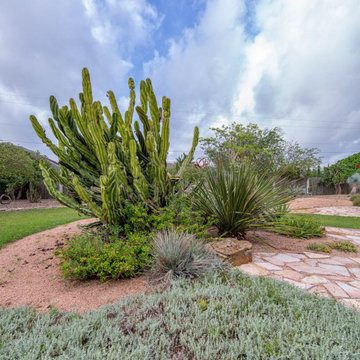
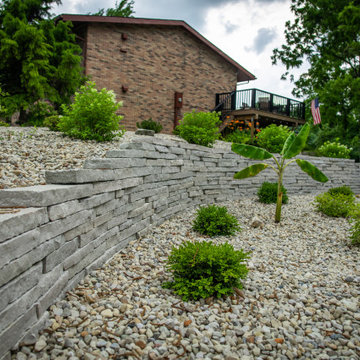
Cacti and pergolas and blue bunnies, oh my! This whimsical space is dominated by a cedar timber pergola painted in a color that evokes sunsets in the Southwest. Blue leaved cacti and agave abound throughout the space. Mass plantings of frog fruit, wooly stemodia, orange zexmenia, and gulf muhly grasses soften the heavy use of crushed granite, stepping stones, and stone retaining walls. Specimen night-blooming cereus, green sotol, and century plants are combined with upcycled natural stone pavers, moss rock boulders, river rock, and crushed granite. The blue bunnies are a crowd favorite that move quickly if you aren’t paying attention.
 Chanova Design LLC
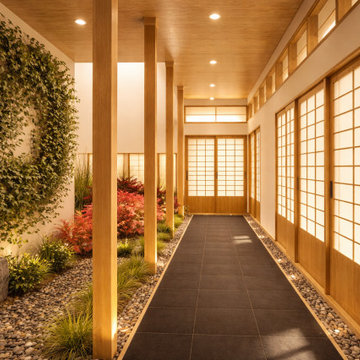
This meditation corridor was designed as a transitional space that gently guides visitors from the outside world into a calm, restorative environment. Inspired by traditional Japanese architecture, the hallway features warm white oak detailing, shoji-style screens, natural stone, and an indoor Zen garden that encourages mindfulness with every step.
Soft lighting, natural textures, and biophilic design elements create a peaceful rhythm throughout the circulation path, transforming a simple hallway into an intentional experience. Every detail was carefully considered to reduce visual clutter, strengthen the connection to nature, and prepare guests for yoga, meditation, and wellness practices.
This conceptual rendering embodies Chanova Design's philosophy of creating holistic environments where every space, including transitional areas, contributes to a seamless journey of relaxation, balance, and well-being.
 Eyoh Design
Louisa, San Clemente Coastal Modern Architecture
The brief for this modern coastal home was to create a place where the clients and their children and their families could gather to enjoy all the beauty of living in Southern California. Maximizing the lot was key to unlocking the potential of this property so the decision was made to excavate the entire property to allow natural light and ventilation to circulate through the lower level of the home.
A courtyard with a green wall and olive tree act as the lung for the building as the coastal breeze brings fresh air in and circulates out the old through the courtyard.
The concept for the home was to be living on a deck, so the large expanse of glass doors fold away to allow a seamless connection between the indoor and outdoors and feeling of being out on the deck is felt on the interior. A huge cantilevered beam in the roof allows for corner to completely disappear as the home looks to a beautiful ocean view and Dana Point harbor in the distance. All of the spaces throughout the home have a connection to the outdoors and this creates a light, bright and healthy environment.
Passive design principles were employed to ensure the building is as energy efficient as possible. Solar panels keep the building off the grid and and deep overhangs help in reducing the solar heat gains of the building. Ultimately this home has become a place that the families can all enjoy together as the grand kids create those memories of spending time at the beach.
Images and Video by Aandid Media.

 Sweet Smiling Landscape Design
The backyard of this house was a no-man’s land when the owners moved in. With little more than a few established trees and a big, noisy air-conditioning unit, the yard was an almost open canvas bordering the Los Padres National Forest in a high-fire zone. We installed a large infiltration swale to capture as much rainfall as possible from the house rain gutters, so the water can be stored in the soil where plants can access it, reducing the amount of irrigation this landscape needs. Plantings obscure the air-conditioning unit, and a water feature was installed so the sound of trickling water would drown-out its sound. The plants we chose are drought tolerant and attractive to native birds and insects. We paid special attention to the plantings nearest to the house, keeping them fairly low growing as to not create a fire ladder beneath the eves. The plants also hold a good deal of moisture in their stems and leaves and are easily kept free of desiccated material, making them fire-wise plants that can actually reduce the chances of the property burning in the event of a nearby wildfire.



 Industrial Projects
Creating a comfortable outdoor living space is a priority for many homeowners and DIY enthusiasts. With rising summer temperatures, installing a shade tarp in your backyard offers an affordable and effective solution for sun protection. We’ve developed this detailed, step-by-step guide to help you confidently install a shade tarp that not only shields you from the sun but also adds aesthetic appeal to your outdoor area.
Benefits of Installing a Backyard Shade Tarp
Before diving into the installation process, let’s explore the key benefits of having a backyard shade tarp:
Provides UV Protection: Keeps your family and guests safe from harmful sun exposure.
Reduces Outdoor Temperatures: Creates a cooler, more enjoyable outdoor space.
Protects Outdoor Furniture: Extends the life of patio furniture by reducing sun damage.
Enhances Outdoor Aesthetics: Adds a modern, stylish look to your yard.
Budget-Friendly: More affordable compared to permanent structures like pergolas.
Materials and Tools You’ll Need
To begin your DIY backyard shade project, gather the following materials and tools:
Materials:
Shade tarp (UV-resistant and breathable)
Sturdy posts or existing structures (trees, fences, walls)
Mounting hardware (eye bolts, D-rings, turnbuckles, snap hooks)
Nylon or polyester rope, or stainless-steel wire
Concrete (if installing new posts)
Tools:
Power drill
Measuring tape
Level
Ladder
Wrench or adjustable spanner
Post hole digger (if installing new posts)
Step 1: Plan Your Shade Tarp Layout
The first step in installing your backyard shade tarp is careful planning. Take time to assess your outdoor area and answer these key questions:
Where is the sun’s path throughout the day?
What size and shape of tarp best suits your space?
Will you anchor the tarp to existing structures or install new posts?
What height do you want the tarp to sit at for maximum shade and airflow?
Pro Tip: Use string or garden hoses to visualize the tarp layout on the ground before making permanent decisions.
Step 2: Measure and Mark Anchor Points
Once you’ve determined the tarp’s location and orientation:
Measure the tarp dimensions.
Mark the exact points where each corner of the tarp will be anchored.
Ensure that the anchor points are at least 5–10% longer than the tarp size to allow for tensioning and slight adjustments.
Consider slope angles for water runoff. Aim for at least a 20-degree angle to prevent water pooling on the tarp.
Step 3: Install Support Posts (If Necessary)
If your backyard lacks existing anchor points like trees or fences, you’ll need to install sturdy support posts:
Dig post holes at least 24 inches deep and 8-12 inches wide for stability.
Set posts in concrete, making sure they remain plumb and level.
Allow the concrete to cure for at least 24–48 hours before applying tension from the tarp.
We recommend using pressure-treated wood, galvanized steel poles, or aluminum posts for longevity and strength.
Step 4: Install Mounting Hardware
With your anchor points ready, it’s time to install the necessary hardware:
Attach eye bolts or pad eyes securely into walls, posts, or other fixed structures.
For added flexibility and adjustability, install turnbuckles or tensioners to fine-tune the tarp’s tightness.
Connect snap hooks, D-rings, or carabiners to make assembly and disassembly easier.
Make sure all hardware is rated for outdoor use to prevent rust and corrosion.
Step 5: Attach and Tension the Shade Tarp
Now it’s time for the most satisfying part—mounting the shade tarp:
Begin by attaching one corner of the tarp to an anchor point.
Gradually attach the remaining corners, moving diagonally for even tension.
Adjust each connection point using your turnbuckles, ropes, or cables.
Pull the tarp tight enough to avoid sagging, but not so tight that it risks tearing.
Check that the tarp maintains the desired slope for rainwater runoff and adjust tension as needed.
Step 6: Final Adjustments and Safety Check
Before enjoying your new shaded area:
Inspect all anchor points and hardware for stability.
Test the tarp’s tension and make adjustments for even distribution.
Ensure that no sharp edges or loose connections remain that could damage the tarp or pose a safety hazard.
Confirm that the tarp is secure in windy conditions by giving it a gentle tug.
If you live in an area with frequent high winds, consider removing the tarp during storms to prevent damage.
Step 7: Enjoy Your Shaded Backyard Oasis
Once installed, your backyard shade tarp provides a comfortable and protective space for outdoor gatherings, relaxation, or family activities. You can decorate underneath with outdoor furniture, string lights, or potted plants to create a personalized outdoor retreat.
Maintenance Tips for Long-Lasting Shade Tarp Performance
To extend the life of your shade tarp, follow these maintenance guidelines:
Regularly check for wear and tear, especially around anchor points and seams.
Clean the tarp periodically with mild soap and water to prevent mildew buildup.
Store the tarp indoors during harsh weather seasons if it's not designed for year-round use.
Tighten hardware as needed to maintain proper tension and avoid sagging.
By following these simple care steps, your shade tarp will continue to deliver years of sun protection and outdoor comfort.
Conclusion: Upgrade Your Outdoor Space with a DIY Shade Tarp
Installing a shade tarp in your backyard is a cost-effective and rewarding DIY project. With careful planning, quality materials, and proper installation techniques, you’ll enjoy cool, shaded outdoor living all season long. This step-by-step guide ensures your project goes smoothly from start to finish.
 Flexi Tech Contracting Inc.
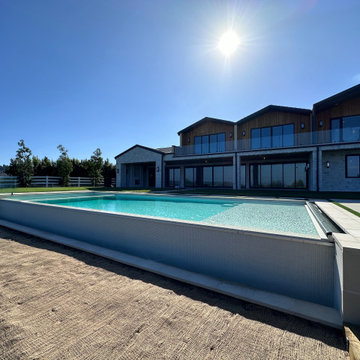
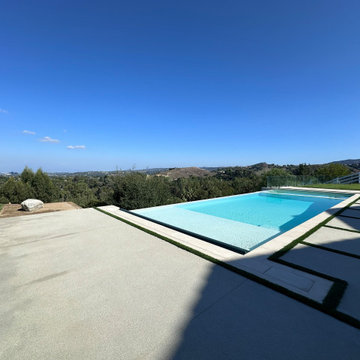
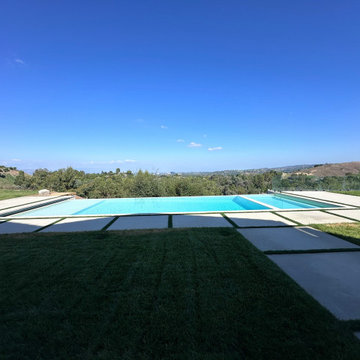
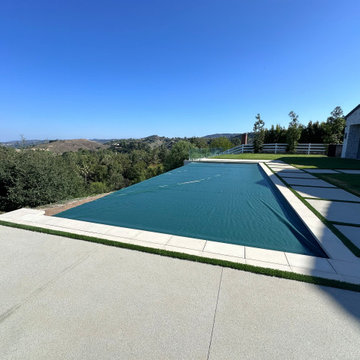
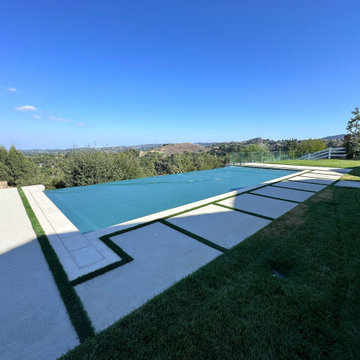
Experience the pinnacle of luxury with this extraordinary cliffside infinity-edge pool and spa, designed to highlight breathtaking panoramic views of majestic mountains and endless blue skies. The pool’s reflective surface creates a seamless connection with the horizon, offering a serene and mesmerizing escape.
Enhancing both convenience and functionality, this masterpiece features a state-of-the-art automatic pool cover. Beyond its sleek design, the cover helps retain heat for extended swimming seasons, keeps the water pristine by reducing debris, and ensures enhanced safety for peace of mind.
The oversized jacuzzi, equipped with multi-part jets, promises the ultimate relaxation, perfect for unwinding or entertaining guests. As the centerpiece of your backyard, this pool combines modern elegance, innovative technology, and unmatched beauty, transforming your outdoor space into a private paradise.
 Flexi Tech Contracting Inc.
Experience the pinnacle of luxury with this extraordinary cliffside infinity-edge pool and spa, designed to highlight breathtaking panoramic views of majestic mountains and endless blue skies. The pool’s reflective surface creates a seamless connection with the horizon, offering a serene and mesmerizing escape.
Enhancing both convenience and functionality, this masterpiece features a state-of-the-art automatic pool cover. Beyond its sleek design, the cover helps retain heat for extended swimming seasons, keeps the water pristine by reducing debris, and ensures enhanced safety for peace of mind.
The oversized jacuzzi, equipped with multi-part jets, promises the ultimate relaxation, perfect for unwinding or entertaining guests. As the centerpiece of your backyard, this pool combines modern elegance, innovative technology, and unmatched beauty, transforming your outdoor space into a private paradise.
 Flexi Tech Contracting Inc.
Experience the pinnacle of luxury with this extraordinary cliffside infinity-edge pool and spa, designed to highlight breathtaking panoramic views of majestic mountains and endless blue skies. The pool’s reflective surface creates a seamless connection with the horizon, offering a serene and mesmerizing escape.
Enhancing both convenience and functionality, this masterpiece features a state-of-the-art automatic pool cover. Beyond its sleek design, the cover helps retain heat for extended swimming seasons, keeps the water pristine by reducing debris, and ensures enhanced safety for peace of mind.
The oversized jacuzzi, equipped with multi-part jets, promises the ultimate relaxation, perfect for unwinding or entertaining guests. As the centerpiece of your backyard, this pool combines modern elegance, innovative technology, and unmatched beauty, transforming your outdoor space into a private paradise.
 Flexi Tech Contracting Inc.
Experience the pinnacle of luxury with this extraordinary cliffside infinity-edge pool and spa, designed to highlight breathtaking panoramic views of majestic mountains and endless blue skies. The pool’s reflective surface creates a seamless connection with the horizon, offering a serene and mesmerizing escape.
Enhancing both convenience and functionality, this masterpiece features a state-of-the-art automatic pool cover. Beyond its sleek design, the cover helps retain heat for extended swimming seasons, keeps the water pristine by reducing debris, and ensures enhanced safety for peace of mind.
The oversized jacuzzi, equipped with multi-part jets, promises the ultimate relaxation, perfect for unwinding or entertaining guests. As the centerpiece of your backyard, this pool combines modern elegance, innovative technology, and unmatched beauty, transforming your outdoor space into a private paradise.
 Flexi Tech Contracting Inc.
Experience the pinnacle of luxury with this extraordinary cliffside infinity-edge pool and spa, designed to highlight breathtaking panoramic views of majestic mountains and endless blue skies. The pool’s reflective surface creates a seamless connection with the horizon, offering a serene and mesmerizing escape.
Enhancing both convenience and functionality, this masterpiece features a state-of-the-art automatic pool cover. Beyond its sleek design, the cover helps retain heat for extended swimming seasons, keeps the water pristine by reducing debris, and ensures enhanced safety for peace of mind.
The oversized jacuzzi, equipped with multi-part jets, promises the ultimate relaxation, perfect for unwinding or entertaining guests. As the centerpiece of your backyard, this pool combines modern elegance, innovative technology, and unmatched beauty, transforming your outdoor space into a private paradise.
35