
Search results for "Restores confidence" in Home Design Ideas
 Tile Doctor Ltd
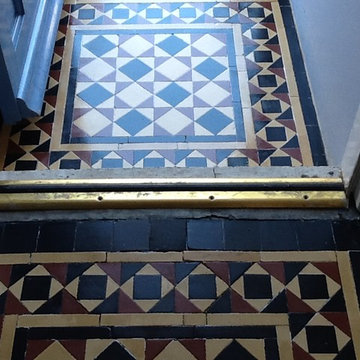
When you discover an old Victorian tiled floor underneath carpet, the first question that will probably pop into your mind is: can it be restored?
The answer, in the majority of cases, is yes. In fact, Tile Doctor has completed hundreds of Victorian tiled floor restorations. Victorian tiles have a timeless quality about them and are still popular for residential use even in the twenty first century.
What you can usually expect upon lifting your carpet is for the tiles to be covered in carpet adhesives and grippers, as was the case with this particular example of a Victorian Tiles hallway floor at a property in Bedford. Sometimes you might also find paint splashes or other staining left over from decoration work. And, of course, the tiles will be dirty and in much need of a deep clean. These issues spoil the original appearance of the tiles, but with the right methods and products, a complete restoration can be achieved quickly and cost-effectively.
My first task upon arriving at the proper was to carry out a site survey to address the condition of the tiles, before running a quick test clean on a small area of the floor. The result was good and so I was confident that I could achieve a high-quality restoration for the client.
A quote was issued and accepted, and the work was booked in at a date that was convenient for the customer.
Returning to the property, my first course of action was to mix a strong dilution of Tile Doctor Pro Clean, which is a powerful alkaline cleaner safe to use on natural stone, with hot water. This cleaning solution was sprayed along all edges of the floor loosen the glue securing the carpet grippers. I then successfully removed the adhesive carefully using handheld tools to avoid damaging any tiles.
Once this was done, I applied Tile Doctor Remove and Go, scrubbing it into the tiles with a rotary machine. This product is designed to remove heavy soiling, paint splashes and old waxes and sealers. The soiled solution was then extracted using a wet vacuum and stubborn areas re-treated until I was satisfied the floor was clean.
The entire floor was then given a thorough rinse with water to remove any trace of cleaning products and extracted using a wet vax machine.
The floor was allowed to dry for several days before I was able to return to seal the tiles. It’s always important to leave significant time for the floor to dry because any moisture left over can impact the performance of the sealer.
The choice of sealer was Tile Doctor Seal and Go Extra, which provides robust protection against dirt and stains, with a light sheen finish. I chose this sealer not only because the customer wanted a light sheen finish, but also because this particular sealer is fully breathable. Dampness can sometimes be an issue with old Victorian and Quarry tiles which were installed before damp proof membranes became standard.
The transformation achieved within the space of a week was quite incredible and the colours in the tile have really come through.
Another satisfied customer!
David Vissian
Bedfordshire Tile Doctor
 Tile Doctor Ltd
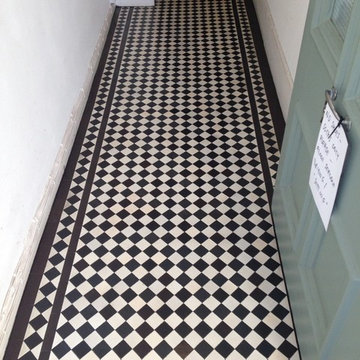
This Victorian floor was discovered at a house in Swiss Cottage in the London borough of Camden when the current owner took the old carpet up. It was in need of substantial restoration to bring it back to its former glory however we have had really good results from restoring similar floors so we were confident it could be done.
The carpet had literally just been taken away so we had to remove the gripper rods, underlay and deal with the adhesive which we managed to tackle using a strong solution of Tile Doctor Remove and Go which was left to dwell and penetrate the glue for ten minutes before being scrubbed in.
Once the glue was removed the tiles were given a thorough clean using Tile Doctor Pro-Clean using the same process of leaving it to soak in and then actively scrubbing it into the floor to get the tile and grout as clean as possible. The floor was then rinsed and stubborn areas re-treated until we were satisfied with the result.
The last cleaning step was to use a steam cleaner to pull as much dirt out of the pores of the tiles as possible and a wet vacuum to extract the liquids and get the floor as dry as possible and we also re-grouted where necessary due to the damage caused by the gripper rods.
We also gave the Victorian tiles in the entrance lobby a thorough clean using the same process, although they had not been covered in carpet they were still in need of a deep clean.
The floor was left to dry and when we returned the whole floor was ready to be sealed and for this we used five coats of Tile Doctor Seal and Go which adds a nice shine to the floor as well as providing a surface seal that will help protect the tiles from stains going forward. For the entrance lobby we used two coats of Colour Grow which doesn’t add the shine but as an impregnating sealer we felt it would perform better with the wear at the front of the house.
The owner of the house was very pleased with the outcome and left the following testimonial:
Prompt, courteous, hard working and great results !.
Nigel Voyce
North London Tile Doctor
 Tile Doctor Ltd
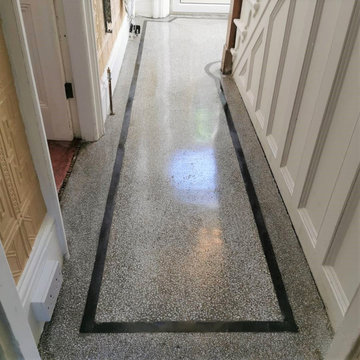
This beautiful Terrazzo floor was uncovered in the hallway of a house in Doncaster, as you can see it had taken a bit of a beating over the years, but the owners were keen on having it restored. Restoring period features like these are a great idea as they are very sought after and can add a lot of value to a property.
The floor had spent many years below carpet and nails had been hammered through the floor to hold carpet grippers in place. Along with this there was a lot of glue and paint to remove. However, I was confident that we could get the floor restored, I gave them a quotation for the work, and they were happy to proceed as soon as possible.
Doncaster is a hot spot for terrazzo floors, apparently there was a big Italian community there in the early part of the 1900s. Doncaster is also famous for its rich rail heritage; the main Doncaster train station is on the East Coast mainline and you find many original station buildings have Terrazzo floors in the public areas.
The first job was to remove as much of the paint, glue and other contaminates as possible. These were scraped off the floor by hand using a razor-sharp scraper.
We then moved onto using a set of five diamond burnishing pads of different grits to cut through the top layers and grime to eventually bring this floor back up to its’ former glory. Starting off with the most coarse pad first I started to go over the floor a pad at a time, each pad is fitted to a rotary machine which has extra weight added to it to make the pads work ever better. Each time a pad is changed, it is slightly less coarse, this starts to polish the floor up to a shine eventually ended with a very fine diamond pad. Water is added at each stage and removed with the wet vacuum before the next pad is used.
Gradually the original floor started to shine through, the colours were quite pronounced, and you could see the floor was a lovely example of terrazzo. After a final rinse to remove the soiling generated by burnishing, I turned my attention to filling the many holes where the nails had been.
The floor was left to dry off overnight and the following morning I returned to seal the floor with several coats of Tile Doctor Colour Grow. I choose this product as its designed to enhance the subtle colours in the floor and its fully breathable which is an important consideration when sealing floors in older properties. Damp proof membranes are a common feature these days but are a relatively recent invention. With older floors you need to allow the floor to breathe so the moisture in the sub floor can rise and evaporate at the surface, without this the moisture will reach out to the walls where it can cause rising damp.
The result was a highly polished floor just the way it would have looked when it was first installed 90 years ago. As you can imagine the owners were over the moon with the transformation.
Matthew Lovett
South Yorkshire TIle Doctor
Find the right local pro for your project

 Twelve Stones Designs, LLC
The owners of this kitchen had spent the money to upgrade the finishes in their kitchen upon building the home 12 years ago, but after living in the space for several years they realized how nonfunctional the layout really was. The (then) two preschool aged children had grown into busy, hungry teenagers with many friends who also liked to hang out at the house. So the family needed a more functional kitchen with better traffic flow, space for daily activities revolving around the kitchen at different times of day, and a kitchen that could accommodate cooking for and serving large groups. Furthermore, the dark, traditional finishes no longer reflected the homeowners’ style. They requested a brighter, more relaxed, coastal style that reflected their love of the seaside cities they like to visit.
Originally, the kitchen was U-shaped with a narrow island in the middle. The island created narrow aisles that bottle-necked at the dishwasher, refrigerator, and cooktop areas. There was a pass-through from the foyer into the kitchen, but the owners never liked that the pass-through was also located so close to the powder room. The awkward proximity was unappealing and made guests feel uncomfortable.
The kitchen’s storage was made up of lots of narrow cabinets, apothecary drawers, clipped corner units, and very few drawers. It lacked useful storage for the larger items the family used on a daily basis. And the kitchen’s only pantry was small closet that had only builder-grade, narrow shelving with no illumination to be able to see the contents inside.
Overall, the kitchen’s lighting plan was poorly executed. Only six recessed cans illuminated the entire kitchen and nook areas. The under cabinet lighting was not evenly distributed either. In fact, the builder had mis-placed the under cabinet lighting around the decorative pilasters which made for choppy, dark cubbies. Further, the builder didn’t include any lighting over the sink or the bar area, which meant whoever was doing the dishes was always in their own shadow. That, coupled with the steep overhang of the game room above made the bar area feel like a dim, cavernous space that wasn’t inviting or task oriented. The kitchen looked out into the main living space, but the raised bar and a narrow wall (which held the only large cabinet in the kitchen) created more of a barrier than a relationship to the living room or breakfast nook. In fact, one couldn’t even see the breakfast nook from the cooktop or sink areas due to its orientation. The raised bar top was too narrow to comfortably sit to either dine at or chat from due to the lack of knee space. The the homeowners confided that the kitchen felt more like a dark, dirty prison than place where the family, or their guests, wanted to gather and commune.
The clients' needs and desires were:
➢ to create a kitchen that would be a space the family loved to be in; to relate to the adjacent spaces all around, and to have better flow for entertaining large groups
➢ to remove the walls between the breakfast nook and living area and to be able to utilize the natural light from the windows in both those areas
➢ to incorporate a functional chopping block for prepping fresh food for home cooked meals, an island with a large sink and drain board, 2 pull out trash cans, and seating for at least the 2 teens to eat or do homework
➢ to design a kitchen and breakfast nook with an airy, coastal, relaxed vibe that blended with the rest of the house's coastal theme
➢ to integrate a layered lighting plan which would include ample general illumination, specific task lighting, decorative lighting, and lots of illuminated storage
➢ to design a kitchen with not only more storage for all the husband’s kitchen gadgets and collection of oils and spices, but smart storage, including a coffee/breakfast bar and a place to store and conceal the toaster oven and microwave
➢ to find a way to utilize the large open space between the kitchen, pantry area, and breakfast nook
Twelve Stones Designs achieved the owner's goals by:
➢ removing the walls between the kitchen and living room to allow the natural light to filter in from the adjacent rooms and to create a connection between the kitchen, nook, and living spaces for a sense of unity and communion
➢ removing the existing pantry and designing 3 large pantry style cabinets with LED tape lights and rollout drawers to house lots of kitchen appliances, gadgets, and tons of groceries. We also took the cabinets all the way up to the 9’ ceiling for additional storage for seasonal items and bulk storage.
➢ designing 2 islands - 1 with a gorgeous black walnut chopping block that houses a drawer for chopping and carving knives and a custom double pull out trash unit for point of use utilization - and 1 that houses the dishwasher, a large Blanco Gourmet sink with integrated drain board, woven baskets for fresh root vegetables and kitchen towels, plenty of drawer storage for kitchen items, and bar seating for up to 4 diners.
➢ closing off the space between the kitchen and the powder room to create a beautiful new private alcove for the powder room as well as adding some decorative storage. This also gave us space to include more tall storage near the new range for precision placement of the husband’s extensive oil and spice collection as well as a location for a combo-steam oven the wife wanted for baking and cooking healthy meals.
The project is enhanced functionally by:
➢ incorporated USB and standard receptacles for the kids’ laptops and phone charging in the large island
➢ designing the small island to include additional open shelving for items used on a daily basis such as a variety of bowls, plates, and colanders. This set up also works well for the husband who prefers to “plate” his dinners in restaurant-style fashion before presenting them to the table.
➢ the integration of specific storage units, such as double stacked cutlery drawers, a custom spice pull-out, a Kuerig coffee and tea pod drawer, and custom double stacked utensil drawers
➢ moving the refrigerator to the old oven location - this eliminated the bottle neck as well as created a better relationship to the eating table. It also utilizes the floor space between the pantry, nook, and kitchen
➢ creating a banquet style breakfast nook - this banquette seating not only doubles the amount of seating for large gatherings but it better utilizes the odd space between the kitchen and the previous nook area. It also helps to create a distinct pathway from the mudroom room through the pantry area, kitchen, nook, and living room.
➢ the coffee/breakfast bar area which includes the perfect location for the concealed microwave and toaster oven, convenient storage for the coffee pods and tea accoutrements. Roll-out drawers below also house the smoothie maker, hot water kettle, and a plethora of smoothie-making ingredients such as protein powders, smoothie additives, etc. Furthermore, the drawers below the Keurig house measuring utensil, cutlery, baking supplies and tupperware storage.
➢ incorporating lots of wide drawers and pullouts to accommodate large cookware.
➢ utilizing as much vertical space as possible by building storage to the ceiling which accommodates the family’s abundant amount of serving platters, baking sheets, bakeware, casserole dishes, and additional cutting boards.
The project is enhanced aesthetically by:
➢ new 5-piece Versailles pattern porcelain tile that now seamlessly joins the entire down stairs area together creating a bright, cohesiveness feeling instead of choppy separated spaces - it also adds a coastal feeling
➢ designing a cabinet to conceal the microwave and toaster oven
➢ the coastal influenced light fixtures over the nook table and island
➢ the sandy colors of the Langdon Cambria countertops. The swirling pattern and sparkling quartz pieces remind the homeowner of black-and-tan sandy beaches
➢ the striped banquet seating whose creamy white background and blue-green stripes were the inspiration for the cabinet and wall colors.
➢ All the interior doors were painted black to coordinate with the blacks and grays in the backsplash tile and countertop. This also adds a hint of tailored formality to an otherwise casual space.
➢ the use of WAC's Oculux small aperture LED units for the overhead lighting complimented with Diode LED strips for task lighting under the cabinets and inside the pantry and glass wall cabinets. All of the lighting applications are on separate dimmer switches.
Innovative uses of materials or construction methods by Realty Restoration LLC:
➢ Each 1-1/2” x 3” block of reclaimed end-grain black walnut that makes up the center island chopping block was hand milled and built in the shop. It was designed to look substantial and proportional to the surrounding elements, executed by creating the 4 inch tall top with a solid wood chamfered edge band.
➢ The metal doors on either side of the vent hood were also custom designed for this project and built in the Realty Restoration LLC shop. They are made 1x2, 11-gauge mild steel with ribbed glass. Weighing 60 lbs a piece, heavy duty cabinet hinges were added to support the weight of the door and keep them from sagging.
➢ Under-cabinet receptacles were added along the range wall in order to have a clean, uninterrupted backsplash.
Design obstacles to overcome:
➢ Because we were removing the demising walls between the kitchen and living room, we had to find a way to plumb and vent the new island. We did this by tunneling through the slab (the slab had post tension cables which prevented us from just trenching) to run a new wet vent through a nearby structural wall. We pulled the existing hot and cold lines between upper floor joists and ran them down the structural wall as well and up through a conduit in the tunnel.
➢ Since we were converting from wall overs to a gas range it allowed us to utilize the 220 feed for the wall ovens to provide a new sub panel for all the new kitchen circuits
➢ Due to framing deficiencies inherited from the original build there was a 1-1/2” differential in the floor-to-ceiling height over a 20 foot span; by utilizing the process of cutting and furring coupled with the crown moulding details on the cabinet elevations we were able to mask the problem and provide seamless transitions between the cabinet components.
Evidence of superior craftsmanship:
➢ uniquely designed, one-of-a-kind metal “X” end panels on the large island. The end panels were custom made in the Realty Restoration LLC shop and fitted to the exact dimensions of the island. The welding seams are completely indistinguishable - the posts look like they are cut from a single sheet of metal
➢ square metal posts on the small island were also custom made and designed to compliment and carry through the metal element s throughout the kitchen
➢ the beautiful, oversized end panels on the pantry cabinets which give the breakfast nook a tailored look
➢ integrating a large format 5 piece Versailles tile pattern to seamlessly flow from the existing spaces into the new kitchen space
➢ By constructing a custom cabinet that jogged around a corner we could not remodel (housing the entry way coat closet) we were able to camouflage the adjacent wall offset within the upper and lower cabinets. By designing around the existing jog in the structural walls we accomplished a few things: we were able to find the space to house, and hide, the microwave and toaster oven yet still have a clean cohesive appearance from the kitchen side. Additionally, the owners were able to keep their much needed coat closet and we didn’t have to increase the budget with unnecessary structural work.
 Centoni Restoration & Development, Inc.
CLIENT GOALS
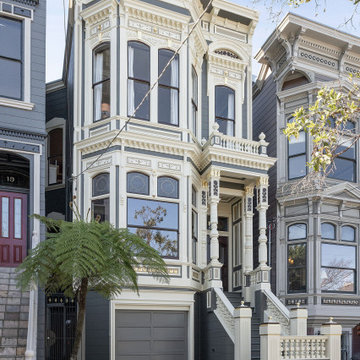
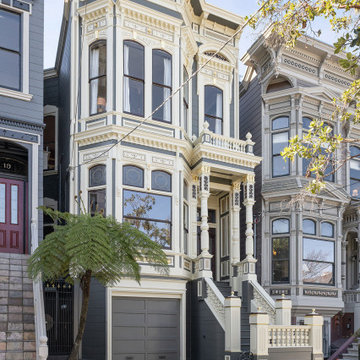
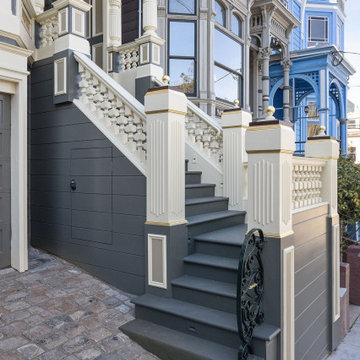
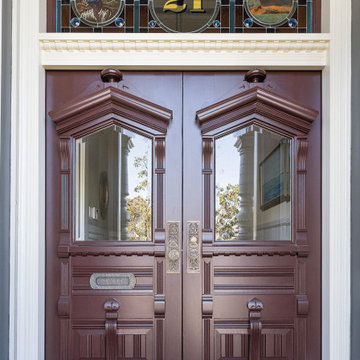
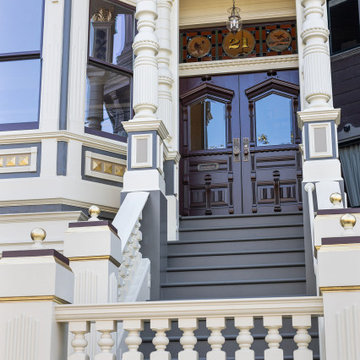
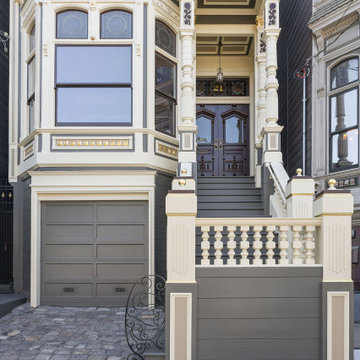
This spectacular Victorian was built in 1890 for Joseph Budde, an inventor, patent holder, and major manufacturer of the flush toilet. Through its more than 130-year life, this home evolved with the many incarnations of the Haight District. The most significant was the street modification that made way for the Haight Street railway line in the early 1920s. At that time, streets and sidewalks widened, causing the straight-line, two-story staircase to take a turn.
In the 1920s, stucco and terrazzo were considered modern and low-maintenance materials and were often used to replace the handmade residential carpentry that would have graced this spectacular staircase. Sometime during the 1990s, the entire entry door assembly was removed and replaced with another “modern” solution. Our clients challenged Centoni to recreate the original staircase and entry.
OUR DESIGN SOLUTION
Through a partnership with local artisans and support from San Francisco Historical Planners, team Centoni sourced information from the public library that included original photographs, writings on Cranston and Keenan, and the history of the Haight. Though no specific photo has yet to be sourced, we are confident the design choices are in the spirit of the original and are based on remnants of the original porch discovered under the 1920s stucco.
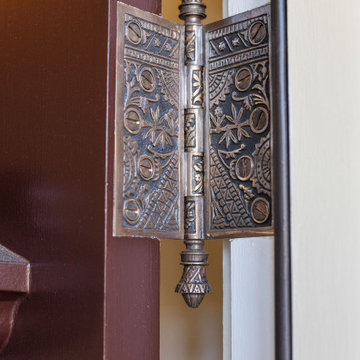
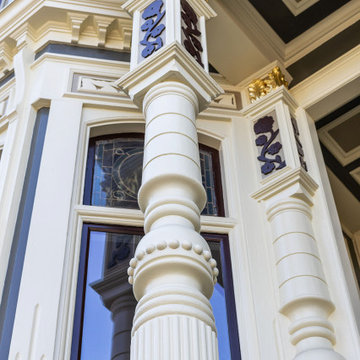
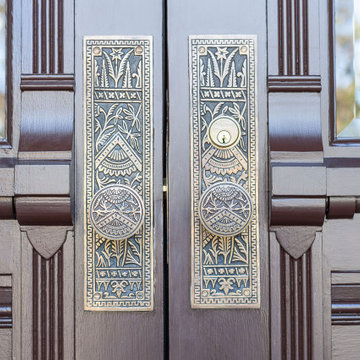
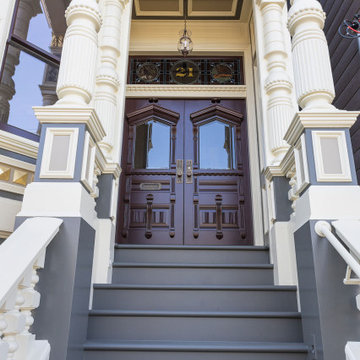
Through this journey, the staircase foundation was reengineered, the staircase designed and built, the original entry doors recreated, the stained glass transom created (including replication of the original hand-painted bird-theme rondels, many rotted decorated elements hand-carved, new and historic lighting installed, and a new iron handrail designed and fabricated.
 Centoni Restoration & Development, Inc.
CLIENT GOALS
This spectacular Victorian was built in 1890 for Joseph Budde, an inventor, patent holder, and major manufacturer of the flush toilet. Through its more than 130-year life, this home evolved with the many incarnations of the Haight District. The most significant was the street modification that made way for the Haight Street railway line in the early 1920s. At that time, streets and sidewalks widened, causing the straight-line, two-story staircase to take a turn.
In the 1920s, stucco and terrazzo were considered modern and low-maintenance materials and were often used to replace the handmade residential carpentry that would have graced this spectacular staircase. Sometime during the 1990s, the entire entry door assembly was removed and replaced with another “modern” solution. Our clients challenged Centoni to recreate the original staircase and entry.
OUR DESIGN SOLUTION
Through a partnership with local artisans and support from San Francisco Historical Planners, team Centoni sourced information from the public library that included original photographs, writings on Cranston and Keenan, and the history of the Haight. Though no specific photo has yet to be sourced, we are confident the design choices are in the spirit of the original and are based on remnants of the original porch discovered under the 1920s stucco.
Through this journey, the staircase foundation was reengineered, the staircase designed and built, the original entry doors recreated, the stained glass transom created (including replication of the original hand-painted bird-theme rondels, many rotted decorated elements hand-carved, new and historic lighting installed, and a new iron handrail designed and fabricated.

 Susan Yeley Homes
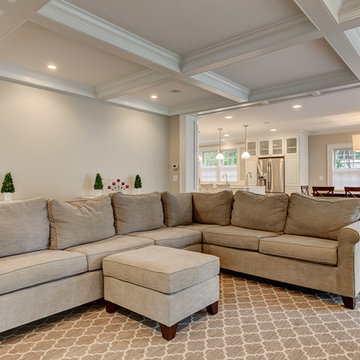
Lacking confidence after a really rough remodeling experience, this client called SYI first to redesign her master bathroom, after which she asked us to carry its zen into the family room. There, we created a more cohesive and functional furniture plan and filled it in with mostly new pieces and accessories, repurposing some existing furniture and using the rest elsewhere in the house. It's a large room that must comfortably accommodate grandkid sleepovers, frequent group meetings, and a gaggle of aging little dogs, while also being the homeowners' place to relax and wind down in quiet and calming environs. SYI created activity zones, specified easily cleanable and replaceable FLOR carpet tiles that affordably unified those zones, replaced the husband's bulky lazyboy with a more streamlined recliner, and made sure to include layers of light with table and floor lamps, adding warmth and flexibility. We decorated with local art and our own line of custom throw pillows made locally from upcycled fabrics.
Photographer: Nina Nelsen
Sponsored
Columbus, OH

Hope Restoration & General Contracting
Columbus Design-Build, Kitchen & Bath Remodeling, Historic Renovations
 Susan Yeley Homes
Lacking confidence after a really rough remodeling experience, this client called SYI first to redesign her master bathroom, after which she asked us to carry its zen into the family room. There, we created a more cohesive and functional furniture plan and filled it in with mostly new pieces and accessories, repurposing some existing furniture and using the rest elsewhere in the house. It's a large room that must comfortably accommodate grandkid sleepovers, frequent group meetings, and a gaggle of aging little dogs, while also being the homeowners' place to relax and wind down in quiet and calming environs. SYI created activity zones, specified easily cleanable and replaceable FLOR carpet tiles that affordably unified those zones, replaced the husband's bulky lazyboy with a more streamlined recliner, and made sure to include layers of light with table and floor lamps, adding warmth and flexibility. We decorated with local art and our own line of custom throw pillows made locally from upcycled fabrics.
Photographer: Nina Nelsen
 Centoni Restoration & Development, Inc.
CLIENT GOALS
This spectacular Victorian was built in 1890 for Joseph Budde, an inventor, patent holder, and major manufacturer of the flush toilet. Through its more than 130-year life, this home evolved with the many incarnations of the Haight District. The most significant was the street modification that made way for the Haight Street railway line in the early 1920s. At that time, streets and sidewalks widened, causing the straight-line, two-story staircase to take a turn.
In the 1920s, stucco and terrazzo were considered modern and low-maintenance materials and were often used to replace the handmade residential carpentry that would have graced this spectacular staircase. Sometime during the 1990s, the entire entry door assembly was removed and replaced with another “modern” solution. Our clients challenged Centoni to recreate the original staircase and entry.
OUR DESIGN SOLUTION
Through a partnership with local artisans and support from San Francisco Historical Planners, team Centoni sourced information from the public library that included original photographs, writings on Cranston and Keenan, and the history of the Haight. Though no specific photo has yet to be sourced, we are confident the design choices are in the spirit of the original and are based on remnants of the original porch discovered under the 1920s stucco.
Through this journey, the staircase foundation was reengineered, the staircase designed and built, the original entry doors recreated, the stained glass transom created (including replication of the original hand-painted bird-theme rondels, many rotted decorated elements hand-carved, new and historic lighting installed, and a new iron handrail designed and fabricated.
 Centoni Restoration & Development, Inc.
CLIENT GOALS
This spectacular Victorian was built in 1890 for Joseph Budde, an inventor, patent holder, and major manufacturer of the flush toilet. Through its more than 130-year life, this home evolved with the many incarnations of the Haight District. The most significant was the street modification that made way for the Haight Street railway line in the early 1920s. At that time, streets and sidewalks widened, causing the straight-line, two-story staircase to take a turn.
In the 1920s, stucco and terrazzo were considered modern and low-maintenance materials and were often used to replace the handmade residential carpentry that would have graced this spectacular staircase. Sometime during the 1990s, the entire entry door assembly was removed and replaced with another “modern” solution. Our clients challenged Centoni to recreate the original staircase and entry.
OUR DESIGN SOLUTION
Through a partnership with local artisans and support from San Francisco Historical Planners, team Centoni sourced information from the public library that included original photographs, writings on Cranston and Keenan, and the history of the Haight. Though no specific photo has yet to be sourced, we are confident the design choices are in the spirit of the original and are based on remnants of the original porch discovered under the 1920s stucco.
Through this journey, the staircase foundation was reengineered, the staircase designed and built, the original entry doors recreated, the stained glass transom created (including replication of the original hand-painted bird-theme rondels, many rotted decorated elements hand-carved, new and historic lighting installed, and a new iron handrail designed and fabricated.
 Centoni Restoration & Development, Inc.
CLIENT GOALS
This spectacular Victorian was built in 1890 for Joseph Budde, an inventor, patent holder, and major manufacturer of the flush toilet. Through its more than 130-year life, this home evolved with the many incarnations of the Haight District. The most significant was the street modification that made way for the Haight Street railway line in the early 1920s. At that time, streets and sidewalks widened, causing the straight-line, two-story staircase to take a turn.
In the 1920s, stucco and terrazzo were considered modern and low-maintenance materials and were often used to replace the handmade residential carpentry that would have graced this spectacular staircase. Sometime during the 1990s, the entire entry door assembly was removed and replaced with another “modern” solution. Our clients challenged Centoni to recreate the original staircase and entry.
OUR DESIGN SOLUTION
Through a partnership with local artisans and support from San Francisco Historical Planners, team Centoni sourced information from the public library that included original photographs, writings on Cranston and Keenan, and the history of the Haight. Though no specific photo has yet to be sourced, we are confident the design choices are in the spirit of the original and are based on remnants of the original porch discovered under the 1920s stucco.
Through this journey, the staircase foundation was reengineered, the staircase designed and built, the original entry doors recreated, the stained glass transom created (including replication of the original hand-painted bird-theme rondels, many rotted decorated elements hand-carved, new and historic lighting installed, and a new iron handrail designed and fabricated.
 Centoni Restoration & Development, Inc.
CLIENT GOALS
This spectacular Victorian was built in 1890 for Joseph Budde, an inventor, patent holder, and major manufacturer of the flush toilet. Through its more than 130-year life, this home evolved with the many incarnations of the Haight District. The most significant was the street modification that made way for the Haight Street railway line in the early 1920s. At that time, streets and sidewalks widened, causing the straight-line, two-story staircase to take a turn.
In the 1920s, stucco and terrazzo were considered modern and low-maintenance materials and were often used to replace the handmade residential carpentry that would have graced this spectacular staircase. Sometime during the 1990s, the entire entry door assembly was removed and replaced with another “modern” solution. Our clients challenged Centoni to recreate the original staircase and entry.
OUR DESIGN SOLUTION
Through a partnership with local artisans and support from San Francisco Historical Planners, team Centoni sourced information from the public library that included original photographs, writings on Cranston and Keenan, and the history of the Haight. Though no specific photo has yet to be sourced, we are confident the design choices are in the spirit of the original and are based on remnants of the original porch discovered under the 1920s stucco.
Through this journey, the staircase foundation was reengineered, the staircase designed and built, the original entry doors recreated, the stained glass transom created (including replication of the original hand-painted bird-theme rondels, many rotted decorated elements hand-carved, new and historic lighting installed, and a new iron handrail designed and fabricated.
 Centoni Restoration & Development, Inc.
CLIENT GOALS
This spectacular Victorian was built in 1890 for Joseph Budde, an inventor, patent holder, and major manufacturer of the flush toilet. Through its more than 130-year life, this home evolved with the many incarnations of the Haight District. The most significant was the street modification that made way for the Haight Street railway line in the early 1920s. At that time, streets and sidewalks widened, causing the straight-line, two-story staircase to take a turn.
In the 1920s, stucco and terrazzo were considered modern and low-maintenance materials and were often used to replace the handmade residential carpentry that would have graced this spectacular staircase. Sometime during the 1990s, the entire entry door assembly was removed and replaced with another “modern” solution. Our clients challenged Centoni to recreate the original staircase and entry.
OUR DESIGN SOLUTION
Through a partnership with local artisans and support from San Francisco Historical Planners, team Centoni sourced information from the public library that included original photographs, writings on Cranston and Keenan, and the history of the Haight. Though no specific photo has yet to be sourced, we are confident the design choices are in the spirit of the original and are based on remnants of the original porch discovered under the 1920s stucco.
Through this journey, the staircase foundation was reengineered, the staircase designed and built, the original entry doors recreated, the stained glass transom created (including replication of the original hand-painted bird-theme rondels, many rotted decorated elements hand-carved, new and historic lighting installed, and a new iron handrail designed and fabricated.
Sponsored
Columbus, OH
Hope Restoration & General Contracting
Columbus Design-Build, Kitchen & Bath Remodeling, Historic Renovations
 Susan Yeley Homes
Lacking confidence after a really rough remodeling experience, this client called SYI first to redesign her master bathroom, after which she asked us to carry its zen into the family room. There, we created a more cohesive and functional furniture plan and filled it in with mostly new pieces and accessories, repurposing some existing furniture and using the rest elsewhere in the house. It's a large room that must comfortably accommodate grandkid sleepovers, frequent group meetings, and a gaggle of aging little dogs, while also being the homeowners' place to relax and wind down in quiet and calming environs. SYI created activity zones, specified easily cleanable and replaceable FLOR carpet tiles that affordably unified those zones, replaced the husband's bulky lazyboy with a more streamlined recliner, and made sure to include layers of light with table and floor lamps, adding warmth and flexibility. We decorated with local art and our own line of custom throw pillows made locally from upcycled fabrics.
Photographer: Nina Nelsen
 Centoni Restoration & Development, Inc.
CLIENT GOALS
This spectacular Victorian was built in 1890 for Joseph Budde, an inventor, patent holder, and major manufacturer of the flush toilet. Through its more than 130-year life, this home evolved with the many incarnations of the Haight District. The most significant was the street modification that made way for the Haight Street railway line in the early 1920s. At that time, streets and sidewalks widened, causing the straight-line, two-story staircase to take a turn.
In the 1920s, stucco and terrazzo were considered modern and low-maintenance materials and were often used to replace the handmade residential carpentry that would have graced this spectacular staircase. Sometime during the 1990s, the entire entry door assembly was removed and replaced with another “modern” solution. Our clients challenged Centoni to recreate the original staircase and entry.
OUR DESIGN SOLUTION
Through a partnership with local artisans and support from San Francisco Historical Planners, team Centoni sourced information from the public library that included original photographs, writings on Cranston and Keenan, and the history of the Haight. Though no specific photo has yet to be sourced, we are confident the design choices are in the spirit of the original and are based on remnants of the original porch discovered under the 1920s stucco.
Through this journey, the staircase foundation was reengineered, the staircase designed and built, the original entry doors recreated, the stained glass transom created (including replication of the original hand-painted bird-theme rondels, many rotted decorated elements hand-carved, new and historic lighting installed, and a new iron handrail designed and fabricated.
 Centoni Restoration & Development, Inc.
CLIENT GOALS
This spectacular Victorian was built in 1890 for Joseph Budde, an inventor, patent holder, and major manufacturer of the flush toilet. Through its more than 130-year life, this home evolved with the many incarnations of the Haight District. The most significant was the street modification that made way for the Haight Street railway line in the early 1920s. At that time, streets and sidewalks widened, causing the straight-line, two-story staircase to take a turn.
In the 1920s, stucco and terrazzo were considered modern and low-maintenance materials and were often used to replace the handmade residential carpentry that would have graced this spectacular staircase. Sometime during the 1990s, the entire entry door assembly was removed and replaced with another “modern” solution. Our clients challenged Centoni to recreate the original staircase and entry.
OUR DESIGN SOLUTION
Through a partnership with local artisans and support from San Francisco Historical Planners, team Centoni sourced information from the public library that included original photographs, writings on Cranston and Keenan, and the history of the Haight. Though no specific photo has yet to be sourced, we are confident the design choices are in the spirit of the original and are based on remnants of the original porch discovered under the 1920s stucco.
Through this journey, the staircase foundation was reengineered, the staircase designed and built, the original entry doors recreated, the stained glass transom created (including replication of the original hand-painted bird-theme rondels, many rotted decorated elements hand-carved, new and historic lighting installed, and a new iron handrail designed and fabricated.
 Tile Doctor Ltd
This detailed Victorian tiled hallway at a property in Camden was overdue some much-needed repair and maintenance. The owners of the property appreciated that original period features like this add a lot of value to a property and asked me to visit the property to quote for renovating it. The property was in a terrace of similar properties most of which appeared to have retained their Victorian character.
I inspected the floor and found there were a couple of loose, cracked, worn and broken tiles that needed to be replaced. In addition, the floor tiles needed a deep clean and then seal to bring back the wow factor. I was confident we could renovate the floor but at that point unsure if we would be able to find exact match replacements for the damaged tiles. Fortunately, Victorian tiles are still in demand and I knew of several companies I could check with so I was confident they could be found.
We discussed how long the work would take and assuming I could source the replacements agreed a price for the full restoration of the floor. After doing some research I managed to find suitable replacements with a company called Original Style and the work was scheduled for the following month.
Firstly, we prepared all areas with protective tapes to threshold edges and skirting.
This was followed by spaying the tiles with a strong dilution of Tile Doctor Remove & Go which is product designed to remove old sealers and coatings. After about ten minutes the tiles were scrubbed with black scrubbing pads and scrubbing brushes. Fresh water was used to rinse the floor and the slurry was extracted using a wet vacuum.
The floor was inspected and then a second clean carried out, this time using Tile Doctor Pro-Clean which is a Tile and Grout cleaning agent. The same process of application was used and after rinsing and extracting the dirt the tiles were given a steam clean. This ensured all the dirt was lifted out of the pores of the tile and the floor was now as clean as it possible could be.
The next step was the remove the loose and cracked tiles using the reclaimed tiles we had sourced earlier. Some cuts were necessary to get the replacements to match the originals but overall the plan worked. A quick drying adhesive was used to secure the tiles so we could apply the grout shortly after. The whole floor was then re-grouted and cleaned off to ensure a good match. The floor was left to dry off overnight, and you could already see it was now looking considerably improved.
Returning the next morning we checked the floor was dry using a moisture meter, this is important as to apply a sealer to damp tiles will lead to a patchy experience. All was well so we were ready to apply the sealer.
To start a single base coat of Tile Doctor Colour Grow sealer was applied to the floor and left to dry. This sealer is an impregnator that protects from within by occupying the pores in the clay tile improving colour in the process. This sealer does leave a matt finish however and the client wanted a subtle shine so one dry it was followed by four coats of Tile Doctor Seal & Go. The combination of the two sealers works really well to add long lasting protection to the tiles and provide the desired finish to the floor.
The floor was much improved, and the client was delighted. The detailed pattern and colours were now much more prominent, and the hallway looked much more inviting for both the owner and their guests. For the aftercare of Victorian tiles, I recommended the use of Tile Doctor Neutral Cleaner which is pH neutral and won’t prematurely erode the life of the sealer.
Nigel Voyce
North London Tile Doctor
Sponsored
Columbus, OH
Hope Restoration & General Contracting
Columbus Design-Build, Kitchen & Bath Remodeling, Historic Renovations
 Susan Yeley Homes
Lacking confidence after a really rough remodeling experience, this client called SYI first to redesign her master bathroom, after which she asked us to carry its zen into the family room. There, we created a more cohesive and functional furniture plan and filled it in with mostly new pieces and accessories, repurposing some existing furniture and using the rest elsewhere in the house. It's a large room that must comfortably accommodate grandkid sleepovers, frequent group meetings, and a gaggle of aging little dogs, while also being the homeowners' place to relax and wind down in quiet and calming environs. SYI created activity zones, specified easily cleanable and replaceable FLOR carpet tiles that affordably unified those zones, replaced the husband's bulky lazyboy with a more streamlined recliner, and made sure to include layers of light with table and floor lamps, adding warmth and flexibility. We decorated with local art and our own line of custom throw pillows made locally from upcycled fabrics.
Photographer: Nina Nelsen
 Centoni Restoration & Development, Inc.
CLIENT GOALS
This spectacular Victorian was built in 1890 for Joseph Budde, an inventor, patent holder, and major manufacturer of the flush toilet. Through its more than 130-year life, this home evolved with the many incarnations of the Haight District. The most significant was the street modification that made way for the Haight Street railway line in the early 1920s. At that time, streets and sidewalks widened, causing the straight-line, two-story staircase to take a turn.
In the 1920s, stucco and terrazzo were considered modern and low-maintenance materials and were often used to replace the handmade residential carpentry that would have graced this spectacular staircase. Sometime during the 1990s, the entire entry door assembly was removed and replaced with another “modern” solution. Our clients challenged Centoni to recreate the original staircase and entry.
OUR DESIGN SOLUTION
Through a partnership with local artisans and support from San Francisco Historical Planners, team Centoni sourced information from the public library that included original photographs, writings on Cranston and Keenan, and the history of the Haight. Though no specific photo has yet to be sourced, we are confident the design choices are in the spirit of the original and are based on remnants of the original porch discovered under the 1920s stucco.
Through this journey, the staircase foundation was reengineered, the staircase designed and built, the original entry doors recreated, the stained glass transom created (including replication of the original hand-painted bird-theme rondels, many rotted decorated elements hand-carved, new and historic lighting installed, and a new iron handrail designed and fabricated.
 Tile Doctor Ltd
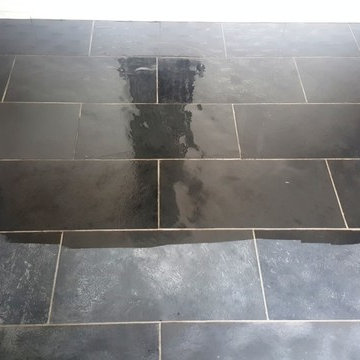
This customer, who lives in Paisley, one of Scotland’s biggest towns – and one with a rich history in the textiles industry – had not been completely satisfied with her Slate tiled kitchen floor since it had been laid. Having only been laid recently, the tiles themselves were in good shape, but they lacked the aesthetic quality desired by the customer.
She wanted them to be a richer, darker black in colour while keeping the matte look – as she had seen advertised in the tile shop – but once laid the tiles had been left looking rather unexceptional. The floor area itself was only small (at around 12 metres squared), and I was confident I could have it looking much nicer in no time at all using the right products.
To begin, I stripped away any previous sealer using a diluted mixture of Tile Doctor Pro Clean and Tile Doctor Remove and Go scrubbed into the tiles. This also helped to remove and bits of dirt and dust left on the floor. While the tiles, as mentioned, were in relatively good nick, I wanted to get the floor as clean as possible before giving it a fresh seal and my chosen combination of products did not let me down.
The floor was then neutralised with clean water, removing any outstanding cleaning chemicals, and the resulting cleaning slurry was promptly removed using a wet-vac machine. To finish the clean, I washed the tiles in pH Neutral Tile Cleaner, leaving it fresh and ready to be sealed.
The next day I returned to the property to seal the Slate tiles making sure first that the tiles were dry. To restore the colour and texture of the Slate I started with an application of Tile Doctor Stone Oil which impregnates the pores of the stone and like a sealer provides a barrier to ingrained dirt once cured. To maintain the matt finish, as requested by the customer, I added a coat of Tile Doctor Ultra Seal.
Just looking at the before and after photographs it’s clear to see that the customer got that the exact result she had requested. Stone Oil worked wonders to restore the rich, dark tones to the Slate that had been so sorely lacking previously. The customer can also be assured that the sealer will be keep the floor easy to clean for a long time to come.
Steve Thompson
Glasgow Tile Doctor
5