
Search results for "Safety switches" in Home Design Ideas
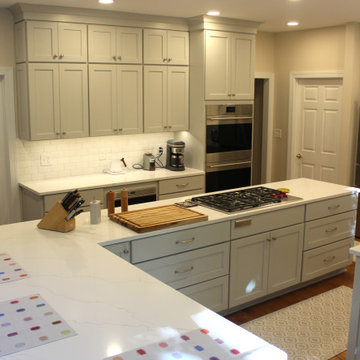
 Talon Construction Inc.
Renovating an open kitchen can be an exciting project that can improve the functionality, aesthetics, and value of your home. Here are some steps to guide you through the process:
Planning and Design:
Define your goals and budget for the renovation.
Determine the layout of your open kitchen. Consider factors like the work triangle (the relationship between the stove, sink, and refrigerator) and the flow of traffic.
Choose a design style and color scheme that suits your preferences and complements the rest of your home.
Research and Inspiration:
Collect inspiration from magazines, websites, and social media platforms to get ideas for your open kitchen design.
Create a mood board or vision board to help you visualize the final look.
Hiring Professionals:
Depending on the scale of your renovation, you may need to hire professionals, such as architects, interior designers, contractors, and electricians. Make sure to check references and get multiple quotes.
Demolition and Structural Work:
If your renovation involves structural changes, like removing walls, this is the time to do it. Ensure that the necessary permits are obtained.
Plumbing and Electrical Work:
Update or reconfigure plumbing and electrical systems as needed. This may include adding or moving outlets, switches, and lighting fixtures.
Cabinetry and Countertops:
Choose and install new kitchen cabinets and countertops. This is a significant part of your renovation and will greatly influence the kitchen's appearance and functionality.
Appliances:
Update or install new kitchen appliances, including the refrigerator, stove, oven, microwave, and dishwasher.
Flooring:
Select and install flooring that is suitable for a kitchen, such as hardwood, tile, laminate, or vinyl. Ensure it complements the overall design.
Backsplash and Wall Finishes:
Install a backsplash that matches your design and protects your walls. Consider materials like tile, glass, or stainless steel.
Lighting:
Choose and install various types of lighting, including ambient, task, and accent lighting. Pendant lights above an island or breakfast bar can add style and functionality.
Paint and Finishing Touches:
Paint the walls and ceiling in the colors you've selected. Add finishing touches like hardware, window treatments, and decorative elements.
Furniture and Accessories:
Bring in furniture, such as a dining table and chairs, barstools, and any other pieces you need to complete the space. Decorate with accessories like artwork, plants, and decorative items.
Final Inspection and Cleanup:
Ensure that all work meets safety and building code requirements. Clean the entire area thoroughly.
Enjoy Your New Kitchen:
Once the renovation is complete and everything is in its place, enjoy your beautiful, functional open kitchen.
Remember that open kitchen renovations can be complex and may require careful planning. It's essential to stay within your budget, communicate with your contractors and designers, and be flexible as unexpected issues may arise during the process. Ultimately, a well-executed open kitchen renovation can enhance the heart of your home and improve your overall living space.
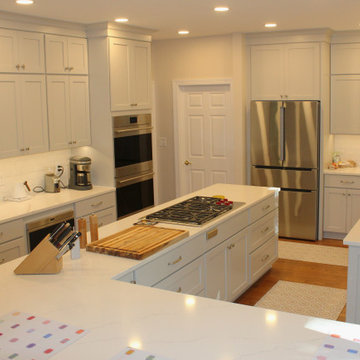 Talon Construction Inc.
Renovating an open kitchen can be an exciting project that can improve the functionality, aesthetics, and value of your home. Here are some steps to guide you through the process:
Planning and Design:
Define your goals and budget for the renovation.
Determine the layout of your open kitchen. Consider factors like the work triangle (the relationship between the stove, sink, and refrigerator) and the flow of traffic.
Choose a design style and color scheme that suits your preferences and complements the rest of your home.
Research and Inspiration:
Collect inspiration from magazines, websites, and social media platforms to get ideas for your open kitchen design.
Create a mood board or vision board to help you visualize the final look.
Hiring Professionals:
Depending on the scale of your renovation, you may need to hire professionals, such as architects, interior designers, contractors, and electricians. Make sure to check references and get multiple quotes.
Demolition and Structural Work:
If your renovation involves structural changes, like removing walls, this is the time to do it. Ensure that the necessary permits are obtained.
Plumbing and Electrical Work:
Update or reconfigure plumbing and electrical systems as needed. This may include adding or moving outlets, switches, and lighting fixtures.
Cabinetry and Countertops:
Choose and install new kitchen cabinets and countertops. This is a significant part of your renovation and will greatly influence the kitchen's appearance and functionality.
Appliances:
Update or install new kitchen appliances, including the refrigerator, stove, oven, microwave, and dishwasher.
Flooring:
Select and install flooring that is suitable for a kitchen, such as hardwood, tile, laminate, or vinyl. Ensure it complements the overall design.
Backsplash and Wall Finishes:
Install a backsplash that matches your design and protects your walls. Consider materials like tile, glass, or stainless steel.
Lighting:
Choose and install various types of lighting, including ambient, task, and accent lighting. Pendant lights above an island or breakfast bar can add style and functionality.
Paint and Finishing Touches:
Paint the walls and ceiling in the colors you've selected. Add finishing touches like hardware, window treatments, and decorative elements.
Furniture and Accessories:
Bring in furniture, such as a dining table and chairs, barstools, and any other pieces you need to complete the space. Decorate with accessories like artwork, plants, and decorative items.
Final Inspection and Cleanup:
Ensure that all work meets safety and building code requirements. Clean the entire area thoroughly.
Enjoy Your New Kitchen:
Once the renovation is complete and everything is in its place, enjoy your beautiful, functional open kitchen.
Remember that open kitchen renovations can be complex and may require careful planning. It's essential to stay within your budget, communicate with your contractors and designers, and be flexible as unexpected issues may arise during the process. Ultimately, a well-executed open kitchen renovation can enhance the heart of your home and improve your overall living space.

 Womack Iron
Womack Iron
770-595-5996
http://www.facebook.com/womackiron
Design ideas for a traditional landscaping in Atlanta.
Design ideas for a traditional landscaping in Atlanta.
Find the right local pro for your project
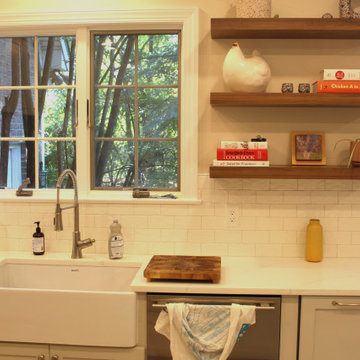 Talon Construction Inc.
Renovating an open kitchen can be an exciting project that can improve the functionality, aesthetics, and value of your home. Here are some steps to guide you through the process:
Planning and Design:
Define your goals and budget for the renovation.
Determine the layout of your open kitchen. Consider factors like the work triangle (the relationship between the stove, sink, and refrigerator) and the flow of traffic.
Choose a design style and color scheme that suits your preferences and complements the rest of your home.
Research and Inspiration:
Collect inspiration from magazines, websites, and social media platforms to get ideas for your open kitchen design.
Create a mood board or vision board to help you visualize the final look.
Hiring Professionals:
Depending on the scale of your renovation, you may need to hire professionals, such as architects, interior designers, contractors, and electricians. Make sure to check references and get multiple quotes.
Demolition and Structural Work:
If your renovation involves structural changes, like removing walls, this is the time to do it. Ensure that the necessary permits are obtained.
Plumbing and Electrical Work:
Update or reconfigure plumbing and electrical systems as needed. This may include adding or moving outlets, switches, and lighting fixtures.
Cabinetry and Countertops:
Choose and install new kitchen cabinets and countertops. This is a significant part of your renovation and will greatly influence the kitchen's appearance and functionality.
Appliances:
Update or install new kitchen appliances, including the refrigerator, stove, oven, microwave, and dishwasher.
Flooring:
Select and install flooring that is suitable for a kitchen, such as hardwood, tile, laminate, or vinyl. Ensure it complements the overall design.
Backsplash and Wall Finishes:
Install a backsplash that matches your design and protects your walls. Consider materials like tile, glass, or stainless steel.
Lighting:
Choose and install various types of lighting, including ambient, task, and accent lighting. Pendant lights above an island or breakfast bar can add style and functionality.
Paint and Finishing Touches:
Paint the walls and ceiling in the colors you've selected. Add finishing touches like hardware, window treatments, and decorative elements.
Furniture and Accessories:
Bring in furniture, such as a dining table and chairs, barstools, and any other pieces you need to complete the space. Decorate with accessories like artwork, plants, and decorative items.
Final Inspection and Cleanup:
Ensure that all work meets safety and building code requirements. Clean the entire area thoroughly.
Enjoy Your New Kitchen:
Once the renovation is complete and everything is in its place, enjoy your beautiful, functional open kitchen.
Remember that open kitchen renovations can be complex and may require careful planning. It's essential to stay within your budget, communicate with your contractors and designers, and be flexible as unexpected issues may arise during the process. Ultimately, a well-executed open kitchen renovation can enhance the heart of your home and improve your overall living space.
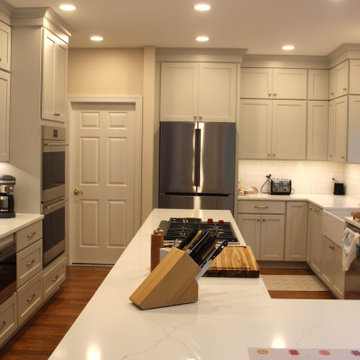 Talon Construction Inc.
Renovating an open kitchen can be an exciting project that can improve the functionality, aesthetics, and value of your home. Here are some steps to guide you through the process:
Planning and Design:
Define your goals and budget for the renovation.
Determine the layout of your open kitchen. Consider factors like the work triangle (the relationship between the stove, sink, and refrigerator) and the flow of traffic.
Choose a design style and color scheme that suits your preferences and complements the rest of your home.
Research and Inspiration:
Collect inspiration from magazines, websites, and social media platforms to get ideas for your open kitchen design.
Create a mood board or vision board to help you visualize the final look.
Hiring Professionals:
Depending on the scale of your renovation, you may need to hire professionals, such as architects, interior designers, contractors, and electricians. Make sure to check references and get multiple quotes.
Demolition and Structural Work:
If your renovation involves structural changes, like removing walls, this is the time to do it. Ensure that the necessary permits are obtained.
Plumbing and Electrical Work:
Update or reconfigure plumbing and electrical systems as needed. This may include adding or moving outlets, switches, and lighting fixtures.
Cabinetry and Countertops:
Choose and install new kitchen cabinets and countertops. This is a significant part of your renovation and will greatly influence the kitchen's appearance and functionality.
Appliances:
Update or install new kitchen appliances, including the refrigerator, stove, oven, microwave, and dishwasher.
Flooring:
Select and install flooring that is suitable for a kitchen, such as hardwood, tile, laminate, or vinyl. Ensure it complements the overall design.
Backsplash and Wall Finishes:
Install a backsplash that matches your design and protects your walls. Consider materials like tile, glass, or stainless steel.
Lighting:
Choose and install various types of lighting, including ambient, task, and accent lighting. Pendant lights above an island or breakfast bar can add style and functionality.
Paint and Finishing Touches:
Paint the walls and ceiling in the colors you've selected. Add finishing touches like hardware, window treatments, and decorative elements.
Furniture and Accessories:
Bring in furniture, such as a dining table and chairs, barstools, and any other pieces you need to complete the space. Decorate with accessories like artwork, plants, and decorative items.
Final Inspection and Cleanup:
Ensure that all work meets safety and building code requirements. Clean the entire area thoroughly.
Enjoy Your New Kitchen:
Once the renovation is complete and everything is in its place, enjoy your beautiful, functional open kitchen.
Remember that open kitchen renovations can be complex and may require careful planning. It's essential to stay within your budget, communicate with your contractors and designers, and be flexible as unexpected issues may arise during the process. Ultimately, a well-executed open kitchen renovation can enhance the heart of your home and improve your overall living space.
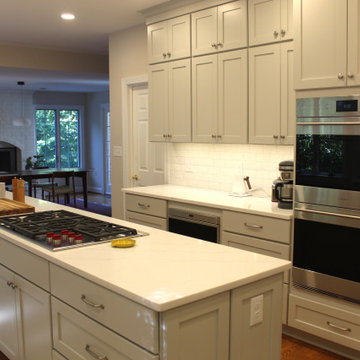 Talon Construction Inc.
Renovating an open kitchen can be an exciting project that can improve the functionality, aesthetics, and value of your home. Here are some steps to guide you through the process:
Planning and Design:
Define your goals and budget for the renovation.
Determine the layout of your open kitchen. Consider factors like the work triangle (the relationship between the stove, sink, and refrigerator) and the flow of traffic.
Choose a design style and color scheme that suits your preferences and complements the rest of your home.
Research and Inspiration:
Collect inspiration from magazines, websites, and social media platforms to get ideas for your open kitchen design.
Create a mood board or vision board to help you visualize the final look.
Hiring Professionals:
Depending on the scale of your renovation, you may need to hire professionals, such as architects, interior designers, contractors, and electricians. Make sure to check references and get multiple quotes.
Demolition and Structural Work:
If your renovation involves structural changes, like removing walls, this is the time to do it. Ensure that the necessary permits are obtained.
Plumbing and Electrical Work:
Update or reconfigure plumbing and electrical systems as needed. This may include adding or moving outlets, switches, and lighting fixtures.
Cabinetry and Countertops:
Choose and install new kitchen cabinets and countertops. This is a significant part of your renovation and will greatly influence the kitchen's appearance and functionality.
Appliances:
Update or install new kitchen appliances, including the refrigerator, stove, oven, microwave, and dishwasher.
Flooring:
Select and install flooring that is suitable for a kitchen, such as hardwood, tile, laminate, or vinyl. Ensure it complements the overall design.
Backsplash and Wall Finishes:
Install a backsplash that matches your design and protects your walls. Consider materials like tile, glass, or stainless steel.
Lighting:
Choose and install various types of lighting, including ambient, task, and accent lighting. Pendant lights above an island or breakfast bar can add style and functionality.
Paint and Finishing Touches:
Paint the walls and ceiling in the colors you've selected. Add finishing touches like hardware, window treatments, and decorative elements.
Furniture and Accessories:
Bring in furniture, such as a dining table and chairs, barstools, and any other pieces you need to complete the space. Decorate with accessories like artwork, plants, and decorative items.
Final Inspection and Cleanup:
Ensure that all work meets safety and building code requirements. Clean the entire area thoroughly.
Enjoy Your New Kitchen:
Once the renovation is complete and everything is in its place, enjoy your beautiful, functional open kitchen.
Remember that open kitchen renovations can be complex and may require careful planning. It's essential to stay within your budget, communicate with your contractors and designers, and be flexible as unexpected issues may arise during the process. Ultimately, a well-executed open kitchen renovation can enhance the heart of your home and improve your overall living space.
 Hollingsworth Design, LLC
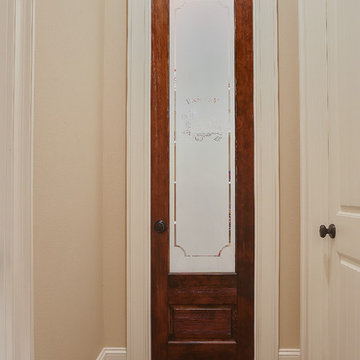
Traditional pantry door.
Inspiration for a timeless closet remodel in New Orleans
Inspiration for a timeless closet remodel in New Orleans
 User
UserThe clients enjoy entertaining guests in their home. They enjoy sports events, but don't necessarily enjoy the hustle 'n bustle of going to the stadium, finding a place to park, and in the case of football, freezing to death. They much prefer sharing the ambiance of their comfortable home, offering snacks and drinks from the bar, and enjoying a round of pool during intermissions and halftime, or watching halftime shows on a state-of-the-art home theater.
These clients were so committed to this enterprise, they dedicated their 3,000 sq’ basement, except those areas already used for utility, storage, and mechanical needs, the renovation.To make sure the clients' every wish was met, a complete entertainment area was designed and constructed with ease of movement, lighting, and safety in mind. The area would include a home theater with totally wireless controls, a pool room, and a social area replete with a commercial-grade wet bar.
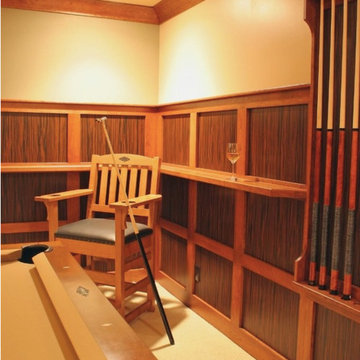
The home theater consists of a screen within a custom cabinet system that also houses the complete audio-visual equipment center. Speakers are nestled in custom benches with the sound cones discretely hidden behind fabric panels. The motor for the panel that hides the screen when not in use is behind a similar fabric panel.The furniture style cabinet has Shaker style doors with walnut peg inlays and leaded glass panels. There are multiple lighting "scenes" for ambiance; low-voltage lighting inside the crown molding, and recessed can lights are discretely placed so that they can provide an extra level of illumination when required.The pool room was walled with a custom wainscot paneling with clear cherry stiles and rails finished with a clear satin lacquer.
The panels are of Madagascar ebony with a light satin stain and a clear lacquer finish. A custom cue rack was constructed from clear cherry and backed with the Madagascar ebony panel.Drink rails were custom fabricated from cherry and custom crown molding was fabricated to match the rest of the house. The space is lit with a combination of recessed lights and a series of hidden lights behind crown molding for dramatic effect. The bar area is topped with a custom crown detail to contain the lighting.
The bar is constructed in the same manner and fashion as the theater and pool rooms with Shaker style cabinetry with square walnut peg in the door corners and decorative leaded glass door fronts with more than enough front and back bar space to serve and enjoy drinks and snacks. Entry behind the bar is through custom, bi-directional butler doors. A custom bottle display and storage area takes up the bottom half of the bar's back wall. And, for the sake of convenience, a full size automatic dishwasher is installed under the bar for cleaning glasses and stemware. The bar is also tricked out with an espresso machine, its own flat screen TV and AmX video controller.
The bar is lit with puck lights in the upper cabinets that illuminate downward through glass shelves, and low-voltage lighting is used behind the bottle display. The bar itself is lit by a series of earthen tone pendant lights.All three areas complement each other and are in total harmony with the remainder of the house. Moldings were matched, carpeting styles were chosen to complement rather than compromise, and muted, natural colors and textures were chosen that complement the surroundings. There is a seamless transition between the newer areas of the home and those already in everyday use. The entire area is a nebula of electrons operating servos, quietly opening and closing hidden switches, mysteriously dimming and brightening lights, and not only creating an alluring atmosphere, but one that is programmable, available at the touch of a finger to a heat sensitive screen, for an individual, or a group. At a single touch the lights in the theater and bar areas dim as the theater screen lowers into viewing position. Not only does the AMX controller open and close shades and window treatments to facilitate better viewing, but on an entirely different level it controls the very access to the property. It opens and closes entryways, external doors and gates as well.None of this magic came easily. Electrical circuits were at a premium. Over heating plagued the AV rack, and pesky rays of light seemed to creep in where and when they were least welcome. An exhaust fan was installed in the AV cabinet to dissipate the heat. New electrical outlets were scheduled and placed while others were moved. The bar area received custom wire chases hidden within the cabinetry. Exterior roll-a-way shutters, all controlled from the AMX controller, were installed and programmed as the answer to those pesky light rays.
 General Assembly
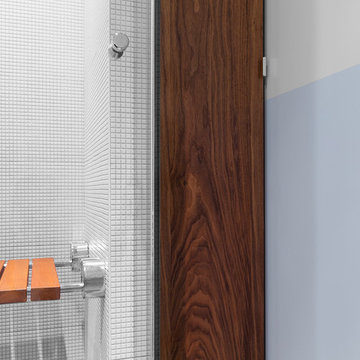
This spa like bathroom brings together small italian modern tile with colorblock walls. A flip down bench was installed in the shower.
© Devon Banks
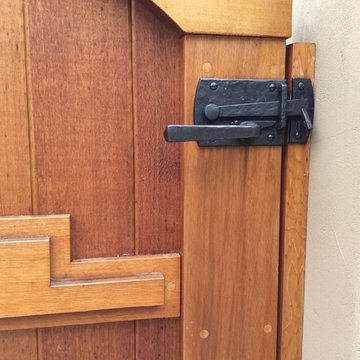
 360 Yardware
Built by Scott Jensen Construction of Jacksonville, Oregon, the Spanish style gate features a dark bronze gate latch with lever. The texture on the latch fits with the rustic feel, while the lever gives it a contemporary look.
Note the wood jamb installed to the stucco wall. This is the easiest way to create a gate/door installation in stucco.
Client-provided photos.
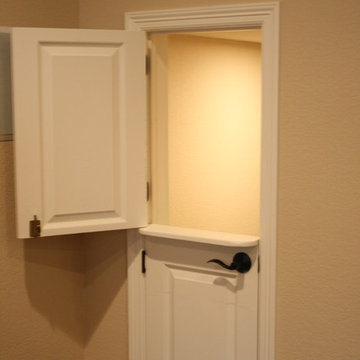
 Brothers Construction
Photo by: Brothers Construction
Kids' room - traditional kids' room idea in Denver
Kids' room - traditional kids' room idea in Denver


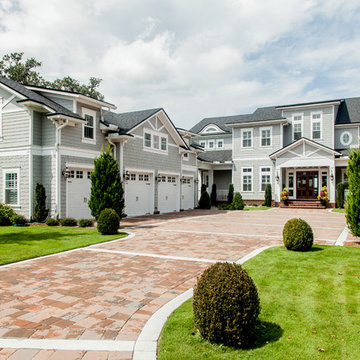
 J.A. Long, Inc
Built by:
J.A. Long, Inc
Design Builders
Large craftsman gray two-story wood exterior home idea in Jacksonville
Large craftsman gray two-story wood exterior home idea in Jacksonville
 User
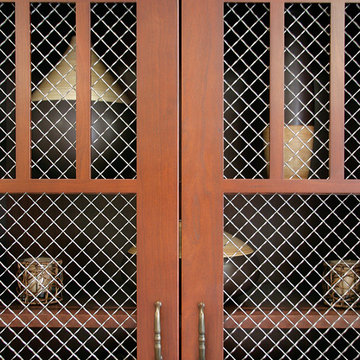
UserThink beyond glass and select an acrylic panel or wire mesh insert for a personalized touch, adding complimentary organic textures, patterns and shapes to enhance the overall look of your space.

 Custom Surface Solutions
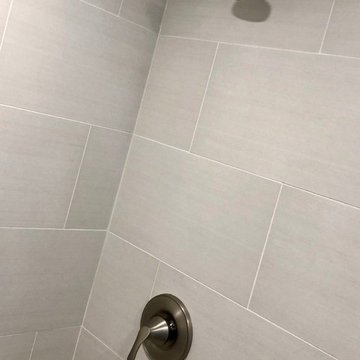
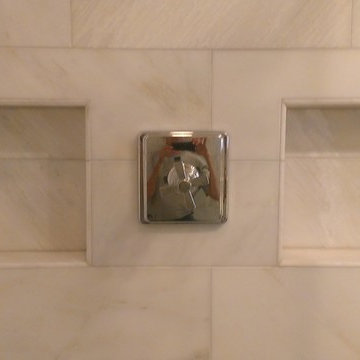
Custom Surface Solutions (www.css-tile.com) - Owner Craig Thompson (512) 430-1215. This project shows the remodel of a small 1950's vintage home master bathroom. 8"" x 18" Calcutta gold marble tile was used on the shower walls and floor wall base and ceramic gray penny tile on the floor. Shower includes curbless pan / floor, dual shower boxes, frameless glass slider, trough duel fixture sink and chrome fixtures.
 Floors to Ceiling Construction
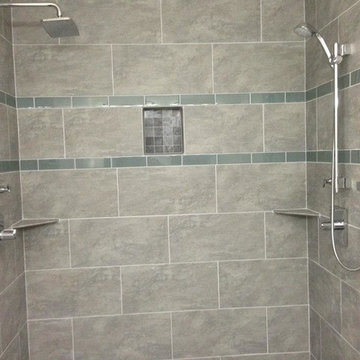
custom shower
Alcove shower - mid-sized contemporary master gray tile, green tile and porcelain tile alcove shower idea in San Francisco
Alcove shower - mid-sized contemporary master gray tile, green tile and porcelain tile alcove shower idea in San Francisco
 HUNTINGTON ID
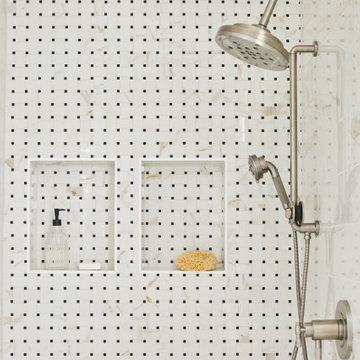
Our Ridgewood Estate project is a new build custom home located on acreage with a lake. It is filled with luxurious materials and family friendly details.
 Easy Renovations
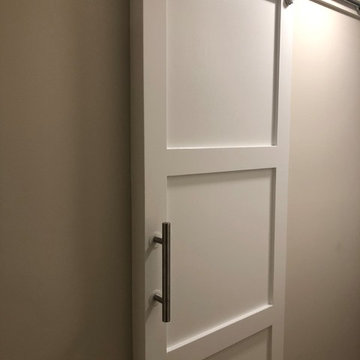
Barn door installed to give more space in this very small bathroom. This way the door does not open into the shower
Example of a small minimalist 3/4 white tile and ceramic tile porcelain tile and gray floor alcove shower design in DC Metro with shaker cabinets, white cabinets, a two-piece toilet, white walls, an undermount sink, granite countertops and blue countertops
Example of a small minimalist 3/4 white tile and ceramic tile porcelain tile and gray floor alcove shower design in DC Metro with shaker cabinets, white cabinets, a two-piece toilet, white walls, an undermount sink, granite countertops and blue countertops
10