
Search results for "Schedule cleaning" in Home Design Ideas

 Naples Pool Cleaning Pros
Are you looking for more info related to Hot Tub Maintenance Naples FL ?
Want to know more about Pool Cleaning Naples FL?
You are in the right place when it comes to Pool Repairs Naples FL...
Our pool cleaning service covers a comprehensive range of tasks, including skimming the surface for debris, vacuuming the pool floor, brushing the walls, checking and balancing water chemistry, and inspecting equipment. Reach out to Naples Pool Cleaning Pros at (239) 933-6068 to schedule your next cleaning.

 Maidwell Cleaning
Maidwell provides house cleaning, deep cleaning, move-in/out cleaning, office cleaning, post-construction cleaning, and short-term rental cleaning services in Asheville, NC. Their team prioritizes quality and customer satisfaction, using eco-friendly products to ensure thorough cleaning. They offer flexible scheduling and customizable packages to suit individual needs.
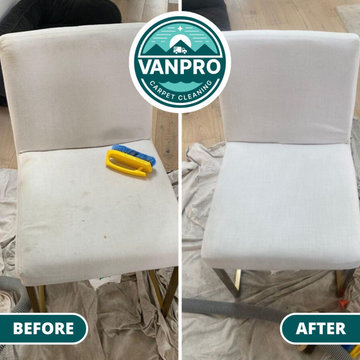
 Vanpro Carpet Cleaning
Just as you care for your floors, you should also care for your upholstery, and that's what Vanpro Carpet Cleaning is for. We provide professional upholstery cleaning in Ventura, CA, to revive your sofas, chairs, and sectionals to make them look revitalized and smell clean! Make sure you call us today at 805 620 8546 to schedule your service.
Find the right local pro for your project
 Nova Tayona Architects
Kristin Sjaarda
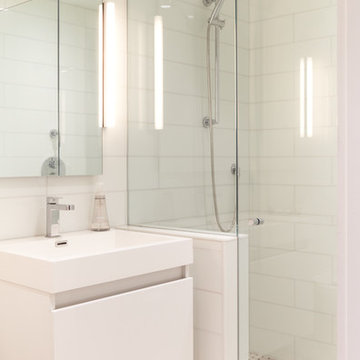
Alcove shower - small contemporary 3/4 white tile and ceramic tile mosaic tile floor and brown floor alcove shower idea in Toronto with a console sink, flat-panel cabinets, white cabinets, white walls, quartzite countertops and a hinged shower door
Alcove shower - small contemporary 3/4 white tile and ceramic tile mosaic tile floor and brown floor alcove shower idea in Toronto with a console sink, flat-panel cabinets, white cabinets, white walls, quartzite countertops and a hinged shower door

 Qudsia Fatima
Putting up a sign in the yard and waiting for the right buyer to come along isn't always the easiest way to sell a house. The traditional process of selling your home can be slow, expensive and frustrating for many Springfield, OH homeowners. You may have to fix the house up, clean it out, show it, negotiate with buyers, wait for inspections, and hope the buyer's financing doesn't fall through. That can be a lot to manage, especially if you need to move quickly or work with a property that is no longer working for your situation.
That’s why many homeowners now look for a faster option. If you want to sell your house fast for cash in Springfield, OH, then working with a local cash home buyer like Sell House Now Columbus can be a practical solution. The company works with homeowners in Columbus, Springfield and other parts of Ohio, providing a direct cash-buying process that helps sellers avoid repairs, agent commissions, closing delays and unnecessary stress. They buy houses as-is, and offer a simple selling process and possibly help with closing costs, according to the company’s website.
Why Springfield, OH Homeowners Choose to Sell for Cash
Every homeowner has their own reason for desiring a quick sale. Some are relocating for jobs and don’t have months to wait for a buyer.” Others may have inherited a property they don’t want to keep up. Some houses need a lot of work and the owner may not have the time, money or energy to do it all before listing. There are also situations of divorce, concerns about foreclosure, bad tenants, unpaid taxes, or simply a desire to move on without the hassle of a traditional sale.
It makes sense to do a cash sale because it takes away a lot of the common roadblocks. Rather than waiting for mortgage approvals, appraisals, repair requests and lengthy negotiations, homeowners can receive a direct offer from a buyer who is ready, willing and able to purchase the property. At Sell House Now Columbus, sellers can request a fair cash offer and pick a closing timeline that suits them. The firm says homeowners can sell without agents, fees, repairs or cleaning, which can be a huge relief for anyone going through a stressful property situation.
Selling as is No repairs or cleaning
One of the biggest advantages of selling to a cash home buyer is the fact that you can sell the property as-is. This is good news because you don’t have to spend thousands of dollars on fixing the roof, replacing flooring, repainting walls, updating the kitchen, repairing plumbing or improving kerb appeal to attract buyers. Buyers expect the home to look clean, updated and move-in ready in traditional sales. Issues discovered during the inspection can force the seller to lower the price or pay for repairs prior to closing.
An as-is cash sale is a different process. The purchaser is taking the property “as is” and is offering based on the current condition. Sell House Now, Columbus, states that sellers are spared the hassle of repairs, daily showings and cleaning. They also say that unwanted items can be left behind and dealt with after purchase. This can save time and money for Springfield homeowners confronted with an older house, damaged property, rental cleanup or inherited home full of belongings.
No Real Estate Agent Fees or Hidden Commissions
When you sell your home, conventional real estate agents eat up a huge portion of your final proceeds through commission fees. You might have closing costs, staging costs, repair costs, inspection-related costs, photography fees and other costs that eat into what you actually walk away with. After deducting all expenses the final number is much lower than expected for some sellers.
A direct cash sale makes the numbers simple. “Sell House Now, Columbus says they don’t charge commissions and their process is designed to help homeowners avoid listing fees and agent-related expenses.” This provides sellers more clarity up front. Instead of guessing what the final payout might be after months of negotiations and deductions, you can review a cash offer and decide if it meets your needs.
Faster Closing Timeline for Springfield Homeowners
When you need to sell fast, time is of the essence. A traditional home sale can take weeks or even months, depending on market conditions, buyer financing, inspections, appraisals and negotiations. Once you’ve accepted an offer, there is always the risk that the buyer’s loan may be delayed or denied. Delays can add additional pressure to a homeowner who needs cash fast, who needs to stop paying taxes or utilities, or who needs to relocate soon.
Cash buyers are often faster than traditional buyers because they don’t rely on bank financing. Sell House Now Columbus says their process offers a competitive cash offer, a simple experience and Sellers can pick their closing day. That flexibility can be helpful if you need to close quickly or if you need extra time to make your next move. You don’t have to follow someone else’s schedule but can choose a plan that works better for your circumstances.
Who Can Use Selling For Cash?
Is your property stressing you out? Is it costing you money every month? If so then selling your House for cash in Springfield OH may be a good option. It can help homeowners who are behind on payments, tired of being landlords, dealing with code violations, handling probate property, in need of costly repairs, or just ready for a clean break. It can also be a benefit to those who do not live near the property and do not want to travel back and forth to manage repairs, contractors, cleaning and showings.
And the best part is you don’t need to have a perfect house. Cash buyers often see the property as an investment and are willing to do repairs after the sale. This makes it easier for sellers who are stuck with a dated, vacant, damaged, or otherwise hard-to-list property.
How it works
Generally, the process begins with a call to discuss the property in general terms. After reviewing those details, Sell House Now Columbus can assess the home and make a cash offer. If the offer interests you, you can pick a closing date that suits you. You don’t have to accept and the offer can help you explore your options before making a final decision.
This approach gives control to homeowners. You don’t have to go through months of listings, open houses, questionable buyers or last-minute repair demands. You can look at the cash offer and see if it solves your problem.
Summary
If you need to Sell your House fast for cash in Springfield, OH then a direct cash sale might be the easiest path forward. It gives homeowners a way to avoid repairs, agent commissions, delays and stress. Whether you’re looking to sell an inherited property, a damaged home, a rental you no longer want, or a life change that requires a quick sale, Sell House Now Columbus provides a simple option for homeowners that want speed and convenience.
Selling a house should be no more difficult than dragging a heavy box up hill. A good cash buyer can make the process a lot lighter, faster and easier to manage. If you are a homeowner in Springfield and want to get a fair cash offer and an easy solution, Sell House Now Columbus can make the next step a lot easier.
 SUPERIOR CHIMNEY SERVICES CORPORATION
The dryer vent. Who is thinking about cleaning the dryer vent when we clean them every time we do laundry, right? Let me share with you what I discovered this weekend. I spent some time outside this weekend trying to do two things at one time. 1. Enjoy some of the sunshine 2. Spring Clean.
Spring Cleaning
As Spring cleaning is well underway, it seems like the leaves never went away from the Fall. In every corner of the home, there’s a pile of leaves wet and stuck to the ground. However, on the back side of the home, the leaves made its way from one side to the other. I knew this was going to take a while.
As I reached the half way mark, I remembered that a family member was inside washing a load of laundry. I could hear the low sound of the dryer running. But wait…the flap is barely moving.
Dryer Vent Cleaning #1 Benefit
Let’s first discuss the #1 benefit of a dryer vent sweep. You get done with your laundry faster and your dryer unit lasts longer. If the dryer vent isn’t cleaned once per year, the hot moist air remains in the dryer and venting system. It takes longer for the dryer to complete its job. And…not very good for the life of your dryer unit either. Infrequent dryer vent service shortens the life of your dryer unit as it needs to work harder and longer to dry your clothes. The moist air can also get trapped in your clothes and leave a musty smell. All that work, and you’re right back where you started.
Dryer Vent #1 Problem to Solve
The issue of dryer vents is a real one. According to the National Fire Protection Association, about 13,000 home dryer fires are reported each year. 34% of those fires are caused by lint. Now that’s not to say that you don’t clean your dryer vent. You do. But lint has a mind of its own. Some light and fluffy lint gets past the lint trap and accumulates in the duct that leads to the outside.
More Problems with Dryer Vents
Because we want you to be fully armed with information, here are some additional problematic signs that can cause a dryer vent fire.
Clothes are too hot to touch. Remember, there’s a cool down before you take the clothes out. When that’s still too hot, that’s a sign the dryer vent is clogged.
The room with the washer and dryer, it’s also too hot.
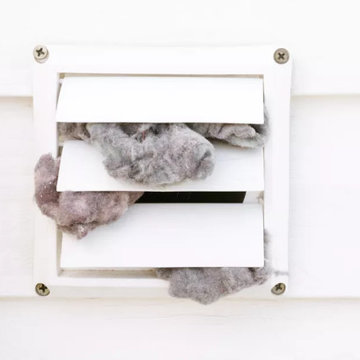
The dryer vent flap or slats outside isn’t working properly. If you also notice in the picture, lint and debris begin to make its way out of the slats or flap. That’s pretty full.
Smell the dryer sheet. If you notice it doesn’t smell like the dryer sheet, there’s a clog.
What Can a Homeowner Do?
To begin, to check your dryer vent outside. Is it working properly? Is there anything overflowing outside? Next, throw in a load of laundry. Does it smell musty? A little or a lot? Is the dryer overly hot in the cool down? Is it running longer than it used to?
If you get a slight yes to a full blown yes, then it’s time to get it cleaned by Superior Chimney. Give us a call at 877-244-6349 to schedule up your spring dryer vent cleaning. Smell like fresh spring!

 SabaRehman Abdulrehman
Phoenix's food scene is vibrant and thriving, but also one of the most closely watched in the country. Health inspectors in Maricopa County are strict, and customers expect spotless dining spaces.
To stay competitive, restaurant owners and food vendors must stay on top of evolving health codes, sanitation protocols, and food safety benchmarks. That starts with a firm grip on restaurant cleaning safety standards. Ignoring sanitation rules risks more than bad reviews. It invites citations, customer complaints, and operational shutdowns.
Whether you're operating a food truck or a restaurant, following these Phoenix cleaning standards helps you stay compliant, pass health inspections, and build customer trust.
Importance of a Clean Phoenix Restaurant that Follows Food Health and Safety Standards
The restaurant industry in Phoenix operates under strict oversight. The Maricopa County Environmental Services Department conducts regular inspections, and violations can result in fines or closures. In this climate, restaurant cleaning is not just a hygiene standard. It is a business-critical measure.
Proper food handling and establishment cleaning protocols reduce the risk of foodborne illnesses, control pests, protect equipment, and keep your staff safe. Inconsistent practices, on the other hand, can quickly become liabilities.
Start With the Food Code
Phoenix food vendors must comply with the 2017 FDA Food Code as adopted by Maricopa County. This includes rules on:
- Sanitizing food-contact surfaces after each use
- Maintaining proper water temperatures for dishwashing
- Cleaning restrooms frequently and keeping them stocked
- Storing cleaning chemicals away from prep areas
- Daily: Wipe prep tables, mop floors, clean grills, sanitize cutting boards
- Weekly: Deep clean kitchen hoods, polish cooking equipment, disinfect drains
- Monthly: Check pest control measures, clean freezer coils, and inspect HVAC filters
- Using the right sanitizers and PPE
- Logging cleaning times and who performed the task
- Identifying signs of mold, grease buildup, or rodent activity
- Conducting thorough surface cleaning to ensure all food-contact surfaces are sanitized regularly
- Food-safe and non-corrosive
- Effective against norovirus, salmonella, and E. coli
- Clearly labeled and stored in original containers
- Seal gaps around doors and pipes
- Store dry goods in sealed, elevated containers
- Keep outdoor waste bins locked and distanced from entry points
- Record cleaning completion in real time
- Alert managers when tasks are missed
- Keep a historical record for inspections
- Is certified and understands the Arizona food codes
- Provides documented service reports
- Offers customized cleaning plans
- Offers flexible scheduling around your operating hours
- Cross-contamination prevention: Regularly clean food prep surfaces and tools, and use separate equipment for raw meats, vegetables, and ready-to-eat foods. Proper cleaning prevents any contact with food that could lead to cross-contamination and affects food quality.
- Temperature monitoring: While not directly related to cleaning, maintaining proper food temperature is essential. Hot foods should be stored above 140°F, and cold foods below 40°F. Regularly monitor temperatures and clean temperature gauges to ensure accuracy.
- Proper storage: Use clean storage containers and shelving for food storage, keeping items off the floor. Ensure all food is sealed and labeled to avoid contamination risks and comply with food safety standards.


 The Little Design Corner
Esteban La Tessa
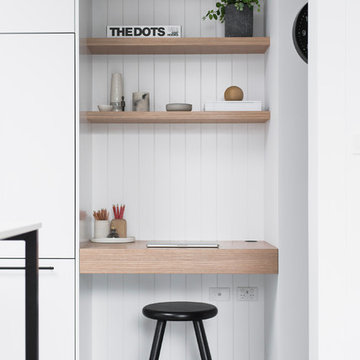
Example of a large minimalist built-in desk concrete floor and gray floor home office design in Sydney with white walls
Example of a large minimalist built-in desk concrete floor and gray floor home office design in Sydney with white walls

 tesa SE - International
Colourful squares: Who needs a rear wall if the area behind the open shelf cubes is painted in gorgeous colours?
HERE’S WHAT WE NEED:
Shelf cube without rear wall, pencil, wall paint in pastel colours, paint roller, tesa® Masking Tape PREMIUM CLASSIC 30 mm
AND THIS IS HOW IT’S DONE:
› Stand or hang the shelf cube where you want it. Trace the inside space of the cube shelf on the wall with the pencil. Remove the shelf.
› Mask the pencilled area on the wall with tesa® Masking Tape PREMIUM CLASSIC 30 mm.
› Use the paint roller to paint the area on the wall.
› Peel off the masking tape and place or hang the cube shelf in front of the painted area.
CUBOS DIFERENTES TAMAÑOS — natiram6
 Tile Doctor Ltd
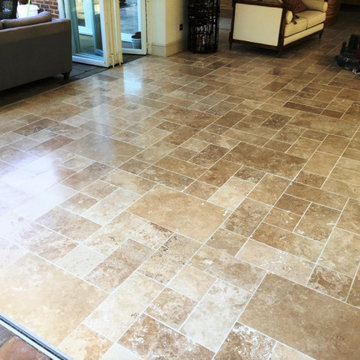
This property in Godalming had the whole downstairs floor tiled with Fired Earth Limestone tiles nine years prior and had never had it cleaned or maintained professionally. The once beautiful stone was now looking dull and the grout had turned black with dirt leaving the floor looking uninviting.
This is quite normal for stone floors as it is the sealer that protects the stone from dirt and enhances its look. Most sealers wear off after three to four years sealer and in this case after nine years it was well overdue a deep clean and reseal.
I visited the property to survey the floor. It was indeed looking in need of some attention and the kitchen was particularly bad. To restore the appearance of the Limestone tile and grout the floor would need to be stripped of what remains of the old sealer, then deep cleaned with attention to the grout, polished with burnishing pads and then finally resealed. I was confident I could get it restored to a nearly new finish and to prove it I completed a small demonstration clean which the homeowner was very happy with. They agreed to my quote and we scheduled in a couple of days to carry out the work.
On day one I started by cleaning the grout using a strong dilution of Tile Doctor Pro-Clean. its run along the grout line and then left to soak in for about ten minutes so it can get to work breaking down dirt and old sealer. The grout is then scrubbed using a grout brush which is then scrubbed backwards and forwards along the grout line until clean. The area is then rinsed with water and all the waste removed with a wet vacuum cleaner.
Next, I turned my attention to the Limestone tiles which needed stripping of any remaining sealer, cleaned and polished. I find the best way to do this is by apply a set of diamond encrusted Burnishing pads in sequence starting with a coarse 400-grit followed by 800, 1500 and finally finishing with an extra fine 3000 grit. Water is used to lubricate the burnishing process and the slurry is rinsed and extracted off the floor between pads. Each pad is run over the tiles three times, and it was a large floor so as you can imagine this process took most of the day.
I left the floor to dry out overnight and returned the next day to seal the Limestone. Before doing that, I reviewed my previous day’s work and I cleaned up any areas that needed further attention. Next step was to ensure the floor was dry as I don’t recommend applying a sealer to damp tile as you won’t get an even appearance, so before sealing a floor I tested for moisture using a damp meter.
To seal the floor, I applied two coats of Tile Doctor Ultra Seal which is an impregnating sealer that works by occupying the small pores in the stone to prevent dirt becoming ingrained there. Limestone is a light stone and most customers like that appearance so I find it best not to use a colour enhancing sealer as it can darken the stone. Ultra-Seal doesn’t contain any colour enhancer and leaves the floor with a natural finish whilst allowing the stone variations and patterns to show through.
Once the sealer was dry, I gave it a further polish with the 3000-grit pad which further brought out the natural beauty of the stone. My client was very happy with the floor, it really lifted the who area and the Kitchen in particular.
Rupert Mcleod
West Surrey Tile Doctor
 Tile Doctor Ltd
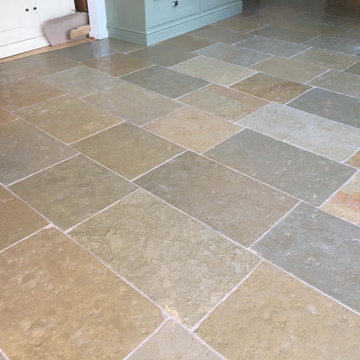
Laid six years ago at a house in Farnham this Sandstone tiled kitchen floor was routinely trampled on by two teenagers, gardening parents and two large dogs. All of this had taken its toll of the sealer which had worn off and without its protection the Sandstone tile and grout had turned an indistinguishable sea of brown.
The floor now needed a deep clean and reseal to restore it appearance and get it looking its best for which I had planned should take two days, the first day for cleaning and drying, the second for sealing and quoted accordingly. My client was happy with the quote and we scheduled a date to do the work.
Farnham is a market town in Surrey and is largest town in the borough of Waverley. It is quite a historic town, with many old buildings, including a number of Georgian houses. With good access links to the A3 and London by train its popular with commuters and I often get requests to work here.
I began by taping up the wooden skirting and the plinths in the kitchen to protect them from splashing during the work. Then armed with Tile Doctor Pro-Clean and a stiff brush I set about cleaning up the grout. The dirt released was removed with a wet vacuum before it had a chance to dry then using more Pro-Clean and a 17” buffing machine fitted with a rotating black nylon pad I cleaned the tiles.
The unamused dogs had been banished to the garden. I love dogs but they were chasing my machine around, so I needed to keep them out of the way. The floor tiles were surprisingly dirty, and the client was quite shocked by the amount of dirt I manged to extract.
Once finished I left the floor to dry off fully overnight, sealing a damp floor is never recommended and can result in a patchy appearance.
Returning the next day, I first checked for areas that needed further attention and then took several moisture readings with a damp meter to check the floor was dry. Satisfied that it was, I was ready to apply the sealer.
We had discussed choice of sealer previously and for this floor I had recommended a Tile Doctor sealer called Seal and Go Extra which would be ideal for her traffic heavy floor. Sealing is an important step as it protects the tiles and grout from dirt becoming ingrained in the stone and improves the look of the stone. Seal and Go Extra is also super tough and should last for years if cleaned with the right product. It sets with a subtle sheen but not a shine which she definitely didn’t want. Three coats of sealer were applied which takes around two hours to be dry to the touch but really needs 24 hours for it to cure.
The sealer brought out the variety of colours in the stone floor and the family were happy with their new floor, now they just had to keep the dogs out of the way for 24 hours!
For aftercare I recommended the use of Tile Doctor Neutral Tile Cleaner to keep the floor in great condition.
Rupert Mcleod
West Surrey Tile Doctor
 Tile Doctor Ltd
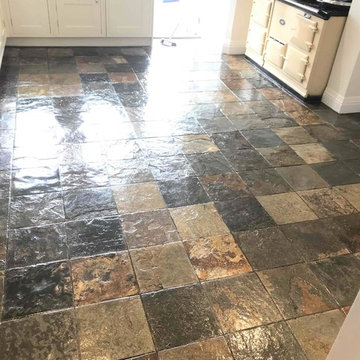
I recently completed the renovation of a Multi-Coloured Slate tiled kitchen floor in Sutton Coldfield. I was actually at the property before Christmas to survey the floor and quote for the work however the owners had planned to have a new kitchen installed in the new year, so we decided it was best for me to wait until after the installation to complete the work.
The slate was in good condition but like any stone floor you do need to maintain the sealer to prevent dirt becoming ingrained in the stone. Sealer do wear off overtime especially in the high foot traffic areas such as Kitchens and within a few years the tiles become dull and difficult to clean effectively.
The kitchen was installed on schedule and I got the call to arrange a visit to deep clean and reseal the floor which would take to two days, one to clean and one to seal.
To begin the restoration, I soaked the slate in a strong dilution of Tile Doctor Pro-Clean and left it to soak in for about ten minutes re-applying extra solution where it dried. Pro-Clean is a powerful tile cleaner that will strip old sealers when applied in concentrated form. I agitated the product using a black pad fitted to a rotary buffing machine. I paid particular attention to the grout which the customer had trouble keeping clean. The rotary pad struggles to reach into the recesses of the grout lines so I also made sure to scrub the solution into the grout with a grout brush.
Once I was satisfied that the Slate and the Grout was clean and clear of old sealers, I gave the whole floor a thorough rinse with water using a wet vacuum to extract the soil and get the floor as dry as possible. The floor was then left to dry off fully overnight.
Returning to the property the next day, I ran some quick damp tests to check for any excess moisture that might have prevented me from sealing the floor. We will always do this as excess moisture can affect the sealer curing.
The customer was very happy with the clean and the floor was dry, so we discussed sealer options to find out their preference for Matt or Satin finish. With the decision made to go with a Satin finish I began the application of the Tile Doctor Seal and Go which enhances the look of the stone with an aesthetically pleasing low-sheen finish, as well as providing on-going protection against ingrained dirt and staining.
A total of four coats of Seal and Go were needed to seal the Slate tiles and as you can see from the photos the sealer really put the life back into the floor.
Trevor Preece
Staffordshire Tile Doctor
 Tile Doctor Ltd
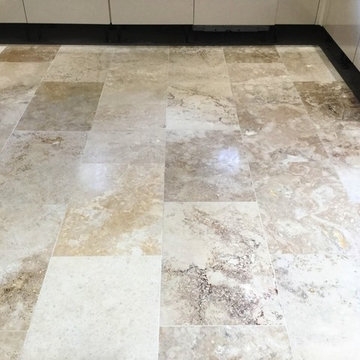
Travertine floor tiles are very appealing and very hardwearing, but without the protection of a sealer to stop dirt becoming ingrained in the pores of the stone their appearance will degrade. Fortunately, this can be remedied as demonstrated in these pictures of a Travertine floor I recently polished at a house in Weston Favell, Northampton.
This owner of the property had called me out as their kitchen floor was looking very sorry for itself and he was concerned that a lot of holes were appearing which was making cleaning the floor difficult as dirt was getting trapped in the holes. I went over and carried out a test clean on two separate tiles in the kitchen and the customer was amazed at how clean they came up and especially the grout.
The kitchen was stunning, but unfortunately the state of the Travertine tiled floor was bringing down its overall appearance. Impressed with the test clean they were keen to get the whole floor renovated so we agreed a price and I scheduled the work in for the following month.
I returned on the agreed data and made a start by protecting the kitchen units by removing the plinths and covering base units and the appliances with a protective film. We then commenced the cleaning process to remove surface dirt by cleaning with Tile Doctor Pro-Clean paying special attention to the grout lines. The holes in the Travertine were filled with a stone resin, mixing it to closely match the colours of the stone.
The resin was allowed to dry before starting to re-polish the Travertine using a set of Tile Doctor Diamond encrusted burnishing pads. These pads are applied individually to each tile in sequence starting with a coarse 400-grit pad before moving onto the 800-grit and finishing with the fine 1500 grit pad. A little water is used to lubricate the process along the way and the floor is rinsed in between each pad with the resulting residue extracted from the floor using a wet vacuum. The process takes some time, but it really brings up the polished appearance of the stone and the results are well worth the effort. After a final rinse the floor was inspected and then left to dry off fully overnight.
When we returned the next day, the floor had dried, and we were able to give the floor a final polish with a very fine 3000-grit burnishing pad applied with a little water sprayed onto the tile. Finally, the floor was then sealed with two coats of Tile Doctor Ultra-Seal which provides excellent protection without changing the colour of the stone to provide a natural look.
The client was over the moon with the outcome and surprised at the improvement. They were left with a floor that would be easy to clean and maintain.
Phil Vissian
Northamptonshire Tile Doctor


 Tile Doctor Ltd
This detailed Victorian tiled hallway at a property in Camden was overdue some much-needed repair and maintenance. The owners of the property appreciated that original period features like this add a lot of value to a property and asked me to visit the property to quote for renovating it. The property was in a terrace of similar properties most of which appeared to have retained their Victorian character.
I inspected the floor and found there were a couple of loose, cracked, worn and broken tiles that needed to be replaced. In addition, the floor tiles needed a deep clean and then seal to bring back the wow factor. I was confident we could renovate the floor but at that point unsure if we would be able to find exact match replacements for the damaged tiles. Fortunately, Victorian tiles are still in demand and I knew of several companies I could check with so I was confident they could be found.
We discussed how long the work would take and assuming I could source the replacements agreed a price for the full restoration of the floor. After doing some research I managed to find suitable replacements with a company called Original Style and the work was scheduled for the following month.
Firstly, we prepared all areas with protective tapes to threshold edges and skirting.
This was followed by spaying the tiles with a strong dilution of Tile Doctor Remove & Go which is product designed to remove old sealers and coatings. After about ten minutes the tiles were scrubbed with black scrubbing pads and scrubbing brushes. Fresh water was used to rinse the floor and the slurry was extracted using a wet vacuum.
The floor was inspected and then a second clean carried out, this time using Tile Doctor Pro-Clean which is a Tile and Grout cleaning agent. The same process of application was used and after rinsing and extracting the dirt the tiles were given a steam clean. This ensured all the dirt was lifted out of the pores of the tile and the floor was now as clean as it possible could be.
The next step was the remove the loose and cracked tiles using the reclaimed tiles we had sourced earlier. Some cuts were necessary to get the replacements to match the originals but overall the plan worked. A quick drying adhesive was used to secure the tiles so we could apply the grout shortly after. The whole floor was then re-grouted and cleaned off to ensure a good match. The floor was left to dry off overnight, and you could already see it was now looking considerably improved.
Returning the next morning we checked the floor was dry using a moisture meter, this is important as to apply a sealer to damp tiles will lead to a patchy experience. All was well so we were ready to apply the sealer.
To start a single base coat of Tile Doctor Colour Grow sealer was applied to the floor and left to dry. This sealer is an impregnator that protects from within by occupying the pores in the clay tile improving colour in the process. This sealer does leave a matt finish however and the client wanted a subtle shine so one dry it was followed by four coats of Tile Doctor Seal & Go. The combination of the two sealers works really well to add long lasting protection to the tiles and provide the desired finish to the floor.
The floor was much improved, and the client was delighted. The detailed pattern and colours were now much more prominent, and the hallway looked much more inviting for both the owner and their guests. For the aftercare of Victorian tiles, I recommended the use of Tile Doctor Neutral Cleaner which is pH neutral and won’t prematurely erode the life of the sealer.
Nigel Voyce
North London Tile Doctor
 Tile Doctor Ltd
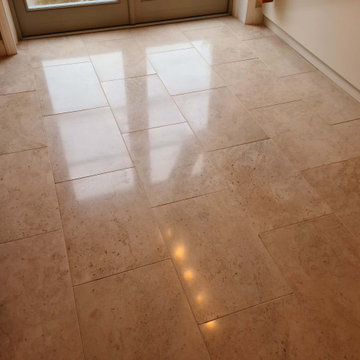
I recently went to survey a floor in Harrogate which I immediately recognised as beige Moleanos Limestone which comes from Portugal. If you have been reading my previous posts you will remember I am not a fan of this type of stone as it is very difficult to clean, polish or seal. This particular floor was laid around 5 years prior and was now looking quite dull and was in need of reviving.
The client didn’t want to spend much so l suggested l could spray burnish the floor to get her shine back again and remove the splash marks. We do this a lot for owners of polished stone floors as part of an annual maintenance package, it is a low cost option that uses a very fine 3,000 grit burnishing pad to renovate the stone and bring up the shine. However, I pointed out to her that this process wouldn’t clean her grout which was making her floor look scruffy.
I priced up the different options and after weighing up the quotes I’m pleased to say she decided to go for a full clean and seal. The full process involves the use of different grades of diamond encrusted burnishing pads from low to very fine grits to renovate the Limestone and also a chemical clean of the grout followed by a fresh seal.
I returned on the scheduled date and after preparing the floor I started cleaning the Limestone by running over the tiles with a 400-grit coarse burnishing pad lubricated with water. The soil was rinsed off with more water and extracted with a wet vacuum. This process was repeated with the 800 and 1500-grit pads which starts to build-up the polish on the stone.
I then turned my attention to the grout with a strong dilution of Tile Doctor Pro-Clean which was left to soak into the grout for ten minutes before scrubbing it by hand with a stiff brush. After a final rinse and extraction with the wet vacuum the tile and grout were looking much cleaner and was left to dry off overnight.
On Day 2 I stated with the application of the 3,000-grit pad which is the last step in the polishing processed and builds up a lovely satin finish on the stone floor. This is done using only a little water and is basically the spray burnish technique I referred to earlier. This process has the added advantage of leaving the floor dry.
With the stone tiles looking lovely and the grout clean the last step was to seal it all in and protect it from dirt and future staining with the application of a sealer. For this I used two coats of Tile Doctor Ultra Seal.
My client was very pleased she had spent the extra money to achieve the floor she had always wanted, apparently it had never looked this good even when new. We discussed the annual maintenance plan to ensure the floor remained looking this good.
Nigel Stoker
North West Yorkshire TIle Doctor
 Tile Doctor Ltd
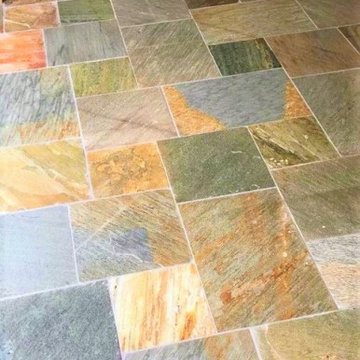
The tiles pictured are Chinese Slate which were laid in the Kitchen of a house in Chepstow around nine years ago. The town of Chepstow is located on the Welsh side of the River Seven and has the River Wye running through it.
The floor had not been professionally cleaned and sealed since installation. During this time the old sealer had mostly worn off allowing dirt to get into the pores of the stone leaving it looking dull, uninviting and dirty. The grout lines had also collected dirt and many of the lines had darkened.
I discussed with the client the process to get the floor cleaned and restored and demonstrated the effectiveness of the process on a small test area. They were impressed and were happy to go ahead with my quote, so we scheduled in the work which would take two days.
To get the floor clean and remove what was left of the old sealer I first made the floor wet and then added a strong dilution of Tile Doctor Pro-Clean mixed with Tile Doctor Remove and Go to give it extra power. This cleaning cocktail was left to soak into the tiles for ten minutes before being scrubbed in with a black scrubbing pad fitted to a rotary machine and by hand where necessary. This combination works well on really dirty floors such as this.
The scrubbing action released the years of dirt from the pores of the Slate and it wasn’t long before the cleaning solution turned black. This was then extracted off the floor using a wet vacuum. We then gave the floor a thorough inspection. There were one or two areas that were particularly stubborn, so these areas were retreated using the same process and the grout scrubbed by hand using more Tile Doctor Pro Clean.
The floor was then given another rinse with water and then dried as much as possible with the wet vacuum. This got the floor dry, but it would need to be completely dry before sealing so it was then left to dry off fully overnight.
I came back the next day to seal the floor first checking the moisture level of the stone by taking readings with a damp meter to ensure it was dry. I chose to use Tile Doctor Colour Grow for the sealer as the colour enhancing formula would be the best product to bring out the natural colours in the Chinese slate. Colour Grow is an impregnating sealer which will provides durable protection as well as allowing the surface to breath. Three coats were applied, allowing each to dry before applying the next one.
The client was so happy, so much that she said it looked better than when first laid!
I discussed aftercare with her and recommended the use of Tile Doctor Neutral Tile Cleaner, it’s pH balanced so it won’t prematurely erode the sealer which can be the problem with stronger products you find in supermarkets. It comes in concentrated form so one bottle lasts a long time.
Paul Wales
Monmouthshire Tile Doctor
 Tile Doctor Ltd
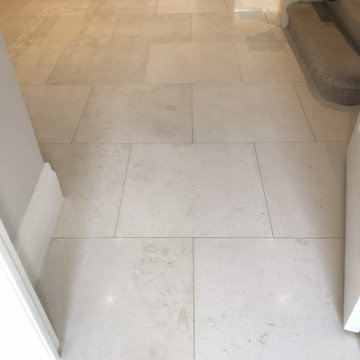
This client from Highgate in North London, N6 contacted us about their large honed Limestone tiled floor that was installed throughout the ground floor. It had been laid seven years prior and was now grubby and in need of a deep clean and seal including the grout which had turned black with dirt.
I visited the property to survey and assess what was required and provided the owner with a quotation for the renovation. The hallway pictured was in the worst condition, it was a busy house with young children and dogs and over the years the sealer had worn down leaving it vulnerable to ingrained dirt. Without a sealer to protect the stone it had become heavily soiled and lost its original polished appearance.
Happy with the quote we scheduled a date for the work to go ahead. The quote included deep cleaning and burnishing the stone to bring back the polish, grout cleaning and re-sealing the Limestone to protect it.
We arrived on the first day and prepared the area by taping up the skirting and woodwork to protect them from potential splashing. Next step was to burnish the floor using a set of Tile Doctor Diamond Burnishing Pads, specifically the 400, 800 and 1500 grit pads fitted to a rotary machine, these were used in sequence running each pad over the tiles several times with water to lubricate the process. The water turns into a fine slurry as pores in the stone are opened and the dirt is released, the slurry is rinsed off with more water and extracted using an industrial wet vacuum after each pad. The finer 800 and 1500-grit pads slowly close the pores and refine the appearance of the stone building up the polish in the process.
A strong dilution of Tile Doctor Pro-Clean was then applied to the grout lines, leaving it for a short while to soak in and then hand scrubbing with a grout brush. The dirty cleaning solution and were then removed from the floor with the wet vacuum.
This process was repeated across the different sections of the Limestone floor until I was satisfied with its appearance. Before leaving for the day, I rinsed the floor again using a buffing machine fitted with a brush fitted to give it a final clean. The floor was dried as much as possible using the wet vacuum and then allowed it to dry off fully overnight.
The following day the final 3000-grit pad in the four-pad set was applied to the floor to bring up the polish even further. The pad is applied dry with only a little water sprayed onto the tile. We call this process a “Spray Burnish” and as well as leaving the floor nice and dry ready for sealing it adds a nice subtle shine to the stone.
The floor was then sealed with two coats of Tile Doctor Colour Grow sealer. This is a colour intensifying impregnating sealer that works by occupying the pores in the stone so dirt cannot become ingrained there. It will provide durable protection and make the floor much easier to keep clean. It worked well on the pale Limestone and beautifully enhanced the colour and features in stone. Once complete the floor looked brand new again.
I left a complimentary bottle of Tile Doctor Stone Soap with the client and gave them some information about how best to maintain the floor. This product is pH neutral and cleans whilst maintaining the patina on the stone helping to keep the floor in great condition.
The client was delighted with the result and left us a great review.
“Andrew is excellent and gets on with the job and we got a fantastic result. Highly recommend. By Aaron S, Highgate, 15 March 2021”
Andrew Newstead
North London Tile Doctor



 Lorenas Cleaning Services
Employee Background Checks Each of Lorena's Cleaning Service’s cleaning technicians are rigorously vetted to insure your satisfaction and safety. Built On Trust Our cleaning technicians show up on schedule or contact you if a schedule change is needed. We take pride in having a reputation for excellence. Our clients are like family to us.
 Tile Doctor Ltd
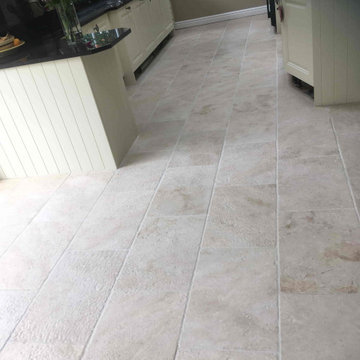
This client from Nantwich had a beautiful Travertine tiled floor installed in their very large kitchen and utility area. Realising that their tiles didn’t look as good as when they were installed, they got in touch to ask if I could clean and re-seal the tiles and grouting.
I went over to survey the floor and could see the grout had darkened (it was originally white) and the travertine was trapping dirt in the natural pits of the stone. I conducted a test clean on the grout and Travertine which responded well, the client was impressed, and I was asked to do the whole floor. Happy with my quote for restoring the tile and grout we scheduled a date to do the work.
Nantwich is a medieval market town in Cheshire, well known for its Tudor and Georgian architecture. It has one of the highest concentrations of listed buildings in England and many of these properties have very old floors.
We scheduled in a date for the work, and I began by cleaning the floor with a strong solution of Tile Doctor Remove and Go worked into the grout and pitting with hand brushes. I then used a wire brush on the grout to get it really clean. The soiled solution was rinsed off with water and extracted with a wet vacuum.
Once done the Travertine was burnished using a series of Tile Doctor burnishing pads from 400 through to 1500-grit attached to the rotary machine, rinsing with water in between to remove the soiling. The pads are encrusted with diamond and after being worked over each pad three times do an amazing job of removing ingrained dirt and bringing up the polish on the stone.
The floor needs to be dry before I can apply the sealer so once the burnishing was done, I gave it a final finish and extracted as much moisture as possible with the wet vacuum.
The Travertine was left to dry off overnight and I returned the next day to apply a sealer, first checking the floor was dry with a damp meter. The readings were acceptable, so I was able to get on with the sealing. My client had requested a natural finish, so I had recommended Tile Doctor Ultra-Seal which is almost invisible sealer that provides protection but doesn’t change the look of the stone. Only a couple of coats are required and being an impregnating sealer, it works by soaking into stone and occupying the pores so dirt can’t become ingrained there.
Once the sealer had dried the floor looked so much cleaner and I had a very happy customer who left the following feedback:
“Kamilla has totally transformed our tumbled travertine kitchen floor. It looks like new again, we are so pleased. Kamilla explained the whole process and was a pleasure to deal with. We are delighted with the end result, Kamilla worked so hard, would highly recommend.”
For aftercare cleaning and maintenance, I recommended they use Tile Doctor Stone Soap which is pH neutral and mild enough to use every day. You must be careful when choosing a cleaner for sealed floors as many products are too strong and will reduce the lifespan of the sealer.
Kamila Logonzy
East Cheshire Tile Doctor
8