
Search results for "Scrapers" in Home Design Ideas


 Tile Doctor Ltd
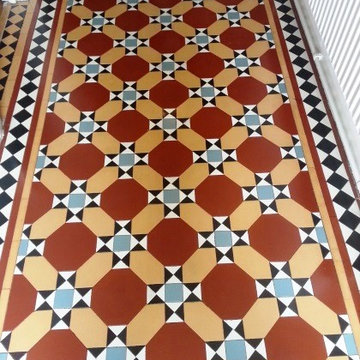
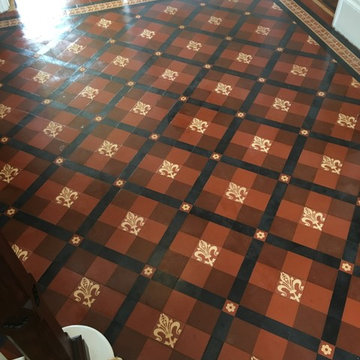
We were asked to restore a beautiful geometric Victorian tiled floor. The property had been used as a letting house and the floor had been used and abused for many years, just given an occasional mop over from time to time.
The new owners wanted to revive the colours and deal with the neglect. Step one was to put down the tile doctor pro clean alkaline cleaning solution and to let it dwell for a period of around twenty minutes.
We gave the solution plenty of dwell time before setting up our low speed rotary machine, underneath it we used a black pad to agitate and help loosen the ingrained dirt.
Once completed we set up our powerful rinsing tool which is attached to a machine fixed into our van, by doing this we do not need to dispose of any dirty water on your property but instead we take it away with us and dispose of it in the proper manner in an appropriate disposal point.
After rinsing the floor came up very well but we still felt it could be better, we used a steamer coupled with HBU Nanotech and a scraper to remove various deposits of paint and other sticky residue which had set over time.
After thoroughly rinsing the floor again we left the floor to dry for 4 days, Victorian tiles along with other earth based tiles are very absorbent and need to dry thoroughly and fully.
On our return we tested for damp ensuring the floor was dry enough to seal.
To seal the floor we used two coats of colour grow impregnating sealer, once the sealer had dried we then began sealing the floor using seal and go.
After applying several thin coats of seal and go, the floor reached the desired appearance.
A combination of Pro clean, hbu nanotech, colour grow and seal and go with a little bit of care from your local tile doctor restored this old uncared for floor back to the prime of its life.
Find the right local pro for your project
 Tile Doctor Ltd
During an inspection for alteration work, this customer from Cheshunt discovered what appeared to be an original encaustic tiled floor under the hallway carpet. Keen to work out what it was, and have it restored, I was asked to pop round and look.
I went over as requested to survey the hallway floor and confirm their suspicions. The carpet had been secured with gripper rods glued onto the floor and that came away easily enough. Underneath, the tiles had been covered with self-levelling cement which had to be carefully scraped away to reveal the tiles.
I ran a test to see if the cement leveller could be easily removed and using a combination of a scraper with Tile Doctor Pro-Clean, I was able to confirm the tiled floor was indeed salvageable. The house was Edwardian, and the tiles had been laid in a classic black and white geometric pattern typical of the period so I suspect the floor was indeed original.
I worked out a quote to restore the whole floor including the removal of the cement, deep cleaning and then sealing the tiles. Without removing all the cement, it would be difficult to price for replacing broken tiles, but I suspected there may be a few as its quite usual for a floor of this age. Keen to have the floor restored we were given the go-ahead and a date scheduled for the work to start.
The first step was to remove all the carpet and gripper rod so we could see the full extent of the self-levelling screed. Once done it was a case of carefully chipping and scraping away to break up the cement until the tiled floor had been fully revealed. Its slow and detailed work but quite rewarding when the tiled floor is finally revealed. The tiles had survived well under the carpet and cement but as suspected a few repairs and replacement would be needed.
With all the cement brushed away work moved onto cleaning which started with a strong dilution of Tile Doctor Pro-Clean applied to the floor and left to soak in for fifteen minutes the scrubbed in with a rotary machine fitted with a Black pad. A lot of soiling is generated from this which is rinsed off with water and extracted with a wet vacuum. The floor was then inspected and the process repeated where required.
The next step was to treat the tiles to an acid wash using Tile Doctor Grout Clean-up. This is applied as before and has several benefits including dissolving the remaining cement residue and neutralising the pH of the floor after the use of Tile Doctor Pro-Clean which is a strong alkaline.
The floor was then inspected and the broken tiles carefully removed so they could be replaced. This is delicate work as lifting a tile can sometimes upset its neighbour and before you know it the size of the work has tripled. Replacement tiles were then cut to fit the existing geometric pattern and secured into place with a rapid set adhesive and grouted in.
Once the replacement tile and grout had set, the floor was given a light clean using Tile Doctor Neutral Tile Cleaner and then left to dry out overnight.
The next day the tiles were sealed using a single coat of Tile Doctor Colour Grow and the followed up with give coats of Tile Doctor Seal & Go. Colour Grow is an impregnator that soaks into the pores of the tile protecting it from within and improving colour, where as Seal and Go adds a nice subtle sheen to the tiles. Both products are breathable which is an important feature with old floors that don’t have a damp proof membrane.
For aftercare I recommended Neutral Tile Cleaner which is a gentle but effective tile cleaning product that won’t damage the sealer.
Robert Voyce
Hertfordshire TIle Doctor
 Tile Doctor Ltd
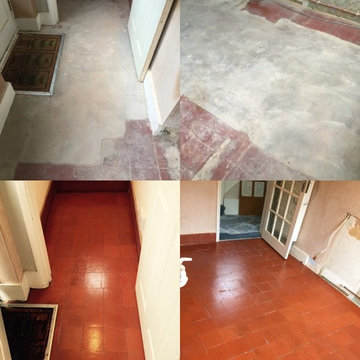
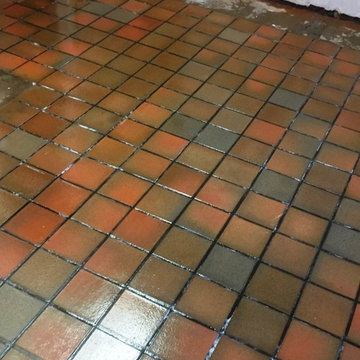
This customer from Woking had a Quarry tiled kitchen floor that she simply didn’t think could be restored. The floor had been unearthed after many years of being covered by a layer of levelling compound cement and then linoleum. Indeed, the situation certainly looked dire, but I carried out a successful test clean on a patch of the floor where the cement was at its thickest to show that it would be possible to conduct a full restoration. Having seen the results, the customer was more than happy for me to get the work underway.
To begin the restoration, I soaked small sections with water and Tile Doctor Remove and Go our heavy duty coatings remover. The solution was left to dwell for a short period to soften the cement, before I used the heat from a steamer in combination with a hand scraper to begin lifting away the muck. As you can probably imagine, this was an arduous and intensive process which took a full four days to fully complete.
Next, I cleaned the cement-free tiles using our high alkaline tile cleaning product Tile Doctor Pro Clean diluted 1 part cleaner with 3 parts water. This helped to eradicate the leftover muck once I had removed the bulk of the cement. I then sprayed Tile Doctor Grout Clean Up onto the grout lines and tiles to fully neutralise them and also remove any cement residue. Finally, I steamed the floor and left it for a week to dry out completely.
Upon my return to the property I sealed the floor with two coats of Tile Doctor Colour Grow, an impregnating sealer which really enhances the natural colours stone, and four coats of Tile Doctor Seal and Go, a topical sealer which provides a high quality sheen finish and durable protection against stains.
The customer was over the moon with the results and left some great feedback:
“Wayne did a really superb job. It was a very tough task, hot and exhausting, but he was fantastically good-humoured throughout, and kept me really well-informed. He was 100% reliable and very good at communicating between visits. I’m absolutely thrilled with the results! Thank you Wayne and thank you Tile Doctor! Would definitely recommend, and use your services again.”
 Tile Doctor Ltd
It’s always a great surprise to find old tiled flooring hidden underneath carpet or linoleum which appears especially common with 19th century properties where it’s not unusual for the owners to uncover fantastically patterned, original Victorian tiled floors and, naturally, they want to restore them to their former glory. If you have a property of this type you might want to look under the carpets.
The majority of the time, however, these tiles have been covered up for decades, allowing for thick layers of muck to build-up and are invariably damaged carpet grippers, surface glue and adhesive tape.
This was pretty much the case with this customer who lives in the town of Warminster and was keen to have her own newly discovered Victorian hallway brought back to life, and called me down to see what could be done. Upon arrival at the property, I determined that the tiles would definitely require a very deep clean, including the remove of numerous glue stains, followed by the application of a new seal.
Before I could begin the deep cleaning process, I needed to remove the carpet grippers and surface glue, attempting to remove as much as possible by hand using a scraper.
For the particularly stubborn areas, I applied Tile Doctor Remove & Go, a powerful stripper specially designed to break down adhesives and solvents, and left it to dwell for 20 minutes to eat through the glue deposits. I then attached a black pad to a rotary machine and scrubbed the area thoroughly to clean the affected areas, before removing the resulting slurry using a wet vacuum and rinsed with clean water.
Once I was satisfied that all of the glue had been removed, I proceeded to soak the floor using a solution of the high alkaline cleaner known as Tile Doctor Pro Clean. This is a versatile product that can be used on a wide range of natural stone floors to deal with heavy soil build-up.
I left the Pro-Clean to dwell for ten minutes, and then scrubbed it into the tiles to remove the ingrained dirt and also to break down any old and ineffectual seals. The floor was then once again rinsed thoroughly with clean water which was then extracted using a wet vacuum before being left to dry for a couple of days.
Upon our return to the property I immediately tested the floor for damp using a damp meter. This is an extremely important test to carry out before sealing any kind of tiled flooring, due to the fact that excess moisture left over from cleaning can cloud the sealer and damage its ability to protect against dirt and stains.
Thankfully, the damp test revealed no excess moisture, and I was able to proceed with sealing the tiles. My choice of sealer was Tile Doctor Seal and Go, a water-based topical sealer that simultaneously provides both a stain resistant surface seal and a durable and aesthetically pleasing low sheen finish, also being water based it doesn’t give off a smell as it dries.
This is a very cost effective product that is highly suitable for use on Victorian and Quarry tiles, I applied five costs to achieve the desired finish.
The customer was very pleased with the final results. It’s always satisfying to restore original Victorian tiled floors to looking their best once again – and this one was no exception.
Stuart Ford
Wiltshire Tile Doctor
 Tile Doctor Ltd
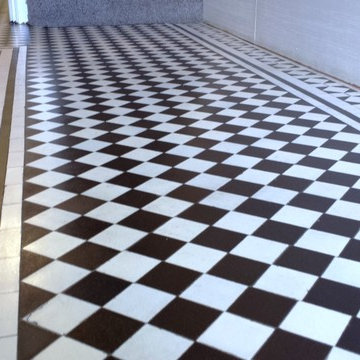
Sometimes you survey a job and you know that if you get the chance to restore it the results will be totally fantastic! This was the case with this Victorian black & white chequer tiled floor in the hallway of a large terraced Victorian house in Cardiff which dated back to around 1900 and was now looking well past its best, I know this because my family used to live in the house opposite. It was a well laid floor with no readings of dampness; I believe it’s imperative you check a floor for dampness before starting so you know what the baseline damp level is and which sealers will work with the floor.
My first action was to hoover the floor and then scrape as much debris off the surface as possible, and then as always I mixed 50/50 Tile Doctor HBU (Heavy Build-Up) remover with Pro-Clean and on this occasion because I wanted the white tiles to become really white I added the same amount of Tile Doctor Grout Clean-Up. This special recipe created a very formidable and strong cleaning solution which is what the job called for. I swept it over the whole floor letting it soak in for about ten minutes and then worked it into the floor using a scrubbing machine fitted with a coarse black pad adding more of the solution to the floor where it was drying out as I went.
The next step was to rinse the floor twice with water and extract the now filthy cleaning solution using a wet vacuum. At this point I inspected the tiles and I could see there were still a few stubborn areas with spots of paint and glue which I addressed with a decorators steam plate together with a scraper and hand held scrubbing pad.
I was now happy that the floor was clean and ready to be sealed, before sealing though it’s important to remove any trace of cleaning solution as it may contaminate the sealer so I gave the floor a thorough rinse and extracted as much of the water as possible to reduce drying times.
I left the floor to dry for 48hrs before coming back to seal the tiles taking a reader on my damp meter first to establish they had indeed dried out. To seal the floor I used eight coats of Tile Doctor Seal & Go which really works well on Victorian tiles and in this case made the whites really stand out.
The customer wanted this floor to look good because they were selling the property and were due to have an open day. The clean tiles really gave the house the wow factor and period features are so desirable these days so I don’t think it will take long to sell.
 Tile Doctor Ltd
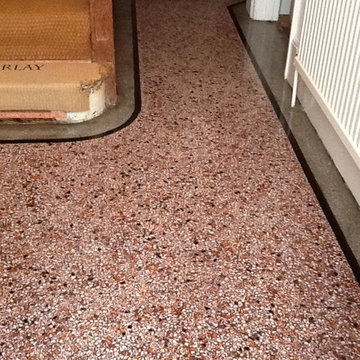
This Terrazzo tiled hallway at a property in Northampton was in a really bad state. It was heavily soiled and suffered from glue marks where the original carpet covering it had been removed. Additionally, there was some damage to the edges of the doorway, and a large crack in the floor running across the width of the hallway.
Terrazzo is an interesting material, originally produced in Italy, that consists mainly of concrete with segments of marble and other stone interspersed and held together with a resin. Since Terrazzo is formed in this way, I explained to the customer that I would fill the crack along the floor and the small holes around the edges with concrete, before then using tile paint to match in the colours as best as possible. This would be the most cost-effective solution, which was ideal since the customer had a limited budget for the repairs.
Before beginning the restoration, I tested a small area using a diamond encrusted burnishing pad, thereby giving the customer an indication of the type of results that could be achieved. With the customer pleased by the results, the job was booked in for the following week.
To begin, Tile Doctor Remove & Go was applied to the floor and was left to dwell for ten minutes to soften the carpet glue and break down any old sealer. This was then scrubbed in to the tiles with a pad fitted to a rotary machine. To remove the remaining residue and marks in the particularly stubborn areas, I used a manual hand scraper. The entire floor was then wet vaxed to soak up the soiled cleaner and leave the area clean for burnishing.
This was followed by the use of Tile Doctor diamond encrusted burnishing pads to polish the tiles, starting with a coarse grit pad, followed by wet vaxing and repeating the process with a medium grit pad and finally the fine grit pad to achieve the desired effect. I then installed a turbo dryer to dry the floor.
I returned to the property once the floor was dry and carried out the repairs which had been discussed earlier with the customer (filling the holes and cracks in the floor with concrete), cleaning off any concrete residue before I finished for the day.
Upon my return to the property the next day, I refined the polish on the floor even further by applying the extra fine grit burnishing pad.
To finish off the three day restoration, I sealed the Terrazzo tiles using two coats of Tile Doctor Colour Grow sealer. As an impregnating sealer, Colour Grow soaks into the pores of the stone, protecting it from ingrained dirt. Colour Grow also contains colour intensifying properties, allowing it to enhance the naturally occurring shades in the stone, and therefore stopping it from appearing dull.
This floor certainly was in a bad state, with damage as well as dirt to deal with, but I’m pleased to say that the work went a long way in transforming its appearance, leaving a very happy customer.
Phil Vissian
Northamptonshire Tile Doctor
 Tile Doctor Ltd
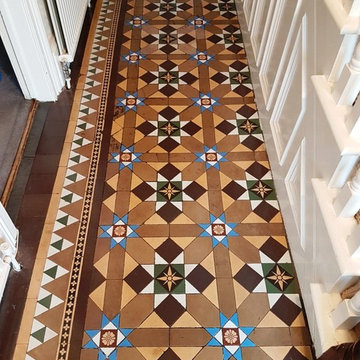
Shipley is a town in West Yorkshire that was heavily shaped by the Industrial Revolution and the Victorian period. It became particularly well-known for its textile industry and some of the original mills in which textiles were manufactured still survive in the town today. Being in West Yorkshire, Shipley is also part of what is commonly known as ‘Brontë country’ – once home to the famous Brontë sisters.
Many Victorian era properties still survive in the area too and all too often the original Victorian tiled floors contained within are not well maintained. I recently visited a customer in Shipley who had a Victorian tiled hallway that was in need of a deep clean and seal. What’s more, the customer told me that there were around 20 loose tiles in the hallway that would need to be reinstalled.
On the first day, I started by refitting the 20 loose tiles in the hallway. The problem however was a lot worse than originally thought and, in the end, I had to take up 108 tiles, so I could rebuild the base of the floor, and then relay them. This process took up most of the day but at least the adhesive and grout would be set in time for cleaning the next day.
On day two I focused on deep cleaning the tiles and removing any remaining sealer by applying a strong dilution of Tile Doctor Pro-Clean. Pro-Clean is a strong alkaline heavy-duty tile and grout cleaner that serves the purpose of both cleaning the stone and when used in a strong dilution will strip off sealers.
I applied the Pro Clean liberally across the length of the hallway and left it to soak into the tiles for about twenty minutes. This allows the product time to breakdown the sealer and dirt before being scrubbed in with a black scrubbing pad.
Special attention had to be paid to parts of the floor which had suffered paint splashes from previous decoration. I was also surprised to find that there were even some chewing gum stains marking the tiles. These were removed using the combination of a steam cleaner, more Pro-Clean and the careful use of a handheld scraper.
The floor was then given a thorough rinse with fresh water and then dried as much as possible with a wet vacuum. It was then also left to dry off overnight.
Upon returning to the property the next day I checked for any moisture issues with a damp tester. Thankfully, the floor proved dry and I could proceed with sealing the tiles which was done using four coats of Tile Doctor Seal and Go that leaves a deep satin finish that the customer had requested.
Nigel Stoker
North West Yorkshire Tile Doctor
 Tile Doctor Ltd
This customer from the historic city of Cardiff was keen to see what Tile Doctor could do to put some life back into their treasured Limestone kitchen floor that was laid in 2008. My first observations were mainly centred on the horrific condition of the surface which although adequately sealed initially the floor had not received any subsequent maintenance and its condition had deteriorated over time. The light shining in from the patio doors highlighted all the imperfections in the floor caused by surface wear and tear commonly seen in high traffic areas such as a kitchen.
Upon closer inspection, there were further problems: the floor was stained and scuffed, and in most places the sealer had worn off completely allowing the dirt to become ingrained into the pores of the Limestone. Additionally the grout was recessed but was now flush with the tile surface due to dirt build-up. There were also areas contaminated with grease and kitchen cooking oil.
The Limestone floor tiles were 20mm thick French Limestone, and had been laid very well so there was no requirement to do any tile or grout repairs however to get this floor back to its original condition the surface would need to be reconditioned using the Tile Doctor four stage burnishing system.
I started by giving the floor a wash with a medium dilution of Tile Doctor Pro-Clean, focusing mainly on the grout lines in order to remove the muck that had built-up there. I used a special stiff grout brush for this activity; it’s quite narrow and ideal for grout scrubbing.
This worked well, but the significant build-up of dirt along some of the grout lines meant more work was required. I tackled this problem with a hand scraper assisted with steam. At the end of this process, the whole floor was then rinsed down with water to remove any soil and the resulting slurry was then extracted using a wet vacuum.
The next step was to start the burnishing process, which basically involves applying four diamond encrusted floor pads in sequence over the floor. Each pad is a different grade, starting with the most abrasive coarse pad and moving through to the finer grades using a little water to lubricate and rinsing away any slurry between each pad.
I eventually finished with the extra fine pad which builds up shine and lustre on the tile; it had taken two days to clean the grout and burnish the Limestone but the floor was much improved and so after a final rinse down I left the floor to dry off overnight with the aid of the underfloor heating.
During this time, I also addressed the stained Limestone in the area of the kitchen where the dustbin was situated. This had been a major upset for the customer and I’m happy to report I managed to deal with it. However, it was quite an involved process, so I’ll write about this in a separate post.
On the third day I came back to seal the floor, checking first that it had dried sufficiently with a damp meter. Fortunately, the underfloor heating had done a great job of drying the stone and I was able to seal the floor using three coats of Tile Doctor Colour Grow sealant. This sealant not only provides a durable seal but also penetrates deep into the pores of the stone protecting it from within and enhancing the natural colours of the Limestone in the process.
After the final layer of sealant, I worked over the floor again with the extra fine burnishing pad both to add shine again following sealing, and to ensure that no smear marks were visible as the lighting conditions were unforgiving and highlighted any imperfections.
The customer was delighted with the results: so much so, in fact, that they booked me in to restore their Victorian hallway floor as well but that’s a story for another time!
Julian Iancono
SE Wales Tile Doctor
 Tile Doctor Ltd
Recently I was called to a house in the very small town of Marton in Warwickshire which is known for its proximity to the medieval “Marton Bridge”, which lies just to the north, crossing the River Leam.
The entire downstairs flooring of my client’s house consisted of Quarry tiles apart from one room where the tiles had been covered by screed and then linoleum. Quarry tiles are a classic hard wearing tile used for both internal and external commercial and residential flooring due to its ability to withstand heavy usage. Reception areas, outdoor patios and porches, for example, are commonly tiled using Quarry.
My client wanted to restore the covered floor back to its original state so that it would match the rest of the downstairs. Realising that this would be a complex and physically demanding task, my client decided to call in Tile Doctor to carry out the restoration.
Removing the Linoleum covering was a relatively straightforward process, so I was able to do this relatively quickly. The main issue concerned removing the screed, which is far more difficult to remove, requiring a lot of physical scraping. Thus I opted to call in some extra manpower in the form of the Nottinghamshire Tile Doctor, Steve Carpenter. With the two of us armed with scrapers we set about removing the screed, taking extra care not to damage the Quarry tile underneath.
Once Steve and I had scraped off as much of the screed as physically possible, I applied a strong dilution of Tile Doctor Remove & Go, a stripper with cleaning properties that is particularly effective at breaking down coatings such as adhesives, plasters and sealers. The product was left to dwell for ten minutes before I worked it into the stone with a scrubbing pad.
After cleaning the tiles, I noticed a layer of grout haze on the surface of the exposed Quarry tiles, so I applied Tile Doctor Grout Clean-Up to remove it. Once the cleaning process was complete I gave the floor a thorough rinse with clean water, before soaking up the resulting residue with a wet-vac machine. The first day of work was a gruelling 12 hours long, but I was very pleased with the results and left the floor to dry overnight.
On day two I returned to finish the job by sealing the newly uncovered Quarry tiles, but not before using a damp meter to check that they were completely dry. Any excess moisture left on unsealed tiles can potentially effect the performance of any sealers that are applied. I sealed the tiles using Tile Doctor Colour Grow, an impregnating, colour-enhancing sealer which gave the surface an aesthetically pleasing shine, as well as durable protection against dirt and wear for the future.
After two long days of work the job was done and the transformation was fantastic and highly rewarding to see, the house now has a fantastic looking Quarry tiled floor running throughout the entirety of the lower level.
Mick Gayton
Warwickshire Tile Doctor
 Tile Doctor Ltd
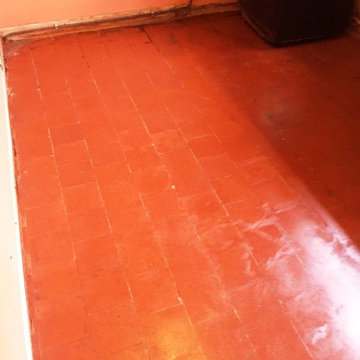
It’s been my experience that it’s not un-common to discover fantastic tiled floors hidden underneath an additional layer of flooring usually carpet or linoleum. This was the case with this property, situated in the town of Canley, Coventry, where the owner had found a Quarry tiled floor underneath Vinyl tiles which had been stuck down using an adhesive.
Quarry tiles are typically hard wearing and very durable and a sensible choice for flooring in high traffic areas of both residential and commercial properties, a tiled floor is of course a difficult to remove so it’s not surprising that tiles do get covered over rather than replaced during redecoration.
Taste’s change and like most property owners who unearth hidden tiled floors, my client was keen to restore them as an original feature. Despite the amount of adhesive and the poor state of the Quarry tiles, I was confident that the floor could be restored to new, so we agreed a date for me to come back to the property and complete the work.
The process of cleaning the Quarry tiled floor – including remove large amounts of adhesive – took a total of two days to complete.
I started by carefully removing the Vinyl tiles using a hand scraper which as you can imagine was a lot of manual effort and the adhesive proved quite difficult to remove. In the end I had to use a combination of a very coarse 50 grit pad fitted to a heavy rotary machine lubricated with water, to clear the area completely of the substance.
The resulting slurry was rinsed away, and the floor was then given a thorough acid rinse with Tile Doctor Grout Clean-Up. Grout Clean-Up is a cleaner which contains concentrated phosphoric acid, and is designed to dissolve minerals such as salts and cement left on the surface of the tile.
This was followed by a final thorough rinse with water, and the excess moisture was soaked up with a wet-vac machine.
After the cleaning process was complete, I left the floor to dry off completely for 24 hours. Upon my return to the house the next day, I checked for any dampness that could have damaged the performance of the sealer, thankfully, the floor was dry and ready to seal, and so I proceeded to apply several coats of Tile Doctor Seal & Go Extra.
Seal & Go Extra is a fully breathable sealer that provides for effective moisture transmission. It provides durable surface protection against dirt and stains, and is suitable for most kinds of internal, natural stone tiled floors, including Quarry, Victorian and Flagstone.
As you can see from the photographs the Quarry tiles came out really well and it’s hard to believe that this is the same floor.
Mick Gayton
Warwickshire Tile Doctor
 Tile Doctor Ltd
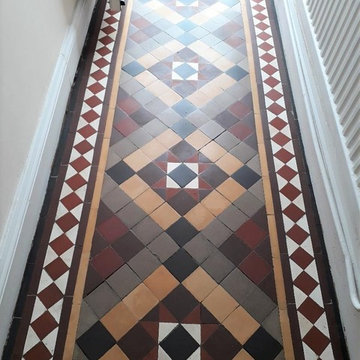
As is often the case in years past and for whatever reason many homeowners covered their decorative Victorian hallway tiles in a variety of products from carpet to laminate flooring. These days the trend has reversed and quite rightly many homeowners now realise the value a tiled floor can bring to a property and look to us to have it restored.
Our client had purchased a property in Norfolk seaport of Kings Lynn and, on lifting the dirty old carpet and decaying underlay in the hallway, discovered a beautiful tiled entrance hall. It was obvious that a previous owner had decided to lay carpet over the tiles as an easy way of hiding the result of careless renovation and decorating which had resulted in a thick coating of plaster, paint, carpet tape glue and various other contaminants which had become firmly stuck to the surface. There were also two small rectangular black and brown tiles missing behind the front door which had been damaged during the removal of some old lead pipes.
This was clearly a job which would need somewhat more than a scrubbing brush and a bottle of Flash!
Our first job was to remove as much of the solid contaminants as possible by hand with floor scrapers and a steamer which softened the more stubborn lumps. We then applied Tile Doctor Remove & Go which is a powerful alkaline stripper to the whole area, left it to dwell on the surface for twenty minutes and then scrubbed it in using a rotary machine fitted with a black scrubbing pad. The resulting slurry was then power rinsed and extracted away using our Ninja machine which is a high-power industrial vacuum. Any remaining patches where the carpet tape had been stuck down were spot treated using Tile Doctor Nanotech HBU which made short work of the hardened glue.
The result was a clean floor, but the surface still felt slightly rough and pitted, a problem which we resolved using the rotary machine fitted with a 200-grit diamond burnishing pad followed by a 400-grit pad with a little 400 grit honing powder which left the surface smooth, silky and ready for the application of a sealer.
Finally, we acid washed the whole area using Tile Doctor Acid Gel, a slow release product which would neutralise any remaining chemicals, improve new sealer adhesion and inhibit the future production of any efflorescence salts. We had used a fair amount of water during the cleaning process, so we left the floor to dry off thoroughly overnight with assistance from our commercial dehumidifier.
On our return the following day, we discussed the sealer options with the client and recommended using microporous Tile Doctor Colour Grow which is an impregnating sealer that seeps into the pores of the stone protecting it from within. It will provide an excellent fluid resistant seal whilst enhancing the natural colours in the stone, additionally it’s fully breathable thereby enabling any moisture trapped under the floor to rise through the floor and evaporate. This is important on old floors like this where no damp-proof membrane was installed. The sealer was applied with a paint pad in tow coats and allowed to dry for an hour before buffing the floor with a hog’s hair pad to give a rich natural-look sheen finish.
The Victorian tiles responded well to the treatments which were completed in two consecutive days. My client was extremely pleased with the results and left the following comment:
“My floor was in poor condition after being buried under carpet as well as many, many years of paint and muck. I enjoyed the time they spent at my home and wouldn’t hesitate to use (or recommend) the Tile Doctor service in the future.”
Nick White
Norfolk Tile Doctor
 Tile Doctor Ltd
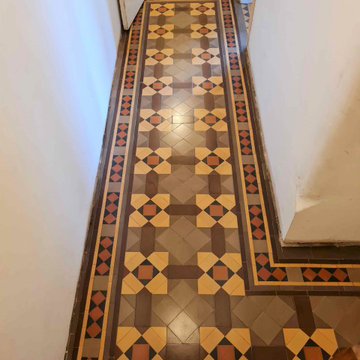
We were contacted by a customer in West Kirby who needed help renovating a Victorian tiled hallway in a house they had just purchased. Kirby is a desirable seaside location North of Heswall that expanded with the arrival of the railway in 1848. The railway brought a demand for property and so it’s not unusual to find housing stock in this area dating back to the Victorian era.
The Victorian tiles at this property appear to have been neglected by the previous owner and were now looking very dull and marked by paint from decorating; all the colours looked washed out and the floor was now looking very unappealing.
The good news however is that this problem is not uncommon and with a deep clean and a fresh sealer applied it can be transformed. I gave the owner a quote which was accepted a date agreed for my return to do the work.
On the first day the floor was sprayed with a neat solution of Tile Doctor Remove and Go which is a powerful alkaline cleaning and stripping agent used to remove old seals and paint. The solution was left to dwell for about twenty minutes so it could soak in and get to work. It was then scrubbed into the tiles using a coarse 200-grit pad fitted to a heavy buffing machine. Water was then added to the floor for lubrication and the soils released from the pores of the tile during scrubbing was removed by with a wet vacuum.
To treat the stubborn paint stains and remains of what I suspect was carpet adhesive a hand scraper and wire brush was used, this was made easier by the Remove and Go which had softened the paint etc.
The next stage was to give the Victorian tiles a mild acid wash using Acid Gel which is applied to the floor, scrubbed in, and rinsed off with a little water then extracted using the wet vacuum. We always recommend an acid wash for old floors like these as it will counter any efflorescent salts resident in the tiles and helps to remove other mineral contaminates and old grout that can mask the true beauty of the tiles.
I left the tiles to dry out for two days before returning to apply the sealer, first checking it was dry by testing for moisture in various places with an electronic damp tester. It’s not a good idea to apply a sealer to a damp floor so we always check first.
Satisfied the floor was dry, I started applying a coat of Tile Doctor Colour Grow which is a colour enhancing impregnating sealer that helps to bring out the true colours in the tile. This was allowed to dry for thirty minutes and then followed up five coats of Tile Doctor Seal and Go Extra which is a breathable sealer that leaves a lovely satin finish and builds on the protection.
Once done the Victorian hallway tiles looked so much cleaner and healthier. It was quite a transformation and the new sealer had given the floor a nice low sheen shine which the customer was very happy with.
For aftercare cleaning I left them with a bottle of Tile Doctor Neutral Cleaner which is specially formulated for cleaning sealed tiles. We don’t recommend tile cleaning products you find on supermarket shelves as the are usually too strong and can strip a sealer off the floor prematurely. If your choosing another product to clean your floor always read the label to make sure its compatible.
Andrew Robb
Merseyside Tile Doctor
 Tile Doctor Ltd
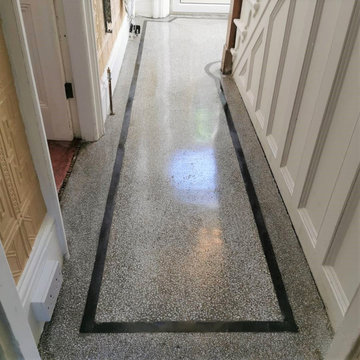
This beautiful Terrazzo floor was uncovered in the hallway of a house in Doncaster, as you can see it had taken a bit of a beating over the years, but the owners were keen on having it restored. Restoring period features like these are a great idea as they are very sought after and can add a lot of value to a property.
The floor had spent many years below carpet and nails had been hammered through the floor to hold carpet grippers in place. Along with this there was a lot of glue and paint to remove. However, I was confident that we could get the floor restored, I gave them a quotation for the work, and they were happy to proceed as soon as possible.
Doncaster is a hot spot for terrazzo floors, apparently there was a big Italian community there in the early part of the 1900s. Doncaster is also famous for its rich rail heritage; the main Doncaster train station is on the East Coast mainline and you find many original station buildings have Terrazzo floors in the public areas.
The first job was to remove as much of the paint, glue and other contaminates as possible. These were scraped off the floor by hand using a razor-sharp scraper.
We then moved onto using a set of five diamond burnishing pads of different grits to cut through the top layers and grime to eventually bring this floor back up to its’ former glory. Starting off with the most coarse pad first I started to go over the floor a pad at a time, each pad is fitted to a rotary machine which has extra weight added to it to make the pads work ever better. Each time a pad is changed, it is slightly less coarse, this starts to polish the floor up to a shine eventually ended with a very fine diamond pad. Water is added at each stage and removed with the wet vacuum before the next pad is used.
Gradually the original floor started to shine through, the colours were quite pronounced, and you could see the floor was a lovely example of terrazzo. After a final rinse to remove the soiling generated by burnishing, I turned my attention to filling the many holes where the nails had been.
The floor was left to dry off overnight and the following morning I returned to seal the floor with several coats of Tile Doctor Colour Grow. I choose this product as its designed to enhance the subtle colours in the floor and its fully breathable which is an important consideration when sealing floors in older properties. Damp proof membranes are a common feature these days but are a relatively recent invention. With older floors you need to allow the floor to breathe so the moisture in the sub floor can rise and evaporate at the surface, without this the moisture will reach out to the walls where it can cause rising damp.
The result was a highly polished floor just the way it would have looked when it was first installed 90 years ago. As you can imagine the owners were over the moon with the transformation.
Matthew Lovett
South Yorkshire TIle Doctor
 Tile Doctor Ltd
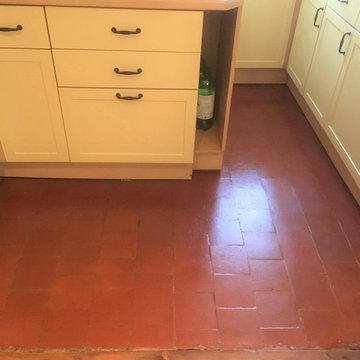
I received a call from this client in Old Marston around two miles north east of the centre of Oxford. They had lifted a lino floor in their kitchen and found an old Quarry Tiled floor underneath and decided to see if they could have it restored.
I went over to survey the floor and could see that the tiles had been covered with a thin layer of levelling screed to ensure the lino didn’t sink into the recesses. I ran some tests to demonstrate how the screed could be removed which worked well and it was apparent that the tiles underneath were intact and could be renovated. I submitted a quotation for removing all the screed, deep cleaning the Quarry tiles and then sealing the tiles to protect them. The client was really pleased that we could restore the floor and the quote was accepted, with a date booked to do the work.
To start the work, I applied undiluted Tile Doctor Grout Clean-up worked in with a small carbide brush attached to a hand-held rotary buffer. The combination of the acid in the Tile Doctor Grout Clean-up combined with the scrubbing action of the brush were effective at removing most of the screed. The small bits of remaining screed were carefully removed by hand, using a floor scraper. The floor was then rinsed with water and the soil removed with a wet vacuum.
For the second phase of the cleaning process I applied Tile Doctor Oxy-Gel which was scrubbed into the floor with a stiff brush rinsing after with water and the soil extracted again using the wet vacuum. After cleaning the floor to remove the dirt I could still see some evidence of the screed on the tiles, so I decided to give the floor an Acid Wash using Tile Doctor Acid Gel which was scrubbed into the floor and rinsed off as before. Tile Doctor Acid Gel is of course an acidic product so once it was removed, I decided to rinse the floor with Tile Doctor Neutral Cleaner to neutralise the pH levels in the floor. The wet vacuum was used again to remove as much moisture from the Quarry tiles as possible before leaving the now clean floor to dry off fully overnight.
I returned to seal this floor the next day. First, I checked the floor was fully dry with the damp meter, it was within the recommended range, so I was ready to complete the sealing process.
The client was not too sure if they wanted a matt or sheen finish, so I first put a coat of Tile Doctor Colour Grow on the floor to show them the matt finish. Colour Grow is an impregnating sealer that enhances natural colour and protects from within by occupying the pores in the tile. After reviewing the floor, they decided it was not for them, so I followed up by applying several coats of Tile Doctor Seal & Go which adds a nice sheen finish and is compatible with Colour Grow.
The combination of sealers worked very well together, and they were very satisfied with the final result and of course that we had been able to restore the Quarry tiles.
Barry Woodward
Oxfordshire Tile Doctor
 Tile Doctor Ltd
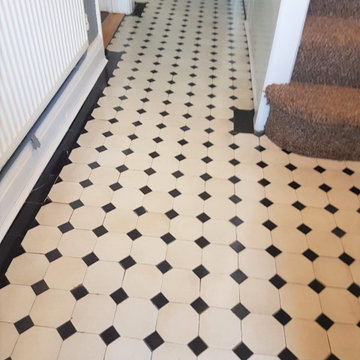
This enquiry from Neath came from an elderly gentleman who was moving into a care home in the near future and wanted his Victorian tiled hallway renovated before the property went on the market. He mentioned he didn’t think it was that dirty however it could do with a clean and reseal.
We arranged to call in one morning and take a look at the tiles and whilst there we completed a test clean so we could provide an accurate price for renovating the floor. For the clean I applied Tile Doctor Pro-Clean, the purpose of this was to see whether and how fast the dirt would shift and also to get an idea of the condition of the floor beneath the layer of dirt.
The test clean went well and the owner was happy to accept our price and suggested that as we had already made a start we might as well continue. Fortunately, there were two of us that day and I only had a couple of other quotes in the area, so I was able to crack on. I should mention this work was done at the beginning of 2020 before the COVID-19 lockdown.
All sorts of detritus gets walked into hallways so we began by using a hand held scraper to take off any anything that sat upon/above the floors surface. This also makes the cleaning process that little bit easier for us. The earlier test clean had enabled us to establish which cleaning methods and products would work best on the floor so it was just a question of putting the plan into action.
The process involved applying a strong dilution of Tile Doctor Pro-Clean to the floor, leaving it to soak in for ten minutes and then working it with a coarse 400-grit diamond pad fitted to a rotary buffer. More water was applied for lubrication where required and the soil produced afterwards was rinsed off and extracted with a wet vacuum. The pad is encrusted with industrial diamonds and cuts into the tile and removes a very thin layer leaving the tile very clean.
After extracting the soil, the floor was inspected, and we noticed that there were a few tiles throughout the floor that needed more work. To deal with these we used hand-held diamond blocks of varying grits to remove the ingrained dirt and bring the tiles back to life.
The client was over the moon with the results of the cleaning and we scheduled a date of the following week to come back and seal the tiles. We also discussed sealers and he had asked if we could leave the floor with a shiny finish. With that in mind we recommended Tile Doctors Seal and Go which works really well on Victorian tiles. It is also water based and so doesn’t produce a smell as it dries.
On our return the floor was given a quick wipe down and once dry sealed with four coats of Tile Doctor Seal and Go which will add protection and make them easy to keep clean.
Once complete the floor looked great and very welcoming, just what you need when selling a property as initial impressions always count.
Adrian Iacono
Swansea Tile Doctor
 Tile Doctor Ltd
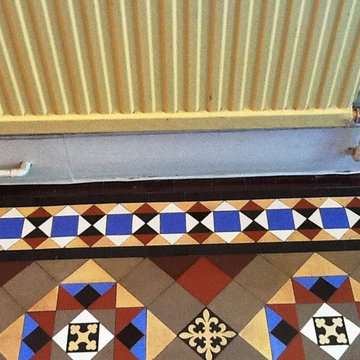
This customer from Bedford, the county town of one of England’s smallest counties Bedfordshire, called me out because they have bought a house and, upon lifting the glued down carpet, had discovered a beautiful Victorian tiled floor. They decided to call me in to see if this original feature could be restored to its former glory having already tried household products to remove the glue and clean the tiles with limited success.
We often find customers who discover old tiles under carpet or linoleum struggle with the standard cleaning products available in supermarket which are only designed for everyday cleaning. The products Tile Doctor sells are far stronger; naturally however to achieve the best results it also helps if you have the right equipment, knowledge and experience and that where we come in.
I popped round to take a look at the floor and having tackled quite a few of these restorations before was confident we could restore the floor so a quote was given and the work was booked in for the next week.
My first course of action was to vacuum the floor to remove any loose debris. This gave me a better picture of the condition of the floor overall, and so I could assess how best to proceed. I opted for our tried and trusted method of applying a diluted solution of Tile Doctor Pro-Clean, which is a very reliable high alkaline cleaner suitable for all types of natural stone and tile. The solution was applied with a pump-up sprayer and left to dwell for 20 minutes to seep into the pores of the tile.
Next, I worked the solution into the tiles using a black scrubbing pad fitted to a rotary machine and hand brushes. The resulting cleaning slurry was then rinsed off – and I found that this had removed most of the glue and surface dirt. There were a few stubborn deposits of glue remaining, but I was able to remove them by using hand brushes and scrapers in combination with Tile Doctor Remove and Go, which is as its name suggest can remove most things including old sealers, epoxy grout haze, urethane coatings, synthetic finishes, adhesives and event paint.
Even after this there were still some patches of glue, so I decided to spray the whole floor with Remove and Go and worked it into the stubborn areas with brushes. I left it to dwell for 15 minutes and then rinsed the floor with a wet pick-up extraction machine. This did the job and the floor was left fresh and clean, ready to be sealed once it had dried.
The floor was left to dry for several days, which is typically necessary for old tiled floors that don’t have a damp proof membrane installed. The customer wanted the floor to look traditional and therefore requested a matt finish. This was achieved by applying two coats of Tile Doctor Colour Grow, which is also breathable thereby allowing any damp to evaporate as gases through the sealer, without affecting the finish.
As I previously mentioned, floors of this age can sometimes have damp issues, so this sealer is ideal for these older floors. Colour Grow is an impregnating sealer, meaning it penetrates the pores of the stone to fill them and prevent trapped dirt. It also intensifies the colours in the tiles to really bring them to life.
The customer was shocked and amazed by the great results as she thought nothing could be done to restore such an old floor. Before leaving the property, I gave her some maintenance instructions to help her keep the floor looking its best in the future. Another satisfied customer!
David Vissian
Bedfordshire Tile Doctor
 Tile Doctor Ltd
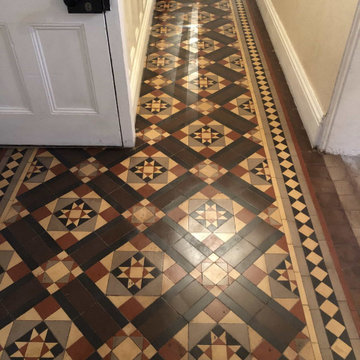
I received this Tile Doctor enquiry from a customer in the historic market town of Kidderminster who had a Victorian Minton Tiled hallway floor that had been covered in carpet for a long time. The carpet had since been removed and now the floor was fully exposed you could see it was covered in carpet glue and dirty with ingrained grime.
I arranged an appointment to inspect the floor thoroughly and provide a quote; you can never be sure what issues you might find, so surveying the floor first ensures I can give an accurate price. As anticipated the entire floor was covered in thick glue, fortunately apart from a few loose tiles the floor was in good order. I explained to the client the process I would use on the floor and that I was confident the floor could be restored for them. My quote was accepted, and we arranged a date to carry out the work.
I often get customers claiming to have an original Minton Tiled floor however there were many manufacturers creating similar patterns at the end of the 19th century, the only way to be certain is to lift a tile and look to see what’s stamped on the back. In this case we had a few loose ones that needed relaying, so I was able to confirm that quite easily.
I arrived on the booked day and the first step was to tape up the surrounding area to prevent any damage from splashing. I was then ready to tackle the glue. I applied a strong solution of Tile Doctor Remove and Go and covered the floor with industrial cling film to allow the solution to get to work without drying out. The film was removed after an hour and then the Remove and Go was worked into the tiles using a coarse 200-grit milling pad to cut through the glue and resurface the tiles.
Afterwards the floor was rinsed with water and the soil removed with a wet vacuum. Some of the glue proved very stubborn to remove and had to be dealt with carefully by hand using an industrial scraper, sometimes a bit of elbow grease is the only way to get the job done.
The floor was then given an Acid Rinse with Tile Doctor Acid Gel, this is designed to further clean the tiles and counter any efflorescent salts that might be present in the tiles due to the lack of damp proof membrane.
After another rinse and soil removal I turned my attention to the loose tiles which were secured by removing the tile, scraping out the adhesive and re-fixing. The appearance of the floor was much improved after day and the floor was then left overnight to dry out in preparation or the sealing process.
Returning the next day, I first checked the floor was dry using a damp meter. Once I was satisfied it was dry, I started to seal the floor. I had selected to use Tile Doctor Seal and Go Extra for sealing. It adds a richness to the colour of the tiles and a subtle sheen finish. I applied three coats, waiting for each one to dry before applying the next.
The pattern on the floor was really nice and the colours were now very vibrant. The client was very pleased and left a great review copied below:
“Our floor wasn’t easy as it had some form of coating on it which was difficult to remove but Mark took a lot of time to ensure the surface was thoroughly clean before the sealant was put down. Very pleased with how it looks. K. B, Kidderminster”
Mark Conway
Worcestershire Tile Doctor
 Tile Doctor Ltd
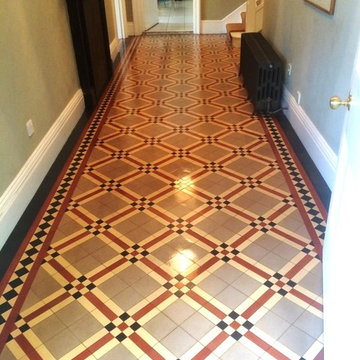
A client from the village of Heytesbury contacted me to see whether we could improve the look of her Victorian tiled hallway floor. It turns out that a competitor had previously cleaned and sealed it two years prior but she was disappointed with the result once she realised that the floor still had dirt ingrained in the tile. As per our normal practice we ran a test clean and she booked us in immediately.
We started by wetting the floor using a strong solution of Tile Doctor Pro-Clean and left it dwell for ten minutes. We then attached a black stripping pad to a rotary machine and slowly covered the whole area to remove ingrained dirt and any existing seals that may be evident. The dirty slurry was then removed with a wet vacuum and then floor rinsed with the aid of a deck brush and a wet vacuum.
Next we used a heavy duty scraper to remove paint splashes around the edges from years of decorating. Once we were satisfied we’d removed all evident dirt, seal and paint we rinsed the floor thoroughly several times to make sure all contaminants are removed again using the wet vacuum to remove the water.
We returned five days later to let the floor dry out thoroughly. Upon our return we tested with a damp meter which tested fine so we proceeded to seal the floor using six coats of Tile Doctor Seal & Go to provide protection and add a nice sheen to the floor which I think you will agree now looks amazing.
Stuart Ford
Wiltshire Tile Doctor
3