
Search results for "Sealing" in Home Design Ideas
 Lindus Construction/Midwest LeafGuard
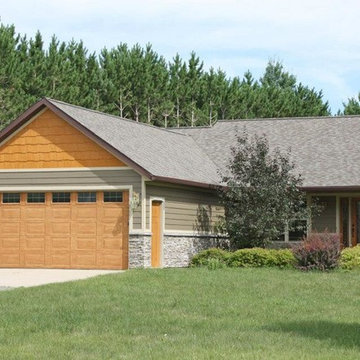
LP SmartSide 8" lap siding pre-finished with Diamond-Kote Seal, LP SmartSide shakes pre-finished with Diamond-Kote Cedar and trim pre-finished with Diamond-Kote Sand.
Photo Courtesy of Diamond Kote
 Carolyn Reyes
Photo: Carolyn Reyes © 2015 Houzz
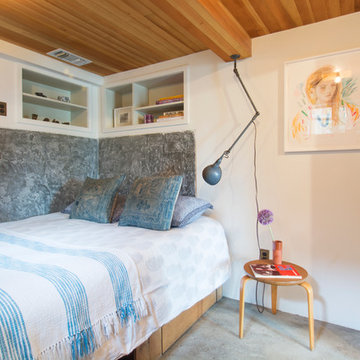
Example of an eclectic concrete floor bedroom design in Los Angeles with white walls
Example of an eclectic concrete floor bedroom design in Los Angeles with white walls
 We Make It Our Home
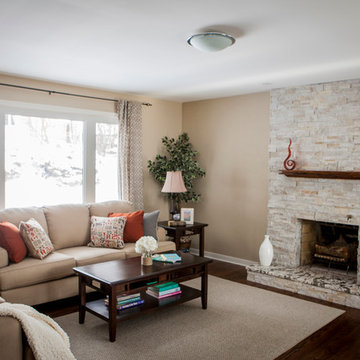
WE partially removed the wall between the living room and the staircase.
The fireplace was updated with floor-to-ceiling natural stone tiles.
Wall Color: shaker beige HC-45 Paint - Benjamin Moore & Co.
Floor stain: Oak wood with the mixture of DuraSeal spice brown stain and DuraSeal coffee brown stain
Window trims and baseboards: cloud white 967 Paint - Benjamin Moore & Co
Fireplace granite: bianco antico granite
Floor to ceiling natural stone mosaic tile around fireplace: ErthCOVERINGS Cream Quartzite 40F.
Find the right local pro for your project
 Tile Doctor Ltd
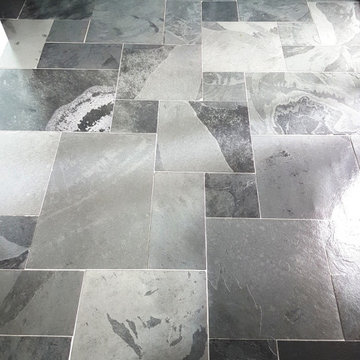
The pictures below are of a Riven Slate floor at a house in in the Leeds suburb of Horsforth which had been laid ten years prior. It’s probably difficult to appreciate from the images but the sealer on this floor was well worn through in the high traffic areas making it patchy in places. Without the protection of the sealer dirt was now ingrained in the pores of the stone leaving it looking dull. Riven slate is always tricky to clean thoroughly due to the rough surface and that combined with the ingrained dirt was making it very difficult to keep clean.
The floor now needed to be stripped of old sealer and then resealed and although I can provide a price for this over the phone my preference is to visit the property and survey the floor. In the case the owner had sent me some photographs via email however they were not too clear and so I felt it would be best if I paid the customer a visit to ensure I could give them an accurate price.
The floor was indeed overdue a clean and seal, as suspected dirt was ingrained into the areas where the seal had worn off. The house was home to a very busy family, so the area was subject to the significant traffic. I carried out a test clean on a small area and they were surprised by the results, when you live with a floor for so long you don’t notice the very slow decline in its appearance. They agreed to my quote and we arranged a time to return and carry the deep clean out.
When I arrived, I started off by protecting the skirting and surrounding woodwork. Given the rough surface of the floor I first applied Tile Doctor Wax Away which is a very effective coatings remover that is designed for removing wax but works very well in these situations. The product was left to dwell for a round ten minutes so it could get to work breaking down the old sealer and then scrubbed in using a black scrubbing pad fitted to a rotary machine.
This process removed most of the dirt and old sealer, but some stubborn patches remained. To treat these, I replaced the black pad with a coarse 200-grit burnishing pad and finally some handheld diamond burnishing blocks for the edges and corners where more intricate work was required, and the circular pads struggle to reach.
I gave the floor a rinse, and extracted the soil with a wet vacuum, the floor was then left to dry off overnight.
The next day I returned, first the slate floor was checked for moisture using the moisture meter. Once I was happy it was within the correct parameters, I then sealed with four coats of Tile Doctor Seal and Go. This is a modern water-based blend of acrylic polymers that provides both a stain resistant surface seal and a durable low-sheen finish also being water based there’s no smell as it dries.
The sealer really brought the stone to back to life and the lovely colours in the natural stones were now evident. The patchy appearance of the floor was gone, and the customer was happy.
I discussed with them how they should maintain the floor and advised them to use Tile Doctor Neutral Tile Cleaner. This is pH neutral cleaner that won’t prematurely erode the new sealer like the stronger products you find in Supermarkets which are only for use on Vinyl and Ceramic floors.
Nigel Stoker
North West Yorkshire Tile Doctor
 Tile Doctor Ltd
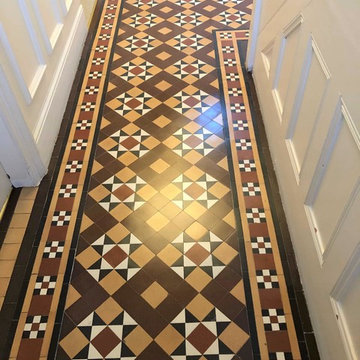
It’s not just major restoration work we do at Tile Doctor, sometimes a simple clean and seal is all that is required and that was the case at this property in Evesham. This medieval market town lies within the Vale of Evesham and is encompassed by the River Avon. It is located between the larger towns of Worcester, Cheltenham and Stratford-upon-Avon.
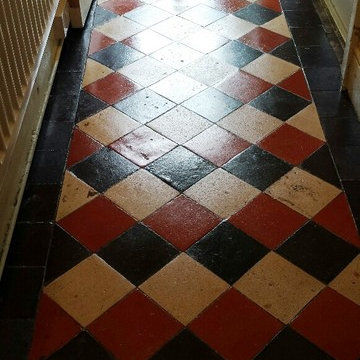
I was contacted by the owner and I arranged a visit to view their Victorian Hallway. The floor was in very good condition, but the previous sealer was now in-effective and the floor was dull and needed a good clean and seal. The colours were starting to fade, and it was due some attention. Sealers do wear off over time so if you have a similar floor to this it’s worth bearing that in mind. We discussed the work required and the cost involved, my quote was accepted, and the work scheduled.
On arrival I set up my equipment and covered any areas of carpet to protect from splashing during cleaning. I then used Tile Doctor Remove and Go spraying the product onto the floor allowing it to dwell for 10 minutes thus breaking down any sealers. This product is a non-flammable, multi-purpose stripper which works best when left to soak in for some time before scrubbing. This product is also great for drawing out ingrained stains and removing heavy grease build up.
The floor was then pasted with Tile Doctor Acid Gel which works to neutralise any alkaline salts in the tiles that can cause efflorescence later. This is a common issue with old floors which often do not have a damp proof membrane in place. I then went to work with my scrubbing machine and a black pad and worked the products into the tile. The resulting slurry was then rinsed off with water and removed with a wet vacuum.
I then went over the floor with microfibres and water to remove any remaining marks before leaving it to dry off overnight and ready for sealing.
I returned the following day and started by checking the floor was dry using a moisture meter. To seal the floor, I chose Tile Doctor Seal and Go Extra which is a fully breathable semi- gloss sealer which made a huge difference to the floor. Choosing a fully breathable sealer is important for floors that don’t have a damp proof membrane as you want to encourage any dampness to rise through the tile and not get trapped underneath where it might spread into the walls.
The deep clean and new seal brought out the vibrant colours in the tiles which were now shining through enhances by the lovely sheen which customer was very pleased with.
For aftercare I left the customer with a bottle of Tile Doctor Neutral Tile Cleaner which being concentrated goes a long way. Once diluted with water the product becomes completely pH neutral which unlike most household cleaners and washing up liquids which contain bleaches won’t prematurely degrade the sealer with use.
Mark Conway
Worcestershire Tile Doctor
 Tile Doctor Ltd
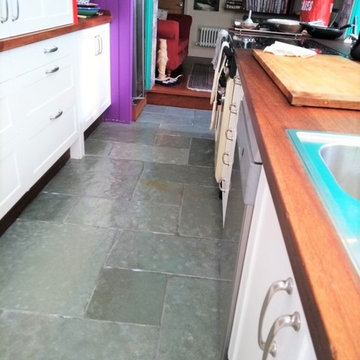
I recently helped a homeowner from my home town of Dursley who got in touch about her kitchen Flagstone floor. The problem revolved around an accident she had with raspberries which had stained the flagstones and the problem became compounded when a house hold clearing product was applied neat to clean up the mess. If you follow any of our Tile Doctor blogs, you will know that using strong household cleaning products can damage the sealer and, in this case, it had left white marks on the floor.
I called round to the property to survey the floor as was surprised to find out that the floor had been cleaned and sealed only four months prior by another company. I don’t like to comment on other people’s work, but I found the grout lines and flagstones were still badly ingrained with dirt, so it wasn’t a through job.
I completed by survey and demonstrated the process I would follow to resolve the issues on one of the flagstone tiles. She could not believe the difference I was able to make and booked me in straight away to restore the entire floor.
My first task was to protect the wooden kitchen units from splashing that can happen when cleaning the floor. Once that was done, I set about stripping the sealer from the floor and deep cleaning the tile and grout with a strong dilution of Tile Doctor Pro-Clean. Pro-Clean is a concentrated, multi-purpose high-alkaline cleaner, stripper and degreaser which is safe to use on all types of tile, stone and grout including natural stone.
Working in sections across the Kitchen and adjacent dining room I diluted one part Pro-Clean to two parts water and mopped it onto the flagstones and grout where I left it to soak in for roughly fifteen minutes. Then using a rotary floor buffer fitted with a black scrubbing pad I scrubbed the solution into the floor into the old sealer and trapped dirt came away turning the cleaning fluid black in the process. The soil was then rinsed off with water and then extracted with a powerful 3,000 watt wet and dry vacuum. This process was repeated until I was satisfied the floor was clean and I ran a stiff grout brush along the grout lines to ensure they also received a good scrub. After I was satisfied the section was clean it was rinsed thoroughly with water to neutralise the floor and remove any trace of product and then dried with the wet and dry vacuum.
The cleaning process took up the whole day, but the flagstones would need to be dry before sealing so after giving the owner an update I left the floor for two days, so it could dry out thoroughly.
On my return I tested the floor was dry in multiple places with a damp meter to ensure it was ready to be sealed. The readings showed that the wet and dry vacuum had done a good job in removing the moisture, so all was well. To seal I applied several coats of Tile Doctor Seal and Go allowing each coat to dry before applying the next however with such a large area to cover I was able to work in sections around the floor.
Seal and Go works really well on Flagstones and leaves a very appealing sheen finish, also being water based it doesn’t leave a smell as it dries.
The results were amazing, and the customer thanked me for making such a massive improvement on her floor. Before leaving I made sure to discuss after-care and to avoid the use of hash cleaning products.
Malcolm Crowther
Gloucester Tile Doctor
 Tile Doctor Ltd
This fantastic Victorian tiled hallway floor in Oxford was in good physical condition for its age; however like any sealed floor the sealer had worn down with use and with dirt becoming trapped in the pores of the tile it was now becoming difficult to clean effectively and had become dull and un-inviting. It was now due a really good deep clean and re-seal. Oxford as I’m sure your aware has a rich history and is home to one of the world’s best universities, so not surprisingly many houses here have interesting floors such as this one.
Upon my arrival at the house, my first task was to protect the skirting boards, as well as the wooden floors leading into the other rooms. I then mixed a solution of Tile Doctor Pro-Clean, a versatile, high alkaline cleaner combined 50:50 with Tile Doctor NanoTech HBU, a particularly strong cleaner that utilises nano-sized particles to penetrate into areas of the stone that standard products simply cannot reach.
I applied the solution to the surface and allowed it to soak for thirty minutes, allowing it to get to work on the ingrained dirt so it could be easily removed. Following this, I agitated the solution with a soft brush attached to a rotary scrubbing machine. I then applied more solution and left it for a further thirty minutes, before scrubbing this into the tiles using a black pad fitted to the rotary machine.
After the clean had been completed, I rinsed the entire floor multiple times and vacuumed up the resulting slurry using a wet-vac machine.
I left the floor overnight, allowing the surface enough time to dry and returned then next day to seal the floor, checking first to ensure the tiles had dried. To seal the floor I used several coatings of Tile Doctor Seal & Go. Seal & Go which is a water-based, topical sealer that is suitable for use on unsealed, porous surfaces such as Victorian tile, textured Quarry, Slate, and Sandstone; being water based you don’t get the smell so it’s much more pleasant to work with.
As you can see from the before and after photos, the result was an aesthetically pleasing and – most importantly – clean, Victorian tiled floor. Needless to say, my client was extremely pleased with my work.
Barry Woodward
Oxfordshire Tile Doctor

Sponsored
Delaware, OH

Buckeye Basements, Inc.
Central Ohio's Basement Finishing ExpertsBest Of Houzz '13-'21
 Tile Doctor Ltd
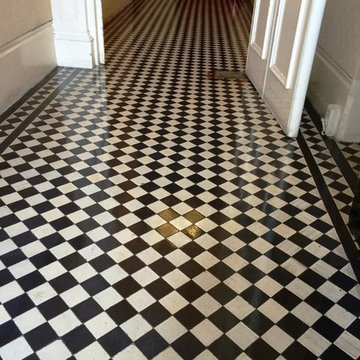
Recently, I was asked to do some Tile Doctoring at Palmeira Square, in the seaside city of Brighton and Hove, to restore the Victorian tiled floor of one of the downstairs offices. Palmeira Square is a residential area which was first developed in the mid-19th century during the reign of Queen Victoria, so many of the buildings feature some fantastic original Victorian tile floors. Although there are many large terraced houses and even mansions in the area, some of the buildings have been converted into offices for commercial use. My client, who leased the downstairs office, managed to persuade the other tenants to employ professional help to restore the tiles, and so I was asked to come in to clean and seal the floor to get it back to looking its best.
With Palmeira Square being quite a lively area, I made sure to fence off the front door area from the wandering public. My first job was to apply Tile Doctor Remove & Go to the floor, a heavy duty stripper, multi-purpose stripper that was able to remove the stubborn marks, stains and ingrained dirt on and between the tiles. In particular, Remove & Go helped to remove some rust stains I found near the door hinges.
I left the product to sit and work its magic for twenty minutes, and during this time I began cleaning the floor using a buffing pad, which is suitable for use on all types of floor (except polished stone), and a solution of Tile Doctor Pro-Clean diluted with water. The combination of a buffing pad and Pro-Clean helped to remove the general dirt and grime that had built up over time in this high traffic area of the office. After the cleaning was complete, the black tiles appeared grey because any remaining sealer had been removed. However, the colour would return after resealing the tiles, which was my next job.
I returned to the office after two days to seal the Victorian tile floor. To do this, I needed to use Tile Doctor Seal & Go, which meant I had to ask the office workers to keep off the floor for most of the day. This is because I needed to apply six coats of Seal & Go to the floor, and each coat takes roughly fourty minutes to dry. Seal & Go provides a stain-resistant surface seal and a durable low-sheen finish, which will help keep this floor looking great for a long time, even with a high traffic of workers coming in and out of the office.
Luckily, it was a warm day outside, and the floor dried quickly, leaving a shiny, deep black surface. Both my client and I were very happy with the result. The client was also pleasantly surprised to see that I had been able to remove the rust stains near the door.
 Tile Doctor Ltd
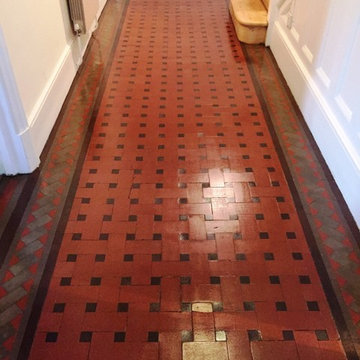
The pictures below were taken at a house in the town of Merthyr Tydfil, which is located not too far north of Cardiff. My client was keen to keep her very old Quarry tiled floor – which dated back to 1905 – intact. The floor had understandably seen a large amount of traffic in its lifetime, and was now in dire need of a professional restoration, including a thorough clean and seal.
First, I completed a survey of the area and provided my client with a quote. After completing many similar jobs in the past, I generally have a good idea of what the final result will look like. I passed on some images of a final result to my client, who was happy for me to begin my work.
On the first day, my first task was to take run some damp tests which were fine; it’s always good to know up front if there are likely to be any damp issues. Next I covered the floor with water to take the surface suction out and waited fifteen minutes before applying a cocktail of Tile Doctor NanoTech Heavy Build-Up cleaner mixed with Pro-Clean and Grout clean-up covering the whole floor. I then immediately starting to work the solution into the floor with a rotary machine fitted with a coarse black pad. The solution was then rinsed off with water which was then extracted with a wet vacuum as I worked. For stubborn areas I applied more of the previously mixed solution scrubbed into the floor with coarse wire wool by hand followed by further rinsing with water.
Each of the products used serves a particular purpose. Pro-Clean is a strong high-alkaline cleaner for natural stone, while NanoTech HBU is a particularly powerful cleaner that uses nano-sized particles to penetrate deep into the stone to get underneath and lift out ingrained dirt and stains. Grout Clean-Up, as the name implies, is a product for resolving grout related problems such as removing grout smears from tile surfaces aka grout haze.
After completing the clean I left the house for 48 hours, to leave enough time for the floor to dry completely in preparation for sealing. Upon my arrival back at the house I conducted some more damp tests to check that the floor was dry enough to seal using the previous readings as a benchmark. The results indicated that I was fine to proceed with the seal, so I applied a total of eight coats of Tile Doctor Seal & Go for durable protection. This was the product I recommended to my client as she wanted a nice, soft shine for her surface seal.
As you can see from the photos, the desired result was achieved to a high standard and needless to say my client was delighted with the transformation.
Julian Iancono
South East Wales
 Tile Doctor Ltd
I was recently contacted by a client who had just moved into a large Victorian property in the West Cheshire village of Tarvin about renovating their Victorian tiled hallway. Apparently, the floor was in good condition, and it would just be a case of removing what was left of the old sealer, deep cleaning the tiles and then applying a fresh seal. Unless the floor has been regularly maintained with the same sealer it’s important to remove all traces of old sealers before applying fresh.
Victorian Hallway Before Cleaning Tarvin Cheshire
A lot of the work we do at Tile Doctor can be a lot more involved, often requiring the sourcing of matching replacement tiles and rebuilding large sections of tiled flooring so straight forward clean and seal job is always welcome.
To remove what was left of the sealer and the ingrained dirt from the pores of the Victorian tile I dressed the floor with a strong dilution of Tile Doctor Pro-Clean. On this occasion I used a 1:3 dilution with water and applied it to the floor with a mop. I left it to soak into the tile for fifteen minutes before scrubbing so it could get to work breaking down the old sealer.
During this time, I set up a weighted floor buffer and fitted a black buffing pad, these pads are designed for scrubbing hard floors and lifting out the dirt. I applied a little water as required during this process to ensure the pad was lubricated. Shortly the cleaning solution darkened as the old sealer and dirt was released from the tile.
The soil was rinsed away with water and then removed using a wet vacuum. Once clear the floor was inspected and the process repeated until I was satisfied it was as clean as it could be and free of sealer.
I left the floor to dry off overnight and returned the next day to apply a new sealer. Before doing so however I like to use a damp meter to take moisture readings from the floor. This is needed to ensure it is dry enough to seal which is important as any moisture in the tile can affect the sealer and lead to an inconsistent finish.
To seal I started with the application of a single coat of Tile Doctor Colour Grow which is a colour intensifying breathable impregnator that soaks into the tile improving appearance and adding protection from within. Any excess sealant was removed by wiping the floor with a microfibre cloth and then it was left to dry for an hour.
This was followed with four coats of Tile Doctor Seal and Go Extra which is an acrylic breathable sealer which adds a pleasing subtle shine to the tile. This is an important feature when choosing a sealer for old floors where moisture needs to be allowed to rise through the tile, otherwise it can become trapped under the floor and reach out to the walls causing rising damp.
The customer was very happy with the revamped hallway which made the house a lot brighter and welcoming. Before closing I should mention that for aftercare cleaning I recommend Tile Doctor Neutral cleaner which is designed for the daily cleaning for sealed tiles, this is important as most domestic supermarket cleaners are simply too strong and can prematurely erode the sealer.
Alastair Robb
West Cheshire Tile Doctor


 Encore Sustainable Design
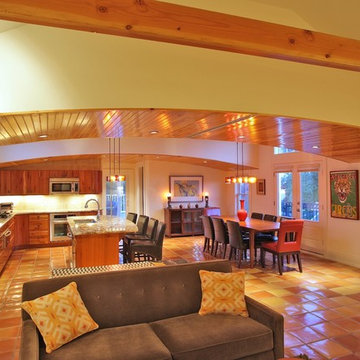
Large elegant l-shaped terra-cotta tile and brown floor open concept kitchen photo in Baltimore with an undermount sink, flat-panel cabinets, medium tone wood cabinets, granite countertops, stainless steel appliances and an island
 Morey Remodeling Group
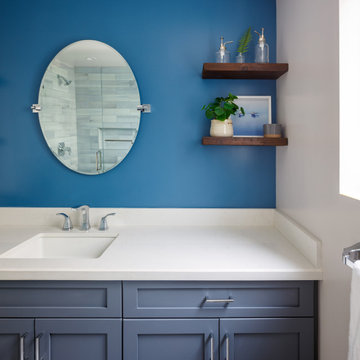
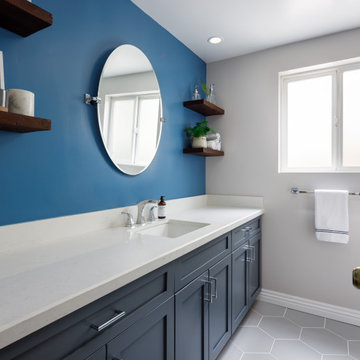
Example of a small transitional 3/4 blue tile porcelain tile, gray floor and single-sink bathroom design in Los Angeles with shaker cabinets, blue cabinets, a one-piece toilet, an undermount sink, quartz countertops, white countertops and a built-in vanity
 All Florida Exteriors
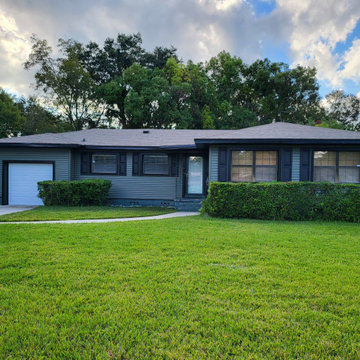
Royal Woodlands 16' vinyl siding over block home
Inspiration for a large contemporary gray one-story vinyl house exterior remodel in Other
Inspiration for a large contemporary gray one-story vinyl house exterior remodel in Other
 Tile Doctor Ltd
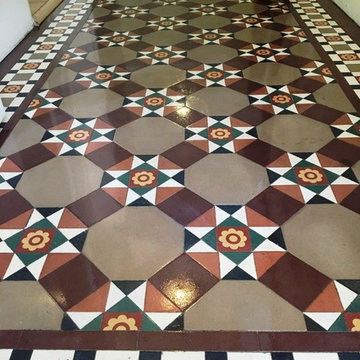
Esher is a small suburb in Surrey, situated just outside London. It was a fashionable area to live in amongst royalty and the aristocracy in the Victorian period, and during this time many buildings were built.
One such building has since been turned into a block of separate flats, and some of the flats still contain the original Victorian tiles in the hallway. I was contacted by one of these flat owners about restoring their tiles back to the best possible condition. Interestingly this customer’s tiles were part of a larger floor that had been divided between two flats.
I began the restoration by spreading Tile Doctor Remove and Go across the entire set of tiles. Remove and Go is a heavy-duty stripper that helped to loosen and remove old glue deposits where carpet had been laid over the tile, it will also strip off old sealers and release ingrained muck.
The Remove and Go was worked into the tile and grout with a stiff brush and then the soiled solution rinsed off and extracted using a wet vacuum. I followed by this applying a coarse 200-grit diamond encrusted burnishing pad, fitted to a handheld buffer, to grind away the particularly stubborn dirt and stains to restore the appearance of the stone. Afterwards, I rinsed the tiles again with water and soaked up the resultant slurry with a wet vacuum.
I noticed that there remained several ingrained stains dotted across the floor, so to remove these I aggressively burnished the affected areas with a very coarse 50-grit handheld diamond block. This essentially removed the very top layer of the stone, taking with it the ingrained marks.
Next, I dried the area with a large blower and heat gun. Under normal circumstances, 48 hours needs to pass before the tiles can be sealed, but as this was a small area I was able to dry it very quickly. After carrying out a damp test, I determined the tiles were ready to be sealed.
To seal the Victorian Tiles, I applied six coats of Tile Doctor Seal and Go sealer, which provides a high-quality sheen finish, as well as plenty of protection for the future. Tile Doctor have a range of suitable sealers available including Colour Grow which provides a matte finish – it’s just a matter of personal choice for the customer.
The outcome of the restoration was fantastic and the customer was very pleased, leaving the following testimonial.
“Promptly organised, delivered when promised. Good looking job when complete. Well done.”
Rupert Mcleod
West Surrey Tile Doctor
 Tile Doctor Ltd
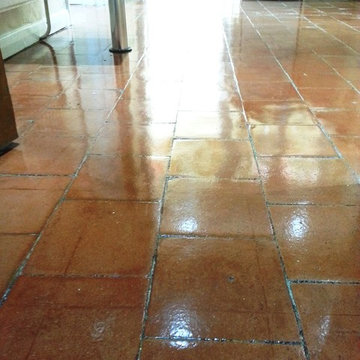
This was an unusual request in that this customer, in the small Bedfordshire village of Cople, had her Kitchen Quarry tiled floor cleaned and sealed six months earlier by another company. The sealer had come off and it soon became evident that after the work had been carried out the client was ill advised as to the correct maintenance of her floor. The cleaning product left by the previous company was totally unsuitable and over the course of six months she had managed in fact to slowly strip the sealer off of the tiles.
I soon realised the problem and advised that the only solution would be to strip any remaining sealer off the floor and re-seal, it’s generally not good practice to apply a different sealer on top of an existing sealer as there can be compatibility issues and the floor may look different in places where there are more layers of seal.
I used a strong dilution of Tile Doctor Pro-Clean to strip any remaining sealer off the tiles and clean them in the process, this involves spreading the solution over the tiles, allow it to dwell and soak in and then scrubbing the solution into the floor using a rotary machine fitted with a black scrubbing pad. The floor was then rinsed with water applied with a mop and bucket and the soiled water extracted using a wet vacuum. One the floor was clean I noticed there was evidence of concrete dust and grout haze on the surface of the tiles from when they were installed so I applied a another Tile Doctor product called Grout Clean-up to remove it, again the floor was thoroughly rinsed with water which was extracted the floor dried using air movers.
Tiled floors need to be dry before sealing and so I left this floor for four days to allow enough time for it to thoroughly dry out before returning to seal it. Choice of sealer for this floor was four coats of Tile Doctor Seal and Go which is a water based sealer so it doesn’t leave a smell and additionally adds a nice subtle shine to the floor. The difference was transformational as the sealer really does bring out the best in the quarry tiles.
Before leaving we have provided the customer a bottle of Tile Doctor Neutral Tile Cleaner which is the correct cleaning agent to maintain a sealed floor. It has a neutral PH formula so it won’t erode the sealer like many of the acidic floor cleaning products you find in the supermarket which are really only meant for use on Vinyl or Ceramic tiles.
Andrew Evans
Bedfordshire Tile Doctor
10