
Search results for "Specific process" in Home Design Ideas
 User
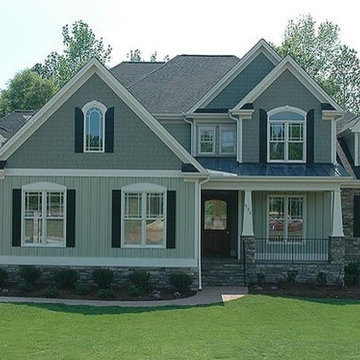
House Plan #20-1825 : Houseplans.com
Questions? Call us at 1-800-913-2350
Photographs may show modified designs. All images are copyrighted.
Plan 20-1825
3124 sq ft
4 beds
4.50 baths
68' wide
63' deep
×
Plans
Main Floor Plan
Reverse
Upper Floor Plan
Reverse
Specifications
Plan Styles
Craftsman
European
Area
Garage Sq Ft
930 sq ft
Main Floor Sq Ft
1988 sq ft
Bonus Sq Ft
499 sq ft
Total Sq Ft
3124 sq ft
Upper Floor Sq Ft
1136 sq ft
Porch Sq Ft
144 sq ft
Basic Features
Bedrooms
4
Baths
4.50
Potential Bedrooms
0
Garage Stalls
3
Stories
2
Dimension
Width
68'
Depth
63'
Height
33'
Ceiling
Upper Ceiling Ft
8'
Main Ceiling Ft
9'
Plan Feature
Unlimited Use
Designer Notes
Included
COVER PAGE: Plan features the rendered elevation and informative reference sections including general notes and design criteria, abbreviations and symbols.
ELEVATIONS: Drafted at 1/4" scale for the front and 1/8" scale for the rear and sides.
All elevations are detailed and an aerial view of the roof is provided, showing all hips, valleys and ridges.
FOUNDATIONS: Drafted at 1/4" scale.
Block foundations and basements are standard.
The foundation plan also shows the HVAC equipment, structural information, steel beam and pole locations and the direction and spacing of the floor system above.
MAIN LEVEL FLOOR PLAN: 1/4" scale.
Fully dimensioned from stud to stud for ease of framing.
2x4 walls are standard unless noted otherwise.
The detailed drawings include such things as structural header locations, framing layout and kitchen layout.
SECOND LEVEL FLOOR PLAN: (if applicable) 1/4" scale.
Dimensioned from stud to stud and drafted to the same degree of detail as the main level floor plan.
INTERIOR ELEVATIONS: Useful for the cabinet and bidding process, this page shows all kitchen and bathroom cabinets as well as any other cabinet elevations.
ELECTRICAL AND SECTIONS: Illustrated on a separate page for clarity, the electrical plan shows suggested electrical layout for the foundation, main and second level

 Edgewater Design Group
As written in Northern Home & Cottage by Elizabeth Edwards
In general, Bryan and Connie Rellinger loved the charm of the old cottage they purchased on a Crooked Lake peninsula, north of Petoskey. Specifically, however, the presence of a live-well in the kitchen (a huge cement basin with running water for keeping fish alive was right in the kitchen entryway, seriously), rickety staircase and green shag carpet, not so much. An extreme renovation was the only solution. The downside? The rebuild would have to fit into the smallish nonconforming footprint. The upside? That footprint was built when folks could place a building close enough to the water to feel like they could dive in from the house. Ahhh...
Stephanie Baldwin of Edgewater Design helped the Rellingers come up with a timeless cottage design that breathes efficiency into every nook and cranny. It also expresses the synergy of Bryan, Connie and Stephanie, who emailed each other links to products they liked throughout the building process. That teamwork resulted in an interior that sports a young take on classic cottage. Highlights include a brass sink and light fixtures, coffered ceilings with wide beadboard planks, leathered granite kitchen counters and a way-cool floor made of American chestnut planks from an old barn.
Thanks to an abundant use of windows that deliver a grand view of Crooked Lake, the home feels airy and much larger than it is. Bryan and Connie also love how well the layout functions for their family - especially when they are entertaining. The kids' bedrooms are off a large landing at the top of the stairs - roomy enough to double as an entertainment room. When the adults are enjoying cocktail hour or a dinner party downstairs, they can pull a sliding door across the kitchen/great room area to seal it off from the kids' ruckus upstairs (or vice versa!).
From its gray-shingled dormers to its sweet white window boxes, this charmer on Crooked Lake is packed with ideas!
- Jacqueline Southby Photography
 Klopf Architecture
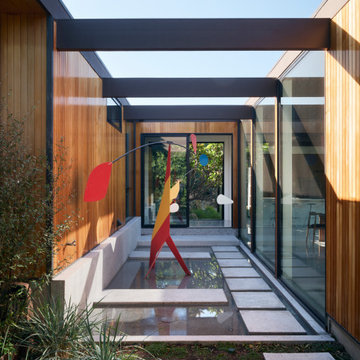
Malibu Glass Box House by Klopf Architecture
Following the devastating Woolsey Fire of 2018, the site in Malibu offered a unique opportunity to rebuild not just a home, but a new architectural composition that highlighted the property’s potential while navigating strict fire-rebuild codes in the area. Designed by Klopf Architecture, this project embraced a set of limitations and translated them into an architectural asset.
The city’s fire-rebuild process required the new structure to remain close to the original footprint, size and bulk, a constraint that ultimately clarified the architectural direction. Perched near the front of a long, narrow lot, the new home frames and overlooks a private, park-like rear expanse, an uncommon luxury especially in this part of Malibu .
Without a fixed program, the design process allowed for a different kind of creative focus allowing Klopf Architecture the opportunity to explore how a modernist home could best respond to this site. The team approached the project not with a list of requirements, but with a question: How might a modernist live here? What spatial qualities would inspire calm, connection, and a sense of wonder in this setting? The process became less about problem-solving and more about architectural storytelling—letting the site, the light, and the principles of modern design guide the form and flow of the home.
The response emerged in the form of a glass-box pavilion, an open, Mid-Century Modern inspired living, dining, and kitchen space that floats at the edge of the property’s natural descent. Connected to the more enclosed, private areas of the home by a glass-walled hallway, the living pavilion becomes a distinct centerpiece of the design. It opens on all four sides to the landscape with decks and patios on the flanks, an internal garden and water feature to the north, and a dramatic unguarded view of the expansive backyard and ocean horizon to the south.
Because of the mandated footprint, careful planning was required to ensure every space could still engage with light, landscape, or both. Strategic voids in the form of atriums and courtyards allow daylight to filter deep into the home’s core, while offering moments of surprise and retreat. These design gestures allow natural light to filter deep into the interior, creating a sense of brightness and openness throughout the day. At the same time, they expand the perceptual boundaries between inside and out, making the home feel more expansive while anchoring its connection to the surrounding landscape.
The siting of the house is what gives it its unique character. Rather than receding into the backyard like the neighboring homes, the house holds a slight prominence. From the central living pavilion, stepping down into the landscape feels more like entering a secluded park where a separate existing accessory structure, trail, and recreational areas await. The home’s modest street presence gives way to this unfolding drama of space, view, and nature.
Fire-resilient materials and assemblies are integrated seamlessly throughout including triple-pane glazing, under-slab and roof insulation, and locally sourced fire-rated cladding ensure the house not only meets Calfornia’s rigorous wildland-urban interface (WUI) standards, but feels effortlessly aligned with them. While technical decisions like fire-hardening and mechanical systems presented some construction challenges, particularly around the cantilevered glass box, the team found a functional compromise that preserved the integrity of the design.
Inside, a restrained palette and exposed post and beam design celebrate the ethos of mid-century modernism. A central circulation spine extends from the entry to the rear glass wall, offering a continuous visual link from street to ocean. Spaces such as the library and office, though more intimate in scale, are never cut off from nature as each opens to its own unique courtyard or garden view.
Though born out of a strict regulatory framework and developed without a specific client, the rebuild design unfolded with remarkable clarity. Grounded in site logic, refined by limitations and an emphasis on timeless spatial relationships – light, proportion, and a strong connection to nature, the resulting design feels both effortless and uplifting. The home lives lightly on the land, opens generously to its surroundings, and strikes a careful balance between privacy, openness, and calm. For Klopf Architecture, it stands as a compelling case study in how site, code, and circumstantial constraints can inspire enduring, modernist architecture. With years of experience reimagining mid-century modern design for how people live today, the firm took the project’s limitations as an opportunity. The result is a home shaped by open, flowing spaces, strong indoor-outdoor connections, and a calm, clear sense of structure. It’s a good reminder that even with strict constraints, there’s still room for architecture to breathe—and for modernism to keep moving forward.
Klopf Architecture project team: Geoff Campen, John Klopf, AIA, and Sherry Tan
Structural Engineer: ZFA
Contractor: Maison D’Artiste
Photography: ©2025 Mariko Reed
Year Completed: 2023
Find the right local pro for your project
 Northwest Outdoor Lighting
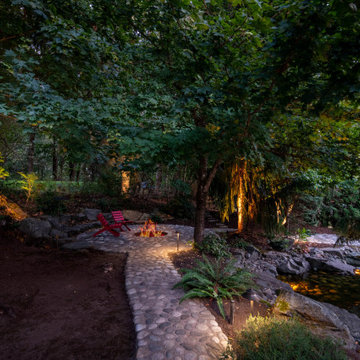
This immersive water feature experience is like nothing we’ve ever seen or lit before!
This large water feature circumstance is at least 40 feet wide with multiple waterfalls and viewing vignettes. Each sitting area provides a different experience. Some areas are purposefully darker and more intimate than others. You can walk from the patio area to the firepit, situated in the back corner. Then from the sitting area and back to the patio all while enjoying this beautiful experience. Never fearing that you'll fall in!
During their evening consultation, the homeowners were greatly involved. They even chose specific fixtures. With our design guidance, we included various color tones for high impact and minimal light glare. We used multiple uplights, path lights and submersible lights in a mixture of 2700 K (Kelvin). We also used the Sunset tone in the water feature to create a waterscape that was relaxing.
That's the beauty of hiring Northwest Outdoor Lighting. You can choose how involved you want to be. Our designers are flexible! We know we'll select the best products based on function and aesthetics. But having homeowners get involved in the design process means you'll love it that much more!
The extensive backyard lawn and trees were also lit with flush in-grade well lights. This makes mowing and lawn care so much easier. Highlighting the tall evergreens creates a safe environment for when the puppies need to go out at night. No scary animals are lurking in dark corners now. Path lights have been added to all the walkways.
After having the water feature unlit for years, the water feature has now become the homeowner’s pride and joy!

 Stone Action
Cambrian Black granite is shown in this project!
Search the specific granite name, see more granite or other stone options: http://www.stoneaction.com
Learn more about granite to see if it’s right for you:
Granite countertops can last a lifetime. It contains no harmful chemicals and do not emit harmful radiation or gasses. Granite is heat resistant and is one of the most heat-resistant countertops on the market. You can place a hot pan out of the oven directly onto the countertop surface. Experts do recommend the use of a trivet when using appliances that emit heat for long periods of time, such as crockpots. Since the material is so dense, there is a small possibility heating one area of the top and not the entire thing, could cause the countertop to crack.
Granite is scratch resistant. You can cut on it, but it will dull your knives! Granite scores a seven on Moh’s hardness scale.
Granite countertops are considered to be a low maintenance countertop surface. The likelihood of needing to be repaired or resurfaced is low. Granite is a porous material. Most fabricators will apply a sealer to granite countertops before they are installed which will protect them from absorbing liquids too quickly. Many sealers last more than 10 years before needing to be reapplied. When they do need to be reapplied, it is something that most homeowners can do on their own as the process is similar to cleaning. Darker granites are very dense and sometimes don’t even require a sealer.
When it comes to pricing, there are a lot of variables such as edge profile, total square footage, backsplash, etc. Don’t be fooled by the stereotype that all granite is expensive. Lower-range granites will cost less than high-range laminate. Though granite countertops are not considered “low range” in pricing, there are a lot of affordable options.
If you are looking for something truly unique, consider an exotic granite. Some quarries are not easily accessible and/or only able to be quarried for short periods of time throughout the year. If these circumstances exist in a quarry with gorgeous stone, the price will be driven upward
You won’t find a lot of solid patterns or bright colors, but both do exist. Also, watch for a large range of color and pattern within the same color of stone. It’s always a good idea to view the exact slab(s) that will be fabricated for your kitchen to make sure they are what you expected to see from the sample. Another factor is that many exotic types of granite have huge flowing waves, and a small sample will not be an accurate representation of the whole slab.
Granite countertops are very resistant to chemicals. Acids and bases will not harm the material.
 Twelve Stones Designs, LLC
The owners of this kitchen had spent the money to upgrade the finishes in their kitchen upon building the home 12 years ago, but after living in the space for several years they realized how nonfunctional the layout really was. The (then) two preschool aged children had grown into busy, hungry teenagers with many friends who also liked to hang out at the house. So the family needed a more functional kitchen with better traffic flow, space for daily activities revolving around the kitchen at different times of day, and a kitchen that could accommodate cooking for and serving large groups. Furthermore, the dark, traditional finishes no longer reflected the homeowners’ style. They requested a brighter, more relaxed, coastal style that reflected their love of the seaside cities they like to visit.
Originally, the kitchen was U-shaped with a narrow island in the middle. The island created narrow aisles that bottle-necked at the dishwasher, refrigerator, and cooktop areas. There was a pass-through from the foyer into the kitchen, but the owners never liked that the pass-through was also located so close to the powder room. The awkward proximity was unappealing and made guests feel uncomfortable.
The kitchen’s storage was made up of lots of narrow cabinets, apothecary drawers, clipped corner units, and very few drawers. It lacked useful storage for the larger items the family used on a daily basis. And the kitchen’s only pantry was small closet that had only builder-grade, narrow shelving with no illumination to be able to see the contents inside.
Overall, the kitchen’s lighting plan was poorly executed. Only six recessed cans illuminated the entire kitchen and nook areas. The under cabinet lighting was not evenly distributed either. In fact, the builder had mis-placed the under cabinet lighting around the decorative pilasters which made for choppy, dark cubbies. Further, the builder didn’t include any lighting over the sink or the bar area, which meant whoever was doing the dishes was always in their own shadow. That, coupled with the steep overhang of the game room above made the bar area feel like a dim, cavernous space that wasn’t inviting or task oriented. The kitchen looked out into the main living space, but the raised bar and a narrow wall (which held the only large cabinet in the kitchen) created more of a barrier than a relationship to the living room or breakfast nook. In fact, one couldn’t even see the breakfast nook from the cooktop or sink areas due to its orientation. The raised bar top was too narrow to comfortably sit to either dine at or chat from due to the lack of knee space. The the homeowners confided that the kitchen felt more like a dark, dirty prison than place where the family, or their guests, wanted to gather and commune.
The clients' needs and desires were:
➢ to create a kitchen that would be a space the family loved to be in; to relate to the adjacent spaces all around, and to have better flow for entertaining large groups
➢ to remove the walls between the breakfast nook and living area and to be able to utilize the natural light from the windows in both those areas
➢ to incorporate a functional chopping block for prepping fresh food for home cooked meals, an island with a large sink and drain board, 2 pull out trash cans, and seating for at least the 2 teens to eat or do homework
➢ to design a kitchen and breakfast nook with an airy, coastal, relaxed vibe that blended with the rest of the house's coastal theme
➢ to integrate a layered lighting plan which would include ample general illumination, specific task lighting, decorative lighting, and lots of illuminated storage
➢ to design a kitchen with not only more storage for all the husband’s kitchen gadgets and collection of oils and spices, but smart storage, including a coffee/breakfast bar and a place to store and conceal the toaster oven and microwave
➢ to find a way to utilize the large open space between the kitchen, pantry area, and breakfast nook
Twelve Stones Designs achieved the owner's goals by:
➢ removing the walls between the kitchen and living room to allow the natural light to filter in from the adjacent rooms and to create a connection between the kitchen, nook, and living spaces for a sense of unity and communion
➢ removing the existing pantry and designing 3 large pantry style cabinets with LED tape lights and rollout drawers to house lots of kitchen appliances, gadgets, and tons of groceries. We also took the cabinets all the way up to the 9’ ceiling for additional storage for seasonal items and bulk storage.
➢ designing 2 islands - 1 with a gorgeous black walnut chopping block that houses a drawer for chopping and carving knives and a custom double pull out trash unit for point of use utilization - and 1 that houses the dishwasher, a large Blanco Gourmet sink with integrated drain board, woven baskets for fresh root vegetables and kitchen towels, plenty of drawer storage for kitchen items, and bar seating for up to 4 diners.
➢ closing off the space between the kitchen and the powder room to create a beautiful new private alcove for the powder room as well as adding some decorative storage. This also gave us space to include more tall storage near the new range for precision placement of the husband’s extensive oil and spice collection as well as a location for a combo-steam oven the wife wanted for baking and cooking healthy meals.
The project is enhanced functionally by:
➢ incorporated USB and standard receptacles for the kids’ laptops and phone charging in the large island
➢ designing the small island to include additional open shelving for items used on a daily basis such as a variety of bowls, plates, and colanders. This set up also works well for the husband who prefers to “plate” his dinners in restaurant-style fashion before presenting them to the table.
➢ the integration of specific storage units, such as double stacked cutlery drawers, a custom spice pull-out, a Kuerig coffee and tea pod drawer, and custom double stacked utensil drawers
➢ moving the refrigerator to the old oven location - this eliminated the bottle neck as well as created a better relationship to the eating table. It also utilizes the floor space between the pantry, nook, and kitchen
➢ creating a banquet style breakfast nook - this banquette seating not only doubles the amount of seating for large gatherings but it better utilizes the odd space between the kitchen and the previous nook area. It also helps to create a distinct pathway from the mudroom room through the pantry area, kitchen, nook, and living room.
➢ the coffee/breakfast bar area which includes the perfect location for the concealed microwave and toaster oven, convenient storage for the coffee pods and tea accoutrements. Roll-out drawers below also house the smoothie maker, hot water kettle, and a plethora of smoothie-making ingredients such as protein powders, smoothie additives, etc. Furthermore, the drawers below the Keurig house measuring utensil, cutlery, baking supplies and tupperware storage.
➢ incorporating lots of wide drawers and pullouts to accommodate large cookware.
➢ utilizing as much vertical space as possible by building storage to the ceiling which accommodates the family’s abundant amount of serving platters, baking sheets, bakeware, casserole dishes, and additional cutting boards.
The project is enhanced aesthetically by:
➢ new 5-piece Versailles pattern porcelain tile that now seamlessly joins the entire down stairs area together creating a bright, cohesiveness feeling instead of choppy separated spaces - it also adds a coastal feeling
➢ designing a cabinet to conceal the microwave and toaster oven
➢ the coastal influenced light fixtures over the nook table and island
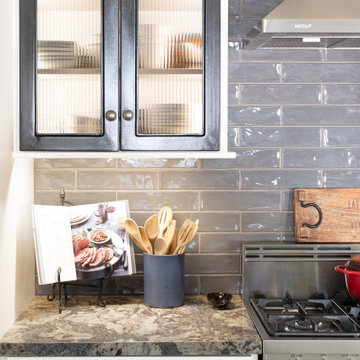
➢ the sandy colors of the Langdon Cambria countertops. The swirling pattern and sparkling quartz pieces remind the homeowner of black-and-tan sandy beaches
➢ the striped banquet seating whose creamy white background and blue-green stripes were the inspiration for the cabinet and wall colors.
➢ All the interior doors were painted black to coordinate with the blacks and grays in the backsplash tile and countertop. This also adds a hint of tailored formality to an otherwise casual space.
➢ the use of WAC's Oculux small aperture LED units for the overhead lighting complimented with Diode LED strips for task lighting under the cabinets and inside the pantry and glass wall cabinets. All of the lighting applications are on separate dimmer switches.
Innovative uses of materials or construction methods by Realty Restoration LLC:
➢ Each 1-1/2” x 3” block of reclaimed end-grain black walnut that makes up the center island chopping block was hand milled and built in the shop. It was designed to look substantial and proportional to the surrounding elements, executed by creating the 4 inch tall top with a solid wood chamfered edge band.
➢ The metal doors on either side of the vent hood were also custom designed for this project and built in the Realty Restoration LLC shop. They are made 1x2, 11-gauge mild steel with ribbed glass. Weighing 60 lbs a piece, heavy duty cabinet hinges were added to support the weight of the door and keep them from sagging.
➢ Under-cabinet receptacles were added along the range wall in order to have a clean, uninterrupted backsplash.
Design obstacles to overcome:
➢ Because we were removing the demising walls between the kitchen and living room, we had to find a way to plumb and vent the new island. We did this by tunneling through the slab (the slab had post tension cables which prevented us from just trenching) to run a new wet vent through a nearby structural wall. We pulled the existing hot and cold lines between upper floor joists and ran them down the structural wall as well and up through a conduit in the tunnel.
➢ Since we were converting from wall overs to a gas range it allowed us to utilize the 220 feed for the wall ovens to provide a new sub panel for all the new kitchen circuits
➢ Due to framing deficiencies inherited from the original build there was a 1-1/2” differential in the floor-to-ceiling height over a 20 foot span; by utilizing the process of cutting and furring coupled with the crown moulding details on the cabinet elevations we were able to mask the problem and provide seamless transitions between the cabinet components.
Evidence of superior craftsmanship:
➢ uniquely designed, one-of-a-kind metal “X” end panels on the large island. The end panels were custom made in the Realty Restoration LLC shop and fitted to the exact dimensions of the island. The welding seams are completely indistinguishable - the posts look like they are cut from a single sheet of metal
➢ square metal posts on the small island were also custom made and designed to compliment and carry through the metal element s throughout the kitchen
➢ the beautiful, oversized end panels on the pantry cabinets which give the breakfast nook a tailored look
➢ integrating a large format 5 piece Versailles tile pattern to seamlessly flow from the existing spaces into the new kitchen space
➢ By constructing a custom cabinet that jogged around a corner we could not remodel (housing the entry way coat closet) we were able to camouflage the adjacent wall offset within the upper and lower cabinets. By designing around the existing jog in the structural walls we accomplished a few things: we were able to find the space to house, and hide, the microwave and toaster oven yet still have a clean cohesive appearance from the kitchen side. Additionally, the owners were able to keep their much needed coat closet and we didn’t have to increase the budget with unnecessary structural work.
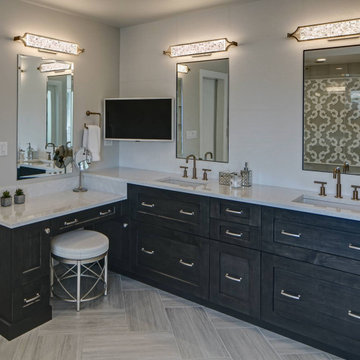
 Drury Design
The original idea was to update the tile floor and the tub. That’s it.
A further discussion of wants and needs revealed intentions for an eventual larger shower and an improved vanity storage. It made sense to map out the possibilities and design our update with potential next steps in mind. The process was exciting, ultimately leading to the decision to do a full primary bath remodel.
Design Objectives:
-Maintain existing locations for all major bathroom functions
-Make the shower larger and more open
-Use luxurious materials throughout
-Improve vanity storage and define accessories for specific items
-Incorporate luxury shower fixtures
-Include the latest technology
Design Challenges
-Enlarging the shower in a typical rectangular shape would block the view and light from the alcove windows behind the tub
-Logical placement of the built-in shower caddy and all shower components in accordance with how and where they were to be used
-Keeping the long, back wall free from any shower modules to maintain the decorative tile design
-Combining the owner’s existing smart home system with a comprehensive shower system
-Planning cabinetry for hidden storage and use for various small appliances and make-up
-Integrating expensive shower wall tile with less expensive wall tile for aesthetic and budget purposes
-Incorporating special design features to balance the highly decorative shower tile
Design solutions:
-A clipped corner was planned for the shower bench seat – this allowed for a larger glass wall. The glass wall at the angled bench also brought more natural light into the shower
-Thoughtful shower space design prevented the crowding of features – the shower caddy and handheld shower head were placed on the full-height wall by the shower bench, the regular shower head and body sprays remained on the opposite wall, and the rain head was placed in the center of the shower
-A multi-port DTV system was installed, providing control of all shower components, including chromotherapy and music inside and outside the shower
-The lavish water-jet stone and glass decorative tile was paired with a less-expensive glass tile found in the mosaic
-Pull-out grooming organizers and electrical docking stations were incorporated into the cabinetry
Additional storage was created in the lower corner cabinet
The homeowners are thrilled with their new primary bathroom. Clear goals and carefully evaluated materials informed a fun and functional design that is both thoughtful and sumptuous!
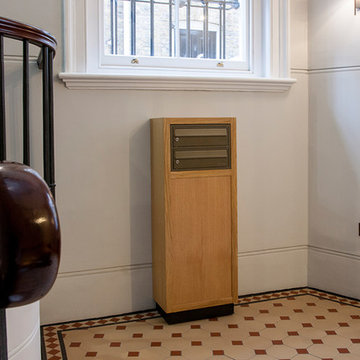
 The Safety Letterbox Company
Floral Court is a mixed-use development featuring a high-quality residential, retail and restaurant space located in London’s Covent Garden. The project has created a new public walkway between Floral Street and King Street, providing increased footfall levels that provide a vital link to the retail and restaurant units in the development.
The mailboxes used in the Floral Court project are situated in internal lobby areas that residents pass through to access their apartment. Each bank of mailboxes is fitted into a bespoke timber frame with an internal steel frame support that ensures multiple mailboxes are securely installed in their respective locations.
The chosen mailbox model for this development is the NW2 product, an item that is particularly popular with clients looking for a mailbox that has a minimalist design finish and where mail is to be both delivered and retrieved through the front face. This project uses a lateral variation of the NW2 mailbox, which allows for A4 sized flexible mail to be deposited and securely stored in the post box. The lateral type of post box typically features a shorter depth and larger width, which is ideal for installation areas that are relatively narrow.
To reflect the number of residences that they service, the mailboxes are in a variety of different configurations across the site.
Each post box has been engraved with corresponding residence numbers during the manufacturing process. To allow for a clean finish on the mailbox, the client opted for the engraving to be the same colour as the mailboxes themselves. Being used with the NW2 product, which has been specifically designed to have minimal features, this is the ideal mailbox and engraving combination for a sleek designer look.
The mailbox is engraved with the front family ‘Calisto MT’, which is used in other locations on the site. This ensures a consistent mirroring of fonts used throughout the Floral Court development.
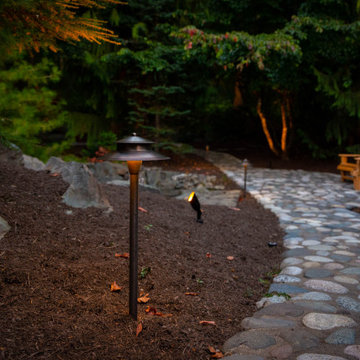 Northwest Outdoor Lighting
This immersive water feature experience is like nothing we’ve ever seen or lit before!
This large water feature circumstance is at least 40 feet wide with multiple waterfalls and viewing vignettes. Each sitting area provides a different experience. Some areas are purposefully darker and more intimate than others. You can walk from the patio area to the firepit, situated in the back corner. Then from the sitting area and back to the patio all while enjoying this beautiful experience. Never fearing that you'll fall in!
During their evening consultation, the homeowners were greatly involved. They even chose specific fixtures. With our design guidance, we included various color tones for high impact and minimal light glare. We used multiple uplights, path lights and submersible lights in a mixture of 2700 K (Kelvin). We also used the Sunset tone in the water feature to create a waterscape that was relaxing.
That's the beauty of hiring Northwest Outdoor Lighting. You can choose how involved you want to be. Our designers are flexible! We know we'll select the best products based on function and aesthetics. But having homeowners get involved in the design process means you'll love it that much more!
The extensive backyard lawn and trees were also lit with flush in-grade well lights. This makes mowing and lawn care so much easier. Highlighting the tall evergreens creates a safe environment for when the puppies need to go out at night. No scary animals are lurking in dark corners now. Path lights have been added to all the walkways.
After having the water feature unlit for years, the water feature has now become the homeowner’s pride and joy!
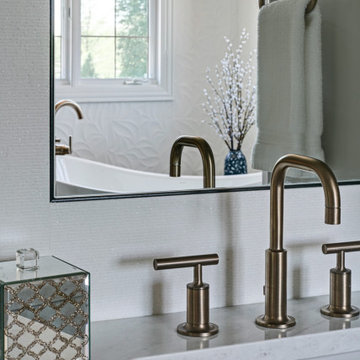 Drury Design
The original idea was to update the tile floor and the tub. That’s it.
A further discussion of wants and needs revealed intentions for an eventual larger shower and an improved vanity storage. It made sense to map out the possibilities and design our update with potential next steps in mind. The process was exciting, ultimately leading to the decision to do a full primary bath remodel.
Design Objectives:
-Maintain existing locations for all major bathroom functions
-Make the shower larger and more open
-Use luxurious materials throughout
-Improve vanity storage and define accessories for specific items
-Incorporate luxury shower fixtures
-Include the latest technology
Design Challenges
-Enlarging the shower in a typical rectangular shape would block the view and light from the alcove windows behind the tub
-Logical placement of the built-in shower caddy and all shower components in accordance with how and where they were to be used
-Keeping the long, back wall free from any shower modules to maintain the decorative tile design
-Combining the owner’s existing smart home system with a comprehensive shower system
-Planning cabinetry for hidden storage and use for various small appliances and make-up
-Integrating expensive shower wall tile with less expensive wall tile for aesthetic and budget purposes
-Incorporating special design features to balance the highly decorative shower tile
Design solutions:
-A clipped corner was planned for the shower bench seat – this allowed for a larger glass wall. The glass wall at the angled bench also brought more natural light into the shower
-Thoughtful shower space design prevented the crowding of features – the shower caddy and handheld shower head were placed on the full-height wall by the shower bench, the regular shower head and body sprays remained on the opposite wall, and the rain head was placed in the center of the shower
-A multi-port DTV system was installed, providing control of all shower components, including chromotherapy and music inside and outside the shower
-The lavish water-jet stone and glass decorative tile was paired with a less-expensive glass tile found in the mosaic
-Pull-out grooming organizers and electrical docking stations were incorporated into the cabinetry
Additional storage was created in the lower corner cabinet
The homeowners are thrilled with their new primary bathroom. Clear goals and carefully evaluated materials informed a fun and functional design that is both thoughtful and sumptuous!
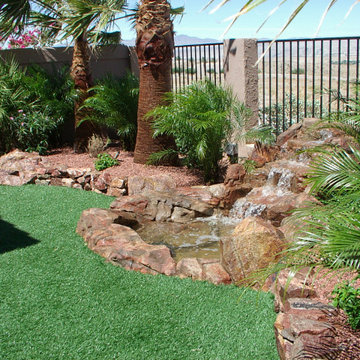
 Babcock Custom Pools & Environments
Babcock Custom Pools: Transforming Backyards into Oases with Palms
If you seek a swimming pool that boasts an interplay of aesthetics, elegance, and proficiency, then Babcock Custom Pools is the solution you have been searching for. Our pool-crafting experts boast an extensive portfolio of pool designs that have consistently surpassed our clients’ anticipations. A hallmark of our designs is the seamless integration of palms – an element we passionately incorporate into our custom creations.
At Babcock Custom Pools, we take great pride in our unwavering commitment to craftsmanship and quality. Our process, from the initial consultation to the final construction, is a testament to our pursuit of excellence. Our team of experts consists of seasoned professionals who possess a passion for creating pools that not only serve their practical purpose but are also visually stunning.
Palms are a ubiquitous choice for pool landscaping, and for good reason. They add a tropical vibe to your outdoor space, and their presence imbues the area with a lush, serene atmosphere. Furthermore, palms provide the much-needed shade on a hot summer day. At Babcock Custom Pools, we wholeheartedly embrace the use of palms in our designs, and our clients rave about the results.
We appreciate the fact that each of our clients is unique, and their pool designs should be a reflection of their individuality. As such, we work closely with our clients to craft customized designs that align with their specific needs and preferences. Whether you envision a sleek, minimalist design or a more traditional aesthetic, our team will collaborate with you to create a pool that perfectly embodies your style.
When it comes to constructing pools, we use only the finest materials and the most advanced technologies. Our pools are designed to be durable, energy-efficient, and low-maintenance, ensuring that you can spend more time relishing in the pool and less time maintaining it.
In conclusion, if you desire a custom pool design that is both beautiful and functional, Babcock Custom Pools is the answer. Our team of experts will work hand-in-hand with you to create a pool that exceeds your expectations. And, of course, we will not forget to incorporate an ample amount of palms – because we love palms and are confident that you will too. Contact us today to learn more about our services!
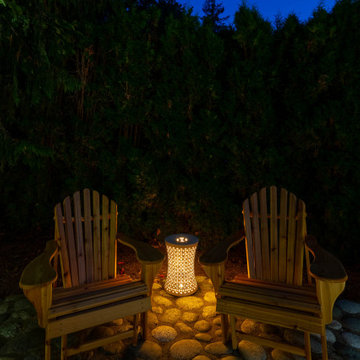 Northwest Outdoor Lighting
This immersive water feature experience is like nothing we’ve ever seen or lit before!
This large water feature circumstance is at least 40 feet wide with multiple waterfalls and viewing vignettes. Each sitting area provides a different experience. Some areas are purposefully darker and more intimate than others. You can walk from the patio area to the firepit, situated in the back corner. Then from the sitting area and back to the patio all while enjoying this beautiful experience. Never fearing that you'll fall in!
During their evening consultation, the homeowners were greatly involved. They even chose specific fixtures. With our design guidance, we included various color tones for high impact and minimal light glare. We used multiple uplights, path lights and submersible lights in a mixture of 2700 K (Kelvin). We also used the Sunset tone in the water feature to create a waterscape that was relaxing.
That's the beauty of hiring Northwest Outdoor Lighting. You can choose how involved you want to be. Our designers are flexible! We know we'll select the best products based on function and aesthetics. But having homeowners get involved in the design process means you'll love it that much more!
The extensive backyard lawn and trees were also lit with flush in-grade well lights. This makes mowing and lawn care so much easier. Highlighting the tall evergreens creates a safe environment for when the puppies need to go out at night. No scary animals are lurking in dark corners now. Path lights have been added to all the walkways.
After having the water feature unlit for years, the water feature has now become the homeowner’s pride and joy!
 Stone Action
Cambrian Black granite is shown in this project!
Search the specific granite name, see more granite or other stone options: http://www.stoneaction.com
Learn more about granite to see if it’s right for you:
Granite countertops can last a lifetime. It contains no harmful chemicals and do not emit harmful radiation or gasses. Granite is heat resistant and is one of the most heat-resistant countertops on the market. You can place a hot pan out of the oven directly onto the countertop surface. Experts do recommend the use of a trivet when using appliances that emit heat for long periods of time, such as crockpots. Since the material is so dense, there is a small possibility heating one area of the top and not the entire thing, could cause the countertop to crack.
Granite is scratch resistant. You can cut on it, but it will dull your knives! Granite scores a seven on Moh’s hardness scale.
Granite countertops are considered to be a low maintenance countertop surface. The likelihood of needing to be repaired or resurfaced is low. Granite is a porous material. Most fabricators will apply a sealer to granite countertops before they are installed which will protect them from absorbing liquids too quickly. Many sealers last more than 10 years before needing to be reapplied. When they do need to be reapplied, it is something that most homeowners can do on their own as the process is similar to cleaning. Darker granites are very dense and sometimes don’t even require a sealer.
When it comes to pricing, there are a lot of variables such as edge profile, total square footage, backsplash, etc. Don’t be fooled by the stereotype that all granite is expensive. Lower-range granites will cost less than high-range laminate. Though granite countertops are not considered “low range” in pricing, there are a lot of affordable options.
If you are looking for something truly unique, consider an exotic granite. Some quarries are not easily accessible and/or only able to be quarried for short periods of time throughout the year. If these circumstances exist in a quarry with gorgeous stone, the price will be driven upward
You won’t find a lot of solid patterns or bright colors, but both do exist. Also, watch for a large range of color and pattern within the same color of stone. It’s always a good idea to view the exact slab(s) that will be fabricated for your kitchen to make sure they are what you expected to see from the sample. Another factor is that many exotic types of granite have huge flowing waves, and a small sample will not be an accurate representation of the whole slab.
Granite countertops are very resistant to chemicals. Acids and bases will not harm the material.
 The Safety Letterbox Company
Floral Court is a mixed-use development featuring a high-quality residential, retail and restaurant space located in London’s Covent Garden. The project has created a new public walkway between Floral Street and King Street, providing increased footfall levels that provide a vital link to the retail and restaurant units in the development.
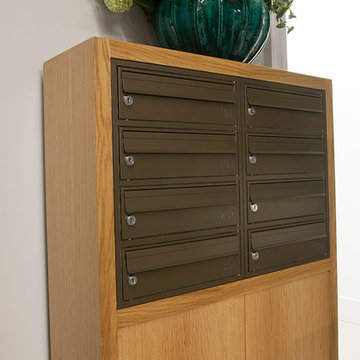
The mailboxes used in the Floral Court project are situated in internal lobby areas that residents pass through to access their apartment. Each bank of mailboxes is fitted into a bespoke timber frame with an internal steel frame support that ensures multiple mailboxes are securely installed in their respective locations.
The chosen mailbox model for this development is the NW2 product, an item that is particularly popular with clients looking for a mailbox that has a minimalist design finish and where mail is to be both delivered and retrieved through the front face. This project uses a lateral variation of the NW2 mailbox, which allows for A4 sized flexible mail to be deposited and securely stored in the post box. The lateral type of post box typically features a shorter depth and larger width, which is ideal for installation areas that are relatively narrow.
To reflect the number of residences that they service, the mailboxes are in a variety of different configurations across the site.
Each post box has been engraved with corresponding residence numbers during the manufacturing process. To allow for a clean finish on the mailbox, the client opted for the engraving to be the same colour as the mailboxes themselves. Being used with the NW2 product, which has been specifically designed to have minimal features, this is the ideal mailbox and engraving combination for a sleek designer look.
The mailbox is engraved with the front family ‘Calisto MT’, which is used in other locations on the site. This ensures a consistent mirroring of fonts used throughout the Floral Court development.
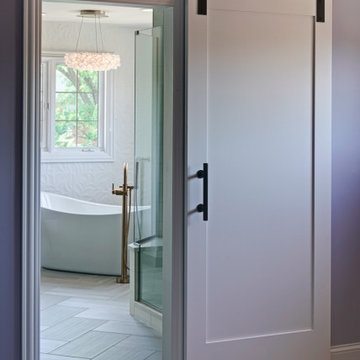 Drury Design
The original idea was to update the tile floor and the tub. That’s it.
A further discussion of wants and needs revealed intentions for an eventual larger shower and an improved vanity storage. It made sense to map out the possibilities and design our update with potential next steps in mind. The process was exciting, ultimately leading to the decision to do a full primary bath remodel.
Design Objectives:
-Maintain existing locations for all major bathroom functions
-Make the shower larger and more open
-Use luxurious materials throughout
-Improve vanity storage and define accessories for specific items
-Incorporate luxury shower fixtures
-Include the latest technology
Design Challenges
-Enlarging the shower in a typical rectangular shape would block the view and light from the alcove windows behind the tub
-Logical placement of the built-in shower caddy and all shower components in accordance with how and where they were to be used
-Keeping the long, back wall free from any shower modules to maintain the decorative tile design
-Combining the owner’s existing smart home system with a comprehensive shower system
-Planning cabinetry for hidden storage and use for various small appliances and make-up
-Integrating expensive shower wall tile with less expensive wall tile for aesthetic and budget purposes
-Incorporating special design features to balance the highly decorative shower tile
Design solutions:
-A clipped corner was planned for the shower bench seat – this allowed for a larger glass wall. The glass wall at the angled bench also brought more natural light into the shower
-Thoughtful shower space design prevented the crowding of features – the shower caddy and handheld shower head were placed on the full-height wall by the shower bench, the regular shower head and body sprays remained on the opposite wall, and the rain head was placed in the center of the shower
-A multi-port DTV system was installed, providing control of all shower components, including chromotherapy and music inside and outside the shower
-The lavish water-jet stone and glass decorative tile was paired with a less-expensive glass tile found in the mosaic
-Pull-out grooming organizers and electrical docking stations were incorporated into the cabinetry
Additional storage was created in the lower corner cabinet
The homeowners are thrilled with their new primary bathroom. Clear goals and carefully evaluated materials informed a fun and functional design that is both thoughtful and sumptuous!
 User
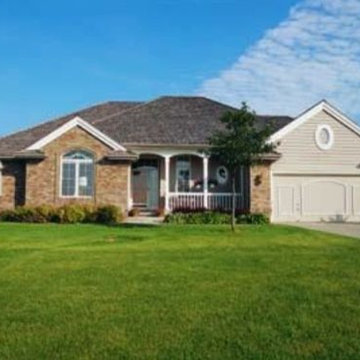
House Plan 20-560 - Houseplans.com
Questions? Call us at 1-800-913-2350
Photographs may show modified designs. All images are copyrighted.
Plan 20-560
1808 sq ft
3 beds
2.50 baths
64' wide
44' deep
×
Plans
Main Floor Plan
Reverse
Specifications
Plan Styles
Traditional
Kitchen Features
Nook Breakfast Area Dining
Peninsula Eating Bar
Outdoor Spaces
Covered Front Porch
Area
Main Floor Sq Ft
1808 sq ft
Total Sq Ft
1808 sq ft
Plan Feature
Unlimited Use
Teen Suite Jack Jill Bath
Basic Features
Garage Stalls
2
Potential Bedrooms
0
Bedrooms
3
Stories
1
Baths
2.50
Additional Rooms
Great Room Living Room
Bedroom Features
Walk In Closet
Dimension
Width
64'
Depth
44'
Designer Notes
Included
COVER PAGE: Plan features the rendered elevation and informative reference sections including general notes and design criteria, abbreviations and symbols.
ELEVATIONS: Drafted at 1/4" scale for the front and 1/8" scale for the rear and sides.
All elevations are detailed and an aerial view of the roof is provided, showing all hips, valleys and ridges.
FOUNDATIONS: Drafted at 1/4" scale.
Block foundations and basements are standard.
The foundation plan also shows the HVAC equipment, structural information, steel beam and pole locations and the direction and spacing of the floor system above.
MAIN LEVEL FLOOR PLAN: 1/4" scale.
Fully dimensioned from stud to stud for ease of framing.
2x4 walls are standard unless noted otherwise.
The detailed drawings include such things as structural header locations, framing layout and kitchen layout.
SECOND LEVEL FLOOR PLAN: (if applicable) 1/4" scale.
Dimensioned from stud to stud and drafted to the same degree of detail as the main level floor plan.
INTERIOR ELEVATIONS: Useful for the cabinet and bidding process, this page shows all kitchen and bathroom cabinets as well as any other cabinet elevations.
ELECTRICAL AND SECTIONS: Illustrated on a separate page for clarity, the electrical plan shows suggested electrical layout for the foundation, main and seco
 Allreno
How AI is Revolutionizing Bathroom and Kitchen Renovations in 2025
The renovation industry is entering a new era — and it’s powered by artificial intelligence. For decades, bathroom and kitchen makeovers required weeks of back-and-forth planning, consultations, and budgeting. But in 2025, AI bathroom design and AI kitchen renovation tools are transforming the experience, making it faster, smarter, and far more personalized.
A Smarter Way to Renovate
Traditional renovation processes are known for being time-consuming and stressful. From collecting measurements to selecting products and coordinating contractors, homeowners are often left overwhelmed. That’s where AI comes in — simplifying every step of the journey.
Using platforms like the Allreno app, homeowners can now scan their space with a smartphone, instantly generate a 3D model, and receive personalized layout suggestions. The app’s AI engine automatically recommends styles, color palettes, and materials that match your preferences — saving hours of guesswork.
AI Bathroom Design: A Game-Changer
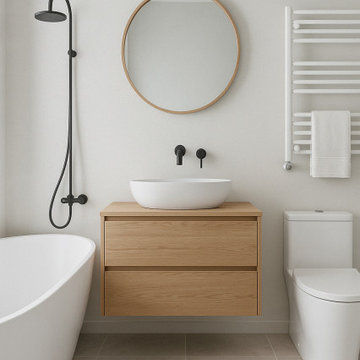
Designing a bathroom used to mean working with spreadsheets, mood boards, and several design consultations. Today, AI bathroom design streamlines this process into minutes. Tools like Allreno analyze space dimensions, plumbing positions, lighting conditions, and user style inputs to generate design proposals that are not only beautiful but also practical and code-compliant.
Homeowners can preview their dream bathroom in realistic 3D, adjust fixtures and finishes, and even get instant price estimates — all before a single tile is laid.
AI Kitchen Renovation: Built for Speed and Precision
AI kitchen renovation takes things even further. AI models can detect where cabinetry fits best, suggest storage optimizations, and align design with ergonomic principles. Whether you’re planning a sleek modern kitchen or a cozy traditional space, AI delivers layouts that balance aesthetics with function.
Allreno’s smart design engine can pull directly from product inventories, ensuring the designs you see are not only buildable but immediately available — reducing delays and backorders.
Empowering Professionals and Homeowners
What makes AI-powered home renovation truly powerful is how it bridges the gap between homeowners and professionals. Contractors, designers, and suppliers can now work with exact specifications and visuals shared directly through platforms like Allreno, eliminating miscommunication and ensuring smoother execution.
This also means cost savings. With AI managing space planning, product selection, and budgeting, professionals spend less time on repetitive tasks and more time delivering quality craftsmanship.
The Rise of Smart Home Remodels
The trend toward smart home remodels is also being fueled by AI. Renovation projects now consider how your bathroom or kitchen connects with your smart lighting, voice assistants, or energy-efficient systems. Allreno helps integrate this tech seamlessly into your renovation plan, future-proofing your investment.
Why Allreno Is Leading the AI Renovation Movement
The Allreno app is at the forefront of this AI-driven shift. It’s not just a design tool — it’s a full renovation ecosystem. By combining design automation, real-time pricing, local contractor matching, and AI-powered recommendations, Allreno makes renovation as easy as ordering a product online.
In a world where speed and personalization are key, Allreno empowers homeowners to take control of their renovation journey — with clarity, confidence, and creativity.
Ready to renovate smarter?
Try the Allreno app and experience the future of home renovation today.
 Drury Design
The original idea was to update the tile floor and the tub. That’s it.
A further discussion of wants and needs revealed intentions for an eventual larger shower and an improved vanity storage. It made sense to map out the possibilities and design our update with potential next steps in mind. The process was exciting, ultimately leading to the decision to do a full primary bath remodel.
Design Objectives:
-Maintain existing locations for all major bathroom functions
-Make the shower larger and more open
-Use luxurious materials throughout
-Improve vanity storage and define accessories for specific items
-Incorporate luxury shower fixtures
-Include the latest technology
Design Challenges
-Enlarging the shower in a typical rectangular shape would block the view and light from the alcove windows behind the tub
-Logical placement of the built-in shower caddy and all shower components in accordance with how and where they were to be used
-Keeping the long, back wall free from any shower modules to maintain the decorative tile design
-Combining the owner’s existing smart home system with a comprehensive shower system
-Planning cabinetry for hidden storage and use for various small appliances and make-up
-Integrating expensive shower wall tile with less expensive wall tile for aesthetic and budget purposes
-Incorporating special design features to balance the highly decorative shower tile
Design solutions:
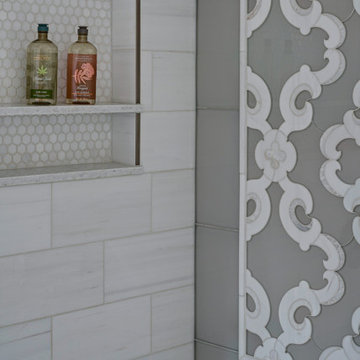
-A clipped corner was planned for the shower bench seat – this allowed for a larger glass wall. The glass wall at the angled bench also brought more natural light into the shower
-Thoughtful shower space design prevented the crowding of features – the shower caddy and handheld shower head were placed on the full-height wall by the shower bench, the regular shower head and body sprays remained on the opposite wall, and the rain head was placed in the center of the shower
-A multi-port DTV system was installed, providing control of all shower components, including chromotherapy and music inside and outside the shower
-The lavish water-jet stone and glass decorative tile was paired with a less-expensive glass tile found in the mosaic
-Pull-out grooming organizers and electrical docking stations were incorporated into the cabinetry
Additional storage was created in the lower corner cabinet
The homeowners are thrilled with their new primary bathroom. Clear goals and carefully evaluated materials informed a fun and functional design that is both thoughtful and sumptuous!
 The Safety Letterbox Company
Floral Court is a mixed-use development featuring a high-quality residential, retail and restaurant space located in London’s Covent Garden. The project has created a new public walkway between Floral Street and King Street, providing increased footfall levels that provide a vital link to the retail and restaurant units in the development.
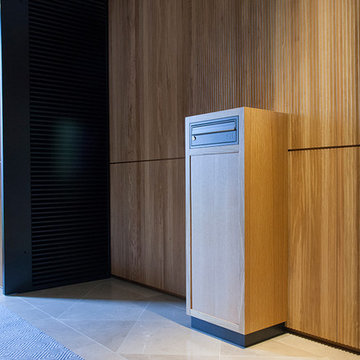
The mailboxes used in the Floral Court project are situated in internal lobby areas that residents pass through to access their apartment. Each bank of mailboxes is fitted into a bespoke timber frame with an internal steel frame support that ensures multiple mailboxes are securely installed in their respective locations.
The chosen mailbox model for this development is the NW2 product, an item that is particularly popular with clients looking for a mailbox that has a minimalist design finish and where mail is to be both delivered and retrieved through the front face. This project uses a lateral variation of the NW2 mailbox, which allows for A4 sized flexible mail to be deposited and securely stored in the post box. The lateral type of post box typically features a shorter depth and larger width, which is ideal for installation areas that are relatively narrow.
To reflect the number of residences that they service, the mailboxes are in a variety of different configurations across the site.
Each post box has been engraved with corresponding residence numbers during the manufacturing process. To allow for a clean finish on the mailbox, the client opted for the engraving to be the same colour as the mailboxes themselves. Being used with the NW2 product, which has been specifically designed to have minimal features, this is the ideal mailbox and engraving combination for a sleek designer look.
The mailbox is engraved with the front family ‘Calisto MT’, which is used in other locations on the site. This ensures a consistent mirroring of fonts used throughout the Floral Court development.
 The Safety Letterbox Company
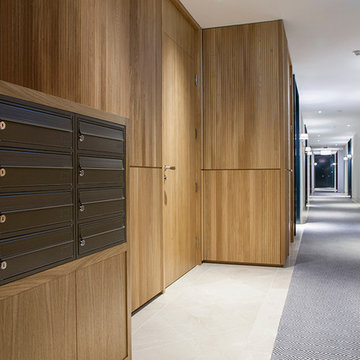
Floral Court is a mixed-use development featuring a high-quality residential, retail and restaurant space located in London’s Covent Garden. The project has created a new public walkway between Floral Street and King Street, providing increased footfall levels that provide a vital link to the retail and restaurant units in the development.
The mailboxes used in the Floral Court project are situated in internal lobby areas that residents pass through to access their apartment. Each bank of mailboxes is fitted into a bespoke timber frame with an internal steel frame support that ensures multiple mailboxes are securely installed in their respective locations.
The chosen mailbox model for this development is the NW2 product, an item that is particularly popular with clients looking for a mailbox that has a minimalist design finish and where mail is to be both delivered and retrieved through the front face. This project uses a lateral variation of the NW2 mailbox, which allows for A4 sized flexible mail to be deposited and securely stored in the post box. The lateral type of post box typically features a shorter depth and larger width, which is ideal for installation areas that are relatively narrow.
To reflect the number of residences that they service, the mailboxes are in a variety of different configurations across the site.
Each post box has been engraved with corresponding residence numbers during the manufacturing process. To allow for a clean finish on the mailbox, the client opted for the engraving to be the same colour as the mailboxes themselves. Being used with the NW2 product, which has been specifically designed to have minimal features, this is the ideal mailbox and engraving combination for a sleek designer look.
The mailbox is engraved with the front family ‘Calisto MT’, which is used in other locations on the site. This ensures a consistent mirroring of fonts used throughout the Floral Court development.
39