
Search results for "Systematic cleaning" in Home Design Ideas

 Barbara Stock Interior Design
WHITE SUBWAY TILE, CARRARA HEXAGON SHOWER FLOOR, DRIFTWOOD PORCELAIN FLOOR TILE,
Example of a mid-sized country master gray tile bathroom design in Los Angeles with shaker cabinets, white cabinets and marble countertops
Example of a mid-sized country master gray tile bathroom design in Los Angeles with shaker cabinets, white cabinets and marble countertops
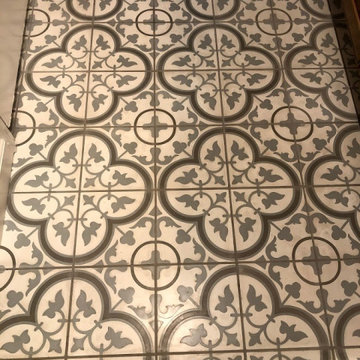
 Whitney Garrett / Kenwood Kitchens
Alcove bathtub - small cottage kids' white tile and subway tile cement tile floor, multicolored floor and single-sink alcove bathtub idea in Baltimore with recessed-panel cabinets, medium tone wood cabinets, a one-piece toilet, gray walls, an undermount sink, quartz countertops, white countertops, a niche and a built-in vanity

 Lisa Miller - PSI, Lowes Store 0477
Cabinets: Kraft Maid "Provence" in Maple w/ Burnished Praline stain.
Countertop: Granite - "Crema Pearl"
Backsplash: "Laser Metallic Earth" (#465718)
Appliances: Frigidaire Professional Series Freezerless-Refrigerator & Freezer w/ trim kit (Stainless Steel); Frigidaire Double Wall Ovens (Stainless Steel); Sharp Microwave-Drawer (#657983); Whirlpool Gold Smooth Surface Cooktop (#158261)
Flooring: Hardwood #589513
Find the right local pro for your project

 Custom Surface Solutions
 (www.css-tile.com) - Owner Craig Thompson (512) 430-1215. This project shows the remodel of a small 1950's vintage home master bathroom. 8"" x 18" Calcutta gold marble tile was used on the shower walls and floor wall base and ceramic gray penny tile on the floor. Shower includes curbless pan / floor, dual shower boxes, frameless glass slider, trough duel fixture sink and chrome fixtures.
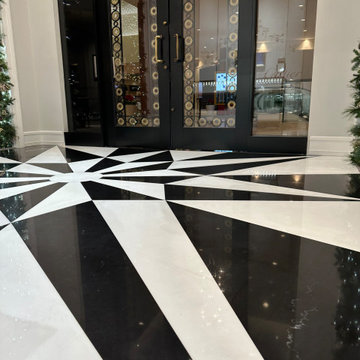
 Marble Restoration Specialist
.1. Surface Protection:
Begin by carefully protecting all sensitive areas surrounding the marble surfaces to prevent any unintended damage during the restoration process. This may involve covering adjacent surfaces, walls, or fixtures.
2. Grinding to Remove Stains & Scratches:
Employ precision grinding techniques to address stains and scratches on the marble surface. This step involves the use of specialized tools and abrasives to level the surface and eliminate imperfections.
3. Polishing to a High Sheen:
Follow the grinding phase with a meticulous polishing process. Utilize progressively finer polishing compounds and pads to enhance the marble's natural shine, achieving a high-gloss finish. This step not only minimizes scratches but also brings out the inherent beauty of the stone.
4. Sealing with 2 Coats of Sealer:
Seal the restored marble surfaces with two coats of high-quality sealer. The sealer creates a protective barrier, guarding against future stains and damage. Ensure even and thorough coverage to maximize the effectiveness of the sealer.
This straightforward process outlines key steps to rejuvenate marble surfaces, addressing both aesthetic and protective aspects. It's a systematic approach that combines precision in addressing imperfections with a focus on enhancing the overall appearance of the marble.

 Satin & Slate
Here's a complete bathroom remodel done for a family in Long Beach. Though this bathroom may look like a simple small and compact bathroom, this room holds a lot of great features. The main attraction of this bathroom comes from the open shower that is accompanied by a accented black tile wall. This shower is also featured with a full length niche for shower accessories and a bench for extra support. The bathroom is enhanced more by the golden features that come from the knobs and faucet. This bathroom is the perfect master bathroom extension.

 Floor Coverings International Coastal Carolinas
Outdoor covered patio. Herringbone pattern using 12x24 tiles
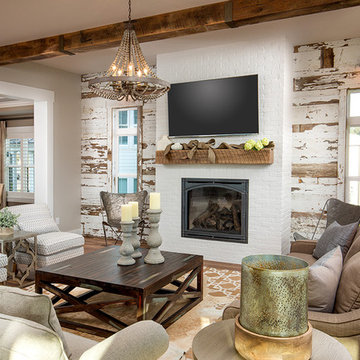


 Mark Grgurovic Hardwood Floors
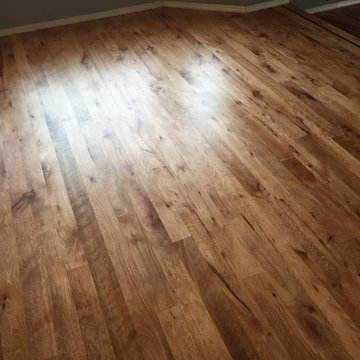
6 inch character grade white oak flooring. White washed and finished with zero voc water base finish.
Eat-in kitchen - huge contemporary single-wall light wood floor eat-in kitchen idea in Boston with two islands
Eat-in kitchen - huge contemporary single-wall light wood floor eat-in kitchen idea in Boston with two islands

 Tile Doctor Ltd
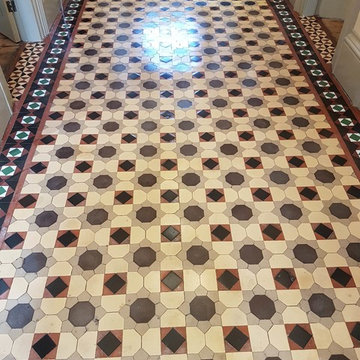
I recently re-visited a Victorian period property in the Leeds suburb of Headingley which had an unusually large tiled entrance hall which we believe to be as old as the property itself. I say re-visited as I actually gave this floor a deep clean and reseal around five years ago; it’s always nice to be asked to return to a job as it shows the customers was very happy with the work. However, with five years of wear and tear the sealer had worn down and the floor was now starting to trap dirt, also it had lost the attractive shine added by the sealer and the owner felt it was time to have it done again. Additionally, the owner had recently had the whole house decorated and wanted the floor to look its best and match the fresh appearance of the property.
Sealers do wear off with use and so it is inevitable that the tiles will need to be cleaned and sealed again with time. Given it hadn’t had a professional clean and seal for five years the floor wasn’t looking too bad as you can see from the picture, it was just a bit dull in the high traffic areas such as along the centre. I’ve certainly seen a lot worse.
Initially I wasn’t 100% sure on which cleaning method l was going to use on this floor. Originally l thought about using a coarse 200-grit burnishing pad to take off a couple of layers of sealer and then re-apply 2 more coats. However, the finish on the floor wasn’t even across the width of the hallway and l felt using that approach wouldn’t resolve that. Additionally, a lot of tiles were pitted and a burnishing pad would struggle to get into the holes. So instead I decided to completely strip the floor and re-seal it which would ensure a uniform finish across the floor.
I used a strong 50:50 dilution of Tile Doctor Pro-Clean on the tiles and scrubbed it in with a black floor pad which removed the old sealer and ingrained dirt. The large floor pads are not very effective in the corners and edges, so I used a 6-inch red buffing pad fitted to a hand buffer for those. The floor was rinsed with water and the soil extracted using a wet vacuum. After inspecting the floor some areas were retreated with a repeat of the same process.
After a final rinse and extraction of the soiled water the floor was left to dry overnight.
The next day after first checking the floor was dry with a damp meter it was sealed with four coats of Tile Doctor Seal and Go. This is a water based sealer that gives a lovely sheen and allows the colours to shine through as well as letting the floor breath, which is important in properties of this age that usually do not have a damp proof membrane.
I was very pleased with the finished result as the pictures show and glad that l had chosen to do a deep clean and not just apply more coats of sealer. The client was over the moon.
Nigel Stoker
North West Yorkshire Tile Doctor


 Total Flooring Systems
Custom Modern design Shower. Bianco Carrara on the Shower walls, Alcamo Waterjet on the Bathroom and Shower floor. Complimented by Schluter and Linear drain.
 Tom Brzoskwinia
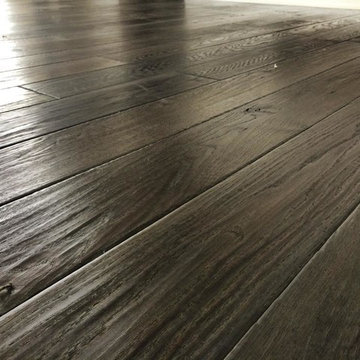
One of the most popular hardwood floor finishing which offers Tom & Peter Flooring is provided by WOCA. If you’ve decided that you want a natural looking wooden floor that is lacquer-free, then the likelihood is that you’ve chosen oil as your way of protecting your wood and making your floor look great at the same time. WOCA for wood flooring comes in various forms and is a great way of making sure that your wood is protected, but at the same time looks natural. A highly popular as well as effective way of treating wood floors, oils effectively penetrate into the wood and in some cases harden into the surface of the floor to stop damage and to maintain the wood in its optimum condition.
WOCA Oil finish hardwood flooring has taken the United States market by in 2014 and shows no signs of slowing down in 2016 and now. Here are some of the most common questions we have regarding this type of finish which we will I’m to answer in today’s my blog:
Is oil finish as durable as traditional factory urethane finishes with aluminum oxide?
When it comes to durability, oil finish flooring tackles the issue with a completely different method. The penetrating oil serves as protection from moisture and wear while allowing the user to feel the wood grains in their bare feet. If compared directly to factory finished aluminum oxide finish, the oil finish flooring will not perform as well to abrasion and impact. However, the beauty of this finish is the fact that it will camouflage any scratches which will inevitably accumulate over time.
Will this finish evaporate over time and will this be harmful for indoor air quality?
Another concern for oil finished floors its effect on indoor air quality. For on-site applications, some varieties suggest several coats which typically require the residents to be out of the home due to mild odors. However, there are factory finished UV-cured or single coat applications which lessen the downtime. Despite the odors produced during the drying process, oil finish floors rank amongst the lowest for VOC (volatile organic compound) emissions. Certain brands even boast true zero VOC. This fact alone makes oil finished floors one of the best options for green building solutions.
“WOCA products are certified by independent laboratories, the German Institute for Biological Building Materials, and are in accordance with DIN–Norm 53–160. WOCA WoodCare Denmark products meet or exceed the most stringent U.S. standards for volatile organic compounds.” –WOCA Oil Finish Manufacture
Does this type of finish require additional maintenance which I am not familiar with?
For weekly cleaning, oiled floors use a special cleaner which contains an oil and soap mixture. After a period of 12-18 months some oil may evaporate causing the wood grains to appear dry. An additional layer of oil can be reapplied to keep the floor looking fresh. Although oil finished floors require more involvement in periodic maintenance in high traffic areas, this maintenance can be done much easier than the equivalent of an onsite sand and refinish.
WOCA Master Color Oil contains pigment, which provides a single-step hardwood floor staining process. Laying down the stain and the finish in one step.
This product comes 14 different colors, from Black to Extra White, and you can mix them freely to create various color palettes that will meet the demands of any job.
Below are some pictures of the finished job…

 Custom Surface Solutions
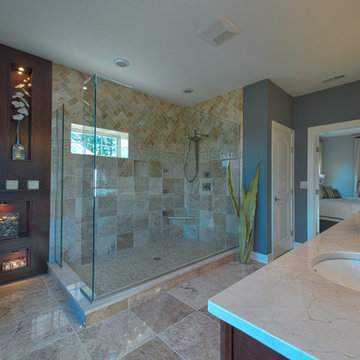
 (www.css-tile.com) - Owner Craig Thompson (512) 430-1215. This project shows new 12 x 24 tile installed vertically with offset layout pattern on wall and floor. Includes shower box with linear glass accent tile back and vertical glass accent band. Tile edges are finished with Schluter Jolly satin aluminum profile edge trim.

 Main Street Floor & Shade
Sisal Stair Carpeting with a wide cotton binding
Example of a classic staircase design in New York
Example of a classic staircase design in New York


 User
Stairs in honed Pietra d'Avola and wall in Raw texture from Salvatori
Pepe Fotografia
Staircase - contemporary staircase idea in Turin
Staircase - contemporary staircase idea in Turin
Sponsored
Columbus, OH

Hope Restoration & General Contracting
Columbus Design-Build, Kitchen & Bath Remodeling, Historic Renovations
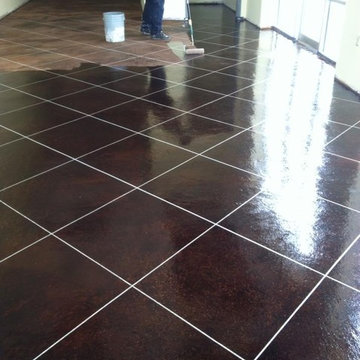


 Worm Wood Floors
Stain nutmeg oak
Mid-sized elegant formal and enclosed light wood floor living room photo in Milwaukee with white walls, no fireplace and no tv
Mid-sized elegant formal and enclosed light wood floor living room photo in Milwaukee with white walls, no fireplace and no tv

 Green Step Flooring, Inc.
Random width reclaimed oak flooring. Custom free-handed beveling, distressing, hand scraping, wire brushing. Finished with Rubio pure hand rubbed oil by Green Step Flooring, Inc. Home is located in Falls River neighborhood Raleigh, NC
5