
Search results for "Timeline based" in Home Design Ideas
 JWT Associates
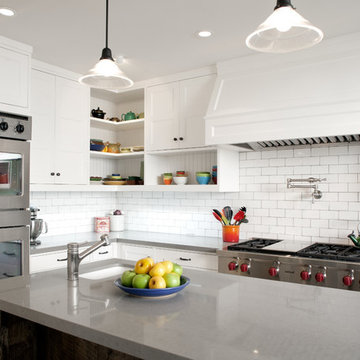
Custom face-frame cabinets and Caesarstone countertops. French door double ovens from American Range.
Arts and crafts u-shaped enclosed kitchen photo in Los Angeles with a farmhouse sink, beaded inset cabinets, white cabinets, quartz countertops, white backsplash, ceramic backsplash and paneled appliances
Arts and crafts u-shaped enclosed kitchen photo in Los Angeles with a farmhouse sink, beaded inset cabinets, white cabinets, quartz countertops, white backsplash, ceramic backsplash and paneled appliances
 Cure Design Group
KITCHEN RENOVATION CURRENT CRAFTSMAN
This client started off just being curious about our services - what we could do, and if we could even help her update her kitchen. She and her husband with their two teenage kids have lived in their home for several years without updating anything since the house was originally built. They didn’t quite have a budget in mind yet. They didn’t know their style, or even if they had one. Their timeline was simple, “as fast as you can so we’re not without a kitchen for very long” (usually what we hear for kitchen updates).
After a very productive consultation: determining the scope of work and zeroing in on a budget, I was very excited to update this underwhelming space to something that is modern but timeless, something that is theirs. And, it was easy to see what type of design style they gravitated toward looking at the pieces they already own: Craftsman/Prairie Style. I left the meeting so excited to weave in yet another genre of design to my CDG portfolio! We circled in our contractor to discuss the changes they were looking to make and the scope of work that would be theirs. Then I was off to get designing:
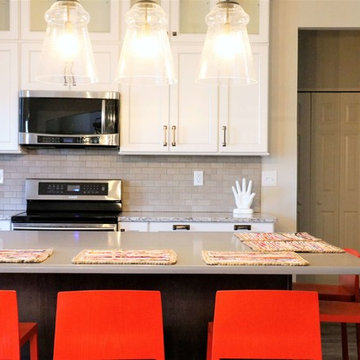
// Because the kitchen’s footprint and the defined breakfast space delineated by the bay, we kept the perimeter cabinetry as it was originally laid out. We updated these cabinets to a beautiful soft Alabaster White with a Barn Wood Glaze to highlight the simplicity of the shaker style doors. We added transom cabinets above the uppers, with only the back wall having seeded glass inserts to highlight some of their collectables.
// The original shaped island was counter-productive (See what I did there?) in functionality and design. We squared this off to reduce some of the angles and gain more storage. We highlighted the new island with a contrasting oak cabinet in a dark finish, to pay our respects to the craftsman style, and topped with a concrete-like countertop as a nod to the Prairie Style, allowing the homeowners to gain two extra seats and a massive -uninterrupted- work surface.
// The small section of cabinetry between the garage entry and fridge now is the perfect dump-station for mail, electronics, whatever is in their hands when they come into the house; and completely hidden by the refrigerator.
// The disconnected cabinetry in the breakfast area makes for a great place to have a working office. Accessible from the kitchen or the adjacent great room, this is the perfect place for the kids to do their homework while mom and dad are putting together dinner. The base cabinets are built out for office-type storage: paper and pencil drawers, filing systems, and cord management. Additionally, the long counter provides a ton of worksurface to spread out.
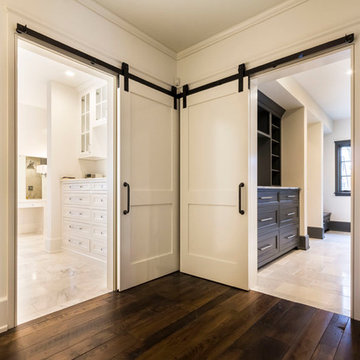
// The largest transformation was the pantry. We raised the height of the doorway and added huge custom designed bypass sliding barndoors. Finished with a dark stain to compliment the island and cut to inset 4 stained glass windows, typical of this style of design, and driving home the concept for the whole space.
// They were desperate to replace their flooring with something extremely durable to flow throughout the kitchen and the whole main level. This beautiful new flooring is actually a textured LVT(!) Which allowed them to save on overall cost and extend the life of their new flooring purchase.
// They loved their copper table, so we kept it and added new simple, mid-century modern chairs around it and a shiny new craftsman-style chandelier above. We added bright barstools in a burnt orange-red accent, and a bright woven rug to tie it all together.
// Because the kitchen renovation was shaping up to be pretty spectacular, they decided they needed to now replace their ‘now-these-look-a-little-too-old’ upholstered seating in the neighboring great room with 2 new sofas. We found the perfect sage-y-grey fabric which we covered on sofa frames that have and exposed oak-wood base, which we finished in a warm weathered grey.
// As every designer knows, a room isn’t finished until there’s something on the windows. Now that the new flooring was installed and every other room on the main level ‘seemed’ to be updated, we needed to update the window treatments in the dining, and great rooms to reflect their new design concept.
I hope you find the ‘after’ photos refreshing (as refreshing as it was for me to work on something that’s not a “Farm House” style that’s saturating the industry right now!) This was such a fun project and a great collaboration with our contractor.

 PropertyLark
The Pros and Cons of Fix and Flip Real Estate Investment
Last week, we covered The Pros and Cons of Buy and Hold Real Estate Investment for rental property investors. This week, we want to talk about the other most common type of real estate investment: “fix and flip.”
The Appeal of House Flipping
We all love the house flipping shows on HGTV and other reality channels. They’re great and they make the prospect of buying, renovating and flipping homes for big profits seem super sexy and fun. However, any experienced real estate investor will tell you it’s not quite as easy as they make it look. There’s a lot of work that goes into a successful fix and flip investment.
The basic premise of a fix and flip investment is pretty simple. You buy a property, usually one that needs some work and is available at a great price. You renovate the property, making the necessary repairs and upgrades to maximize its resale value. Then, you sell the property on the open market for the highest possible price. You get in and out as quickly as possible. Full-time flippers will move from property to property or will have multiple properties being worked on at the same time. Rather than the “buy and hold” strategy where you keep the house while earning rental income and equity over time, you are looking for the quick sale to earn your profits.
If you are going to explore house flipping—whether as a full-time career or just a side hustle—you will want to know exactly what you are getting into. That is why we are going to cover the pros and cons of fix and flip real estate investment in this article.
The Pros of Fix and Flip
Here are some of the pros of fix and flip investing:
Faster Return on Investment—The biggest appeal of fix and flip investing is that it gives you a quicker return on investment. Buy and hold will take you longer to see your ROI. House flipping allows you to see your full profit (hopefully) as soon as the house sells. The average house flip for an experienced investor is around six months. It may take longer for a first-timer who is just learning how to do certain things.
Fairly Safe Investment—As long as you do all your projections and calculations carefully and avoid any major problems along the way, house flipping is a relatively safe investment strategy compared to something as turbulent as the stock market. Real estate markets are generally predictable and the short time frame of a flip helps you avoid losses if the property happens to depreciate over a longer period of time.
Exciting—There is a reason why there are so many reality shows based around flipping and none based on buy and hold investing. It’s an exciting process to buy a home, gut it and completely renovate it. Then, you get the ultimate reward of selling it and collecting the profits—as long as you do things right.
The Cons of Fix and Flip
Here are some of the cons of fix and flip investing:
Upfront Expenses—A house flip will require a lot of upfront expenses. We’re not only talking about financing the house itself, but all the renovation costs and other expenses involved in the flip. You are laying out all that money at the beginning and only seeing your returns when the property sells. This can create cash flow issues and stress if you fall being schedule or go above your initial budget.
Taxes—House flips will usually create dramatic swings in income year over year, and that can increase your tax bill. You have to pace things correctly to take advantage of specific capital gains tax rules. Capital gains taxes are higher on any property owned less than a year, so you have to find that balance of how long you own any specific investment properties and how long it takes to complete the renovation and sale. Before you get too deep into fix and flip investing, you will want to talk with your tax advisor to make sure you have the right plan in place.
Surprises—All real estate investment is susceptible to surprises. You don’t always know what lies behind the walls until you start the renovation process. You cannot plan for everything as a real estate investor, but you have to be prepared for anything. It is a good idea to add some wiggle room in your budget and overestimate your renovation expenses/timeline to cover any surprises that may come up.
These are some of the biggest pros and cons of fix and flip real estate investment. Of course, there are other things you need to know as an investor, so be sure and do your homework in order to get the most out of your investment portfolio. Both fix and flip and buy and hold strategies can be highly lucrative if you do things right. There are no wrong answers, but there are wrong ways of doing things if you truly want to be successful in this field.
If you are looking for great investment properties to fix and flip, join the exclusive PropertyLark home buyers’ network. If you qualify, you’ll have access to our exclusive off-market deals and analytics tools that will help you identify the best investments and get the highest possible ROI. Fill out the contact form and questionnaire on the PropertyLark buyer’s site to apply!
Find the right local pro for your project
 Windy City Painters
ver look at your iron fence and wonder how rust crept up so fast? For homeowners across Chicago's North Side and Near West Side, that moment of recognition often comes too late. Windy City Painters built this project guide to help you understand exactly what a professional iron fence restoration involves, what products matter, and what Chicago's climate demands from every coat of paint applied to exposed metal.
PROJECT OVERVIEW
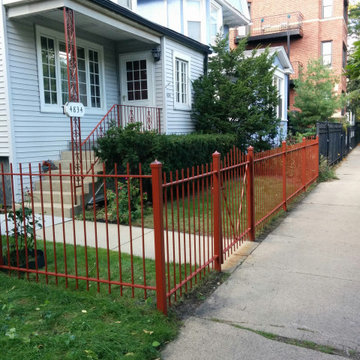
This iron fence restoration involved a multi-unit property featuring an ornamental iron perimeter fence typical of Chicago's greystone and courtyard building streetscape. The fence presented moderate-to-severe surface rust, multiple areas of paint delamination, and two sections with deep pitting requiring needle gun descaling before any coating could be applied. The goal was full rust remediation and a durable topcoat finish built for Chicago's demanding climate. Windy City Painters completed the project in two days with zero damage to surrounding hardscape.
MATERIALS AND PRODUCTS
Ospho Rust Converter - A phosphoric acid-based treatment that chemically transforms iron oxide into iron phosphate, halting active corrosion before primer is applied. Essential on Chicago iron exposed to decades of salt air and freeze-thaw cycling.
Corroseal Rust-Inhibitive Primer - A water-based latex primer with built-in rust inhibitors, applied over converted surfaces to seal and prepare metal for topcoating.
Sherwin-Williams DTM Acrylic Coating - Direct-to-Metal formulation delivering exceptional adhesion, flexibility, and corrosion resistance. Available in satin and semi-gloss, ideal for ornamental iron fence painting across Chicago properties.
THE PROCESS
Step 1 - Mechanical Surface Preparation: Wire wheel grinding with angle grinder attachments removed all loose rust scale, failing paint, and surface contamination. Heavily pitted sections received needle gun descaling to expose clean stable metal beneath. This step determines everything. No primer or topcoat performs correctly over compromised metal, regardless of product quality. Windy City Painters treats prep as the primary investment on every iron fence project.
Step 2 - Rust Conversion: Ospho was applied liberally to all areas showing active rust. The phosphoric acid reaction was allowed to complete fully before any priming began. On severely oxidized sections, a second Ospho application ensured complete conversion. This step is non-negotiable in Chicago where freeze-thaw cycles push moisture into every surface irregularity.
Step 3 - Priming with Corroseal: Full coverage Corroseal primer coat sealed the converted surface and established adhesion for the finish coats. Corroseal's rust-inhibitive chemistry adds a secondary barrier against moisture penetration, extending the effective life of the topcoat by years in Chicago's humid lakefront environment.
Step 4 - DTM Topcoat Application: Two coats of Sherwin-Williams DTM acrylic in satin black were applied by brush to ensure full penetration into ornamental detail. DTM's flexibility accommodates the metal expansion and contraction Chicago temperatures demand, from minus-15 winters to 95-degree July afternoons. Final coverage was uniform and true to color.
CHICAGO-SPECIFIC CHALLENGES
Chicago iron faces challenges most other markets do not. Lake Michigan humidity accelerates surface oxidation year-round. Road salt from winter de-icing migrates to fence bases and lower rails. Freeze-thaw cycling cracks poorly adhered coatings within a single winter. Greystones, two-flats, and Victorian brownstones often feature original ornamental ironwork with decades of layered paint that must be assessed before any new coating is added. Windy City Painters factors all of these conditions into every iron fence estimate and material selection.
WHAT TO EXPECT LONG-TERM
A properly prepared and coated iron fence using the Ospho, Corroseal, and Sherwin-Williams DTM system should deliver 5-8 years of performance in Chicago conditions. Annual visual inspection for chips or scratches, followed by prompt spot priming, extends that timeline significantly. Full refinishing cycles become less frequent when the initial prep work is done correctly.
PRO TIPS
Tip 1 - Never skip the rust converter. Painting over active rust with even the best topcoat guarantees early failure. Ospho or a comparable phosphoric acid treatment must precede any primer on iron showing orange or brown oxidation.
Tip 2 - Assess for weld repairs before scheduling painting. If rust has eaten through the metal creating structural voids or broken sections, a welder must address those areas before painting begins. Windy City Painters identifies weld repair needs during the free estimate.
Tip 3 - Choose satin or semi-gloss finish on iron. Flat finishes on metal hold moisture and show wear faster. Satin DTM provides enough sheen to shed water while maintaining the traditional look Chicago ornamental iron demands.
Ready to restore your iron fence the right way? Visit windypainters.com to schedule your free estimate with Windy City Painters.
FAQ
Q: What does iron fence painting cost in Chicago?
A: Most residential iron fence projects range from $500 to $1,800 depending on linear footage, rust severity, and prep requirements. Windy City Painters provides free detailed on-site estimates for accurate iron fence painting cost in Chicago.
Q: How do I know if my fence needs rust conversion or just repainting?
A: Any visible orange or brown rust requires chemical conversion before priming. Windy City Painters evaluates every fence during the estimate to determine whether Ospho, mechanical prep, or weld repair is needed before coating begins.
Q: Can you paint iron in cold Chicago weather?
A: DTM coatings have lower application temperature thresholds than standard exterior paint, but we avoid application below 35 degrees Fahrenheit. Windy City Painters schedules iron fence projects for appropriate weather windows throughout the season.
Q: How long does iron fence paint last in Chicago?
A: With complete rust conversion, Corroseal priming, and Sherwin-Williams DTM topcoat, iron fence painting in Chicago lasts 5-8 years. Annual inspections and prompt touch-ups of chips extend that timeline further.
Q: Do I need a welder before an iron fence can be painted?
A: Only if rust has created structural voids or breaks in the metal. Windy City Painters assesses this during the free estimate and can coordinate with welders when needed before our painting crew begins.
Q: What is the difference between Ospho and Corroseal?
A: Ospho is a rust converter applied directly to active rust to chemically neutralize it. Corroseal is a rust-inhibitive primer applied over converted or clean metal. Windy City Painters often uses both in sequence for maximum protection on Chicago iron.
Q: How often should Chicago iron fences be inspected?
A: Annual inspection is recommended, ideally in early spring after winter salt and freeze-thaw exposure. Catching small chips and bare spots early allows simple touch-up rather than full iron fence repainting, saving significant cost.
 Cure Design Group
KITCHEN RENOVATION CURRENT CRAFTSMAN
This client started off just being curious about our services - what we could do, and if we could even help her update her kitchen. She and her husband with their two teenage kids have lived in their home for several years without updating anything since the house was originally built. They didn’t quite have a budget in mind yet. They didn’t know their style, or even if they had one. Their timeline was simple, “as fast as you can so we’re not without a kitchen for very long” (usually what we hear for kitchen updates).
After a very productive consultation: determining the scope of work and zeroing in on a budget, I was very excited to update this underwhelming space to something that is modern but timeless, something that is theirs. And, it was easy to see what type of design style they gravitated toward looking at the pieces they already own: Craftsman/Prairie Style. I left the meeting so excited to weave in yet another genre of design to my CDG portfolio! We circled in our contractor to discuss the changes they were looking to make and the scope of work that would be theirs. Then I was off to get designing:
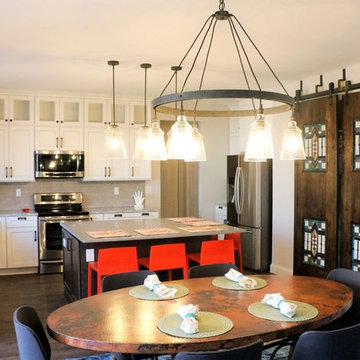
// Because the kitchen’s footprint and the defined breakfast space delineated by the bay, we kept the perimeter cabinetry as it was originally laid out. We updated these cabinets to a beautiful soft Alabaster White with a Barn Wood Glaze to highlight the simplicity of the shaker style doors. We added transom cabinets above the uppers, with only the back wall having seeded glass inserts to highlight some of their collectables.
// The original shaped island was counter-productive (See what I did there?) in functionality and design. We squared this off to reduce some of the angles and gain more storage. We highlighted the new island with a contrasting oak cabinet in a dark finish, to pay our respects to the craftsman style, and topped with a concrete-like countertop as a nod to the Prairie Style, allowing the homeowners to gain two extra seats and a massive -uninterrupted- work surface.
// The small section of cabinetry between the garage entry and fridge now is the perfect dump-station for mail, electronics, whatever is in their hands when they come into the house; and completely hidden by the refrigerator.
// The disconnected cabinetry in the breakfast area makes for a great place to have a working office. Accessible from the kitchen or the adjacent great room, this is the perfect place for the kids to do their homework while mom and dad are putting together dinner. The base cabinets are built out for office-type storage: paper and pencil drawers, filing systems, and cord management. Additionally, the long counter provides a ton of worksurface to spread out.
// The largest transformation was the pantry. We raised the height of the doorway and added huge custom designed bypass sliding barndoors. Finished with a dark stain to compliment the island and cut to inset 4 stained glass windows, typical of this style of design, and driving home the concept for the whole space.
// They were desperate to replace their flooring with something extremely durable to flow throughout the kitchen and the whole main level. This beautiful new flooring is actually a textured LVT(!) Which allowed them to save on overall cost and extend the life of their new flooring purchase.
// They loved their copper table, so we kept it and added new simple, mid-century modern chairs around it and a shiny new craftsman-style chandelier above. We added bright barstools in a burnt orange-red accent, and a bright woven rug to tie it all together.
// Because the kitchen renovation was shaping up to be pretty spectacular, they decided they needed to now replace their ‘now-these-look-a-little-too-old’ upholstered seating in the neighboring great room with 2 new sofas. We found the perfect sage-y-grey fabric which we covered on sofa frames that have and exposed oak-wood base, which we finished in a warm weathered grey.
// As every designer knows, a room isn’t finished until there’s something on the windows. Now that the new flooring was installed and every other room on the main level ‘seemed’ to be updated, we needed to update the window treatments in the dining, and great rooms to reflect their new design concept.
I hope you find the ‘after’ photos refreshing (as refreshing as it was for me to work on something that’s not a “Farm House” style that’s saturating the industry right now!) This was such a fun project and a great collaboration with our contractor.
 Living with Lolo
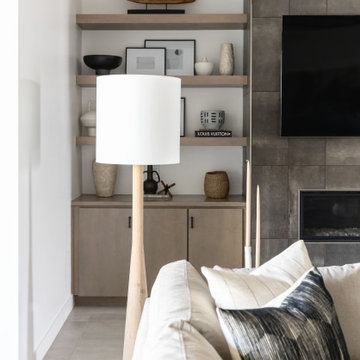
Living Room in Monte Lindo | Room Type:
Full Home Furnishing – 4,368 sq ft | 6 Bedrooms | 5 Baths- Living Room, Dining Room, Kitchen Nook, Family Room, Office, Primary Bedroom + Bath.
Project Name:
Monte Lindo |
Key Feature:
A Modern Transitional new build transformed from builder-grade into a unique, personality-driven home through curated furnishings, lighting, art, and mirrors.
Challenge:
COVID-related supply and delivery delays, along with limitations of working within a builder-grade home that restricted creativity in certain areas.
Solution:
The team elevated the space with thoughtfully selected furnishings, lighting, wallpaper, art, and mirrors, pushing the clients slightly outside their comfort zone to create a home that felt both comfortable and impressive.
Materials:
Lighting: Arteriors, Palecek, Circa, Memoky.
Rugs: Loloi, Surya.
Mirrors: Four Hands, Ferguson, Arteriors.
Wallpaper: Savannah Hayes.
Furniture: Classic Home, Four Hands, Moss Home, Dovetail, Union Home.
Budget:
$50k-$75K |
Timeline:
11 months, completed September 2021.
 Living with Lolo
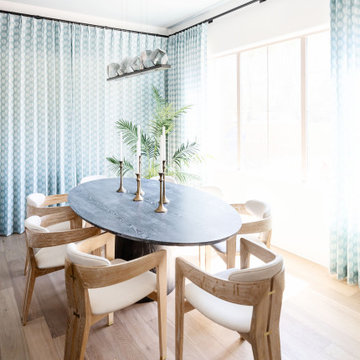
Dining Room in Trailside View | Refined Transitional Home in Scottsdale, AZ |
Room Type: Whole Home Remodel and Furnishings |
Project Name: Trailside View Residence |
Key Feature: A full home remodel and furnishings project anchored by white oak cabinetry and countertops, where the clients gave Living with Lolo real creative freedom to play with bold fabrics, wallpapers, and drapery that most homeowners would talk themselves out of.
Challenge: Transitional design can play it safe by default, neutral palette, inoffensive finishes, nothing that makes you catch your breath. The remodel needed a strong foundation that felt refined and timeless, but the clients wanted more than that. They wanted a home with personality, and the challenge was channeling that creative openness into something cohesive rather than chaotic.
Solution: Living with Lolo used white oak cabinetry and countertops to ground the remodel in warmth and quiet sophistication, then let the soft goods carry the personality. Bold fabric choices, expressive wallpapers, and thoughtful drapery gave each room its own moment without losing the thread that connected the whole home. Because the remodel and furnishings were managed together under one roof, the bolder design choices landed the way they were intended to rather than feeling like afterthoughts layered onto a finished renovation.
Materials: White oak cabinetry, white oak countertops, curated wallpapers, bold upholstery fabrics, custom drapery, and layered accessories sourced through Living with Lolo's trade relationships.
Budget: $250,000 to $550,000 |
Timeline: Approximately 5 to 9 months from design through completion.

 Cure Design Group
KITCHEN RENOVATION CURRENT CRAFTSMAN
This client started off just being curious about our services - what we could do, and if we could even help her update her kitchen. She and her husband with their two teenage kids have lived in their home for several years without updating anything since the house was originally built. They didn’t quite have a budget in mind yet. They didn’t know their style, or even if they had one. Their timeline was simple, “as fast as you can so we’re not without a kitchen for very long” (usually what we hear for kitchen updates).
After a very productive consultation: determining the scope of work and zeroing in on a budget, I was very excited to update this underwhelming space to something that is modern but timeless, something that is theirs. And, it was easy to see what type of design style they gravitated toward looking at the pieces they already own: Craftsman/Prairie Style. I left the meeting so excited to weave in yet another genre of design to my CDG portfolio! We circled in our contractor to discuss the changes they were looking to make and the scope of work that would be theirs. Then I was off to get designing:
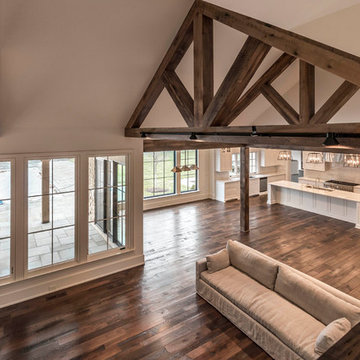
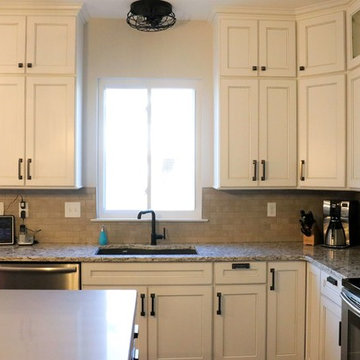
// Because the kitchen’s footprint and the defined breakfast space delineated by the bay, we kept the perimeter cabinetry as it was originally laid out. We updated these cabinets to a beautiful soft Alabaster White with a Barn Wood Glaze to highlight the simplicity of the shaker style doors. We added transom cabinets above the uppers, with only the back wall having seeded glass inserts to highlight some of their collectables.
// The original shaped island was counter-productive (See what I did there?) in functionality and design. We squared this off to reduce some of the angles and gain more storage. We highlighted the new island with a contrasting oak cabinet in a dark finish, to pay our respects to the craftsman style, and topped with a concrete-like countertop as a nod to the Prairie Style, allowing the homeowners to gain two extra seats and a massive -uninterrupted- work surface.
// The small section of cabinetry between the garage entry and fridge now is the perfect dump-station for mail, electronics, whatever is in their hands when they come into the house; and completely hidden by the refrigerator.
// The disconnected cabinetry in the breakfast area makes for a great place to have a working office. Accessible from the kitchen or the adjacent great room, this is the perfect place for the kids to do their homework while mom and dad are putting together dinner. The base cabinets are built out for office-type storage: paper and pencil drawers, filing systems, and cord management. Additionally, the long counter provides a ton of worksurface to spread out.
// The largest transformation was the pantry. We raised the height of the doorway and added huge custom designed bypass sliding barndoors. Finished with a dark stain to compliment the island and cut to inset 4 stained glass windows, typical of this style of design, and driving home the concept for the whole space.
// They were desperate to replace their flooring with something extremely durable to flow throughout the kitchen and the whole main level. This beautiful new flooring is actually a textured LVT(!) Which allowed them to save on overall cost and extend the life of their new flooring purchase.
// They loved their copper table, so we kept it and added new simple, mid-century modern chairs around it and a shiny new craftsman-style chandelier above. We added bright barstools in a burnt orange-red accent, and a bright woven rug to tie it all together.
// Because the kitchen renovation was shaping up to be pretty spectacular, they decided they needed to now replace their ‘now-these-look-a-little-too-old’ upholstered seating in the neighboring great room with 2 new sofas. We found the perfect sage-y-grey fabric which we covered on sofa frames that have and exposed oak-wood base, which we finished in a warm weathered grey.
// As every designer knows, a room isn’t finished until there’s something on the windows. Now that the new flooring was installed and every other room on the main level ‘seemed’ to be updated, we needed to update the window treatments in the dining, and great rooms to reflect their new design concept.
I hope you find the ‘after’ photos refreshing (as refreshing as it was for me to work on something that’s not a “Farm House” style that’s saturating the industry right now!) This was such a fun project and a great collaboration with our contractor.

 Free Lancing
Effective residential construction project management is crucial in today’s fast-moving building industry. It means overseeing every step of building a home, from planning to finishing, to ensure projects are completed time, within budget, and with high quality. Unlike commercial projects, residential projects require special attention to meet homeowners' unique needs and wishes, requiring a customized approach from the beginning to the end.
In 2025, the construction sector will use advanced technologies like AI and integrated project delivery (IPD) to streamline processes and improve stakeholder collaboration. However, project managers face significant challenges, including managing risks, maintaining quality control, and ensuring effective communication among team members.
A WIP Report (Work-in-Progress Report) is a key tool that helps track a project's budget, progress, and resource use. It provides clear insights, making managing costs easier, avoiding delays, and making informed decisions.
By adopting best practices and using modern construction management tools, project managers can overcome these challenges and deliver successful residential construction projects that meet client expectations and contribute to a sustainable future.
This article provides a brief overview of residential construction project management, highlights its importance, and touches on the challenges faced by project managers while incorporating the latest trends and technologies in the field.
Types of Residential Construction Management
Here are the different types of Residential Construction Management:
Single-Family Homes: These are standalone houses built for individual families. Managing these projects involves overseeing construction from planning to completion, ensuring that the home meets the owner's preferences and budget.
Multi-Family Housing: This includes apartments, condominiums, and townhouses. Projects of this type require managing multiple units, often with shared facilities, and ensuring compliance with local building codes.
Custom Home Building: This involves constructing homes tailored to specific client needs. Close collaboration with architects and designers is required to ensure the house reflects the owner's personality and preferences.
Home Renovation and Remodeling: These projects focus on updating or expanding existing homes. They often involve working with subcontractors for specialized tasks like electrical or plumbing work.
Components of Residential Construction Project Management
Managing a residential construction project requires carefully coordinating people, materials, and timelines. A well-structured approach ensures efficiency, cost control, and high-quality results.
Roles and Responsibilities
A project manager plays a vital role in residential construction. They oversee every step from planning to completion and ensure the project stays on schedule, within budget, and meets quality standards.
Project Manager’s Role in Home Construction
The project manager is responsible for organizing tasks, managing resources, and solving problems that arise during construction. They coordinate between different teams, track progress, and ensure safety regulations are followed.
Collaboration with Contractors, Architects, and Stakeholders
Successful residential construction requires teamwork. Project managers work closely with architects to bring designs to new heights, coordinate with contractors to manage labor and materials, and keep stakeholders (such as homeowners and investors) informed about project updates.
Client Communication and Expectations Management
Clear communication with clients is essential. The project manager keeps homeowners updated on timelines, changes, and challenges. Setting realistic expectations and providing regular updates, they help avoid misunderstandings and keep the project running smoothly.
Project Scope & Planning
Practical project planning sets the foundation for a successful residential construction project. It ensures clear goals, minimizes risks, and keeps the project on track.
Defining Project Objectives and Deliverables:
Clearly outlining what needs to be done and what the final result should look like is essential. This involves setting specific, measurable goals that align with the homeowner's vision and budget.
Managing Homeowner Expectations and Scope Creep:
Homeowners often have changing needs or ideas. Effective project managers must manage these expectations to prevent "scope creep," which can delay projects and increase costs. This involves open communication and setting clear boundaries.
Ensuring Compliance with Zoning Laws and Permits:
Before construction begins, it's crucial to ensure that all necessary permits are obtained and that the project complies with local zoning laws. This step avoids costly fines and delays, ensuring the project moves forward smoothly.
Budgeting & Cost Control
Proper budgeting is essential for keeping residential construction projects financially viable. Effective cost management prevents overspending and ensures profitability.
Accurate Cost Estimation for Residential Projects
A precise cost estimate considers labor, materials, permits, and unexpected expenses. Using historical data and Sage 300 CRE for financial management improves accuracy and helps set realistic budgets.
Budget Allocation and Tracking
Allocating funds efficiently ensures that each phase of the project receives the necessary resources. Tracking expenses through Construction & Financial Dashboards allows for real-time monitoring and early detection of budget deviations.
Preventing Budget Overruns
Uncontrolled costs can derail a project. Regular financial reviews, automated alerts for overspending, and contingency planning help keep expenses in check and prevent financial strain.
Scheduling & Timeline Management
Timely project completion is crucial in residential construction. Effective scheduling minimizes delays and ensures a smooth workflow.
Creating Detailed Project Schedules
A structured schedule outlines all tasks, deadlines, and dependencies. Breaking down the project into phases, planning, execution, and finishing, helps maintain order and clarity.
Preventing Delays & Meeting Deadlines
Delays can result from labor shortages, weather conditions, or supply chain issues. To avoid problems, it’s good to check for risks ahead of time, add extra time to schedules, and keep everyone on the same page.
Using Gantt Charts and Critical Path Methods
CPM for Construction helps identify critical activities that directly impact project completion, while Gantt charts provide a visual timeline of tasks. Both tools optimize scheduling and improve efficiency.
Residential Construction Project Management Phases
Managing a residential construction project effectively requires a structured approach through various phases. Each phase plays a critical role in ensuring the project's success, from initial planning to completion.
Pre-Construction Phase
The pre-construction phase sets the foundation for a smooth and efficient building process. Proper planning at this stage helps prevent costly changes and delays later.
Site Analysis & Approvals: A thorough site analysis assesses soil conditions, topography, and environmental factors. Feasibility studies evaluate project viability, including costs and regulatory compliance. Obtaining zoning approvals, permits, and other legal clearances is crucial before breaking ground.
Selecting Materials and Procurement Strategies: Choosing the right materials impacts durability, sustainability, and cost efficiency. A well-planned procurement strategy, including bulk purchasing and reliable supplier partnerships, ensures timely delivery and cost savings. Using Sage 300 CRE for procurement management helps streamline material sourcing and financial planning.
Construction Phase
The construction phase transforms plans into reality. Effective coordination and strict quality control ensure a successful build.
Resource Allocation and Workflow Coordination: Efficiently managing labor, equipment, and materials is key to maintaining progress. Using CPM for Construction, project managers can allocate resources strategically, prevent bottlenecks, and optimize workflows for timely completion.
Quality Control and Ensuring Compliance with Safety Regulations: Strict adherence to building codes and safety standards is non-negotiable. Regular inspections, worker training, and real-time quality monitoring ensure a structurally sound and legally compliant project. Proactive safety measures prevent accidents and project disruptions.
Project Closeout & Handover
The final phase of residential construction project management is crucial for ensuring a smooth transition from construction to occupancy. Proper closeout procedures guarantee quality, client satisfaction, and long-term project success.
Final Inspections and Quality Assurance: Before finishing the project, a final inspection checks that everything meets safety rules and quality standards. Any problems need to be fixed quickly. Using Procore helps make inspections and tracking issues easier, ensuring a high-quality final product.
Client Walkthrough and Support: A final check helps homeowners see the finished work, ask questions, and make sure it meets their expectations. This is also a chance to explain important home features and maintenance tips. Good communication here builds trust and strengthens relationships.
Warranty Management and Feedback: Efficient warranty management ensures clients get quick help for any issues after construction. A clear process for tracking requests and keeping in touch with homeowners boosts satisfaction. Collecting feedback helps improve future projects. Using S-Curve Forecasting tracks performance trends and refines management strategies.
Software for Residential Construction Project Management
The integration of technology in residential construction project management has revolutionized the way projects are planned, executed, and monitored. Digital tools streamline operations, reduce costs, and improve communication, making them essential for modern construction firms.
Importance of Digital Tools
Investing in digital tools is crucial for construction firms as it transforms the industry by enhancing efficiency, accuracy, and collaboration across the entire project lifecycle. They also improve project management by streamlining processes, automating tasks, and facilitating real-time stakeholder communication.
Top Construction Management Software for Residential Projects
Several software solutions are available for managing residential construction projects:
Procore: Known for its comprehensive project management features, including document management and collaboration tools.
Sage 300 CRE: Offers robust accounting and financial management capabilities, ideal for large-scale construction projects.
Buildertrend: Specializes in residential construction, providing tools for project scheduling, budgeting, and client communication.
CoConstruct: Focuses on custom home building and remodeling, offering features for estimating, scheduling, and project management.
WIP Reports: Useful for tracking work-in-progress and managing project finances effectively.
Features Comparison and Best Use Cases:
Procore: Best for large projects requiring extensive collaboration and document management.
Sage 300 CRE: Ideal for firms needing robust financial management.
Buildertrend: Suitable for residential builders focusing on client communication and project scheduling.
CoConstruct: Perfect for custom home builders who need detailed estimating and scheduling tools.
WIP Reports: Useful for firms needing to track project finances closely.
How Software Improves Project Efficiency
Construction management software significantly enhances project efficiency in several ways:
Automating Accounting and Job Costing: Software like Sage 300 CRE automates financial tasks, reducing manual errors and improving budget tracking.
Streamlining Document Management and Communication: Tools like Procore centralize documents and facilitate real-time communication among team members, reducing misunderstandings and delays.
Mobile-Friendly Solutions for Real-Time Tracking: Mobile apps from platforms like Buildertrend allow for on-site access to project data, enabling real-time tracking and decision-making.
These digital tools and software solutions are essential for modern residential construction project management, offering benefits such as improved efficiency, enhanced collaboration, and better financial control.
Challenges in Residential Construction Project Management
Residential construction projects face a variety of challenges that can impact their success. Here are some of the key issues project managers encounter:
Managing Subcontractors and Labor Shortages
One of the biggest challenges in residential construction is managing subcontractors and dealing with labor shortages. Subcontractors often have their own schedules and priorities, which can lead to delays if not coordinated properly. Additionally, labor shortages can slow down projects and increase costs due to the need for overtime or hiring temporary workers.
Budget Overruns and Unexpected Costs
Budget overruns are common in residential construction due to factors like material price fluctuations, unexpected site conditions, or changes in project scope. Effective budget management involves regularly monitoring expenses and having contingency plans for unexpected costs.
Changing Construction and Eco Rules
Construction and Eco Rules are always changing, so project managers need to keep up with the latest regulations. This involves following guidelines for saving energy, protecting the environment, and ensuring safety. Ignoring these rules can lead to fines, delays, or even stopping the project.
Best Practices
To ensure your residential construction projects run smoothly and successfully, follow these essential best practices:
Setting Clear Project Goals and Milestones
Clearly defining what you want to achieve is the first step to success. Set specific, measurable, achievable, relevant, and time-bound (SMART) goals. This helps everyone involved understand what needs to be done and by when. For example, instead of saying "build a house," say "build a house with three bedrooms and two bathrooms within the next nine months."
Stakeholder Collaboration
Good communication is key to keeping everyone on the same page. Regular meetings with contractors, suppliers, and homeowners help prevent misunderstandings and ensure that everyone knows what's happening and what's next. This open dialogue also helps resolve issues quickly, preventing small problems from becoming big delays.
Using Data-Driven Insights for Decision-Making
Making decisions based on facts rather than guesses is crucial. Use data and analytics to understand project progress, identify potential issues early, and make informed decisions. For instance, if data shows that a particular material is consistently causing delays, you can plan ahead to avoid those delays in the future.
Proactive Risk Management Strategies
Things don't always go as planned, so being prepared is essential. Identify potential risks early and have a plan to manage them. This might include having backup suppliers, planning for weather conditions, or setting aside extra funds for unexpected expenses. Being proactive can prevent small issues from turning into major problems.
Conclusion
Effective residential construction project management requires careful planning, clear communication, and the right digital tools. From single-family homes to multi-family housing and custom projects, managing timelines, budgets, and quality is essential for success.
By following best practices, using project management software, and staying ahead of industry trends, project managers can ensure smooth execution and client satisfaction despite challenges like labor shortages, budget overruns, and regulatory compliance; modern technology and strategic planning help mitigate risks.
Construction firms can improve efficiency, enhance collaboration, and maintain financial control by adopting advanced tools like Procore, Sage 300 CRE, and Buildertrend. A well-managed project delivers a quality home and builds trust and long-term success in the industry.
FAQs
What is residential construction project management?
It involves overseeing all aspects of building residential properties, from initial planning and design to construction and completion, ensuring projects are completed on time, within budget, and to the desired quality standards.
How can I prevent budget overruns in my construction project?
Accurate cost estimation, continuous budget tracking, and having contingency plans for unexpected expenses are key strategies to prevent budget overruns.
What are the main stages of a residential construction project?
The primary stages include design, pre-construction, procurement, and construction.
How does construction management software improve project efficiency?
It streamlines processes like scheduling, budgeting, and communication, providing real-time data access and collaboration among stakeholders, which enhances overall project efficiency.
How can I ensure my project complies with local building codes and regulations?
Engage professionals familiar with local laws, obtain all necessary permits before starting, and conduct regular inspections to ensure adherence to building codes and regulations.
 Living with Lolo
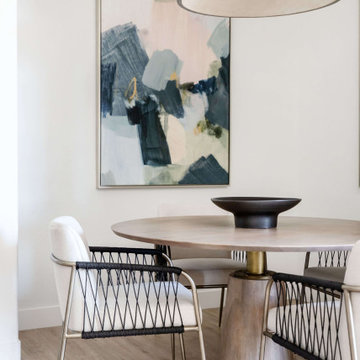
Dining Room in Ironwood Drive | Warm Modern Home in Scottsdale, AZ |
Room Type: Whole Home Remodel and Furnishings |
Project Name: Ironwood Drive Residence |
Key Feature: A Tuscan home transformed into a warm modern interior through a full remodel and furnishings, highlighted by a custom hand-painted terracotta tile backsplash, custom cabinetry, and a new fireplace clad in basalt black stone that anchors the living space with drama and elegance.
Challenge: Tuscan homes in Scottsdale are everywhere, and the design language that defined them, heavy wood, ornate details, dark iron, and rustic stone, does not transition gracefully on its own. The goal was to shed that Old World weight and move the home into something warmer and more current without losing the character that makes a remodeled home feel intentional rather than generic.
Solution: Living with Lolo led the full remodel and furnishings as a single integrated project, which meant every decision from the custom cabinetry to the final throw pillow was made in service of the same design vision. The hand-painted terracotta tile backsplash brought artisan character into the kitchen in a way that felt fresh rather than Tuscan, and the basalt black stone fireplace gave the living space a bold focal point that reads as distinctly modern. Because Lauren holds both an interior design credential and an active Arizona ROC general contractor license, the construction and design were managed under one roof with no gap between the two.
Materials: Custom hand-painted terracotta tile backsplash, custom cabinetry, basalt black stone fireplace, curated warm modern furnishings and textiles sourced through Living with Lolo's trade relationships.
Budget: $250,000 to $550,000 |
Timeline: Approximately 5 to 9 months from design through completion.
 Centerlight Custom Solutions
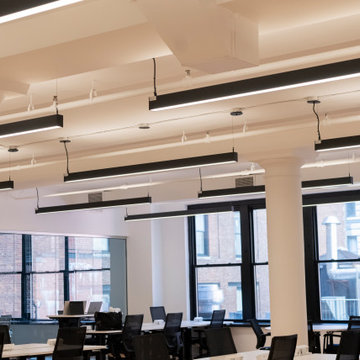
Join us as we take you behind the scenes of our latest project in collaboration with Eagle Seal Contracting Inc., one of New York City's most esteemed design and build companies. Our team at Centerlight, a leading architectural lighting solutions provider, delivered exceptional results with over 50 of our own RTS fixtures in this New York-based venture.
With a focus on quality and innovation, our premade LED linear fixtures offer impressive lighting features, boasting a high color rendering index (CRI) of 96+. As a company with over a decade of experience in the commercial and residential building industry, we understand the needs of professionals like you, and that's why we strive to offer unbeatable solutions and service.
When you work with us, you'll benefit from:
1. Direct access to our own lighting solutions, eliminating middlemen and ensuring the best prices for your projects.
2. Swift delivery with most products ready to ship from our Los Angeles warehouse, reducing delays and keeping your timeline on track.
3. Professional lighting design services, including comprehensive calculations, to ensure optimal illumination and ambiance in your spaces.
Don't just take our word for it. Let's hear directly from Eagle Seal Contracting Inc., as they share their experience working with us on this remarkable project.
 Landis Architects | Builders
Michael K. Wilkinson
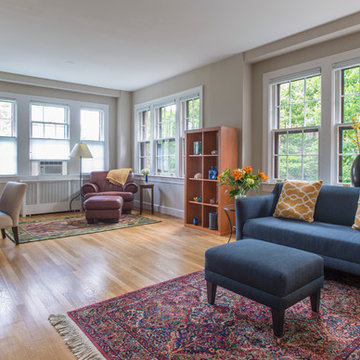
This apartment is in a 1930’s cooperative building on a complex that is surrounded by trees and gardens. The owner was downsizing from a large home and purchased this property. She wanted to remodel the three-bedroom, two-bath space before she moved in. She wanted the space to reflect her style and create a home base for her two college-age daughters. As with any older buildings, it had a few quirks that our team had to work around. During the 14-week construction timeline, we updated every room in the apartment.
 BMR BelMax Remodeling
Full Bathroom Remodel with Modern Elegance and Functionality
BMR Belmax Remodeling recently completed an exceptional full bathroom remodel, transforming a dated space into a luxurious retreat that combines style, function, and elegance. This Richboro-based project showcases our team’s dedication to craftsmanship, innovation, and efficiency, with the entire remodel completed in just 12 days. From large-format tiles to a new walk-in shower and freestanding bathtub, every detail was carefully selected and executed to meet the client’s vision and lifestyle.
Project Details: Elegant Modern Touches
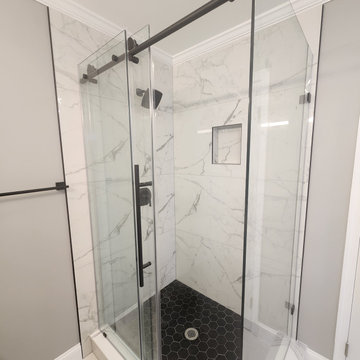
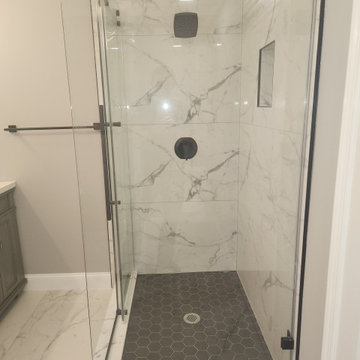
The remodel started with a complete demolition of the existing bathroom, allowing us to design and rebuild the space from scratch. This fresh start enabled our designers to create a seamless flow between key features, maximizing both space and functionality. Large-format tiles were chosen for the floors and walls, creating a sleek, sophisticated look while minimizing grout lines for easier maintenance. The neutral tones of the tiles bring warmth and elegance, setting a relaxing ambiance for the entire bathroom.
Walk-In Shower and Freestanding Bathtub
One of the primary highlights of this remodel is the new walk-in shower, designed with clean lines and glass doors that enhance the spacious feel of the bathroom. Equipped with a modern rain showerhead and stylish matte black fixtures, the shower provides a luxurious, spa-like experience. Adjacent to the shower, a freestanding bathtub adds a touch of modern sophistication. Its elegant design serves as a focal point, offering a perfect spot for relaxation after a long day, enhanced by the striking black finish on all fixtures.
Custom Vanity and Lighting
The client wanted both style and storage in their vanity, so we installed a custom-built vanity with ample drawer space and a sleek countertop. The vanity’s design complements the bathroom’s overall aesthetic, blending seamlessly with the large-format tiles and matte black fixtures. Above the vanity, new lighting fixtures were installed to provide soft, even illumination, perfect for daily routines. The strategically placed lights not only add to the bathroom’s functionality but also enhance the room’s calming, inviting atmosphere.
Updated Plumbing Fixtures and High-Quality Materials
Throughout the remodel, our team used only high-quality materials, ensuring the bathroom is built to last. The updated plumbing fixtures, finished in matte black, add a contemporary edge to the space. This finish not only complements the neutral tones of the large-format tiles but also contributes a modern sophistication to the bathroom. Every element, from the large tiles to the smallest fixtures, was selected for its durability, function, and style.
A Smooth and Efficient Remodel
One of the most remarkable aspects of this project was its timeline—completed in just 12 days. BMR Belmax Remodeling’s skilled team managed each phase meticulously, from demolition to final touches, ensuring a seamless process. The client was thrilled with both the efficiency and the high-quality finish, expressing delight in the transformation of their bathroom into a functional, beautiful retreat.
In this project, BMR Belmax Remodeling delivered a bathroom that is not only visually stunning but also optimized for comfort and convenience. Our commitment to quality and client satisfaction is evident in every detail, making this Richboro bathroom remodel a proud addition to our portfolio.
 Living with Lolo
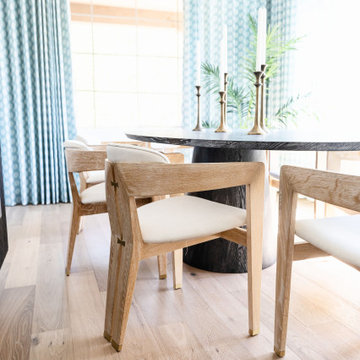
Dining Room in Trailside View | Refined Transitional Home in Scottsdale, AZ |
Room Type: Whole Home Remodel and Furnishings |
Project Name: Trailside View Residence |
Key Feature: A full home remodel and furnishings project anchored by white oak cabinetry and countertops, where the clients gave Living with Lolo real creative freedom to play with bold fabrics, wallpapers, and drapery that most homeowners would talk themselves out of.
Challenge: Transitional design can play it safe by default, neutral palette, inoffensive finishes, nothing that makes you catch your breath. The remodel needed a strong foundation that felt refined and timeless, but the clients wanted more than that. They wanted a home with personality, and the challenge was channeling that creative openness into something cohesive rather than chaotic.
Solution: Living with Lolo used white oak cabinetry and countertops to ground the remodel in warmth and quiet sophistication, then let the soft goods carry the personality. Bold fabric choices, expressive wallpapers, and thoughtful drapery gave each room its own moment without losing the thread that connected the whole home. Because the remodel and furnishings were managed together under one roof, the bolder design choices landed the way they were intended to rather than feeling like afterthoughts layered onto a finished renovation.
Materials: White oak cabinetry, white oak countertops, curated wallpapers, bold upholstery fabrics, custom drapery, and layered accessories sourced through Living with Lolo's trade relationships.
Budget: $250,000 to $550,000 |
Timeline: Approximately 5 to 9 months from design through completion.
 Living with Lolo
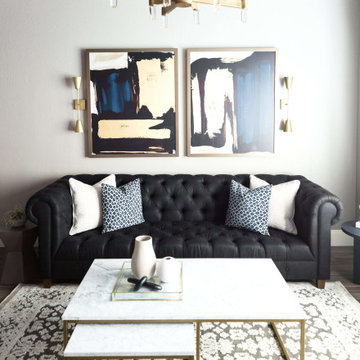
Living Room in Calle Lejos | Room Type:
Primary Bathroom and Whole Home Furnishings |
Project Name:
Calle Lejos |
Key Feature:
A glamorous, modern primary bathroom renovation paired with updated furnishings throughout the home to create a luxurious feel.
Challenge:
The homeowners wanted to elevate the home with a more glamorous and luxurious aesthetic while updating key areas, particularly the primary bathroom, and furnishing the home to reflect a modern style.
Solution:
The project focused on renovating the primary bathroom with modern materials and finishes while also furnishing the home to create a cohesive, elevated look that matched the client’s desire for a glamorous and modern space.
Materials:
Arizona Tile, Vadara quartz, and lighting from Sunlighting.
Budget:
$75k-$150K |
Timeline:
Completed October 2019.
 BMR BelMax Remodeling
Full Bathroom Remodel with Modern Elegance and Functionality
BMR Belmax Remodeling recently completed an exceptional full bathroom remodel, transforming a dated space into a luxurious retreat that combines style, function, and elegance. This Richboro-based project showcases our team’s dedication to craftsmanship, innovation, and efficiency, with the entire remodel completed in just 12 days. From large-format tiles to a new walk-in shower and freestanding bathtub, every detail was carefully selected and executed to meet the client’s vision and lifestyle.
Project Details: Elegant Modern Touches
The remodel started with a complete demolition of the existing bathroom, allowing us to design and rebuild the space from scratch. This fresh start enabled our designers to create a seamless flow between key features, maximizing both space and functionality. Large-format tiles were chosen for the floors and walls, creating a sleek, sophisticated look while minimizing grout lines for easier maintenance. The neutral tones of the tiles bring warmth and elegance, setting a relaxing ambiance for the entire bathroom.
Walk-In Shower and Freestanding Bathtub
One of the primary highlights of this remodel is the new walk-in shower, designed with clean lines and glass doors that enhance the spacious feel of the bathroom. Equipped with a modern rain showerhead and stylish matte black fixtures, the shower provides a luxurious, spa-like experience. Adjacent to the shower, a freestanding bathtub adds a touch of modern sophistication. Its elegant design serves as a focal point, offering a perfect spot for relaxation after a long day, enhanced by the striking black finish on all fixtures.
Custom Vanity and Lighting
The client wanted both style and storage in their vanity, so we installed a custom-built vanity with ample drawer space and a sleek countertop. The vanity’s design complements the bathroom’s overall aesthetic, blending seamlessly with the large-format tiles and matte black fixtures. Above the vanity, new lighting fixtures were installed to provide soft, even illumination, perfect for daily routines. The strategically placed lights not only add to the bathroom’s functionality but also enhance the room’s calming, inviting atmosphere.
Updated Plumbing Fixtures and High-Quality Materials
Throughout the remodel, our team used only high-quality materials, ensuring the bathroom is built to last. The updated plumbing fixtures, finished in matte black, add a contemporary edge to the space. This finish not only complements the neutral tones of the large-format tiles but also contributes a modern sophistication to the bathroom. Every element, from the large tiles to the smallest fixtures, was selected for its durability, function, and style.
A Smooth and Efficient Remodel
One of the most remarkable aspects of this project was its timeline—completed in just 12 days. BMR Belmax Remodeling’s skilled team managed each phase meticulously, from demolition to final touches, ensuring a seamless process. The client was thrilled with both the efficiency and the high-quality finish, expressing delight in the transformation of their bathroom into a functional, beautiful retreat.
In this project, BMR Belmax Remodeling delivered a bathroom that is not only visually stunning but also optimized for comfort and convenience. Our commitment to quality and client satisfaction is evident in every detail, making this Richboro bathroom remodel a proud addition to our portfolio.
 Living with Lolo
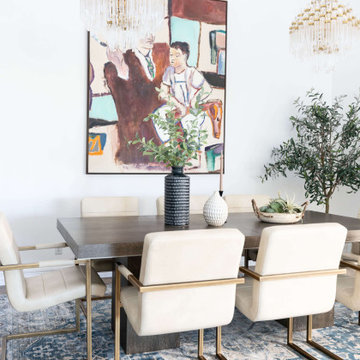
Dining Room in Marshall Ave | Room Type:
Whole Home (Kitchen, Bathrooms, Living Spaces) |
Project Name:
Marshall Ave |
Key Feature:
Modern transitional design with lake views, incorporating custom cabinetry, quartz surfaces, and creative design details throughout the home.
Challenge:
The home required a full remodel and furnishing plan that would modernize the space while embracing the client’s openness to unique, creative design ideas.
Solution:
The design team remodeled and furnished the entire home, introducing modern transitional finishes, custom cabinetry, and thoughtfully selected materials to create a cohesive, elevated look while highlighting the home’s beautiful lake views.
Materials:
Bedrosians and Porcelanosa tile, Vadara quartz, custom vanities and kitchen cabinetry, and lighting from Sunlighting.
Budget:
$50k-$100k |
Timeline:
Completed September 2020.
 BMR BelMax Remodeling
Full Bathroom Remodel with Modern Elegance and Functionality
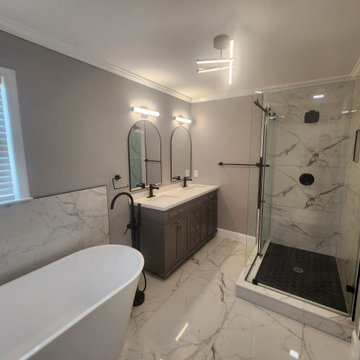
BMR Belmax Remodeling recently completed an exceptional full bathroom remodel, transforming a dated space into a luxurious retreat that combines style, function, and elegance. This Richboro-based project showcases our team’s dedication to craftsmanship, innovation, and efficiency, with the entire remodel completed in just 12 days. From large-format tiles to a new walk-in shower and freestanding bathtub, every detail was carefully selected and executed to meet the client’s vision and lifestyle.
Project Details: Elegant Modern Touches
The remodel started with a complete demolition of the existing bathroom, allowing us to design and rebuild the space from scratch. This fresh start enabled our designers to create a seamless flow between key features, maximizing both space and functionality. Large-format tiles were chosen for the floors and walls, creating a sleek, sophisticated look while minimizing grout lines for easier maintenance. The neutral tones of the tiles bring warmth and elegance, setting a relaxing ambiance for the entire bathroom.
Walk-In Shower and Freestanding Bathtub
One of the primary highlights of this remodel is the new walk-in shower, designed with clean lines and glass doors that enhance the spacious feel of the bathroom. Equipped with a modern rain showerhead and stylish matte black fixtures, the shower provides a luxurious, spa-like experience. Adjacent to the shower, a freestanding bathtub adds a touch of modern sophistication. Its elegant design serves as a focal point, offering a perfect spot for relaxation after a long day, enhanced by the striking black finish on all fixtures.
Custom Vanity and Lighting
The client wanted both style and storage in their vanity, so we installed a custom-built vanity with ample drawer space and a sleek countertop. The vanity’s design complements the bathroom’s overall aesthetic, blending seamlessly with the large-format tiles and matte black fixtures. Above the vanity, new lighting fixtures were installed to provide soft, even illumination, perfect for daily routines. The strategically placed lights not only add to the bathroom’s functionality but also enhance the room’s calming, inviting atmosphere.
Updated Plumbing Fixtures and High-Quality Materials
Throughout the remodel, our team used only high-quality materials, ensuring the bathroom is built to last. The updated plumbing fixtures, finished in matte black, add a contemporary edge to the space. This finish not only complements the neutral tones of the large-format tiles but also contributes a modern sophistication to the bathroom. Every element, from the large tiles to the smallest fixtures, was selected for its durability, function, and style.
A Smooth and Efficient Remodel
One of the most remarkable aspects of this project was its timeline—completed in just 12 days. BMR Belmax Remodeling’s skilled team managed each phase meticulously, from demolition to final touches, ensuring a seamless process. The client was thrilled with both the efficiency and the high-quality finish, expressing delight in the transformation of their bathroom into a functional, beautiful retreat.
In this project, BMR Belmax Remodeling delivered a bathroom that is not only visually stunning but also optimized for comfort and convenience. Our commitment to quality and client satisfaction is evident in every detail, making this Richboro bathroom remodel a proud addition to our portfolio.
 Living with Lolo
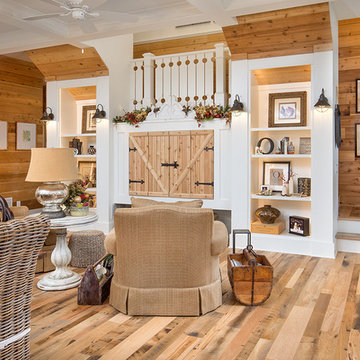
Living Room in West Trail Drive | Moody Modern Home in Scottsdale, AZ |
Room Type: Full home remodel and furnishings |
Project Name: West Trail Drive Residence |
Key Feature: A moody, modern aesthetic built from the ground up through renovation and furnishings, where every finish, fixture, and piece of furniture was selected to work as a cohesive whole rather than a collection of separate decisions.
Challenge: The home had good bones but felt generic. The clients wanted something that reflected a specific point of view, not a safe Scottsdale palette. The risk with moody, dark interiors is that they can feel heavy or disconnected if the layering isn't right.
Solution: Living with Lolo led both the remodel and the furnishings, which meant the design intent carried through from the walls and floors all the way to how the room actually lives. Because Lauren holds both an interior design credential and an active Arizona ROC general contractor license, there was no handoff between designer and contractor. That single point of accountability kept the vision intact and the project on track.
Materials: Custom cabinetry, natural stone surfaces, designer lighting, curated furniture and textiles sourced through Living with Lolo's trade relationships.
Budget: $150,000 to $400,000 |
Timeline: 4 to 8 months.
 Living with Lolo
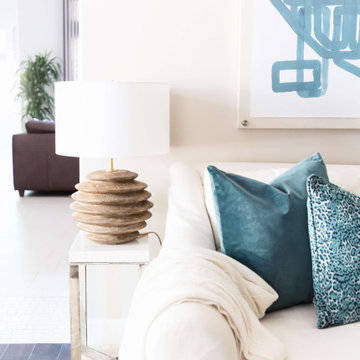
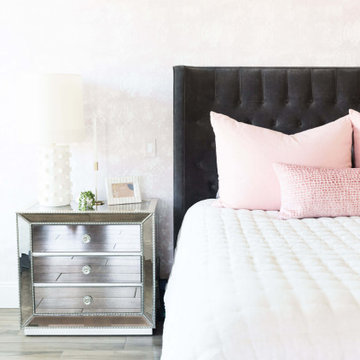
Bedroom in Calle Lejos | Room Type:
Primary Bathroom and Whole Home Furnishings |
Project Name:
Calle Lejos |
Key Feature:
A glamorous, modern primary bathroom renovation paired with updated furnishings throughout the home to create a luxurious feel.
Challenge:
The homeowners wanted to elevate the home with a more glamorous and luxurious aesthetic while updating key areas, particularly the primary bathroom, and furnishing the home to reflect a modern style.
Solution:
The project focused on renovating the primary bathroom with modern materials and finishes while also furnishing the home to create a cohesive, elevated look that matched the client’s desire for a glamorous and modern space.
Materials:
Arizona Tile, Vadara quartz, and lighting from Sunlighting.
Budget:
$75k-$150K |
Timeline:
Completed October 2019.
3