
Search results for "Topical anesthetic" in Home Design Ideas
 Dancer Concrete Design
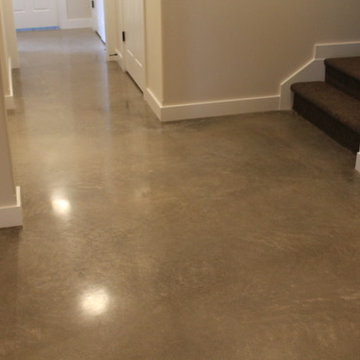
New construction opens a wide array of options when it comes to selecting finishes. For this particular client, they wanted a durable floor that was also aesthetically pleasing to complete their basement. Since there was no topical sealer on the new concrete, a polished flooring system was selected.
The basement itself was a little over 1200 square feet and featured a game room, main living area, bedrooms, bathrooms and a kitchen. All of the flooring was to be polished to a level 400 shine and finished with a densifier and stain guarding product. Polished concrete is the most durable flooring choice. It allows the concrete to breathe below grade, creates movement and character throughout the space and is very easy to maintain. With a pond out back, a polished concrete floor is easy to clean and will be able to withstand high traffic.

 Albert, Righter & Tittmann Architects, Inc.
Harbor View is a modern-day interpretation of the shingled vacation houses of its seaside community. The gambrel roof, horizontal, ground-hugging emphasis, and feeling of simplicity, are all part of the character of the place.
While fitting in with local traditions, Harbor View is meant for modern living. The kitchen is a central gathering spot, open to the main combined living/dining room and to the waterside porch. One easily moves between indoors and outdoors.
The house is designed for an active family, a couple with three grown children and a growing number of grandchildren. It is zoned so that the whole family can be there together but retain privacy. Living, dining, kitchen, library, and porch occupy the center of the main floor. One-story wings on each side house two bedrooms and bathrooms apiece, and two more bedrooms and bathrooms and a study occupy the second floor of the central block. The house is mostly one room deep, allowing cross breezes and light from both sides.
The porch, a third of which is screened, is a main dining and living space, with a stone fireplace offering a cozy place to gather on summer evenings.
A barn with a loft provides storage for a car or boat off-season and serves as a big space for projects or parties in summer.

 Bruns Architecture
Tricia Shay Photography
Example of a large trendy courtyard concrete patio design in Milwaukee with no cover
Example of a large trendy courtyard concrete patio design in Milwaukee with no cover
Find the right local pro for your project
 Dancer Concrete Design
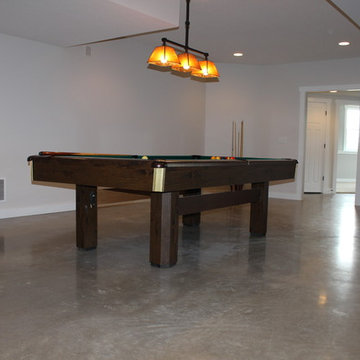
New construction opens a wide array of options when it comes to selecting finishes. For this particular client, they wanted a durable floor that was also aesthetically pleasing to complete their basement. Since there was no topical sealer on the new concrete, a polished flooring system was selected.
The basement itself was a little over 1200 square feet and featured a game room, main living area, bedrooms, bathrooms and a kitchen. All of the flooring was to be polished to a level 400 shine and finished with a densifier and stain guarding product. Polished concrete is the most durable flooring choice. It allows the concrete to breathe below grade, creates movement and character throughout the space and is very easy to maintain. With a pond out back, a polished concrete floor is easy to clean and will be able to withstand high traffic.
 Dancer Concrete Design
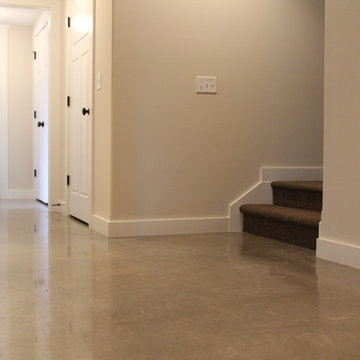
New construction opens a wide array of options when it comes to selecting finishes. For this particular client, they wanted a durable floor that was also aesthetically pleasing to complete their basement. Since there was no topical sealer on the new concrete, a polished flooring system was selected.
The basement itself was a little over 1200 square feet and featured a game room, main living area, bedrooms, bathrooms and a kitchen. All of the flooring was to be polished to a level 400 shine and finished with a densifier and stain guarding product. Polished concrete is the most durable flooring choice. It allows the concrete to breathe below grade, creates movement and character throughout the space and is very easy to maintain. With a pond out back, a polished concrete floor is easy to clean and will be able to withstand high traffic.
 Dancer Concrete Design
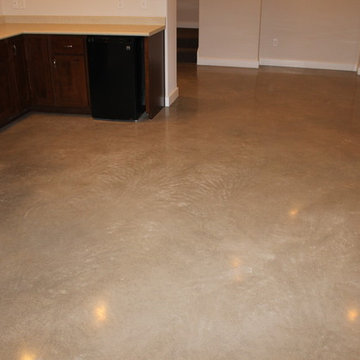
New construction opens a wide array of options when it comes to selecting finishes. For this particular client, they wanted a durable floor that was also aesthetically pleasing to complete their basement. Since there was no topical sealer on the new concrete, a polished flooring system was selected.
The basement itself was a little over 1200 square feet and featured a game room, main living area, bedrooms, bathrooms and a kitchen. All of the flooring was to be polished to a level 400 shine and finished with a densifier and stain guarding product. Polished concrete is the most durable flooring choice. It allows the concrete to breathe below grade, creates movement and character throughout the space and is very easy to maintain. With a pond out back, a polished concrete floor is easy to clean and will be able to withstand high traffic.


Sponsored
Delaware, OH

Buckeye Basements, Inc.
Central Ohio's Basement Finishing ExpertsBest Of Houzz '13-'21
 Dancer Concrete Design
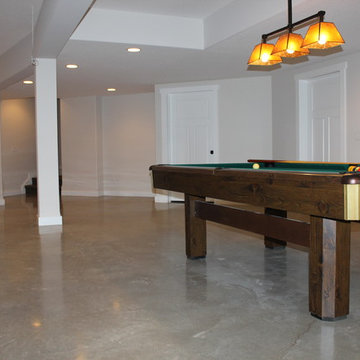
New construction opens a wide array of options when it comes to selecting finishes. For this particular client, they wanted a durable floor that was also aesthetically pleasing to complete their basement. Since there was no topical sealer on the new concrete, a polished flooring system was selected.
The basement itself was a little over 1200 square feet and featured a game room, main living area, bedrooms, bathrooms and a kitchen. All of the flooring was to be polished to a level 400 shine and finished with a densifier and stain guarding product. Polished concrete is the most durable flooring choice. It allows the concrete to breathe below grade, creates movement and character throughout the space and is very easy to maintain. With a pond out back, a polished concrete floor is easy to clean and will be able to withstand high traffic.
 Dancer Concrete Design
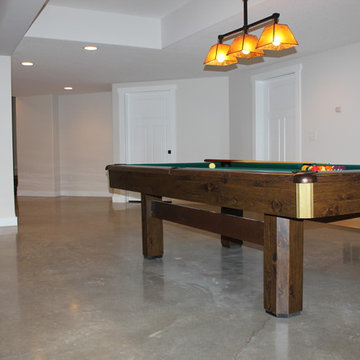
New construction opens a wide array of options when it comes to selecting finishes. For this particular client, they wanted a durable floor that was also aesthetically pleasing to complete their basement. Since there was no topical sealer on the new concrete, a polished flooring system was selected.
The basement itself was a little over 1200 square feet and featured a game room, main living area, bedrooms, bathrooms and a kitchen. All of the flooring was to be polished to a level 400 shine and finished with a densifier and stain guarding product. Polished concrete is the most durable flooring choice. It allows the concrete to breathe below grade, creates movement and character throughout the space and is very easy to maintain. With a pond out back, a polished concrete floor is easy to clean and will be able to withstand high traffic.
 Dancer Concrete Design
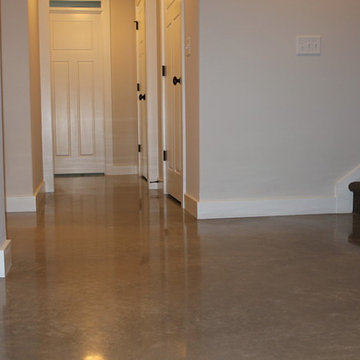
New construction opens a wide array of options when it comes to selecting finishes. For this particular client, they wanted a durable floor that was also aesthetically pleasing to complete their basement. Since there was no topical sealer on the new concrete, a polished flooring system was selected.
The basement itself was a little over 1200 square feet and featured a game room, main living area, bedrooms, bathrooms and a kitchen. All of the flooring was to be polished to a level 400 shine and finished with a densifier and stain guarding product. Polished concrete is the most durable flooring choice. It allows the concrete to breathe below grade, creates movement and character throughout the space and is very easy to maintain. With a pond out back, a polished concrete floor is easy to clean and will be able to withstand high traffic.
 Design Actually, LLC
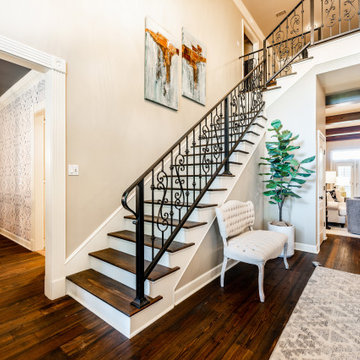
I would say that my design aesthetic is to create Classic, Transitional and Chic spaces for busy professional women who want to make good investments. The type of fibers you use in area rugs, fabrics on the chairs and topical treatments that can be applied to fabrics or rugs that are not inherently stain resistant. Another way to be Smart is by using furniture that can function so you can maintain great conversation, such as with these swivel chairs in the living room.
 iCork Floor
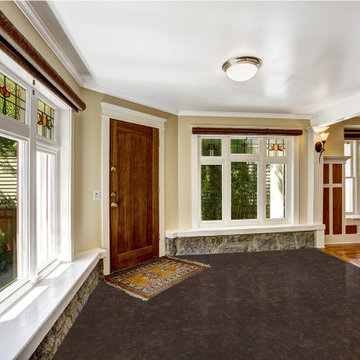
Cork tiles – beauty and soundproofing functionality all in one. Make the floors and walls in your home a hot topic of conversation. Be proud that you chose cork tiles to represent all your soundproofing needs. Show it off knowing you not only got a great product at a great price, but that it’s more than worth the money, because you have the functionality of a great soundproofing product along with the aesthetic beauty that will keep your guests impressed.
 Intex Surface Solutions
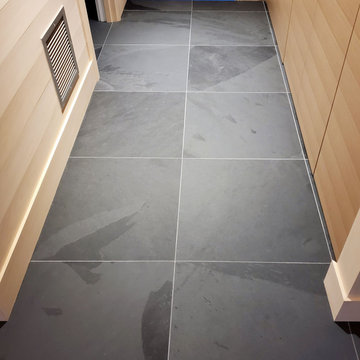
We cleaned and sealed this recently installed slate floor in Muskoka, Ontario.
Where possible, we try to avoid topical coatings. This beautiful slate floor has a natural cleffed finish, and blends beautifully with the existing untreated materials found throughout this luxury cottage. We decided a penetrating sealer would be best to maintain it's current aesthetic.
In the long term, as the floor wears and scratches, we will likely move over to an enhancer to hide damage while still avoiding topical sealers or waxes.
 Tile Doctor Ltd
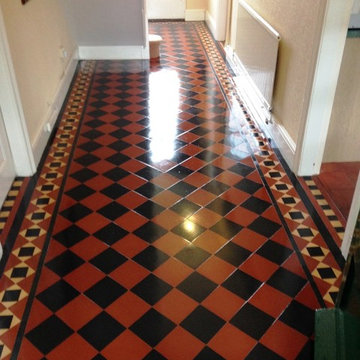
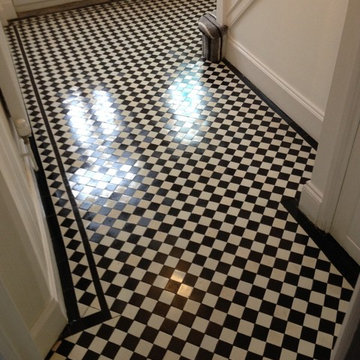
This black and red Victorian tiled hallway at a property in Newport, the third largest city in Wales, had a timeless charm about it, and a classic diamond pattern. Unfortunately, the tiles had lost their colour, leaving them looking dull and lifeless. It was clear to me, upon further inspection, that the existing sealer had failed, allowing dirt to become trapped in the pores of tile.
This can be a very difficult problem to rectify without the right professional assistance; everyday household cleaners are rarely suitable for sealed floors and acidic cleaners can actually male the problem worse. The tiles needed a deep clean with strong products, followed by a fresh, robust surface seal to prevent dirt from becoming trapped again in the future.
I started cleaning the tiles with a strong dilution of Tile Doctor Pro Clean, worked in to the stone as per usual by using a rotary machine fitted with a black scrubbing pad. Pro Clean is a reliable alkaline cleaner that works well on most kinds of natural stone, and while I could see it made a difference here, it was clear something stronger was required to remove what was left of the old sealer.
To remove this, I applied a dilution of Tile Doctor Remove and Go, which is a dedicated stripper that is safe to use on tile and stone for the purposes of breaking down old sealers, waxes, paints, and adhesives, and this proved effective in getting rid of all the old sealer.
Once the cleaning was complete, I rinsed the floor thoroughly to remove any trace of chemicals left over from the cleaning products, before leaving it to dry overnight.
I came back to the property the next day and, after checking the floor was completely dry, I proceeded to seal the floor using eight coats of Tile Doctor Seal and Go. This types of sealer is known as ‘topical’, which means that it builds up a solid layer of protection on the surface of the tile. Topical sealers tend to be more suitable to Victorian and Quarry tiles as they typically require a lot of sealer due to their porosity and these types of sealer are less costly. Seal and Go also adds a nice aesthetically pleasing low sheen finish.
As you can see from the second photo, this did wonders to the tiles and really brought this classic Victorian pattern back to life. Another satisfied client for the Monmouthshire Tile Doctor.
Paul Wales
Monmouthshire Tile Doctor
 Tile Doctor Ltd
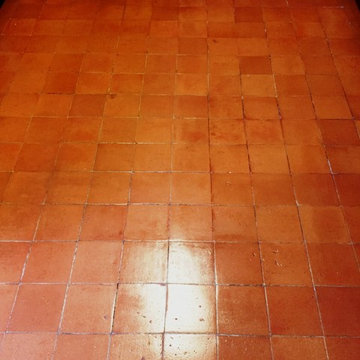
Not too long ago I visited a client who had just moved into a lovely old cottage in Milton, Oxfordshire. She wanted to restore many of the antique features of the building, including a fantastic Quarry tiled floor in the kitchen.
Quarry is typically a robust, hard wearing stone, but in a high traffic area like a kitchen, the tiles will need regular maintenance. These tiles clearly hadn’t seen a thorough clean and fresh seal in a long time, and so I was called in to provide just that.
On the first day of work, I gave the Quarry tiles a deep clean using a strong solution of Tile Doctor Pro-Clean and water. Pro-Clean is a versatile alkaline cleaner that also helps to break down any old and no longer effectual sealer remaining on the tiles.
The solution was applied evenly to the floor and left to dwell for half an hour, allowing time for it to seep into the stone to get underneath and lift out the ingrained dirt. I then removed the dirt by agitating the solution with a scrubbing pad fitted to a rotary floor scrubber. I worked in small sections at first, and gradually finished the entire floor.
After completing the initial clean, I rinsed away the soiled solution and vacuumed up the excess moisture using a wet-vac machine. I then scrubbed the floor an acid wash using a dilution of Tile Doctor Grout Clean-Up to remove grout smears and other mineral type deposits. The resulting solution was then removed in a similar fashion using a wet-vac.
The final step in the cleaning process was to rinse the floor with Tile Doctor pH Neutral Cleaner to remove any trace of product helps to tackle any remaining dirt and reset the pH balance of the tiles before sealing.
After leaving the floor to dry overnight, I returned the next day to the house to seal the floor with Tile Doctor Seal & Go, a water-based topical sealer which gives the floor an aesthetically pleasing sheen and a robust surface seal.
The photos demonstrate the results better than this short account can, needless to say the floor is now transformed.
Barry Woodward
Oxfordshire Tile Doctor
 Tile Doctor Ltd
At Tile Doctor, we often come across Victorian tiled hallways in need of restoration. They’re very popular due to their timeless and unique patterns – and as a result are still in production, having first being produced in the 19th century. While many have been maintained in their original state since first being laid (which is sometimes over a century ago), others have been hidden by carpet or linoleum for many years, only to be uncovered by new property owners.
In this case, at a property in Newport – the port city of South East Wales – the Victorian tiled hallway had not been subject to an effective cleaning plan leaving the fantastic white and black checkered pattern grubby and unsightly. I was asked if I could help bring it back to life – and I was happy to oblige!
I started the restoration by applying a strong cleaning solution combined from mixing two Tile Doctor products in equal parts namely Remove and Go and Pro Clean. Together they create a powerful sealer remover and cleaner to break down any remaining old sealers, paint whilst lifting ingrained dirt and muck from the pores of the tile.
The two products were worked into the tiles using firstly a 17 inch black buffing pad to remove the initial layer of dirt, followed by a 6 inch buffing pad, wire brush, and hand-held scrapper to remove the more stubborn specks of paint and dirt. The resultant slurry was then rinsed away with water and a wet vacuum and stubborn areas retreated until I was satisfied. The results were great so after a final rinse I left tiles to dry off.
A couple of days later, after leaving the tiles to dry completely, I went back to the property to seal the floor. I checked first for any excess moisture as this can cloud the sealer and prevent it from acting an effective barrier against dirt and stains.
My choice of sealer included one coat of Tile Doctor Colour Grow to restore the rich colour to the black and white tiles, followed by seven coats of Tile Doctor Seal and Go to provide an aesthetically pleasing sheen finish. Colour Grow is an impregnating sealer that penetrates the pores of the tile to fill them and prevent dirt becoming trapped, while Seal and Go is a topical sealer that builds up an additional layer of protection on the surface of the tiles.
The combination of fresh sealers, preceded by a deep and thorough clean, really helped to restore these Victorian tiles to a condition in which they could be easily mistaken for newly laid! The customer was very pleased and undoubtedly will be looking forward to showing off the tiles to friends and family.
Paul Wales
Monmouthshire Tile Doctor
 Tile Doctor Ltd
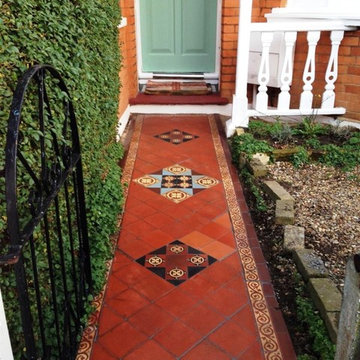
At first sight, this Victorian tiled pathway in Palmers Green, N13 did not appear to need too many repairs, with just a few obvious broken and loose tiles to be fixed. On closer inspection however it became clear it was in need of a deep clean and fresh seal.
To start, we applied Tile Doctor Remove & Go across the entire length of the pathway to break down and strip off the old sealer and provide an initial clean. In the more stubborn and difficult to reach areas where we saw the buildup of efflorescence, we applied Tile Doctor Acid Gel to neutralise the alkaline salts.
Acid Gel, as the name indicates, is a pH1 blend of Phosphoric and Hydrochloric acid in gel form, making it easier to apply to tricky areas, including sloped or vertical surfaces. Users should be aware not to use this type of product on acid-sensitive stone such as Limestone, as this can cause etching if left on too long.
Once the dirt and efflorescence buildups had been dealt with, I focused my attention towards the tile repairs, quickly realising that the extent of damage was greater than initially thought. Firstly, the numerous loose and broken tiles were removed and individually cleaned in a similar way to the rest of the floor. We then repaired the sub base ready for the existing and newly sourced tiles to be re-laid, before leaving the floor to set and dry overnight.
The next day, the pathway was grouted, before being sealed with Tile Doctor’s colour enhancing, impregnating sealer, Colour Grow to bring back the life and character to the Victorian tiles.
I was also asked to renovate the Edwardian hallway tiles in the house so once finished with the pathway they were deep cleaned using a strong dilution of Tile Doctor Pro Clean. This also helped to break down the old sealers and waxes – followed by a careful cleaning of the grout lines using Tile Doctor Grout Clean Up in combination with 3m black pads and detail brushes.
To ensure any pre existing sealer was completely removed, I followed up with a steam clean and left the tiles to dry overnight.
Upon my return to the property the next day, I completed re-grouting in the necessary areas, before sealing the tiles with five coats of Tile Doctor Seal & Go, providing an aesthetically pleasing satin finish. Seal & Go is a topical, solvent-based sealer which forms a layer of durable protection on the surface of the tiles, protecting against dirt and stains.
The hard work invested in restoring these two floors certainly paid off, as the client was exceptionally pleased with the results, going as far as to leave the following feedback:
“I wanted to restore my tired Edwardian tiled hallway and was given Rob Voyce’s
contact details. I was very impressed with Rob and his team; they were very
professional and friendly. Rob explained the stages of the work to be carried out and
we agreed a date and the job was completed much to my satisfaction. Very pleased.”
Nigel Voyce
North London Tile Doctor
 Tile Doctor Ltd
Having an effective sealer in place is essential for ensuring the long term condition of tiled floors in fact a lack of sealer can make cleaning the tiles exceptionally difficult as the sealer prevents dirt becoming ingrained in the tile.
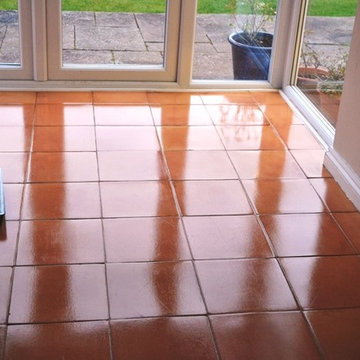
This property owner, living in the former spa town of Matlock in Derbyshire, was experiencing problems with their Terracotta tiled kitchen floor since they had applied some kind of wax to act as a sealer, and this had worn off within a few weeks. After this happened the tiles were not sealed again, making cleaning a big problem. Terracotta is a highly porous stone and thus easily soaks in spillages and stains, and allows dirt to become very easily trapped.
In this situation, the property owner resolved to contact me about some professional maintenance. I suggested that the tiles would need a deep clean followed by the application of a fresh, high quality sealer. The work was agreed on and I made my way down to the property the following week.
When I arrived at the property and saw the tiles first hand it became clear that a professional clean had been in need for a long time: greasy looking stains were particularly prevalent and covered large areas of the kitchen floor.
To remove I mixed a strong solution of Tile Doctor Pro Clean, which is a multi-purpose, high-alkaline cleaner, stripper and degreaser, and, working in small areas, applied it to the floor. Working in small sections was important because the stone is very porous and quickly soaked in any product laid down. I scrubbed the cleaner into the stone using a rotary machine fitted with a black scrubbing pad, with the dirt and stains coming away nicely. Pro Clean is highly versatile and can be used for similar cleaning purposes on most types of natural stone floor.
After cleaning each section, I quickly removed the excess dirty water and chemicals with my wet vax machine. Once the whole floor had been cleaned I rinsed it several times with fresh water just to make sure all cleaning chemicals were gone. I then left the floor to dry completely for 36 hours.
When I returned to the property, I conducted several damp tests to check for any areas of the floor that needed further drying. As is almost always the case, there were a few areas that remained slightly damp, and I set about speeding the drying process along using my heat gun. In fact, it actually took me more than three hours to get the floor completely dry, but this was worth the effort as even the slightest excess moisture can damage the performance of the sealer.
Once the floor was finally dried I began sealing the floor with one coat of Tile a Doctor Colour Grow sealer. Colour Grow is an impregnating sealer that penetrates deep into the pores of the stone, thus acting as a shield against ingrained dirt, and also raises the colour of the tiles to provide an aesthetically appealing appearance. sealer. After sealing with Colour Grow, I left the floor to dry for couple of hours and then applied six coats of Tile Doctor Seal & Go, which is a topical sealer that builds up durable protection on the surface of the tiles.
The combination of through cleaning and the application of not one, but two high quality sealers really did wonders for the appearance of these Terracotta tiles. Looking at the final results you wouldn’t have believed they had been without a proper clean and seal for so long! Needless to say the customer was exceptionally pleased and will surely be able to keep her floor looking great for a long time to come.
Tony Olmet
Derbyshire Tile Doctor
 Tile Doctor Ltd
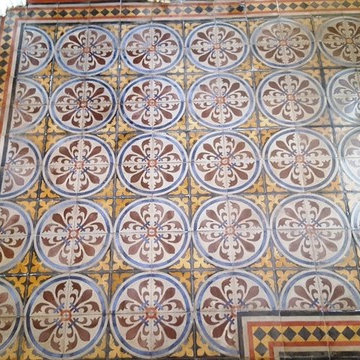
This very old Encaustic tiled flooring was uncovered at a property in Chester when the present owners started to undertake renovation. They removed the carpets and vinyl tiles from the hallway, revealing the Encaustic tiles to find that they were in truly horrific condition. This included being covered by heavy dirt, dust and, in some parts, by a sticky black bitumen.
Encaustic tiles are made out of compressed cement, and were commonly used in properties built during the Edwardian and Victorian period. This gives us a good idea of just how old these tiles are – but the owners were keen to see what Tile Doctor could do to restore their condition.
The black bitumen was my main concern when it came to cleaning the tiles. To remove this, along with all the other dirt and dust, our powerful cleaner for heavy soil buildup, known as Tile Doctor Remove and Go, was applied.
The product, which is also effective for removing adhesive and paint stains, was worked into the tiles then left to dwell for thirty minutes, before being scrubbed with a black pad fitted to a rotary machine. The resulting cleaning residue was soaked up with a wet vac machine. This cleaning process was repeated once more over to get the tiles as clean as possible, before leaving them to dry overnight.
The next day, damp readings were taken to make sure the floor was dry enough to seal. It’s essential to take damp readings before sealing – especially with old tiled floors that may not have a damp proof membrane installed – as even the slightest amount of excess moisture can damage the performance of the sealer.
Two types of sealer were used in this situation. First to be applied was a single coat of Tile Doctor Colour Grow, an impregnating, colour intensifying sealer which enhances the best shades in the tiles. Following this, four coats of Tile Doctor Seal and Go were applied. This is a topical sealer, which means it builds a layer of protection on the surface of the floor, while also providing an aesthetically pleasing low-sheen finish.
The customer was over the moon at the end result. At first the floor looked to be with a lost cause, but with the right cleaning methods and products it has been a restored to a standard where it almost appears new. Another satisfied customer!
Alastair Robb
West Cheshire Tile Doctor
 Tile Doctor Ltd
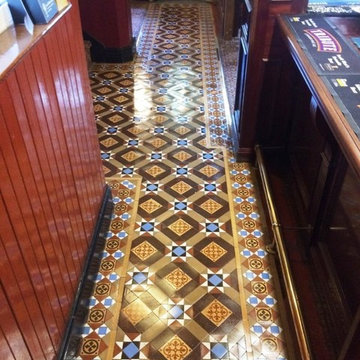
Here’s a really interesting commercial job for you, which I recently completed in the town of Hinckley, Leicestershire. I was asked to take a look at a Victorian Geometric and Encaustic tiled floor in the historic Queen’s Head pub.
This floor is over a century old and although in good condition for its age had suffered significant wear over the years, along with some cracked tiles and slight inherent moisture issues. What the pub landlord requested was a restorative clean to alleviate the aesthetically damaging effect of the wear, and to enhance the natural colours of the stone. I was also asked to seal the floor following the clean to achieve a semi-gloss finish.
The first step in the cleaning process was to mix a strong solution of one part Tile Doctor Pro-Clean to four parts clean water. Pro-Clean is a high alkaline cleaner which also contains stripping properties, allowing it to break down old sealer and tackle heavy soil build-up. The solution was applied to the floor and left to dwell for 15 minutes, giving it times to seep into the stone, get underneath the dirt and lift it to the surface.
I addressed several paint spots and areas suffering from glue contamination by using Tile Doctor Remove & Go, which is specially formulated to break down paint and adhesives on unpolished natural stone floors, amongst others. The entire floor was then scrubbed using a special floor cleaning pad, and the resulting slurry was vacuumed away using a wet-vac machine.
The final issue to deal with was the inherent efflorescence staining. This was treated using Tile Doctor Grout Clean-Up, an acid-based product which removes not just efflorescence but also grout haze, mineral deposits, and rust stains. The solution here was one part Grout Clean-Up diluted with four parts water.
After completing the clean, I thoroughly rinsed the floor with clean water to remove any trace of cleaning product and dried the floor as much as possible with a wet vacuum, then before leaving for the day i installed a couple of air movers to assist with drying overnight.
Upon my return the following day, I checked the floor for any excess moisture before sealing it with our topical, semi-gloss finish sealer, known as Seal & Go Extra which due to its formula is ideal for external or old internal floors where there is unlikely to be damp from membrane.
This unique product provides excellent protection, and allows the tiles to breath where floors are suffering from inherent moisture issues. It is suitable for both internal and external use, on Victorian floor tiles, Sandstone, Flagstones, Terracotta, and rough Slate.
As you can see from the photo, I was able to fulfil my client’s request to a high standard, bringing the pub’s old yet characterful Victorian tiled floor back to life again.
Kay Sylvester
Leicestershire Tile Doctor
1