
Search results for "Trapped" in Home Design Ideas


 ISC Services, Inc.
The new kitchen
Inspiration for a large contemporary u-shaped ceramic tile eat-in kitchen remodel in Philadelphia with an undermount sink, shaker cabinets, light wood cabinets, soapstone countertops, blue backsplash, cement tile backsplash, stainless steel appliances and a peninsula
Inspiration for a large contemporary u-shaped ceramic tile eat-in kitchen remodel in Philadelphia with an undermount sink, shaker cabinets, light wood cabinets, soapstone countertops, blue backsplash, cement tile backsplash, stainless steel appliances and a peninsula


Find the right local pro for your project








 Hueber Industries
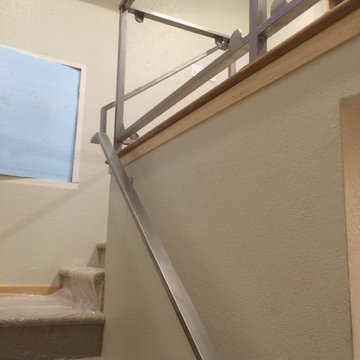
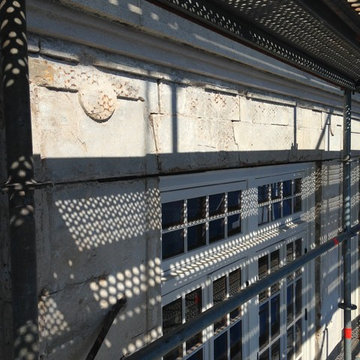
Stainless steel finished with random orbital sander. Wall mounted handrail connects with the upper glass section. Glass panels not installed at time of photo.


 Windy City Painters
Does your iron fence look like Chicago winters have been winning the battle for years? That slow orange spread across pickets and rails is not just an eyesore - it is active corrosion undermining the structural integrity of metalwork that frames some of Chicago's most architecturally significant residential properties. Windy City Painters addresses iron fence rust at the source, using professional-grade rust conversion chemistry and direct-to-metal coatings engineered for the specific abuse Chicago's climate delivers.
PROJECT OVERVIEW
This project involved a heavily rusted ornamental iron fence on a Chicago North Side residential property. Rust had progressed beyond surface oxidation into moderate pitting on lower rails, a pattern Windy City Painters sees frequently on properties within blocks of treated roadways where salt drift accelerates corrosion. The scope included mechanical descaling, chemical rust conversion, DTM priming, and a durable gloss topcoat matched to the original fence color.
MATERIALS AND PRODUCTS
Ospho Rust Converter: A phosphoric acid-based treatment that chemically reacts with iron oxide, converting it to iron phosphate - a stable, paintable compound. Corroseal Water-Based Rust Converter is an alternative for situations requiring lower VOC handling. Rust-Oleum Professional DTM Primer and Sherwin-Williams DTM Acrylic Coating serve as the primary coating system, formulated for direct metal adhesion with built-in rust inhibitors. For structurally compromised sections, welding is coordinated before any chemical or coating work begins.
THE PROCESS
Step 1 - Mechanical Preparation: Wire wheel grinding on an angle grinder removes loose rust scale, mill scale, and flaking paint. For advanced pitting, Windy City Painters deploys a needle gun descaler, which impacts the metal surface thousands of times per minute to drive scale from deep cavities. This step determines whether the fence can be coated or needs welding first.
Step 2 - Chemical Rust Conversion: Ospho or Corroseal is brushed onto all remaining rust surface. These products do not simply seal rust - they react with it. The conversion process takes 24 hours to fully cure before topcoating. Skipping this step is the single most common reason iron fence paint jobs fail prematurely.
Step 3 - DTM Priming: Sherwin-Williams DTM or Rust-Oleum DTM primer is applied by brush to ensure full penetration around decorative elements, picket tips, and weld joints. Spray application is used on open sections for even film build. DTM formulations bond directly to prepared metal without a separate shop primer.
Step 4 - Finish Coating: A DTM topcoat in gloss or semi-gloss provides the final weather barrier. Gloss is preferred for iron fencing because the harder surface sheds water more effectively and resists dirt adhesion between maintenance cycles. Windy City Painters applies two finish coats for maximum film thickness.
CHICAGO-SPECIFIC CHALLENGES
Chicago's freeze-thaw cycle is the primary enemy of iron fence coatings. Water infiltrates micro-cracks in paint film, freezes, expands, and delaminate coating from beneath. Properties on the North Side and Near West Side also contend with lake-effect humidity that keeps metal surfaces damp for extended periods, slowing cure times and promoting under-film corrosion if preparation is inadequate. Greystones and Victorian brownstones typically feature ornate cast iron or wrought iron fencing with complex geometries that trap moisture and demand hand-brush application to fully coat recesses.
WHAT TO EXPECT LONG-TERM
A properly prepared and coated iron fence in Chicago should hold 5-8 years before requiring recoating. Annual inspection of weld joints, picket tips, and base rails closest to grade will identify early rust return. Addressing small spots with touch-up converter and primer extends service life significantly between full recoats.
PRO TIPS
Tip 1: Never pressure wash a rusted iron fence immediately before painting. Water drives moisture into pits and delays the surface drying needed for chemical converter adhesion. Allow 48 hours of dry weather before prep begins.
Tip 2: Picket tips and rail ends are the first failure points. These end-grain equivalent areas on metal concentrate corrosion. Ask your painter to apply an extra brush coat to every tip and terminus.
Tip 3: Black is the traditional and most durable color choice for iron fencing. Dark pigments absorb UV rather than reflecting it, reducing thermal cycling stress on the paint film at color change boundaries.
FAQ
Q: What does iron fence painting cost in Chicago?
A: Most residential iron fence painting in Chicago ranges from $400 to $1,200 depending on linear footage, rust severity, prep method required, and whether structural welding is needed before Windy City Painters can coat the surface.
Q: How do I know if my fence needs a welder before painting?
A: If you can press a screwdriver through a rail or picket, the metal wall has failed. Windy City Painters inspects all fencing before quoting and identifies weld-required sections so repairs happen before any coating investment.
Q: Is Ospho or Corroseal better for my fence?
A: Both convert rust effectively. Ospho is solvent-based and fast-acting, preferred for heavy rust. Corroseal is water-based with lower odor, preferred in enclosed or residential settings where off-gassing is a concern. Windy City Painters selects based on site conditions.
Q: Can iron fence painting be done in winter in Chicago?
A: Application requires temperatures above 50 degrees Fahrenheit for DTM coatings to cure properly. Most iron fence painting in Chicago runs April through October, with scheduling flexibility based on extended warm stretches.
Q: How do I maintain my fence between professional recoats?
A: Inspect annually in spring. Sand any rust spots to bare metal with 80-grit paper, apply Ospho, let cure 24 hours, then spot-prime with DTM primer and touch up with finish coat. Windy City Painters offers maintenance inspections.
Q: Do you paint courtyard building fences and coach house gates?
A: Yes. Multi-unit courtyard buildings and coach houses are common in the North Side neighborhoods Windy City Painters serves. We coordinate with property managers and HOAs for larger perimeter fence projects.
Q: How long after painting can I touch the fence?
A: DTM coatings are typically dry to touch in 2-4 hours and hard dry in 24 hours. Full cure for maximum hardness takes 7 days. Windy City Painters advises against pressure washing or heavy contact during that cure window.
Visit windypainters.com to request your free iron fence assessment and project quote.
 Windy City Painters
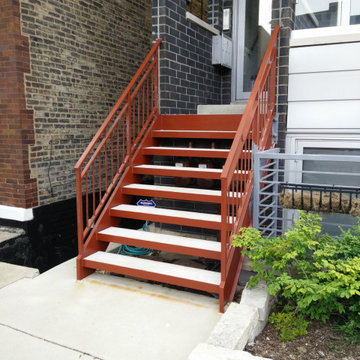
This West Town porch had suffered years of Chicago's harshest conditions. Road salt from winter streets, freeze-thaw cycles that crack metal bonds, and Lake Michigan humidity had transformed the iron railings into a rust catastrophe. The homeowner called Windy City Painters because they knew surface-level repainting wouldn't hold. We delivered a complete restoration using industrial-grade products and techniques that Chicago demands. The transformation took precision, the right chemistry, and an understanding of how brutal our climate actually is.
MATERIALS AND PRODUCTS
Windy City Painters selected RustDestroyer rust-converting primer as the foundation. This product chemically bonds to rust particles, converting them into a stable surface rather than simply covering them. The topcoat is Sherwin-Williams Corothane Aliphatic Urethane, specifically chosen because aliphatic urethanes resist yellowing, maintain flexibility in Chicago's temperature extremes, and provide superior weather resistance. We use 220-grit sandpaper between coats, stainless steel wire wheels for rust removal, and two full coats of finish. No shortcuts. No budget brands that fail in freeze-thaw cycles.
THE PROCESS
Step 1: Wire Wheel to Bare Metal (45 words)
We attached a stainless steel wire wheel to our equipment and removed every flake of loose rust and paint. This isn't cosmetic—it eliminates the corrosion source entirely. Rust spreads beneath paint. By going to bare metal, we stopped the problem at its root. Chicago's salt exposure demands this aggressive approach.
Step 2: Apply RustDestroyer Rust-Converting Primer (48 words)
After the surface was clean, we applied RustDestroyer according to spec. This primer chemically converts remaining rust particles into a protective layer, then bonds everything together. It's the critical bridge between corroded metal and lasting finish. One coat of RustDestroyer on bare metal creates the stable foundation that allows Corothane to perform properly throughout Chicago's cycles.
Step 3: Sand and Inspect Between Coats (42 words)
Once the primer cured, we lightly sanded with 220-grit paper. This step seems small but matters enormously—it removes dust, smooths any drips, and ensures perfect adhesion for the topcoat. We inspected every inch for missed spots. Chicago's humidity can trap moisture under topcoat if prep is rushed.
Step 4: Apply Two Coats of Corothane Topcoat (50 words)
We applied the first coat of Sherwin-Williams Corothane Aliphatic Urethane evenly, let it cure fully, then applied the second coat. Two coats guarantee coverage and durability. One coat thins under Chicago's sun and freeze-thaw stress. Corothane's flexibility is crucial—it moves with the metal as temperatures swing 50+ degrees in a single day.
CHICAGO-SPECIFIC CHALLENGES
West Town sits blocks from Lake Michigan. Humidity here is relentless. Winter brings road salt that penetrates every micro-gap in paint. Spring freeze-thaw cycles expand and contract iron, cracking weak coatings. Summer sun accelerates UV breakdown. Fall brings moisture creep before freezing begins again. Generic paints fail fast. Windy City Painters uses products engineered for this exact climate. RustDestroyer stops the chemical source of rust. Corothane's aliphatic formula resists yellowing under UV while maintaining the flexibility that stops cracking. The two-coat system ensures thickness that protects through all four seasons.
WHAT TO EXPECT LONG-TERM
With proper application and two coats of Corothane, this porch should remain rust-free and attractive for 7-10 years. This assumes normal Chicago weather exposure and no damage from impact or intentional scratching. Homeowners should rinse salt off railings after heavy winter storms and inspect annually for any paint cracks. Windy City Painters stands behind our work. If you see rust appearing in year 3 or 4, something failed—and we'll address it. This level of confidence comes from using the right products and proper technique.
PRO TIPS
1. Never paint over rust. If your railing shows orange or flaking, wire-wheel it first. Windy City Painters refuses shortcuts that fail.
2. Timing matters. Paint in spring or early fall when humidity is lower and temperatures are stable. Avoid summer heat and winter moisture.
3. Inspect annually. Catch paint cracks before rust starts underneath. A small touch-up now prevents a full restoration later.
Contact Windy City Painters at windypainters.com or 773-818-6331 for your free estimate.
FAQS
Q: Why is Corothane better than cheaper urethanes? A: Aliphatic urethanes resist UV yellowing and maintain flexibility in extreme temperature swings. Chicago needs flexible protection, not brittle coatings that crack.
Q: How do I know if my railing needs wire-wheeling? A: If you see rust flakes, discoloration, or pitting, wire-wheeling is essential. Windy City Painters inspects free and explains exactly what's needed.
Q: Can you paint over old paint if it's not rusted? A: Sometimes, but we always inspect. If the old paint is loose or the metal beneath shows any corrosion, we start over with wire-wheeling.
Q: What's the cost difference between one coat and two? A: Two coats cost more upfront but last 7-10 years versus 3-4 years with one coat. Windy City Painters recommends the investment.
Q: How do I protect my railing between professional paintings? A: Rinse salt off after winter storms, keep paint clean, and report any cracks immediately. Prevention beats restoration.
Q: Does RustDestroyer work on all metal? A: It works on iron, steel, and rust-prone alloys. Windy City Painters uses it exclusively for rust conversion because it's proven.
Q: Why do West Town homes rust faster than other neighborhoods? A: Proximity to Lake Michigan increases humidity. Combined with road salt, the freeze-thaw cycles hit West Town and River West harder than inland areas.
Q: Can I apply Corothane myself? A: Technically yes, but surface prep (wire-wheeling and RustDestroyer application) is where most DIYers fail. Windy City Painters handles this correctly.
Q: How often should I repaint my porch? A: Every 7-10 years with proper two-coat application. If you see rust sooner, the original prep was insufficient.
Q: What neighborhoods does Windy City Painters serve? A: We serve West Town, River West, and all of Chicago. Call 773-818-6331 for your area.
 SUPERIOR CHIMNEY SERVICES CORPORATION
A friend noticed a damp, musty smell coming from her living room fireplace the week after a February thaw. When she called a masonry technician from Superior Chimney, to take a look, and found that water had been working its way behind the bricks for years. What started as a small crack now meant her chimney needed structural repairs before she could safely use it again.
Chimney repairs are any work done to restore the structural and weatherproof condition of a chimney. This can include mortar joint repair, brick replacement, crown repair, flue repair, and cap or flashing replacement. Most Chicagoland homeowners discover the need for chimney repairs often times after winter, when the freeze and thaw cycles have already done its damage. Uncovering the symptoms early is the best way to keep chimney repairs down. Let’s discuss how that can be done.
Why Chicagoland Weather Is Especially Hard on Chimneys
Chicagoland has some of the most polarized weather. One day it’s a blizzard and the next week hot, humid and 100 degrees. That swing in weather conditions and temperatures are the real reasons why chimney repairs are needed.
When moisture from humid and rainy days’ soak into brick and mortar and then freezes, it expands. As it begins to thaw, the materials contract. Repeat that cycle dozens of times in a single Illinois winter and even solid masonry in the chimney starts to crack, spall, and separate from the joints holding it together. This is called the freeze thaw cycle. We’ve talked about it many times over the years, and it continues to be the single biggest reason homes need chimney repairs more often than homes in milder climates.
The Chimney Safety Institute of America (CSIA), the leading nonprofit certifying body for chimney professionals in the United States, notes that water intrusion is one of the most damaging and most preventable problems. If the problem is left to mature, it affects more than the appearance. It compromises the structure itself.
What Do Chimney Repairs Involve?
Not every chimney problem requires the same fix. Chimney repairs generally fall into a few categories. Understanding the difference, helps homeowners have a more informed conversation with the expert technician.
Mortar joint repair or tuckpointing. This involves removing deteriorated mortar between bricks and replacing it with fresh mortar, matched to the original color and texture as closely as possible.
Brick replacement. When individual bricks have spalled, meaning the face has cracked or popped off from trapped moisture, those bricks are removed and replaced.
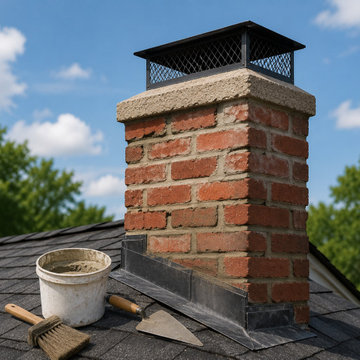
Crown and cap repair. The crown is the concrete slab at the very top of the chimney. Cracks both big and small let water directly into the chimney flue. Chimney crown repair is often one of the most urgent forms of chimney repairs.
Flashing repair. Flashing is the barrier where the chimney meets the roofline. Loose, damaged or poorly installed flashing is a common source for water leaks. The roof gets the blame as it is the largest piece that covers the house. However, it certainly can be the overlooked chimney.
Flue and liner repair. Cracked flue tiles or damaged liners affect how safely a chimney vents smoke and combustion gases.
When to Know a Chimney Needs Repair
Most chimney damage shows up as small, easy to dismiss way. Let’s take a look at the following list. Be sure to print this out and keep it handy so if/when something happens, you know what to look for.
• Water stains near the fireplace or on the ceiling
• A brownish stain on the wall around your fireplace, or a stain on the ceiling near an exterior chimney. This means water is getting in somewhere it should not.
• Crumbling or missing mortar
• If you can see gaps between bricks, or mortar that flakes off when you touch it
• A leaning or visibly shifting chimney
• A chimney that appears to pull away from the house, even slightly, could indicate a structural issue
• White staining on the brick (efflorescence)
• Chalky white residue left behind as water evaporates out of the masonry. It is a visible sign that moisture is moving through brick
• Rusted damper or firebox components
• Metal parts inside a fireplace that are rusting are a strong indicator that moisture is present
• Debris in the fireplace
• Small chunks of brick, mortar, or tile landing in the firebox
What are the Various Types of Chimney Repair?
This is a compiled list of chimney repairs so you can be aware of what to look for. If you have any questions, contact us directly at 877-244-6349.
Homeowners who schedule chimney repairs at the first sign of trouble typically spend far less than those who wait until water damage reaches the interior of the home. This is a great reason to contact Superior Chimney at 877-244-6349.
Why an Annual Inspection Matters More Than People Think
The CSIA and the National Fire Protection Association both recommend that chimneys, fireplaces, and vents be inspected at least once a year, whether or not the fireplace gets used. This recommendation exists because damage does not take a break just because a chimney sits without any use.
According to data stated by the CSIA, chimney related fires still contribute to tens of thousands of residential fires across the United States each year, and a large share of those incidents can be traced back to deferred maintenance. An annual chimney inspection is what catches the small mortar crack or the hairline crown crack before it turns into a repair bill.
Hiring the Right Company for Chimney Repairs
Not every company who offers chimney repair work has the certified training to diagnose a problem correctly. CSIA certification is the most widely recognized credential in the industry, and it requires technicians to study chimney physics, venting systems, and fire codes. After the studies, the new technician needs to pass an exam and agree to a professional code of ethics.
When you call, be sure to ask:
Are your technicians CSIA certified, and can I verify that certification?
Will you show me photos or video of the damage before starting work?
Does the estimate distinguish between cosmetic repair and structural repair?
At Superior Chimney, we welcome these and other of your questions.
How Chimney Repairs Affect Insurance and Resale
A chimney in poor condition can complicate a home sale or an insurance claim. Home inspectors routinely report on visible mortar loss, leaning chimneys, or missing chimney caps. Some insurers will request proof of repair before renewing a policy on an older home. Addressing chimney repairs proactively protects more than curb appeal. It protects the sale timeline and the claims history associated to the property.
Frequently Asked Questions
How often should a Chicago area chimney be inspected? At least once a year, per CSIA and NFPA guidance, regardless of how often the fireplace is used.
Can chimney repairs be done in winter? Some interior repairs can happen in cold weather, but most masonry repair requires temperatures consistently above freezing. Spring and fall are the most common repair times in the Chicago area.
Is tuckpointing the same thing as chimney repair? Tuckpointing is one type of chimney repair, focused on replacing deteriorated mortar joints.
Does homeowners insurance cover chimney repairs? It depends. Sudden damage from a storm may be covered, while gradual deterioration from lack of maintenance typically is not.
So Finally…
Taking care of your home includes a chimney. Just because you don’t see it every day, doesn’t mean things aren’t happening. Be sure to get a chimney inspection done once per year by a certified and credible company such as Superior Chimney to take care of the issues. Contact us today by calling 877-244-6349.

 Bellingham Bay Builders
The Twin Peaks Passive House + ADU was designed and built to remain resilient in the face of natural disasters. Fortunately, the same great building strategies and design that provide resilience also provide a home that is incredibly comfortable and healthy while also visually stunning.
This home’s journey began with a desire to design and build a house that meets the rigorous standards of Passive House. Before beginning the design/ construction process, the homeowners had already spent countless hours researching ways to minimize their global climate change footprint. As with any Passive House, a large portion of this research was focused on building envelope design and construction. The wall assembly is combination of six inch Structurally Insulated Panels (SIPs) and 2x6 stick frame construction filled with blown in insulation. The roof assembly is a combination of twelve inch SIPs and 2x12 stick frame construction filled with batt insulation. The pairing of SIPs and traditional stick framing allowed for easy air sealing details and a continuous thermal break between the panels and the wall framing.
Beyond the building envelope, a number of other high performance strategies were used in constructing this home and ADU such as: battery storage of solar energy, ground source heat pump technology, Heat Recovery Ventilation, LED lighting, and heat pump water heating technology.
In addition to the time and energy spent on reaching Passivhaus Standards, thoughtful design and carefully chosen interior finishes coalesce at the Twin Peaks Passive House + ADU into stunning interiors with modern farmhouse appeal. The result is a graceful combination of innovation, durability, and aesthetics that will last for a century to come.
Despite the requirements of adhering to some of the most rigorous environmental standards in construction today, the homeowners chose to certify both their main home and their ADU to Passive House Standards. From a meticulously designed building envelope that tested at 0.62 ACH50, to the extensive solar array/ battery bank combination that allows designated circuits to function, uninterrupted for at least 48 hours, the Twin Peaks Passive House has a long list of high performance features that contributed to the completion of this arduous certification process. The ADU was also designed and built with these high standards in mind. Both homes have the same wall and roof assembly ,an HRV, and a Passive House Certified window and doors package. While the main home includes a ground source heat pump that warms both the radiant floors and domestic hot water tank, the more compact ADU is heated with a mini-split ductless heat pump. The end result is a home and ADU built to last, both of which are a testament to owners’ commitment to lessen their impact on the environment.
232