
Search results for "Typically involving" in Home Design Ideas
 Tom Brzoskwinia
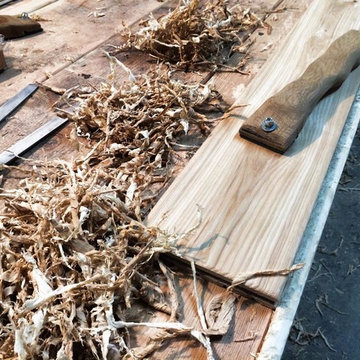
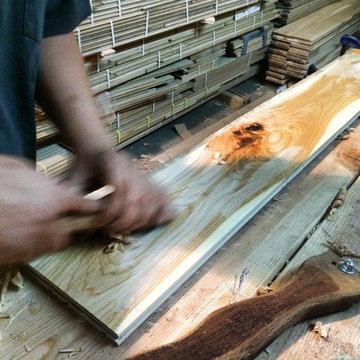
One of the most popular hardwood floor finishing which offers Tom & Peter Flooring is provided by WOCA. If you’ve decided that you want a natural looking wooden floor that is lacquer-free, then the likelihood is that you’ve chosen oil as your way of protecting your wood and making your floor look great at the same time. WOCA for wood flooring comes in various forms and is a great way of making sure that your wood is protected, but at the same time looks natural. A highly popular as well as effective way of treating wood floors, oils effectively penetrate into the wood and in some cases harden into the surface of the floor to stop damage and to maintain the wood in its optimum condition.
WOCA Oil finish hardwood flooring has taken the United States market by in 2014 and shows no signs of slowing down in 2016 and now. Here are some of the most common questions we have regarding this type of finish which we will I’m to answer in today’s my blog:
Is oil finish as durable as traditional factory urethane finishes with aluminum oxide?
When it comes to durability, oil finish flooring tackles the issue with a completely different method. The penetrating oil serves as protection from moisture and wear while allowing the user to feel the wood grains in their bare feet. If compared directly to factory finished aluminum oxide finish, the oil finish flooring will not perform as well to abrasion and impact. However, the beauty of this finish is the fact that it will camouflage any scratches which will inevitably accumulate over time.
Will this finish evaporate over time and will this be harmful for indoor air quality?
Another concern for oil finished floors its effect on indoor air quality. For on-site applications, some varieties suggest several coats which typically require the residents to be out of the home due to mild odors. However, there are factory finished UV-cured or single coat applications which lessen the downtime. Despite the odors produced during the drying process, oil finish floors rank amongst the lowest for VOC (volatile organic compound) emissions. Certain brands even boast true zero VOC. This fact alone makes oil finished floors one of the best options for green building solutions.
“WOCA products are certified by independent laboratories, the German Institute for Biological Building Materials, and are in accordance with DIN–Norm 53–160. WOCA WoodCare Denmark products meet or exceed the most stringent U.S. standards for volatile organic compounds.” –WOCA Oil Finish Manufacture
Does this type of finish require additional maintenance which I am not familiar with?
For weekly cleaning, oiled floors use a special cleaner which contains an oil and soap mixture. After a period of 12-18 months some oil may evaporate causing the wood grains to appear dry. An additional layer of oil can be reapplied to keep the floor looking fresh. Although oil finished floors require more involvement in periodic maintenance in high traffic areas, this maintenance can be done much easier than the equivalent of an onsite sand and refinish.
WOCA Master Color Oil contains pigment, which provides a single-step hardwood floor staining process. Laying down the stain and the finish in one step.
This product comes 14 different colors, from Black to Extra White, and you can mix them freely to create various color palettes that will meet the demands of any job.
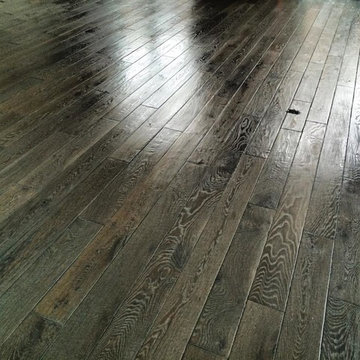
Below are some pictures of the finished job…
 Tom Brzoskwinia
One of the most popular hardwood floor finishing which offers Tom & Peter Flooring is provided by WOCA. If you’ve decided that you want a natural looking wooden floor that is lacquer-free, then the likelihood is that you’ve chosen oil as your way of protecting your wood and making your floor look great at the same time. WOCA for wood flooring comes in various forms and is a great way of making sure that your wood is protected, but at the same time looks natural. A highly popular as well as effective way of treating wood floors, oils effectively penetrate into the wood and in some cases harden into the surface of the floor to stop damage and to maintain the wood in its optimum condition.
WOCA Oil finish hardwood flooring has taken the United States market by in 2014 and shows no signs of slowing down in 2016 and now. Here are some of the most common questions we have regarding this type of finish which we will I’m to answer in today’s my blog:
Is oil finish as durable as traditional factory urethane finishes with aluminum oxide?
When it comes to durability, oil finish flooring tackles the issue with a completely different method. The penetrating oil serves as protection from moisture and wear while allowing the user to feel the wood grains in their bare feet. If compared directly to factory finished aluminum oxide finish, the oil finish flooring will not perform as well to abrasion and impact. However, the beauty of this finish is the fact that it will camouflage any scratches which will inevitably accumulate over time.
Will this finish evaporate over time and will this be harmful for indoor air quality?
Another concern for oil finished floors its effect on indoor air quality. For on-site applications, some varieties suggest several coats which typically require the residents to be out of the home due to mild odors. However, there are factory finished UV-cured or single coat applications which lessen the downtime. Despite the odors produced during the drying process, oil finish floors rank amongst the lowest for VOC (volatile organic compound) emissions. Certain brands even boast true zero VOC. This fact alone makes oil finished floors one of the best options for green building solutions.
“WOCA products are certified by independent laboratories, the German Institute for Biological Building Materials, and are in accordance with DIN–Norm 53–160. WOCA WoodCare Denmark products meet or exceed the most stringent U.S. standards for volatile organic compounds.” –WOCA Oil Finish Manufacture
Does this type of finish require additional maintenance which I am not familiar with?
For weekly cleaning, oiled floors use a special cleaner which contains an oil and soap mixture. After a period of 12-18 months some oil may evaporate causing the wood grains to appear dry. An additional layer of oil can be reapplied to keep the floor looking fresh. Although oil finished floors require more involvement in periodic maintenance in high traffic areas, this maintenance can be done much easier than the equivalent of an onsite sand and refinish.
WOCA Master Color Oil contains pigment, which provides a single-step hardwood floor staining process. Laying down the stain and the finish in one step.
This product comes 14 different colors, from Black to Extra White, and you can mix them freely to create various color palettes that will meet the demands of any job.
Below are some pictures of the finished job…
 Tom Brzoskwinia
One of the most popular hardwood floor finishing which offers Tom & Peter Flooring is provided by WOCA. If you’ve decided that you want a natural looking wooden floor that is lacquer-free, then the likelihood is that you’ve chosen oil as your way of protecting your wood and making your floor look great at the same time. WOCA for wood flooring comes in various forms and is a great way of making sure that your wood is protected, but at the same time looks natural. A highly popular as well as effective way of treating wood floors, oils effectively penetrate into the wood and in some cases harden into the surface of the floor to stop damage and to maintain the wood in its optimum condition.
WOCA Oil finish hardwood flooring has taken the United States market by in 2014 and shows no signs of slowing down in 2016 and now. Here are some of the most common questions we have regarding this type of finish which we will I’m to answer in today’s my blog:
Is oil finish as durable as traditional factory urethane finishes with aluminum oxide?
When it comes to durability, oil finish flooring tackles the issue with a completely different method. The penetrating oil serves as protection from moisture and wear while allowing the user to feel the wood grains in their bare feet. If compared directly to factory finished aluminum oxide finish, the oil finish flooring will not perform as well to abrasion and impact. However, the beauty of this finish is the fact that it will camouflage any scratches which will inevitably accumulate over time.
Will this finish evaporate over time and will this be harmful for indoor air quality?
Another concern for oil finished floors its effect on indoor air quality. For on-site applications, some varieties suggest several coats which typically require the residents to be out of the home due to mild odors. However, there are factory finished UV-cured or single coat applications which lessen the downtime. Despite the odors produced during the drying process, oil finish floors rank amongst the lowest for VOC (volatile organic compound) emissions. Certain brands even boast true zero VOC. This fact alone makes oil finished floors one of the best options for green building solutions.
“WOCA products are certified by independent laboratories, the German Institute for Biological Building Materials, and are in accordance with DIN–Norm 53–160. WOCA WoodCare Denmark products meet or exceed the most stringent U.S. standards for volatile organic compounds.” –WOCA Oil Finish Manufacture
Does this type of finish require additional maintenance which I am not familiar with?
For weekly cleaning, oiled floors use a special cleaner which contains an oil and soap mixture. After a period of 12-18 months some oil may evaporate causing the wood grains to appear dry. An additional layer of oil can be reapplied to keep the floor looking fresh. Although oil finished floors require more involvement in periodic maintenance in high traffic areas, this maintenance can be done much easier than the equivalent of an onsite sand and refinish.
WOCA Master Color Oil contains pigment, which provides a single-step hardwood floor staining process. Laying down the stain and the finish in one step.
This product comes 14 different colors, from Black to Extra White, and you can mix them freely to create various color palettes that will meet the demands of any job.
Below are some pictures of the finished job…
Find the right local pro for your project
 Windy City Painters
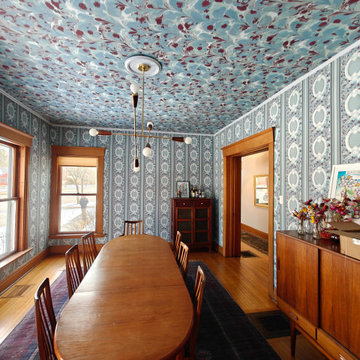
Professional wallpaper installation Chicago dining room showcases expert craftsmanship in this stunning transformation that perfectly complements the home's architectural character.
## Project Overview
This comprehensive wallpaper installation project involved both walls and ceiling application in a formal dining room within a vintage Chicago greystone. The intricate pattern required precise alignment and professional techniques to achieve seamless results that honor the home's historic charm while adding contemporary elegance.
## Materials and Products
We utilized premium wallpaper adhesive specifically formulated for Chicago's climate variations, along with professional-grade smoothing tools and precision cutting equipment. High-quality primer ensured optimal surface preparation for lasting adhesion across both vertical and horizontal applications.
## Installation Process
First, comprehensive surface preparation included removing existing materials and repairing any imperfections. Second, application of specialized primer designed for wallpaper adhesion. Third, precise measurement and cutting with careful attention to pattern alignment. Finally, professional installation with meticulous corner work and ceiling transitions.
## Chicago-Specific Challenges
Chicago homes present unique wallpaper installation challenges including settling foundations that affect wall surfaces, humidity fluctuations impacting adhesive performance, and older plaster surfaces requiring specialized preparation techniques. Additionally, vintage buildings often have irregular walls demanding expert adjustment skills.
## Results and Quality
The completed wallpaper installation creates a sophisticated dining environment that seamlessly integrates with the home's architectural character. Perfect pattern matching across walls and ceiling demonstrates the precision possible with professional installation techniques.
## Professional Tips
Before starting wallpaper installation, always test adhesion in inconspicuous areas first. Maintain consistent room temperature throughout the process. Choose quality materials designed for Chicago's climate. Plan pattern layout carefully to minimize waste and ensure optimal visual flow.
See more work and request free estimate at windypainters.com - Windy City Painters delivers exceptional results.
Q: How long does wallpaper installation take?
A: Professional wallpaper installation typically requires 1-2 days depending on room size, pattern complexity, and surface preparation needs.
Q: Can you install wallpaper on textured walls?
A: Yes, textured wall wallpaper installation requires proper surface preparation and specialized techniques for optimal adhesion results.
Q: Do you remove old wallpaper first?
A: Complete old wallpaper removal is essential before new wallpaper installation to ensure proper adhesion and smooth finish.
Q: What about ceiling wallpaper installation?
A: Ceiling wallpaper installation requires specialized equipment and techniques - Windy City Painters handles this expertly and safely.
Q: How do you ensure pattern matching?
A: Professional wallpaper installation includes precise measuring, cutting, and alignment techniques for seamless pattern matching throughout the space.
Q: Can wallpaper installation work in humid areas?
A: Proper wallpaper installation with quality adhesives designed for humidity variations ensures lasting results in Chicago's climate.
Q: What surfaces accept wallpaper installation?
A: Most properly prepared surfaces including drywall, plaster, and previously painted walls can accept professional wallpaper installation successfully.
Q: Do you handle corner installations?
A: Corner wallpaper installation requires specialized techniques for inside and outside corners - we ensure perfect alignment.
Q: What's included in the service?
A: Complete wallpaper installation service includes surface preparation, removal if needed, professional application, cleanup, and quality guarantee.
Q: How do you prepare surfaces?
A: Surface preparation for wallpaper installation includes cleaning, repairing imperfections, priming, and ensuring optimal conditions for adhesion.

 User
Detail of Iridescent Venetian plaster finish on all walls in Living Room by Christianson Lee Studios
Example of a transitional home design design in New York
Example of a transitional home design design in New York

 threshold interiors
Location: New York, NY, United States
This Loft was tastefully renovated back in the '90s, but was due for an update and an expansion of the kitchen and dining areas to accommodate the client's cooking skills and entertaining needs. EnlargIing the island and adding cabinetry to delineate the office, bar and dining areas was a priority. The bathroom was updated to feel like a tranquil spa with beautiful new tile, plumbing fixtures and cabinets. Our biggest challenge was coordinating the entire renovation while our client was out of town for the Summer!
Photographed by: James Salomon
 User
DECO Window Fashions
Sheer pleated custom made drapes, ceiling mount metal rod.
Trendy bedroom photo in Austin
Trendy bedroom photo in Austin




 Tile Doctor Ltd
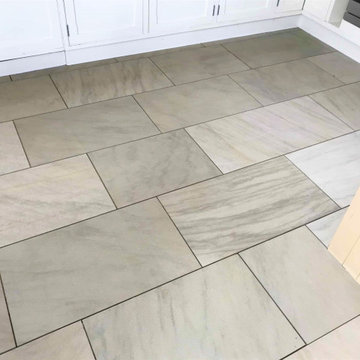
I received an enquiry from a property in Crowthorne to come and survey an unknown Flagstone Floor in a converted barn that was ready to be rented out. The owners where concerned the stone was letting the rest of the property down due to it being dirty and heavily stained, particularly around the kitchen and entrance areas. If your selling or renting out a property it really needs to look its best if you want to achieve a good price. Having spoken over the phone we agreed a date for me to pop over to complete a survey.
From further inspection I confirmed the stone was in fact a Sandstone, it was also clear that the sealer protecting the stone from ingrained dirt had worn away and was now allowing dirt and staining to ruin the appearance of the flagstones. It was a large floor so I measured up so I could work out the quantities of cleaning and sealing products needed and then walked the customer through the cleaning process. Later that day I sent over a detailed quotation which was accepted, and a date agreed for my return.
I should mention this work took place during the Covid restrictions, fortunately being a rental property, I was able to work in the property alone.
To deep clean the floor and remove the ingrained dirt and staining I used a strong dilution of Tile Doctor Pro-Clean. It is sprayed onto the floor and left to soak in for five minutes before agitating with a Black scrubbing pad fitted to a weighted buffing machine. The resultant slurry was then wet extracted away using a powerful high-pressure van mounted extracting system.
This action cleaned up most of the stone nicely however certain areas where heavily stained, particularly in the kitchen area where food and drink stains were more apparent. To tackle this, I applied a stronger cleaner/stripper product called Tile Doctor Remove and Go this time allowing ten minutes for it to soak in before scrubbing the surface with a very coarse 100-grit soft milling pad. This took quite a few attempts each time extracting the slurry away and then inspecting the floor to see if more work was needed.
Happy the stains have been removed, I then focused on renovating the surface Sandstone after the application of the coarse pad. This involves the application of several finer grit burnishing pads which close the pores and adds a subtle polish to the Sandstone. As I started with 100-grit pad it was necessary to gradually refine the surface with an incremental series of pads that included 200, 400 and finally 800-grit pads. Then to ensure a uniform finish across the floor I continued the 400 and 800 grit pads throughout the property. Water is used to lubricate the process and this turns into a fine slurry that is rinse extracted as before.
The cleaning process took up the whole of the first day and I am pleased to say the Sandstone floor looked very clean after I had finished.
The stone was then allowed dry off overnight with the aid of an industrial air mover and I returned later the next day to apply a new protective seal. In the meantime, my customer had been over to check out the floor and were over the moon with how it looked and wanted to keep the finish as natural as possible.
With this in mind, I applied Tile Doctor Ultra-Seal sealer to the Sandstone throughout, only two coats were needed. This is a premium sealer that is almost invisible and works by penetrating the stone thus preventing dirt from becoming ingrained. Once done the floor looked very clean and much brighter than before, it now had that wow factor which will help it attract a good yield in the rental market.
The trouble with rental properties of course is making sure the tenant uses the right product to maintain the floor and not a typical supermarket tile cleaner that are only designed for use on Ceramic and Porcelain tiles. In fact, these types of cleaning product can slowly strip the sealer off the floor so it’s always worth checking the label before purchasing. Fortunately Tile Doctor sells a product called Neutral Cleaner that is ideal for maintaining sealed stone floors, so I left them with a complimentary bottle and recommended they get some more to leave under the sink for the new tenant.
Dennis Buckland
Berkshire Tile Doctor
 User
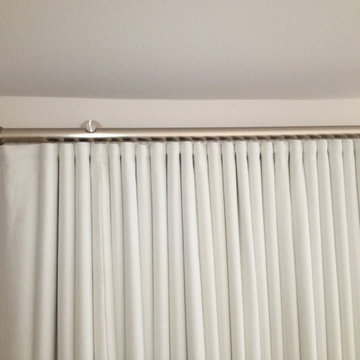
DECO Window Fashions.
Ripple Fold Draperies
Home design - contemporary home design idea in Austin
Home design - contemporary home design idea in Austin

 Atelier Armbruster
Master bathroom
Photos: Natalia Lorca Ruiz
Mid-sized trendy master white tile and ceramic tile ceramic tile and black floor doorless shower photo in New York with flat-panel cabinets, white cabinets, a wall-mount toilet, white walls, an integrated sink, solid surface countertops and a hinged shower door
Mid-sized trendy master white tile and ceramic tile ceramic tile and black floor doorless shower photo in New York with flat-panel cabinets, white cabinets, a wall-mount toilet, white walls, an integrated sink, solid surface countertops and a hinged shower door

 MIDWEST CONSTRUCTION & SUPPLY INC
Paul Despenas: Since 1995 Midwest Construction has been offering insulated vinyl siding, because we believed in the product in many ways.
Vinyl siding has come a long way since I (Paul Despenas – VP Marketing) installed the companies 1st job in 1982. The product was Alside D-5 Endura Supreme. I drove by the job 6 years later and it was still on the house, wall lines looked good, but the color had faded from nice Beige to a dirty white.
Manufacturers stepped up to the plate and added the right blends of vinyl resins, the addition of color stabilizers, thicker and better material, and the best improvement to vinyl siding was to add laminated foam behind it for strength and energy savings.
Well here is some documented proof to what we have been saying for years, Your new American Classic Insulated Siding will save energy and maintenance over fiber cement siding.
NYSERDA HOME VINYL SIDING INSTITUTE STUDY
NYSERDA Home- In a new study, Insulated Vinyl Siding (Fullback® siding insulation laminated to vinyl siding) proved to outperform fiber cement in multiple categories. The Vinyl Siding Institute (VSI) recently commissioned a study to evaluate the environmental performance of Fullback® Insulated Siding. The Vinyl Siding Institute study was conducted by Newport Ventures, a research and consulting firm with expertise in the housing industry.
Two high-performance homes were built to comply with the rigorous goals of the New York State Energy Research and Development Authority's (NYSERDA) High Performance Residential Development Challenge, one in Saratoga Springs, NY and one in Burnt Hills, NY. The challenge was conceived to educate home builders on construction of cost-effective, high performance homes designed to achieve 50-60% energy savings above that of typical homes built to New York's stringent energy code. In achieving this goal, both builders involved in the challenge showed preferences for systems that offered both energy savings and affordability. Fullback® Insulated Siding was specified by both builders as a system to help them achieve energy conservation and LEED for Homes.
Fullback V Siding Comparison
BURNT HILLS, NY: Researchers performed a side-by-side field test on the Burnt Hills home to compare Fullback® Insulated Siding against uninsulated fiber cement. This Vinyl Siding Institute study was conducted during the winter on a two story colonial built by Stewart Construction. The thermal imaging clearly indicated that there was less heat loss from the home to the outdoors with the Fullback® Insulated Siding compared to the fiber cement. The exterior surface temperature of the Fullback® Insulated Siding section of the wall was considerably colder, indicating that there was more thermal bridging (heat loss) with the fiber cement product.
SARATOGA SPRINGS, NY:
In the case of the Saratoga Springs home, the LEED case study found that environmental performance and visual appeal can go hand-in-hand through the use of Fullback® Insulated Siding. This home became the first home in New York's capital region to achieve LEED for Homes' Gold Rating. Sixty eight percent of visitors to the home found the siding to be "very attractive" while 95% agreed that the visual appeal of the Fullback® Insulated Siding was "better than average".
Overall, the study provides documentation that insulated vinyl siding can outperform exterior cladding alternatives on environmental issues while at the same time remaining aesthetically pleasing.
Midwest Construction Qualified Remodeler Magazine Big 50 inductee and Top 500 remodeler's has won the Better Business Bureau Integrity Award 2 times.(1999 & 2015) Quality Products & Quality Installation is our motto since 1958 and we still live up to that today by delivering the best home improvement products in our industry. Backing those products up with top notch installation crews with all of the certifications and water management techniques to give you the home owner some peace of mind and comfort knowing your products will save you energy and maintenance for years to come.
Midwest Construction is also a Progressive Foam Preferred Platinum Contractor which gives you the home owner, extra benefits, Lifetime warranty on the thermal performance of the insulation and a 10 year labor warranty from Progressive foam including our American Classic Insulated Vinyl siding lifetime warranty with lifetime non fade protection.

 Taylor Made Cabinets, Leominster MA
Angela Taylor, Taylor Made Cabinets of Leominster MA
Kitchen pantry - mid-sized transitional l-shaped light wood floor kitchen pantry idea in Boston with recessed-panel cabinets, white cabinets, granite countertops, stainless steel appliances and an island
Kitchen pantry - mid-sized transitional l-shaped light wood floor kitchen pantry idea in Boston with recessed-panel cabinets, white cabinets, granite countertops, stainless steel appliances and an island


 The POOL ARTIST | Brian T. Stratton
Award winning pool designer Brian T. Stratton | The Pool Artist designed this beautiful custom concrete / gunite swimming pool. Luxury pool designer nj, international pool design, new jersey swimming pool designer, pool artist, swimming pool engineer, swimming pool architect nj, water designer, eleuthera Bahamas pool designer, infinity edge pool design, custom spa design, California pool designer, Mississippi pool designer, south Carolina pool designer, new York pool designer, Pennsylvania pool designer

 Renovisions
The owners of this 1980’s built-home wanted to create a completely new look for their outdated master bath and turned to Renovisions for design and build services. Having perused Renovisions website, they were confident they made the right choice to help them transform their ordinary space into something truly extraordinary. The design team created several configurations for the homeowners review until they nailed down one particular design that would create that wow factor.
The main challenges were creating an open, spacious feel and maximizing natural light and ventilation with plenty of storage and customizations. The addition of a second window allows ample light into the space throughout the day along with the recessed and sconce lights which were perfectly placed. Storage, which was a key element of this design, includes two separate vanity cabinets (his and hers) with plenty of space for needed toiletries, a matching framed medicine cabinet for her and a custom built cubby for him. Built on site was a linen closet with both roll out and stationary shelves for towels and shower supplies. The spacious walk-in, all tiled shower boasts ‘no door’ access with lineal drain, traditional fixed and hand-held shower heads and a rounded shower seat. Polished black granite was used inside the cubby and topping both the threshold and seat creating a nice contrast to and tying in with the floor. The decorative grab bar ensures safety for these homeowners while showering. The heated floors added throughout the bath take the edge off when stepping out of the warm shower and are conveniently operated by a 24 hour programmable thermostat. Classic white subway tile and chair rail trims adorne all walls and tie in nicely to each vanity station. Carrera look quartz was the perfect choice for countertops creating a clean fresh look. Stunning marble basket-weave mosaic floor tile set the stage in this exquisite bath as the beautiful white painted cabinetry softened the overall feel of the space.
These homeowners are not saving spa retreats for once-a-year vacations anymore, they now enjoy a relaxing spa-like shower experience every day in their own home!


18