
Search results for "Videos creative" in Home Design Ideas

 Saida Mei
Your country, your province, your city, your neighborhood, your house… What could be more important than the place where your family feels safe and secure? Everything starts from here. No matter which part of the city you live, you always take care of your house, working on upgrades and design. Yes, it could be quite expensive to renovate or re-design your house. The budget could easily exceed thousands and thousands of dollars. However, there is a way to make your house comfortable, modern and fancy while keeping money in your pocket! How? We are here to help and answer this question.
We are the team of Design Matters - CANADIAN WEB/TELEVISION SERIES based in Manitoba, produced by RTV Media and features unusual interior design projects.
The professional team of the Design Matters - top builders, hosts, interior designers, producers, and filming crew - bring their extraordinary expertise, creativity and reno how-how to completely
transform the rooms into a modern family space.
The TV/web show helps the customer to:
• reduce the renovation budget
• develop and implement the concept of the modern interior design
• learn useful renovation tips and techniques
• find the right materials and tools supplier
• prepare the house for the market
The show is aired by local cable Shaw Spotlight in Winnipeg, Manitoba, and Amazon Prime Video worldwide. All episodes of the show are also available online. The target audience for our show is the following:
-builders
-construction companies
-renovation companies
-homeowners
-production companies
-suppliers
-small businesses
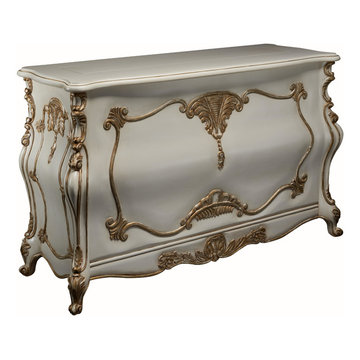
 TV Lift Cabinet by Cabinet Tronix
Here a beautiful new hand carved TV lift cabinet furniture where we had a blast using a Benjamin Moore color with gold glazing.
Hopefully the Collage gives a better way to see the TV in the 3 positions being completely hidden to all the way up. These are great for living rooms, family rooms, bed rooms, at the foot of the bed, center of the room as a divider.
This one is expensive however we have over 100 designs to select from which all are made to order based on your space, electronic and TV size needs.
Interior designers, audio video integrator companies, architects, custom home builders, hotels, new home owners, remodeling, direct orders, commercial projects, and luxury property rentals welcome!
Custom furniture with out TV lift kits are also welcome. Cabinet Tronix has been in business for 14 years and more committed to creative and fun designs than ever.
New York Manhattan lofts, condos, apartments and homes enjoy many of our units to help open up and make the rooms more beautiful while having a focal piece of furniture at the same time.
From Miami to Connecticut to California and Hawaii to Washington State and DC.
Houston, Dallas, Austin Texas
 Saida Mei
Your country, your province, your city, your neighborhood, your house… What could be more important than the place where your family feels safe and secure? Everything starts from here. No matter which part of the city you live, you always take care of your house, working on upgrades and design. Yes, it could be quite expensive to renovate or re-design your house. The budget could easily exceed thousands and thousands of dollars. However, there is a way to make your house comfortable, modern and fancy while keeping money in your pocket! How? We are here to help and answer this question.
We are the team of Design Matters - CANADIAN WEB/TELEVISION SERIES based in Manitoba, produced by RTV Media and features unusual interior design projects.
The professional team of the Design Matters - top builders, hosts, interior designers, producers, and filming crew - bring their extraordinary expertise, creativity and reno how-how to completely
transform the rooms into a modern family space.
The TV/web show helps the customer to:
• reduce the renovation budget
• develop and implement the concept of the modern interior design
• learn useful renovation tips and techniques
• find the right materials and tools supplier
• prepare the house for the market
The show is aired by local cable Shaw Spotlight in Winnipeg, Manitoba, and Amazon Prime Video worldwide. All episodes of the show are also available online. The target audience for our show is the following:
-builders
-construction companies
-renovation companies
-homeowners
-production companies
-suppliers
-small businesses
Find the right local pro for your project

 Mike Farley Pool Designer, SWD, ASLA
The clients had just bought the home and loved the inside but not the outside. They did not want the formal setting with Greek busts. Since remodeling the old pool would have restricted the new, they had it removed so they could start from scratch. Their favorite setting was much more organic with a cabana, fireplace, and an outdoor kitchen. The house needed an addition with an entertainment media room, cigar room and pool bath. Privacy was achieved by adding a cabana on the north side with a full stone wall. The spa needed to be close to the master bedroom and have visibility of the flat screen television in the cabana. The spa is flush with the upper patio so not to block the view of the pool. A natural boulder stream connects the pool and spa. To soften the house planting is between the cabana and house. Decks and coping are Travertine. Pebblesheen color is Ocean Blue. Access to the cabana was located between the spa and the pool on the floating pad. Remote controlled fire features accent both ends of the boulders. Retaining walls were built behind the waterfall to bring the grade up so plantings looked more natural and waterfalls appeared to come out of the hillside. The cabana features were to create three zones. It does not matter the season or time of day, this space provides the family's perfect outside setting to enjoy each other. Project designed by Mike Farley. Check out Mike's Reference Site at FarleyPoolDesigns.com for more info and videos.
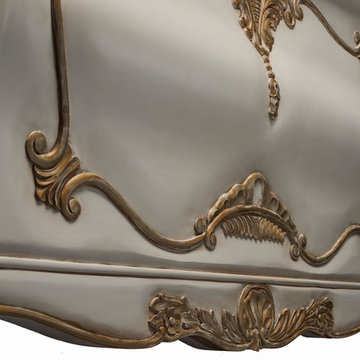 TV Lift Cabinet by Cabinet Tronix
Here a beautiful new hand carved TV lift cabinet furniture where we had a blast using a Benjamin Moore color with gold glazing.
These are great for living rooms, family rooms, bed rooms, at the foot of the bed, center of the room as a divider.
This one is expensive however we have over 100 designs to select from which all are made to order based on your space, electronic and TV size needs.
Interior designers, audio video integrator companies, architects, custom home builders, hotels, new home owners, remodeling, direct orders, commercial projects, and luxury property rentals welcome!
Custom furniture with out TV lift kits are also welcome. Cabinet Tronix has been in business for 14 years and more committed to creative and fun designs than ever.
New York Manhattan lofts, condos, apartments and homes enjoy many of our units to help open up and make the rooms more beautiful while having a focal piece of furniture at the same time.
From Miami to Connecticut to California and Hawaii to Washington State and DC.
New York, Manhattan

 Amazing Spaces
We started with a blank slate on this basement project where our only obstacles were exposed steel support columns, existing plumbing risers from the concrete slab, and dropped soffits concealing ductwork on the ceiling. It had the advantage of tall ceilings, an existing egress window, and a sliding door leading to a newly constructed patio.
This family of five loves the beach and frequents summer beach resorts in the Northeast. Bringing that aesthetic home to enjoy all year long was the inspiration for the décor, as well as creating a family-friendly space for entertaining.
Wish list items included room for a billiard table, wet bar, game table, family room, guest bedroom, full bathroom, space for a treadmill and closed storage. The existing structural elements helped to define how best to organize the basement. For instance, we knew we wanted to connect the bar area and billiards table with the patio in order to create an indoor/outdoor entertaining space. It made sense to use the egress window for the guest bedroom for both safety and natural light. The bedroom also would be adjacent to the plumbing risers for easy access to the new bathroom. Since the primary focus of the family room would be for TV viewing, natural light did not need to filter into that space. We made sure to hide the columns inside of newly constructed walls and dropped additional soffits where needed to make the ceiling mechanicals feel less random.
In addition to the beach vibe, the homeowner has valuable sports memorabilia that was to be prominently displayed including two seats from the original Yankee stadium.
For a coastal feel, shiplap is used on two walls of the family room area. In the bathroom shiplap is used again in a more creative way using wood grain white porcelain tile as the horizontal shiplap “wood”. We connected the tile horizontally with vertical white grout joints and mimicked the horizontal shadow line with dark grey grout. At first glance it looks like we wrapped the shower with real wood shiplap. Materials including a blue and white patterned floor, blue penny tiles and a natural wood vanity checked the list for that seaside feel.
A large reclaimed wood door on an exposed sliding barn track separates the family room from the game room where reclaimed beams are punctuated with cable lighting. Cabinetry and a beverage refrigerator are tucked behind the rolling bar cabinet (that doubles as a Blackjack table!). A TV and upright video arcade machine round-out the entertainment in the room. Bar stools, two rotating club chairs, and large square poufs along with the Yankee Stadium seats provide fun places to sit while having a drink, watching billiards or a game on the TV.
Signed baseballs can be found behind the bar, adjacent to the billiard table, and on specially designed display shelves next to the poker table in the family room.
Thoughtful touches like the surfboards, signage, photographs and accessories make a visitor feel like they are on vacation at a well-appointed beach resort without being cliché.
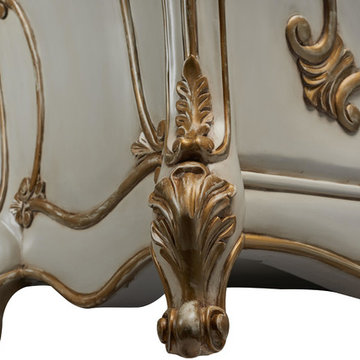 TV Lift Cabinet by Cabinet Tronix
Here a beautiful new hand carved TV lift cabinet furniture where we had a blast using a Benjamin Moore color with gold glazing.
These are great for living rooms, family rooms, bed rooms, at the foot of the bed, center of the room as a divider.
This one is expensive however we have over 100 designs to select from which all are made to order based on your space, electronic and TV size needs.
Interior designers, audio video integrator companies, architects, custom home builders, hotels, new home owners, remodeling, direct orders, commercial projects, and luxury property rentals welcome!
Custom furniture with out TV lift kits are also welcome. Cabinet Tronix has been in business for 14 years and more committed to creative and fun designs than ever.
New York Manhattan lofts, condos, apartments and homes enjoy many of our units to help open up and make the rooms more beautiful while having a focal piece of furniture at the same time.
From Miami to Connecticut to California and Hawaii to Washington State and DC.
New York, Manhattan
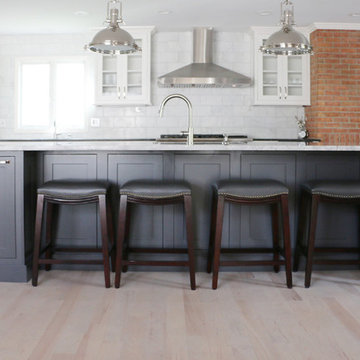
Sponsored
Plain City, OH

The Creative Kitchen Company
Columbus Area Kitchen Remodeling and Refacing Professional
 Saida Mei
Your country, your province, your city, your neighborhood, your house… What could be more important than the place where your family feels safe and secure? Everything starts from here. No matter which part of the city you live, you always take care of your house, working on upgrades and design. Yes, it could be quite expensive to renovate or re-design your house. The budget could easily exceed thousands and thousands of dollars. However, there is a way to make your house comfortable, modern and fancy while keeping money in your pocket! How? We are here to help and answer this question.
We are the team of Design Matters - CANADIAN WEB/TELEVISION SERIES based in Manitoba, produced by RTV Media and features unusual interior design projects.
The professional team of the Design Matters - top builders, hosts, interior designers, producers, and filming crew - bring their extraordinary expertise, creativity and reno how-how to completely
transform the rooms into a modern family space.
The TV/web show helps the customer to:
• reduce the renovation budget
• develop and implement the concept of the modern interior design
• learn useful renovation tips and techniques
• find the right materials and tools supplier
• prepare the house for the market
The show is aired by local cable Shaw Spotlight in Winnipeg, Manitoba, and Amazon Prime Video worldwide. All episodes of the show are also available online. The target audience for our show is the following:
-builders
-construction companies
-renovation companies
-homeowners
-production companies
-suppliers
-small businesses
 Saida Mei
Your country, your province, your city, your neighborhood, your house… What could be more important than the place where your family feels safe and secure? Everything starts from here. No matter which part of the city you live, you always take care of your house, working on upgrades and design. Yes, it could be quite expensive to renovate or re-design your house. The budget could easily exceed thousands and thousands of dollars. However, there is a way to make your house comfortable, modern and fancy while keeping money in your pocket! How? We are here to help and answer this question.
We are the team of Design Matters - CANADIAN WEB/TELEVISION SERIES based in Manitoba, produced by RTV Media and features unusual interior design projects.
The professional team of the Design Matters - top builders, hosts, interior designers, producers, and filming crew - bring their extraordinary expertise, creativity and reno how-how to completely
transform the rooms into a modern family space.
The TV/web show helps the customer to:
• reduce the renovation budget
• develop and implement the concept of the modern interior design
• learn useful renovation tips and techniques
• find the right materials and tools supplier
• prepare the house for the market
The show is aired by local cable Shaw Spotlight in Winnipeg, Manitoba, and Amazon Prime Video worldwide. All episodes of the show are also available online. The target audience for our show is the following:
-builders
-construction companies
-renovation companies
-homeowners
-production companies
-suppliers
-small businesses
 Mike Farley Pool Designer, SWD, ASLA
The clients had just bought the home and loved the inside but not the outside. They did not want the formal setting with Greek busts. Since remodeling the old pool would have restricted the new, they had it removed so they could start from scratch. Their favorite setting was much more organic with a cabana, fireplace, and an outdoor kitchen. The house needed an addition with an entertainment media room, cigar room and pool bath. Privacy was achieved by adding a cabana on the north side with a full stone wall. The spa needed to be close to the master bedroom and have visibility of the flat screen television in the cabana. The spa is flush with the upper patio so not to block the view of the pool. A natural boulder stream connects the pool and spa. To soften the house planting is between the cabana and house. Decks and coping are Travertine. Pebblesheen color is Ocean Blue. Access to the cabana was located between the spa and the pool on the floating pad. Remote controlled fire features accent both ends of the boulders. Retaining walls were built behind the waterfall to bring the grade up so plantings looked more natural and waterfalls appeared to come out of the hillside. The cabana features were to create three zones. It does not matter the season or time of day, this space provides the family's perfect outside setting to enjoy each other. Project designed by Mike Farley. Check out Mike's Reference Site at FarleyPoolDesigns.com for more info and videos.

 pavKann Made in Italy®
Living room - mid-sized modern formal and open concept concrete floor and gray floor living room idea in Toronto with white walls and a media wall
 Amazing Spaces
We started with a blank slate on this basement project where our only obstacles were exposed steel support columns, existing plumbing risers from the concrete slab, and dropped soffits concealing ductwork on the ceiling. It had the advantage of tall ceilings, an existing egress window, and a sliding door leading to a newly constructed patio.
This family of five loves the beach and frequents summer beach resorts in the Northeast. Bringing that aesthetic home to enjoy all year long was the inspiration for the décor, as well as creating a family-friendly space for entertaining.
Wish list items included room for a billiard table, wet bar, game table, family room, guest bedroom, full bathroom, space for a treadmill and closed storage. The existing structural elements helped to define how best to organize the basement. For instance, we knew we wanted to connect the bar area and billiards table with the patio in order to create an indoor/outdoor entertaining space. It made sense to use the egress window for the guest bedroom for both safety and natural light. The bedroom also would be adjacent to the plumbing risers for easy access to the new bathroom. Since the primary focus of the family room would be for TV viewing, natural light did not need to filter into that space. We made sure to hide the columns inside of newly constructed walls and dropped additional soffits where needed to make the ceiling mechanicals feel less random.
In addition to the beach vibe, the homeowner has valuable sports memorabilia that was to be prominently displayed including two seats from the original Yankee stadium.
For a coastal feel, shiplap is used on two walls of the family room area. In the bathroom shiplap is used again in a more creative way using wood grain white porcelain tile as the horizontal shiplap “wood”. We connected the tile horizontally with vertical white grout joints and mimicked the horizontal shadow line with dark grey grout. At first glance it looks like we wrapped the shower with real wood shiplap. Materials including a blue and white patterned floor, blue penny tiles and a natural wood vanity checked the list for that seaside feel.
A large reclaimed wood door on an exposed sliding barn track separates the family room from the game room where reclaimed beams are punctuated with cable lighting. Cabinetry and a beverage refrigerator are tucked behind the rolling bar cabinet (that doubles as a Blackjack table!). A TV and upright video arcade machine round-out the entertainment in the room. Bar stools, two rotating club chairs, and large square poufs along with the Yankee Stadium seats provide fun places to sit while having a drink, watching billiards or a game on the TV.
Signed baseballs can be found behind the bar, adjacent to the billiard table, and on specially designed display shelves next to the poker table in the family room.
Thoughtful touches like the surfboards, signage, photographs and accessories make a visitor feel like they are on vacation at a well-appointed beach resort without being cliché.
 Amazing Spaces
We started with a blank slate on this basement project where our only obstacles were exposed steel support columns, existing plumbing risers from the concrete slab, and dropped soffits concealing ductwork on the ceiling. It had the advantage of tall ceilings, an existing egress window, and a sliding door leading to a newly constructed patio.
This family of five loves the beach and frequents summer beach resorts in the Northeast. Bringing that aesthetic home to enjoy all year long was the inspiration for the décor, as well as creating a family-friendly space for entertaining.
Wish list items included room for a billiard table, wet bar, game table, family room, guest bedroom, full bathroom, space for a treadmill and closed storage. The existing structural elements helped to define how best to organize the basement. For instance, we knew we wanted to connect the bar area and billiards table with the patio in order to create an indoor/outdoor entertaining space. It made sense to use the egress window for the guest bedroom for both safety and natural light. The bedroom also would be adjacent to the plumbing risers for easy access to the new bathroom. Since the primary focus of the family room would be for TV viewing, natural light did not need to filter into that space. We made sure to hide the columns inside of newly constructed walls and dropped additional soffits where needed to make the ceiling mechanicals feel less random.
In addition to the beach vibe, the homeowner has valuable sports memorabilia that was to be prominently displayed including two seats from the original Yankee stadium.
For a coastal feel, shiplap is used on two walls of the family room area. In the bathroom shiplap is used again in a more creative way using wood grain white porcelain tile as the horizontal shiplap “wood”. We connected the tile horizontally with vertical white grout joints and mimicked the horizontal shadow line with dark grey grout. At first glance it looks like we wrapped the shower with real wood shiplap. Materials including a blue and white patterned floor, blue penny tiles and a natural wood vanity checked the list for that seaside feel.
A large reclaimed wood door on an exposed sliding barn track separates the family room from the game room where reclaimed beams are punctuated with cable lighting. Cabinetry and a beverage refrigerator are tucked behind the rolling bar cabinet (that doubles as a Blackjack table!). A TV and upright video arcade machine round-out the entertainment in the room. Bar stools, two rotating club chairs, and large square poufs along with the Yankee Stadium seats provide fun places to sit while having a drink, watching billiards or a game on the TV.
Signed baseballs can be found behind the bar, adjacent to the billiard table, and on specially designed display shelves next to the poker table in the family room.
Thoughtful touches like the surfboards, signage, photographs and accessories make a visitor feel like they are on vacation at a well-appointed beach resort without being cliché.

Sponsored
Plain City, OH
The Creative Kitchen Company
Columbus Area Kitchen Remodeling and Refacing Professional

 Stonelace Designs
Originally, the exterior of the Napa ranch residence was a standard knocked down stucco finish. We covered over the entire exterior of the house with a natural plaster product that has been made in Italy for centuries, known as Rialto or Vero. This product is a combination of slaked lime mixed with 60% reconstituted crushed marble dust. Quarried from the legendary Carrara marble mines. The finish itself is a vertically combed striated texture embedded into the plaster. While it cures, a transparent group of patinas are applied to the stone-like plaster substance to create a look of an aged villa.

 RAJ Kitchen and Bath, LLC
“Full apartment design”.
IF you have not yet seen this apartment conversion before, we strongly urge you to go to the bottom left of this page and click on the short 2-minutes video. It would put a lot of things into perspective when you come back and continue reading this.
It is true we were literally handed the keys and told a list of things that they wanted to have happen and we were to go into the apartment, look at the space and come up with a design that would satisfy all of that need. UNTIL we showed up! The unit had really seen some better days but we knew we had to look past that and come up with a concept that would work for them.
The immediate challenges were centered around 3 big ideas:
1. Adding a second bedroom to the already small footprint
2. Figuring out a way to make the kitchen bigger, better and brighter
3. Creating a master room walk in closet
It’s always difficult to add new rooms into existing footprint without expanding out or up and not incurring any opportunity cost. In this case, that was exactly what we had to do. Item one and two above had to be tackled as one. We went ahead and switched out the location of the dining room and eliminating an area where there was a “nook” type eat-in area. By doing so, we were able to cut right into that footprint and change the layout of the kitchen.
That one move allowed us to dig into the kitchen design because it was now the main focal point in the apartment. It was no longer an option to keep it in that tiny hole where it was, so we had to ensure that this design was functional and aesthetically pleasing at the same time. By adding the table into the space where an Island typically would go, we were able to both cut cost and still provide a dining experience. The Table serves as an Island as well when cooking.
We then proceeded to block in the existing doorway to the dining room. By doing this, we were able to create a full room which allowed us to put a door on the other side and called that room Bedroom #2. This was easier to do because all of the mechanicals were already in that space (light, heater and windows). By shifting things around, we also achieved a huge wall to wall closet from inside. PERFECT!
Then we moved into the Single bedroom. We thought it was a big room with a small closet, so by creatively adding an L shaped wall and steal some footprint into the bedroom side, we were able to put a door on that new room and design it for the walk-in closet. Even after this, the bedroom still holds a queen size bed with 2 night stands, a TV on the wall, a sitting chair and plenty of room to walk around. This was done by rethinking the location for the bed and night stands.
The bathroom was gutted to make sure there was no leaks and rebuild from the ground up. We kept all of the plumbing where it was, added a new vanity, medicine cabinet, tiles and lighting and it was done.
From there, the rest of the unit had new flooring all throughout, paint, and lighting. After completion and walk through, this project was handed over back to the clients.
Execution and collaboration between all the trades were: Reggie and his team from Premier Interiors and Rohan from RD Mechanical Services.
p.s. Please see our website to see the video.
 RAJ Kitchen and Bath, LLC
“Full apartment design”.
IF you have not yet seen this apartment conversion before, we strongly urge you to go to the bottom left of this page and click on the short 2-minutes video. It would put a lot of things into perspective when you come back and continue reading this.
It is true we were literally handed the keys and told a list of things that they wanted to have happen and we were to go into the apartment, look at the space and come up with a design that would satisfy all of that need. UNTIL we showed up! The unit had really seen some better days but we knew we had to look past that and come up with a concept that would work for them.
The immediate challenges were centered around 3 big ideas:
1. Adding a second bedroom to the already small footprint
2. Figuring out a way to make the kitchen bigger, better and brighter
3. Creating a master room walk in closet
It’s always difficult to add new rooms into existing footprint without expanding out or up and not incurring any opportunity cost. In this case, that was exactly what we had to do. Item one and two above had to be tackled as one. We went ahead and switched out the location of the dining room and eliminating an area where there was a “nook” type eat-in area. By doing so, we were able to cut right into that footprint and change the layout of the kitchen.
That one move allowed us to dig into the kitchen design because it was now the main focal point in the apartment. It was no longer an option to keep it in that tiny hole where it was, so we had to ensure that this design was functional and aesthetically pleasing at the same time. By adding the table into the space where an Island typically would go, we were able to both cut cost and still provide a dining experience. The Table serves as an Island as well when cooking.
We then proceeded to block in the existing doorway to the dining room. By doing this, we were able to create a full room which allowed us to put a door on the other side and called that room Bedroom #2. This was easier to do because all of the mechanicals were already in that space (light, heater and windows). By shifting things around, we also achieved a huge wall to wall closet from inside. PERFECT!
Then we moved into the Single bedroom. We thought it was a big room with a small closet, so by creatively adding an L shaped wall and steal some footprint into the bedroom side, we were able to put a door on that new room and design it for the walk-in closet. Even after this, the bedroom still holds a queen size bed with 2 night stands, a TV on the wall, a sitting chair and plenty of room to walk around. This was done by rethinking the location for the bed and night stands.
The bathroom was gutted to make sure there was no leaks and rebuild from the ground up. We kept all of the plumbing where it was, added a new vanity, medicine cabinet, tiles and lighting and it was done.
From there, the rest of the unit had new flooring all throughout, paint, and lighting. After completion and walk through, this project was handed over back to the clients.
Execution and collaboration between all the trades were: Reggie and his team from Premier Interiors and Rohan from RD Mechanical Services.
p.s. Please see our website to see the video.

 Alair Homes Plano
Our clients house was built in 2012, so it was not that outdated, it was just dark. The clients wanted to lighten the kitchen and create something that was their own, using more unique products. The master bath needed to be updated and they wanted the upstairs game room to be more functional for their family.
The original kitchen was very dark and all brown. The cabinets were stained dark brown, the countertops were a dark brown and black granite, with a beige backsplash. We kept the dark cabinets but lightened everything else. A new translucent frosted glass pantry door was installed to soften the feel of the kitchen. The main architecture in the kitchen stayed the same but the clients wanted to change the coffee bar into a wine bar, so we removed the upper cabinet door above a small cabinet and installed two X-style wine storage shelves instead. An undermount farm sink was installed with a 23” tall main faucet for more functionality. We replaced the chandelier over the island with a beautiful Arhaus Poppy large antique brass chandelier. Two new pendants were installed over the sink from West Elm with a much more modern feel than before, not to mention much brighter. The once dark backsplash was now a bright ocean honed marble mosaic 2”x4” a top the QM Calacatta Miel quartz countertops. We installed undercabinet lighting and added over-cabinet LED tape strip lighting to add even more light into the kitchen.
We basically gutted the Master bathroom and started from scratch. We demoed the shower walls, ceiling over tub/shower, demoed the countertops, plumbing fixtures, shutters over the tub and the wall tile and flooring. We reframed the vaulted ceiling over the shower and added an access panel in the water closet for a digital shower valve. A raised platform was added under the tub/shower for a shower slope to existing drain. The shower floor was Carrara Herringbone tile, accented with Bianco Venatino Honed marble and Metro White glossy ceramic 4”x16” tile on the walls. We then added a bench and a Kohler 8” rain showerhead to finish off the shower. The walk-in shower was sectioned off with a frameless clear anti-spot treated glass. The tub was not important to the clients, although they wanted to keep one for resale value. A Japanese soaker tub was installed, which the kids love! To finish off the master bath, the walls were painted with SW Agreeable Gray and the existing cabinets were painted SW Mega Greige for an updated look. Four Pottery Barn Mercer wall sconces were added between the new beautiful Distressed Silver leaf mirrors instead of the three existing over-mirror vanity bars that were originally there. QM Calacatta Miel countertops were installed which definitely brightened up the room!
Originally, the upstairs game room had nothing but a built-in bar in one corner. The clients wanted this to be more of a media room but still wanted to have a kitchenette upstairs. We had to remove the original plumbing and electrical and move it to where the new cabinets were. We installed 16’ of cabinets between the windows on one wall. Plank and Mill reclaimed barn wood plank veneers were used on the accent wall in between the cabinets as a backing for the wall mounted TV above the QM Calacatta Miel countertops. A kitchenette was installed to one end, housing a sink and a beverage fridge, so the clients can still have the best of both worlds. LED tape lighting was added above the cabinets for additional lighting. The clients love their updated rooms and feel that house really works for their family now.
Design/Remodel by Hatfield Builders & Remodelers | Photography by Versatile Imaging
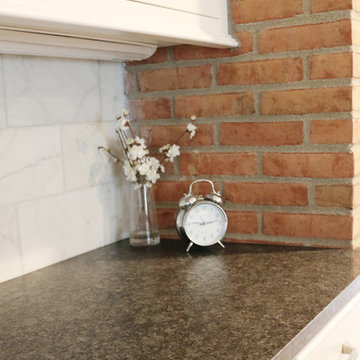
Sponsored
Plain City, OH
The Creative Kitchen Company
Columbus Area Kitchen Remodeling and Refacing Professional

 Village Home Stores
Full-overlay Rustic Beech cabinets in the "Charleston" door style and "Briarwood" finish.
Village Home Stores
Example of a large mountain style kitchen design in Chicago
Example of a large mountain style kitchen design in Chicago
 RAJ Kitchen and Bath, LLC
“Full apartment design”.
IF you have not yet seen this apartment conversion before, we strongly urge you to go to the bottom left of this page and click on the short 2-minutes video. It would put a lot of things into perspective when you come back and continue reading this.
It is true we were literally handed the keys and told a list of things that they wanted to have happen and we were to go into the apartment, look at the space and come up with a design that would satisfy all of that need. UNTIL we showed up! The unit had really seen some better days but we knew we had to look past that and come up with a concept that would work for them.
The immediate challenges were centered around 3 big ideas:
1. Adding a second bedroom to the already small footprint
2. Figuring out a way to make the kitchen bigger, better and brighter
3. Creating a master room walk in closet
It’s always difficult to add new rooms into existing footprint without expanding out or up and not incurring any opportunity cost. In this case, that was exactly what we had to do. Item one and two above had to be tackled as one. We went ahead and switched out the location of the dining room and eliminating an area where there was a “nook” type eat-in area. By doing so, we were able to cut right into that footprint and change the layout of the kitchen.
That one move allowed us to dig into the kitchen design because it was now the main focal point in the apartment. It was no longer an option to keep it in that tiny hole where it was, so we had to ensure that this design was functional and aesthetically pleasing at the same time. By adding the table into the space where an Island typically would go, we were able to both cut cost and still provide a dining experience. The Table serves as an Island as well when cooking.
We then proceeded to block in the existing doorway to the dining room. By doing this, we were able to create a full room which allowed us to put a door on the other side and called that room Bedroom #2. This was easier to do because all of the mechanicals were already in that space (light, heater and windows). By shifting things around, we also achieved a huge wall to wall closet from inside. PERFECT!
Then we moved into the Single bedroom. We thought it was a big room with a small closet, so by creatively adding an L shaped wall and steal some footprint into the bedroom side, we were able to put a door on that new room and design it for the walk-in closet. Even after this, the bedroom still holds a queen size bed with 2 night stands, a TV on the wall, a sitting chair and plenty of room to walk around. This was done by rethinking the location for the bed and night stands.
The bathroom was gutted to make sure there was no leaks and rebuild from the ground up. We kept all of the plumbing where it was, added a new vanity, medicine cabinet, tiles and lighting and it was done.
From there, the rest of the unit had new flooring all throughout, paint, and lighting. After completion and walk through, this project was handed over back to the clients.
Execution and collaboration between all the trades were: Reggie and his team from Premier Interiors and Rohan from RD Mechanical Services.
p.s. Please see our website to see the video.
 RAJ Kitchen and Bath, LLC
“Full apartment design”.
IF you have not yet seen this apartment conversion before, we strongly urge you to go to the bottom left of this page and click on the short 2-minutes video. It would put a lot of things into perspective when you come back and continue reading this.
It is true we were literally handed the keys and told a list of things that they wanted to have happen and we were to go into the apartment, look at the space and come up with a design that would satisfy all of that need. UNTIL we showed up! The unit had really seen some better days but we knew we had to look past that and come up with a concept that would work for them.
The immediate challenges were centered around 3 big ideas:
1. Adding a second bedroom to the already small footprint
2. Figuring out a way to make the kitchen bigger, better and brighter
3. Creating a master room walk in closet
It’s always difficult to add new rooms into existing footprint without expanding out or up and not incurring any opportunity cost. In this case, that was exactly what we had to do. Item one and two above had to be tackled as one. We went ahead and switched out the location of the dining room and eliminating an area where there was a “nook” type eat-in area. By doing so, we were able to cut right into that footprint and change the layout of the kitchen.
That one move allowed us to dig into the kitchen design because it was now the main focal point in the apartment. It was no longer an option to keep it in that tiny hole where it was, so we had to ensure that this design was functional and aesthetically pleasing at the same time. By adding the table into the space where an Island typically would go, we were able to both cut cost and still provide a dining experience. The Table serves as an Island as well when cooking.
We then proceeded to block in the existing doorway to the dining room. By doing this, we were able to create a full room which allowed us to put a door on the other side and called that room Bedroom #2. This was easier to do because all of the mechanicals were already in that space (light, heater and windows). By shifting things around, we also achieved a huge wall to wall closet from inside. PERFECT!
Then we moved into the Single bedroom. We thought it was a big room with a small closet, so by creatively adding an L shaped wall and steal some footprint into the bedroom side, we were able to put a door on that new room and design it for the walk-in closet. Even after this, the bedroom still holds a queen size bed with 2 night stands, a TV on the wall, a sitting chair and plenty of room to walk around. This was done by rethinking the location for the bed and night stands.
The bathroom was gutted to make sure there was no leaks and rebuild from the ground up. We kept all of the plumbing where it was, added a new vanity, medicine cabinet, tiles and lighting and it was done.
From there, the rest of the unit had new flooring all throughout, paint, and lighting. After completion and walk through, this project was handed over back to the clients.
Execution and collaboration between all the trades were: Reggie and his team from Premier Interiors and Rohan from RD Mechanical Services.
p.s. Please see our website to see the video.
29