
Search results for "Water ensure" in Home Design Ideas

 ZeroEnergy Design
This LEED Platinum certified house reflects the homeowner's desire for an exceptionally healthy and comfortable living environment, within a traditional neighborhood.
INFILL SITE. The family, who moved from another area of Wellesley, sought out this property to be within walking distance of the high school and downtown area. An existing structure on the tight lot was removed to make way for the new home. 84% of the construction waste, from both the previous structure and the new home, was diverted from a landfill. ZED designed to preserve the existing mature trees on the perimeter of the property to minimize site impacts, and to maintain the character of the neighborhood as well as privacy on the site.
EXTERIOR EXPRESSION. The street facade of the home relates to the local New England vernacular. The rear uses contemporary language, a nod to the family’s Californian roots, to incorporate a roof deck, solar panels, outdoor living space, and the backyard swimming pool. ZED’s careful planning avoided to the need to face the garage doors towards the street, a common syndrome of a narrow lot.
THOUGHTFUL SPACE. Homes with dual entries can often result in duplicate and unused spaces. In this home, the everyday and formal entry areas are one and the same; the front and garage doors share the entry program of coat closets, mudroom storage with bench for removing your shoes, and a laundry room with generous closets for the children's sporting equipment. The entry area leads directly to the living space, encompassing the kitchen, dining and sitting area areas in an L-shaped open plan arrangement. The kitchen is placed at the south-west corner of the space to allow for a strong connection to the dining, sitting and outdoor living spaces. A fire pit on the deck satisfies the family’s desire for an open flame while a sealed gas fireplace is used indoors - ZED’s preference after omitting gas burning appliances completely from an airtight home. A small study, with a window seat, is conveniently located just off of the living space. A first floor guest bedroom includes an accessible bathroom for aging visitors and can be used as a master suite to accommodate aging in place.
HEALTHY LIVING. The client requested a home that was easy to clean and would provide a respite from seasonal allergies and common contaminants that are found in many indoor spaces. ZED selected easy to clean solid surface flooring throughout, provided ample space for cleaning supplies on each floor, and designed a mechanical system with ventilation that provides a constant supply of fresh outdoor air. ZED selected durable materials, finishes, cabinetry, and casework with low or no volatile organic compounds (VOCs) and no added urea formaldehyde.
YEAR-ROUND COMFORT. The home is super insulated and air-tight, paired with high performance triple-paned windows, to ensure it is draft-free throughout the winter (even when in front of the large windows and doors). ZED designed a right-sized heating and cooling system to pair with the thermally improved building enclosure to ensure year-round comfort. The glazing on the home maximizes passive solar gains, and facilitates cross ventilation and daylighting.
ENERGY EFFICIENT. As one of the most energy efficient houses built to date in Wellesley, the home highlights a practical solution for Massachusetts. First, the building enclosure reduces the largest energy requirement for typical houses (heating). Super-insulation, exceptional air sealing, a thermally broken wall assembly, triple pane windows, and passive solar gain combine for a sizable heating load reduction. Second, within the house only efficient systems consume energy. These include an air source heat pump for heating & cooling, a heat pump hot water heater, LED lighting, energy recovery ventilation, and high efficiency appliances. Lastly, photovoltaics provide renewable energy help offset energy consumption. The result is an 89% reduction in energy use compared to a similar brand new home built to code requirements.
RESILIENT. The home will fare well in extreme weather events. During a winter power outage, heat loss will be very slow due to the super-insulated and airtight envelope– taking multiple days to drop to 60 degrees even with no heat source. An engineered drainage system, paired with careful the detailing of the foundation, will help to keep the finished basement dry. A generator will provide full operation of the all-electric house during a power outage.
OVERALL. The home is a reflection of the family goals and an expression of their values, beautifully enabling health, comfort, safety, resilience, and utility, all while respecting the planet.
ZED - Architect & Mechanical Designer
Bevilacqua Builders Inc - Contractor
Creative Land & Water Engineering - Civil Engineering
Barbara Peterson Landscape - Landscape Design
Nest & Company - Interior Furnishings
Eric Roth Photography - Photography

 Equilibrium Interior Design Inc
The design of this master bathroom is set to compliment the natural stone slab floor that sets the tone for this room. Because the entire second floor of the house was renovated into a master suite, the client requested an open concept plan for the entire suite.
This allowed Equilibrium to increase the floor area of the bathroom and design an incredible statement piece which is the floor. Honey onyx slabs were cut into oversized tiles to make them more manageable and installed in a diamond pattern preserving continuity of lines from tile to tile, and slab to slab. Furthermore, what otherwise would be waste cut material, it was chiseled, flamed, and fabricated into custom mosaic installed on the back wall of the bathroom and on shower floor.
To ensure Client’s safety, slabs were treated with anti slippage treatment and shower floor was finished with matching mosaic.
Client requested that the shower is oversized and feels like showering under a waterfall. This was accomplished by running four separate water lines to feed the shower plumbing. When the two oversized rain heads, two shower heads, and six water jets are all on, you get the feeling of being under a natural waterfall in the Amazon. Non of this would be possible in today’s water starved world if it wasn’t for harvesting and special filtration system installed on this property that allows recirculation of water.
Variation of lighting types allows for various theme settings, and energy efficient LED lighting further enhance the beauty of this bathroom with minimum energy consumption.
Even edges of slabs were polished to ensure maximum light refraction with beveled seams that create purposeful patterns instead of hiding seams. Shower doors were etched with a pattern that adds dimension and provides privacy while complimenting the mosaic pattern on the back wall.
The double sink vanity was floated off the floor allowing for maximum visibility of this artistic installation. It was made of rosewood and designed with three sections for drawers and storage. The three levels create a scalloping effect allowing each to be illuminated by LED lights which reflect elegantly in the onyx slab floor. Complimented by honey onyx top, and placed against a 42” high onyx wainscot, it is a functional and beautiful millwork.
This master bathroom is a testament to engineering, originality, and beauty seen in every detail.
Interior Design, Decorating & Project Management by Equilibrium Interior Design Inc
Photography by Craig Denis

 John
JohnCoco coir is a versatile and sustainable growing medium that is gaining popularity among gardeners. Made from the fibrous husk of coconuts, it’s an eco-friendly alternative to peat moss and can greatly enhance the quality of your soil. In gardening, it is often utilized in systems like Coco Coir Hydroponic, where it helps create an efficient water and nutrient delivery system.
What is Coco Coir?
Coco coir is a natural fiber extracted from coconut husks. It has a neutral pH, excellent water retention, and is reusable, making it a favorite among gardeners who prefer organic and sustainable practices. It is available in different forms such as blocks, bricks, or loose coir, each requiring some preparation before use in gardening.
Benefits of Using Coco Coir in Gardening
Coco coir offers several advantages for gardening. Here are the benefits of using coco coir in gardening:
Holds up to 10 times its weight in water, ensuring plants have consistent moisture.
Promotes oxygen flow to plant roots, leading to healthier root systems.
Coco coir is a renewable and eco-friendly alternative to peat moss.
It can be washed, rehydrated, and reused, reducing waste.
Naturally pH neutral, making it suitable for various plants without major adjustments.
Enhances the texture and moisture retention of garden soil.
How to Prepare Coco Coir for Planting
Preparing coco coir for planting involves a few essential steps. First, you need to hydrate the coir block, as it typically comes in a compressed form. Place the block in a large container and add warm water, allowing the block to expand and absorb the water. Once fully expanded, the coir should be fluffed up by breaking it apart with your hands or a tool to ensure it becomes loose and airy. After the coir has been fluffed, it is important to drain any excess water, as overly wet coir can lead to root suffocation. Finally, since coco coir is inert and does not contain nutrients, it’s a good idea to add organic compost or liquid fertilizer to enrich the coir before planting.
Do You Need to Soak Coco Coir Before Planting?
Yes, soaking coco coir before planting is necessary. Since it comes in a compressed form, it needs to be broken down and hydrated for proper use. The soaking process allows the coir to expand and release the fibers, making it usable as a growing medium. After soaking, the coir should be fluffed to ensure the water is evenly distributed. Draining any excess water is crucial because overly wet coir may impede plant root health.
How to Prepare Coco Peat for Planting
Coco peat, a fine, powdery form of coco coir, is highly beneficial for seed starting and improving water retention in soil. To prepare coco peat, it first needs to be hydrated, similar to how you prepare coir blocks. Slowly add water to the peat in a container and allow it to absorb and fluff up. Once hydrated, coco peat can be used on its own or mixed with other growing media such as perlite or vermiculite for added aeration and drainage. It is advisable to check the pH level of your final mix, as coco peat generally has a neutral pH, but adjustments may be necessary depending on the plants being grown.
Can You Use Just Coco Coir for Plants?
Yes, coco coir can be used by itself to grow plants, especially in hydroponic systems or as a seed-starting medium. However, because coco coir does not naturally contain nutrients, you will need to provide regular fertilizer to support plant growth. This makes it particularly suitable for plants grown in controlled environments, such as hydroponics, where nutrient solutions can be carefully managed. In traditional soil-based gardening, mixing coco coir with other organic materials like compost is recommended to provide essential nutrients and improve the overall soil structure.
How to Use Coco Coir in Hydroponics
Coco coir is widely used in hydroponic systems due to its water retention and aeration properties. To use coco coir in hydroponics, it first needs to be soaked and hydrated, as discussed earlier. Once the coir is fully prepared, it can be placed in the hydroponic system. Since coco coir does not contain natural nutrients, you will need to supply a balanced nutrient solution tailored for hydroponic plants. Regular monitoring of water and nutrient levels is essential to prevent nutrient imbalances or root rot. One of the benefits of coco coir in hydroponics is its reusability. After completing a growing cycle, the coir can be washed, rehydrated, and used again in future plantings.
Using Coco Coir as a Soil Amendment
Coco coir is also an excellent soil amendment, as it improves the texture and moisture retention of garden soil. To use coco coir in this way, mix loose coir with your existing garden soil at a ratio of one part coco coir to two parts soil. This will help retain moisture without compacting the soil, improving both water drainage and root growth. For optimal results, you can also add organic compost to the mix, ensuring that the nutrient levels are sufficient for plant growth. Coco coir works particularly well in raised beds, where it helps maintain proper soil structure over time.
Advantages of Using Coco Coir Over Peat Moss
While peat moss has been traditionally used as a growing medium, coco coir offers several advantages over it. Coco coir is a renewable resource, as it is a byproduct of coconut processing, while peat moss is harvested from peat bogs that take centuries to regenerate. Coco coir is also more durable, as it can be reused multiple times without breaking down, while peat moss disintegrates after a single use. Another key benefit is its neutral pH, whereas peat moss is more acidic and may require balancing to meet the needs of specific plants.
Conclusion
Coco coir is a highly versatile and sustainable growing medium that benefits both novice and experienced gardeners alike. Whether you are using it for hydroponics, as a soil amendment, or as a standalone medium for growing plants, knowing how to properly prepare and use it is key to maximizing its benefits. By following the steps detailed above, you can improve water retention, aeration, and overall plant health in your garden, all while contributing to eco-friendly gardening practices.
Find the right local pro for your project
 Editor
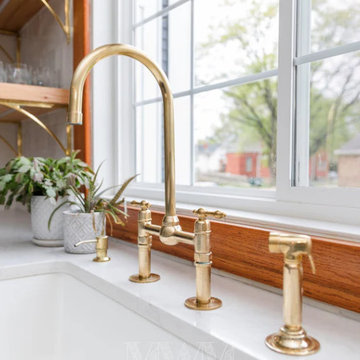
When it comes to selecting fixtures for your kitchen or bathroom, few options offer the blend of elegance, durability, and functionality like brass bridge faucets. These faucets, with their vintage charm and modern efficiency, bring a unique aesthetic and practical benefits to any space. This article explores the appeal of brass bridge faucets, their key features, benefits, and tips on how to choose and maintain them.
The Charm of Brass Bridge Faucets
Classic Aesthetic
Brass bridge faucets are known for their classic, timeless look. The warm, golden hue of brass adds a touch of luxury and sophistication, making these faucets a focal point in any kitchen or bathroom. Their vintage design can seamlessly blend with various décor styles, from rustic to contemporary.
Durability
One of the standout qualities of brass is its durability. Brass is resistant to corrosion and can withstand daily wear and tear, ensuring that your faucet remains in excellent condition for years. This makes brass bridge faucets a long-term investment for your home.
Versatility
Available in various finishes such as polished, brushed, or antique brass, these faucets can complement a wide range of design themes. Whether you want a shiny, reflective finish or a more subdued, matte look, there’s a brass bridge faucet to suit your taste.
Key Features of Brass Bridge Faucets
Elevated Bridge Design
The distinctive feature of bridge faucets is the elevated connecting pipe that links the hot and cold water lines. This bridge not only enhances the faucet's aesthetic appeal but also provides additional clearance, making it easier to clean large pots and pans or to accommodate larger sinks.
Dual Handles
Brass bridge faucets typically feature dual handles, allowing for precise control over water temperature. This functionality ensures a balanced mix of hot and cold water, providing you with the perfect temperature for your needs.
Classic Spout Designs
These faucets often come with high-arc or gooseneck spouts, which are both practical and stylish. The high spout design provides ample space for washing and filling containers, adding to the faucet’s functionality.
Benefits of Brass Bridge Faucets
Visual Appeal
Brass bridge faucets serve as a statement piece in any room. Their elegant design and warm finish add a touch of luxury and can elevate the overall aesthetic of your kitchen or bathroom.
Functionality
Beyond their beauty, brass bridge faucets are highly functional. The dual-handle design allows for precise temperature control, while the elevated bridge offers extra clearance for various tasks. This combination of form and function makes them a practical choice for busy households.
Hygienic Properties
Brass has natural antimicrobial properties, making it a hygienic choice for kitchen and bathroom fixtures. This can be particularly beneficial in spaces where cleanliness is paramount.
Choosing the Right Brass Bridge Faucet
Finish Options
When selecting a brass bridge faucet, consider the finish that best matches your existing décor. Polished brass offers a shiny, reflective surface, while antique brass provides a more vintage, weathered look. Brushed brass has a matte finish that hides fingerprints and water spots.
Coordination with Other Fixtures
Ensure that your brass bridge faucet complements other fixtures in your kitchen or bathroom. Coordinating the faucet with cabinet handles, lighting fixtures, and other hardware can create a cohesive and harmonious look.
Installation Requirements
Check the installation requirements before purchasing a brass bridge faucet. These faucets typically require a three-hole installation, so make sure your sink or countertop is compatible.
Maintenance Tips
Regular Cleaning
To maintain the luster of your brass bridge faucet, clean it regularly with a soft cloth and mild soap. Avoid using abrasive cleaners or scrubbers that can scratch the surface.
Preventing Water Spots
After cleaning, dry the faucet thoroughly to prevent water spots. This is particularly important for polished brass finishes, which are more prone to showing spots and fingerprints.
Addressing Tarnish
Brass can tarnish over time. To address this, use a brass cleaner or a mixture of lemon juice and baking soda to gently polish the surface. Regular polishing can keep your faucet looking its best.
Conclusion
Brass bridge faucets are a beautiful and functional addition to any home. Their timeless design, durability, and practicality make them a worthwhile investment for your kitchen or bathroom. By choosing the right finish and maintaining it properly, you can enjoy the elegance and charm of a brass bridge faucet for years to come. Embrace the classic appeal of brass and elevate the look of your home with this stunning fixture.

 Kansas City Masonry /City Of Fountains
We Install Kansas City Water FeatureS,Water Walls & Waterfalls Kansas City Bubble Wall Panels
Rain Curtain Water Features landscape
Rain Curtain Waterfalls Kansas City
Bubble Wall Panels
Wall Mounted Water Walls
Acrylic Water Walls
Glass & Mirror Waterfalls
Stainless Steel Waterfalls Kansas City
Copper Water Walls
Stone & Tile Water Walls
Water Feature Displays
Bubble Tubes & Columns
Reflection Pools Kansas City
Aquariums
Water Sculptures & Art Kansas City

 4 Seasons Remodeling & Design Inc.
Welcome to a shower of natural elegance and timeless beauty, built with light grey stones that create a stunning and harmonious oasis. As you step inside, you'll be enveloped by the serene and soothing atmosphere that these light grey stones provide.
The shower walls, meticulously crafted with these stones, exude a sense of organic luxury, bringing the calming and earthy essence of nature into your bathing experience. The smooth and cool texture of the stones adds a touch of tactile pleasure, making each shower a delightful sensory journey.
The light grey hue of the stones complements any decor, creating a versatile canvas for your personal style. Whether your bathroom theme is modern, rustic, or classic, the light grey stones seamlessly blend in, enhancing the overall aesthetic.
As the water cascades from the showerhead, it gently dances on the stone walls, creating a gentle and relaxing flow. The interplay of water and stone creates a spa-like ambiance, inviting you to indulge in moments of tranquility and rejuvenation.
The light grey stones also offer the added benefit of being easy to maintain and resistant to water damage, ensuring a shower space that remains pristine and beautiful for years to come.
Whether you're starting your day with an invigorating shower or winding down in the evening with a soothing soak, this shower built with light grey stones offers a refreshing and luxurious experience that embraces the wonders of the natural world right in the comfort of your home.

 SUPERIOR CHIMNEY SERVICES CORPORATION
Do you know what ends our time of enjoying the wonderful Fall colors? Rain. The other day when it rained, it took most of those bright yellow leaves and brought them to the ground. It saddened me not only because the colors were gone, but now the leaves have to be cleaned up. And with the trees being larger, those leaves went everywhere. All over the ground, in the tall bushes, stuck on the window sills, lodged in the gutters and up at the chimney. Nature’s going to happen so, what are the effects of Fall rain and the Chimney? Let’s take a further look.
Fall Rain and the Chimney
The Fall leaves are gorgeous and fall is many homeowners favorite time of year. But as with all seasons, it comes to an end. The Fall rain combined with wind takes those colorful leaves and distributes them…everywhere. Especially on the roof where your chimney is located. By having an annual chimney inspection, we’ll take a look to ensure the safety of your chimney stays intact for the upcoming harsher season: Winter.
The Exterior Chimney
With Fall, we have two of the elements to be concerned about and that’s the leaves and rain. Here are a few areas we check and the effects of fall rain and the chimney. Let’s start at the top:
Chimney Cap: The chimney cap is vital for protecting the opening of your chimney which leads to the interior of your home. We inspect the chimney cap ensuring it is tightly secured to the exterior chimney termination. The chimney is typically the tallest part of your home and gets exposed to the harshest winds, rain, snow, animals and blowing debris. All of that hits the chimney cap trying to find that weak spot so it can get inside the chimney. If it does, that debris is easily ignited and can cause harm to your home.
Chimney Crown: This is the slab of concrete that covers the chimney and extends beyond the bricks or materials that make up the chimney. This is to provide protection from the elements. But remember the chimney crown can also develop cracks over time. This is where crown coat can extend the life of the chimney crown ensuring the elements stay where they should… outside.
Brick, Stone and Mortar: The structure of the chimney can be made of brick, stone or other materials. If it is made of brick or stone, then mortar is involved. All of these materials are porous, meaning that it can absorb water and snow melt, which breaks down over time. As a result, this needs to be checked looking for loose bricks, missing mortar, cracks in either one of these materials and more. Tuckpointing is a good solution to ensure the elements stay out. The use of Chimney Saver is a great way to preserve the bricks, stones and mortar as it waterproofs and protects the materials for about 8 – 10 years and slows down the aging process.
Flashing: This is the material that protects the connection of the roof to the chimney. A critical and common area for leaks. The flashing moves the water away from the chimney and down the roof. The flashing adheres to the chimney with a seal, which dries out over time. This area needs to be checked to ensure the seal is strong and doesn’t allow water to get in.
Before the cold sets in and you want to turn on or fire up the fireplace, be sure to take into consideration the effects of fall rain and the chimney. Contact us today at 877-244-6349 to set up an appointment.

 MAC Reno Design Build LTD ( MAC Renovations)
Part of a second-storey addition to this 1906 family home, this luxurious bath is part of the new top-floor primary suite.
As the homeowner’s first-ever ensuite, the goal was a spacious, relaxing escape with stand-alone soaker tub and walk-in shower, incorporating colour and texture for a mid-century modern feel.

 Get My Rugs LLC
Decorate your living space with the ideal area rug, a key element in enhancing your home's style and comfort. Whether you’re updating your bedroom decor or outfitting your living room, selecting the right rug can transform any area, adding warmth, texture, and a distinctive touch to your space.
For those looking to upgrade their bedroom or living room, area rugs come in a range of styles and materials to suit various tastes and needs. Hand-tufted and hand-knotted rugs offer timeless elegance with their intricate designs and luxurious textures. These handcrafted options are perfect for adding a sophisticated element to your bedroom decor or living room. Hand-loomed rugs, with their artisanal craftsmanship, bring a unique, personalized touch to any room, making them ideal for those who appreciate detailed, bespoke designs.
If you prefer a modern aesthetic, machine-woven rugs provide a practical yet stylish solution. These rugs are available in a variety of patterns and colors and are designed to withstand high foot traffic, making them a durable choice for busy areas. For a more contemporary feel, flat-woven rugs, such as kilims, offer a reversible design that fits seamlessly with both modern and traditional decor themes.
For added comfort and style, consider shag or flokati rugs. Their plush, long fibers create a cozy atmosphere and are perfect for a living room where comfort is key. These rugs are especially suited for spaces where you want to relax and enjoy a soft, inviting texture underfoot.
When it comes to functionality, choosing a rug that is machine washable, stain-resistant, and water-resistant ensures longevity and ease of maintenance. These practical features are essential for busy households and high-traffic areas, helping to keep your rug looking fresh and clean. Non-slip and adhesive backings are also crucial, especially on hardwood floors, to prevent slips and ensure the rug remains securely in place.
For those looking to make a statement, large rugs for the living room or oversized area rugs, such as 8x10 options, can define and elevate your space. Large carpets provide substantial coverage and can anchor a room, adding a sense of scale and sophistication. Whether you opt for a big rug for the living room or a huge carpet to cover a larger area, these choices offer versatility and style.
In addition to large living room rugs, consider rug sets or personalized options to further enhance your decor. Custom rugs with features like fringe or organic textures can add a distinctive element to your space, reflecting your personal style and complementing your existing decor.
To ensure your rug enhances the overall look of your room, consider how it aligns with your decor theme. Contemporary and modern designs offer sleek, clean lines and bold patterns, while traditional and mid-century modern styles provide a more classic or retro look. Transitional rugs blend elements from both traditional and modern styles, offering flexibility and a timeless appeal.
In summary, selecting the right area rug involves balancing aesthetics with practicality. From luxurious hand-tufted and hand-knotted designs to functional machine-woven and flat-woven options, the perfect rug can elevate your living room, bedroom, or kitchen into a stylish and comfortable haven. Explore the vast array of choices available, including large living room rugs and personalized designs, to find the ideal rug that meets both your decorative and functional needs.

 kmjee
kmjeePepper plants are a delightful addition to any garden, offering a vibrant burst of color and spice to your culinary creations. However, even experienced gardeners can encounter challenges when growing pepper plants. In this blog, we'll explore some common issues you might face and provide practical solutions to help your pepper plants thrive.
1. Slow or Stunted Growth
Issue: Slow or stunted growth in pepper plants can be discouraging, but there are specific steps you can take to address this issue effectively.
Solution:
a. Soil Health:
- Well-Draining Soil: Ensure your pepper plants are in well-draining soil to prevent waterlogged roots, which can inhibit growth.
- Organic Matter: Incorporate plenty of organic matter, such as compost or well-rotted manure, into the soil to improve its texture and nutrient content.
- pH Level: Test the soil pH and adjust it to the ideal range between 6.0 and 6.8 using lime or sulfur as needed.
b. Fertilization:
- Balanced Fertilizer: Use a balanced, slow-release fertilizer designed for vegetables to provide essential nutrients steadily throughout the growing season.
- Compost: Amend the soil with compost to enhance nutrient availability and soil structure. This can promote healthier growth.
c. Watering:
- Consistent Moisture: Maintain consistent soil moisture levels by watering your pepper plants regularly but avoid waterlogging. Aim for 1-2 inches of water per week, adjusting based on your local climate and weather conditions.
- Mulching: Apply mulch around the base of the plants to retain soil moisture and regulate temperature.
2. Yellowing Leaves
Issue: Yellowing leaves can be a sign of various underlying problems, but addressing them promptly can restore the vibrancy of your pepper plants.
Solution:
a. Nutrient Deficiencies:
- Balanced Fertilization: Use a well-balanced fertilizer that includes micronutrients to address nutrient deficiencies.
- Specific Nutrients: If you suspect a particular deficiency, such as magnesium, iron, or nitrogen, apply the appropriate nutrient supplement following package instructions.
b. Pest and Disease Control:
- Pest Inspection: Regularly inspect the leaves and stems for common pests like aphids and mites. Remove affected leaves and treat with organic pesticides if necessary.
- Disease Management: Look out for signs of diseases like bacterial leaf spot or fungal issues. Apply organic fungicides or bactericides as recommended.
3. Blossom Drop
Issue: When pepper plants drop their blossoms prematurely, it can hinder fruit development and lead to disappointment.
Solution:
a. Temperature Control:
- Stable Temperatures: Ensure your pepper plants are exposed to consistent temperatures between 70°F and 80°F (21°C to 27°C) during flowering. Avoid sudden temperature fluctuations by providing shelter or using row covers.
b. Pollination:
- Assist with Pollination: If growing peppers indoors or in a greenhouse, help with pollination by gently shaking the plants or using a small brush to transfer pollen between flowers. Outdoor pepper plants are usually pollinated by insects.
4. Wilting Plants
Issue: Wilting or drooping pepper plants can be a sign of various problems, but proper care can revive them.
Solution:
a. Watering:
- Consistent Moisture: Adjust your watering routine to keep the soil consistently moist but not waterlogged. Water early in the day to prevent fungal issues.
- Drainage: Ensure proper soil drainage by amending the soil or using raised beds to prevent waterlogged roots.
b. Pest Control:
- Pest Inspection: Examine the undersides of leaves for signs of pests like aphids, spider mites, or whiteflies. Treat infestations promptly with biological insecticides.
5. Curling Leaves
Issue: Curling or misshapen leaves indicate stress in pepper plants, which can be caused by various factors.
Solution:
a. Environmental Stress:
- Stable Conditions: Ensure your pepper plants are in an environment with stable humidity, temperature, and adequate air circulation. Avoid sudden changes in conditions.
- Proper Ventilation: Adequate air circulation can reduce humidity and prevent fungal issues.
b. Pest and Disease Management:
- Pest Inspection: Regularly inspect your plants for pests and diseases, addressing them promptly with organic remedies as needed.
6. Sunscald
Issue: Sunscald can lead to discolored, leathery patches on pepper fruits when exposed to intense sunlight.
Solution:
a. Shade Cloth:
- Sun Protection: Shield your pepper plants from harsh sunlight during the hottest part of the day using shade cloth or by planting them where they receive some filtered sunlight.
b. Pruning:
- Fruit Shading: Prune excess foliage to allow better fruit shading, reducing the risk of sunscald. Ensure that there's a balance between foliage and fruit.
7. Pepper Plant Pests and Diseases
Issue: Aphids, mites, whiteflies, and various diseases can affect pepper plants, but you can manage them effectively.
Solution:
a. Regular Inspection:
- Vigilant Monitoring: Regularly inspect your pepper plants for signs of pests or diseases, paying close attention to the undersides of leaves and stems.
b. Organic Remedies:
- Pest Control: Use organic remedies like neem oil, insecticidal soap, or diatomaceous earth for pest control.
- Disease Management: Apply organic fungicides or bactericides as recommended to manage diseases like powdery mildew or bacterial spot.
While growing pepper plants can present various challenges, these common issues are manageable with the right knowledge and care. Regular monitoring, proper soil preparation, and timely intervention can help you enjoy a bountiful harvest of vibrant, spicy peppers. Remember that gardening is a learning experience, and each challenge you face is an opportunity to improve your skills and enjoy the rewards of homegrown peppers in your favorite dishes.

 Stylish
Imagine having the convenience of on-tap water filtration right at your sink. This is now possible with our new cold water tap kitchen faucet. Made from premium stainless steel, this faucet has a sturdy and durable structure. It’s beautiful stainless steel finish blends well with modern kitchen decors, it is also available in matte black or brushed gold. This water dispenser is tough and made to last for many years to come. It’s slim and minimalistic design will fit perfectly beside your kitchen faucet, it will not take up extra space and it will give you all the benefits of filtered water at the tip of your hands. This cold water tap kitchen faucet fits a standard 23mm hole. It is very easy to install. This amazing cold tap water dispenser has 90 degree single handle for quick and easy water control. Also equipped with a 360 degree swivel spout, this cold tap water faucet offers more room for a variety of sink activities. It is resistant to tarnish and stain, retaining its aesthetic appeal even after years of usage. Compatible with a reverse osmosis system, this cold water tap kitchen faucet ensures cleaner, crisper, healthier water in every glass.
 WET 1 WATER FEATURES
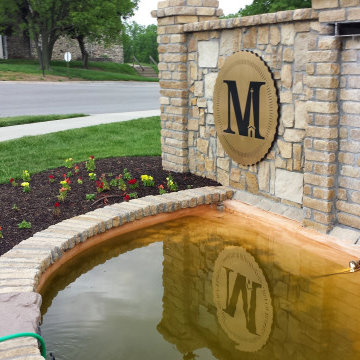
Historical Fountain Restoration: Reviving the splendor of heritage fountains with meticulous care.
Custom Fountain Creation: Designing and constructing unique water features that become the focal point of any space.
Maintenance & Repair: Ensuring the longevity and beauty of your fountains with our comprehensive care plans.

 safe ZOnea
Maintaining a pest-free home requires attention throughout the year. Seasonal changes affect pest behavior, and understanding these patterns can save homeowners from costly damage and health hazards. In this guide, we will explore practical strategies for spring pest prevention tips, ensuring your property stays protected through every season. From spotting early signs to implementing proactive measures, these steps empower homeowners to take control before infestations occur.
Understanding Seasonal Pest Patterns
Pests adapt to changing weather, and knowing their patterns helps prevent infestations effectively.
Spring: Awakening Pests
Spring signals the end of winter dormancy for many pests. Rodents, ants, and termites start seeking food and warmth. Effective spring pest prevention tips include:
● Cleaning gutters and removing debris
● Sealing cracks and gaps in exterior walls
● Inspecting wood piles and compost areas
● Monitoring early signs of termite activity
Pro Tip: Conduct a termite inspection or a professional evaluation to catch infestations early before they spread.
Summer: Peak Pest Season
Warm temperatures accelerate pest breeding cycles. For a comprehensive summer pest prevention guide:
● Maintain lawns and trim vegetation away from homes
● Check window and door screens for tears
● Store food in sealed containers
● Inspect water sources that attract mosquitoes
Do You Know? Mosquitoes can lay eggs in a teaspoon of water. Eliminating stagnant water is crucial to reducing their population.
Fall: Preparing for Winter
As temperatures drop, pests search for warm indoor spaces. Key actions include:
● Inspecting for winter rodent entry points
● Sealing attic vents, crawl spaces, and foundation gaps
● Cleaning storage areas to minimize hiding spots
● Checking chimney and fireplace openings
Quick Fact: Rodents can enter homes through openings as small as ¼ inch.
Seasonal Pest Checklist for Homeowners
Creating a structured seasonal pest checklist simplifies preventive measures and ensures nothing is overlooked.
Season
Key Actions
Spring
Inspect for termites, seal exterior gaps, clean gutters, and check compost
Summer
Repair screens, trim vegetation, remove standing water, and secure food
Fall
Seal entry points, inspect attic/crawlspace, clear debris, and prepare storage
Winter
Monitor indoor activity, keep firewood away from walls, and maintain traps
Inspection & Maintenance Tips
● Schedule annual pest inspections by professional Virginia pest control consultation to detect hidden problems
● Keep a log of pest sightings and treatment dates
● Regularly replace weather stripping and caulk cracks
Note: Even small preventive steps, when consistently applied, drastically reduce infestations.
Common Pests and Their Seasonal Behaviors
Understanding how different pests behave each season helps homeowners take timely action to protect their property.
● Ants and Termites: Ants emerge in spring seeking food, while termites become active and can damage wood unnoticed. Early detection is critical.
● Rodents and Mice: Fall and winter increase rodent intrusions. Block all entry points and keep food sealed.
● Mosquitoes and Flies: Summer creates the ideal breeding environment for mosquitoes. Eliminate standing water and use physical barriers like nets.
● Spiders and Other Insects: Seasonal shifts cause spiders to move indoors. Regular vacuuming and decluttering reduce hiding spots.
Eco-Friendly Prevention Methods
● Use natural repellents like peppermint oil or diatomaceous earth
● Encourage beneficial insects, such as ladybugs, to reduce pest populations
● Plant pest-deterring plants near home boundaries, like marigolds or lavender
Integrated Pest Management (IPM)
Adopt an IPM approach by combining physical barriers, monitoring, and environmentally safe treatments. This minimizes chemical use while maintaining a pest-free home.
Quote: “Prevention is the most effective form of pest control.” – National Pest Management Association
Seasonal Pest Prevention Tools
● Snap traps and humane rodent traps
● Sticky traps for insects
● Outdoor perimeter sprays (eco-friendly)
● Moisture meters to detect early termite or mold problems
Pro Tip: Keep tools organized and accessible to act quickly when pest activity is noticed.
Planning: Annual Pest Calendar
Month
Recommended Action
March-April
Spring pest prevention tips: Inspect, seal, clean gutters
June-July
Summer pest prevention guide: Screens, standing water, food storage
September
Seasonal pest checklist: Seal entries, declutter, prep storage
November
Winter rodent entry points: Monitor indoors, maintain traps
Key Takeaways
● Seasonal awareness prevents infestations and property damage
● Consistent inspections and maintenance are essential
● Simple eco-friendly measures can significantly reduce pests
● Use a structured checklist and calendar for effective prevention
Conclusion
Homeowners who stay proactive and follow spring pest prevention tips, along with year-round monitoring, ensure their properties remain safe and comfortable. Using a summer pest prevention guide, checking winter rodent entry points, and maintaining a seasonal pest checklist ensure your home remains safe and comfortable. Remember to combine inspections, physical barriers, and environmentally friendly methods for the best results.
FAQs
Q1: How often should I perform a termite inspection?
A1: Conduct inspections annually, especially in spring, to detect early signs of termite activity and prevent extensive damage.
Q2: Can pests enter my home during winter?
A2: Yes, rodents and insects seek warmth and shelter indoors. Sealing entry points and monitoring for activity is crucial.
Q3: What is the most effective eco-friendly method for pest prevention?
A3: Using natural repellents, encouraging beneficial insects, and eliminating water sources effectively reduces pest populations without chemicals.
Ensure your home is ready for every season. Schedule a professional Virginia pest control consultation or a termite inspection in Suffolk, VA, today and stay ahead of potential infestations.

Sponsored
Columbus, OH
Free consultation for landscape design!

Peabody Landscape Group
Columbus' Reliable Landscape Design & Contracting

 Rhino Water Damage of Virginia Beach
Rhino Water Damage of Virginia Beach provides professional water damage restoration services to the Virginia Beach community, offering fast, reliable solutions for water-related emergencies. Specializing in everything from water extraction and drying to structural repairs, their experienced team works diligently to restore homes and businesses affected by floods, leaks, and storms. Equipped with industry-leading technology and a commitment to thorough service, Rhino Water Damage of Virginia Beach ensures each property is returned to a safe, dry, and secure state. With a focus on customer satisfaction and efficiency, they deliver high-quality restoration services that protect your property and bring peace of mind.
 Get My Rugs LLC
Bath mats are vital elements in bathroom decor, beautifully blending style and functionality. These bath rugs offer essential moisture protection, ensuring your floors remain dry while providing slip prevention for safety. When choosing a bath mat, prioritize quality; look for options that are absorbent, comfortable, and add warmth to your space.
Consider the size and proportion of the bath mat in relation to your tub and vanity. If you have a double vanity, you can select individual rugs for each sink or opt for a long runner rug for a cohesive appearance. Always measure your bathroom area to ensure a perfect fit, allowing enough space for doors to open freely.
Durability is another crucial factor. Since bath mats frequently encounter water and foot traffic, choose rugs with a nonslip surface and rubber backing to enhance safety on wet floors. Many options are crafted from high-quality cotton, providing a soft texture and easy maintenance, as most are machine washable. However, some may require professional cleaning, so checking care instructions is advisable.
The choice of bath mat size largely depends on the area you want to cover and the dimensions of your bathroom. Look for a shower mat that is appropriately sized for your tub and vanity, ensuring it provides adequate coverage. If your bathroom features a double vanity, you can opt for either individual rugs for each sink or a long runner rug for a cohesive appearance. Before shopping, take measurements of the spaces to ensure a perfect fit. In smaller bathrooms, remember to leave enough space for the door to swing open without obstructing the rug.
Durability should be a top consideration when selecting a bath mat. Since shower mats are frequently exposed to water and heavy foot traffic, it’s important to prioritize quality. Look for options with a nonslip surface and rubber backing to reduce the risk of slipping when the floor or mat is wet. Additionally, pay attention to the cleaning instructions. Most mats are crafted from cotton or chenille and can be machine washed, but some may require professional cleaning, so it’s best to verify before making a purchase.
moisture and helping prevent slips. When choosing a bath mat, quality is just as essential as aesthetics; you'll want one that not only looks appealing and is absorbent but also feels comfortable underfoot. As you search for the ideal bath rug, consider these helpful tips to guide your decision.
The choice of bath mat size largely depends on the area you want to cover and the dimensions of your bathroom. Look for a shower mat that is appropriately sized for your tub and vanity, ensuring it provides adequate coverage. If your bathroom features a double vanity, you can opt for either individual rugs for each sink or a long runner rug for a cohesive appearance. Before shopping, take measurements of the spaces to ensure a perfect fit. In smaller bathrooms, remember to leave enough space for the door to swing open without obstructing the rug.
Durability should be a top consideration when selecting a bath mat. Since shower mats are frequently exposed to water and heavy foot traffic, it’s important to prioritize quality. Look for options with a nonslip surface and rubber backing to reduce the risk of slipping when the floor or mat is wet. Additionally, pay attention to the cleaning instructions. Most mats are crafted from cotton or chenille and can be machine washed, but some may require professional cleaning, so it’s best to verify before making a purchase.
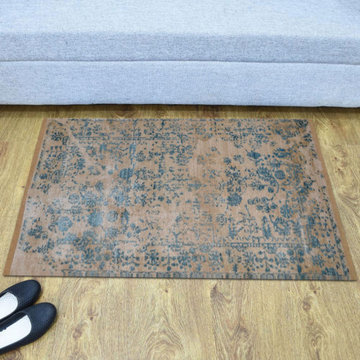
Having a bubbly pink color, this polyester footmat from Turkey ensures that it gets noticed by one and all. Its oriental patterns follow a definite sense of standard geometry. Buy it for your house and it will become an inseparable part of it for sure.
 Windy City Painters
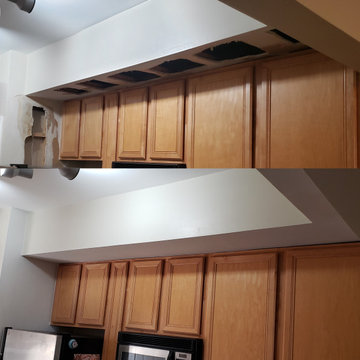
 Windy City Painters response to water damage in a kitchen:
Assessment and Inspection:
Windy City Painters initiates the process by conducting a thorough assessment of the water damage in the kitchen. This involves inspecting the soffit above the kitchen cabinets and the side wall to identify the areas that require repair. The severity of the damage is carefully evaluated to determine the scope of the restoration.
Insulation Replacement:
In cases where water has damaged insulation, Windy City Painters removes and replaces the affected insulation to ensure proper restoration of the affected areas. This step is crucial for preventing future issues related to moisture and maintaining the integrity of the space.
Drywall Replacement:
Damaged drywall is carefully removed and replaced during the repair process. This includes removing sections of drywall that have been compromised by water, ensuring that the new drywall seamlessly integrates with the existing structure.
Sealing Water Spots with Oil-Based Primer:
To prevent any potential water stains from bleeding through the new paint, Windy City Painters applies an oil-based primer to seal water spots. This step not only ensures a smooth and uniform finish but also provides additional protection against future water damage.
Cleaning and Restoration:
After completing the repair work, Chicago painter takes the extra step of cleaning the entire area to ensure a neat and polished final result. This includes removing any debris or dust generated during the repair process, leaving the kitchen in a clean and presentable condition.
Efficient Completion by Skilled Painter:
Windy City Painters prides itself on efficiency, and the entire drywall repair job is completed within one day by a skilled painter. This quick turnaround minimizes disruptions to the homeowner's routine and allows for a prompt return to normalcy.
Scheduling and Estimates:
Customers looking to schedule an appointment or obtain an online estimate can easily do so by visiting the official website at www.windypainters.com. The user-friendly platform facilitates convenient scheduling and access to estimates.
Customer Assurance and Reviews:
Windy City Painters emphasizes customer satisfaction and provides the highest quality service. Potential customers are encouraged to check the company's 5-star reviews on Yelp ( https://www.yelp.com/biz/windy-city-painters-chicago-2) and Google, offering a glimpse into the positive experiences of previous clients.
Windy City Painters offers a comprehensive and efficient drywall repair service, addressing water damage in kitchens with expertise, professionalism, and a commitment to customer satisfaction.

 SabaRehman Abdulrehman
Phoenix's food scene is vibrant and thriving, but also one of the most closely watched in the country. Health inspectors in Maricopa County are strict, and customers expect spotless dining spaces.
To stay competitive, restaurant owners and food vendors must stay on top of evolving health codes, sanitation protocols, and food safety benchmarks. That starts with a firm grip on restaurant cleaning safety standards. Ignoring sanitation rules risks more than bad reviews. It invites citations, customer complaints, and operational shutdowns.
Whether you're operating a food truck or a restaurant, following these Phoenix cleaning standards helps you stay compliant, pass health inspections, and build customer trust.
Importance of a Clean Phoenix Restaurant that Follows Food Health and Safety Standards
The restaurant industry in Phoenix operates under strict oversight. The Maricopa County Environmental Services Department conducts regular inspections, and violations can result in fines or closures. In this climate, restaurant cleaning is not just a hygiene standard. It is a business-critical measure.
Proper food handling and establishment cleaning protocols reduce the risk of foodborne illnesses, control pests, protect equipment, and keep your staff safe. Inconsistent practices, on the other hand, can quickly become liabilities.
Start With the Food Code
Phoenix food vendors must comply with the 2017 FDA Food Code as adopted by Maricopa County. This includes rules on:
- Sanitizing food-contact surfaces after each use
- Maintaining proper water temperatures for dishwashing
- Cleaning restrooms frequently and keeping them stocked
- Storing cleaning chemicals away from prep areas
- Daily: Wipe prep tables, mop floors, clean grills, sanitize cutting boards
- Weekly: Deep clean kitchen hoods, polish cooking equipment, disinfect drains
- Monthly: Check pest control measures, clean freezer coils, and inspect HVAC filters
- Using the right sanitizers and PPE
- Logging cleaning times and who performed the task
- Identifying signs of mold, grease buildup, or rodent activity
- Conducting thorough surface cleaning to ensure all food-contact surfaces are sanitized regularly
- Food-safe and non-corrosive
- Effective against norovirus, salmonella, and E. coli
- Clearly labeled and stored in original containers
- Seal gaps around doors and pipes
- Store dry goods in sealed, elevated containers
- Keep outdoor waste bins locked and distanced from entry points
- Record cleaning completion in real time
- Alert managers when tasks are missed
- Keep a historical record for inspections
- Is certified and understands the Arizona food codes
- Provides documented service reports
- Offers customized cleaning plans
- Offers flexible scheduling around your operating hours
- Cross-contamination prevention: Regularly clean food prep surfaces and tools, and use separate equipment for raw meats, vegetables, and ready-to-eat foods. Proper cleaning prevents any contact with food that could lead to cross-contamination and affects food quality.
- Temperature monitoring: While not directly related to cleaning, maintaining proper food temperature is essential. Hot foods should be stored above 140°F, and cold foods below 40°F. Regularly monitor temperatures and clean temperature gauges to ensure accuracy.
- Proper storage: Use clean storage containers and shelving for food storage, keeping items off the floor. Ensure all food is sealed and labeled to avoid contamination risks and comply with food safety standards.



 Epic Watershapes
We recently completed a truly exceptional pool project in Boca Raton, Florida, designed to complement a multimillion-dollar waterfront home. The client's vision was to create a large, visually stunning pool that would frame their backyard while embodying the relaxed yet sophisticated vibe of South Florida living. They also prioritized convenience and ease of maintenance. Epic Watershapes delivered on all fronts.
One of the primary challenges was constructing a pool of this size so close to the water while ensuring a flawless installation of the surrounding artificial turf. Our team's expertise in waterfront construction and meticulous attention to detail resulted in a seamless integration of the pool, turf, and surrounding landscape. The raised spa, fully tiled for a luxurious feel, adds another dimension of relaxation and visual interest.
The pool itself is a masterpiece, offering ample space for swimming and entertaining. The infinity edge creates a dramatic focal point, seamlessly blending the pool with the tranquil waterfront views. Sundecks with bubblers provide a fun and refreshing way to cool off, while the expansive patio, designed on multiple levels, offers plenty of space for lounging and dining. The use of artificial turf not only adds a vibrant green touch but also ensures low maintenance, a key request from the client. Piling was essential to ensure the structural integrity of the pool given its proximity to the water.
This project perfectly captures Epic Watershapes' ability to create custom outdoor spaces that are both luxurious and practical. From the grand scale of the pool to the thoughtful selection of materials and features, every element of this Boca Raton project reflects our commitment to excellence.
Located in beautiful Boca Raton, this modern pool is a testament to our dedication to transforming backyards into personal paradises. Visit our website at www.epicwatershapes.com or our Houzz profile at https://www.houzz.com/pro/samuel-mello/__public to explore more of our work. Contact us today to begin designing your dream backyard!

 Amsted Design-Build
Previously renovated with a two-story addition in the 80’s, the home’s square footage had been increased, but the current homeowners struggled to integrate the old with the new.
An oversized fireplace and awkward jogged walls added to the challenges on the main floor, along with dated finishes. While on the second floor, a poorly configured layout was not functional for this expanding family.
From the front entrance, we can see the fireplace was removed between the living room and dining rooms, creating greater sight lines and allowing for more traditional archways between rooms.
At the back of the home, we created a new mudroom area, and updated the kitchen with custom two-tone millwork, countertops and finishes. These main floor changes work together to create a home more reflective of the homeowners’ tastes.
On the second floor, the master suite was relocated and now features a beautiful custom ensuite, walk-in closet and convenient adjacency to the new laundry room.
Gordon King Photography

 Serapool Porselen
The Verde Guatemala Villa Pool Project presents a sophisticated design that blends the natural tones of green with the depth of water. The Verde Guatemala series used on the pool floor gives the water a serene and refined appearance with its natural stone texture and rich green transitions. Its Low Water Absorption ensures long-lasting use by providing resistance to UV Resistance, chemicals, and thermal shocks. The PTV ≥ 45° Non-slip value creates a safe swimming experience. The Verde Guatemala Scoth Outer Corner and Outer Angle Corner elements used in the transitions provide technical integrity while enhancing the visual continuity of the design. The result is a pool area that is both aesthetically and functionally balanced, in harmony with its natural surroundings.
8