
Search results for "Wind treated" in Home Design Ideas
 BKH Development, LLC
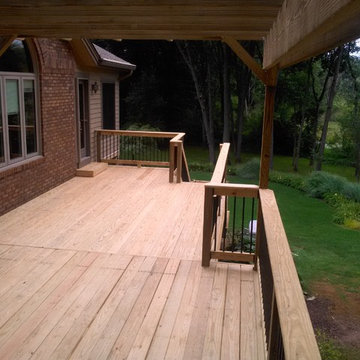
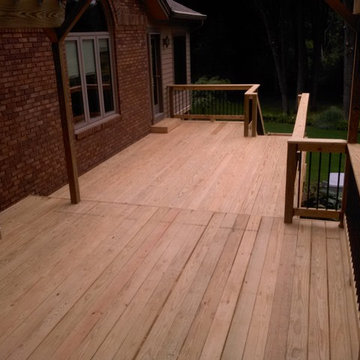
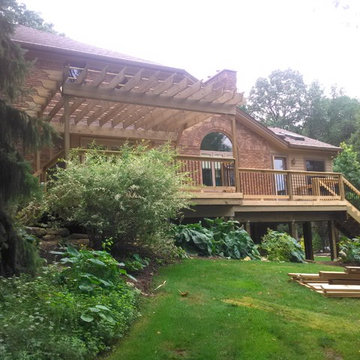
This is a large deck made of pressure treated wood with black aluminum spindles for easy staining and nice visibility. Pergola adds a small amount of shade from direct sunlight.
 Wiler Fence Company
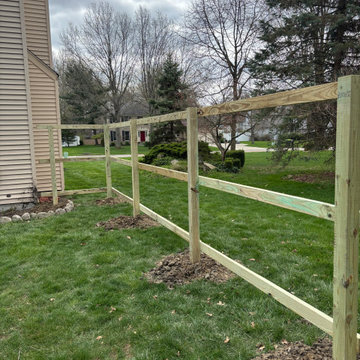
Building a Shadowbox Wood Privacy Fence in Avon Lake, Ohio | Step-by-Step Installation | Wiler Fence CompanyWatch us build a classic shadowbox style wood privacy fence from start to finish in beautiful Avon Lake, Ohio (Lorain County).This 6-foot tall privacy fence provides excellent screening while allowing gentle airflow, making it a perfect choice for Northeast Ohio backyards. In this time-lapse and step-by-step video, you’ll see the entire professional installation process: Phase 1: Installing the 4x4 Posts
We begin by carefully laying out the fence line, digging precise post holes, and setting heavy-duty 4x4 pressure-treated posts in concrete. Each post is plumbed and braced to ensure a rock-solid foundation that will stand up to Ohio’s freeze-thaw cycles for years to come. Phase 2: Installing the 2x4 Framing
Once the posts are set and cured, we attach the top and bottom 2x4 rails, followed by the middle rail. This strong framing system creates the backbone of the fence and ensures the structure stays straight and sturdy. Phase 3: Installing the Shadowbox Pickets
The final step is attaching the privacy pickets in the classic shadowbox pattern — alternating boards on the front and back sides of the rails. This design gives you near-complete privacy from both sides while still allowing air circulation to reduce wind load and prevent warping.The result is a beautiful, durable wood privacy fence that blends naturally with the neighborhood and gives the homeowners the private backyard they’ve been wanting.Project Location: Avon Lake, Ohio – Lorain County
Fence Style: 6ft Shadowbox Wood Privacy Fence
Materials: Pressure-treated pine with protective stainAt Wiler Fence Company, we take pride in every detail — from proper post depth and concrete setting to clean, professional picket installation.Ready for your own wood privacy fence in Avon Lake, Lorain County, or anywhere in Northeast Ohio?
Call us for a free estimate: (216) 714-3337
wiler.org
 Wiler Fence Company
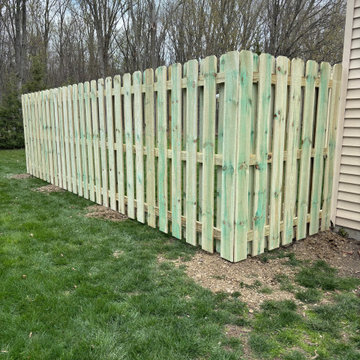
Building a Shadowbox Wood Privacy Fence in Avon Lake, Ohio | Step-by-Step Installation | Wiler Fence CompanyWatch us build a classic shadowbox style wood privacy fence from start to finish in beautiful Avon Lake, Ohio (Lorain County).This 6-foot tall privacy fence provides excellent screening while allowing gentle airflow, making it a perfect choice for Northeast Ohio backyards. In this time-lapse and step-by-step video, you’ll see the entire professional installation process: Phase 1: Installing the 4x4 Posts
We begin by carefully laying out the fence line, digging precise post holes, and setting heavy-duty 4x4 pressure-treated posts in concrete. Each post is plumbed and braced to ensure a rock-solid foundation that will stand up to Ohio’s freeze-thaw cycles for years to come. Phase 2: Installing the 2x4 Framing
Once the posts are set and cured, we attach the top and bottom 2x4 rails, followed by the middle rail. This strong framing system creates the backbone of the fence and ensures the structure stays straight and sturdy. Phase 3: Installing the Shadowbox Pickets
The final step is attaching the privacy pickets in the classic shadowbox pattern — alternating boards on the front and back sides of the rails. This design gives you near-complete privacy from both sides while still allowing air circulation to reduce wind load and prevent warping.The result is a beautiful, durable wood privacy fence that blends naturally with the neighborhood and gives the homeowners the private backyard they’ve been wanting.Project Location: Avon Lake, Ohio – Lorain County
Fence Style: 6ft Shadowbox Wood Privacy Fence
Materials: Pressure-treated pine with protective stainAt Wiler Fence Company, we take pride in every detail — from proper post depth and concrete setting to clean, professional picket installation.Ready for your own wood privacy fence in Avon Lake, Lorain County, or anywhere in Northeast Ohio?
Call us for a free estimate: (216) 714-3337
wiler.org
Find the right local pro for your project
 The Kitchen Witch
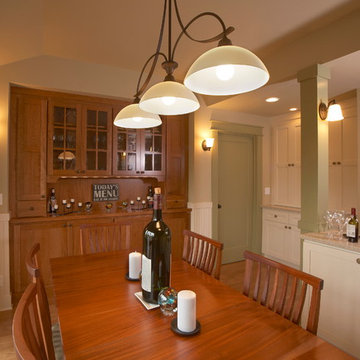
A pantry buffet hugs the wall next to the green door. This space is open and lends itself to easy conversation with the cook while relaxing with a glass of wind and special treats prepared by the chef.

 Industrial Projects
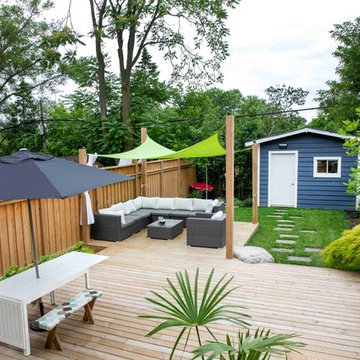
Creating a comfortable outdoor living space is a priority for many homeowners and DIY enthusiasts. With rising summer temperatures, installing a shade tarp in your backyard offers an affordable and effective solution for sun protection. We’ve developed this detailed, step-by-step guide to help you confidently install a shade tarp that not only shields you from the sun but also adds aesthetic appeal to your outdoor area.
Benefits of Installing a Backyard Shade Tarp
Before diving into the installation process, let’s explore the key benefits of having a backyard shade tarp:
Provides UV Protection: Keeps your family and guests safe from harmful sun exposure.
Reduces Outdoor Temperatures: Creates a cooler, more enjoyable outdoor space.
Protects Outdoor Furniture: Extends the life of patio furniture by reducing sun damage.
Enhances Outdoor Aesthetics: Adds a modern, stylish look to your yard.
Budget-Friendly: More affordable compared to permanent structures like pergolas.
Materials and Tools You’ll Need
To begin your DIY backyard shade project, gather the following materials and tools:
Materials:
Shade tarp (UV-resistant and breathable)
Sturdy posts or existing structures (trees, fences, walls)
Mounting hardware (eye bolts, D-rings, turnbuckles, snap hooks)
Nylon or polyester rope, or stainless-steel wire
Concrete (if installing new posts)
Tools:
Power drill
Measuring tape
Level
Ladder
Wrench or adjustable spanner
Post hole digger (if installing new posts)
Step 1: Plan Your Shade Tarp Layout
The first step in installing your backyard shade tarp is careful planning. Take time to assess your outdoor area and answer these key questions:
Where is the sun’s path throughout the day?
What size and shape of tarp best suits your space?
Will you anchor the tarp to existing structures or install new posts?
What height do you want the tarp to sit at for maximum shade and airflow?
Pro Tip: Use string or garden hoses to visualize the tarp layout on the ground before making permanent decisions.
Step 2: Measure and Mark Anchor Points
Once you’ve determined the tarp’s location and orientation:
Measure the tarp dimensions.
Mark the exact points where each corner of the tarp will be anchored.
Ensure that the anchor points are at least 5–10% longer than the tarp size to allow for tensioning and slight adjustments.
Consider slope angles for water runoff. Aim for at least a 20-degree angle to prevent water pooling on the tarp.
Step 3: Install Support Posts (If Necessary)
If your backyard lacks existing anchor points like trees or fences, you’ll need to install sturdy support posts:
Dig post holes at least 24 inches deep and 8-12 inches wide for stability.
Set posts in concrete, making sure they remain plumb and level.
Allow the concrete to cure for at least 24–48 hours before applying tension from the tarp.
We recommend using pressure-treated wood, galvanized steel poles, or aluminum posts for longevity and strength.
Step 4: Install Mounting Hardware
With your anchor points ready, it’s time to install the necessary hardware:
Attach eye bolts or pad eyes securely into walls, posts, or other fixed structures.
For added flexibility and adjustability, install turnbuckles or tensioners to fine-tune the tarp’s tightness.
Connect snap hooks, D-rings, or carabiners to make assembly and disassembly easier.
Make sure all hardware is rated for outdoor use to prevent rust and corrosion.
Step 5: Attach and Tension the Shade Tarp
Now it’s time for the most satisfying part—mounting the shade tarp:
Begin by attaching one corner of the tarp to an anchor point.
Gradually attach the remaining corners, moving diagonally for even tension.
Adjust each connection point using your turnbuckles, ropes, or cables.
Pull the tarp tight enough to avoid sagging, but not so tight that it risks tearing.
Check that the tarp maintains the desired slope for rainwater runoff and adjust tension as needed.
Step 6: Final Adjustments and Safety Check
Before enjoying your new shaded area:
Inspect all anchor points and hardware for stability.
Test the tarp’s tension and make adjustments for even distribution.
Ensure that no sharp edges or loose connections remain that could damage the tarp or pose a safety hazard.
Confirm that the tarp is secure in windy conditions by giving it a gentle tug.
If you live in an area with frequent high winds, consider removing the tarp during storms to prevent damage.
Step 7: Enjoy Your Shaded Backyard Oasis
Once installed, your backyard shade tarp provides a comfortable and protective space for outdoor gatherings, relaxation, or family activities. You can decorate underneath with outdoor furniture, string lights, or potted plants to create a personalized outdoor retreat.
Maintenance Tips for Long-Lasting Shade Tarp Performance
To extend the life of your shade tarp, follow these maintenance guidelines:
Regularly check for wear and tear, especially around anchor points and seams.
Clean the tarp periodically with mild soap and water to prevent mildew buildup.
Store the tarp indoors during harsh weather seasons if it's not designed for year-round use.
Tighten hardware as needed to maintain proper tension and avoid sagging.
By following these simple care steps, your shade tarp will continue to deliver years of sun protection and outdoor comfort.
Conclusion: Upgrade Your Outdoor Space with a DIY Shade Tarp
Installing a shade tarp in your backyard is a cost-effective and rewarding DIY project. With careful planning, quality materials, and proper installation techniques, you’ll enjoy cool, shaded outdoor living all season long. This step-by-step guide ensures your project goes smoothly from start to finish.
 Rodwin Architecture & Skycastle Construction
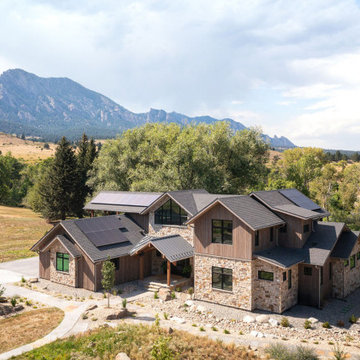
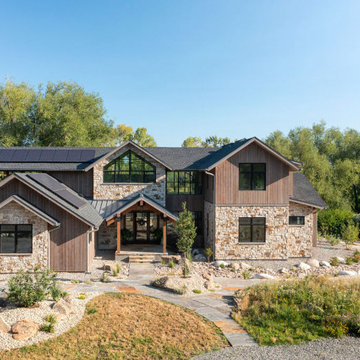
Nestled along South Boulder Creek with sweeping Flatirons views, Creekside is a custom modern mountain home shaped by one guiding principle: dissolve the boundary between light, landscape, and daily living. From the first conversations, the project began not with a floor plan, but with the land itself—carefully evaluating a rare, delicate site and letting its rhythms, constraints, and beauty set the tone for every decision.
Designed for a couple building their forever home in the Boulder foothills, the residence balances crisp modernity with the warmth and honesty of natural materials. Expansive glazing and clean lines are grounded by timber, stone, and tactile finishes—quietly luxurious rather than showy. The clients had spent years “chasing the light” from home to home; here, that pursuit became something more intentional. Instead of chasing the sun, the architecture invites sunlight to travel through the house across the day and seasons.
Light is treated as a living element, orchestrated to create moments of surprise and calm. An interior window captures southern exposure at the upper level, guiding it through the loft and filtering it into the northern living room below—an atmospheric shift that changes hour by hour. A glass stair bridge adds levitation and clarity, linking front and back, public and private. Beneath it, a serene Zen garden winds under floating stairs, creating a quiet pause in the home’s circulation.
Facing the creek, the home opens into a composition of glass and crisp geometry, framing moving water and long bands of daylight. Peaked roofs, timber beams, and stone cladding nod to regional vernacular, rooting the modern form in its mountain context.
Set beside a sensitive riparian corridor, Creekside demanded exceptional care, including meticulous deconstruction of an existing structure with 94% landfill diversion. Performance was treated as a design feature: HERS 4, ENERGY STAR certification, a 15.8 kWh solar array, 30 kW battery backup, 1 ACH air-sealed construction, and air-source heat pumps—proof that stewardship and comfort can coexist beautifully.
 Sweet Smiling Landscape Design
This beautiful property is located in the hills above of Montecito with 360 degree of views onto the Channel Islands and the surrounding mountains. Inspired by the Japanese landscape design principal of the borrowed landscape the gardens on this property serves as a kind of picture frame from which to view the natural beauty of its surroundings.
This 15-year-old costume-built home was crafted with all the style and workmanship ship found in Villa or Château in the Mediterranean. Unfortunately, the garden design was not as well thought out as the house was. Most of this property receives baking sun, drying winds and is in an extremely high fire danger area. Do to these factors many of the plants on the property were unsuitable for their location. The original planting scheme was also lifeless and colorless. Poor landscape maintenance had left many of the plants on the property sick and dying.
We came in to revive this landscape, breathing new life into it.
Creating a drought tolerant and fire wise landscape was of utmost importance to these clients. Staying true to the more formal landscape styles found in Southern Europe we also want to create an opportunity to design seamlessly blend with its natural surroundings. We did that by incorporating a lot of California native plants. This vast property also contains an avocado orchard and a vineyard. By adding California native plants the property is inviting in native birds and insects that help keep pollinate the orchard and vineyard and keep pest problems at bay. Because these clients enjoy harvesting from their land we added elements of edible landscaping to this project. We filled pottery and planter beds with fruit trees, culinary and medicinal herbs as well as flowers that can be used in cut flower arrangements. Lastly, we went through carefully pruning diseased plants, treating pest problems an improving the soil. Now the landscape is not only more beautiful it is more protected against fire, is more water wise and integrate into its surrounds with a wholistic approach.

 BKH Development, LLC
This is a large deck made of pressure treated wood with black aluminum spindles for easy staining and nice visibility. Pergola adds a small amount of shade from direct sunlight.
 Rodwin Architecture & Skycastle Construction
Nestled along South Boulder Creek with sweeping Flatirons views, Creekside is a custom modern mountain home shaped by one guiding principle: dissolve the boundary between light, landscape, and daily living. From the first conversations, the project began not with a floor plan, but with the land itself—carefully evaluating a rare, delicate site and letting its rhythms, constraints, and beauty set the tone for every decision.
Designed for a couple building their forever home in the Boulder foothills, the residence balances crisp modernity with the warmth and honesty of natural materials. Expansive glazing and clean lines are grounded by timber, stone, and tactile finishes—quietly luxurious rather than showy. The clients had spent years “chasing the light” from home to home; here, that pursuit became something more intentional. Instead of chasing the sun, the architecture invites sunlight to travel through the house across the day and seasons.
Light is treated as a living element, orchestrated to create moments of surprise and calm. An interior window captures southern exposure at the upper level, guiding it through the loft and filtering it into the northern living room below—an atmospheric shift that changes hour by hour. A glass stair bridge adds levitation and clarity, linking front and back, public and private. Beneath it, a serene Zen garden winds under floating stairs, creating a quiet pause in the home’s circulation.
Facing the creek, the home opens into a composition of glass and crisp geometry, framing moving water and long bands of daylight. Peaked roofs, timber beams, and stone cladding nod to regional vernacular, rooting the modern form in its mountain context.
Set beside a sensitive riparian corridor, Creekside demanded exceptional care, including meticulous deconstruction of an existing structure with 94% landfill diversion. Performance was treated as a design feature: HERS 4, ENERGY STAR certification, a 15.8 kWh solar array, 30 kW battery backup, 1 ACH air-sealed construction, and air-source heat pumps—proof that stewardship and comfort can coexist beautifully.

 KMSalter Design
Stephani Buchman Photography
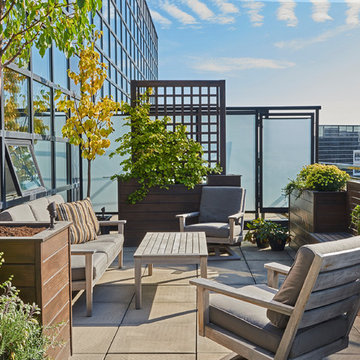
Example of a mid-sized minimalist glass railing balcony container garden design in Toronto with no cover
Example of a mid-sized minimalist glass railing balcony container garden design in Toronto with no cover
 Arbordale Landscaping Ltd
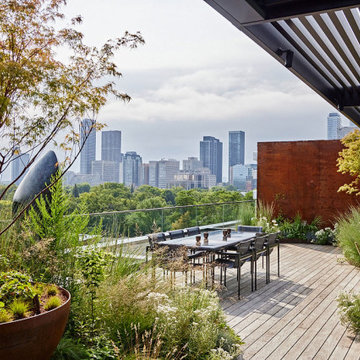
Thermory decking makes up the entertaining and dining spaces. The decking is surrounding with Corten steel edging and densely planted gardens which host Corten steel planters bowls and custom laser cut panels. A custom powder coated steel pergola covers the barbecue area.
 Key Remodeling & Design
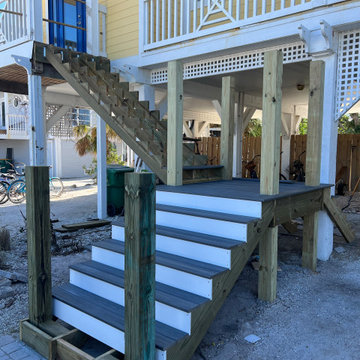
Structural rebuild of stair systems using treated framing and upgraded fasteners
Coastal exterior home idea in Miami
Coastal exterior home idea in Miami
 Rodwin Architecture & Skycastle Construction
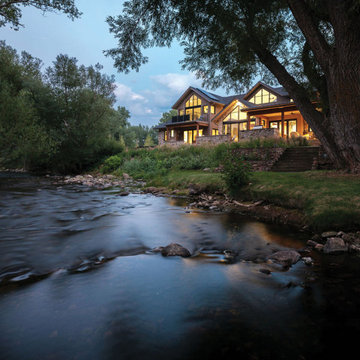
Nestled along South Boulder Creek with sweeping Flatirons views, Creekside is a custom modern mountain home shaped by one guiding principle: dissolve the boundary between light, landscape, and daily living. From the first conversations, the project began not with a floor plan, but with the land itself—carefully evaluating a rare, delicate site and letting its rhythms, constraints, and beauty set the tone for every decision.
Designed for a couple building their forever home in the Boulder foothills, the residence balances crisp modernity with the warmth and honesty of natural materials. Expansive glazing and clean lines are grounded by timber, stone, and tactile finishes—quietly luxurious rather than showy. The clients had spent years “chasing the light” from home to home; here, that pursuit became something more intentional. Instead of chasing the sun, the architecture invites sunlight to travel through the house across the day and seasons.
Light is treated as a living element, orchestrated to create moments of surprise and calm. An interior window captures southern exposure at the upper level, guiding it through the loft and filtering it into the northern living room below—an atmospheric shift that changes hour by hour. A glass stair bridge adds levitation and clarity, linking front and back, public and private. Beneath it, a serene Zen garden winds under floating stairs, creating a quiet pause in the home’s circulation.
Facing the creek, the home opens into a composition of glass and crisp geometry, framing moving water and long bands of daylight. Peaked roofs, timber beams, and stone cladding nod to regional vernacular, rooting the modern form in its mountain context.
Set beside a sensitive riparian corridor, Creekside demanded exceptional care, including meticulous deconstruction of an existing structure with 94% landfill diversion. Performance was treated as a design feature: HERS 4, ENERGY STAR certification, a 15.8 kWh solar array, 30 kW battery backup, 1 ACH air-sealed construction, and air-source heat pumps—proof that stewardship and comfort can coexist beautifully.
 Rheir Home
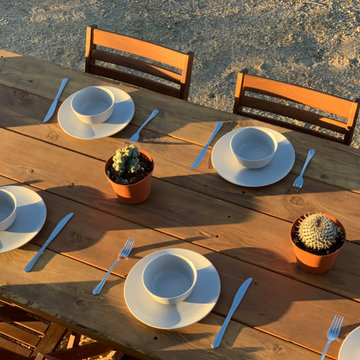
We built this 12 foot table to accommodate rental guests who wanted to enjoy and/or host outdoor dinner parties. The table is heavy enough to endure strong, year long winds, and treated to tolerate the intense sun and dryness of the desert. String lighting was hung above the table with a smart system, so it can be turned on/off remotely or after a certain period of time has been set.
 Rheir Home
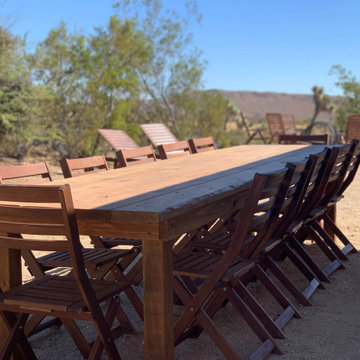
We built this 12 foot table to accommodate rental guests who wanted to enjoy and/or host outdoor dinner parties. The table is heavy enough to endure strong, year long winds, and treated to tolerate the intense sun and dryness of the desert. String lighting was hung above the table with a smart system, so it can be turned on/off remotely or after a certain period of time has been set.
 BKH Development, LLC
This is a large deck made of pressure treated wood with black aluminum spindles for easy staining and nice visibility. Pergola adds a small amount of shade from direct sunlight.

 Mountain View Sun Decks Ltd.
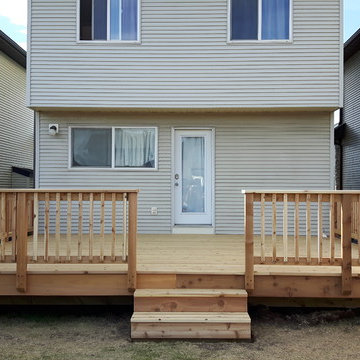
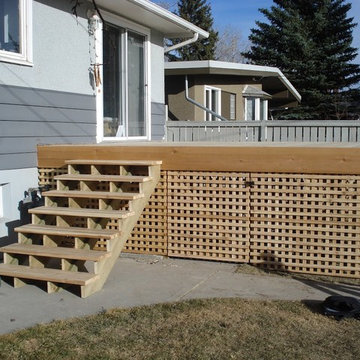
Inspiration for a mid-sized contemporary backyard deck remodel in Calgary
5