Software
Houzz Logo Print
bungalowmo

100 YO sash restoration

12 years ago
last modified: 12 years ago
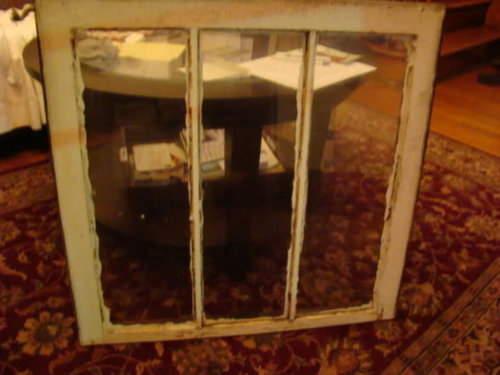
I have been in the process of restoring every sash in my home. I had some amazing and well needed advice from a woman up in MA who does old sash restoration for a living.

There is a deliberate, step by step, process to removing them from the framework. Removing the putty, pins and glass from the sash. Stripping, prepping and either prime & paint or layers of shellac.

This was the first one I did. It came out of my pantry. I figured if I messed anything up, it would be on the one seen the least.

The products I used were metal, flexible putty knives from Lowes, Wagner heat gun, Porter Cable palm sander, Sarco Type M glazing putty, Boiled Linseed Oil (actually a mixture of 3/4 linseed & 1/4 turpentine) Zinsser oil based primer, SW "Caviar", and Bullseye Amber shellac.

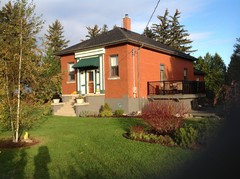
The first photo shows what the upper & lower sash looked like. A crumbling mess.
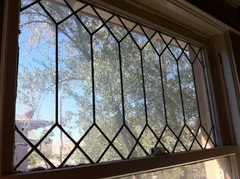
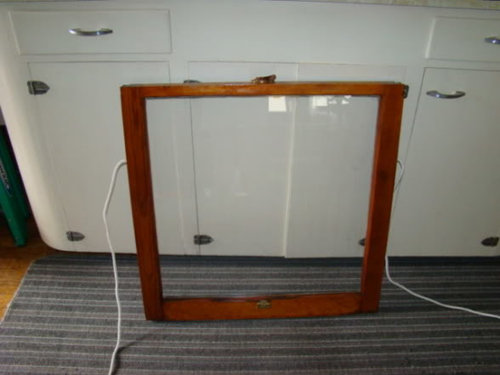
Pic 2...is the bottom sash after cleanup & new putty put in
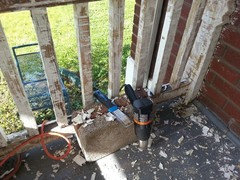
Pic 3...is the same sash with new weight cords and just waiting to be reinstalled & weights attached.
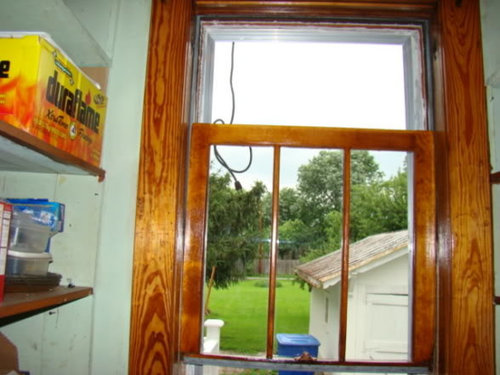
Pic 4...The window is in & you can see the framework all cleaned up with 2 coats of linseed oil mixture for good hydration for the bare wood & 2 coats of shellac for a sealed shine.

Comments (65)

  • 12 years ago
    I rehung the original window weights in the pockets. Tedious process, but so well worth it!

    Nice to see others who "get it"! :0) Learned everything from the forums on Old House Web & WavyGlass.org. OHW got overrun with spammers, but there is still close to 15 years of valuable posts & info. Highly recommended to anyone who own an old place!
  • PRO
    12 years ago
    What a nice job you did on this window, congrats !
    bungalowmo thanked Studio NOO Design
  • 12 years ago
    Thanks! I finally got working storms on the bedrooms upstairs, so I can pull those in the Spring & move at a much faster clip...
  • PRO
    12 years ago
    Well done! Paris
    bungalowmo thanked Paris Flea Interiors
  • 12 years ago
    Thanks for the inspiration. I have two tall double-hungs and 14 casements to restore. The casements are going to be real fun, six of the openings are 48x60, so x2 windows of 24x60 each. And of course at that size many have warped. And of course the mechanisms have been painted over 1 million times. Sigh. I'll be rebuilding windows for the next 5 years.
  • PRO
    12 years ago
    Very nice. I love seeing things brought back to life!
    bungalowmo thanked purehome
  • 12 years ago
    last modified: 12 years ago
    Rachel...as far as the hardware goes, when you get the sash out take a flathead screwdriver & use a hammer on the handle end if you have to & tap the driver into the painted slot & then press & turn...press & turn. The screws will come loose.

    To remove the paint, I have an old crock pot. I shake a generous amount of TSP into the hot water & soak the hardware for a day or so. The paint falls right off . The crock pot has to be for this onlly. Can't use it for cooking. Got mine at goodwill for $5. Tsp is at any Lowes, H.D. or even Kmart.
  • 12 years ago
    Good to know, I've a giant lonely box of TSP waiting to be used. Thanks!
    bungalowmo thanked Rachel
  • 12 years ago
    last modified: 12 years ago
    Check those 2 websites I posted for more great restoration information. I have learned so much from the members there. They rally behind you, much like here, but they all have ballpark 100 yo places that need restoration somewhere too....so they're feeling your pain, trepidation & anxiety. Just a great bunch of folks!

    http://www.oldhouseweb.com/forums/

    https://www.wavyglass.org/
  • 12 years ago
    OHW I've lurked plenty, wavy glass I'll have to check out. I also occasion gardenweb's remodeling and old house forums. All the forums over there have a treasure trove of good info (the plumbing one has saved me a few times.)
  • 12 years ago
    Over the past year or so, OHW has been overrun with spammers & the new site owners aren't doing much about it. That is why the bulk of us have moved to wavy glass. WG was started by one of the longtime OHW members & he is the site admin.

    That being said...OHW is still great for searching out good info. Or just searching the picture section. Eye candy galore for kitchens, living rooms, bedrooms, bathrooms...all of it! When I see new posts there, I send them a PM & the link for wavy glass.
  • 12 years ago
    Patient you! Great job on all of it!
    bungalowmo thanked decoenthusiaste
  • 12 years ago
    Fantastic. Old house love.
    bungalowmo thanked Brenda Farr_Hague
  • 12 years ago
    I'm reveling in this thread of woodwork lovers. Some posts on Houzz make me cringe what with people just dying to paint over beautiful woodwork. Congrats on cleaning up those windows!
    bungalowmo thanked joots07
  • 12 years ago
    Great job- new windows don't hold a candle to the original ones.
    bungalowmo thanked brickln
  • 12 years ago
    Bungalowmo....what kind of rope are you using to restore the counter weights in your windows? I have several sets of original windows that I am restoring in my 1926 schoolhouse. The lead weights are still inside and I'll be reusing them, but the ropes were cut or are so rotten, I can't reuse them. I've been looking at different types of rope at the stores, trying to decide which to use.
    bungalowmo thanked wyndyacre
  • 12 years ago
    I don't recall where I bought mine (was definitely online somewhere), but here is a site that sells it. http://smithrestorationsash.com/sashcord.html
    For the most part, what is sold in local stores is mostly of the clothesline variety. Sash cord is a different animal.

    When you get the weights out & see the weight stamp, I'm sure they can advise on which cord weight you need.

    Big congrats on restoring your windows. Have you completed any? What kind of putty are you using? I had issues with DAP, so a friend who does restoration for a living sent me some Sarco Type-M. Amazing stuff! Sets up in just a day or so, depending on conditions, but I've found it very nice to work with.
  • 12 years ago
    last modified: 12 years ago
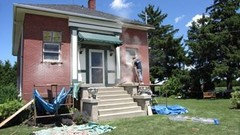
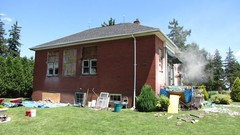
    Thanks for the link and the info bungalomo! I haven't begun to restore the 3 windows I've left to keep original yet. Most of the windows in my 1926 schoolhouse home were bricked up or bricked down smaller in 1963. I've replaced the rotten, drafty 60's windows over the last few years with high quality vinyls that are a colour and style that are sympathetic to the building. After 18 years of renos (which were interupted for 10 years when I got laid off from a well paying job!), I just needed to finish this and have energy efficient windows that didn't let the snow through!

    I lived in a trailer parked in my yard for a month while the main floor windows were sledge hammered out and new window openings were built. One window became a garden door so a deck could be built. The basement windows were rotted and broken beyond saving.

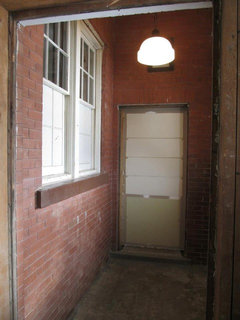
    I saved one original window in the stairwell to the basement. This "room" is the only one that retained original moulding, wainscotting and wide wooden stairs. It is not insulated or heated (I keep doors at the bottom and the top closed in the winter) so it wasn't so important that the window be airtight. It is 6 over 6, double hung with beautiful wavy glass.

    The other two I'm saving are a pair in the bathroom, which was once the teachers office. The other side of the room is the front entrance foyer which was once an open recessed entry way. When it was closed in, the windows were boarded up with chipboard. I was delighted to find the windows still in there when I tore the chipboard off. The bottom panes of glass had been painted though, for privacy in the bathroom, before someone got around to boarding it up.
    My plans are to make them operable again and put stained glass in the bottom panes...for now though, the painted glass remains.

    A few photos of the process....
    I don't want to highjack your thread, but I know from your other posts that you are interested in other folks restorations. :-)
    Sometime I'll have to make an Ideabook with photos of work from chimney to basement that I've completed over the years...I am almost DONE!
  • 12 years ago
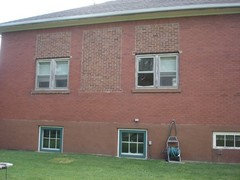
    The most recent photos after staining the foundation...the previous owner had stained HALF of the house foundation a terrible rusty brown/red. I colour matched a concrete stain to the windows and deck.
  • 12 years ago
    last modified: 12 years ago
    That is a great tip about using an old crockpot and some TSP to remove old paint from hardware. I have some to do that to and also some really nice original drawer pulls on a antique jam cupboard I'm going to refinish this winter too. I'm pretty sure it is oak...someone painted it pukey pink! Time to make a trip to the Goodwill for an old crockpot!
    bungalowmo thanked wyndyacre
  • 12 years ago
    Taken before the basement windows were replaced...
  • 12 years ago
    Props to both of you, mo and wyndy. My house turned 103 this year and I'm ashamed to admit I had my windows replaced. Marvins, all wood, though. And I didn't replace the original leaded glass ones in the front. I'm actually afraid to touch them; they're not only wavy, they bow in and out.
    bungalowmo thanked groveraxle
  • 12 years ago
    @dclostboy, is that a Persian rug? It's beautiful.
  • 12 years ago
    Yes...silk...was a splurge at the time. Thank you.
  • 12 years ago
    last modified: 12 years ago
    When I bought my old place, one of the absolute best pieces of advice I got was to wait at least a full year before making any changes to original details. Especially things I cannot return to original.

    Of course, this has nothing to do with things that PO's did that we have no control over.

    I'm so happy to see that there are so many members who have embraced the beauty of our old structures. Once they are muddled up or torn down...they simply are "no more".

    These cannot be rebuilt with timber that is 10 years old...these were made with old growth trees. And the glass...that is a lost art. Once restored & paired with a storm, this is as green as you can get!
  • 12 years ago
    @groveraxle...I'd love to see a pic of those windows!! Those curved sash (usually on porches...or TURRETS) are stunning!

    @dclostboy....wow...I didn't know that was silk...yummy!
  • 12 years ago
    last modified: 12 years ago
    Ok all you old house owners & lovers...have you seen this thread yet?

    I bookmarked it!!

    https://www.houzz.com/discussions/century-club-homes-100-years-old-dsvw-vd~644254
  • 12 years ago
    No, mo, the sashes don't curve; the leaded glass has flowed to the point where the pane itself has bowed at the leaded parts. I don't think you can see it in the pic.
  • PRO
    12 years ago
    The old leaded glass windows are beautiful but not a project I would want to take on. I did restore an entire house full of old windows. My partner wanted to kill me - and still thinks we should have replaced them - but I didn't like the cost of the right replacements and I didn't want the hassle of getting approval from the historic district officialdom The worst windows were the multiple paned lozenge windows...that's a lot of old glazing to remove and new to install.

    We also used a commercial fabric steamer to remove old glazing
  • 12 years ago
    Good job on the windows! We are lucky that most of our almost 100 year old windows are in good shape. There are only two exceptions. The first is in the dining room where previous owners removed the weights and cords, then fill the gap with something and then sealed the windows shut. Just another of our "what were they thinking?" questions. Eventually we will have a pro fix/restore them. The other window isn't really a window, but the glass doors that were taken off some of the built ins in the living/dining room. This is in the laundry room, which was originally the back porch. We will replace these cabinet doors with a real window (that is complementary to the period) when we do an addition in 2014. The plan is to then see about resorting the cabinet doors to the built ins where they belong.
    bungalowmo thanked Nancy S
  • 12 years ago
    last modified: 12 years ago
    @grover....I see what you mean now. Those leaded windows are so pretty! I'm sure it wouldn't be cheap to have them restored, but wow....they're SO nice!!!

    It's also a project I wouldn't trust myself to do correctly. Some things are best left to the masters of their craft. Those are one.
  • 12 years ago
    Linda ...I can feel your pain on the resto. Time consuming but oh, so worth it! and the fact that you did them all.... whoever lives there now is loving the fact that they all work perfectly!
  • 12 years ago
    @nancy...I have a couple that need work too. My bathroom window rotted in the corner. Working on finding a craftsman/woodworker who can restore or rebuild at least that corner.

    I hate how so many are rushed & rip these out in favor of vinyl. Replacements are just that, replaced...about every 15 years. Ours were here before any of us & will long outlast us as well.

    Ok...I'll jump down from the soapbox now... hehe
  • 12 years ago
    You did a fabulous job!! I have a million old windows in my house and I fully intend on stripping and repairing each and every one. It send so daunting but I'm sure it's gratifying to look at all the work you did.
    bungalowmo thanked Jennifer Callahan Phinney
  • PRO
    12 years ago
    So nice to see so many that appreciate the history and beauty of old things, especially the woodwork. Congratulations for not changing to plastic and being trendy.
  • 12 years ago
    last modified: 12 years ago
    Thanks again for the compliments! @Al...I do my best to have absolutely no plastic anything anywhere on my house! And I'd never replace my sash...restoration all the way!!

    @Jennifer....I have a "how to" that was sent to me by a sash restoration guru! I'll see if I can find a reference to it online, but if not...I have it in an old email that I can check when I get home.

    It's really not that difficult, just takes patience. Practice makes perfect.

    I added a document with more info for anyone interested. When I go home later I will find Jade's steps for moisturizing the wood & putty steps.

    This girl is so passionate about what she does...she gives FREE workshops a few times per year to educate those wanting to do it themselves!

    This pic below is the kind of butter knife I use.
  • 12 years ago
    OMG...I can only add photos! Really????
    _____________________________________________
    One thing I found to be the perfect size for working the glazing putty is a small "fancy type" butter knife. They're easy to find at shops like Goodwill, Junk shops, flea markets. The shape like this pic below is perfect. No fancy handle necessary!
    Get yourself a heat gun. I had a Wagner that I had 6 years. LOTS of hours on that thing before it gave up & croaked! Lowes ... $25. Another thing that has been extremely helpful is a small, curved needlenose plier. Works great to remove, straighten & reinsert glazing points. Google images for glazing points. Most of what you will have will be the small diamond shaped ones & likely some triangle ones at the tops of your lower sash:

    https://www.google.com/search?q=glazing+point&tbm=isch&tbo=u&source=univ&sa=X&ei=8YXAUoO7LYfLkQfqkIGoBA&ved=0CCwQsAQ&biw=1240&bih=582

    I also use regular putty scrapers. They sell them at lowes. Get the flexible ones. They work great to remove putty & they're thin enough to slide "under" the points as you come across them. Slide under....lift a little....then use those curved pliers to remove & pinch flat for reuse. I get the Warner flexible 1.5" at Lowes. I must have a dozen.
    The putty itself...personally I hate Dap 33. I get Sarco Type M. This Google list gives you several sites from which to order.

    https://www.google.com/#q=sarco+type+m

    I'd start with a small batch. You don't need much & just keep a light coat of boiled linseed oil on top when not in use.
    Also...get a palm sander. I had a Sears/Craftsman sander that was a p.o.s., to be honest. Got a Porter Cable & that is sweet. Once all paint & glazing is removed, sand the entire sash with fine grit paper. Get a multi grit pack & use your judgment. Some areas might be a little rough so take your time & you’ll figure out which one you need.
    These are just some of my favorite products. Heat gun & scraper to soften & remove putty, palm sander & paper for cleanup.
  • 12 years ago
    @Al...I checked your website... I wish you were my neighbor!!
  • PRO
    12 years ago
    Labor of love, methinks. It shows.
    bungalowmo thanked Ron Ames Photography
  • 12 years ago
    Thank you Ron!! Wait until I finish my porch!! That's a love/hate labor right there. Love doing it...hate what it does to my back!

    I *could* hire someone...but I'm oh, so picky. A friend was helping for a day & he was going to power sand the rail detail to make it "easier". I thanked him & paid him for his time & finished that end on my own.
  • PRO
    12 years ago
    @bungalowwmo - Thanks, where in VA? My brother & family are in Warrenton. I do ship things. I currently have two tables and 4 chairs waiting to go to CA, and I'm in the early stages of working with someone in NJ.
  • 12 years ago
    OMG...my coworker sitting right next to me lives there. I'm in Front Royal! I had a guy lined up last summer to rebuild my bathroom window. The lower sash is rotted out in one corner. That deal fell through & I really need this done right :0(
  • PRO
    12 years ago
    This link from my Facebook business page ( https://www.facebook.com/photo.php?fbid=10151736406914796&set=a.408049714795.182284.268034109795&type=1&theater ) is to a picture of a window I reproduced for a house that had a fire in it. The homeowner didn't want a "new window" to replace it. The firemen ruined the original so it couldn't be repaired. The window next to it was removed, returned to my shop, and I reproduced it. The reproduction has the original weights in it and I was able to get replacement hardware for the pulleys, lock, and lift finger pull.
  • 12 years ago
    I emailed the link to my gmail. Facebook is blocked on my work pc. :0(
  • 12 years ago
    last modified: 12 years ago
    So...you could repair or rebuild for me? **grin**

    I'll have to write you through your website or FB, since there is no emailing or PM thru houzz.

    I'd totally ship it to ya. (no glass) It's about 2'x2' ballpark.
  • PRO
    12 years ago
    bungalowmo, I'd didn't get an email. Try this link http://www.alfortunato.com/contactpage.htm
  • 12 years ago
    I didn't get a chance to email you yet. Been busy coordinating buying a car in PA. Lordy, the paperwork is nuts! I do have the next 5 days off starting tomorrow, so it will certainly be soon!
  • PRO
    12 years ago
    last modified: 12 years ago
    Kudos for keeping the windows! Replacement vinyl insulated windows not only look terrible, they are no more efficient than properly maintained old wood windows. We stripped 40 6-over-6 French windows in our previous home - it took us 100 hours per window! Fortunately the woodwork and windows in our current home have not been painted. You did a fantastic job!
    bungalowmo thanked Restoration Fabrics & Trims
  • 7 years ago

    Very nice! What precautions did you take in terms of lead and asbestos? I am thinking about this myself.

  • 7 years ago

    I put all the paint scrapings into empty paint cans, then took them to the recycling center.